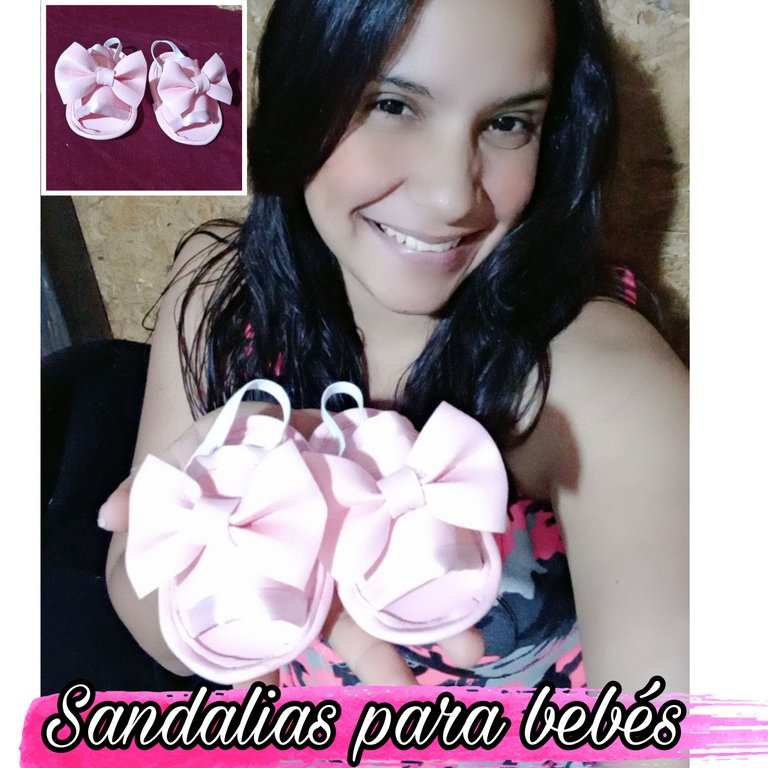
Hola, hola mi linda familia de #NeedleWorkMonday, hoy es lunes de costura y como todos los lunes Les traigo un nuevo tutorial de costura, para realizar unas hermosas sandalias para bebés de 4 a 7 meses de edad, ideales para combinarlas con cualquier prenda de vestir y mucho más en el verano. Aquí te muestro cómo la hice.
Hello hello my cute #NeedleWorkMonday family, today is sewing Monday and like every Monday I bring you a new sewing tutorial, to make beautiful sandals for babies from 4 to 7 months old, ideal to combine with any garment and much more in the summer. Here I show you how I made them.

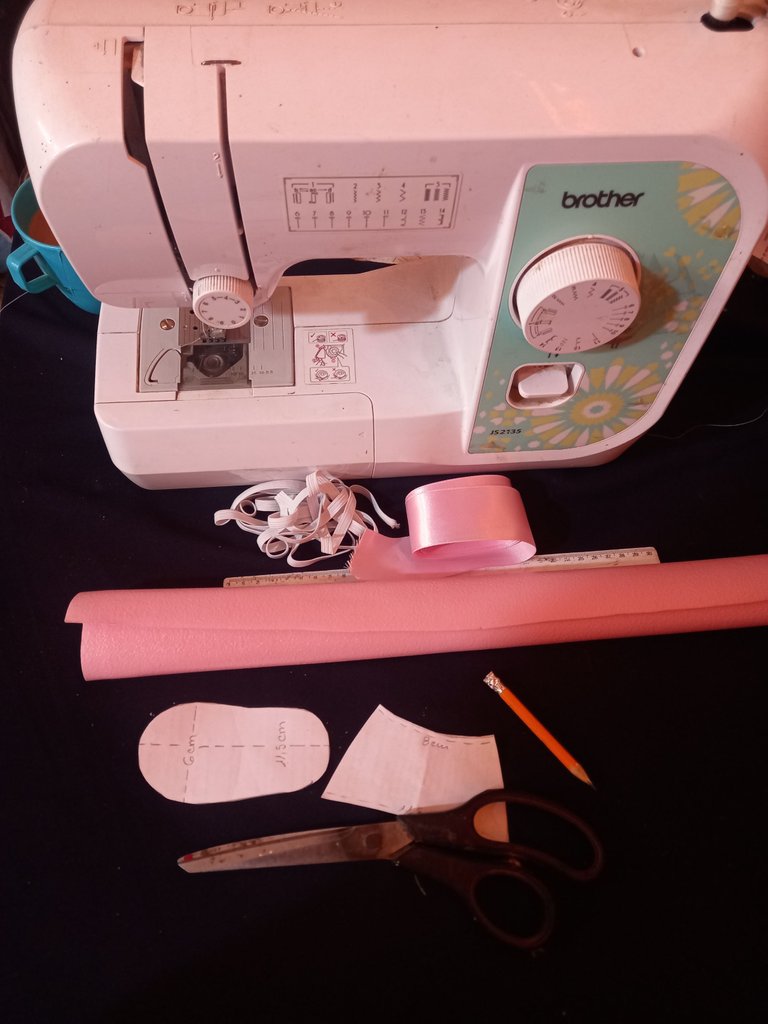
- Corrospum.
- Cinta satinada rosada de 4cm de ancho.
- Patrones.
- Elástico blanco.
- Máquina de coser.
- Tijeras.
- Corrospum.
- Pink satin ribbon 4cm wide.
- Patterns.
- White elastic.
- Sewing machine.
- Scissors.

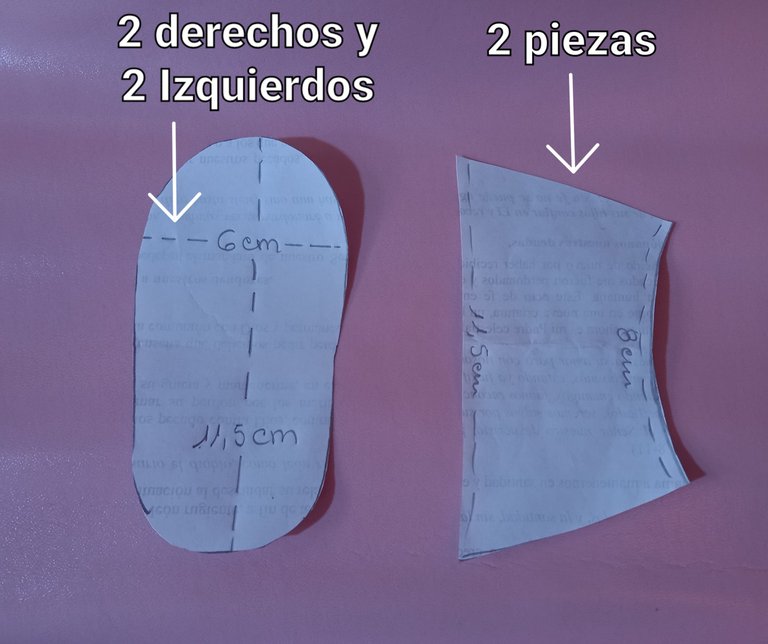
Primero marcamos los patrones sobre el corrospum, en este caso saqué dos piezas de plantillas para el pies derecho y dos para el pies izquierdo, más dos piezas del empeine.
First we mark the patterns on the corrospum, in this case I took two pieces of templates for the right foot and two for the left foot, plus two pieces for the instep.
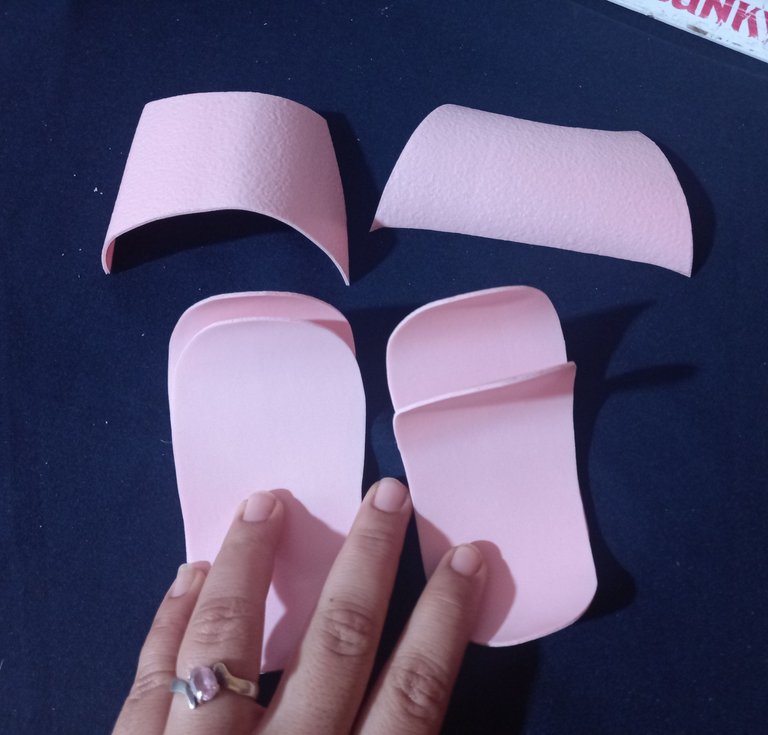
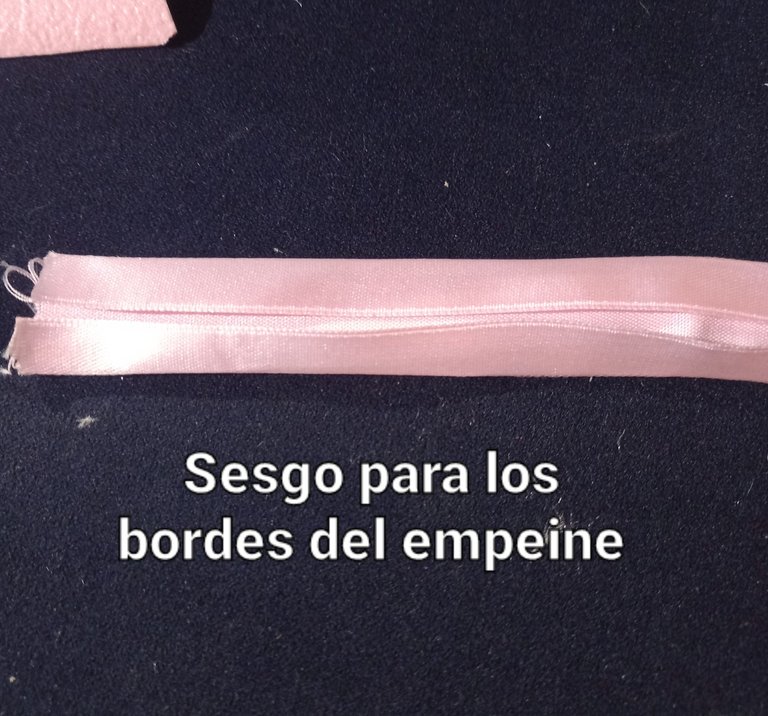
Una vez que tengamos todas nuestras piezas comenzaremos a realizar nuestras sandalias haciendo un sesgo con la cinta satinada la cual vamos a cocer en los bordes superiores e inferiores del empeine los laterales los dejaremos sin sesgo, porque estos se van a coser con la plantilla.
Once we have all our pieces we will begin to make our sandals making a bias with the satin ribbon which we will sew on the upper and lower edges of the instep, the sides we will leave them without bias, because these will be sewn with the template.
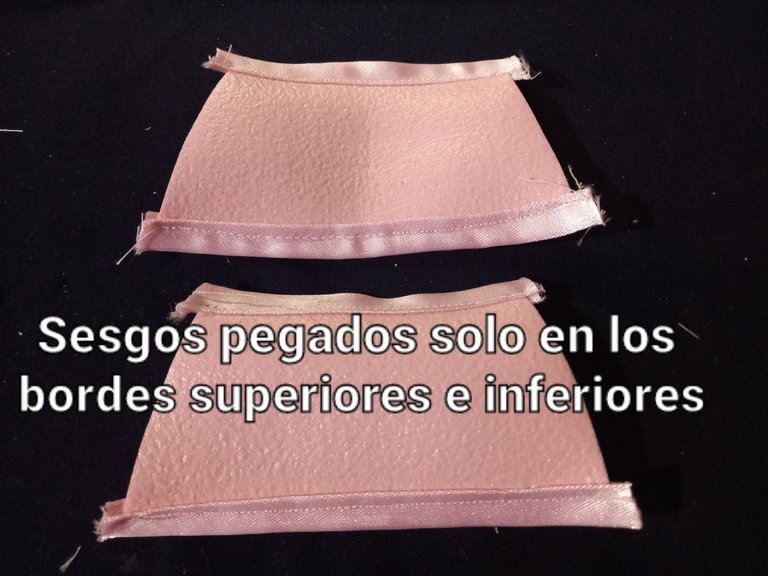
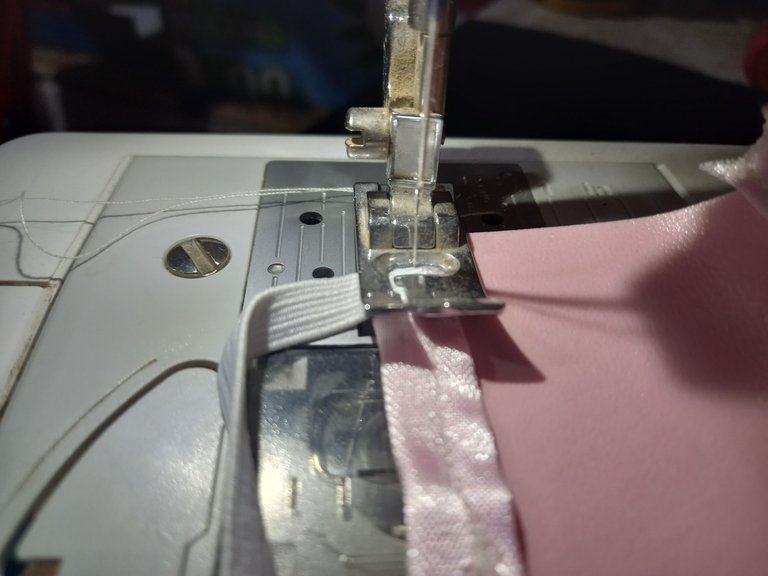
Después de haber cocido el sesgo por cada borde, procedemos a pegar el elástico en los extremos superiores del empeine, dejando una distancia de 1 cm por cada lado.
After having sewn the bias binding on each edge, we proceed to glue the elastic on the upper ends of the instep, leaving a distance of 1 cm on each side.

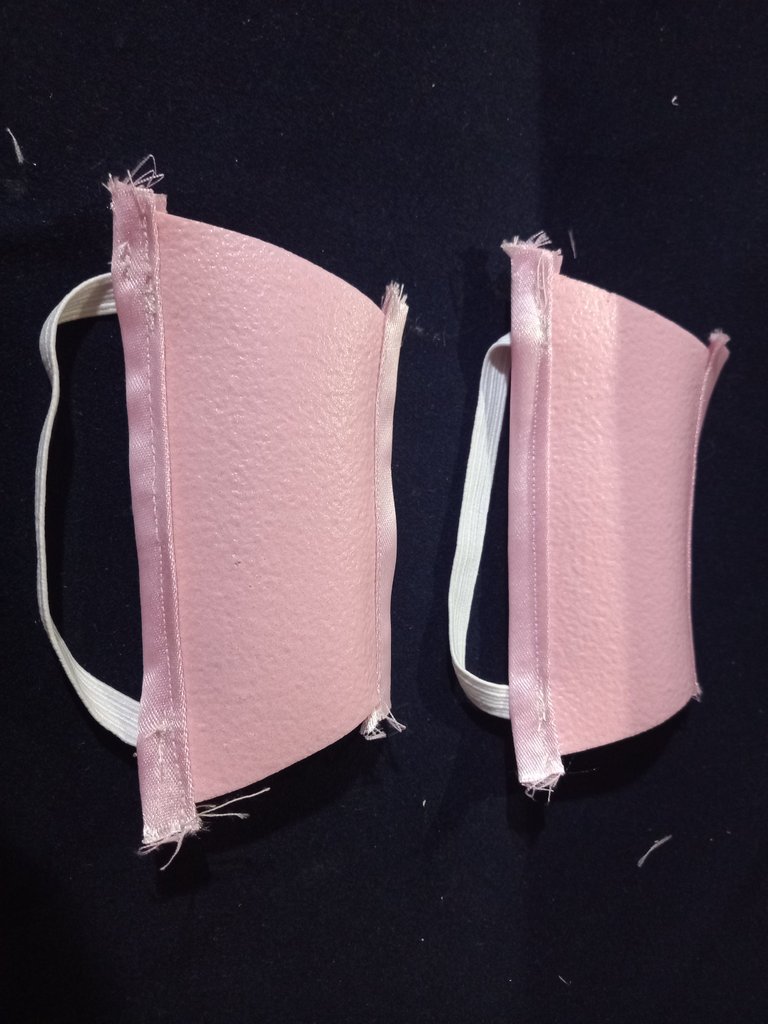
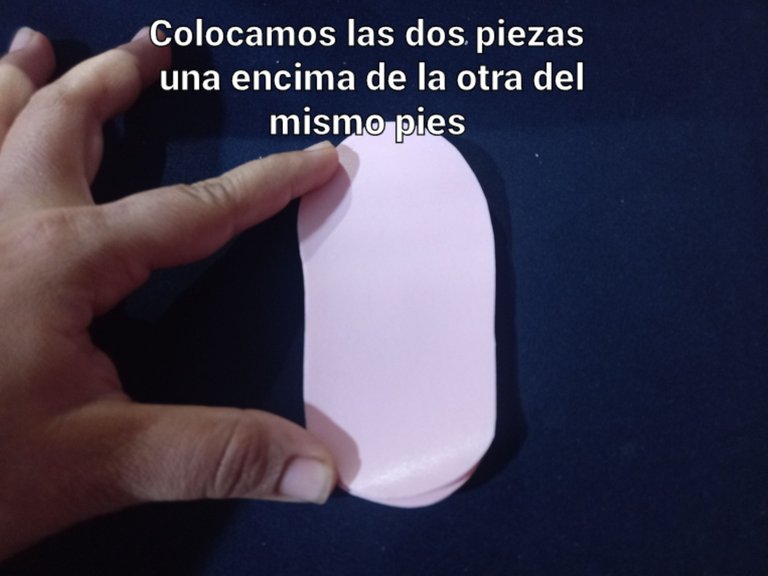
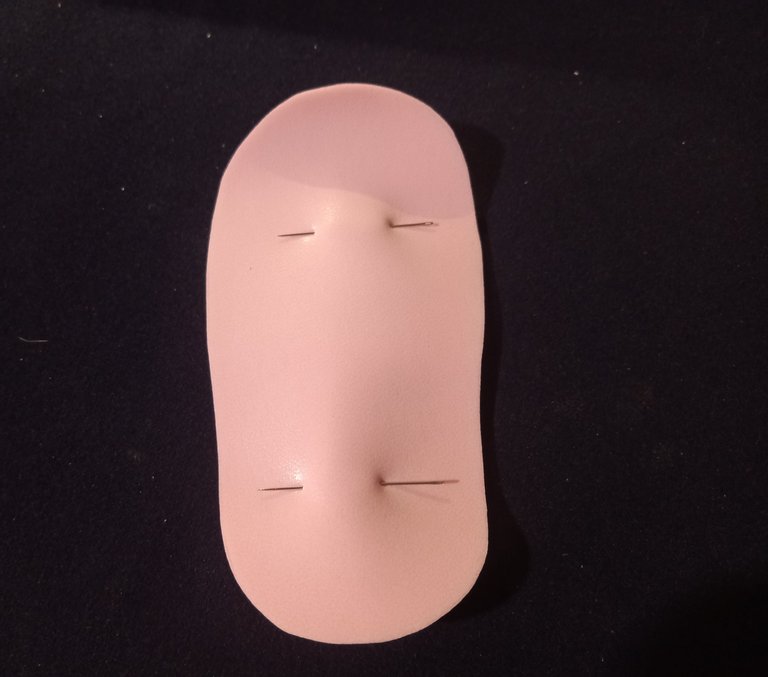
Luego colocaremos cada plantilla sobre su pareja y aseguramos con agujas.
Then we will place each template on your partner and secure with needles.
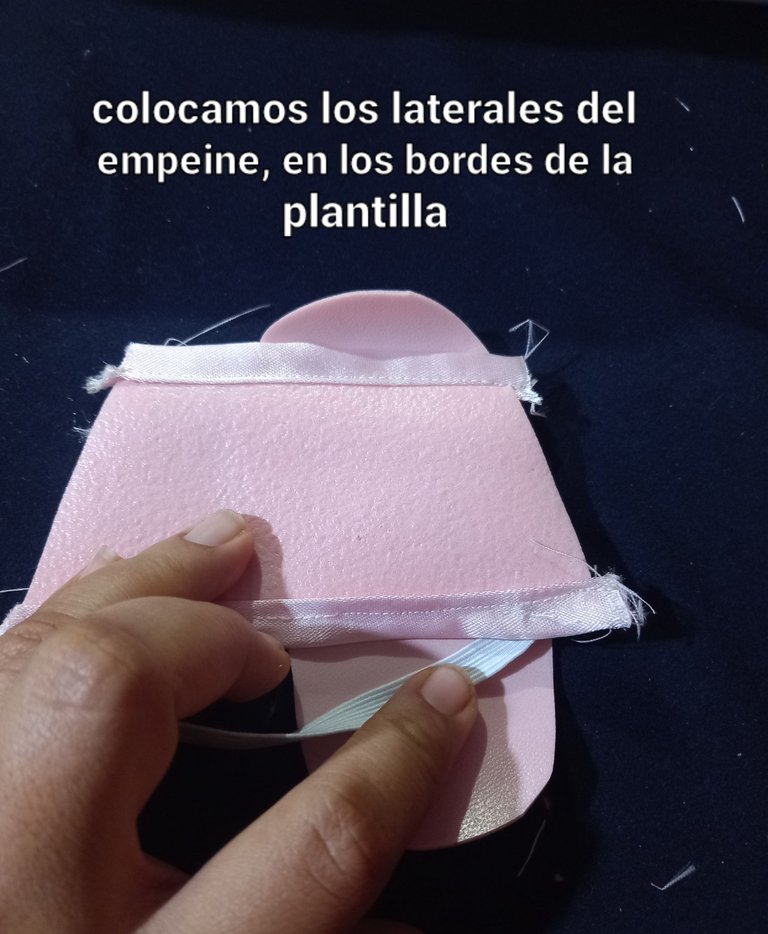
Posteriormente colocaremos el borde de los laterales del empeine, por el borde de la plantilla, dejando 1,5 cm de punta, por donde saldrán los deditos y cosemos.
Then we will place the edge of the sides of the instep, along the edge of the insole, leaving 1.5 cm of tip, where the little fingers will come out and we sew.
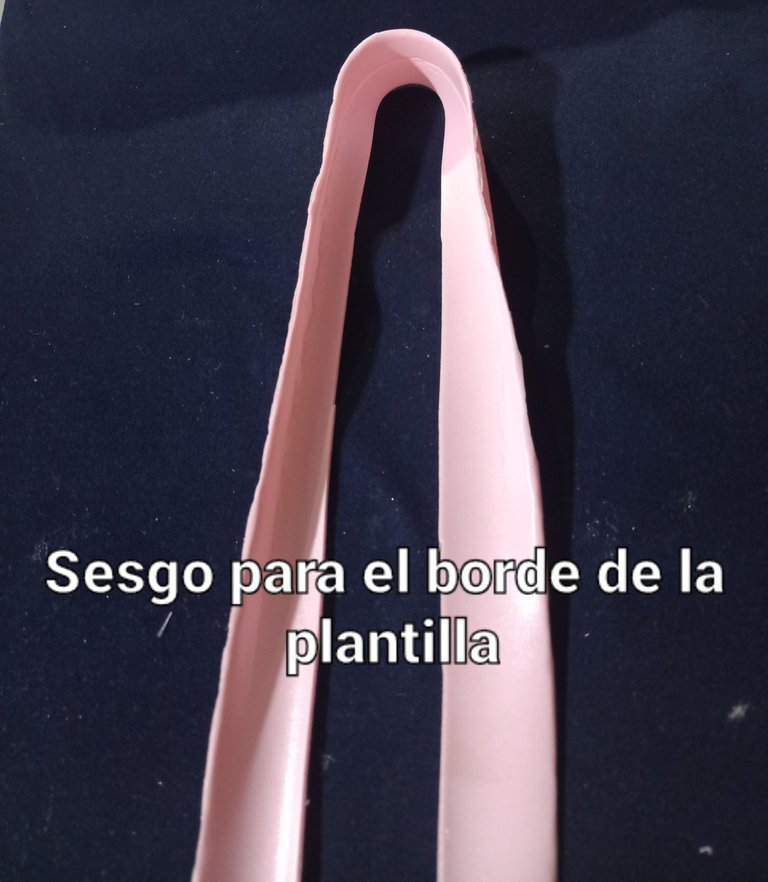
Después que hayamos terminado de pegar el empeine, procedemos a cortar una tira para hacer el sesgo de 2 cm de ancho y de largo el necesario para cubrir todo el borde de la plantilla.
After we have finished gluing the instep, we proceed to cut a strip to make the bias 2 cm wide and long enough to cover the entire edge of the template.
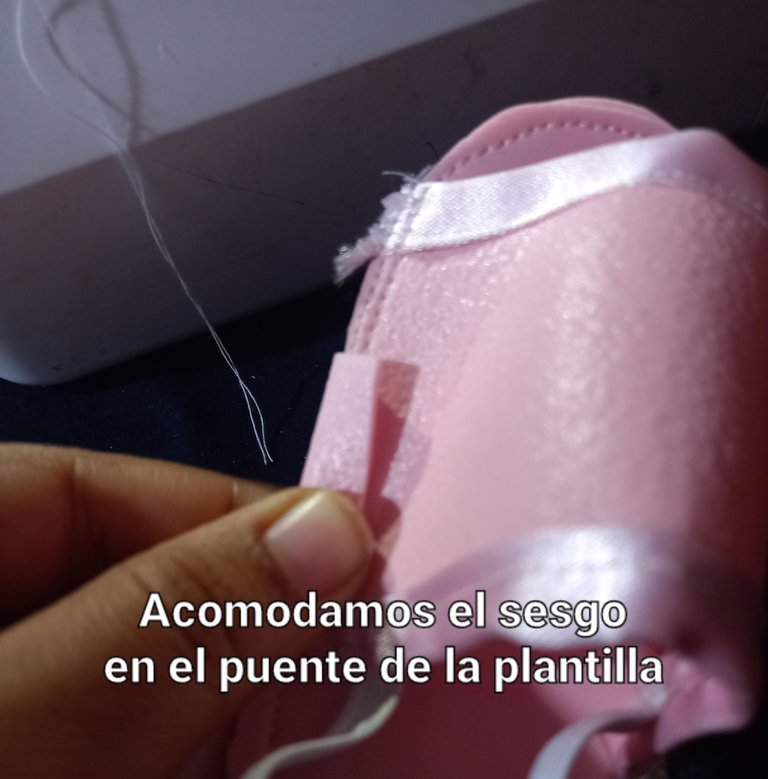
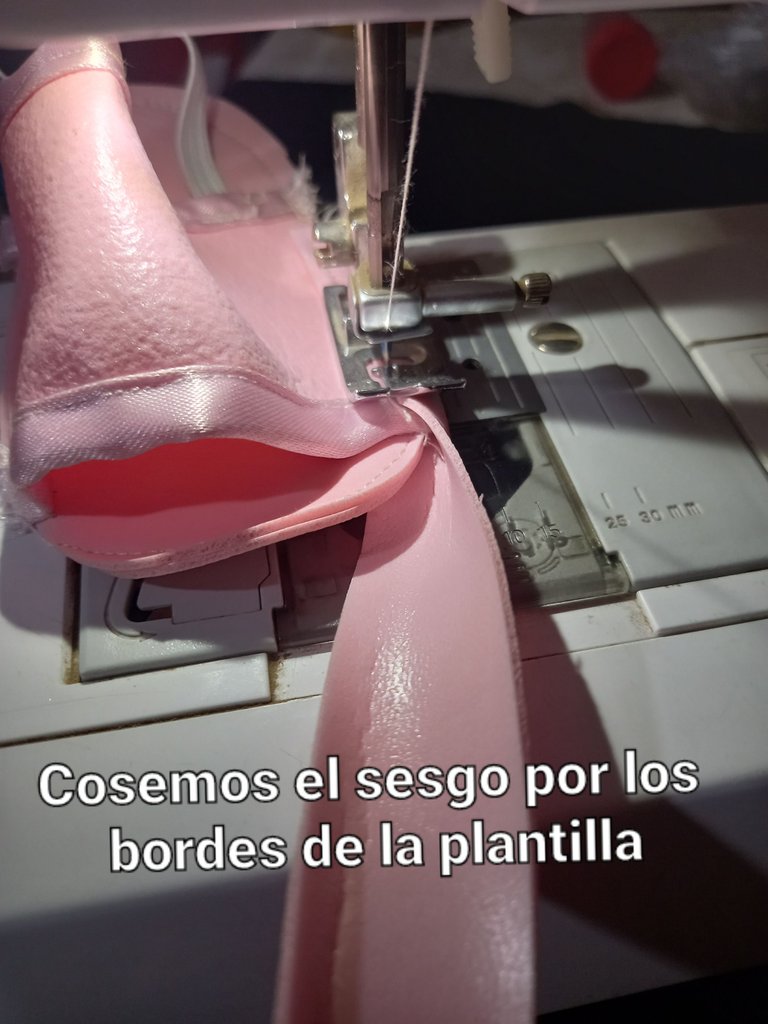
Comenzaremos a cocer el sesgo partiendo desde el puente de la plantilla.
We will start firing the bias firing starting from the bridge of the template.
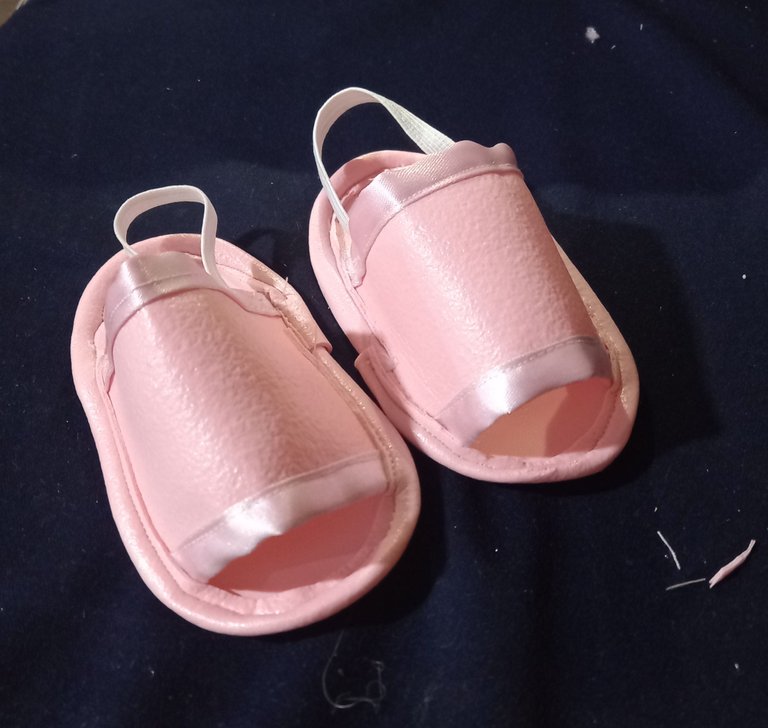
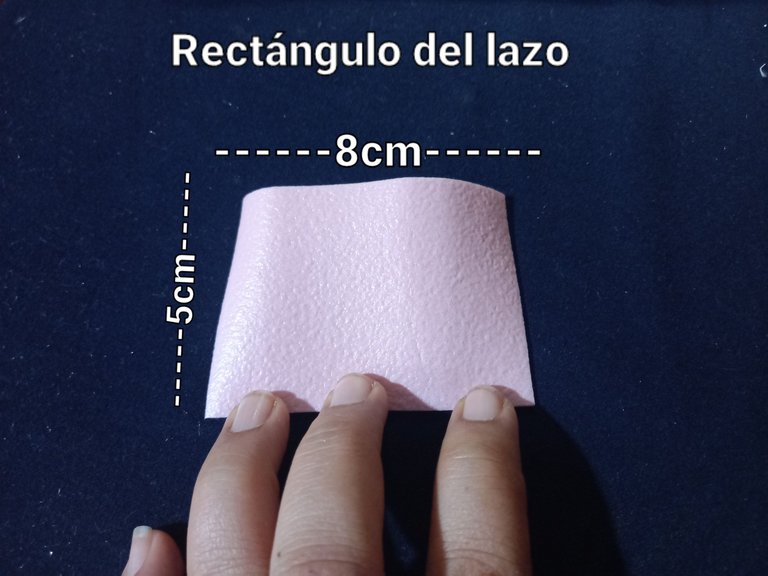
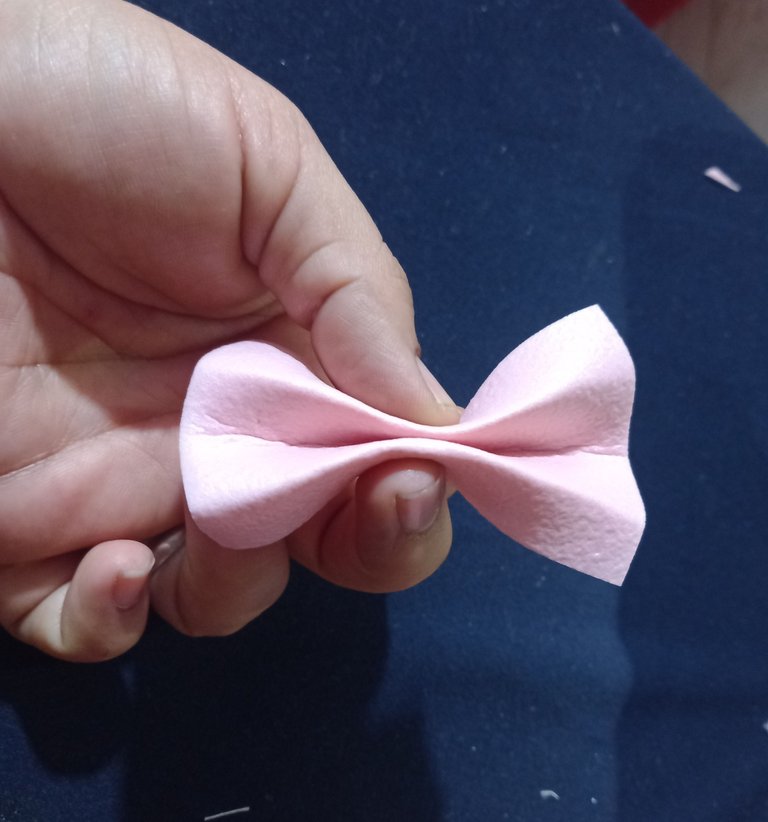
Una vez que hayamos terminado de pegar el sesgo por todo el borde de la plantilla haremos un lazo con un rectángulo de 8 cm de largo y 5 cm de ancho.
Once we have finished gluing the bias binding all around the edge of the template, we will make a loop with a rectangle 8 cm long and 5 cm wide.
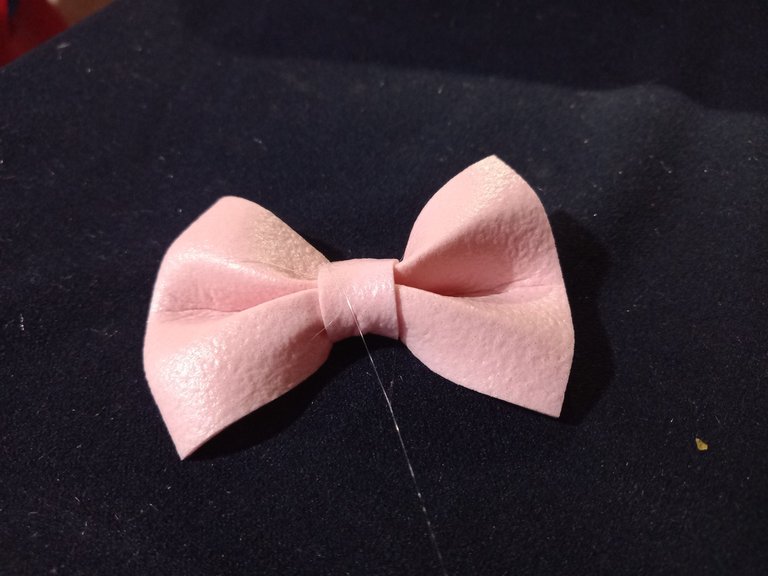
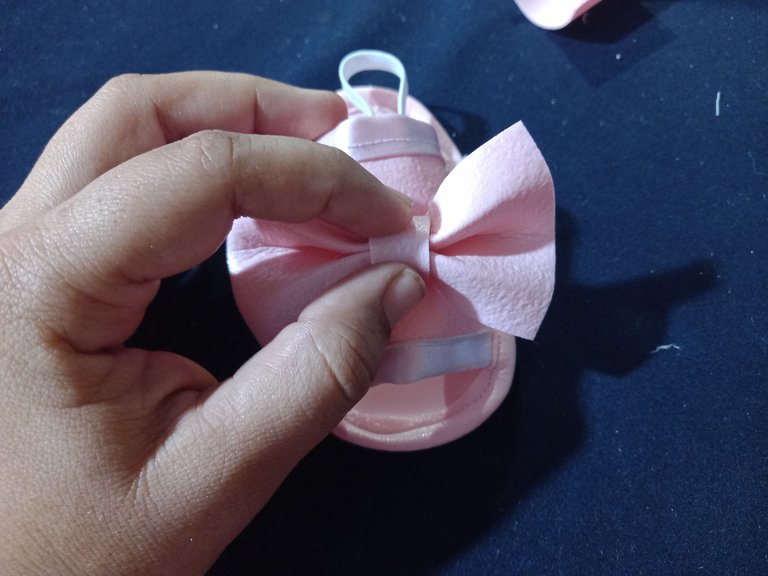
Finalizamos nuestra sandalias pegando el lazo en la parte de arriba del empeine.
We finish our sandals by gluing the bow on the top of the instep.
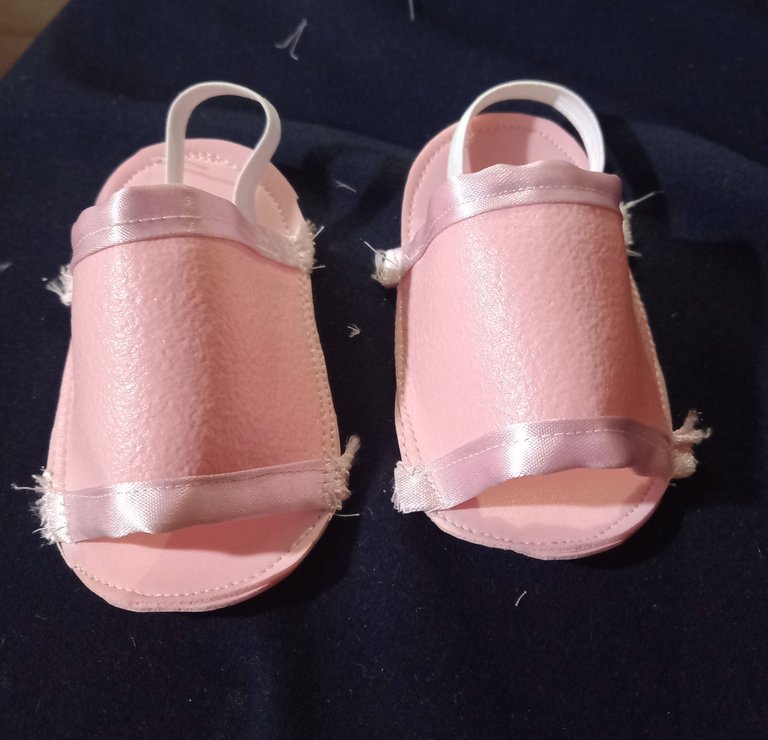
¡Veamos el resultado amigos!
Let's see the result folks!

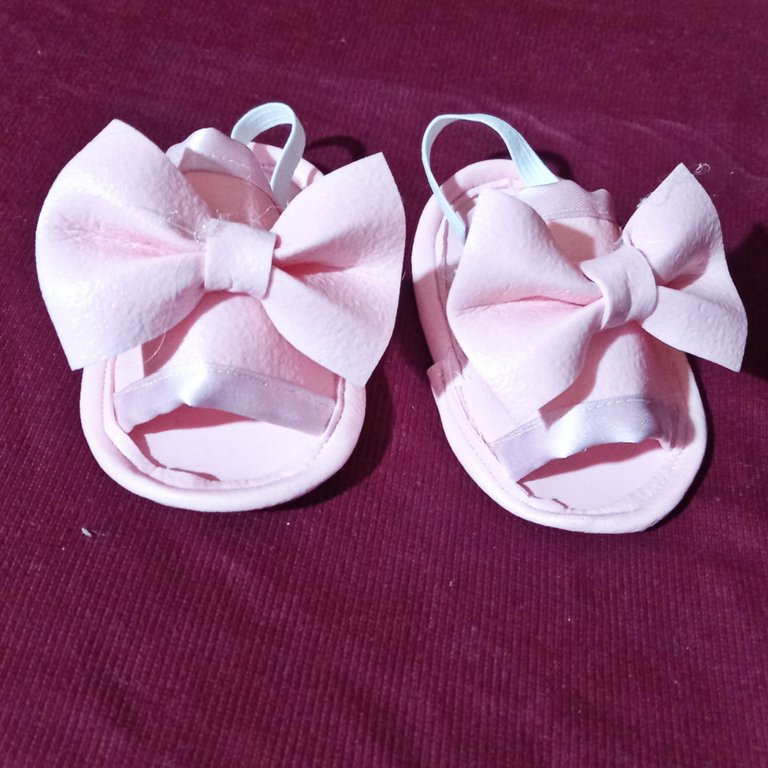
Espero que te haya gustado este tutorial y lo puedas poner en práctica ya que sería un hermoso obsequio para un baby shower o para una sobrina. Gracias por quedarte hasta el final de este tutorial, será hasta otra oportunidad. Saludos 😊 🖐🏻.
I hope you liked this tutorial and can put it into practice as it would be a beautiful gift for a baby shower or for a niece. Thanks for sticking around to the end of this tutorial, will be until another time. Greetings 😊 🖐🏻.
Hola, felicidades te han quedado hermosas...
Hola amiga @katiuskamata, muchas gracias. Saludos 😊
Beautiful job weldon @kathelopez77 thanks for sharing
Gracias a ti amiguito @smilestitches por comentar, que tengas un gran día. 🖐🏻
Wow this is wonderful, I got this one I will put a try to it thanks so much for sharing
Gracias amigos @rutablockchain por su valioso apoyo. Que tengan un gran día.
Hola mí bella te quedaron hermosas esa sandalias para bebe 😍
Hola amiga @ingridmar, gracias por tu comentario. Feliz día 👍🏻😊