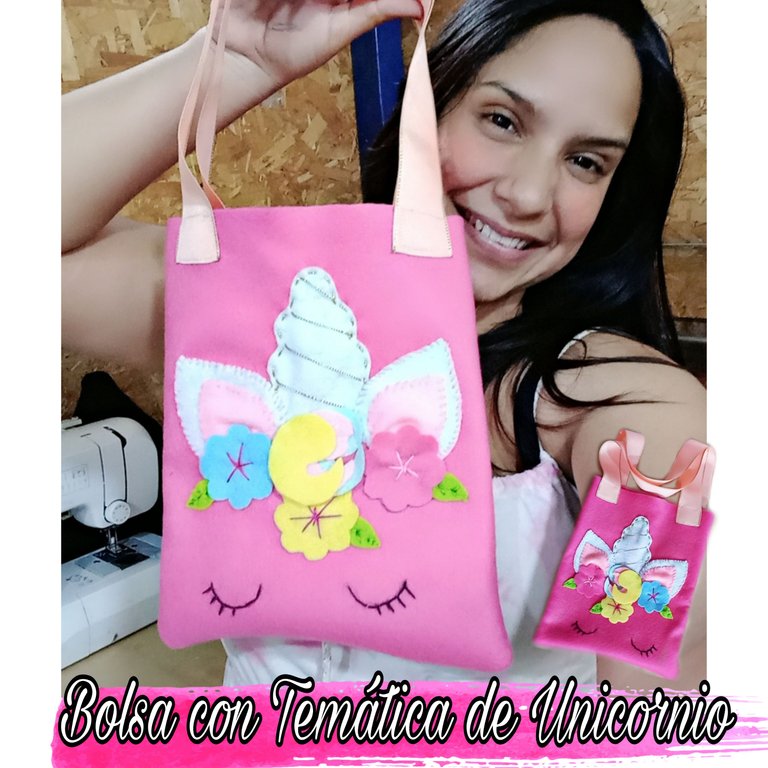
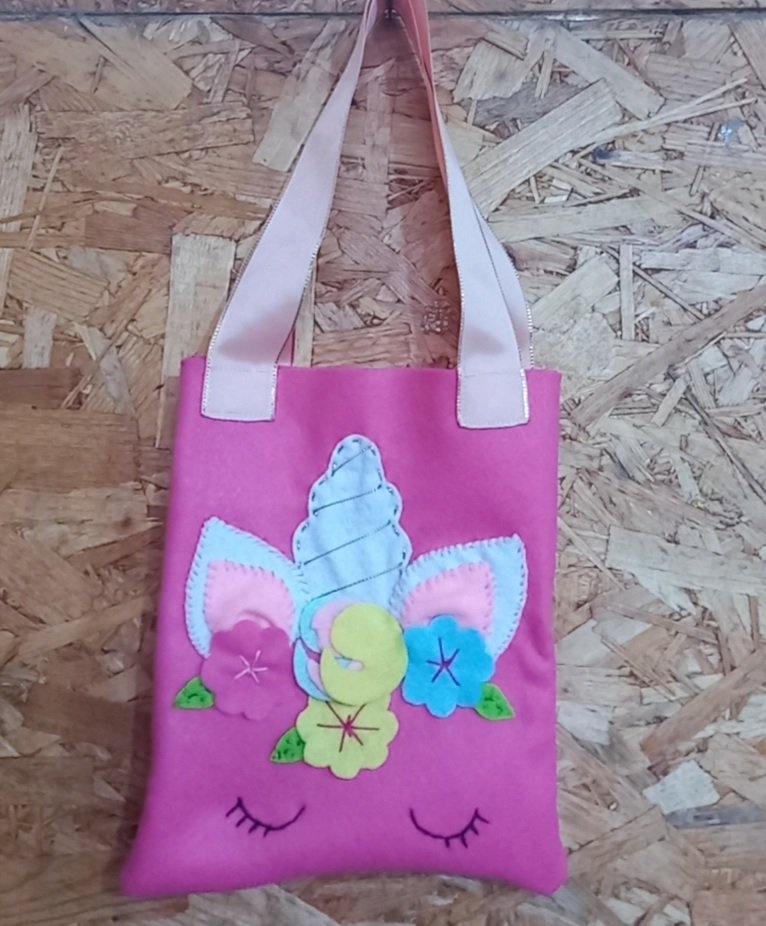
Hola, hola mi linda familia de #NeedleWorkMonday espero que estén pasando un grandioso día, es un gusto volver a saludarlos y compartir con ustedes, a través de éste pequeño tutorial, un nuevo proyecto de costura y bordado. Se trata de una hermosa bolsa con temática de unicornio, ideal para fiestas temáticas o un lindo accesorio para combinar con los atuendos de las niñas y luzcan con mucho estilo. Aquí te muestro cómo la hice.
Hello, hello my beautiful #NeedleWorkMonday family I hope you are having a great day, it is a pleasure to greet you again and share with you, through this little tutorial, a new sewing and embroidery project. This is a beautiful unicorn themed bag, ideal for theme parties or a cute accessory to combine with the girls' outfits and look very stylish. Here I show you how I made it.

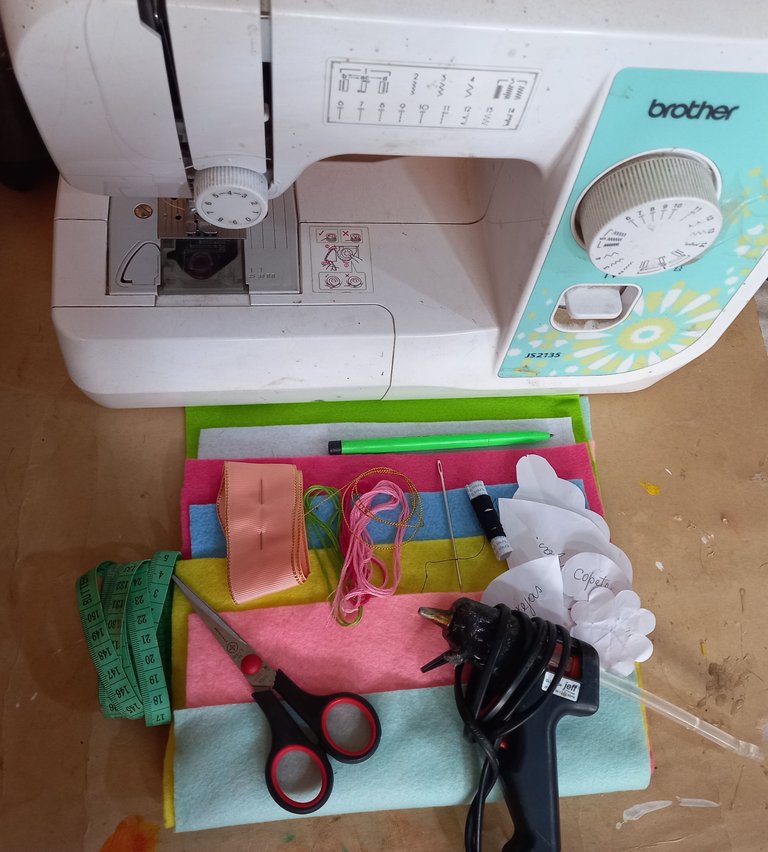
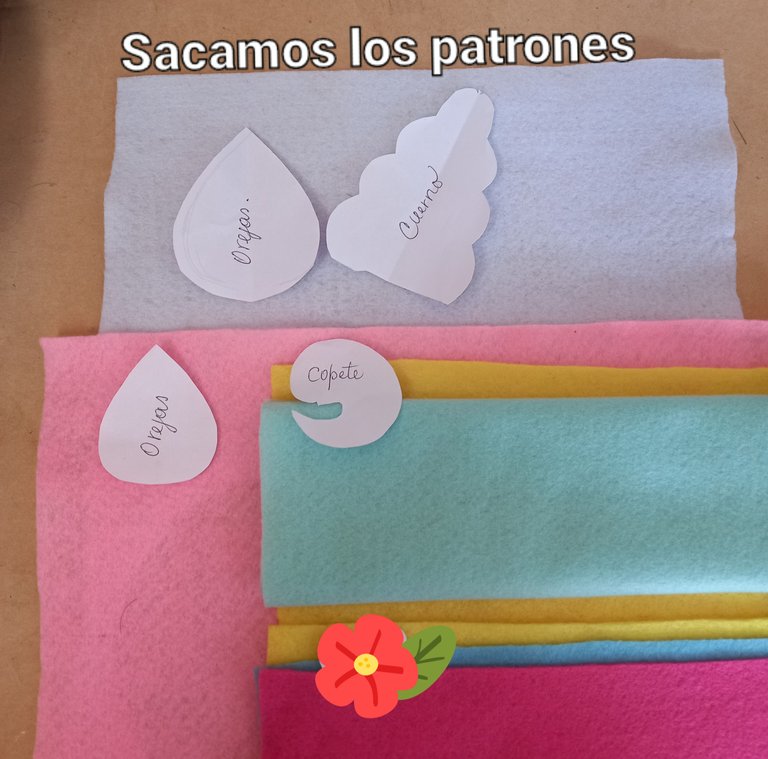
- Fieltros en tamaño A4 color fucsia, azul, turquesa, amarillo, verde, blanco, negro y rosado.
- Patrones de orejas, cuerno de unicornio y flores.
- Hilo de bordar fucsia, rosado y verde.
- Hilo negro.
- Aguja para bordar.
- Cinta Falla color pastel.
- Tijeras.
- Cinta métrica.
- Pistola de silicón caliente.
- Lapicero tinta negra.
- Felts in A4 size in fuchsia, blue, turquoise, yellow, green, white, black and pink.
- Patterns of ears, unicorn horn and flowers.
- Fuchsia, pink and green embroidery thread.
- Black thread.
- Embroidery needle.
- Pastel color Falla ribbon.
- Scissors.
- Measuring tape.
- Hot silicone gun.
- Black ink pen.

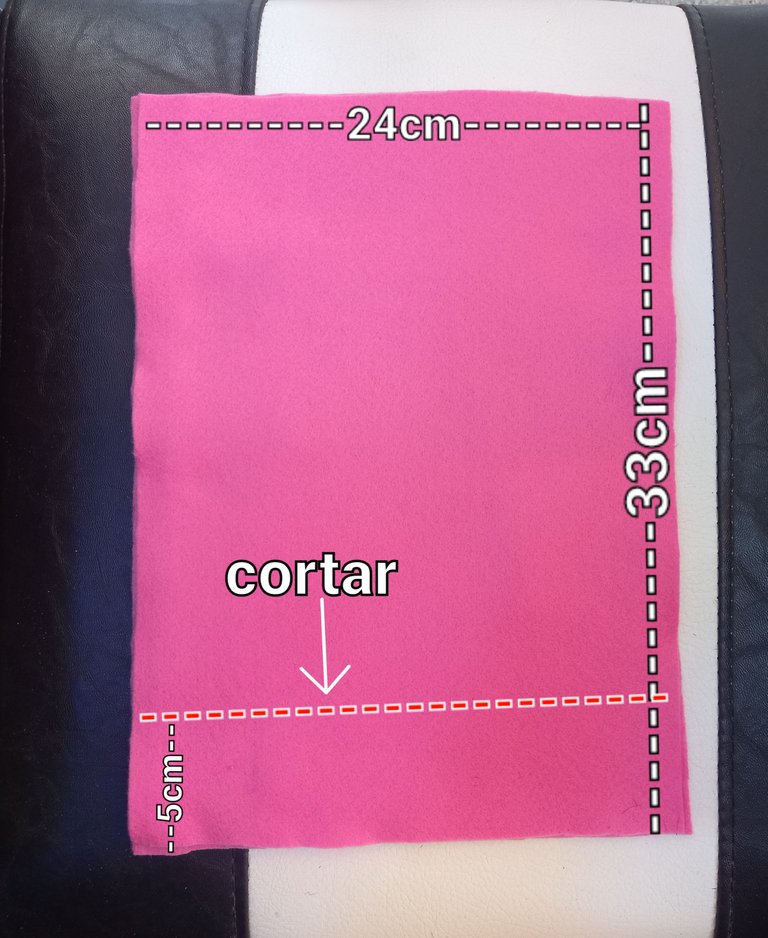
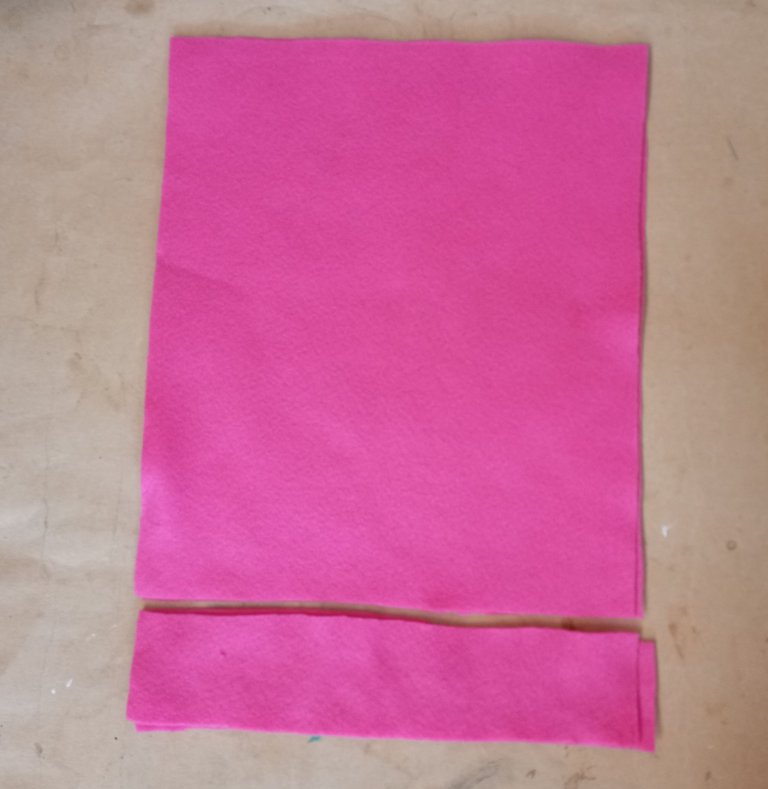
Primero colocaremos las dos piezas de fieltro una sobre la otra, para cortar el largo de la bolsa que sería de 28cm.
First we will place the two pieces of felt one on top of the other, to cut the length of the bag, which would be 28cm.
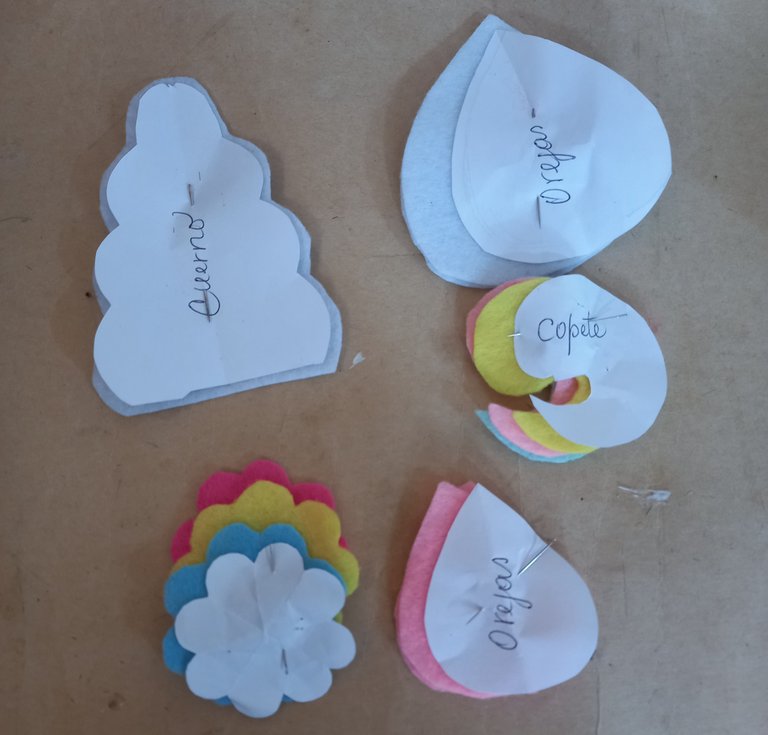
Una vez que hayamos cortado el largo de la bolsa, comenzaremos a sacar los patrones de las orejas, el copete, el cuerno del unicornio y las flores, para cada pieza usé los siguientes colores:
- Blanco y rosado para las orejas.
- Blanco para el cuerno.
- amarillo, turquesa y rosado para el copete.
- Azul, fucsia, amarillo y verde para las flores.
Once we have cut the length of the bag, we will begin to draw the patterns for the ears, the topknot, the unicorn's horn and the flowers, for each piece I used the following colors:
- White and pink for the ears.
- White for the horn.
- Yellow, turquoise and pink for the topknot.
- Blue, fuchsia, yellow and green for the flowers.
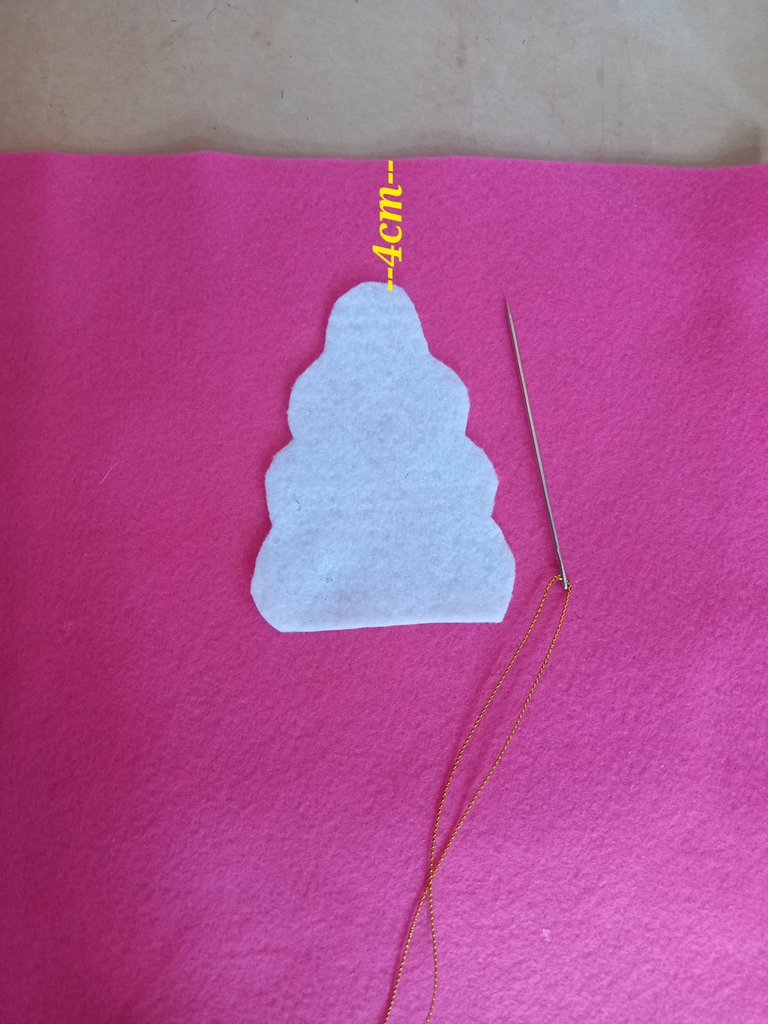
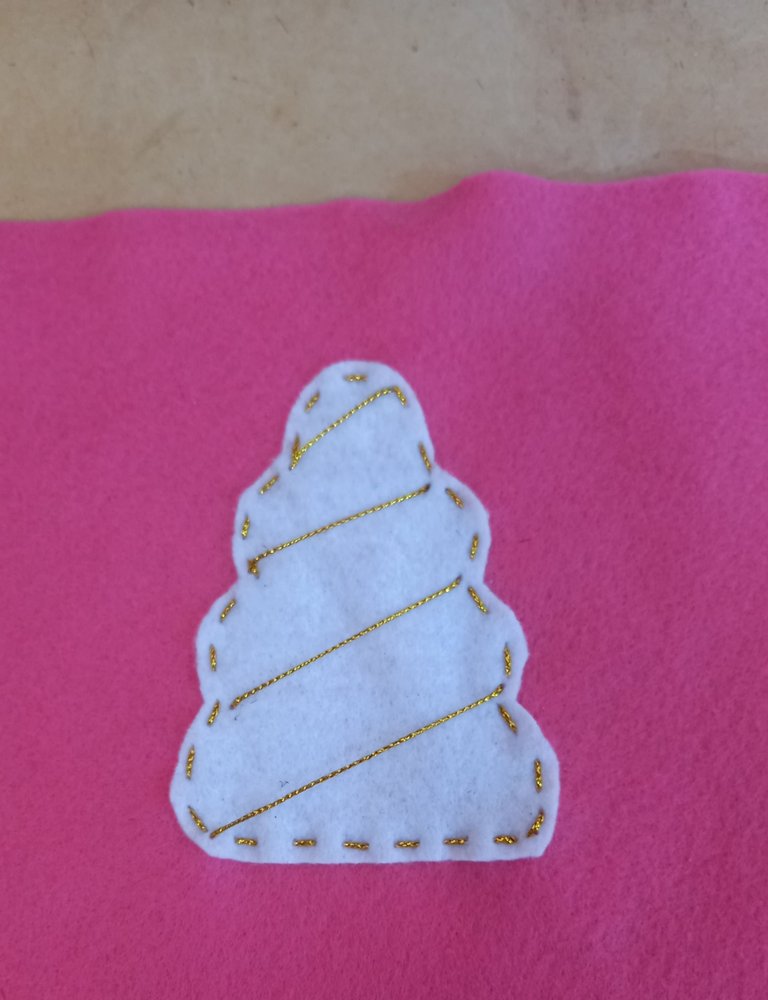
Luego colocamos el cuerno encima del fieltro fucsia a una distancia de la orilla de 4 cm y lo bordamos con hilo dorado, usando un pespunte o como hice en este caso, use una puntada basteada.
Then we place the horn on top of the fuchsia felt at a distance of 4 cm from the edge and embroider it with gold thread, using a backstitch or as I did in this case, I used a baste stitch.
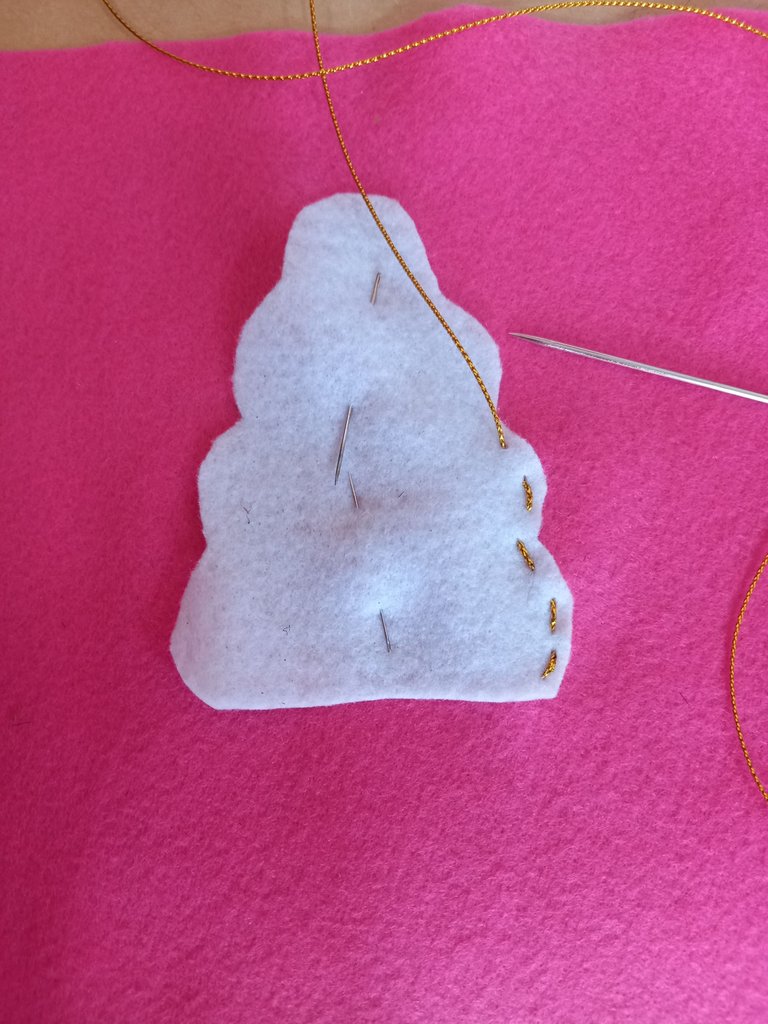

Después le haremos al cuerno, unas líneas diagonales, con el mismo hilo dorado.
Then we will make diagonal lines on the horn with the same golden thread.
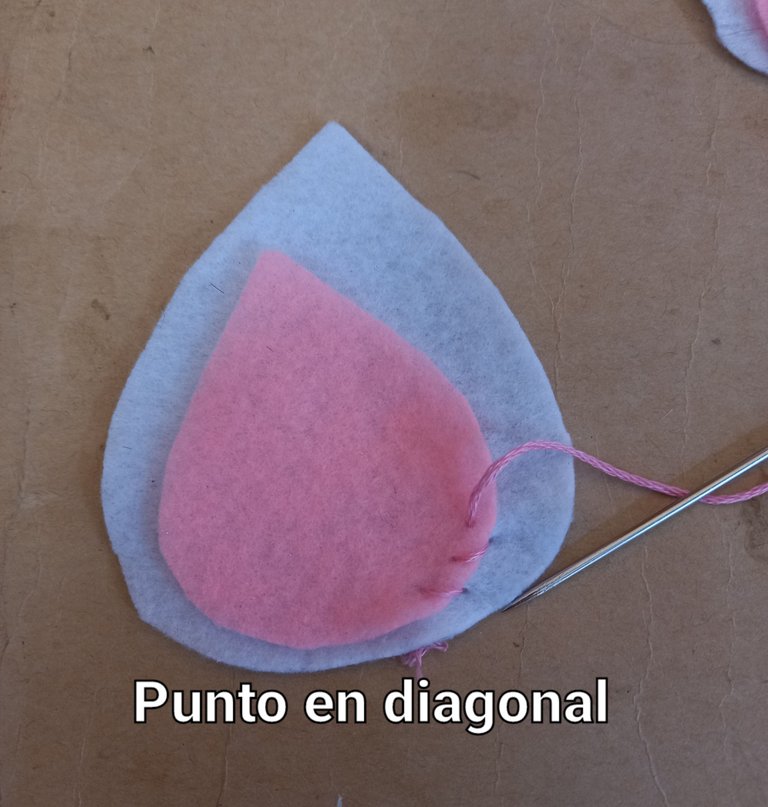
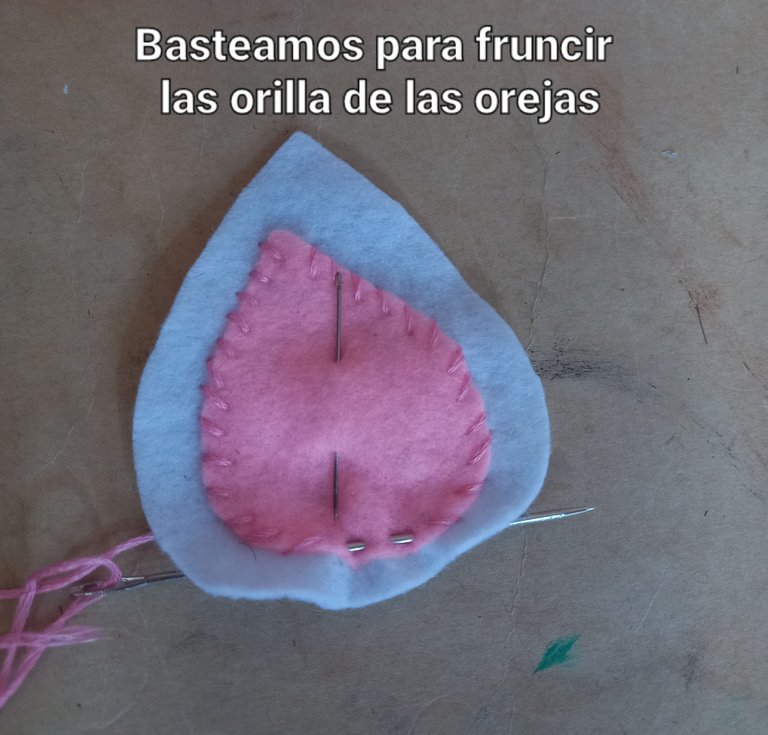
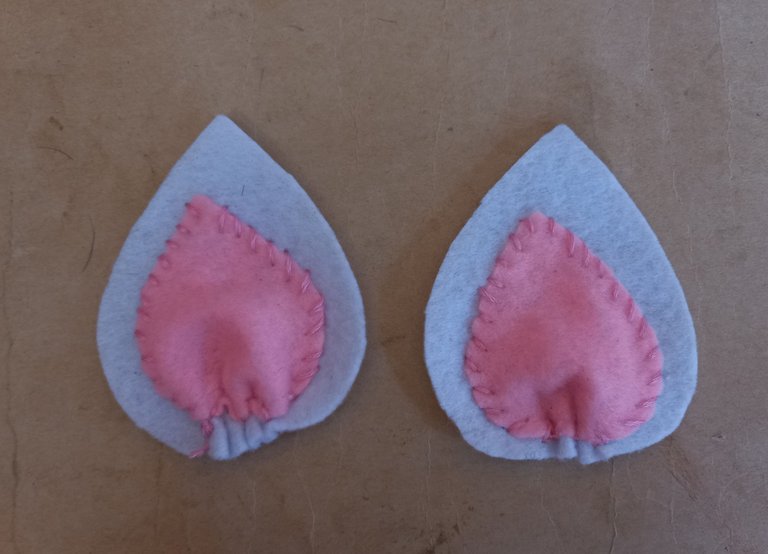
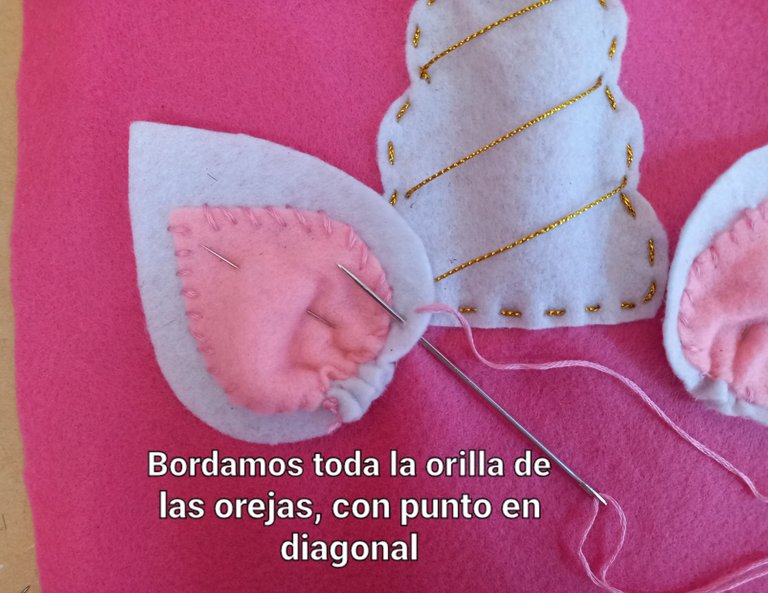
Posteriormente bordamos la oreja rosada sobre la oreja blanca, con punto diagonal, utilizando hilo para bordar de color rosado y fruncimos la parte de abajo.
Then we embroider the pink ear over the white ear, with diagonal stitch, using pink embroidery thread and gather the bottom part.
Luego bordamos las orejas a cada lado del cuerno utilizando en diagonal con el mismo hilo rosado.
Then we embroider the ears on each side of the horn using diagonally with the same pink thread.
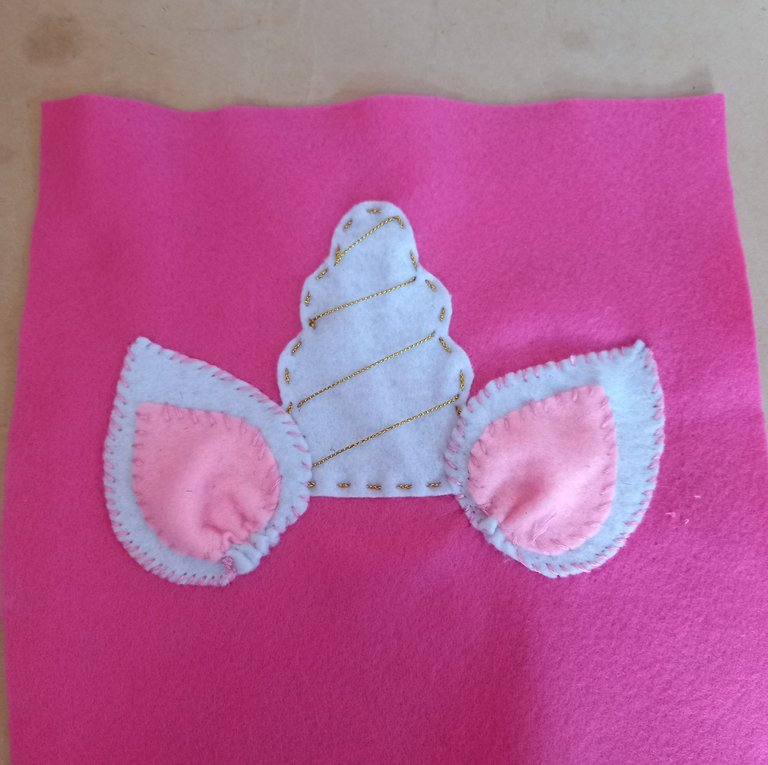
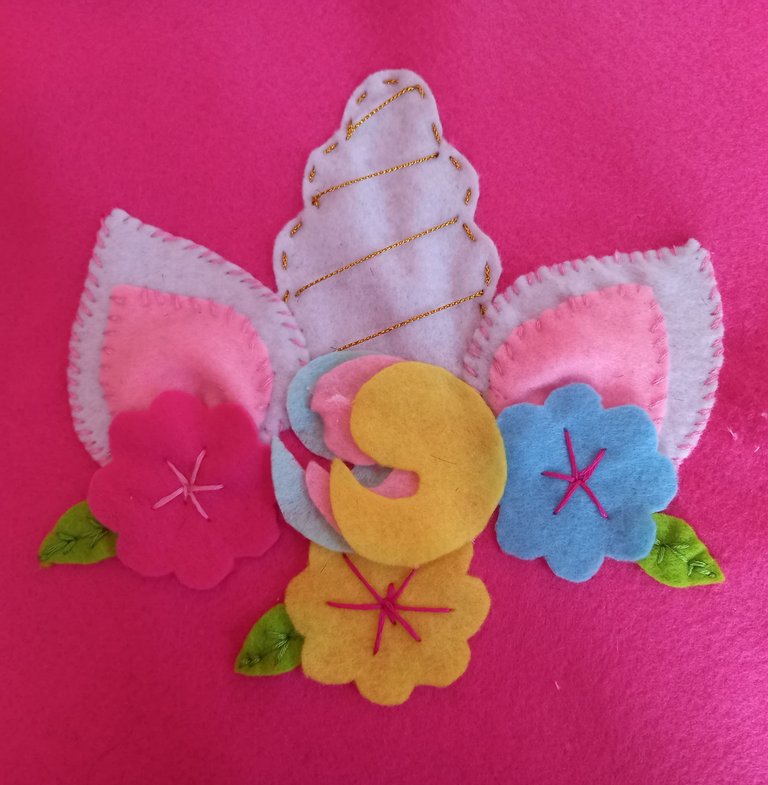
Pegamos con silicón los tres copetes sobre la orilla inferior del cuerno.
Glue with silicone the three cups on the lower edge of the horn.
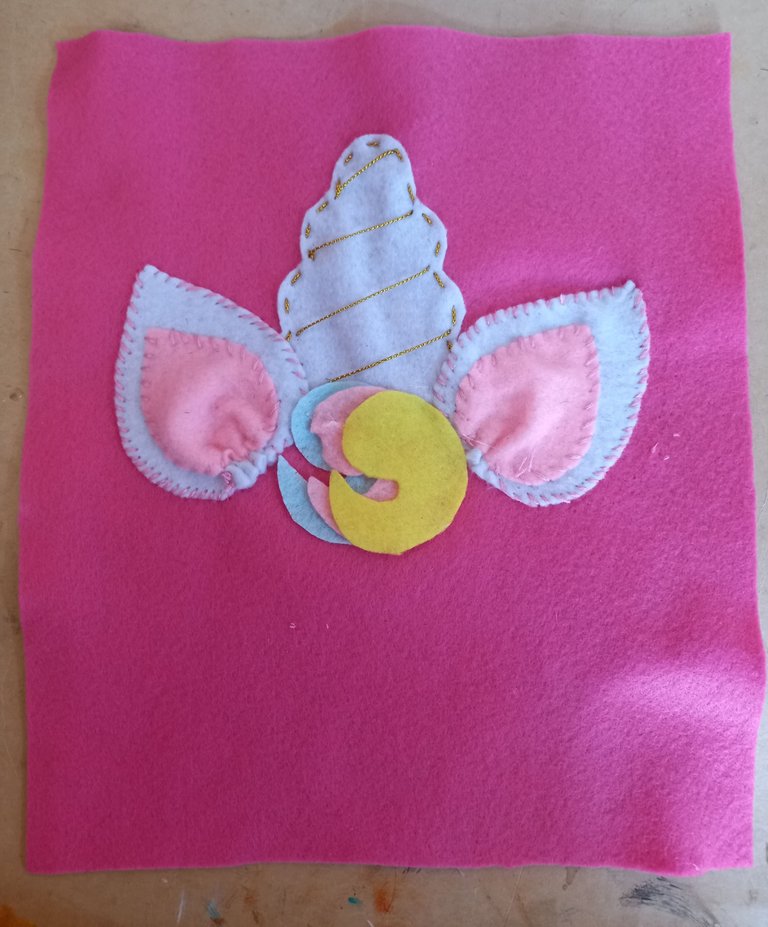
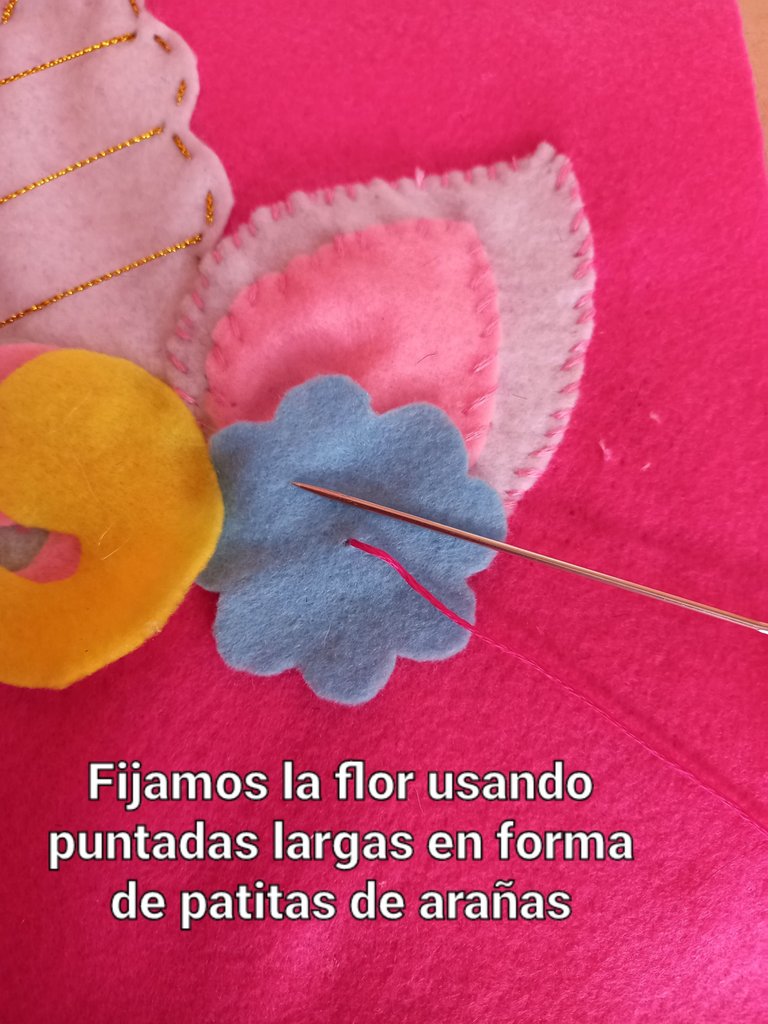
Las tres flores que sacamos en los distintos colores de fieltro, la fijaremos una en cada orilla de las orejas y otra debajo de los tres copetes, haremos una costura desde el centro como patitas de arañas.
The three flowers that we took out in the different colors of felt, we will fix one on each edge of the ears and another one under the three tufts, we will make a seam from the center as spider legs.
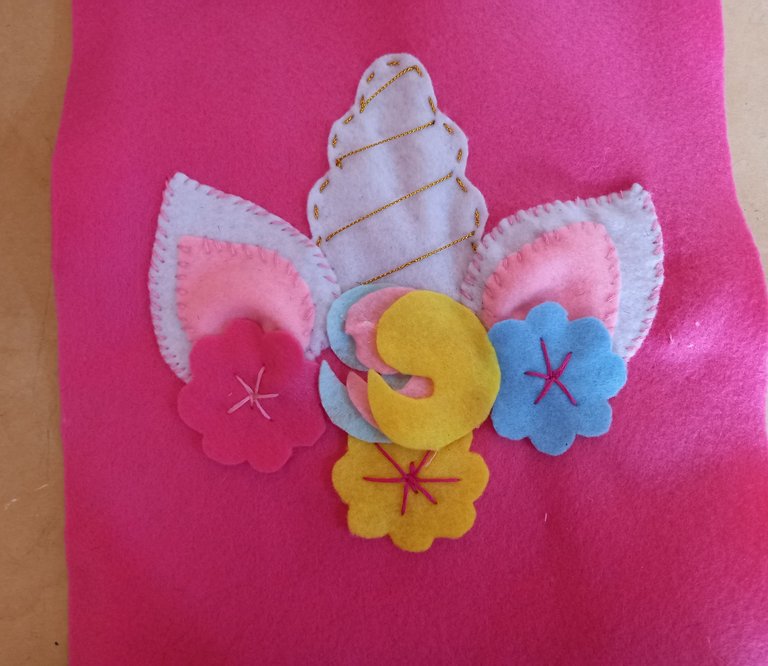
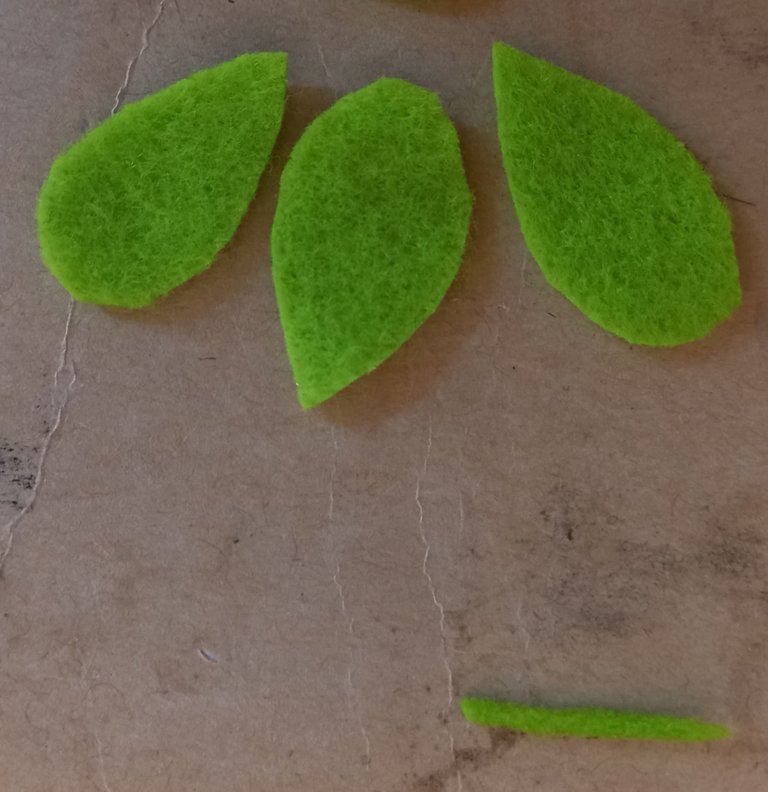
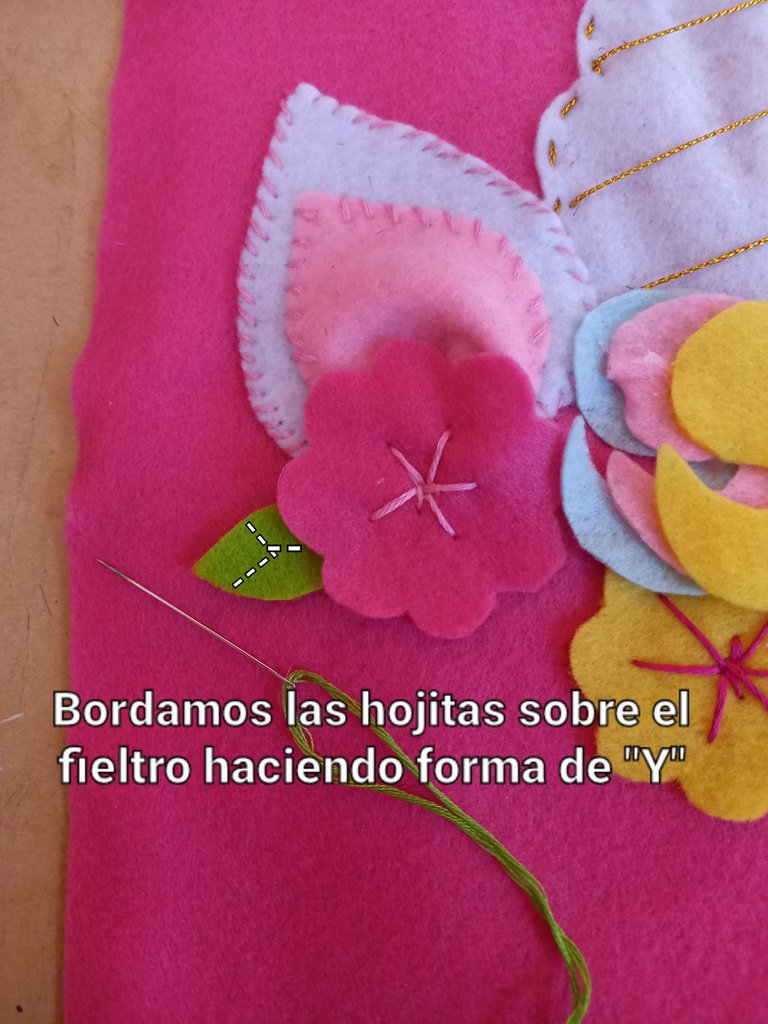
Realizaremos tres ojitas en fieltro verde y la bordamos una a un ladito de cada flor, usando hilo verde, con puntadas en forma de "Y" para simular el nervio central y los nervios secundarios.
We will make three little eyes in green felt and embroider one on the side of each flower, using green thread, with "Y" stitches to simulate the central nerve and the secondary nerves.
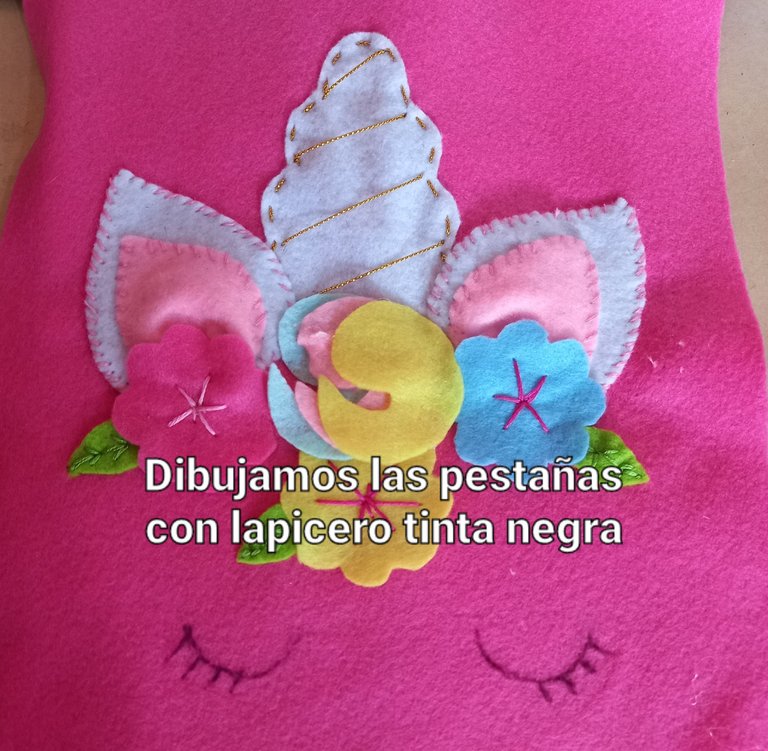
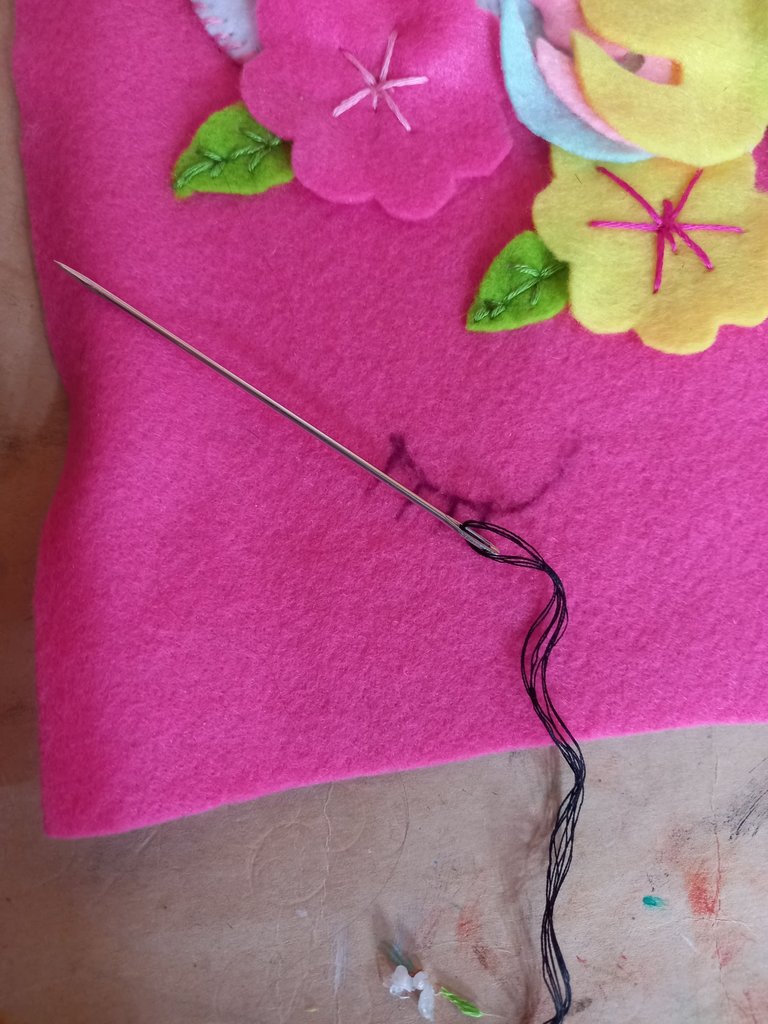
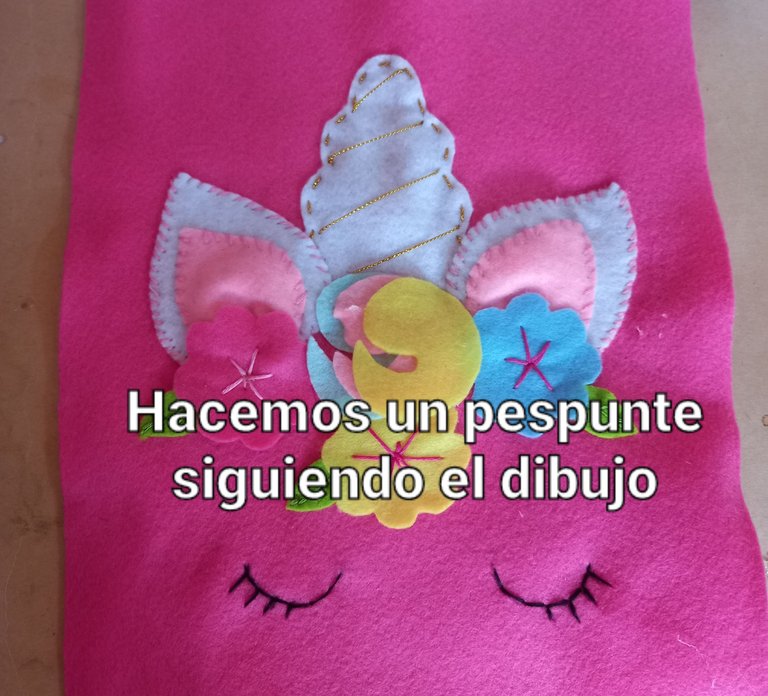
Lo siguiente que haremos es, dibujar las pestañas del unicornio con un lapicero tinta negra y vamos haciendo pespuntes, siguiendo la figura.
The next thing to do is to draw the unicorn's eyelashes with a pencil in black ink and stitch them, following the figure.
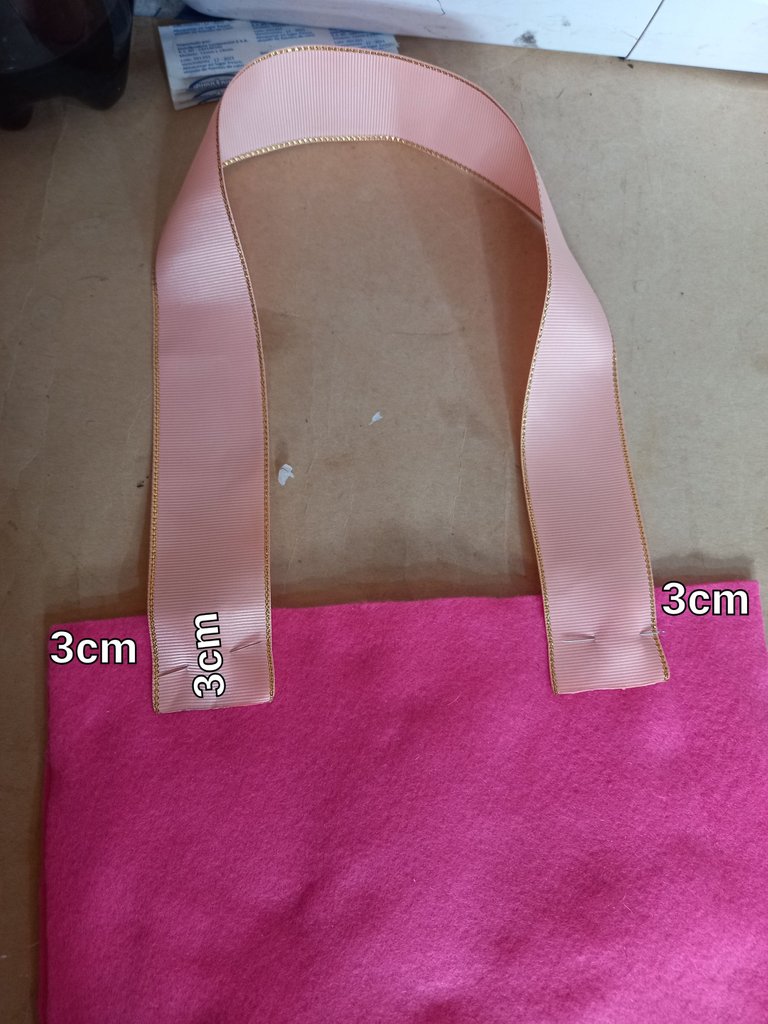
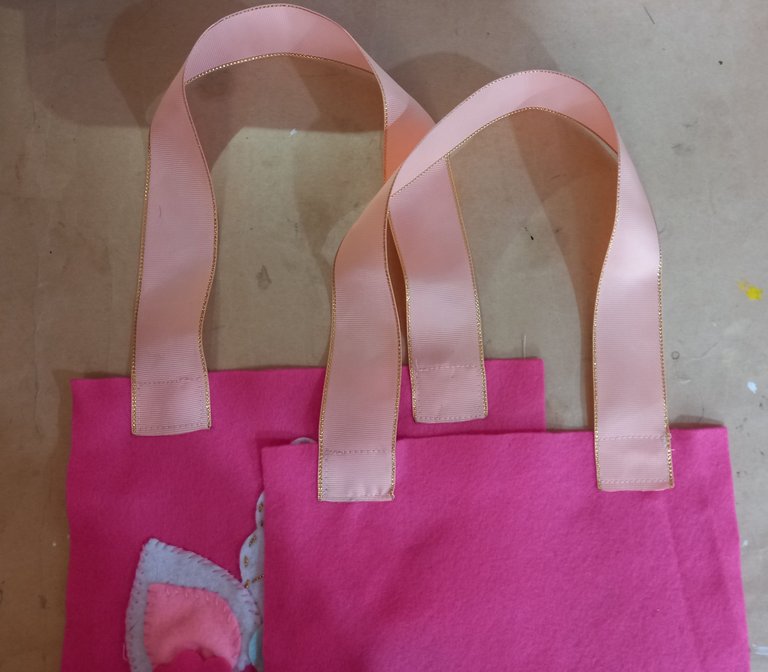
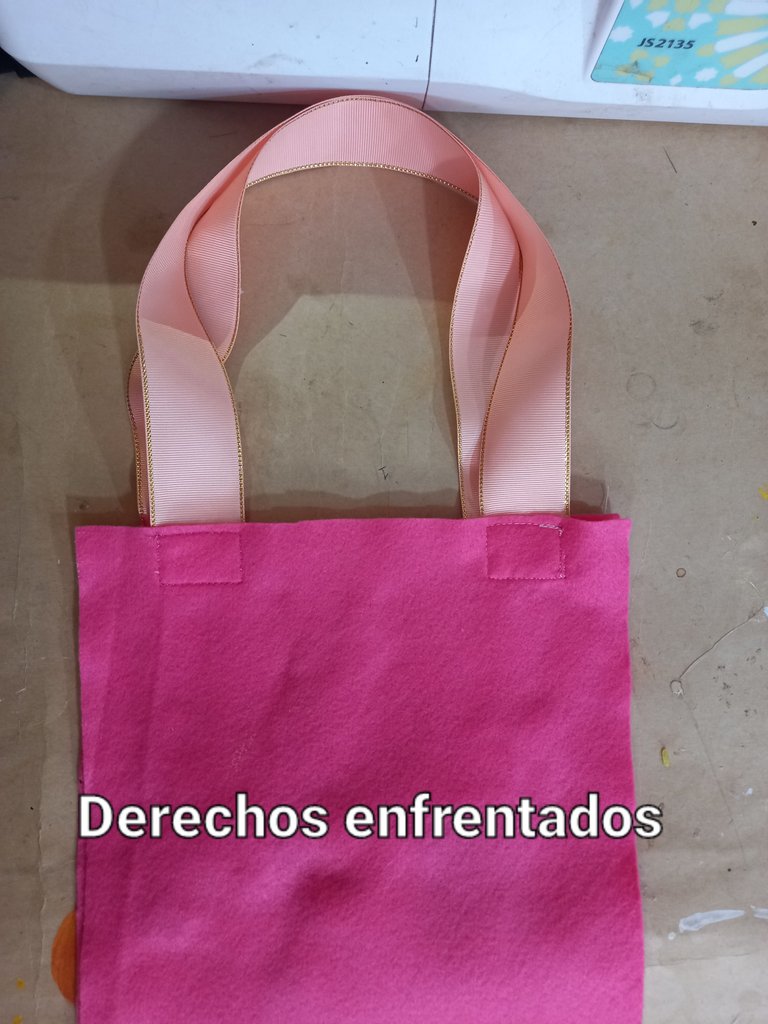
Posteriormente cortamos dos piezas de cinta de 50 cm de largo cada una y cosemos en la máquina los extremos en la orilla de la bolsa para crear las asa de mano. Cosemos dejando 3cm de distancia de los laterales .
Then we cut two pieces of ribbon 50 cm long each and sew the ends on the machine at the edge of the bag to create the hand handles. We sew leaving 3cm distance from the sides.

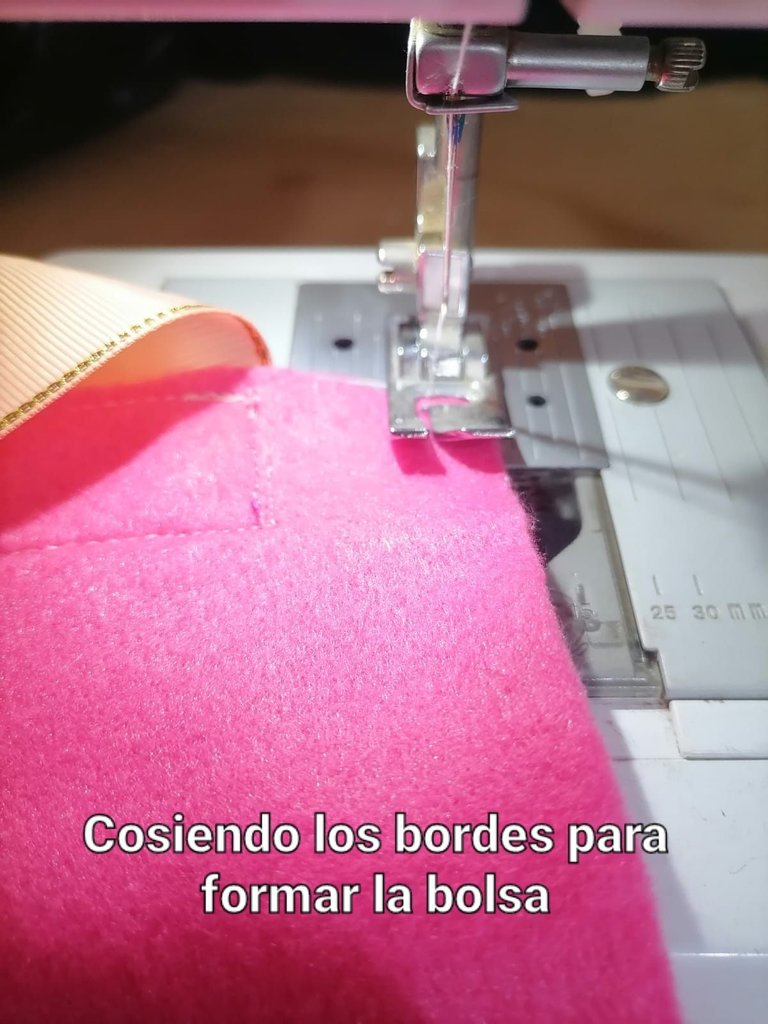
Cuando hayamos pegado las asa de mano, colocaremos las dos piezas con los derechos enfrentados y cosemos hasta hacer la bolsa y desdoblamos.
Once we have glued the hand handles, we will place the two pieces right sides together and sew until we make the bag and unfold it.

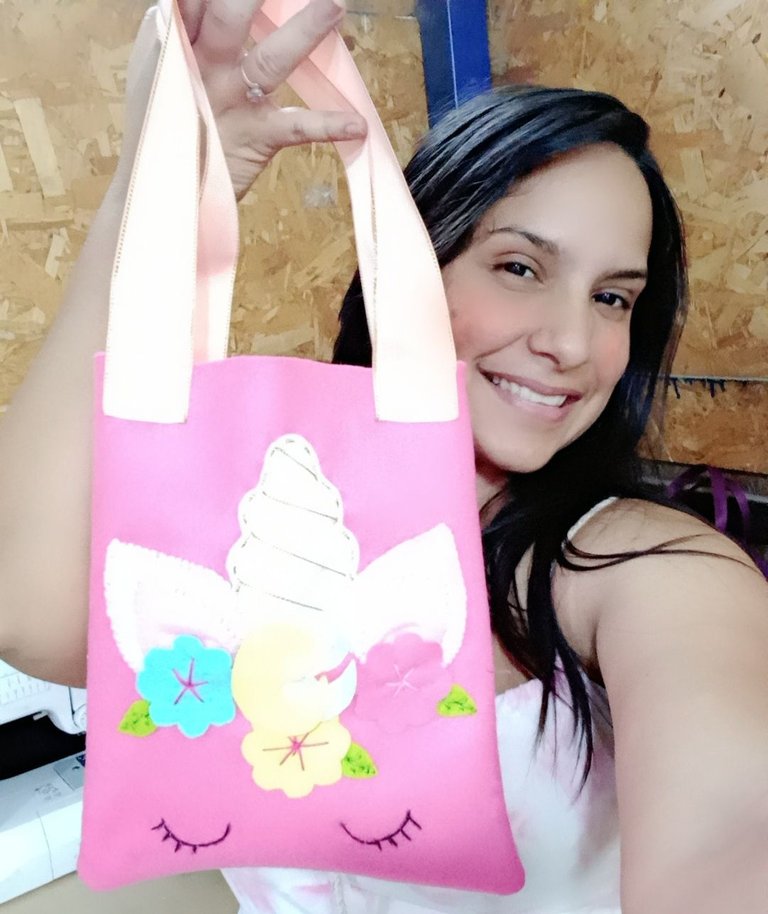
Finalizamos nuestra bolsa, ¡ahora si, veamos el resultado amigos!
We finish our bag, now let's see the result, friends!

Espero que este material te haya gustado y sea de gran utilidad para proyectos futuros. Que tengan un grandioso día, será hasta otra oportunidad. Dios los bendiga mucho 🙏🏻 💕.
I hope you liked this material and that it has been very useful for future projects. Have a great day, will be until another opportunity. God bless you very much 🙏🏻 💕.
Amiga @kathelopez77 te quedó hermosa, es un souvenir ideal y lo podemos hacer nosotras mismas.
Felicitaciones
Hola amiga, muchas gracias por el comentario; así es, es un Souvenir que todo podemos hacer ya que sus pasos son bastante fáciles y con un bonito resultado. Feliz día 🤗
Hola Carmen ❣️💕. Las manualidades de unicornios siempre son tan hemosas y delicadas. Esta bolsa es muy linda, perfecta para las nenas de la casa o todo aquel que ame a los unicornios jaja.
Gracias por compartir tu trabajo. Recuerda interactuar con otros miembros de la comunidad 😁.
Saludos, que tengas un gran día!
Hola mi linda amiga @lauramica, gracias por tu bonito comentario; a mi me encantan las manualidades con temática de unicornio, por la misma razón que dices, son muy hermosas y delicadas, además combinan colores muy alegres. Es un gusto compartir en esta linda colmena. Que tengas un bonito día amiga. 😊 🖐🏻
Beautiful, I love the way you creatively placed the design with different colours and shape, it looks really nice, great job, thanks for sharing @kathelopez77
Gracias a ti mi linda amiga por comentar. Saludos y bendiciones.
¡Te ha quedado increíble! muchas gracias por compartir el paso a paso <3
Gracias a ti amiguita por comentar. Saludos y Bendiciones 😊