Español:
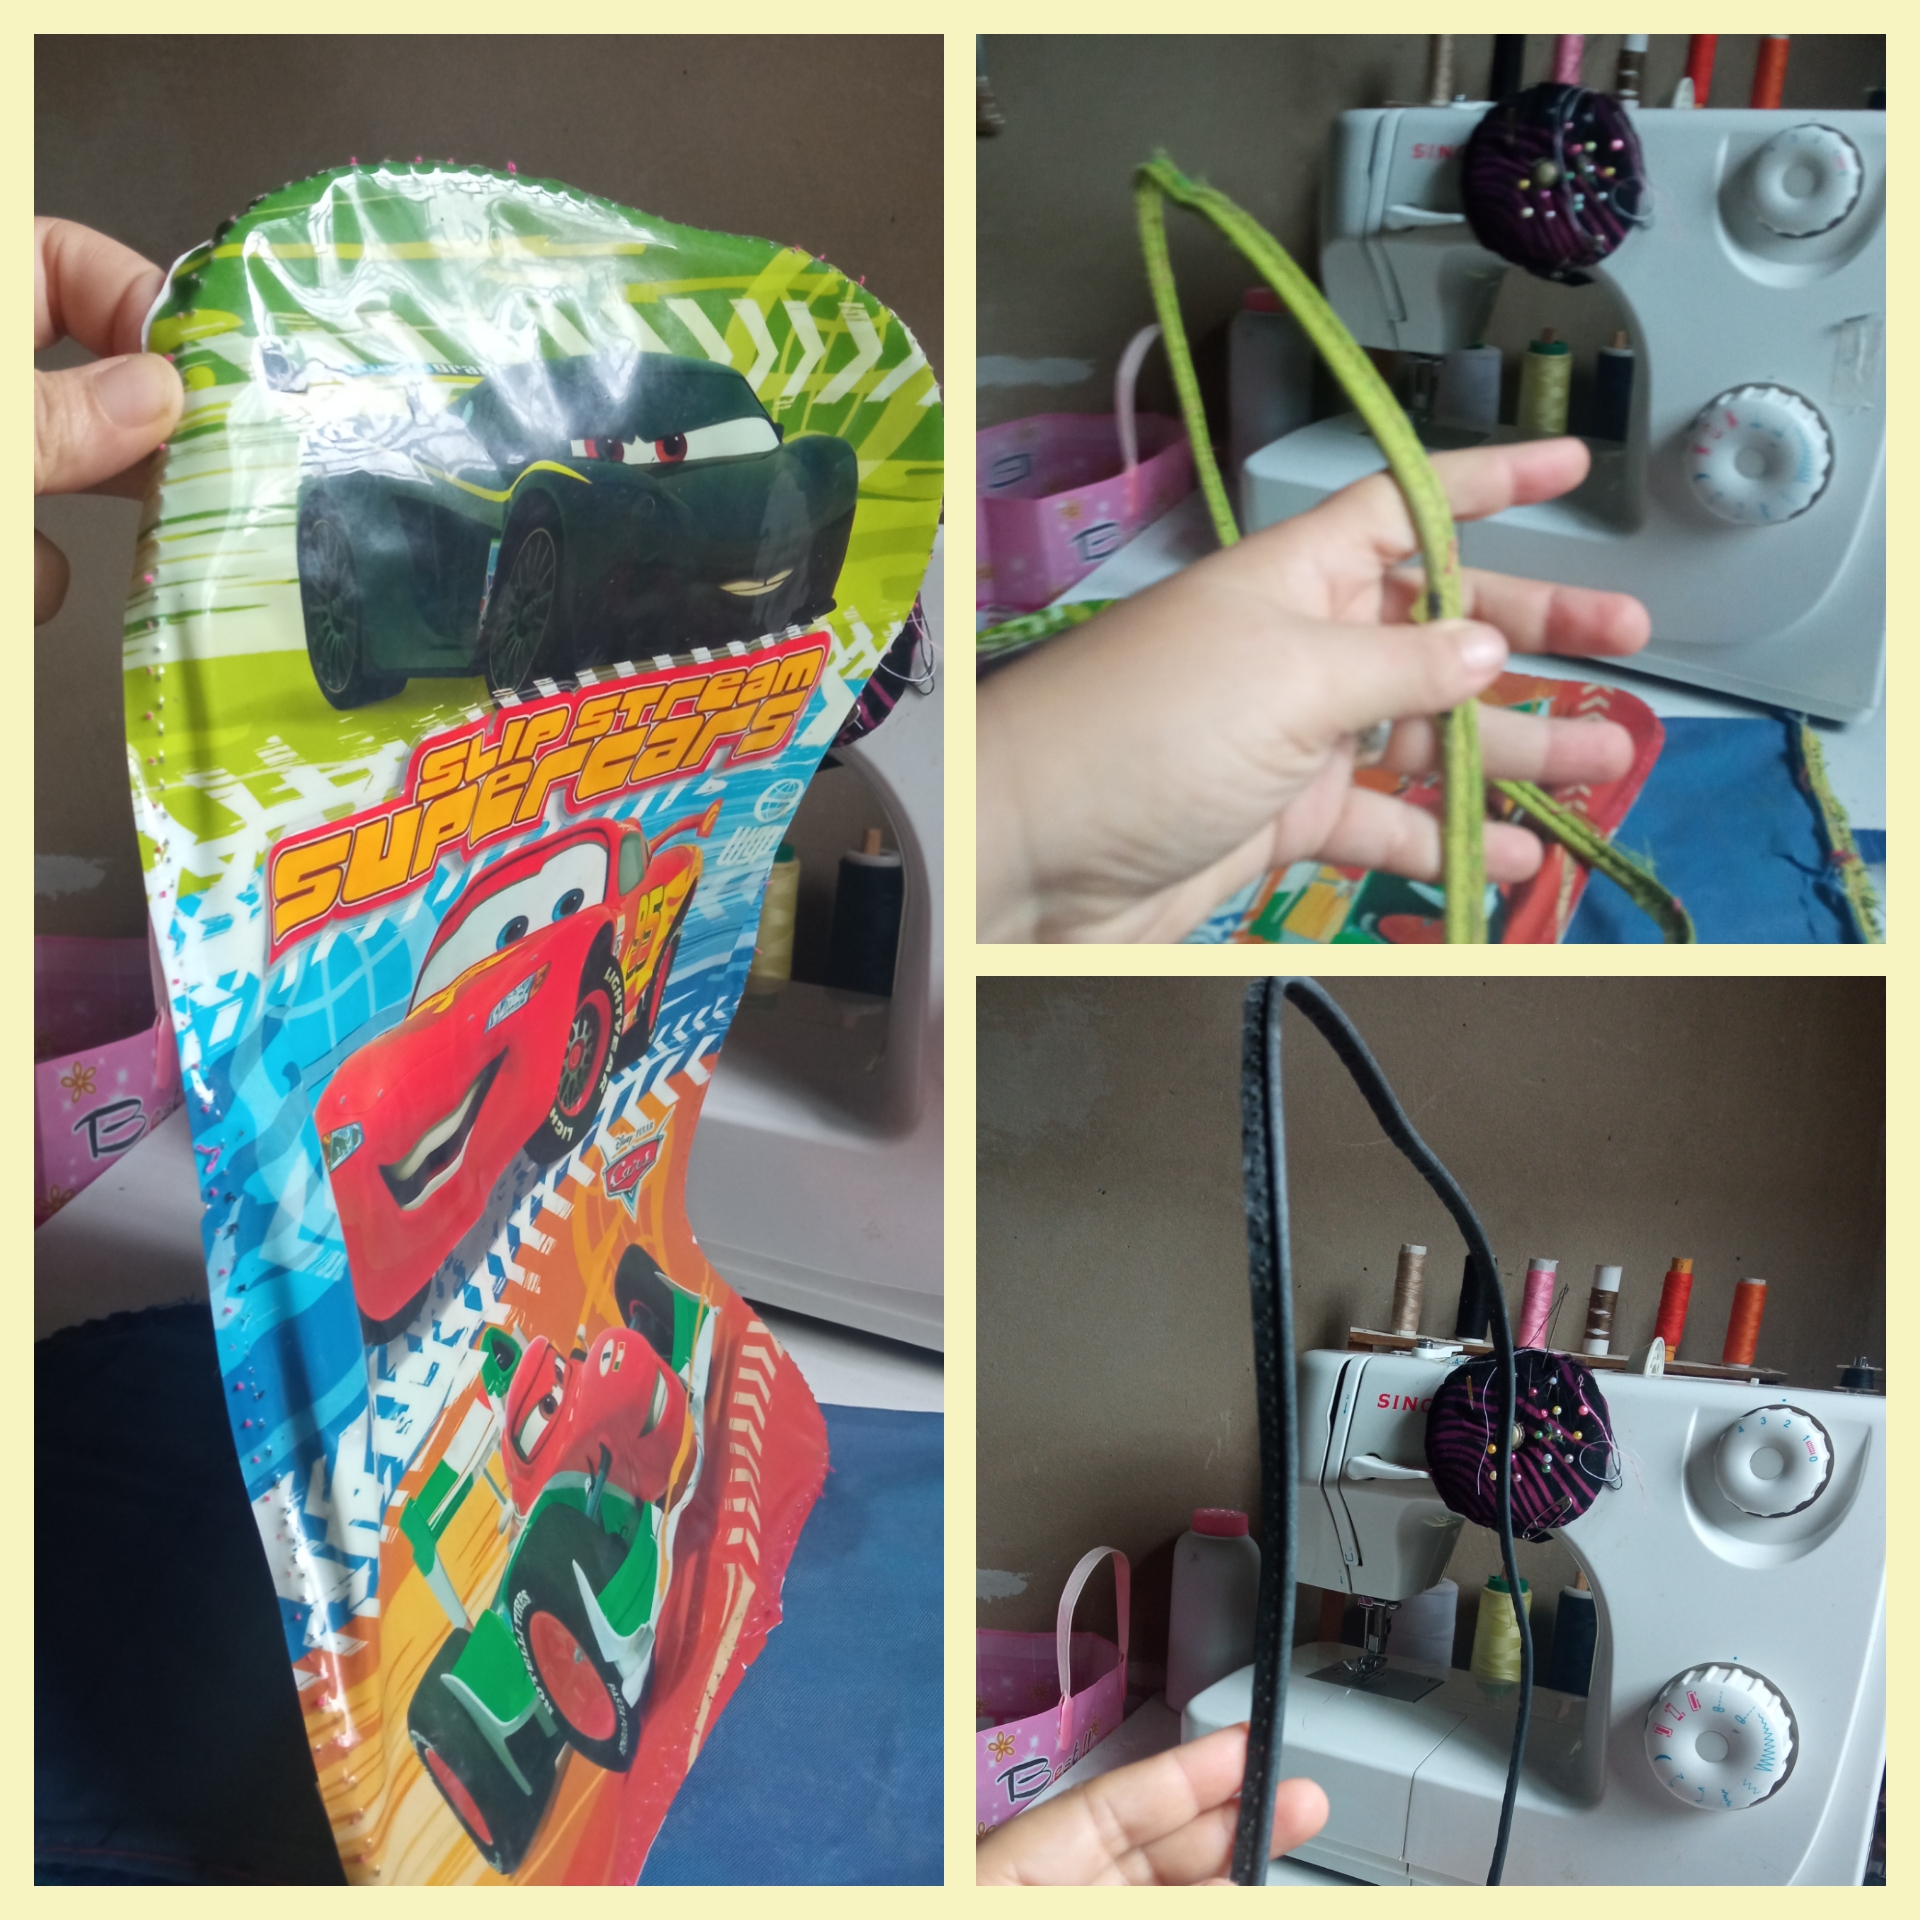
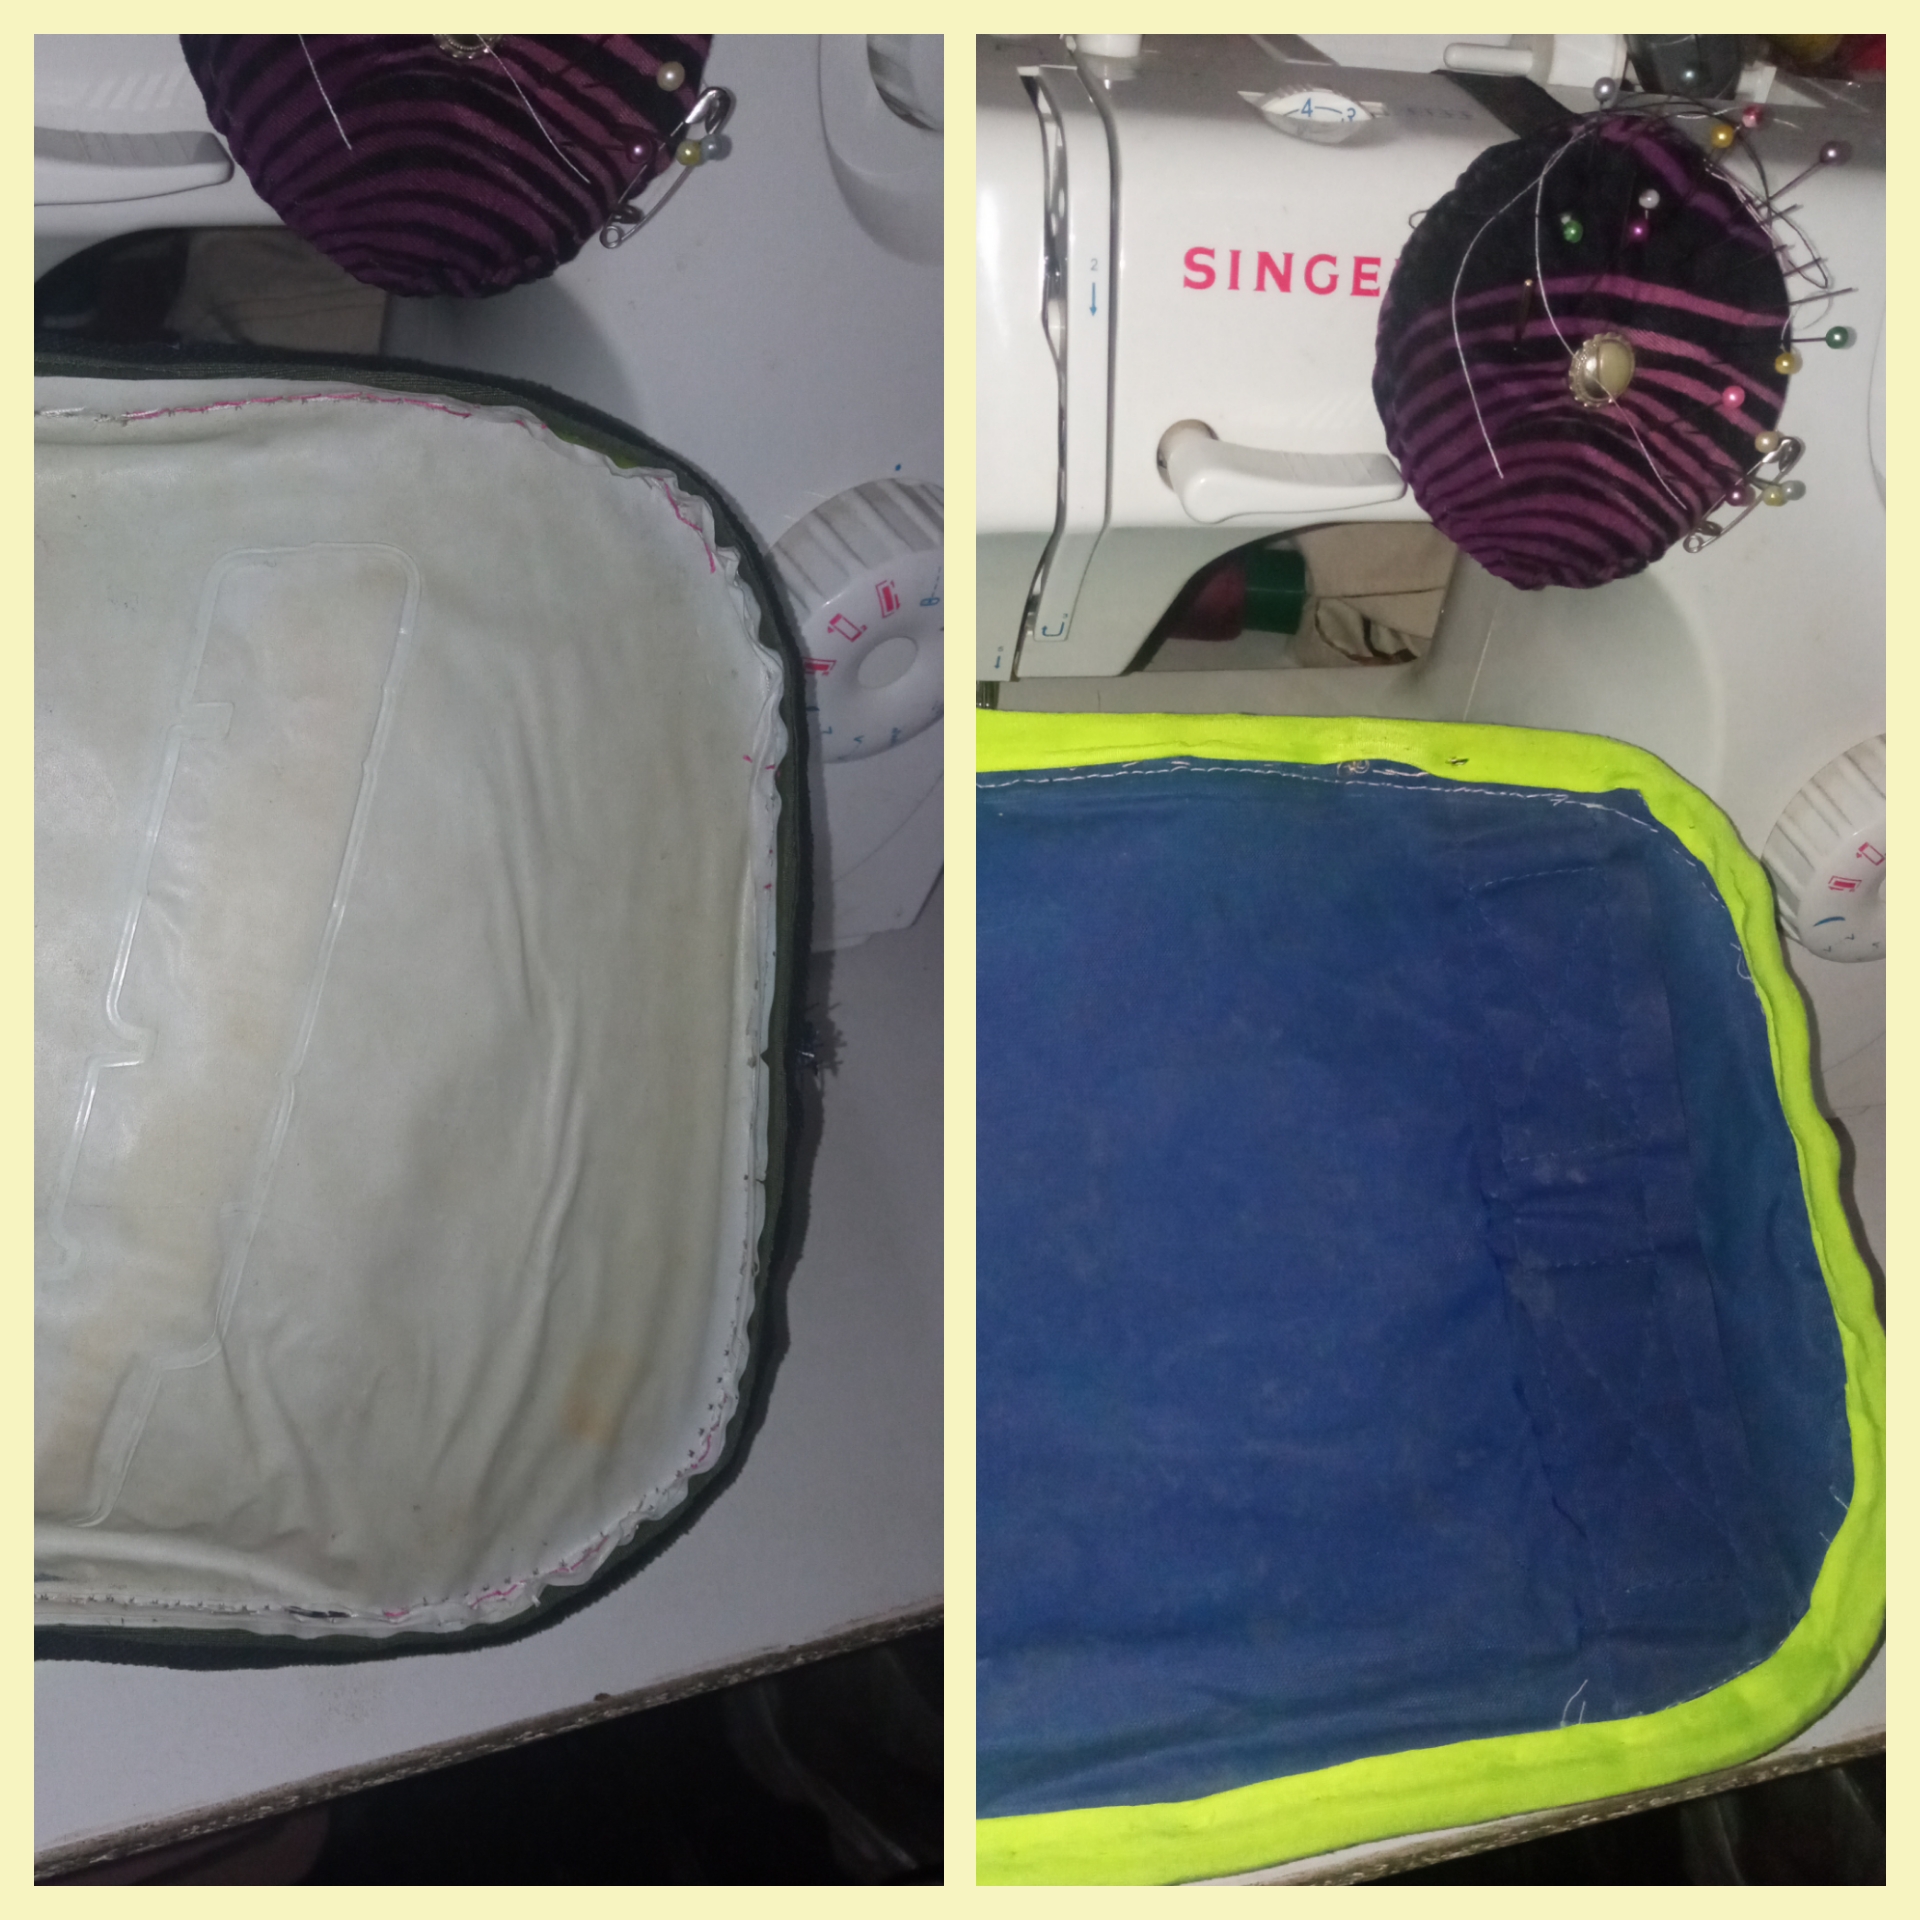
Así que comencemos, saben encontré estás carátulas sin ningún daño. Solo tenía el tapa costura desgastado y obvio mi gran oportunidad de hacer una mochila.
En la imágen pueden notar como las encontré:
English:
So let's start, you know I found these covers without any damage. I only had the stitching cover worn out and obviously my great opportunity to make a backpack.
In the picture you can see how I found them:
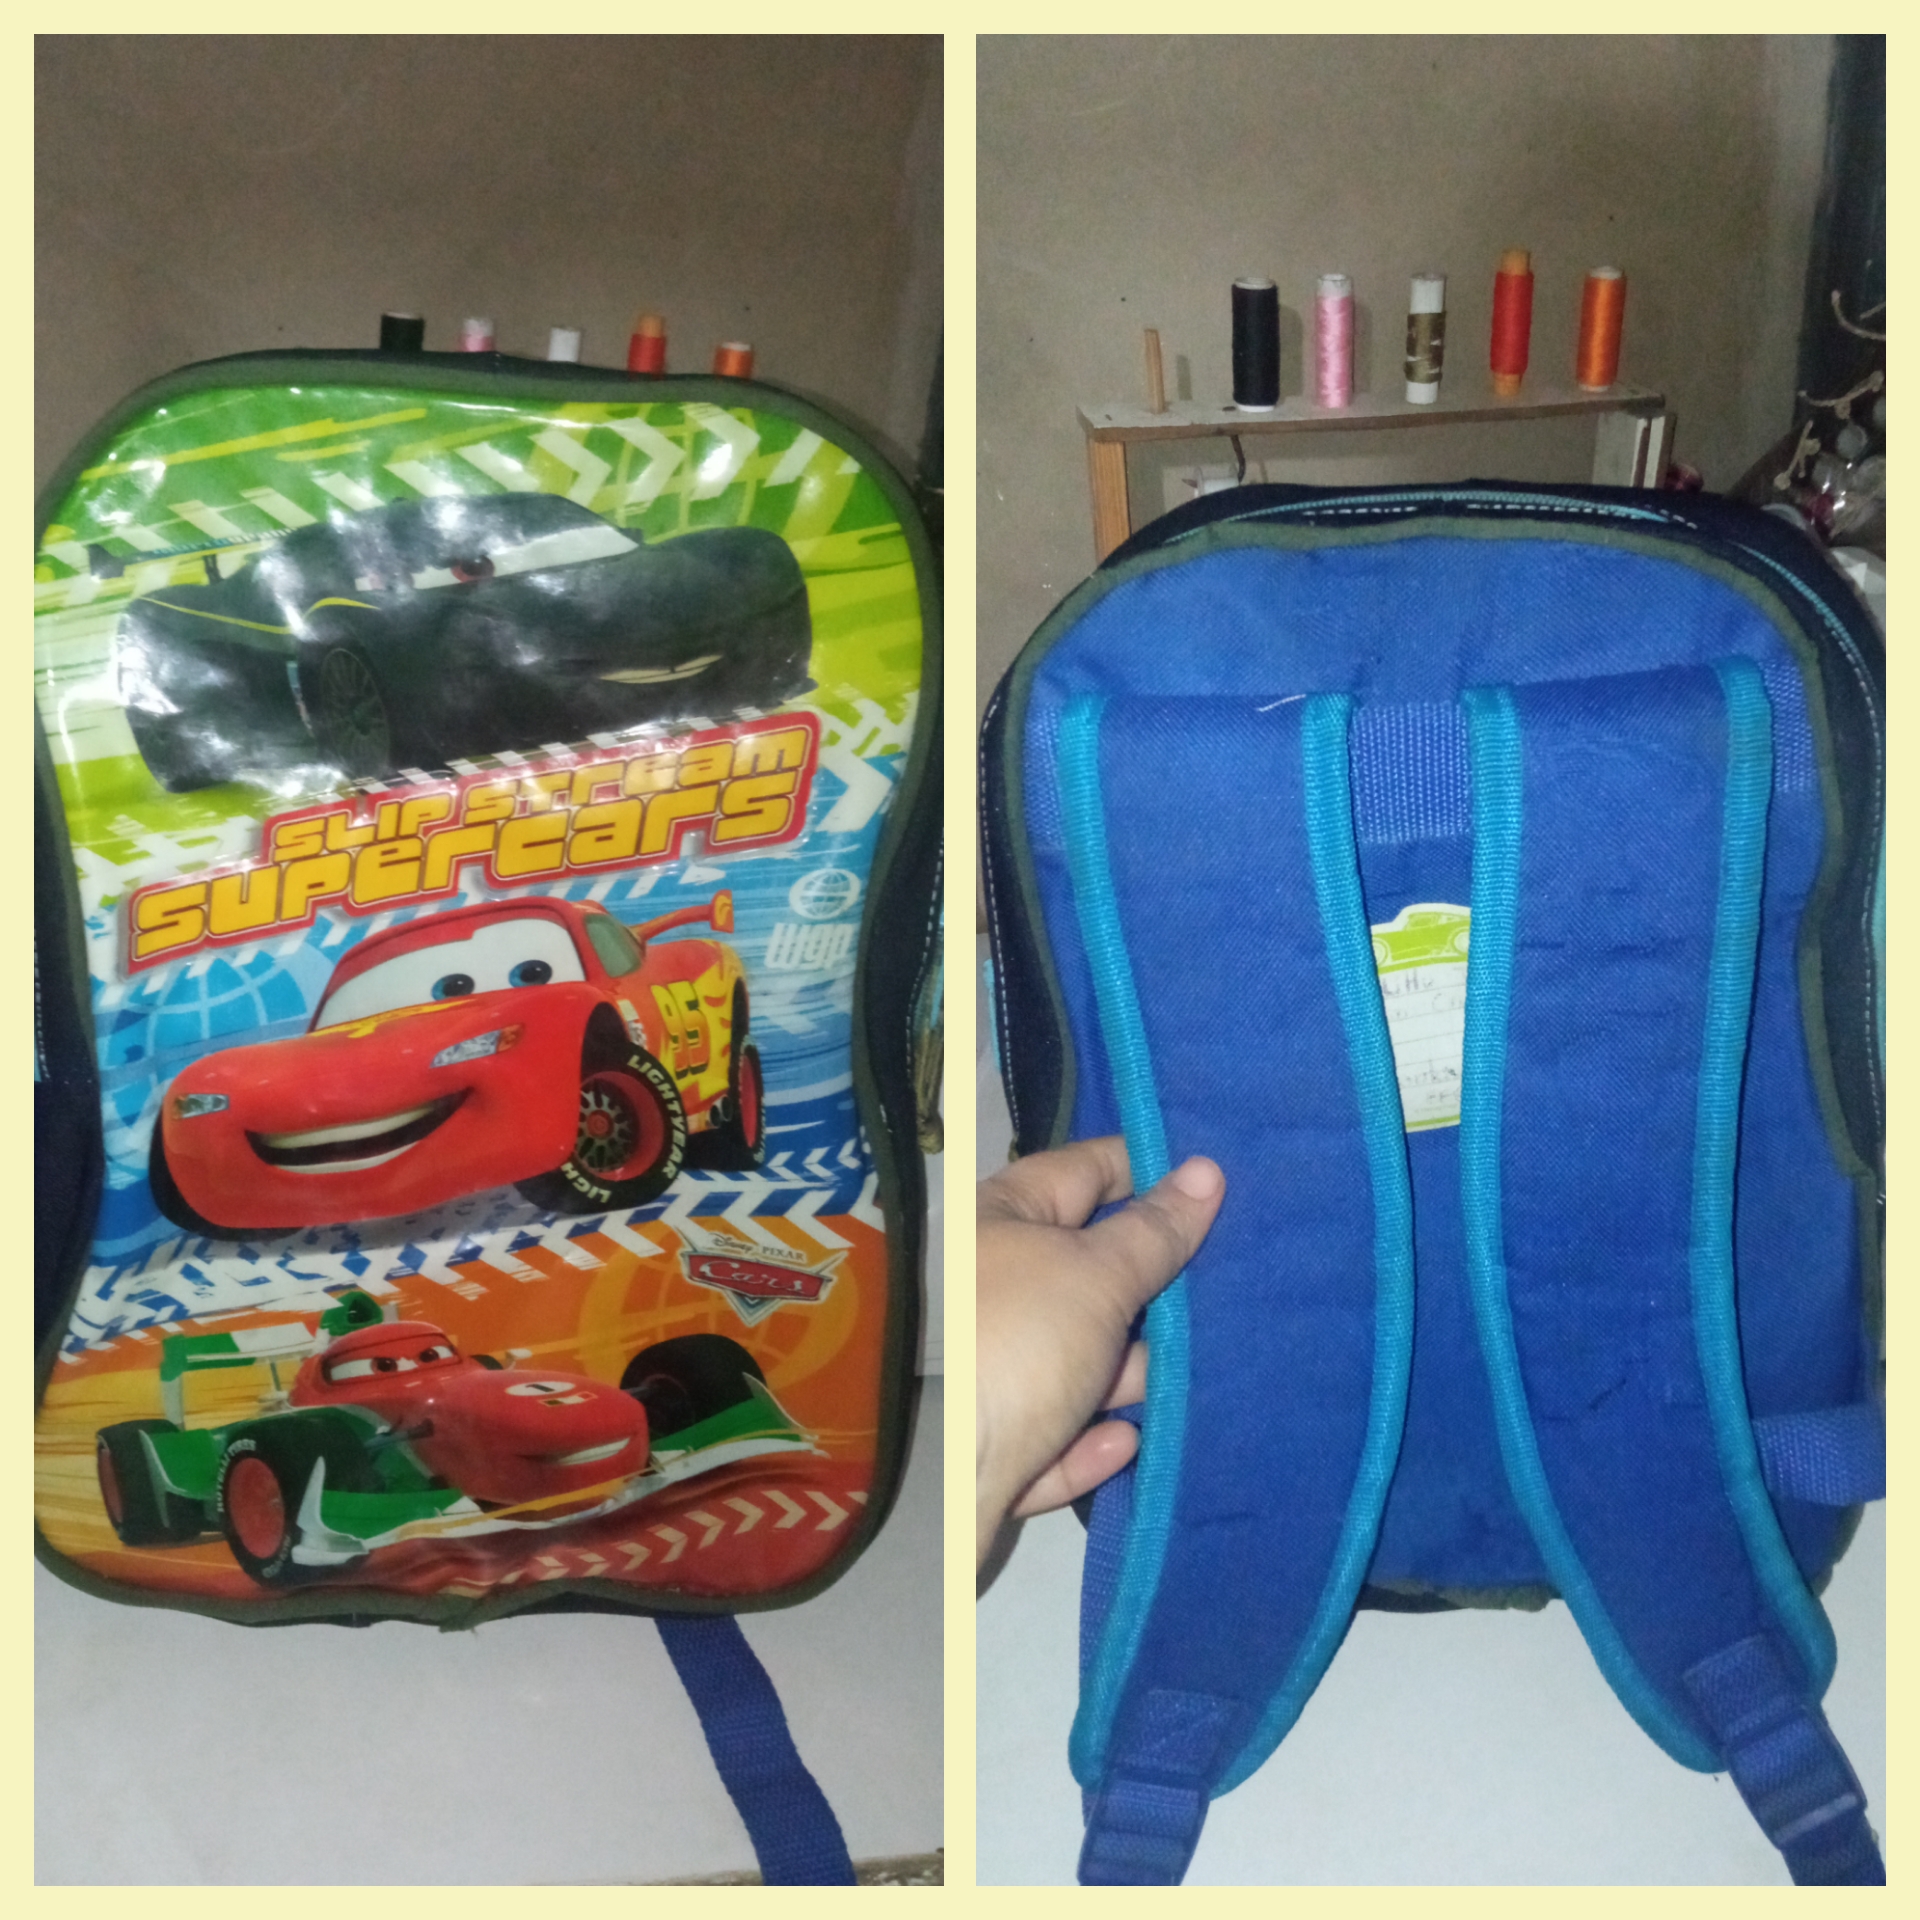
Carátula delantera/ Front cover:
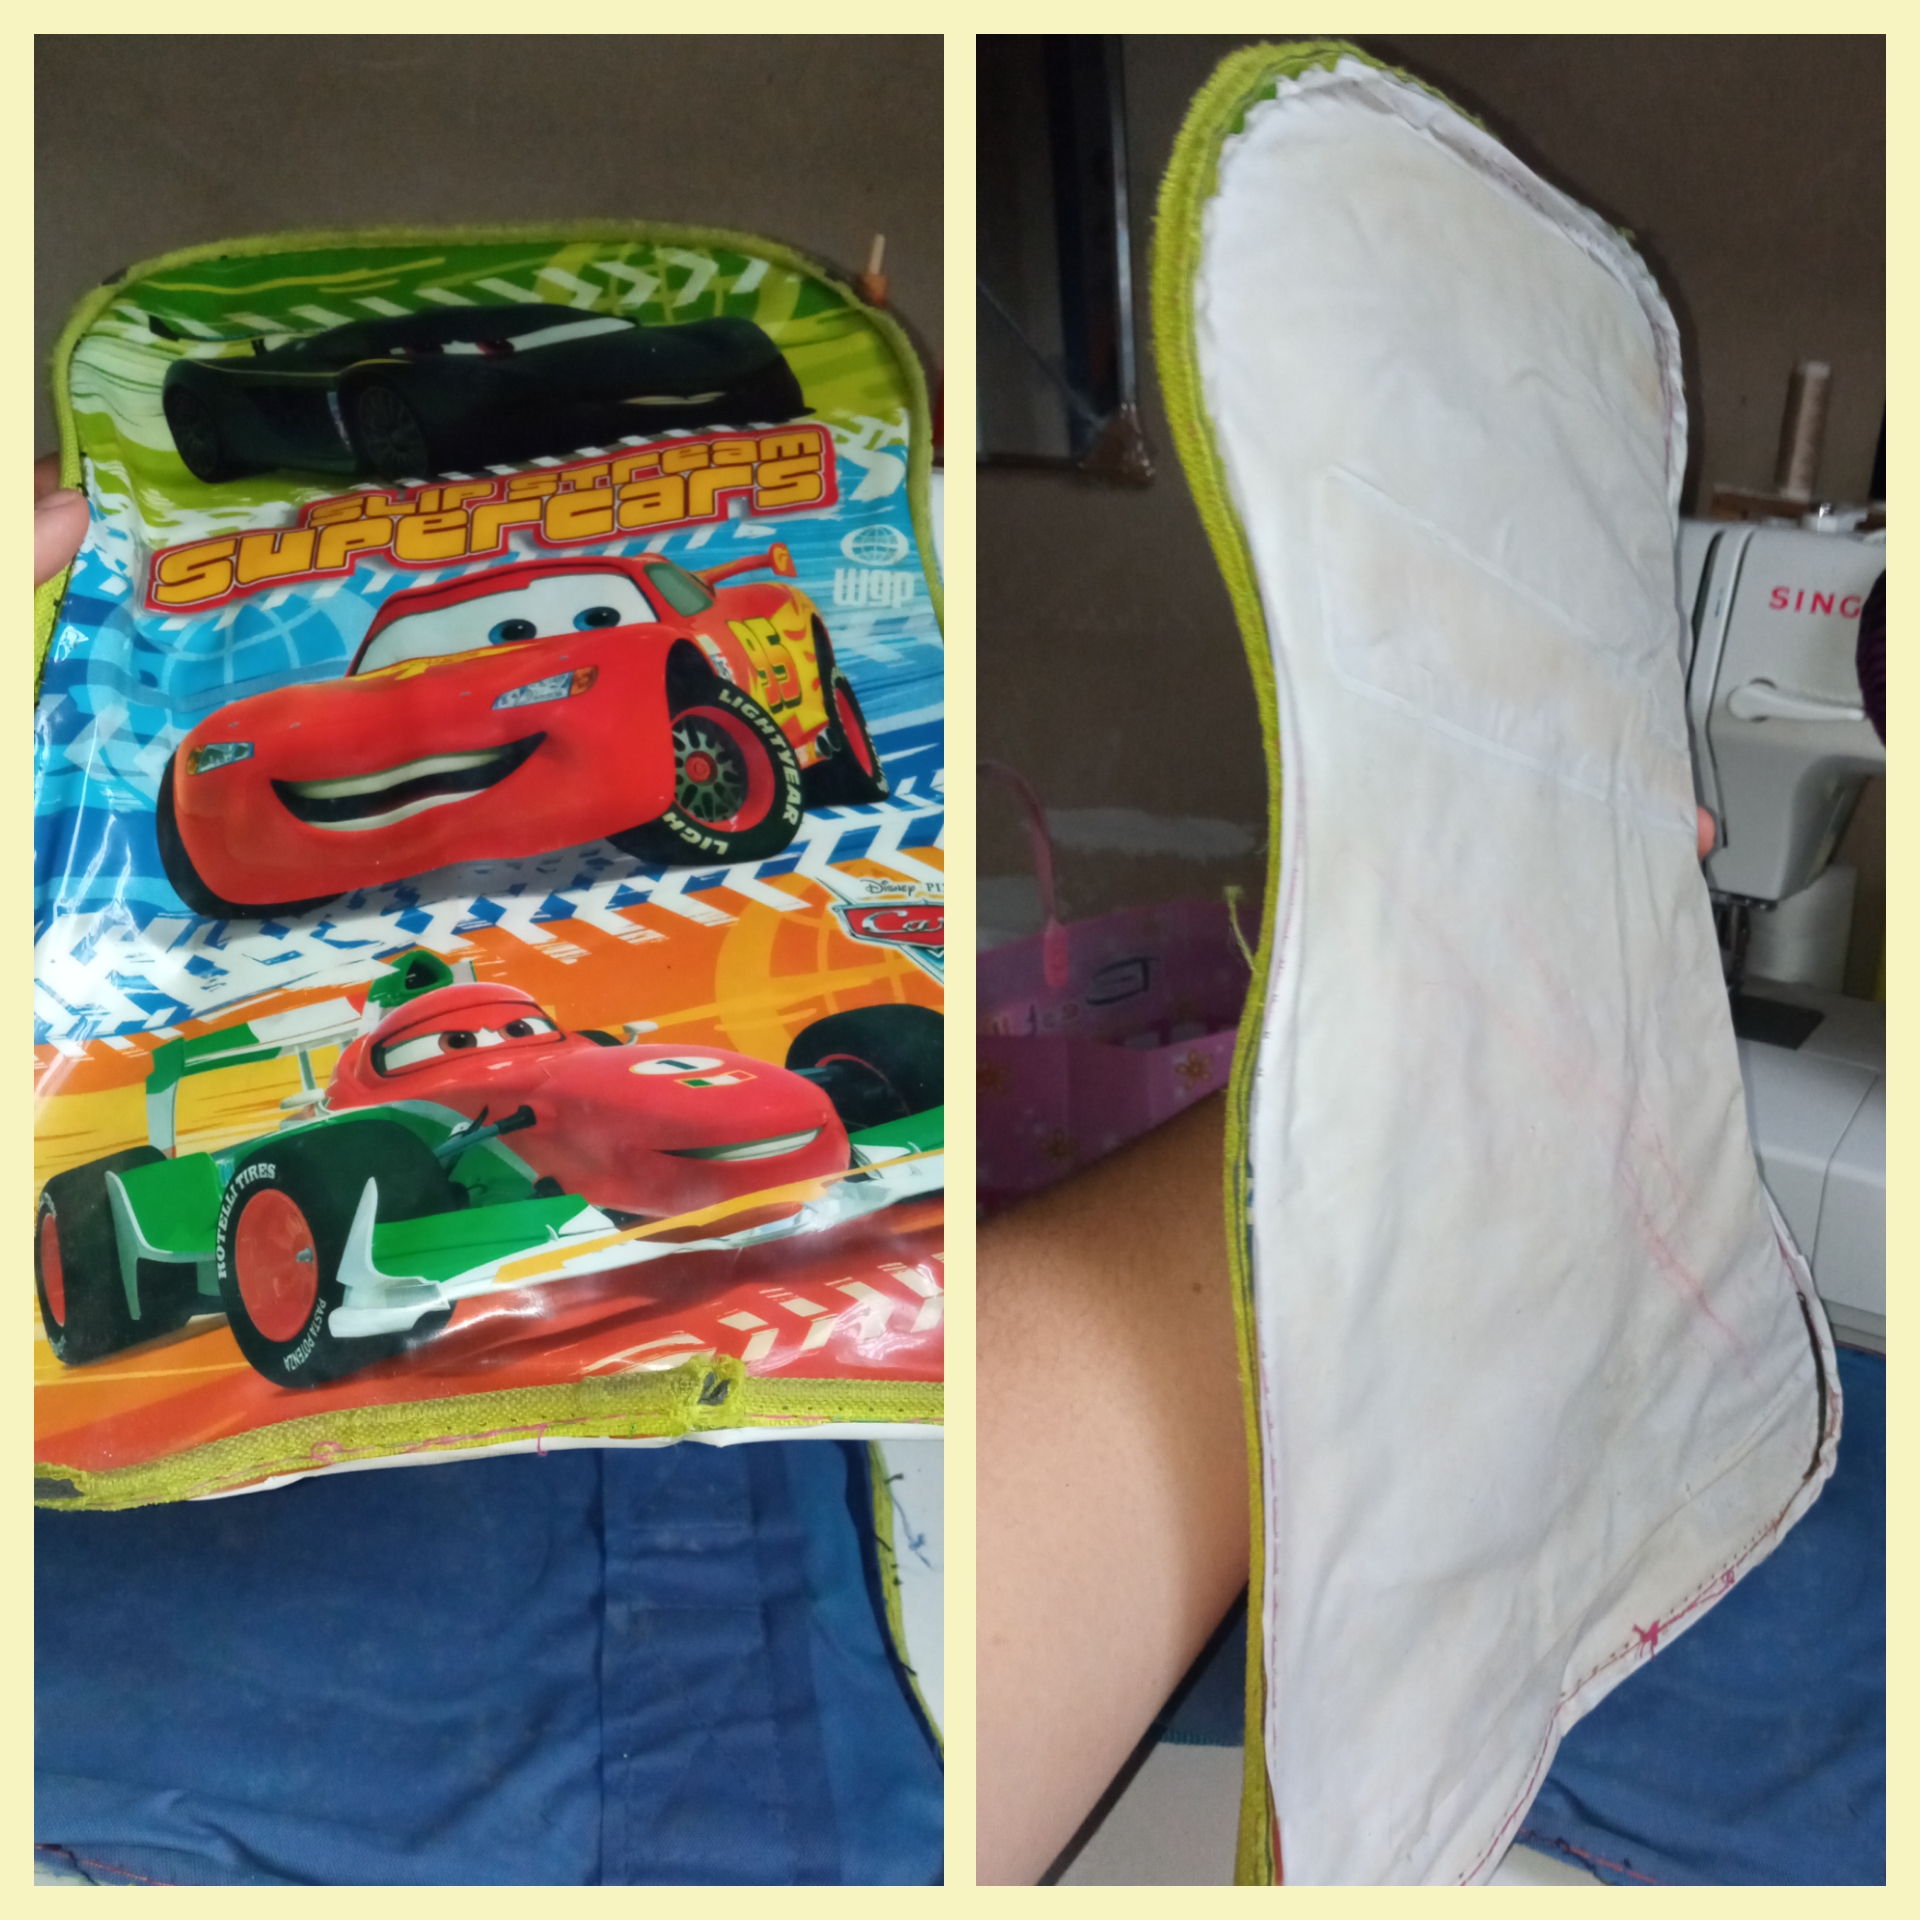
Su cierre/ Its zipper:

Carátula trasera/ Back cover:
Para hacer una mochila necesite los siguientes materiales:
- Descosedor.
- Tela de jeans en color negro.
- Hilo de coser.
- Máquina de coser.
- Tela de algodón.
- Aguja de coser.
- Tijeras.
- Alfileres.
- Cinta métrica.
To make a backpack I needed the following materials:
- Sewing machine.
- Denim fabric in black color.
- Sewing thread.
- Sewing machine.
- Cotton fabric.
- Sewing needle.
- Scissors.
- Pins.
- Tape measure.
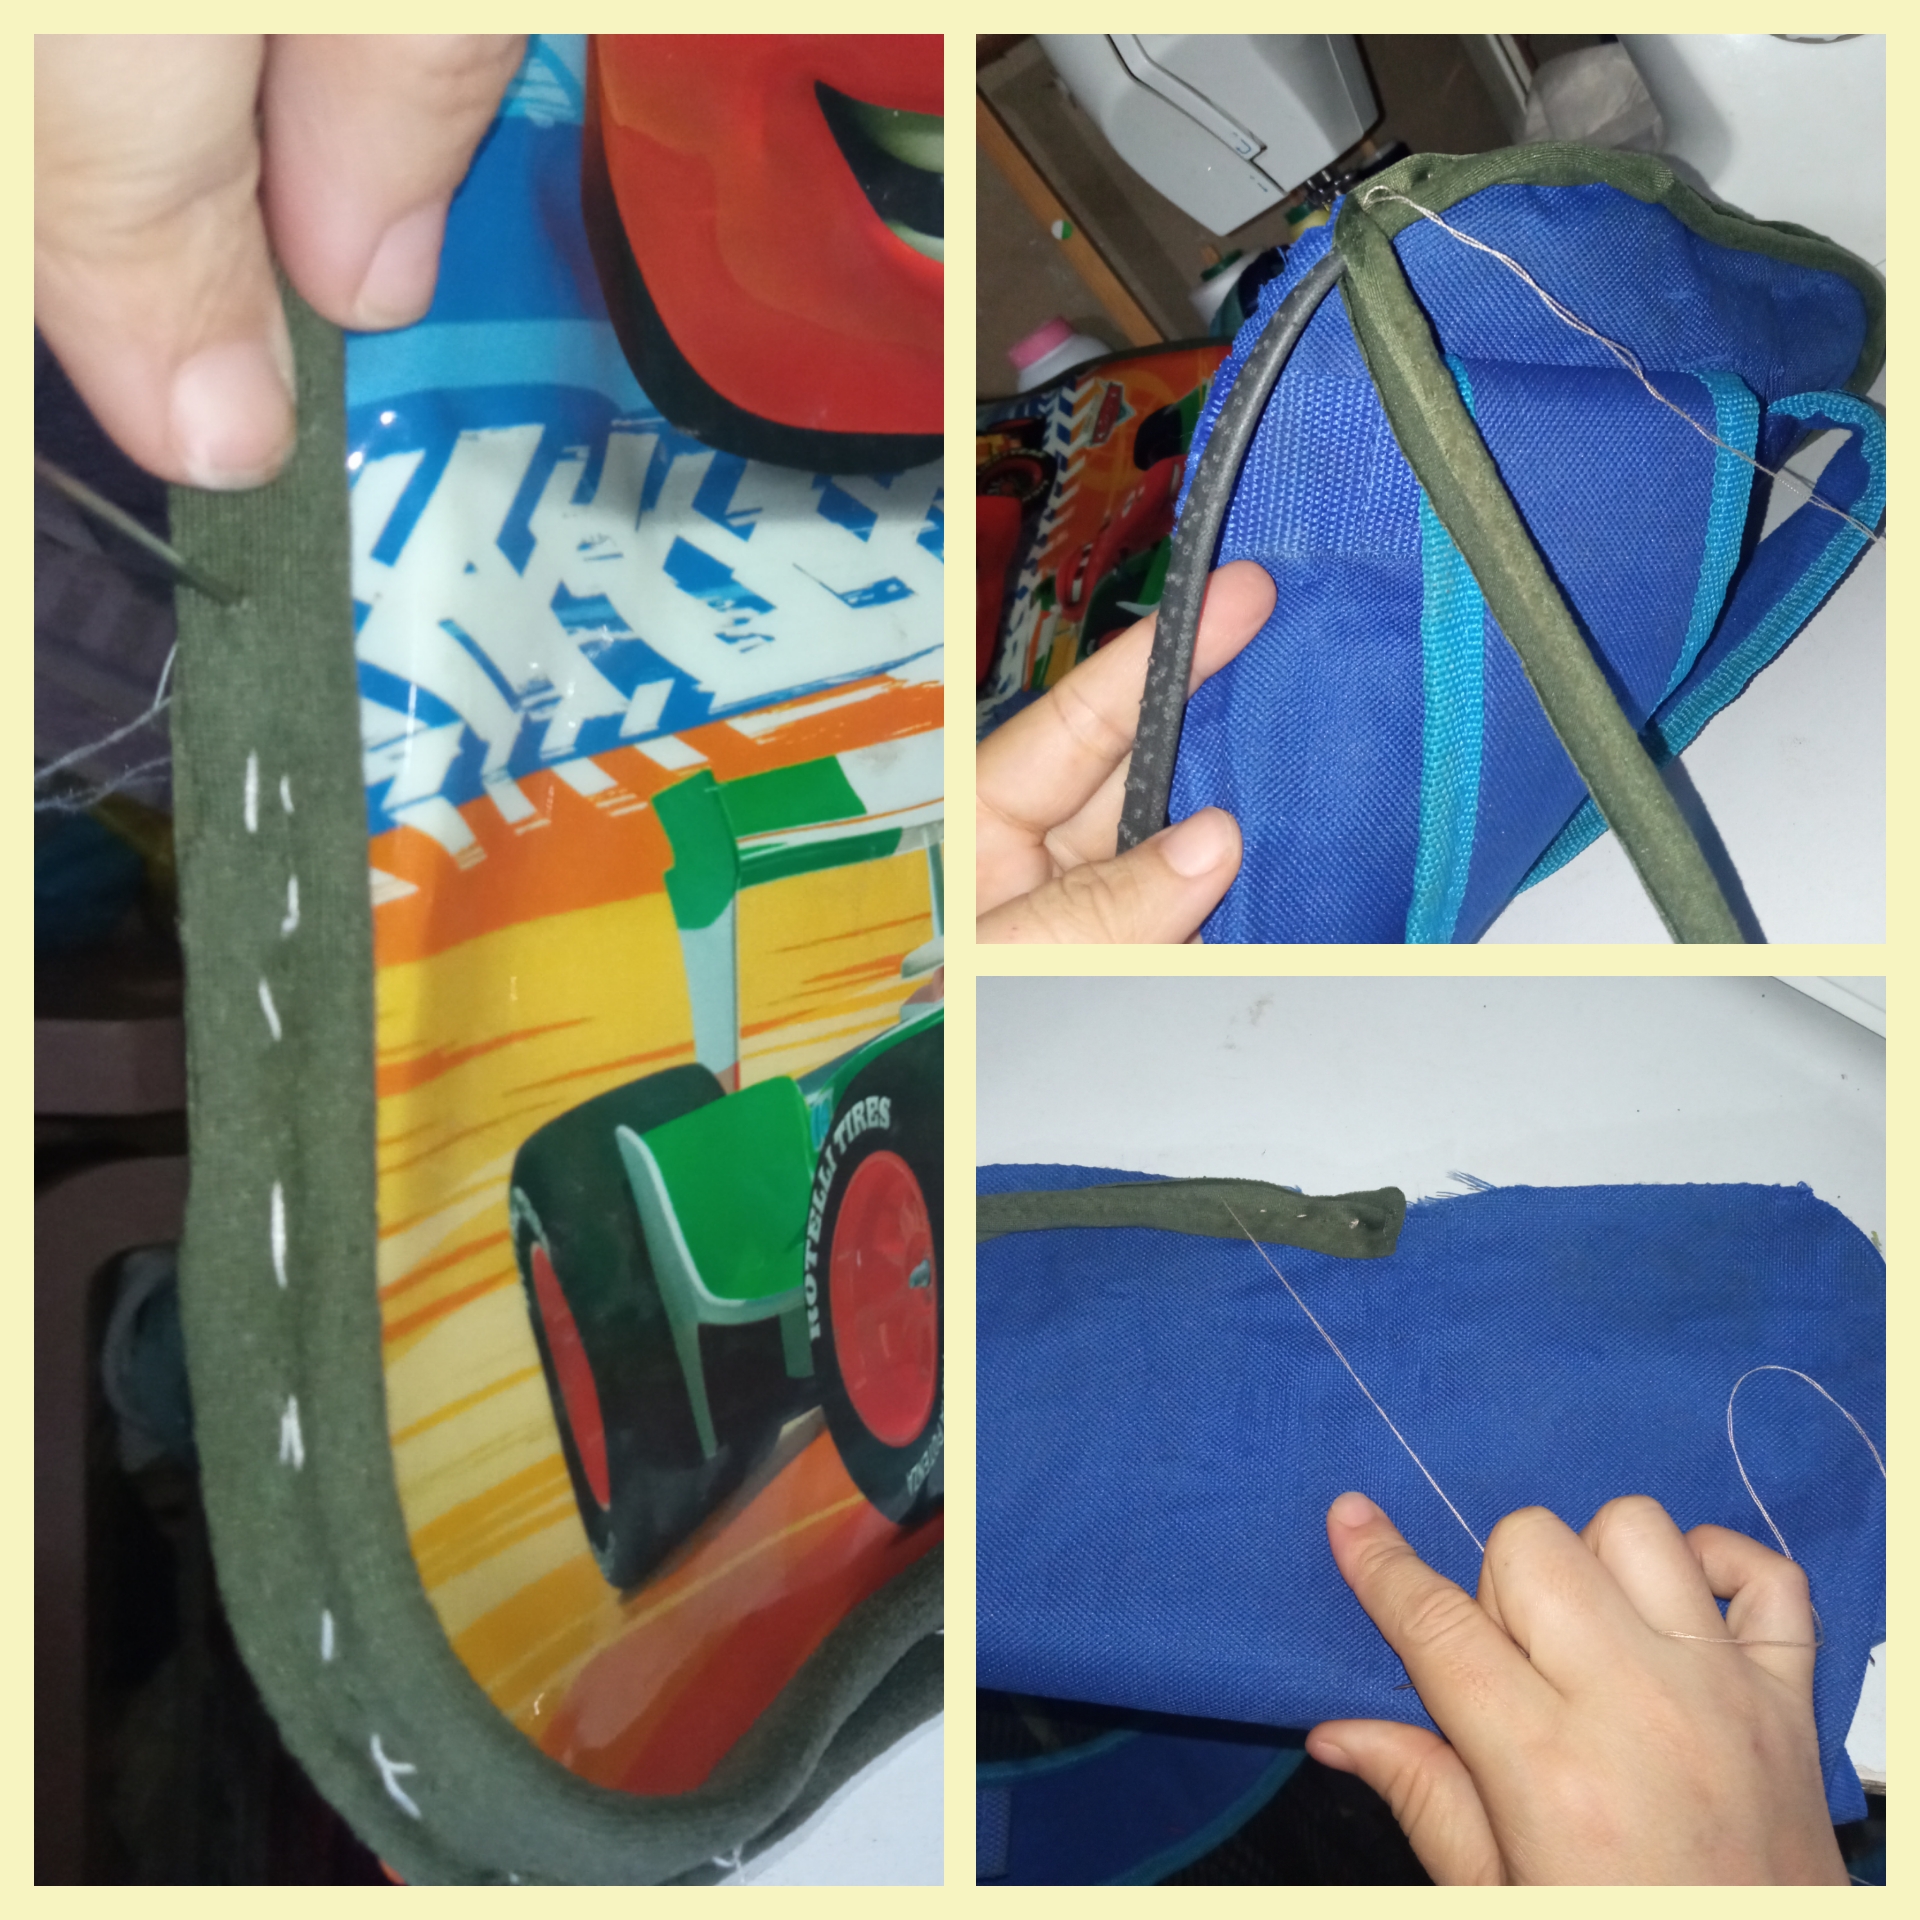
Lo primero que hice fue descoser la tela desgastada que tenía alrededor del cierre con la ayuda del Descosedor. Después le retire todos los hilos cortados que quedaron en el cierre.
The first thing I did was to unpick the worn fabric around the zipper with the help of the unstitcher. Then I removed all the cut threads that were left on the zipper.
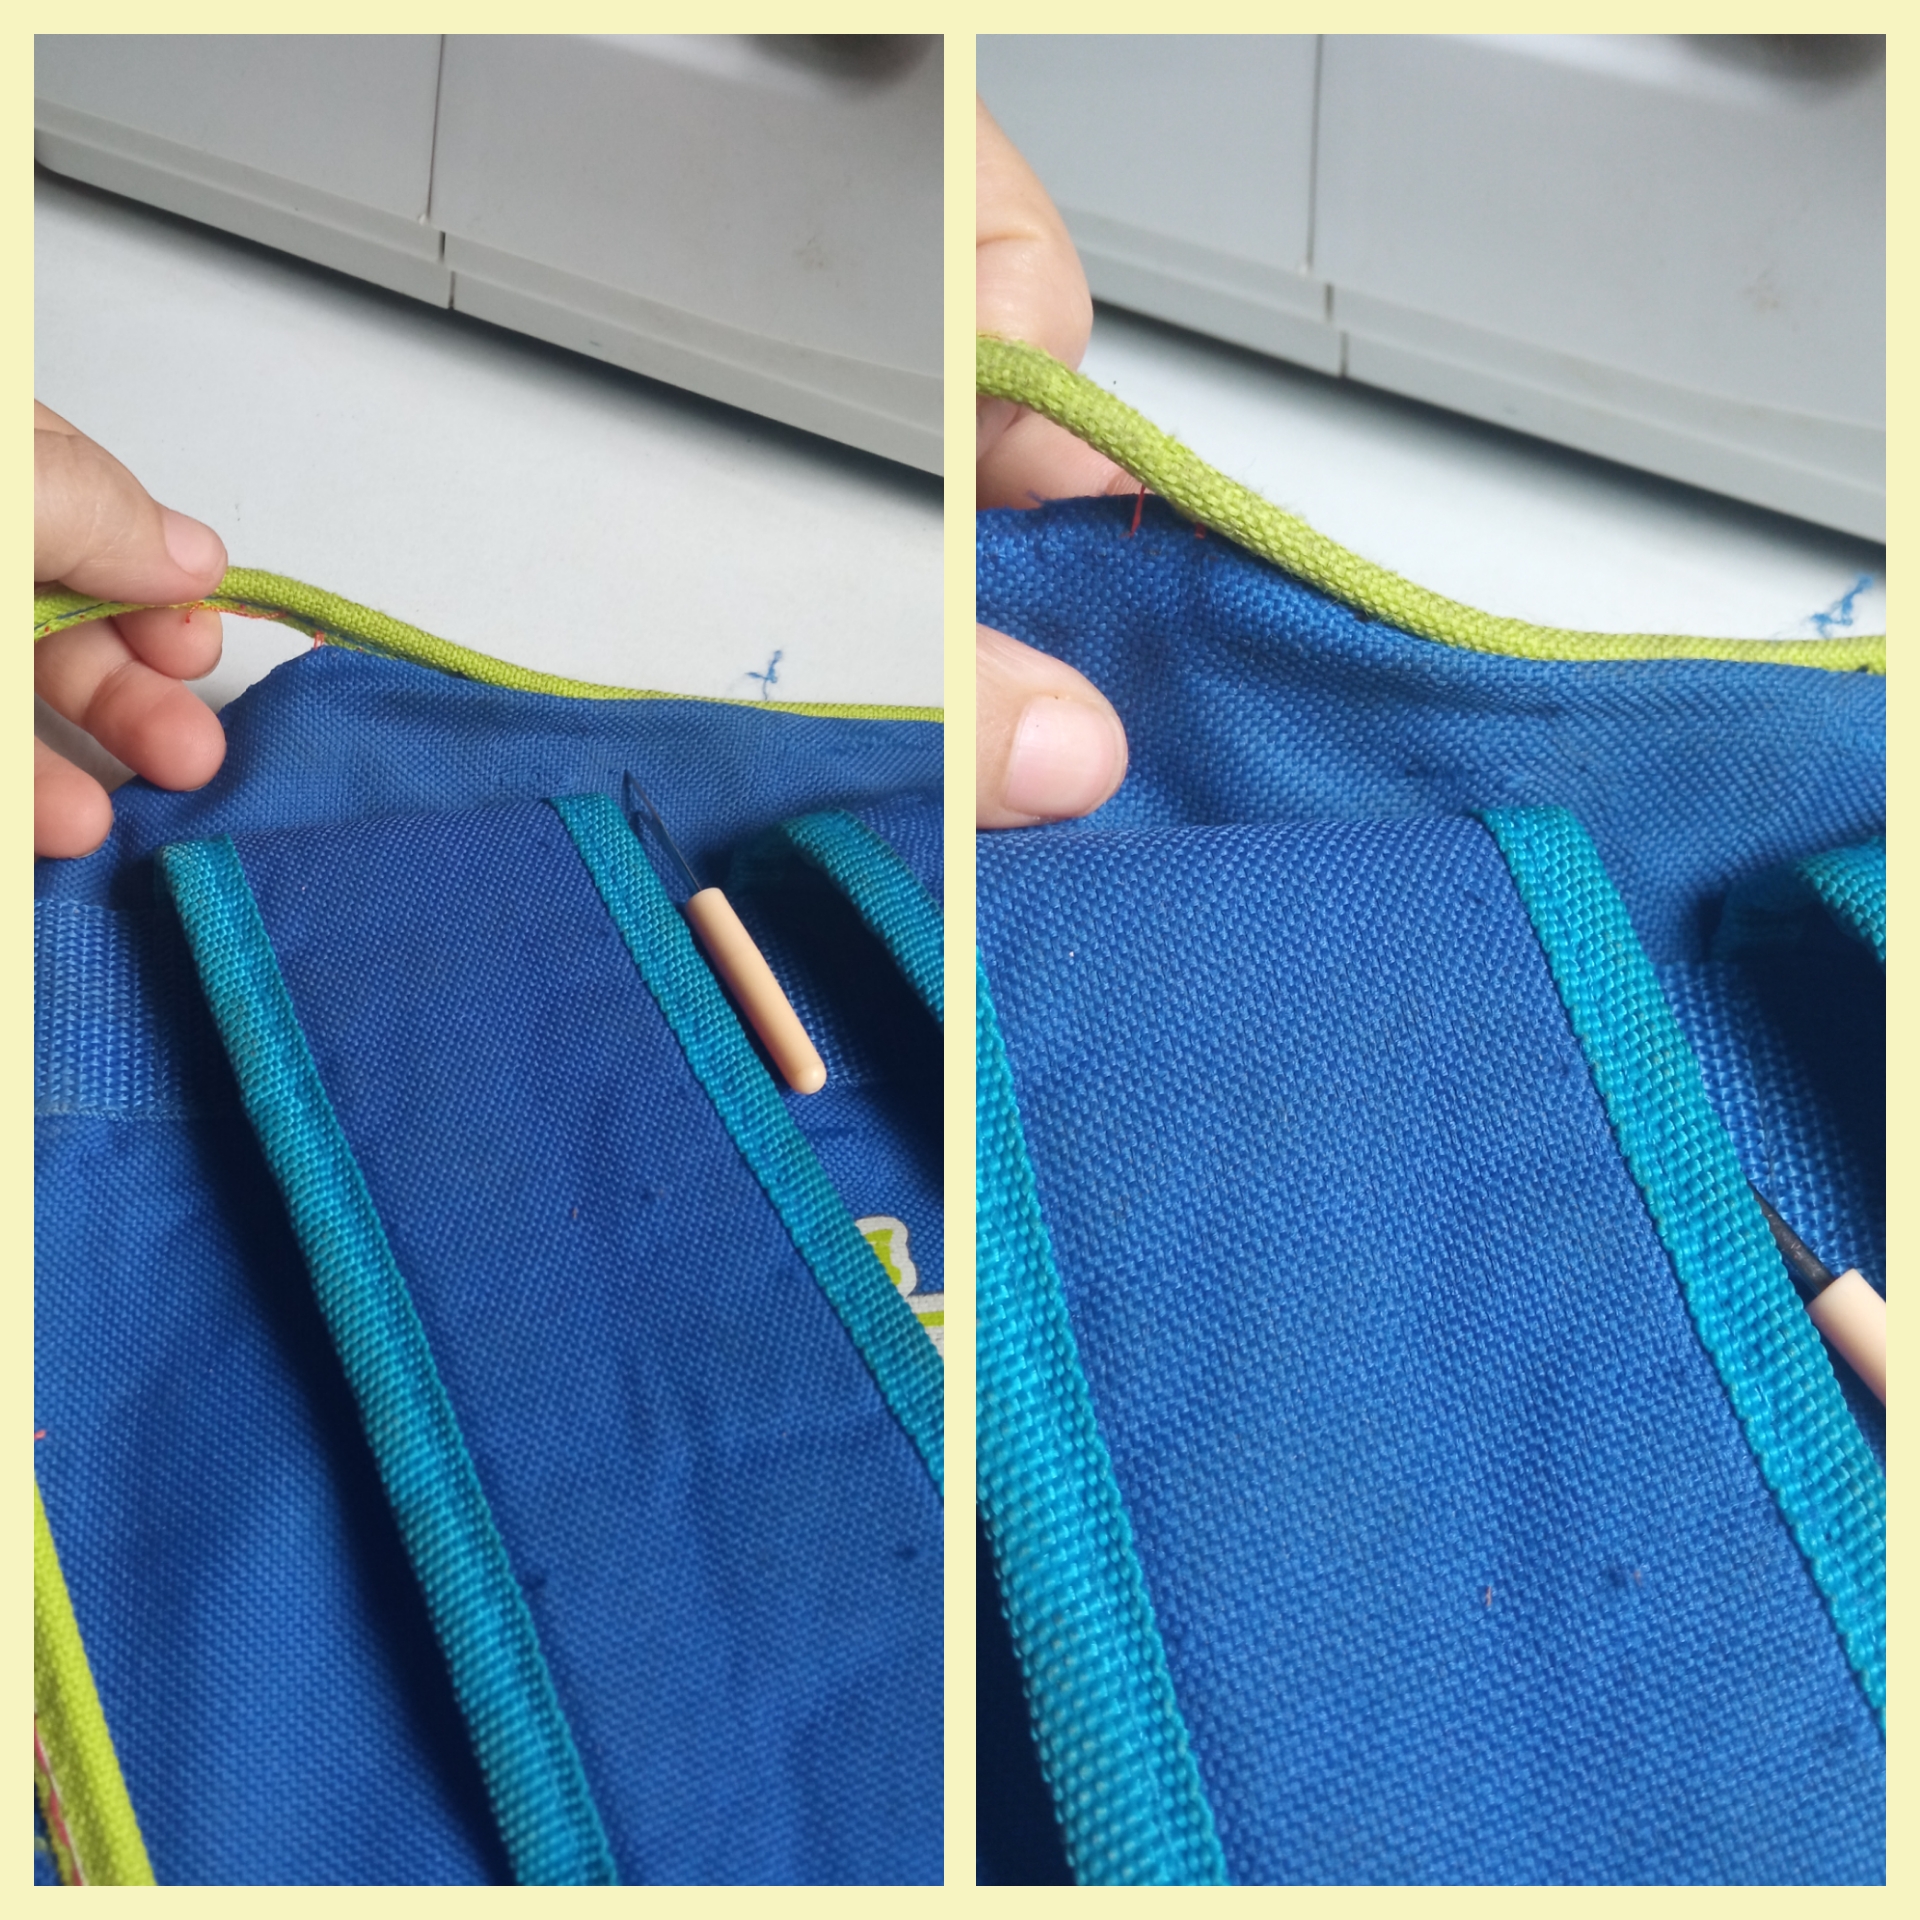
Luego empecé a descoser el tapa costura que tenía alrededor de la carátula para aprovechar la goma que tenía por dentro. Ahora le coloque la tela de algodón que tengo disponible igual lo hice con la carátula trasera.
Luego con la ayuda de la cinta métrica medí todo alrededor de la carátula y su medida era de 111cm (tanto la delantera como la trasera).
Then I started to unpick the seam allowance around the cover to take advantage of the rubber inside. Now I put the cotton fabric that I have available, just as I did with the back cover.
Then with the help of the tape measure I measured all around the front cover and its measurement was 111cm (both front and back).
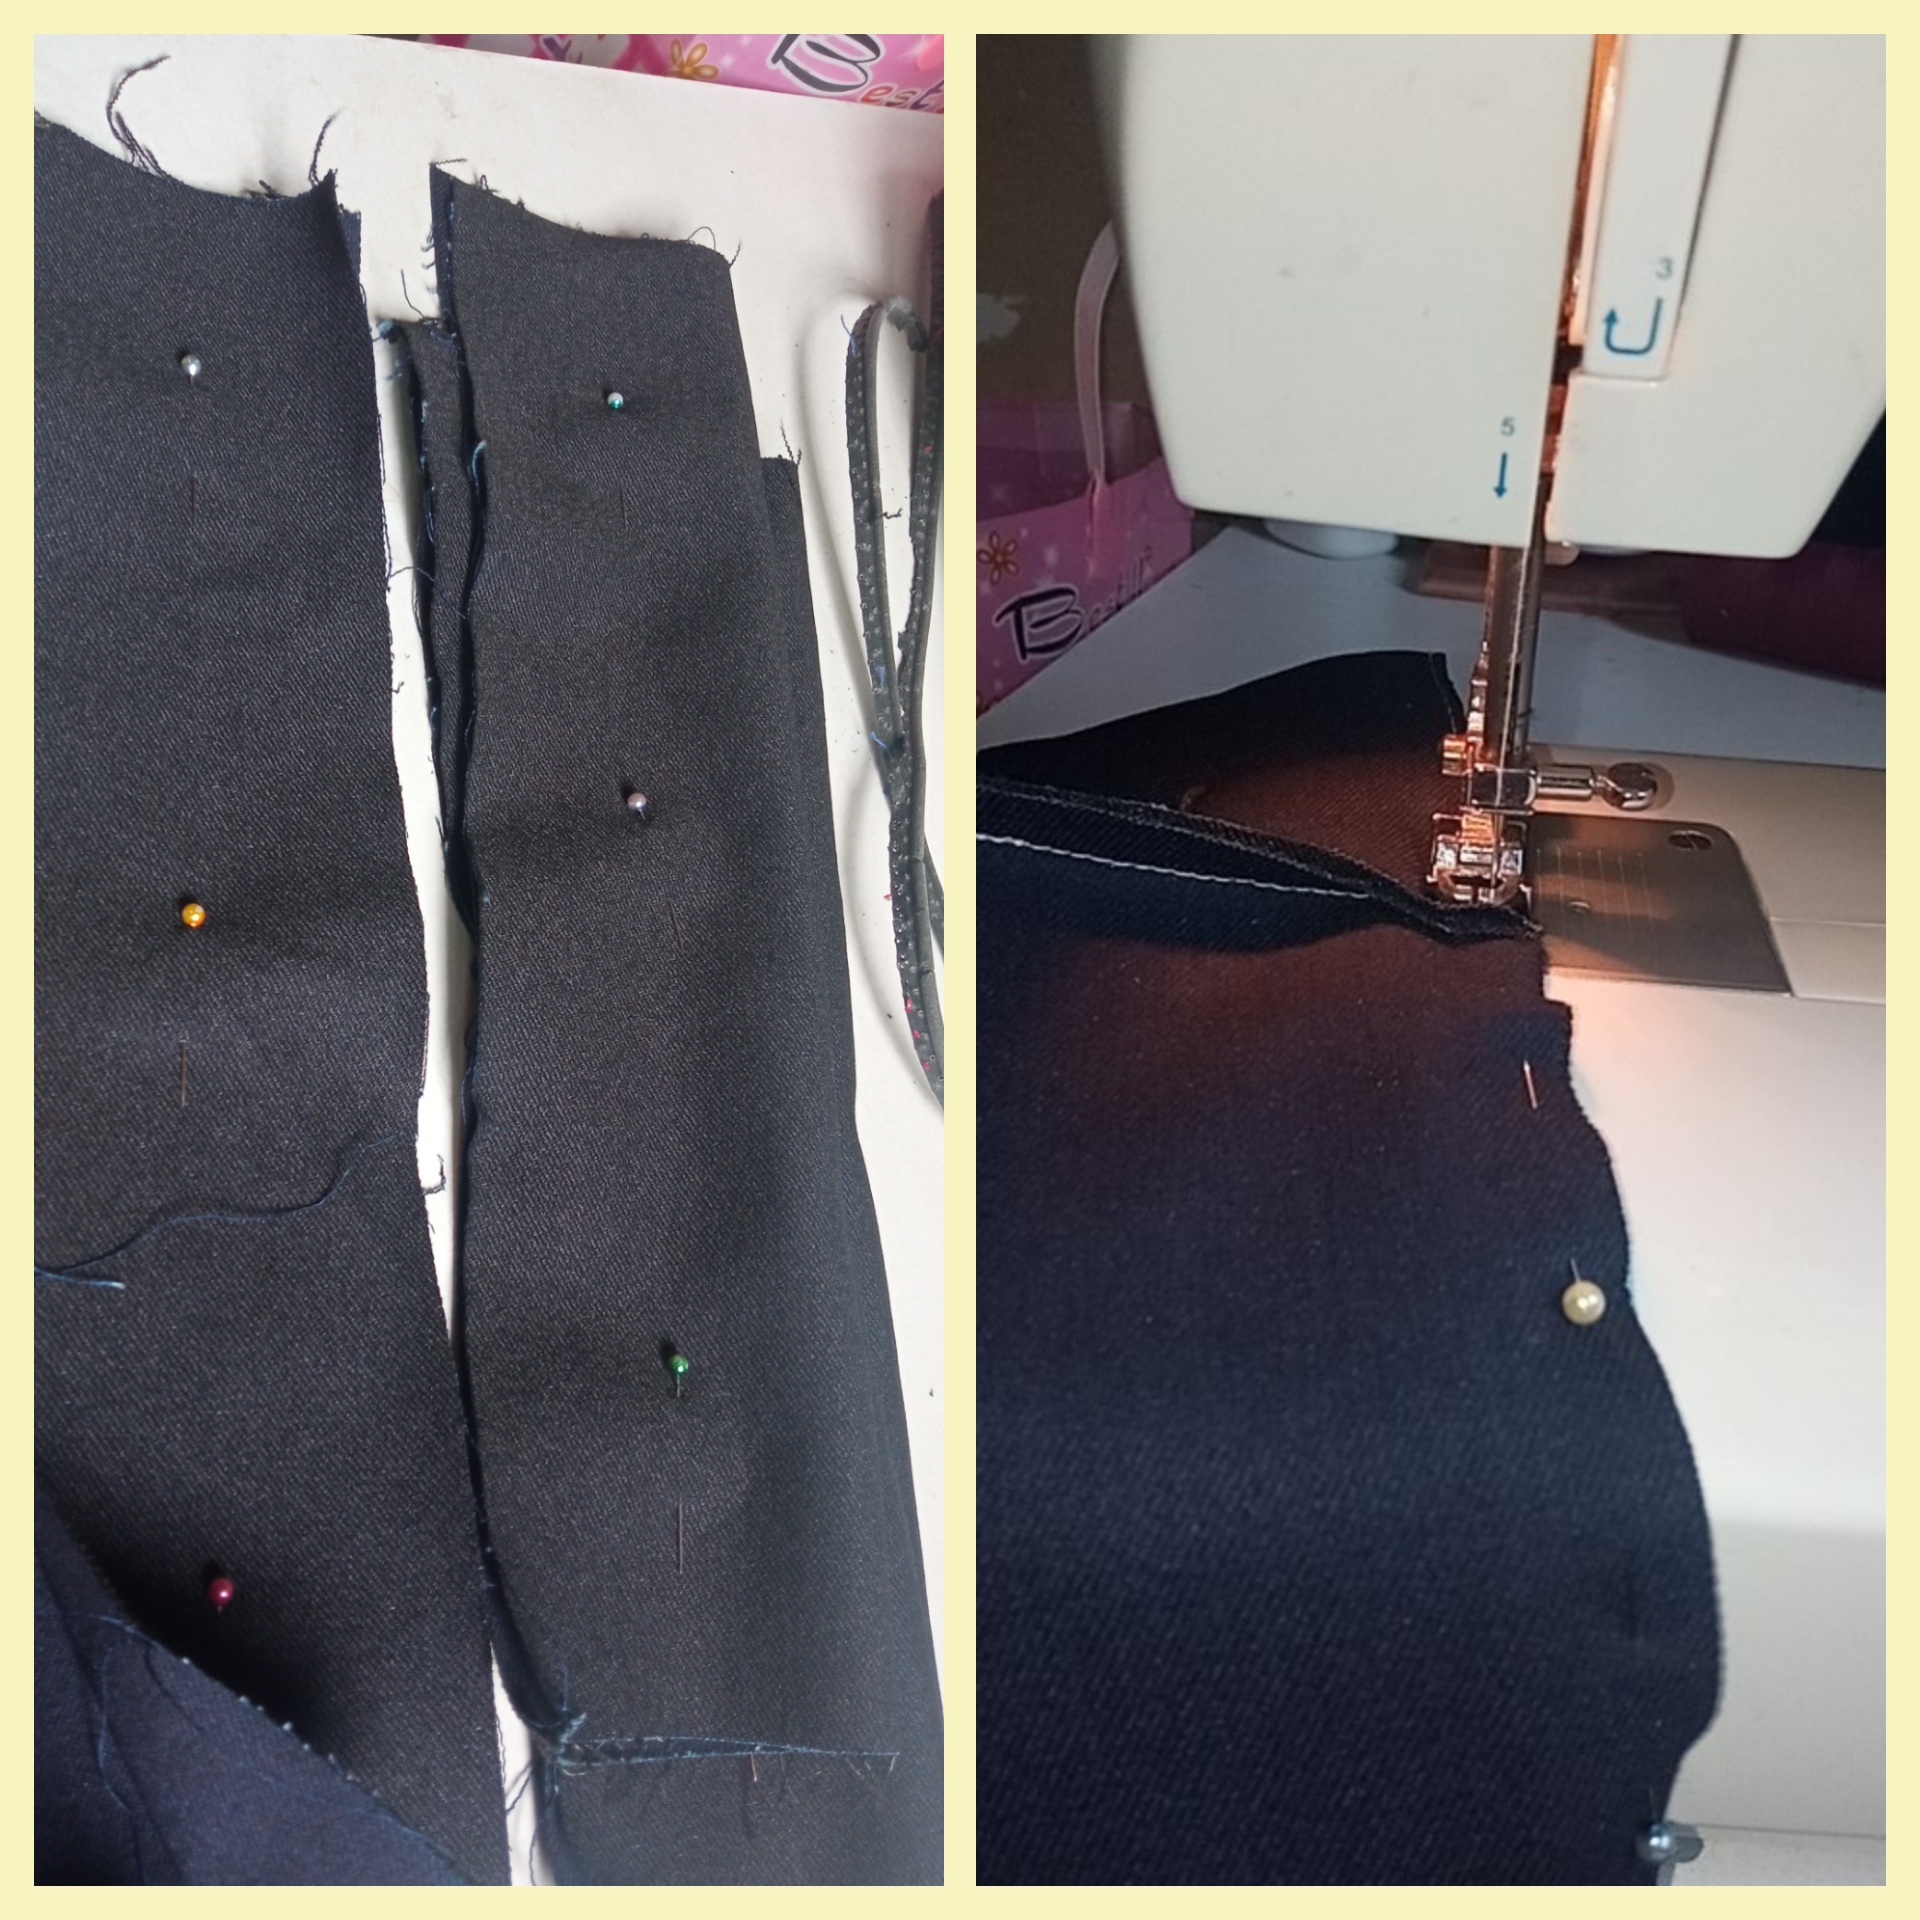
Para el área del cierre utilice la tela jeans en color negro con las siguientes medidas:
58cm de largo x 8cm de ancho.
Esta medida de ancho debía dividirla por la mitad para incorporar el cierre, así que quedaría en 4cm de ancho cada lado para que se pueda utilizar 1cm para las costuras por los laterales y quedará 2cm de ancho ya con el cierre instalado.
For the zipper area I used the jeans fabric in black with the following measurements:
58cm long x 8cm wide.
This width measurement had to be divided in half to incorporate the zipper, so it would be 4cm wide on each side so that 1cm could be used for the seams on the sides and 2cm wide with the zipper already installed.
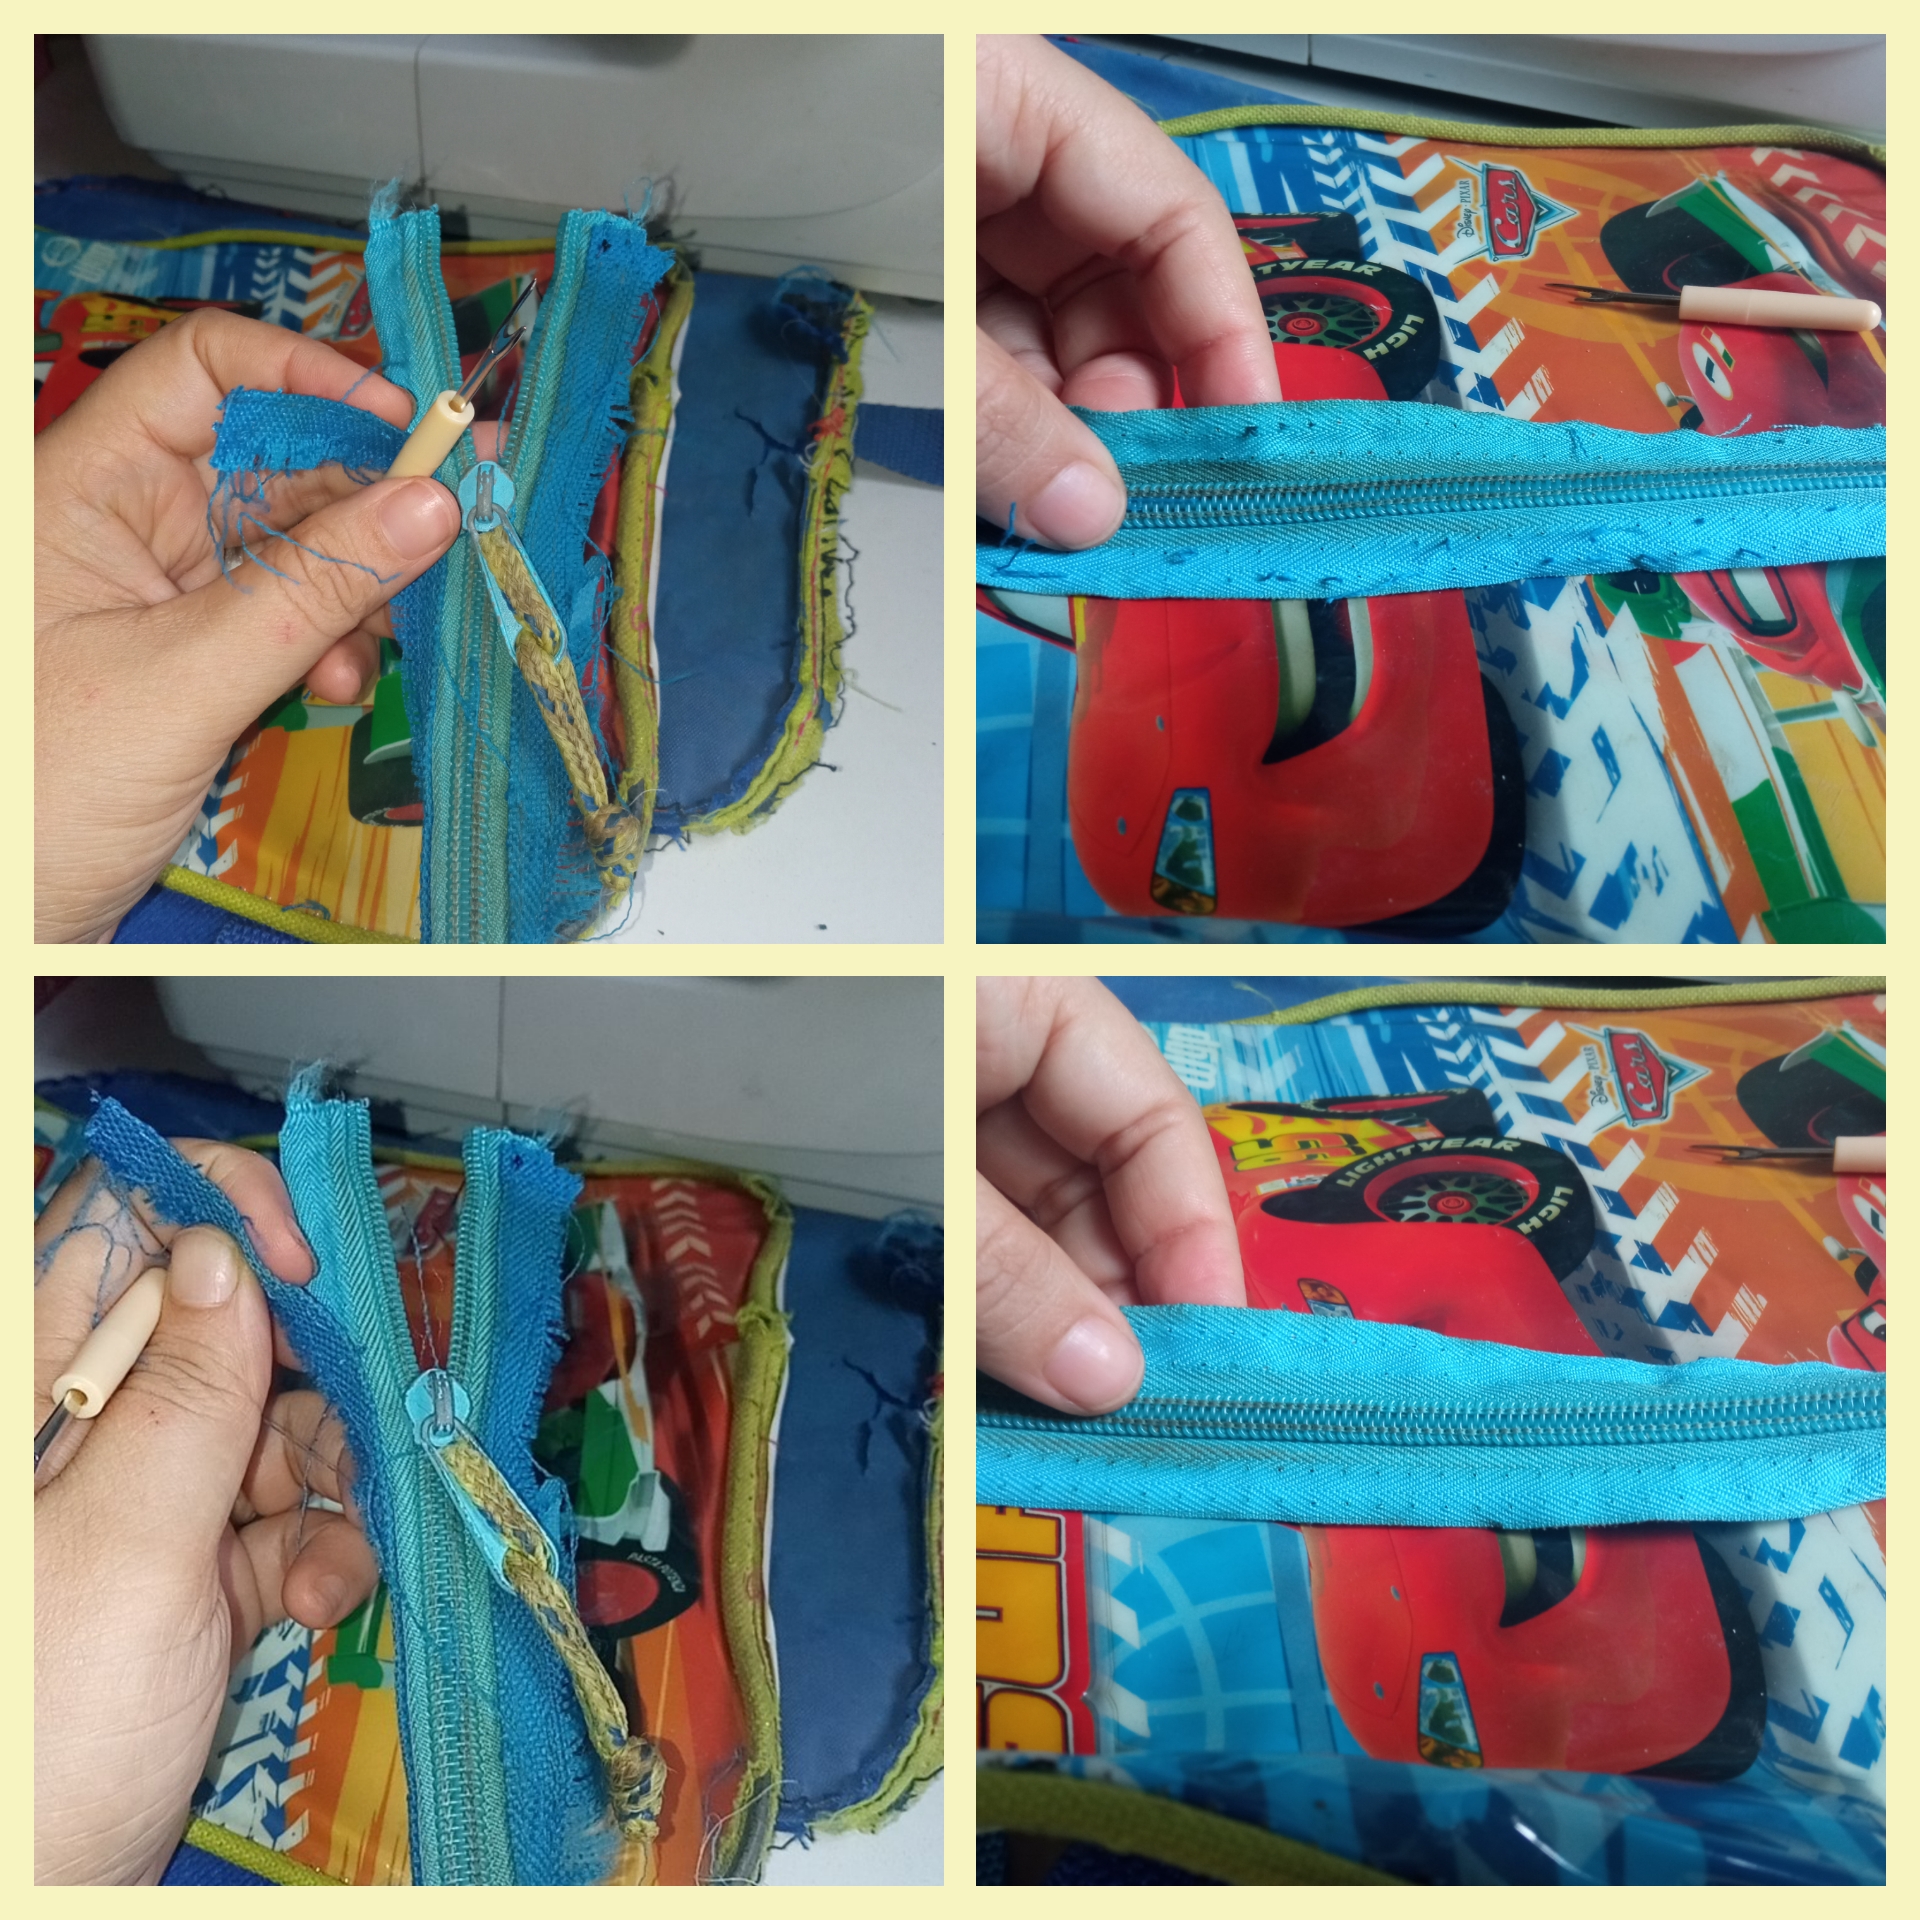
¿Cómo se pega el cierre Noé?
Se debe de colocar la tela derecho hacia arriba y el cierre se pone al revés y por las orillas se pasa costura. Luego se voltea el cierre dejando 0,5cm de distancia del medio del cierre y se pasa costura (esto se le conoce también como reposar costura).
Esta técnica se hace por ambos lados.
How do I glue the Noah zipper?
The fabric should be placed right side up and the zipper should be placed upside down and the seam should be stitched along the edges. Then the zipper is turned over leaving 0.5cm distance from the middle of the zipper and stitching is done (this is also known as seam allowance).
This technique is done on both sides.
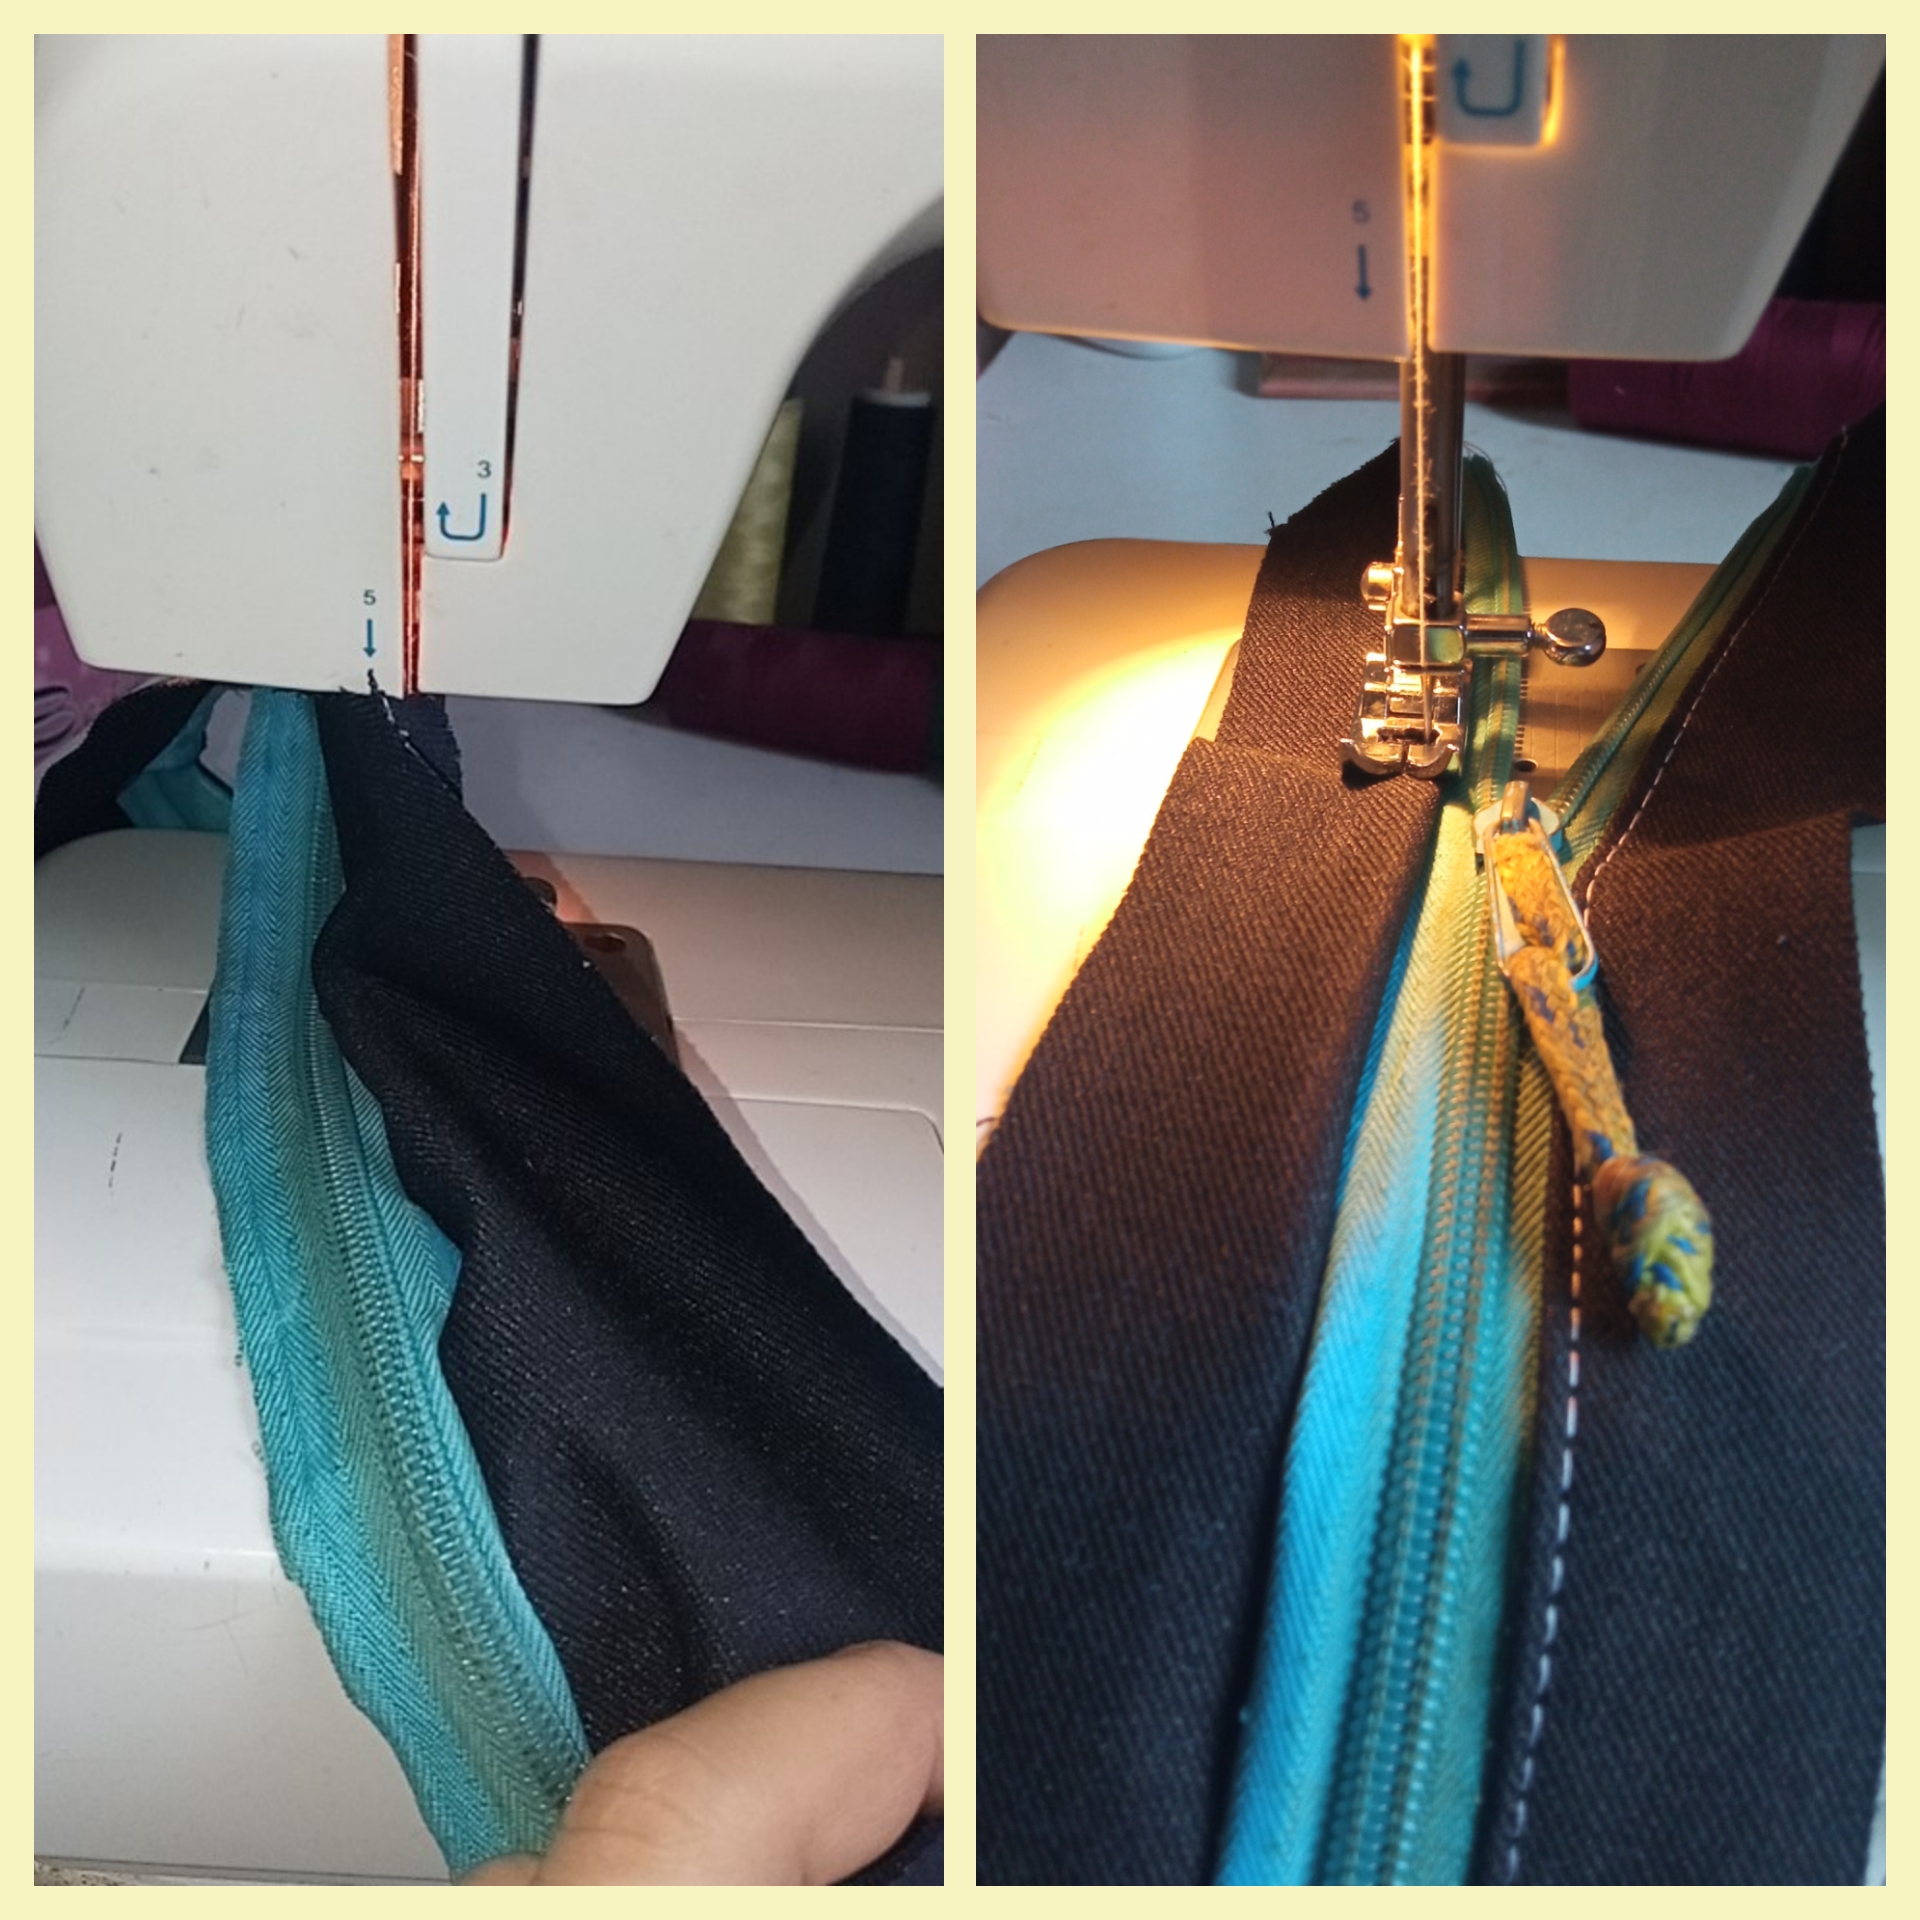
En la parte de abajo tendría 54cm de largo x 8cm de ancho, esta parte la debe unir con la parte del cierre dejando las telas al revés se pasa costura y luego se voltea quedando la tela derecha.
Después de haber terminado el cierre paso a vastear con hilo de coser por la goma que es gruesa y es para que no se mueva en la máquina de coser cuando pase costura a la carátula. Cómo puedes notar en la imágen.
Aquí en la parte de abajo faltó una parte de goma, la cuál lo reemplace con cuero.
The bottom part would be 54cm long x 8cm wide, this part should be joined with the part of the zipper leaving the fabrics upside down, pass the seam and then turn the fabric right side out.
After finishing the zipper, I sew with sewing thread through the thick rubber band so that it does not move in the sewing machine when I sew the seam to the cover. As you can see in the picture.
Here at the bottom of the cover there is a piece of rubber missing, which I replaced with leather.
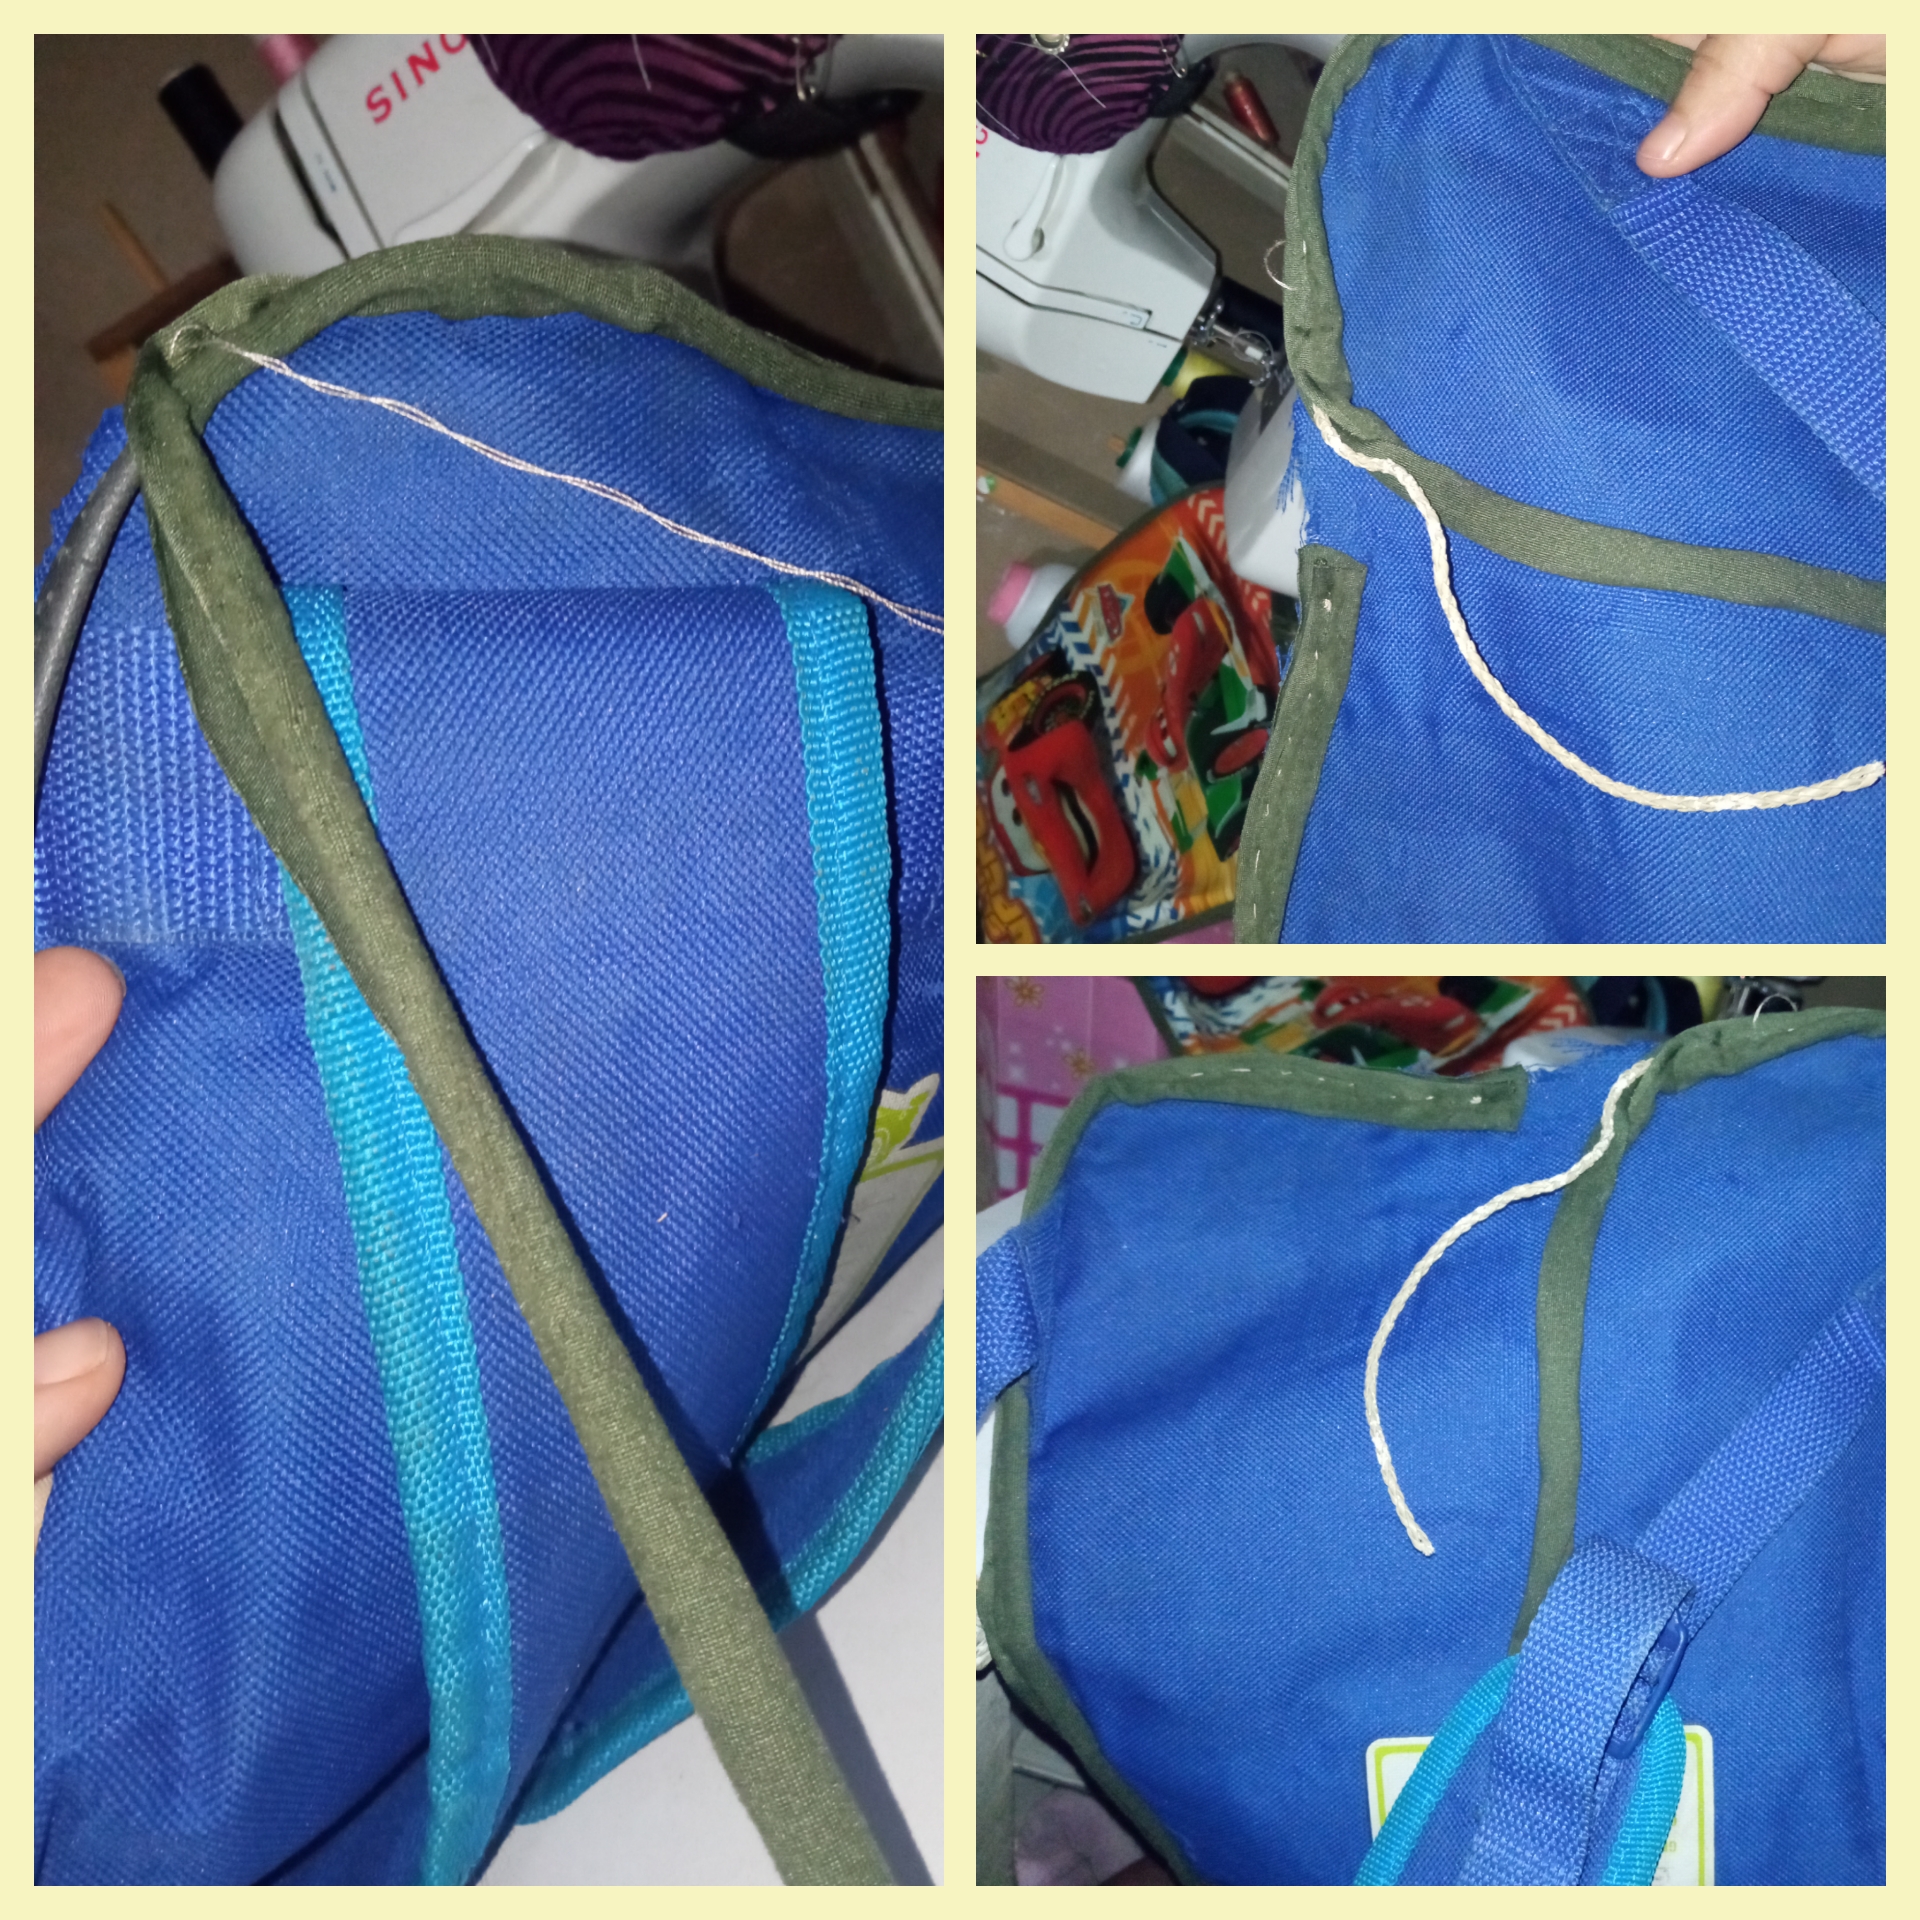
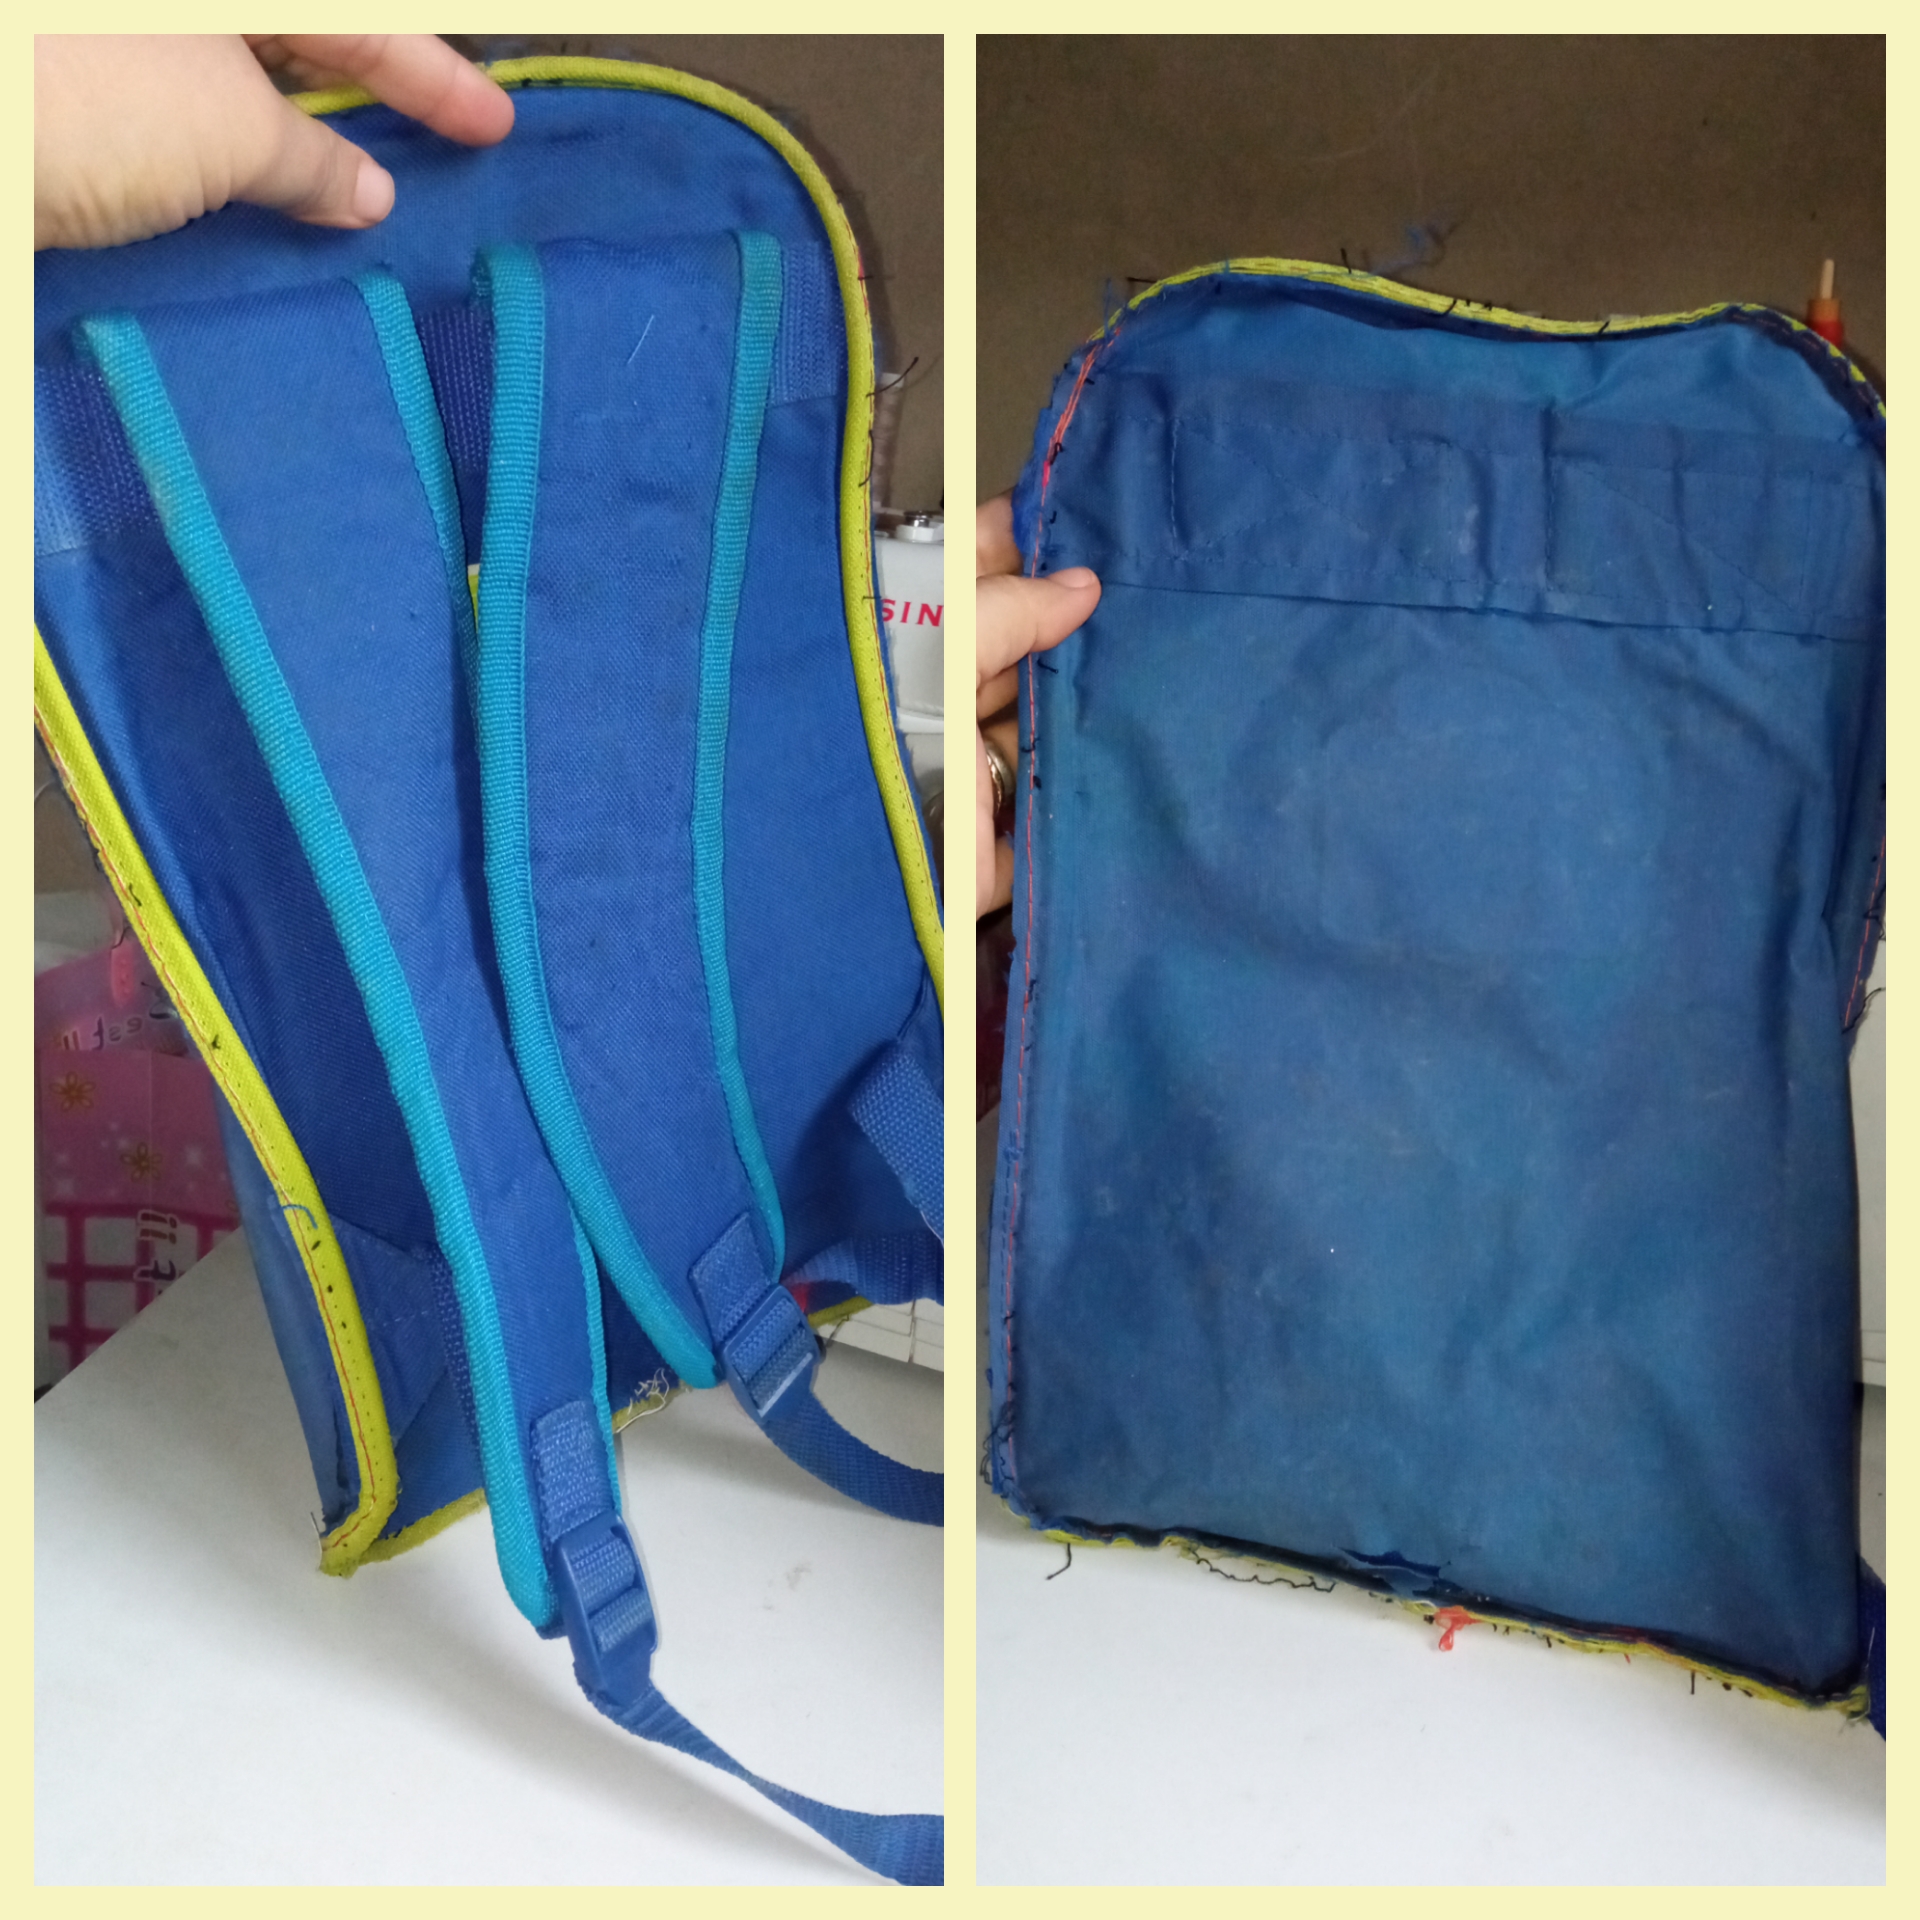
Una vez que terminemos de colocar todo el tapa costura en ambas carátulas se procede a fijar en la máquina de coser con los laterales que habíamos terminado recordando visualizar el dibujo de la carátula y a su vez dejar la parte del cierre hacia arriba.
En la imágen pueden notar como quedó la parte trasera fija:
Once we finish placing all the cover stitching on both covers, we proceed to fix it on the sewing machine with the sides that we had finished remembering to visualize the drawing of the cover and at the same time leave the part of the closure upwards.
In the image you can see how the back part is fixed:
Ahora paso a vastear la parte delantera para pasarla por la máquina de coser. Cómo puedes notar en la imágen:
Now I'm going to sew the front part to pass it through the sewing machine. As you can see in the picture:
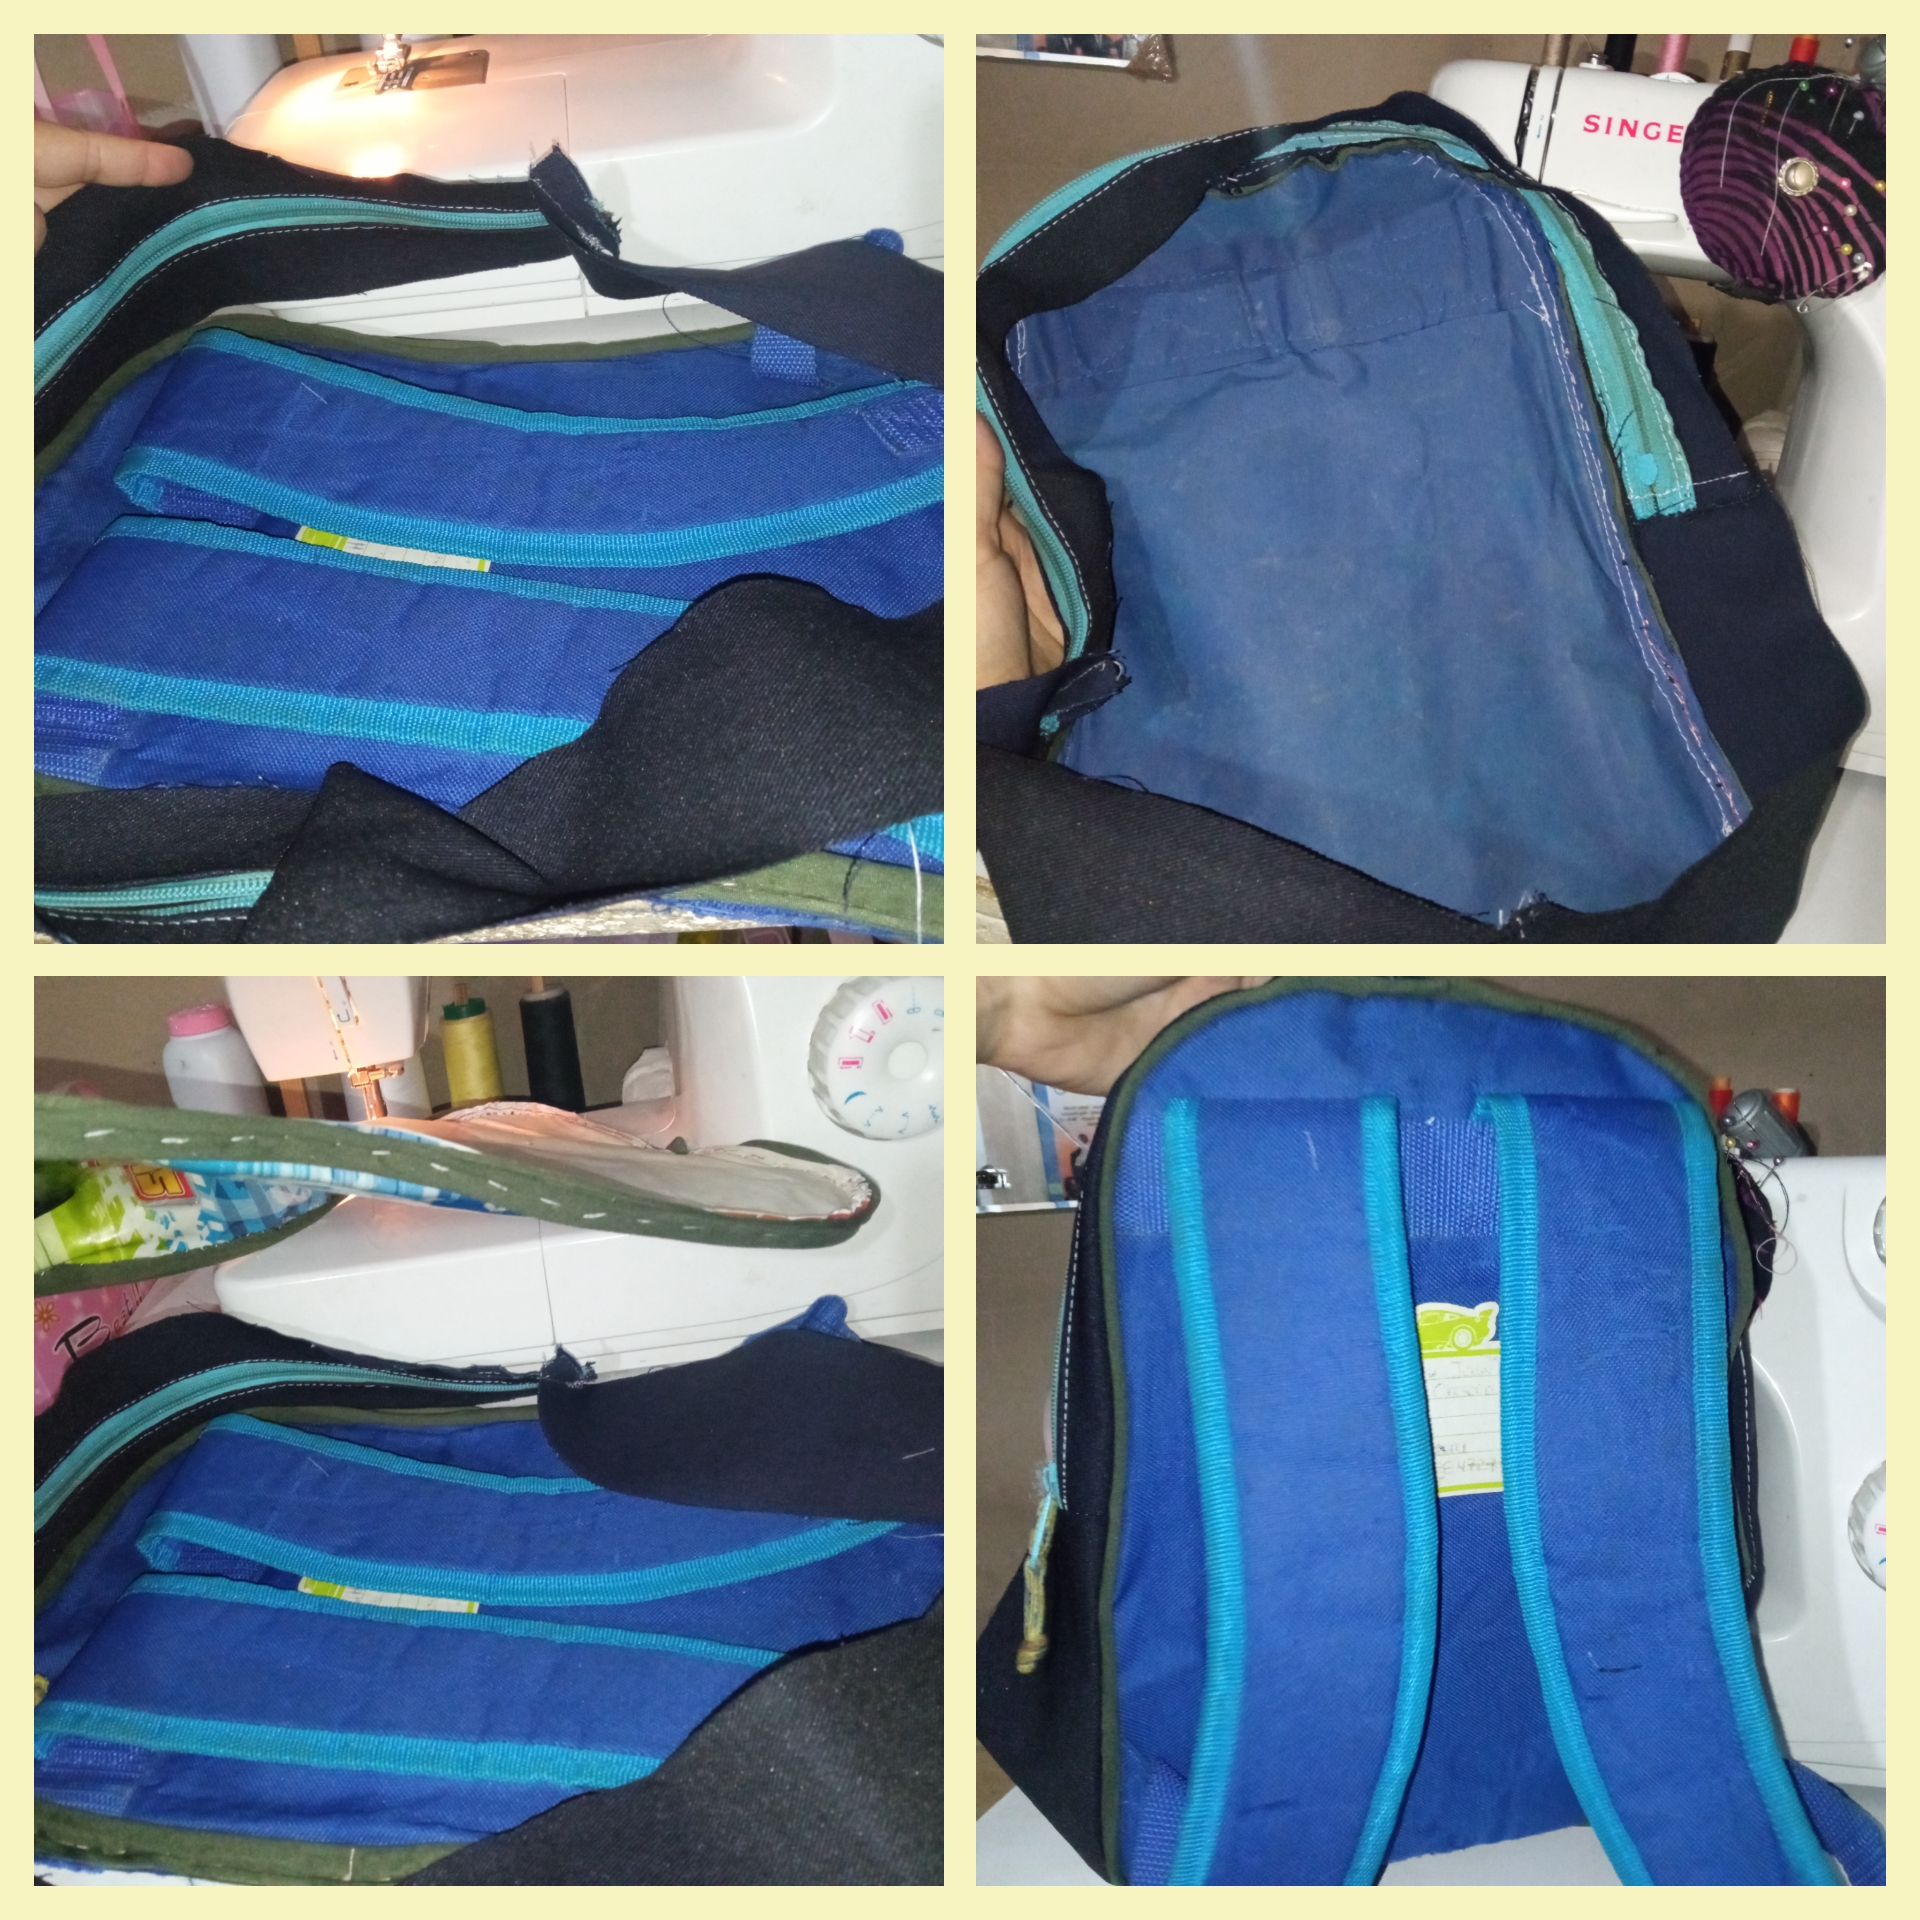
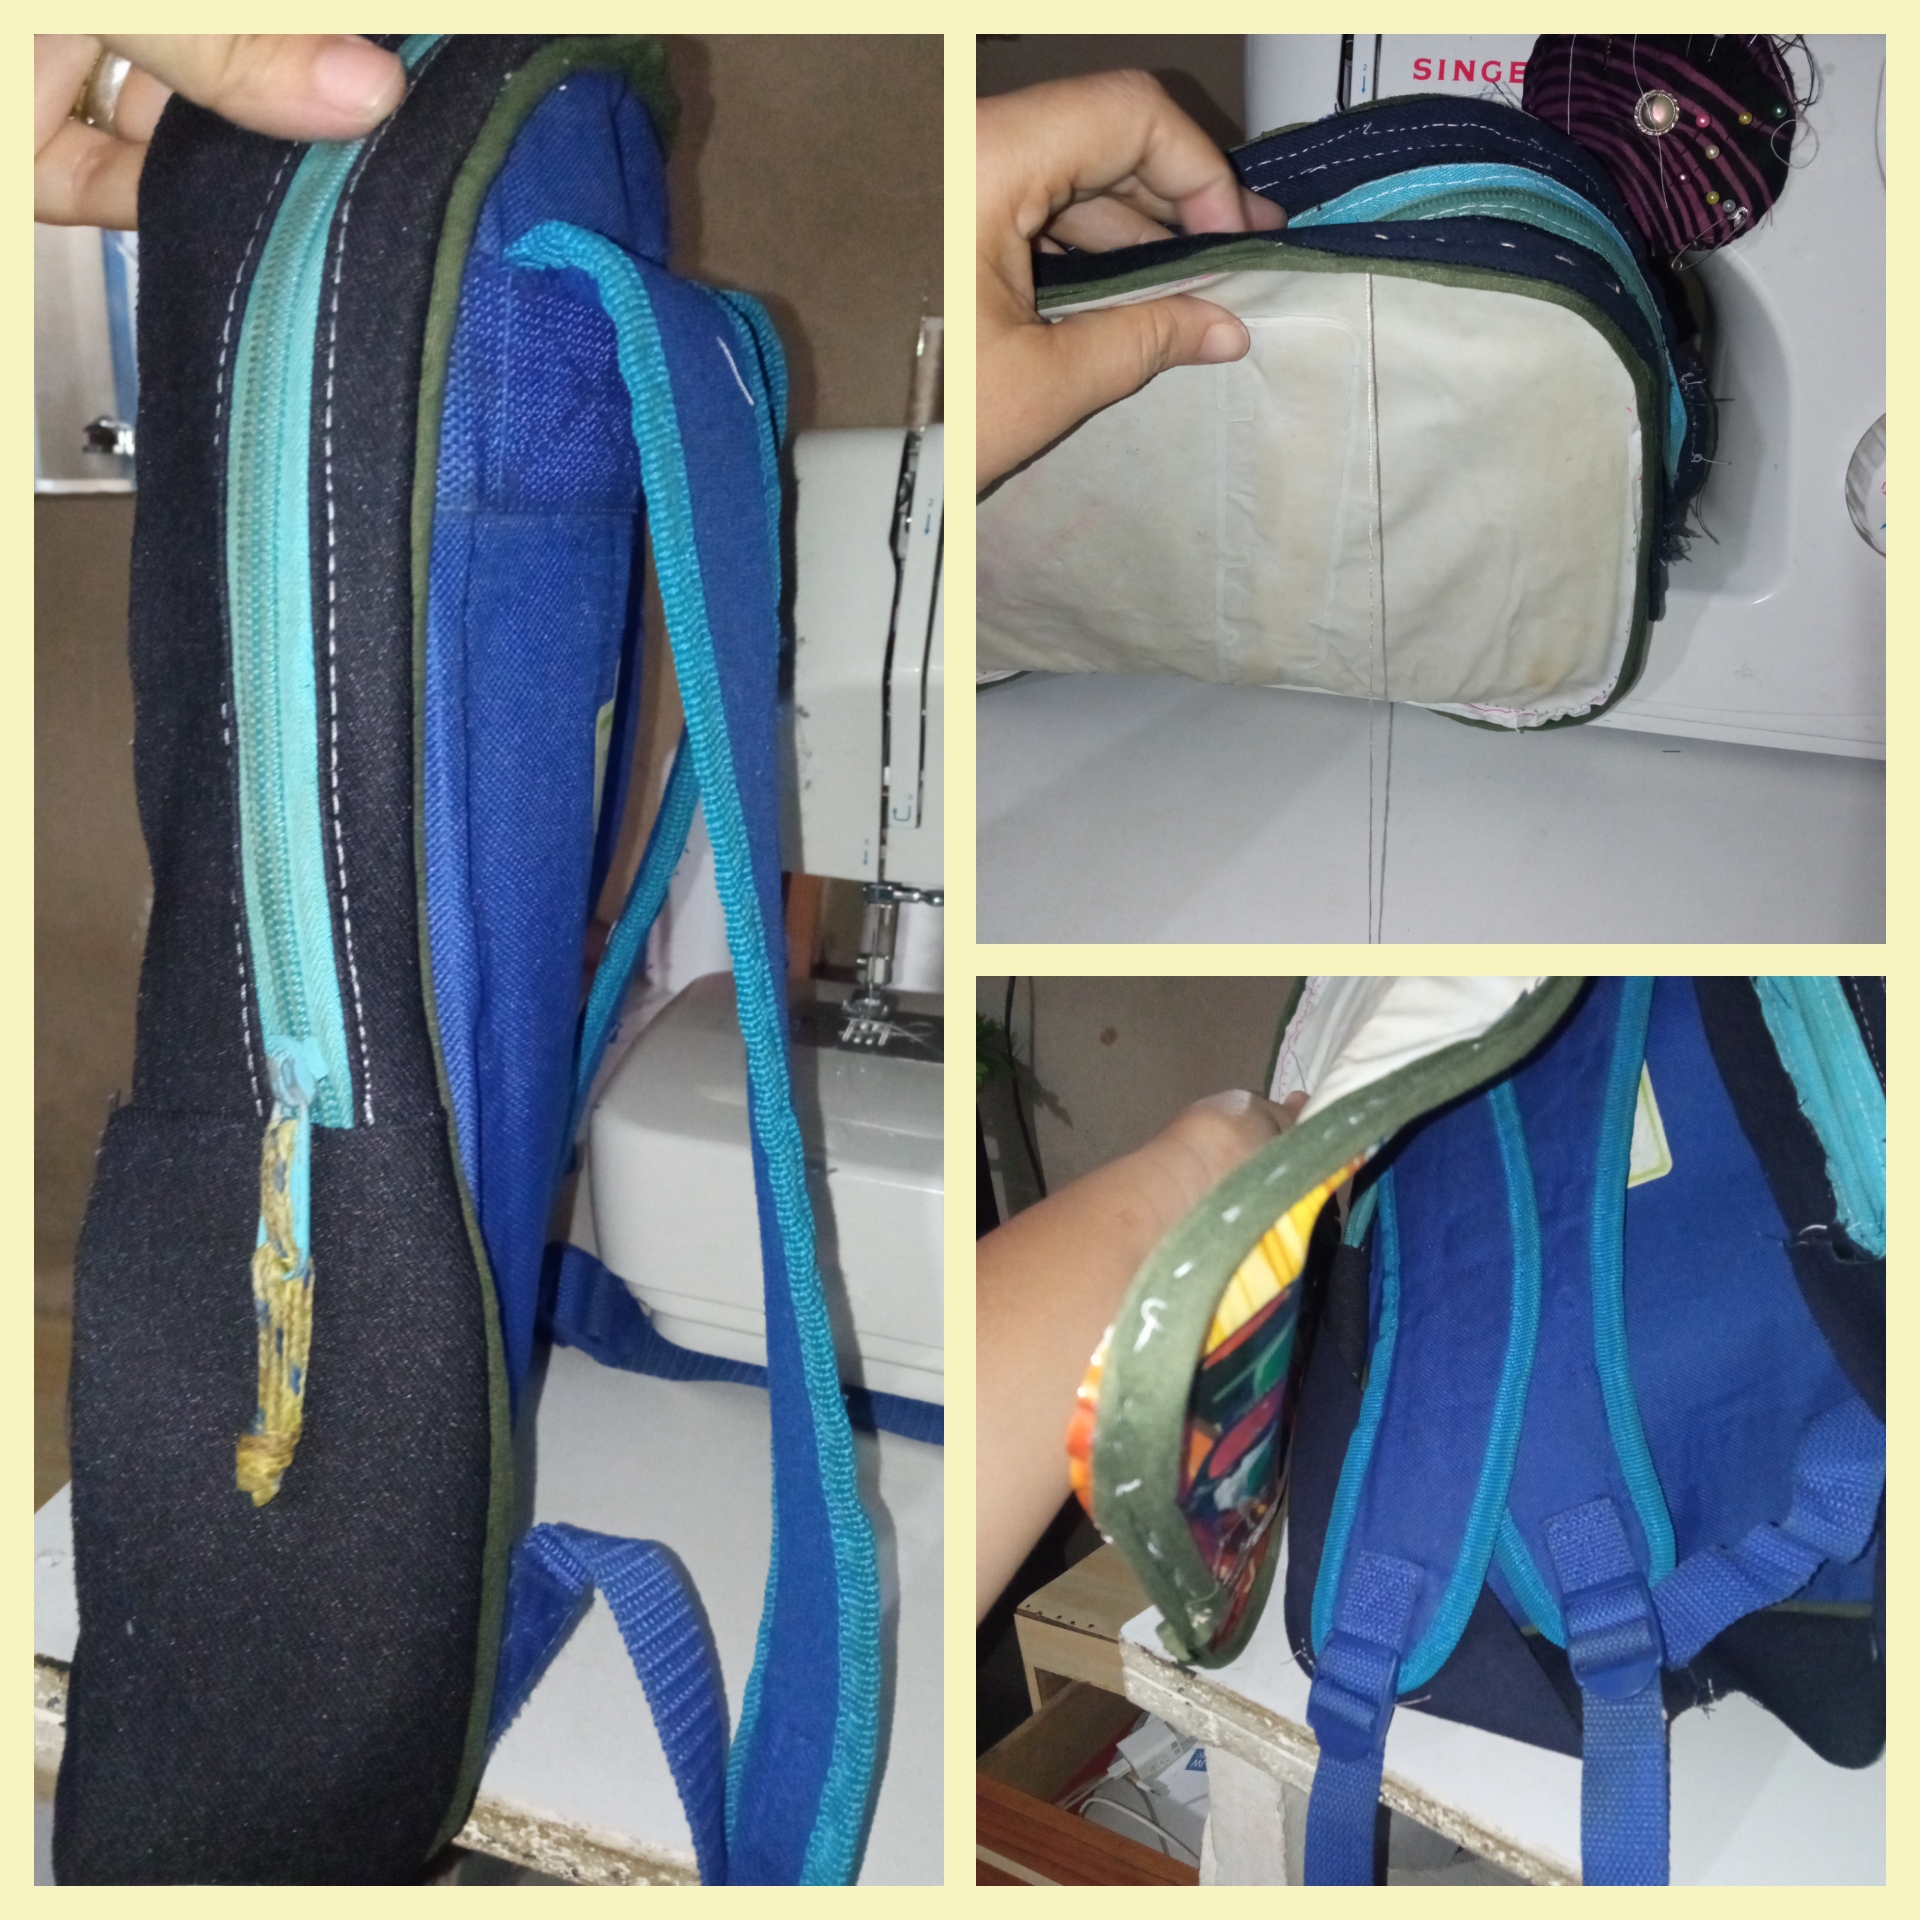
Una vez que tengamos ambas carátulas con costura de la máquina de coser, vamos a colocar tapa costura por dentro (esto lo hice en costura a mano). Coloque está tela de algodón para evitar que se hice la tela y quedé también con un mejor acabado.
Once we have both covers sewn by the sewing machine, we are going to place the inside seam cover (I did this by hand sewing). I placed this cotton fabric to avoid the fabric to get a better finish.
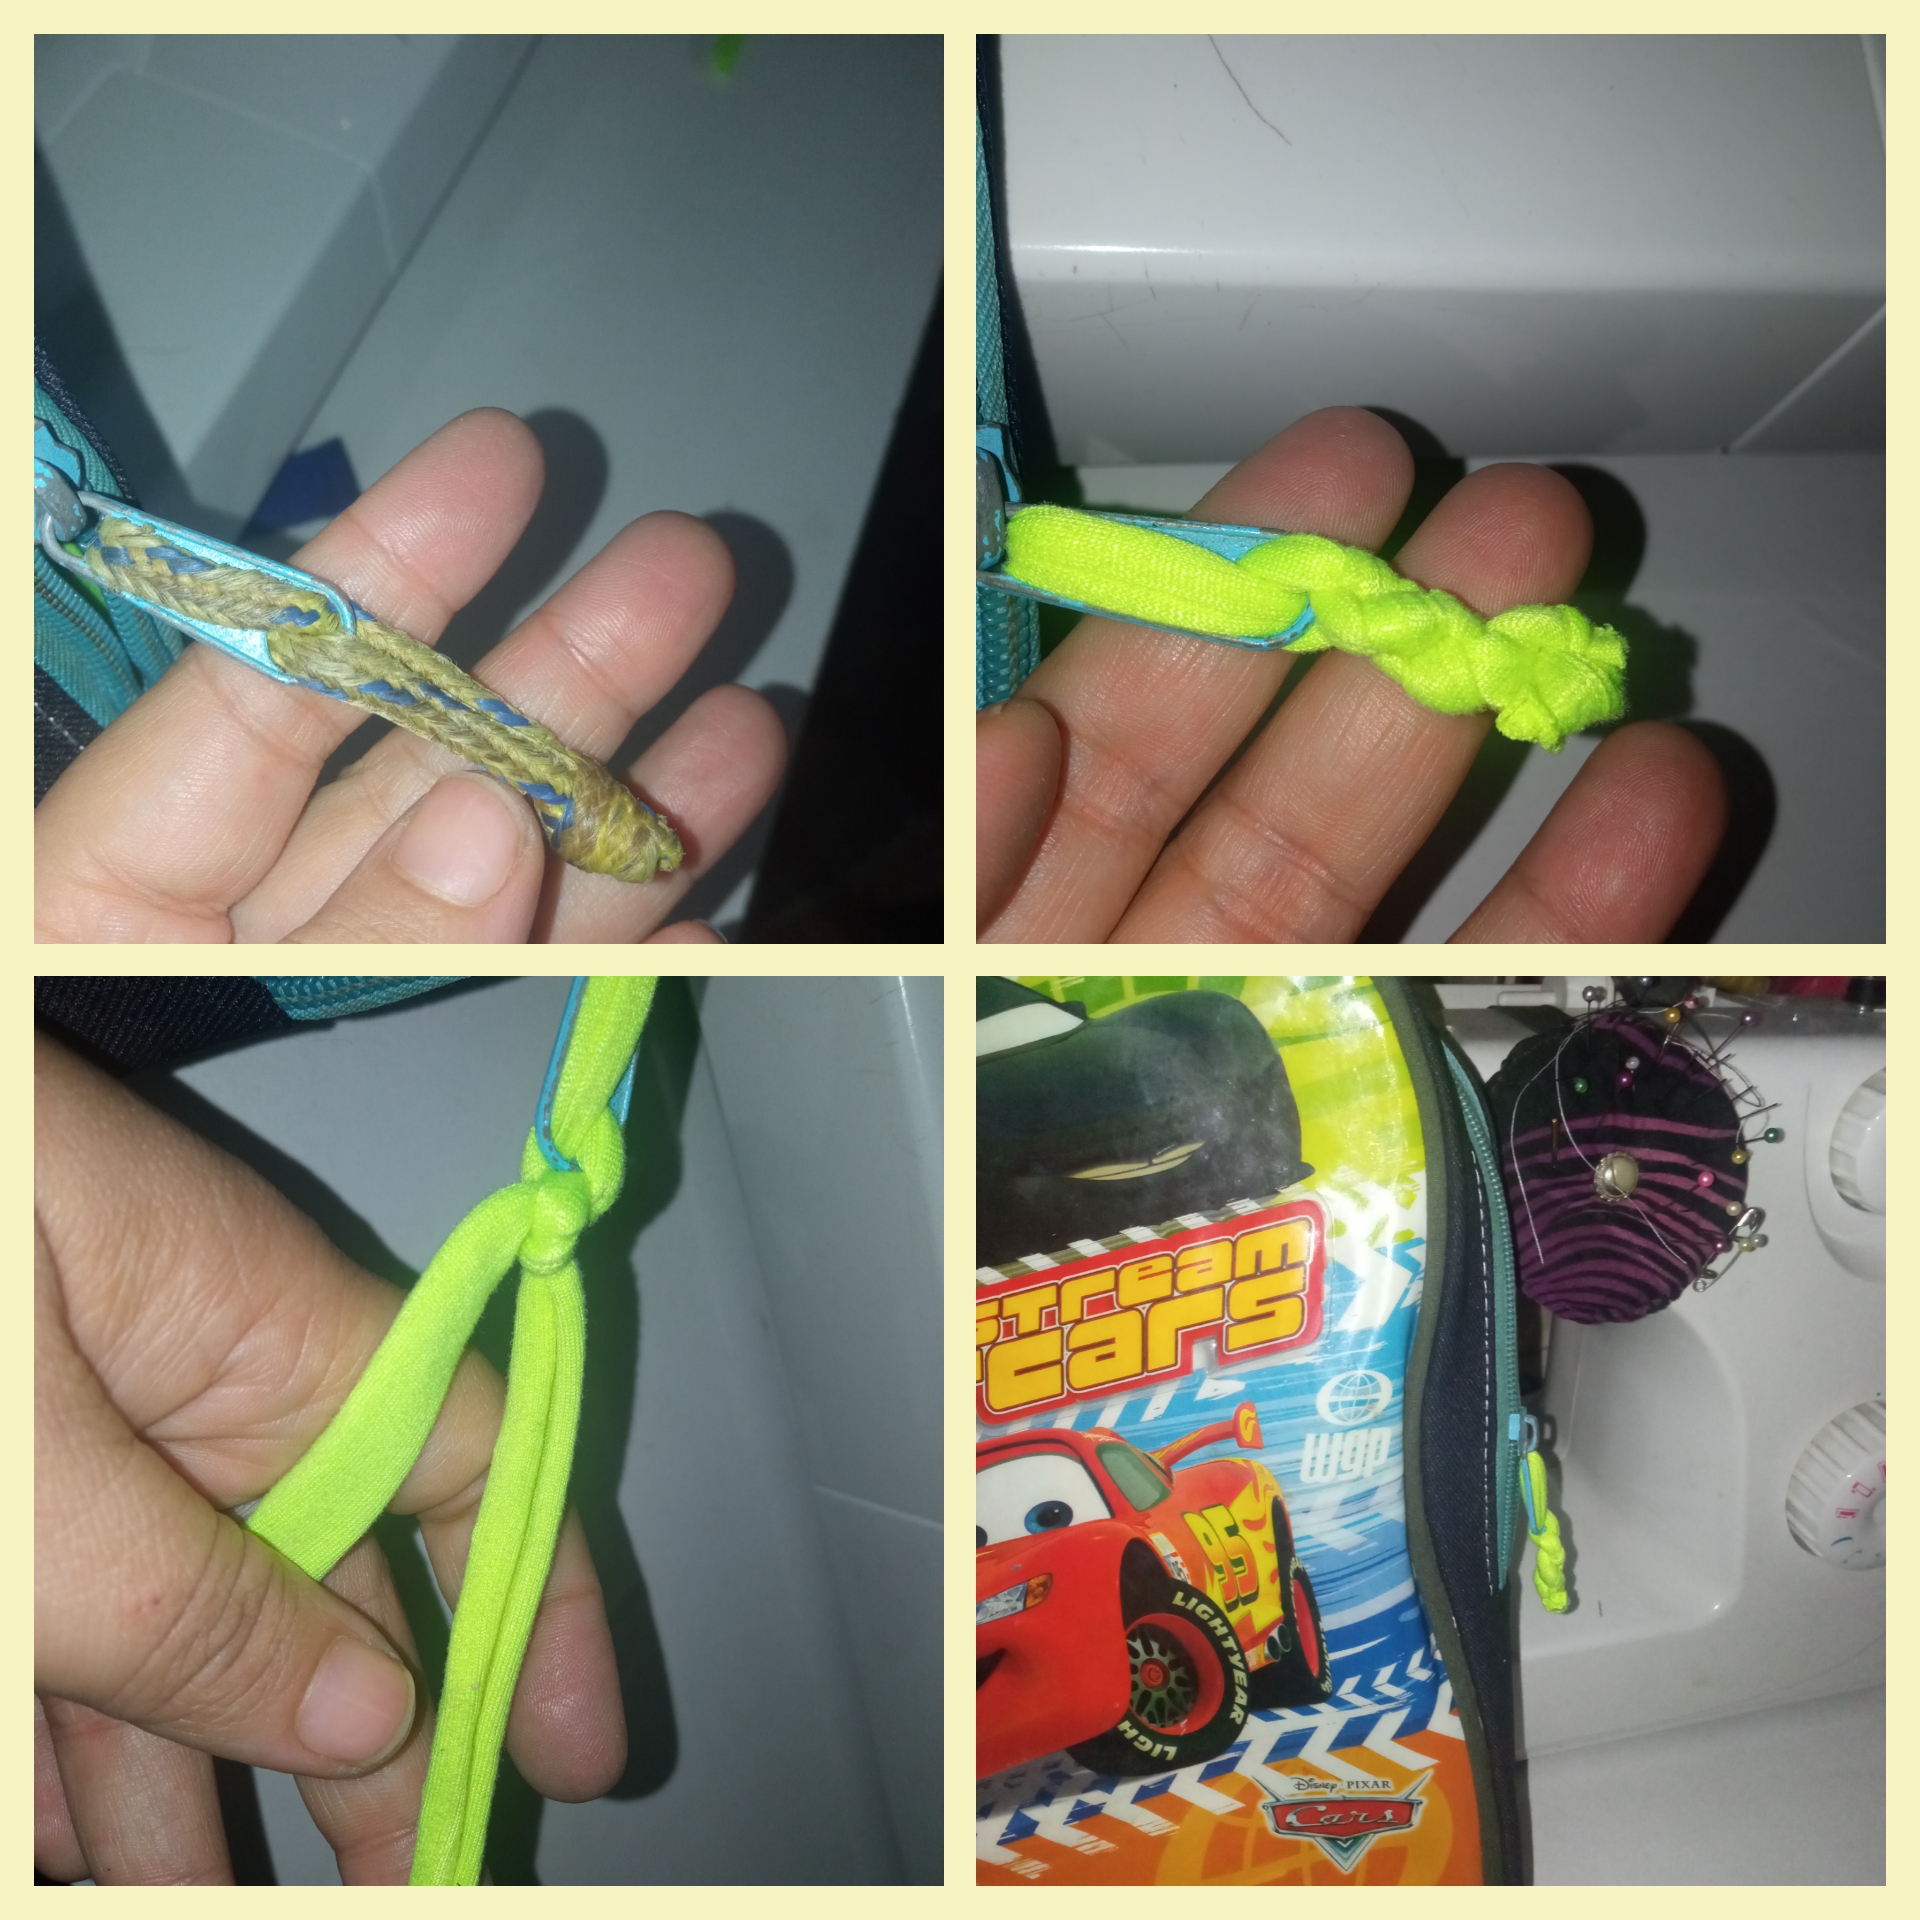
Modifique algo más en el área del súper del cierre. Corte está tira y lo que hice fue retirarla y agregue una nueva con la tela de algodón y quedó de esta manera:
I modified something else in the super area of the zipper. I cut this strip and removed it and added a new one with the cotton fabric and it looked like this:
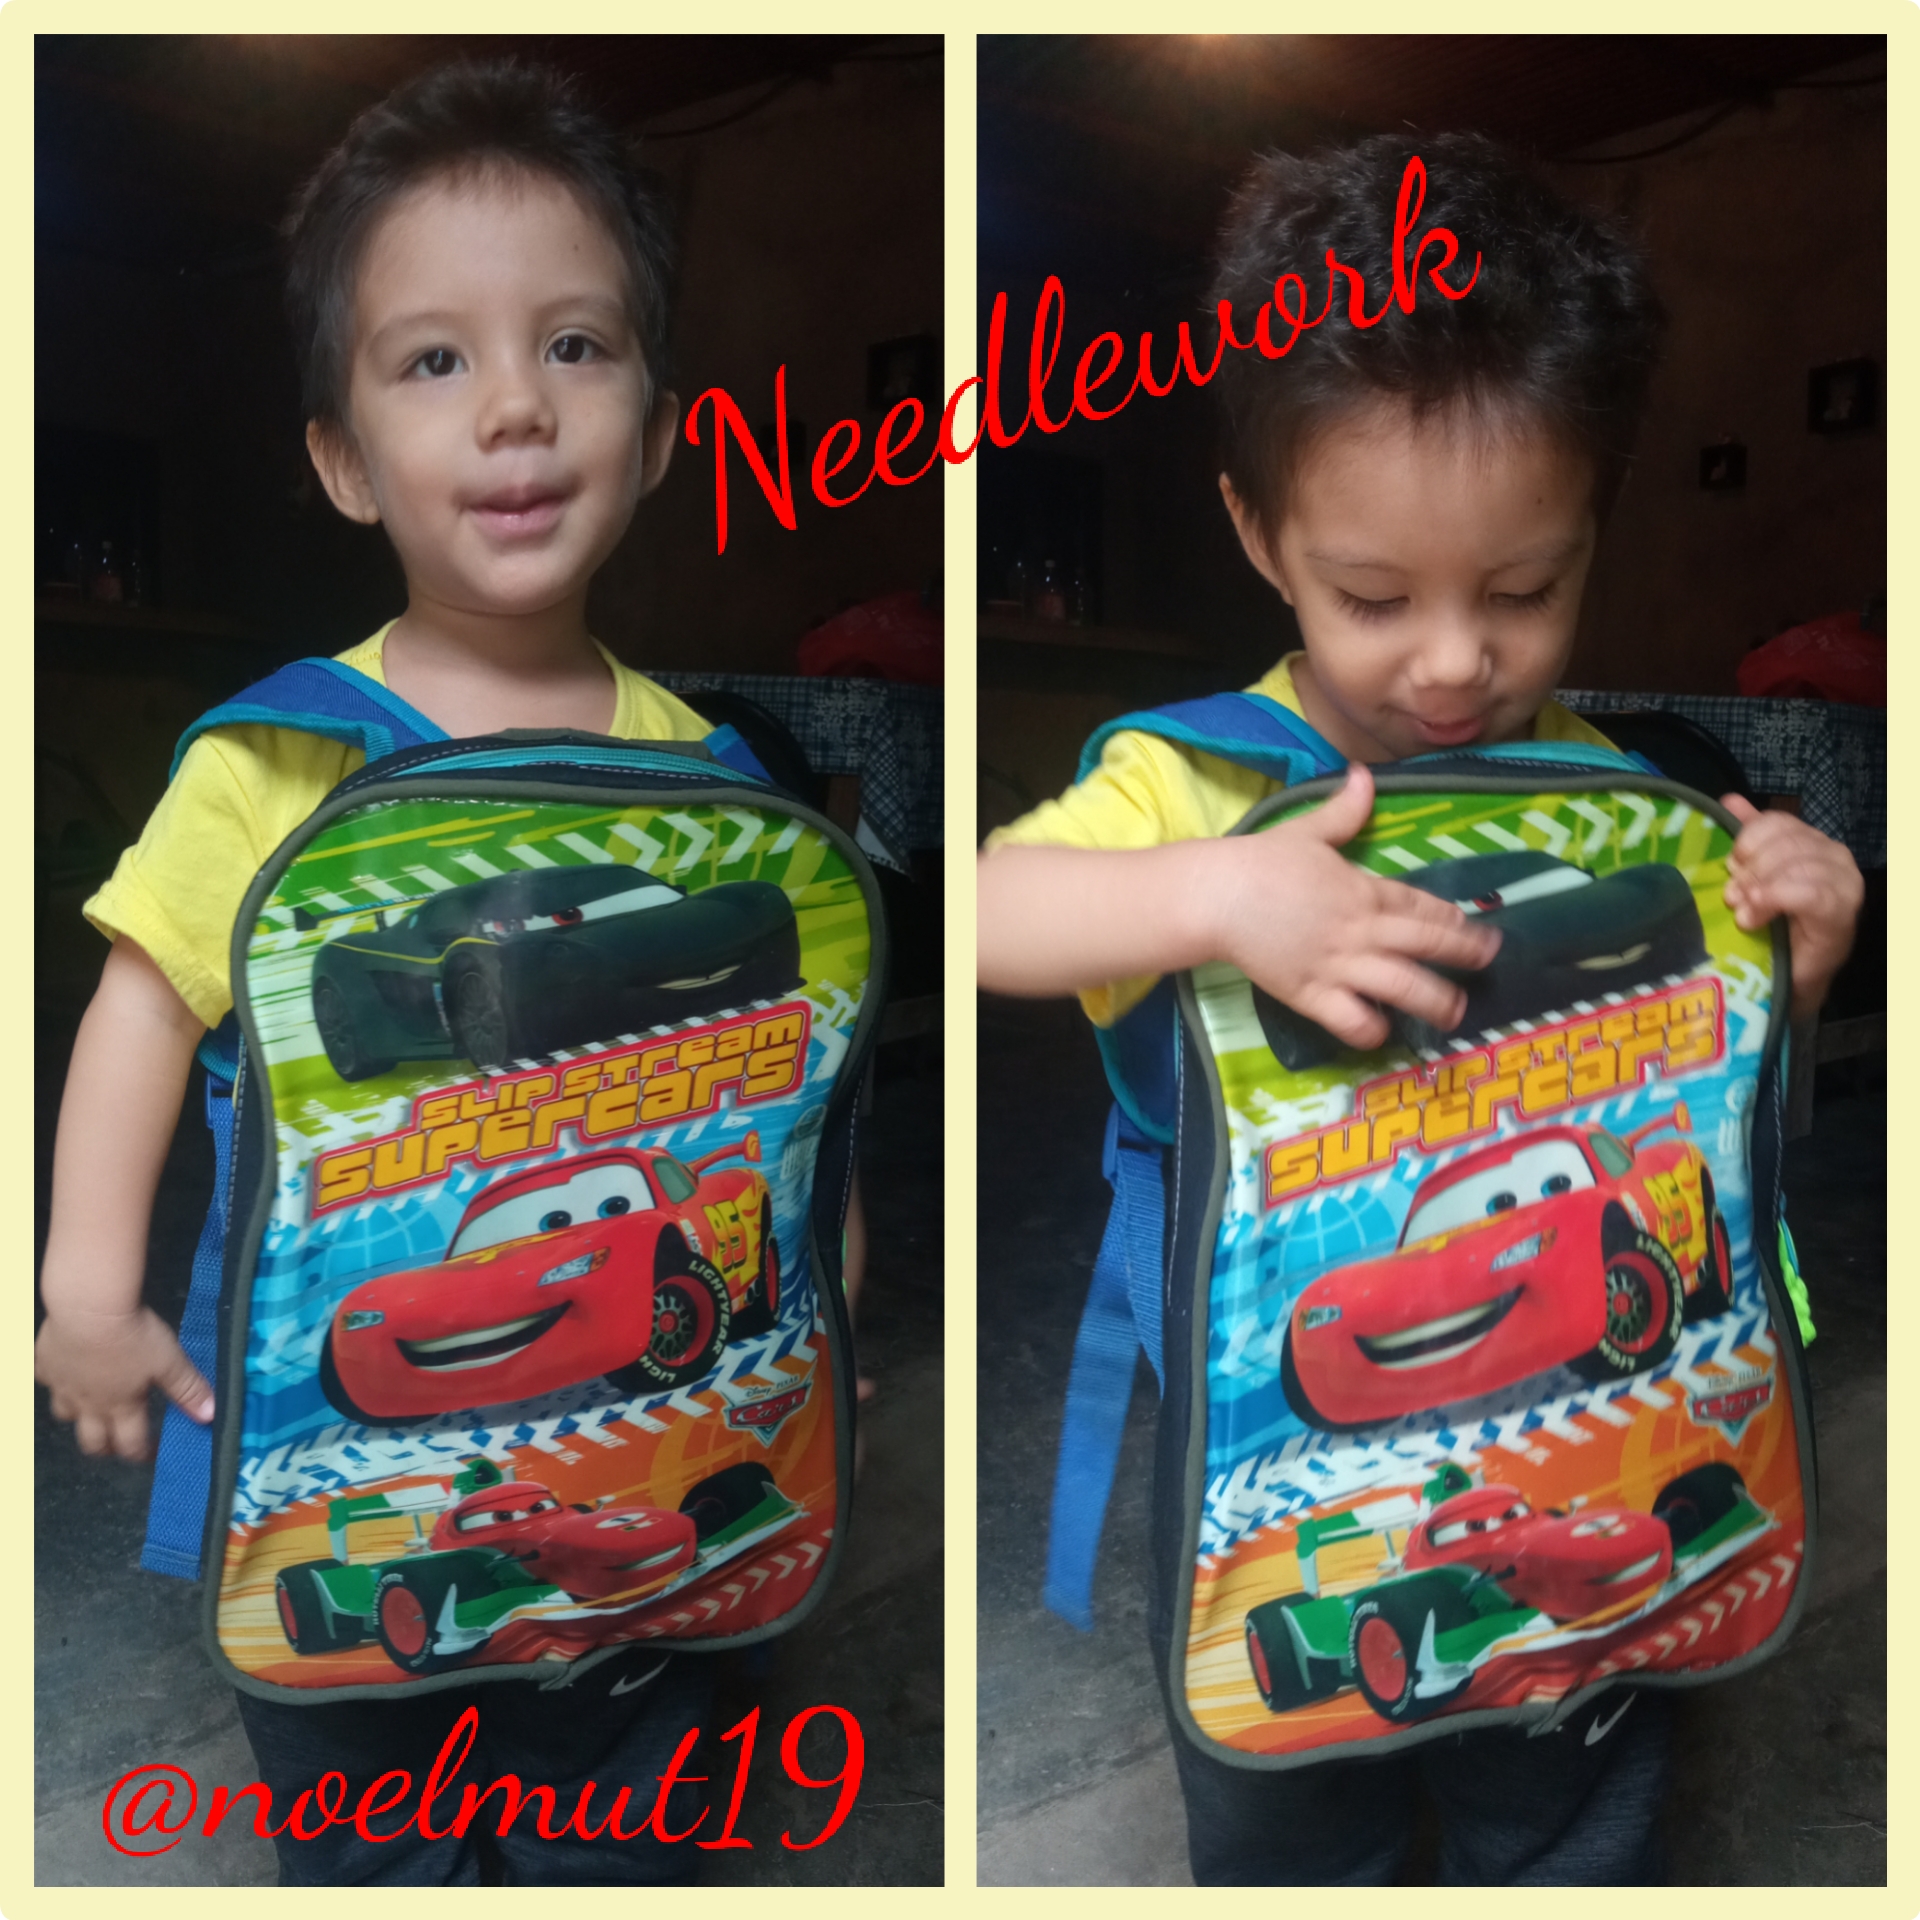
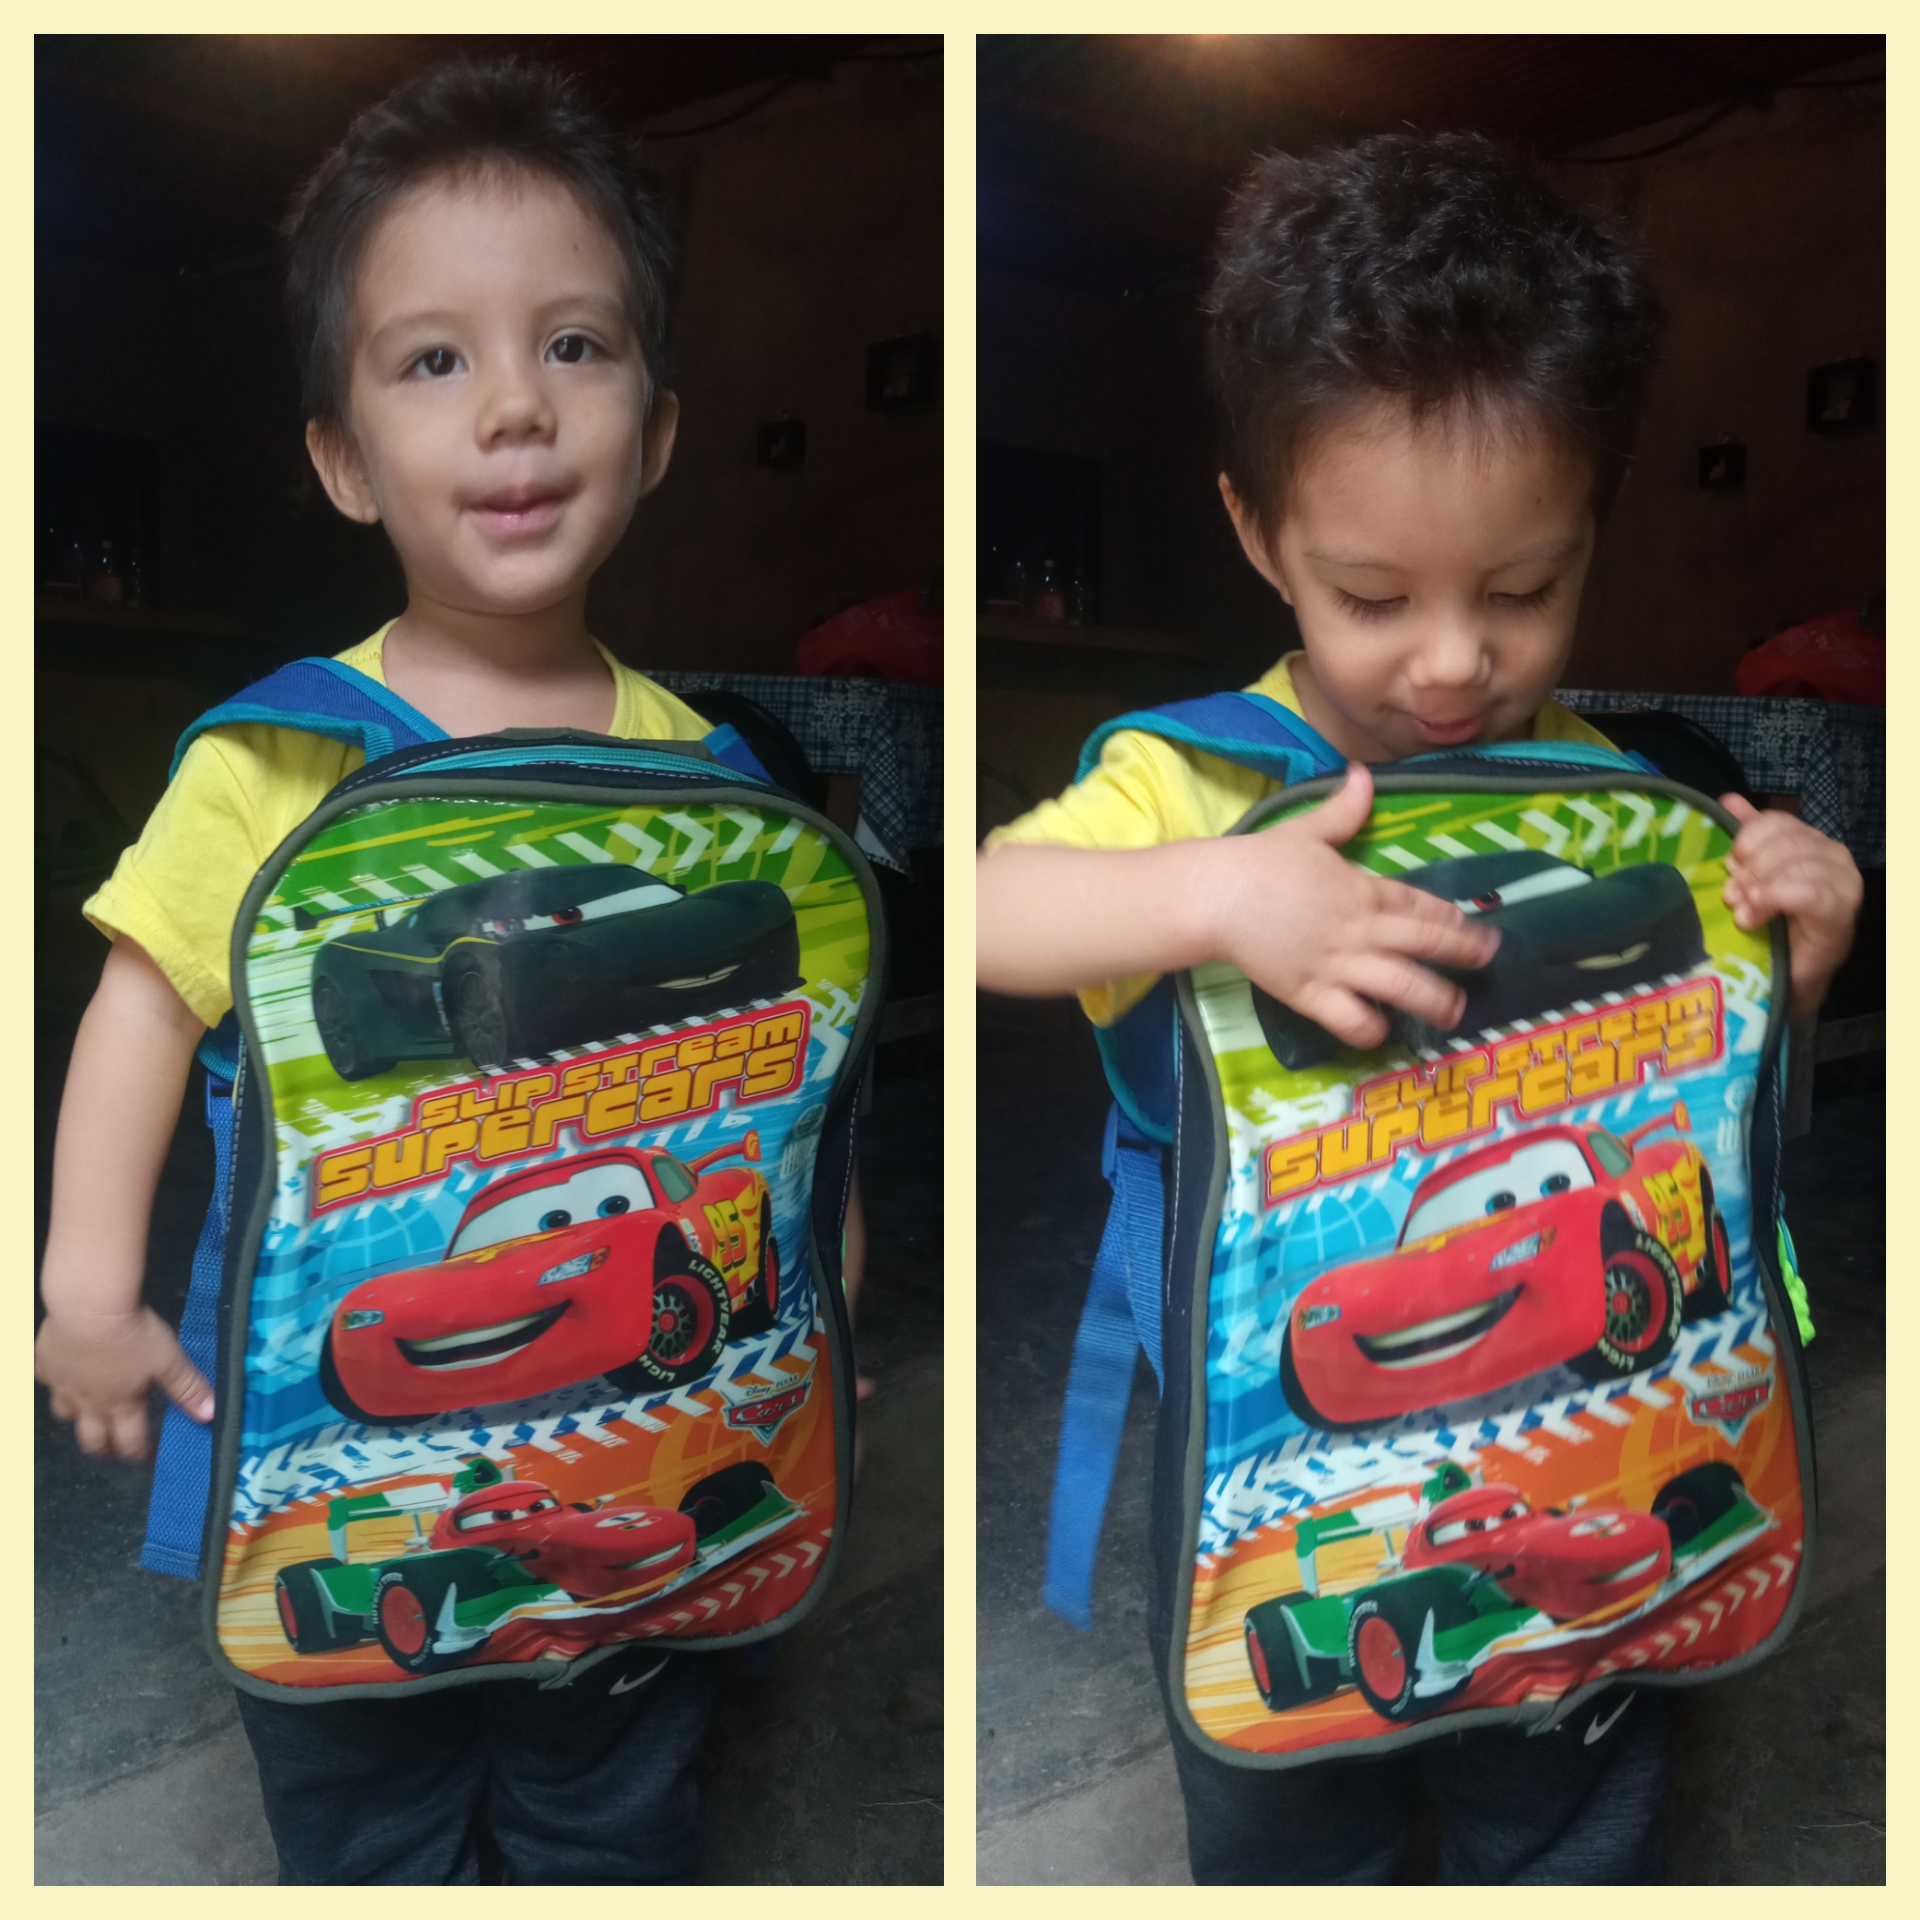
Ahora sí nuestra mochila terminada y mi hijo recibiendo su regalo.
Now our backpack is finished and my son is receiving his gift.
¡Gracias a todos!
Se les quiere Noé
¡Thanks to all!.
You are love Noé
Fotos de mi propiedad. Tomadas con un Remid 9/ 📱Photos of my property. Taken with a Remid 9.
El traductor que utilice/The translator you use:
Editor de fotos/ Editor of Photo: Photoframe
Nice reconstruction and modifications. It’s neat you were able to save the undamaged panel to make a new backpack. Lovely work ~
This turns out to be good for the little boy.
Wow this is beautiful, the outcome of the back so beautiful and I love it
Congratulations @noelmut19! You have completed the following achievement on the Hive blockchain and have been rewarded with new badge(s):
Your next target is to reach 50 upvotes.
You can view your badges on your board and compare yourself to others in the Ranking
If you no longer want to receive notifications, reply to this comment with the word
STOPTo support your work, I also upvoted your post!
Support the HiveBuzz project. Vote for our proposal!
Excelente trabajo 👍 ...nada como reciclar para sentirnos bien con el planeta.
Gracias por compartir.
🎆🎇🎉🎊🌧️💐✨🌾🌱🌹🌙🌿🍃🥀⚡🌺☘️🍀🌈🌷⭐🪴🌵🌸🌟💮🌴🌳💫☀️💮☔🌲🌳🌍🌌🌠☄️🏵️🐝🌻🌼🍄🐞🦋💙☕💜🍍🎆🎇🎉🎊
Excelente trabajo 👏 me gusta darle otra oportunidad a las cosas que antes se desechaban...y lo más importante tu hermoso hijo feliz con su mochila.