
🌟Bienvenidos | Welcome🌟
Saluditos a todos, espero hayan pasado un buen fin de semana y que se encuentren muy bien. El día de hoy quisiera compartir con ustedes un tutorial para aprender a realizar un lindo adorno de estrella para decorar nuestro árbol de navidad.🌟🎄 Espero que les guste mucho.
Sin más que decir, comencemos.
Greetings everyone, I hope you have had a great weekend and that you are doing well. Today I would like to share with you a tutorial to learn how to make a cute star ornament to decorate our Christmas tree.🌟🎄 I hope you like it very much.
Without more to say, let's get started.
Materiales | Materials:
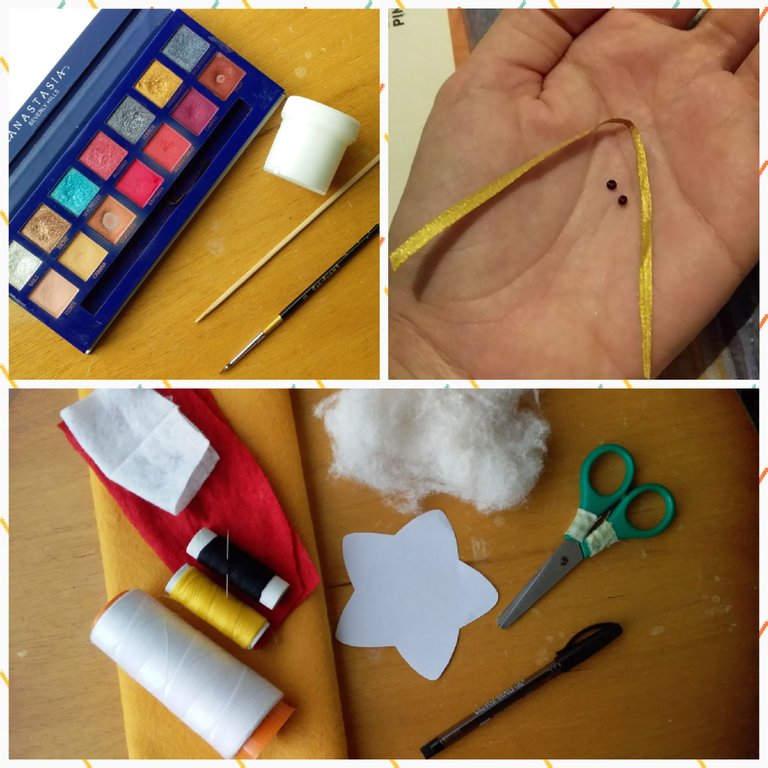
| Fieltro (amarillo, rojo y blanco) | Relleno para peluches | Aguja e hilos |
|---|---|---|
| Patrón de estrella | Pintura blanca | Sombra de ojos rosa |
| Palillo de madera | Listón dorado | 2 abalorios negros |
| Tijeras | Lápiz | Pincel |
| Felt (yellow, red and white) | Stuffing for stuffed animals | Needle and thread |
|---|---|---|
| Star pattern | White paint | Pink eyeshadow |
| Bamboo skewer | Gold Ribbon | 2 Black beads |
| Scissors | Pencil | Brush |
🌟Proceso | Process🌟
Paso 1 | Step 1
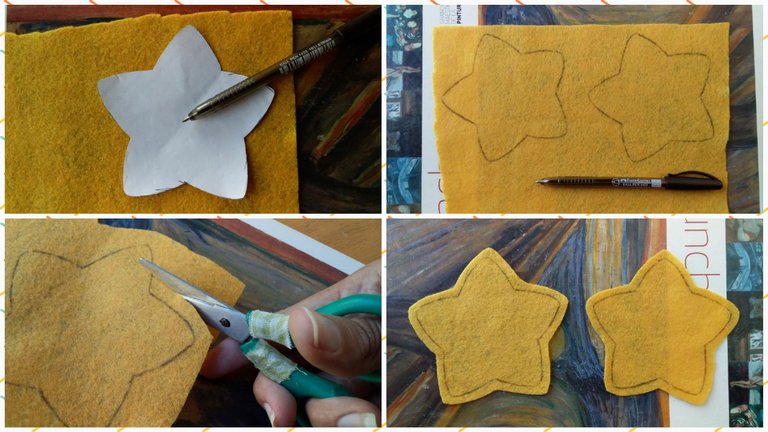
Lo primero que haremos será ubicar y marcar nuestro patrón sobre la tela y luego cortaremos dejando un margen de costura.
The first thing we will do is to place and mark our pattern on the fabric and then we will cut leaving a seam allowance.
Paso 2 | Step 2
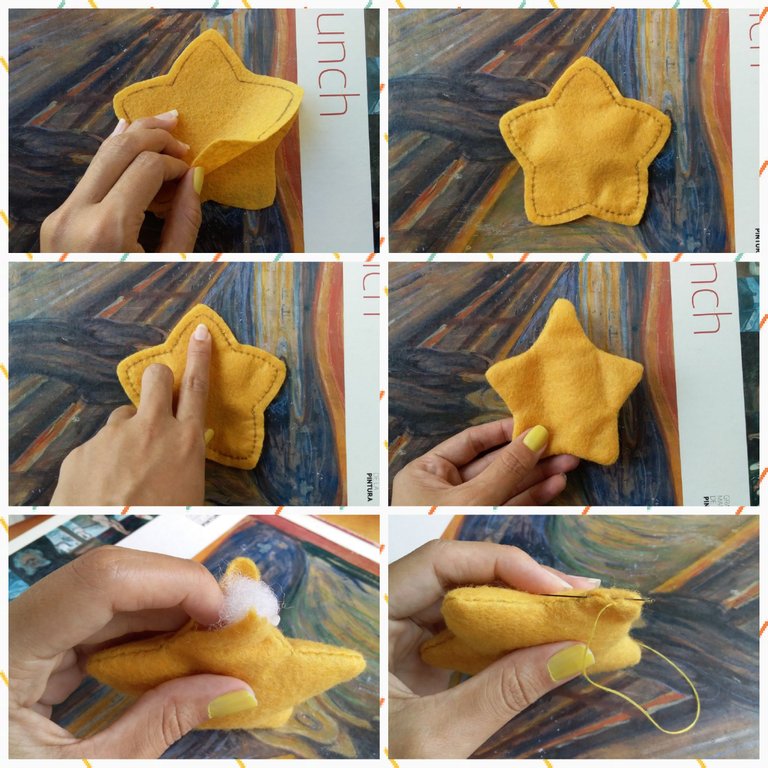
Coseremos ambas piezas dejando una abertura en una de las puntas de la estrella, por ahí le daremos vuelta y rellenaremos, luego la cerraremos.
We will sew both pieces together leaving an opening at one of the ends of the star, through there we will turn it over and stuff it, then we will close it.
Paso 3 | Step 3
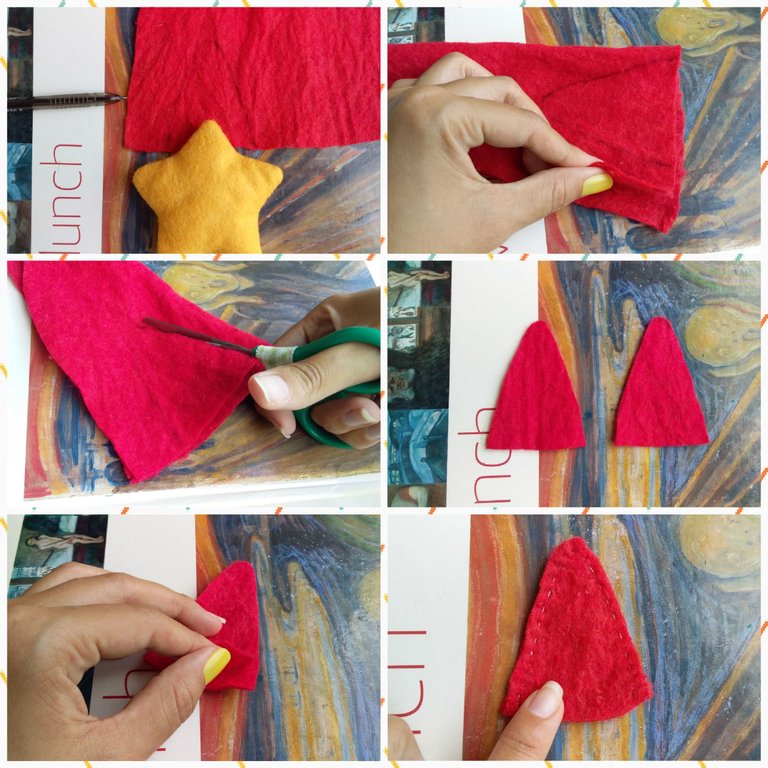
Pondremos una de las puntas de la estrella sobre el fieltro rojo y dibujaremos un triángulo alrededor. Doblaremos y cortaremos para obtener dos triángulos iguales y por último, los coseremos.
We will put one of the points of the star on the red felt and we will draw a triangle around it. We will fold and cut to obtain two equal triangles and sew them together.

Con un trozo de fieltro blanco, lo doblaremos a la mitad y lo uniremos a la pieza que hicimos anteriormente, así formaremos nuestro gorrito.
With a piece of white felt, we will fold it in half and join it to the piece we made previously, thus forming our little hat.
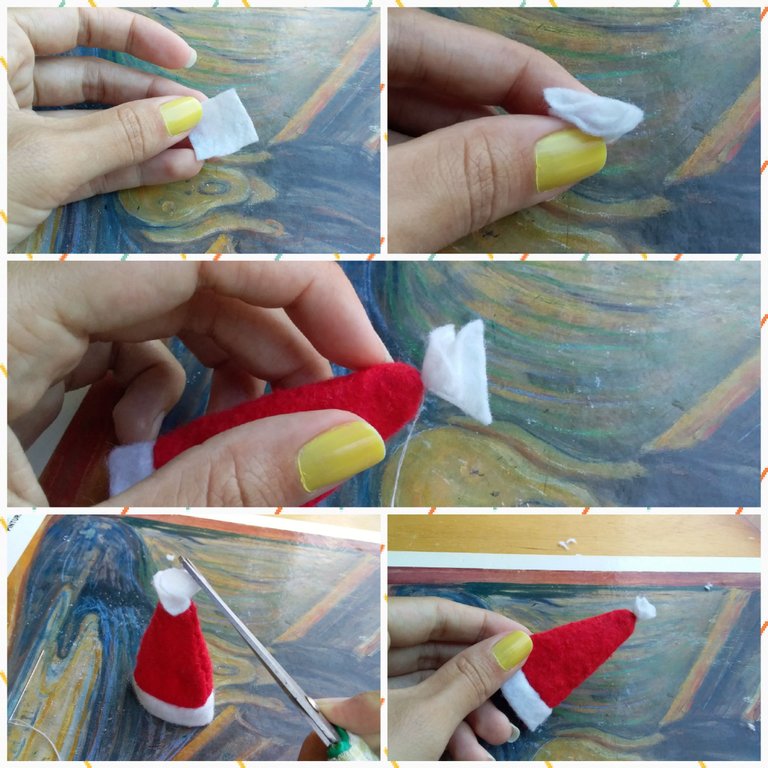
Con un cuadradito de fieltro haremos un pompom. Lo doblaremos para formar una especie de triángulo y lo coseremos en la punta del gorrito, luego con las tijeras le daremos una forma redondeada.
With a small square of felt we will make a pompom. We will fold it to form a kind of triangle and sew it at the tip of the hat, then with scissors we will give it a rounded shape.
Paso 4 | Step 4
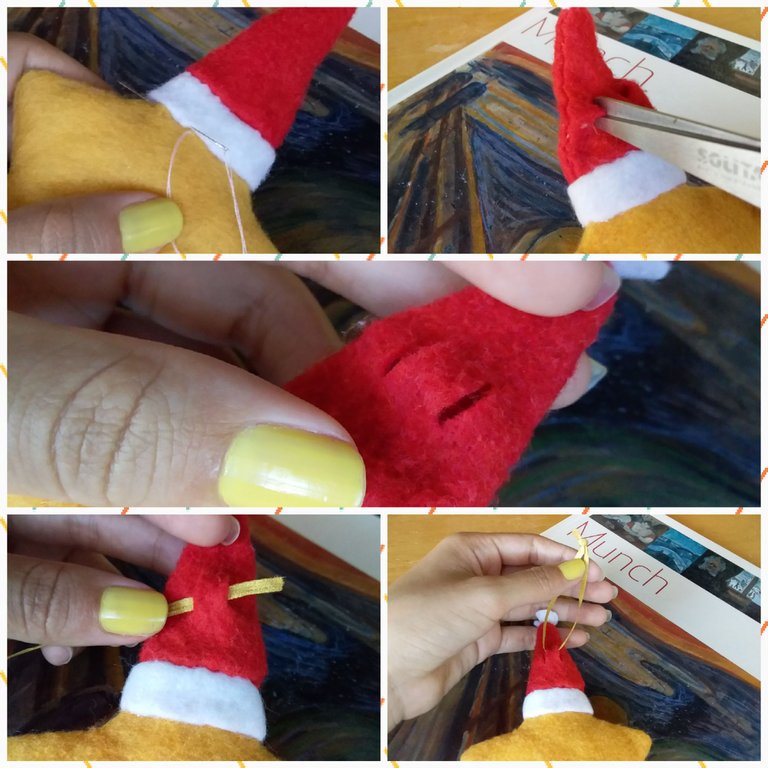
Coseremos el gorro a la estrella y le haremos dos cortes en vertical, pasamos nuestro listón por los hoyos y ataremos un nudo.
We will sew the hat to the star and make two vertical cuts, pass our ribbon through the holes and tie a knot.
Paso 5 | Step 5
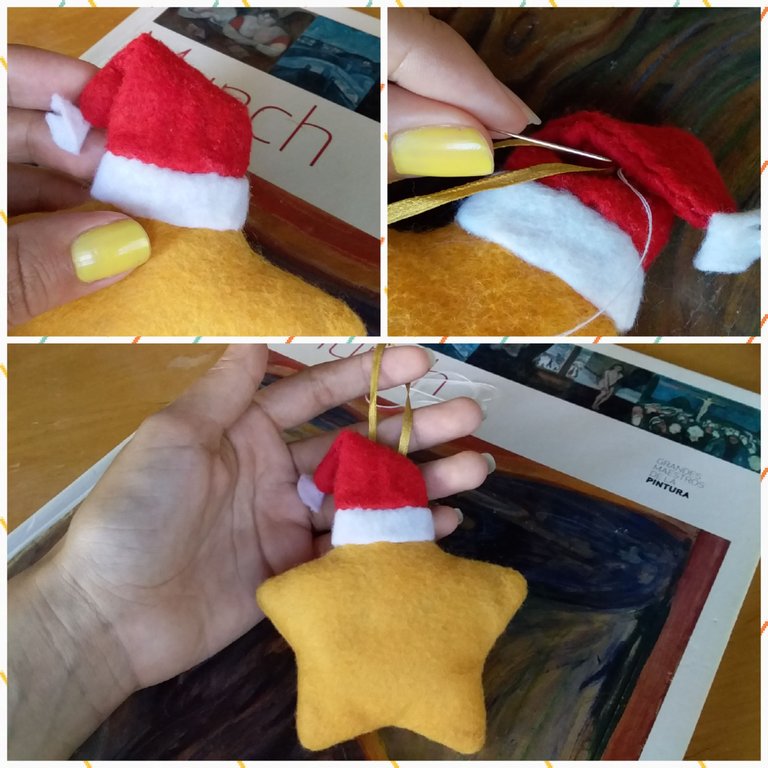
Doblaremos el gorro para cubrir los hoyos y haremos unas puntadas ocultas.
We will fold the cap to cover the holes and make a few hidden stitches.
Paso 6 | Step 6
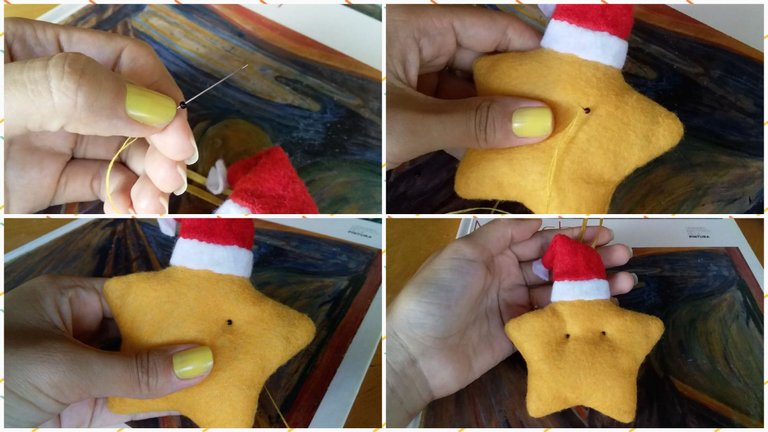
Para los ojitos usaremos los abalorios. Los ubicaremos muy bien y los coseremos atravesando la estrella para dar un efecto de profundidad.
For the eyes we will use the beads. We will place them very well and sew them through the star to give an effect of depth.
Paso 7 | Step 7
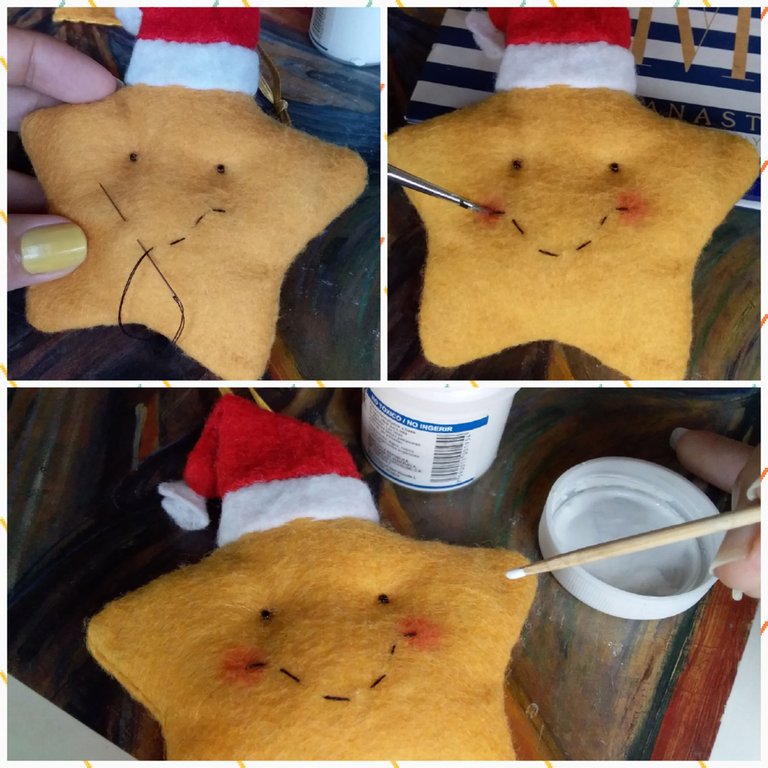
Para la boca, haremos unas puntadas superficiales y con un poco de rubor o sombra de ojos rosa, daremos color a las mejillas. Como último detalle, pintaremos unos puntitos con pintura blanca.
For the mouth, we will make some superficial stitches and with a little blush or pink eyeshadow, we will color the cheeks. As a last detail, we will paint some dots with white paint.
🌟Resultado | Result🌟
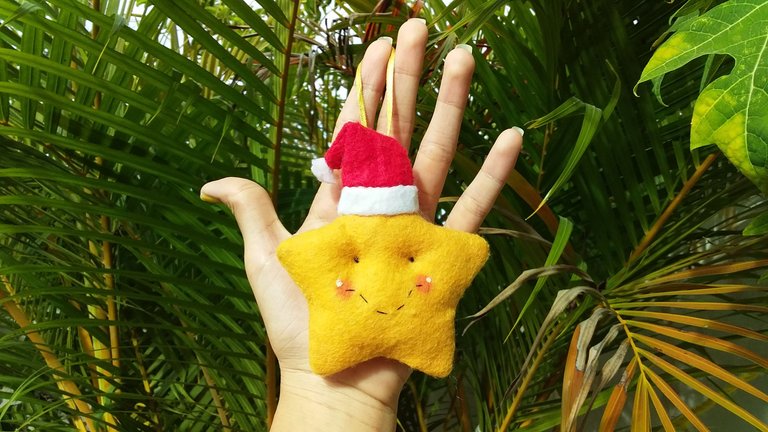
Y este es el resultado de nuestro adorno navideño, espero que les haya gustado.
Muchas gracias por leerme.
And this is the result of our Christmas ornament, I hope you liked it.
Thank you very much for reading me.
So cute , and in Hive it can be a hive star
I love the blog thank you Here a hive ball
Thank you very much🤗💖💖
Hola Pau, que lindo te quedó este adornito, es realmente muy tierno. Me gustó mucho tu post, prolijo, ordenado y fotos lindas. Te felicito ❤️-
Muchísimas gracias, me alegra que te haya gustado 💖💖💖 siempre doy mi mejor esfuerzo.💖
Great job thanks for sharing
Thank you 💖
Your welcome and thanks too for following me and have also followed you back