A couple of weeks ago, my daughter went shopping online with her father and bought two dolls. As soon as she received the package, her initial complaint was that the shoes kept falling off. To which my husband blurted out and promised to her, that I will be crocheting new shoes for her dolls. I was just glad that she was happy with the crochet doll shoes that I made for her. And so she was back to her jolly time playing with her new dolls.
Then a thought came to her mind. She said Elsa and Anna should have a ninja protecting them at all times. We went back and forth with the discussion about them not needing additional protection because Elsa already has powers. In the end, I gave in to her argument saying that it's summer and Elsa would also need some rest so a ninja would be handy.
I don't think I can argue with that so into the crochet cave I went. At this point, I have made a couple of amigurumi dolls like the Frontliner bear and Miss Dolly. These two dolls have something in common, their feet are all round-shaped. This time, I made sure the ninja doll I'll make will have a flat sole.
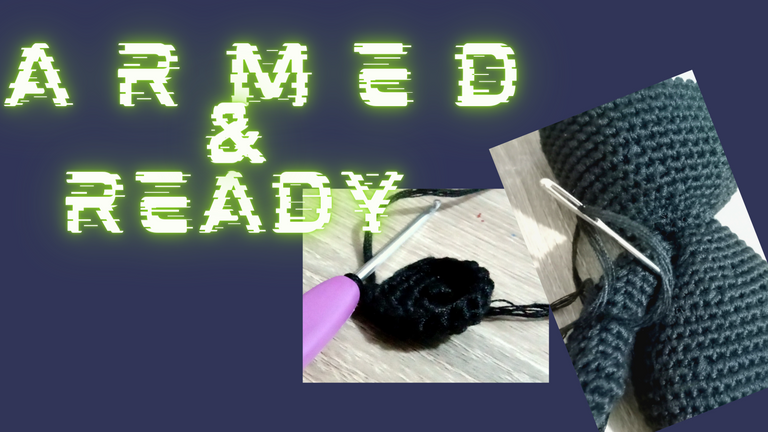
It's a good thing that I had refreshed my sole crocheting technique with the doll shoes last week. But the soles and feet and legs are not all that this amigurumi ninja has. Scroll down a little bit more and I will share with you the journey of the Ninja Amigurumi.
Notes:
You may use any stitch marker you can find. I used a yarn leftover from my old projects.
Take it to the head
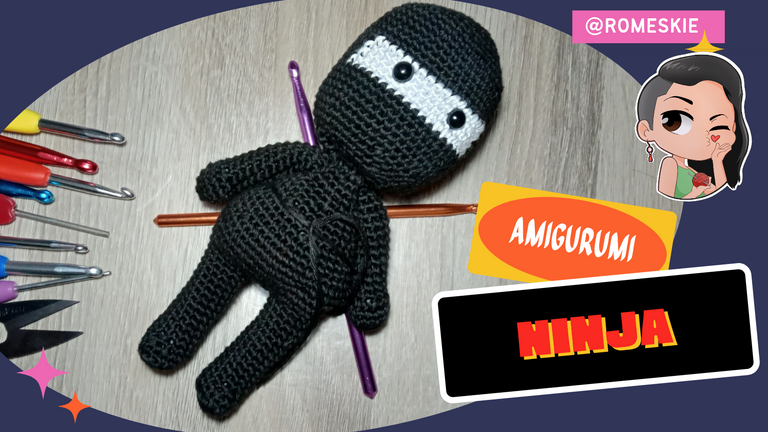
This amigurumi Ninja is 100% my own creation made from my imagination. For the first time, I did not really look for any yarnspirations online nor any patterns. I'd like to take my crocheting to the next level by trying to come up with my own pattern.
Head Pattern
Magic ring
6sc into the magic ring
(I used continuous stitching for this pattern)
Make 2 sc on the first sc you made on the last round.
(Put a stitch marker on the next stitch before making the first sc for your second round.)
Continue making 2 SCs until you reach the stitch marker.
Increase the next round by making 1 sc on the first stitch from the previous round (don't forget to put a stitch marker) and then 2 SC on the next.
Continue making the alternate 1 sc, 2sc until you reach the stitch marker you put.
Next, make 1 sc on the first stitch from the marker (don't forget to put another marker for this round) 2sc on the next stitch, then 1 sc on the next. Repeat the same process until you reach the stitch marker.
You may refer to my post about making the perfect crochet circle to make it easier to follow.
Continue doing this until you've made 9 rows of beautiful perfect crochet circle.
After the 9th round, make SCs on each stitch, making sure to put a stitch marker at the beginning of each round. Make 5 rounds of this.
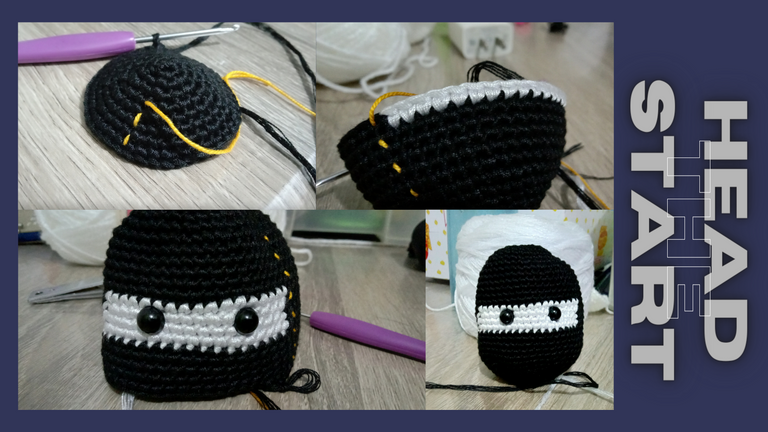
On the sixth round without increases, change yarn color (white) and sc on 16 stitches, then on the 17th, change back to black. Once again, don't forget to put a stitch marker. Make 4 rounds of this.
Stop crocheting for a bit to attach the eyes.
After 4 rounds with the white yarn, make sc on each stitch using the black yarn. Make 5 rounds of this.
Then decrease the way you increased at the start. Do not close off completely. Leave space for the fiber filling and for the neck to be attached do.
Legs
I didn't want to make it too complicated. So I based my pattern from the lesson I learned from the crochet doll shoes.
Row 1
Make 4 chains.
Using the front loops only (FLO), 3 SC on the 2nd ch from the hook, 1 sc on the next stitch.
Make 3 SCs on the next stitch using the back loop only (BLO), 2 sc on the next stitch then slip stitch on the first sc.
Row 2
Ch 1
2sc on the next 2 stitches
1 sc on the next 2 stitches
2 sc on the next 3 stitches
1 sc on the next 2 stitches
2 sc on the next stitch.
slip stitch
Row 3
1 ch
1 sc on each stitch FLO
slip stitch
Row 4
1 ch
1 sc on the next 6 stitches
SC2Tog on the next 2 stitches
sc on the next 6 stitches
Slip stitch
Row 5
1 ch
sc on the next 5 stitches
sc2tog
Row 6
1 ch
1 sc on each stitch
slip stitch
[Repeat 12 times]
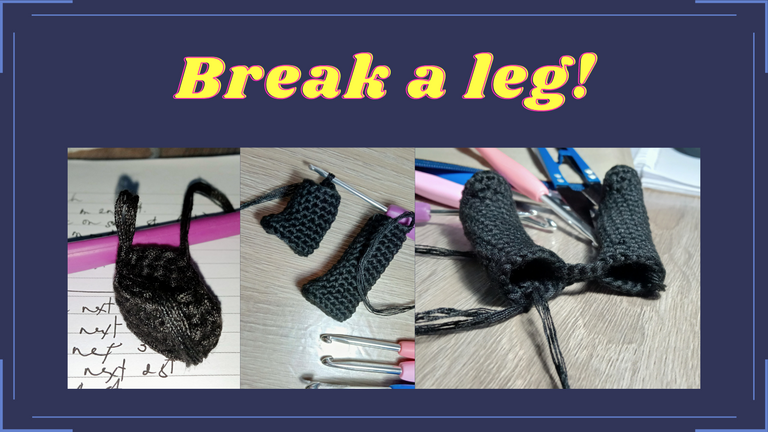
I have mentioned before how I despise making pairs because I couldn't seem to make those two little things equal and balanced. I found the secret in making pairs of anything crochet. 1. Stop at each round (or each stitch if need be) to write down the pattern to the T. 2. Make the two pieces in one go. (If at all possible.) Of course, it's easy if you have just two small pieces to complete. But if you're working on a gigantic pair of headdress maybe, or big socks, or sleeves. But well, that's how I overcome my struggle with pairs on this project.
Hips

Now that the legs are done, it's time to attach them to each other and then add the hips and the torso.
Hold 1 leg, then make 3 sc, make 2 chains, grab the other leg and make an sc on the 2nd to the last stitches then sc all over. Slip stitch to close.
Chain 1 make an increase all over by doing 2 sc, then 1 sc all over.
Chain 1, SC on all stitches.
Chain 1, SC on 9 stitches then 2 sc on the next stitch. Repeat the sc and 2sc pattern all over the round.
Next, make use of the stitch markers at the start of each round, sc on each stitch. Repeat for 2 rounds.
SC2tog, then sc on the next 9 stitches. Repeat all over the round.
SC on each stitch for the next 2 rounds.
Repeat all over for each round:
8 sc, sc2tog
sc2tog, 7 sc on each stitch
3sc, sc2tog, 3sc
sc on each stitch
5 sc, sc2tog throughout the round
sc on each stitch
sc on 2 stitches, sc2tog, sc on 2 stitches throughout the round
1sc on each stitch
3 sc, sc2tog throughout the round
1sc, sc2tog, 1sc throughout the round
Time to Fill in the Blanks
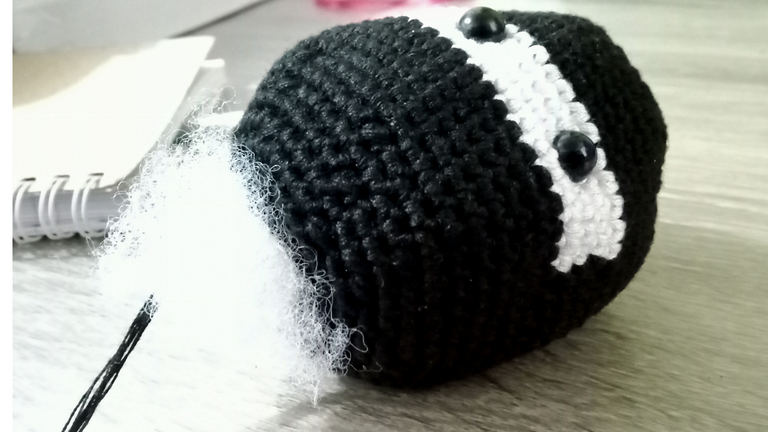
Grab your fiber fillings, and start filling up the spaces on the head, legs, and torso. Make sure to fill up as much space as you can without distorting the shapes crocheted. Too much fillings and you lose the shape, too little and the doll will look limp. I used a small crochet hook to push the fillings on hard-to-reach corners.
I added an extra on the neck and torso. I inserted a glue stick just to make sure that the torso and the quite invisible neck will be able to pull up the head.
Arms
Again, with the pairs! But this pattern is a little bit simple and less complicated. I started it with a magic circle. Then made 5SC into the MC. Increased the circle by making 2 sc on each sc I made at the start. Continued making the increase by making 1 sc, 2sc alternatingly. I was feeling a little bit of an expert at this point so I did not use any stitch markers anymore. I completed the arm by making 2 sc on each stitch, making 2 rows of this. on the last row, I made 1 sc, then sc2tog around, filled the arm with fillers, then stitched the arms closed.
After I completed the second arm, I went ahead and stitched them into the torso. The arms were a little bit too wobbly so I kinda stitched the imaginary elbow into the torso to keep them stable. Also, this way, I will avoid having my daughter accidentally pulling the arms of the amigurumi that the arms would come undone. It happened to the amigurumi front liner bear. Of course, the lesson has been learned. Never again!
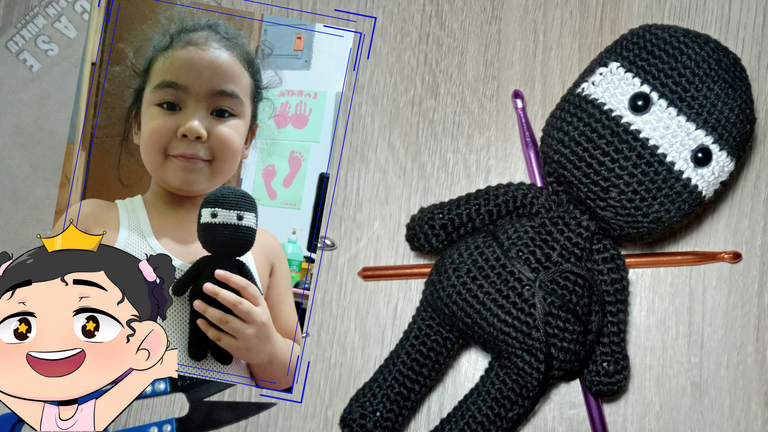
I haven't done a commissioned work in a while, but so far, my one and only client have been giving me so many hugs and kisses as payment for my hard work. I learned new things about crocheting, I get to challenge myself into making new patterns, and I get paid with hugs and kisses. I think this is more than any mom crocheters could ever wish for. Judging by the way she's been having fun with her new dolls and her mysterious amigurumi Ninja, whom we haven't agreed if it's a boy or a girl, she really does love it. She actually has another request which is once again, keeping me busy.


@romeskie is a full-time stay-at-home mom to a homeschooling toddler. Loves crocheting as a hobby. Maintains a mini food forest, aiming to grow more to achieve that farm-to-table homesteading. Learned how to cook after leaving the corporate world to take care of her family and is now starting to acquire basic baking skills. Learn more about her adventures and misadventures in the world of motherhood.
Connect with her through her Facebook Page: The Leftie Crocheter and on Instagram. Feel free to subscribe to her Youtube Channel: The Leftie Crocheter
Nice one. I don't understand the the technical aspects of it but had fun reading your story. Your kiddo is smart! 😁😁😁
!LUV
!PIZZA
@romeskie! I sent you a slice of $PIZZA on behalf of @juanvegetarian.
Learn more about $PIZZA Token at hive.pizza (1/10)
So cute... Looks amazing... loving the crochet hook behind!!
Thank you for share!
Thank you. I was looking for some sort of weapon for the ninja, why not the crochet hooks. Haha
Ang galing naman. Ayan na, may ninja doll na si aya. :)
Haha. Thanks. May nakapila na ulit siyang "order".
Ito ba yong sa fb madam? Lupit ah,
Oo. Yan nga yun. Hehe
I love girls' imaginations to believe that their favorite characters need extra help. It is good that your daughter has a mother who can help her fulfill her wish ❤️.
Thanks. She does have a hyperactive imagination it's sometimes hard to keep up. But well, I guess that's who I am now, a genie who grants the wishes of this little human.
Oh my gosh this is the cutest! I chuckled at her argument about it being Summer, how cute was that!
I am so proud and amazed at how you did this solely on your own with your own imagination! Awesome work mama! I love the crochet hooks you added as the ninjas weapons. Really nice work @romeskie!
You are an inspiration ~ ❤️
Haha. Thanks. Her father was amused when I told him how his daughter convinced me into making another amigurumi.
Midway through the project, I realized I was writing down my own pattern in my notebook, I felt so inspired to finish the ami right away. I guess all the encouragement I get here in the community helped build my confidence.
Yes, that was the highlight of my night reading that. My 11 year old daughter is always coming up with ways to get her way and convince me of things so I resonated with it lol!
I’m so glad you moved forward with it. Keep it up you’re doing great :D
Beautiful ninja, I don't know how to knit but I would be encouraged to make one, congratulations!
Glad to see you're getting inspired. You can also show us your knitting journey, it feels good to hear feedback and words of encouragement from the ladies over here in @needleworkmonday.
Hello, I had a lot of fun reading your post.
Your amigurumi Ninja is super.
I felt very identified with you with respect to the patterns, I had to weave an extraterestre designed by my son, you can imagine, I should have followed his drawing and made him three eyes and everything 🙈, I remember his name was Robert and it is green. He is old now but he still has it.
I also dislike knitting even things a bit since I can't get them to fit exactly the same.
How beautiful and happy your little daughter is with her new guardian.
Greetings and blessings.
(sorry for the long text 🙈)
No worries, I love reading comments and thank you so much for dropping by.
Ahh the things we do for our kids. I sure she keeps this ninja too, along with her crocheted bear and princess.
Very cute ninja, i love it, good job @romeskie <3
Aww. This means a lot to me coming from you. I have followed and admired all of your amigurumis. Thank you so much! 🥰
Ang cute niya tapos handmade pa ni Mommy
Haha. Thanks. Dami nya na tuoy bagong toys.
I think I love your daughter <3 Not only has she a wonderful imagination, can make a convincing argument, no she also wants to protect her dolls and who better to create such a protector than you. YOur mysterious ninja with the crossed hooks on its back is such a good idea, it has the right amount of fierceness but simultaneously looks cute. I can see a big family of ninjas in the future: such a lovely pattern <3 <3
Thank you. I loved the process of making it, including the occasional inquiry from her asking if the ninja is ready. And by occasional I meant every three minutes or so. Lol
@romeskie, you were given LUV from @juanvegetarian. About LUV: https://peakd.com/@luvshares http://ipfs.io/ipfs/QmUptF5k64xBvsQ9B6MjZo1dc2JwvXTWjWJAnyMCtWZxqM
Congratulations @romeskie! You have completed the following achievement on the Hive blockchain and have been rewarded with new badge(s) :
Your next target is to reach 47000 upvotes.
You can view your badges on your board and compare yourself to others in the Ranking
If you no longer want to receive notifications, reply to this comment with the word
STOP