 Saludos para todos, Dios los bendiga, una vez más feliz de compartir con todos ustedes, esta vez realicé una linda y elegante bandana, para los que no saben que es, es un accesorio que se utiliza alrededor del cuello para dar un toque de elegancia, es muy fácil de hacer, veamos los pasos a seguir.
Greetings to all, God bless you, once again happy to share with all of you, this time I made a nice and elegant bandana, for those who do not know what it is, it is an accessory that is used around the neck to give a touch of elegance, it is very easy to do, let's see the steps to follow.
.jpg)
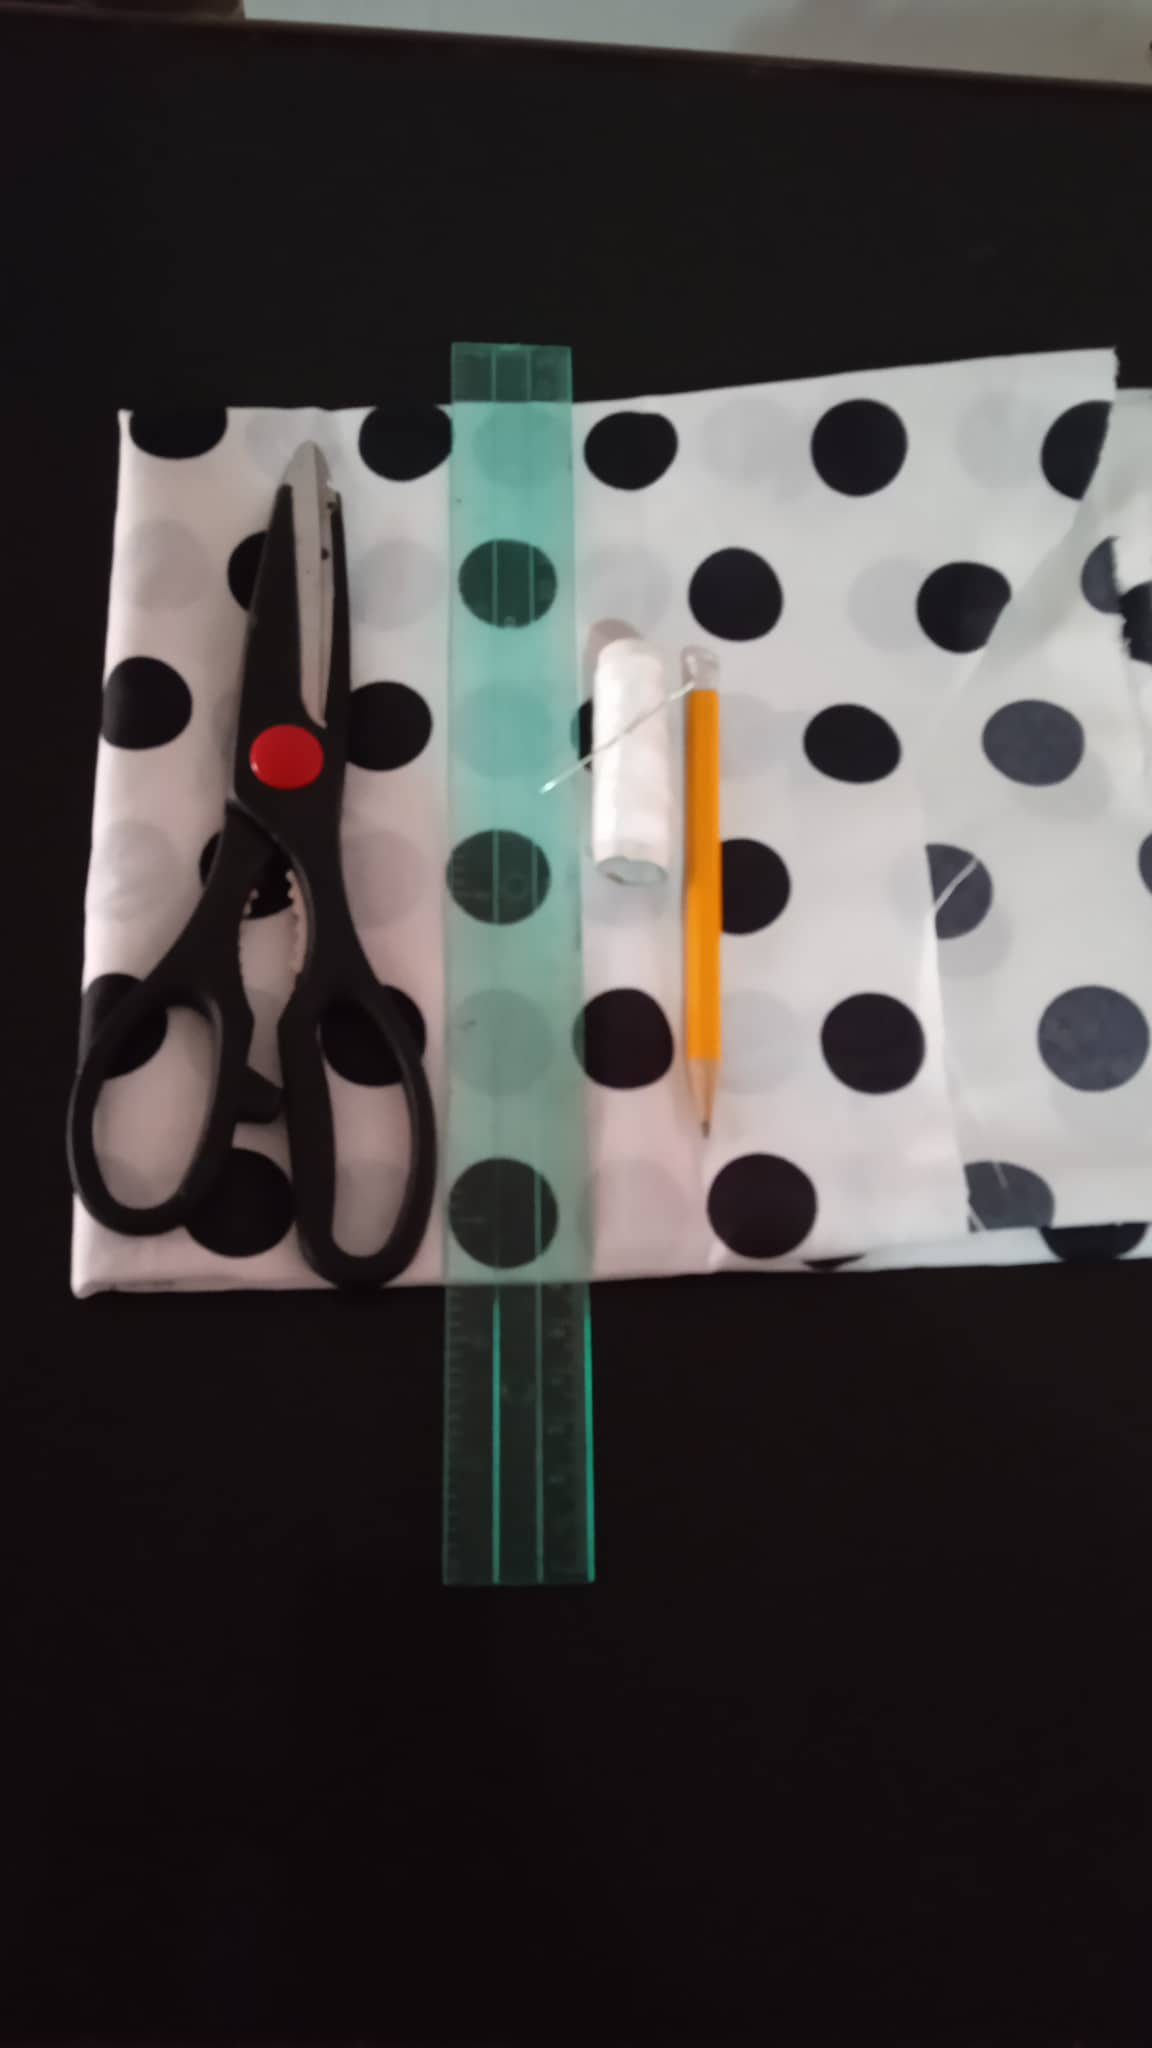
- Los materiales a utilizar son:
- Tela de cualquier color, si es de seda mucho mejor.
- Tijera.
- Hilo y aguja de coser.
- Regla o cinta métrica.
- Lápiz
- The materials to be used are:
- Fabric of any color, if it is silk much better.
- Scissors.
- Thread and sewing needle.
- Ruler or tape measure.
- Pencil
.jpg)
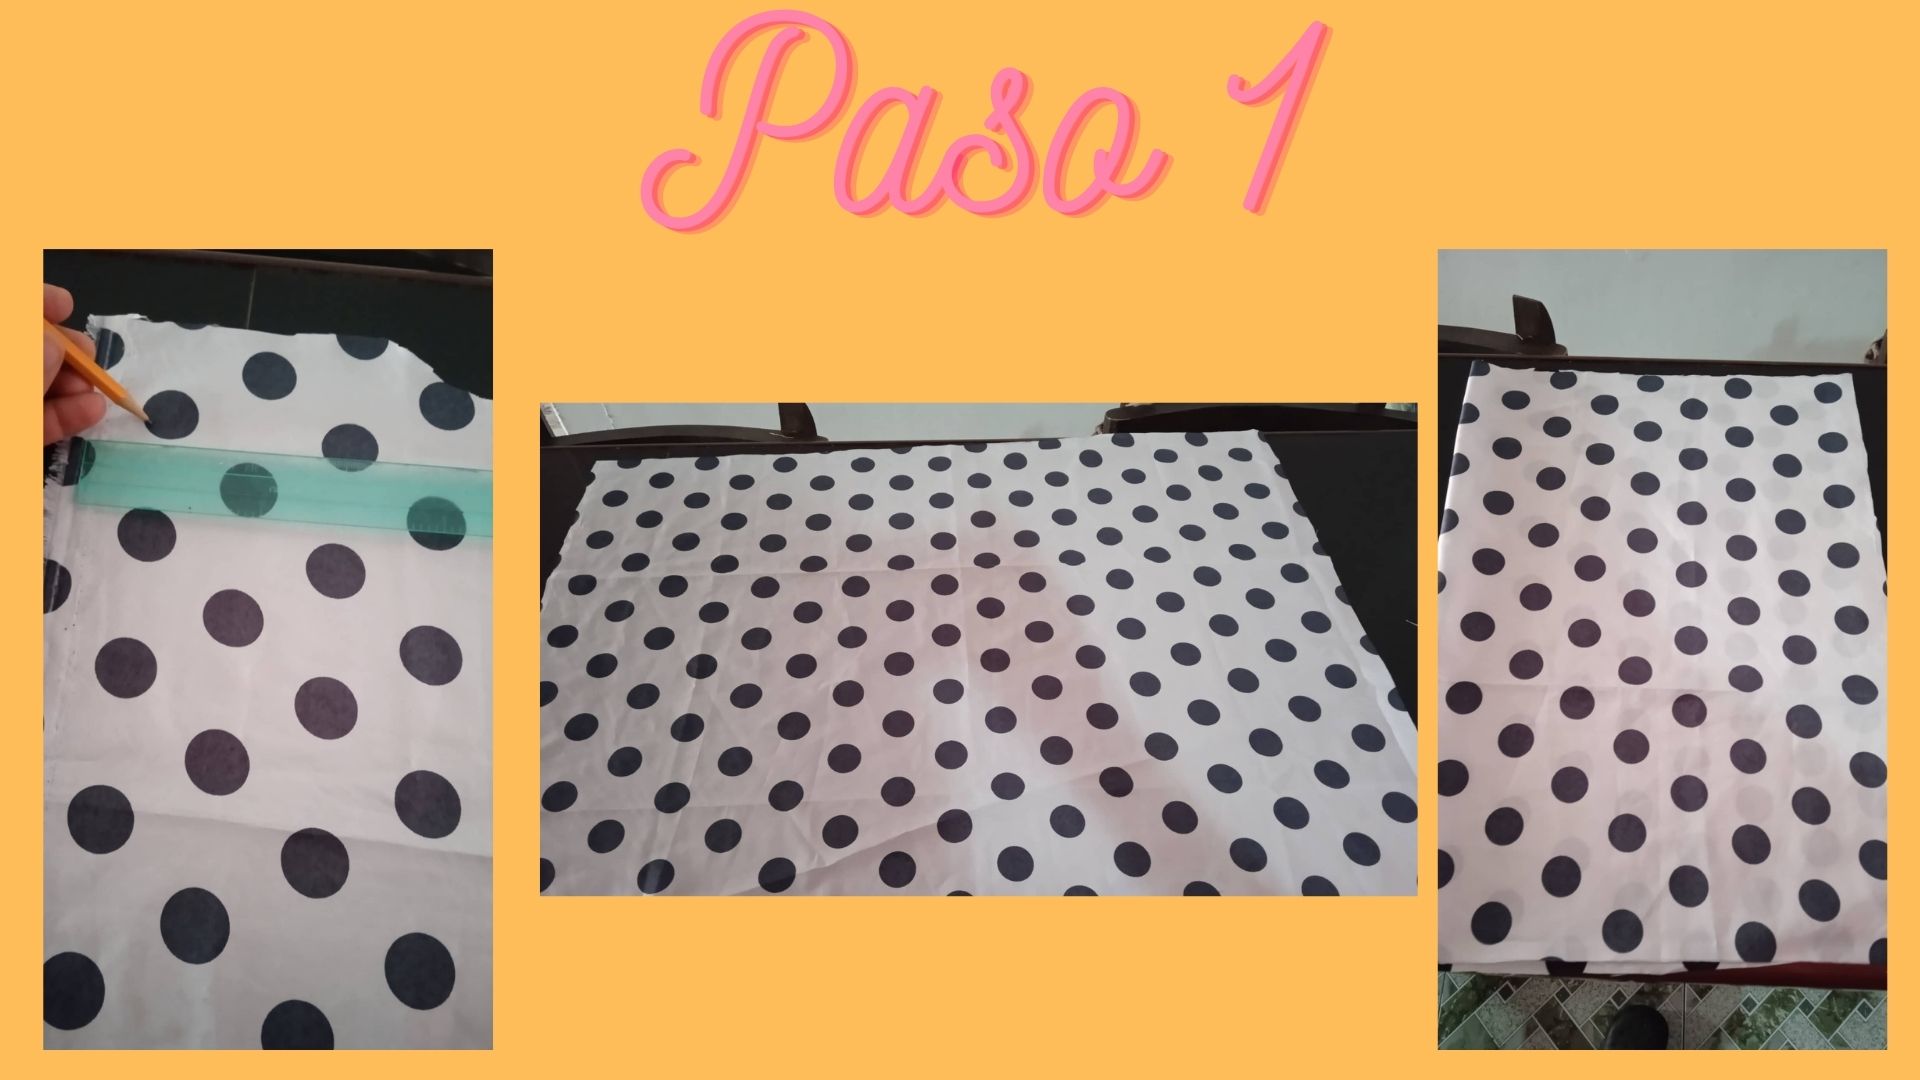
- Paso 1: Primero marcamos un rectángulo sobre la tela con unas medidas de 70 cm de largo por 52 cm de ancho luego recortamos, una vez recortada doblamos la tela a la mitad.
- Step 1: First we mark a rectangle on the fabric with measures of 70 cm long by 52 cm wide then we cut, once cut we fold the fabric in half.
.jpg)
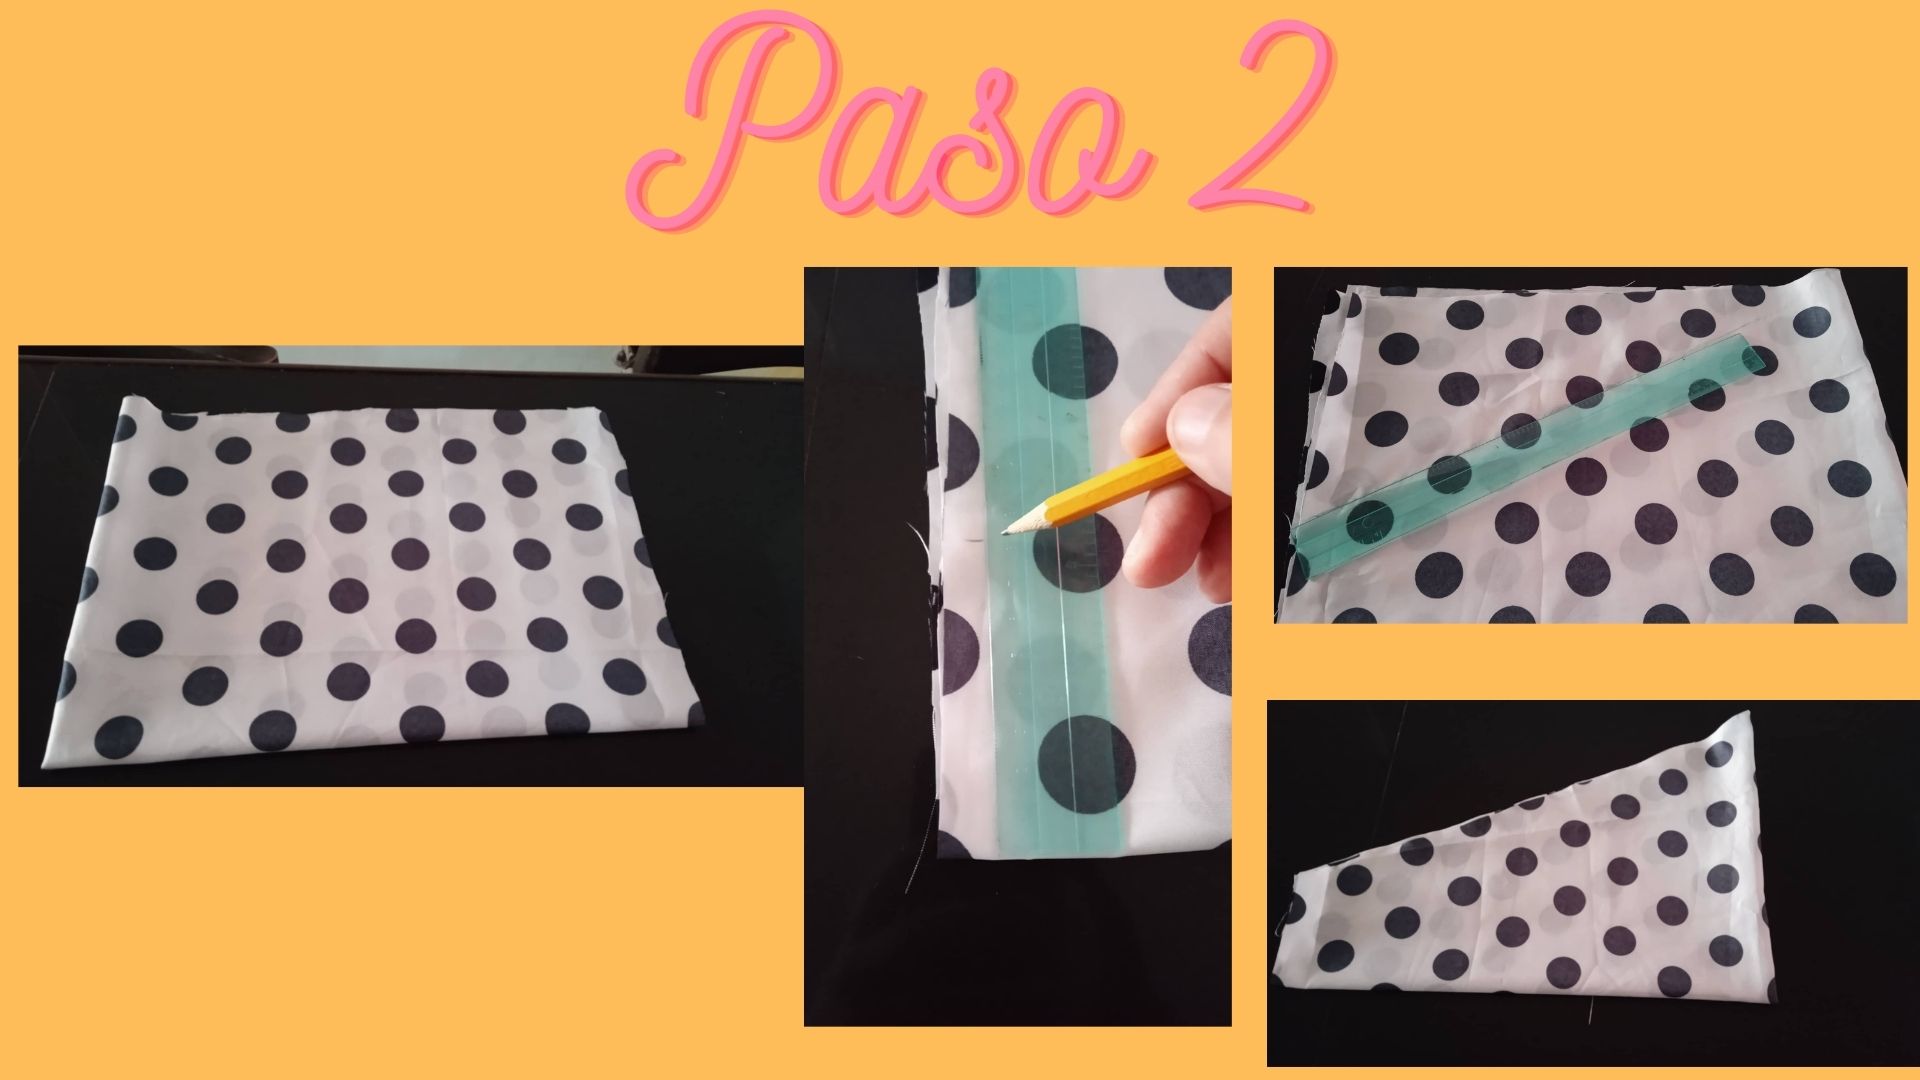
- Paso 2: Luego de doblar a la mitad, volvemos a doblar a la mitad y en la parte que no tiene doblec marcamos 8 cm hacía arriba luego hacemos una linea vertical desde la marca de los 8 cm hasta la parte de arriba de la tela, justo en toda la esquina y posteriormente recortamos, deberá quedar como muestra la cuarta imágen.
- Step 2: After folding in half, we fold again in half and in the part that has no fold we mark 8 cm upwards then we make a vertical line from the mark of 8 cm to the top of the fabric, right in the corner and then cut, it should be as shown in the fourth image.
.jpg)
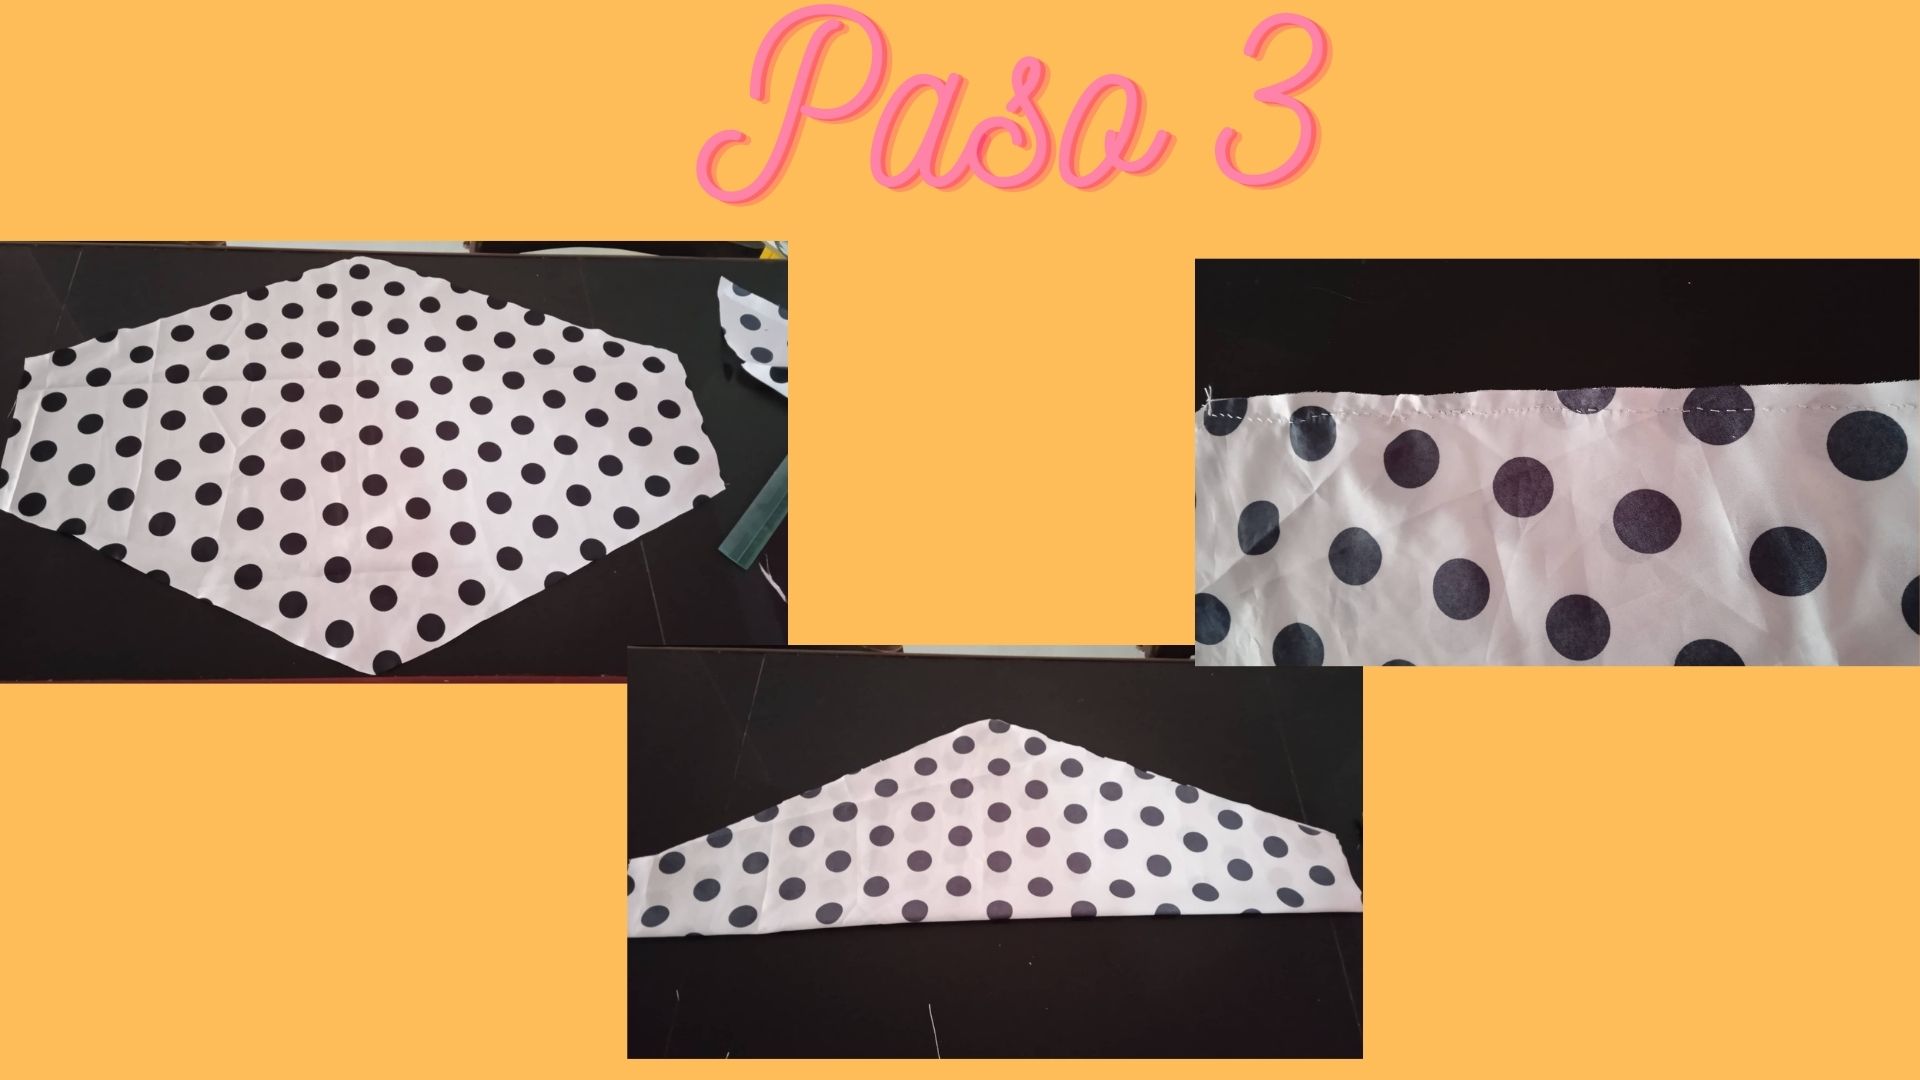
- Paso 3: Luego de haber recortado la tela, la abrimos y la colocamos derecho con derecho, y procedemos a coser por toda la orilla, menos los extremos de cada lado.
- Step 3: After cutting out the fabric, we open it and place it right sides together, and proceed to sew all around the edge, except for the ends of each side.
.jpg)
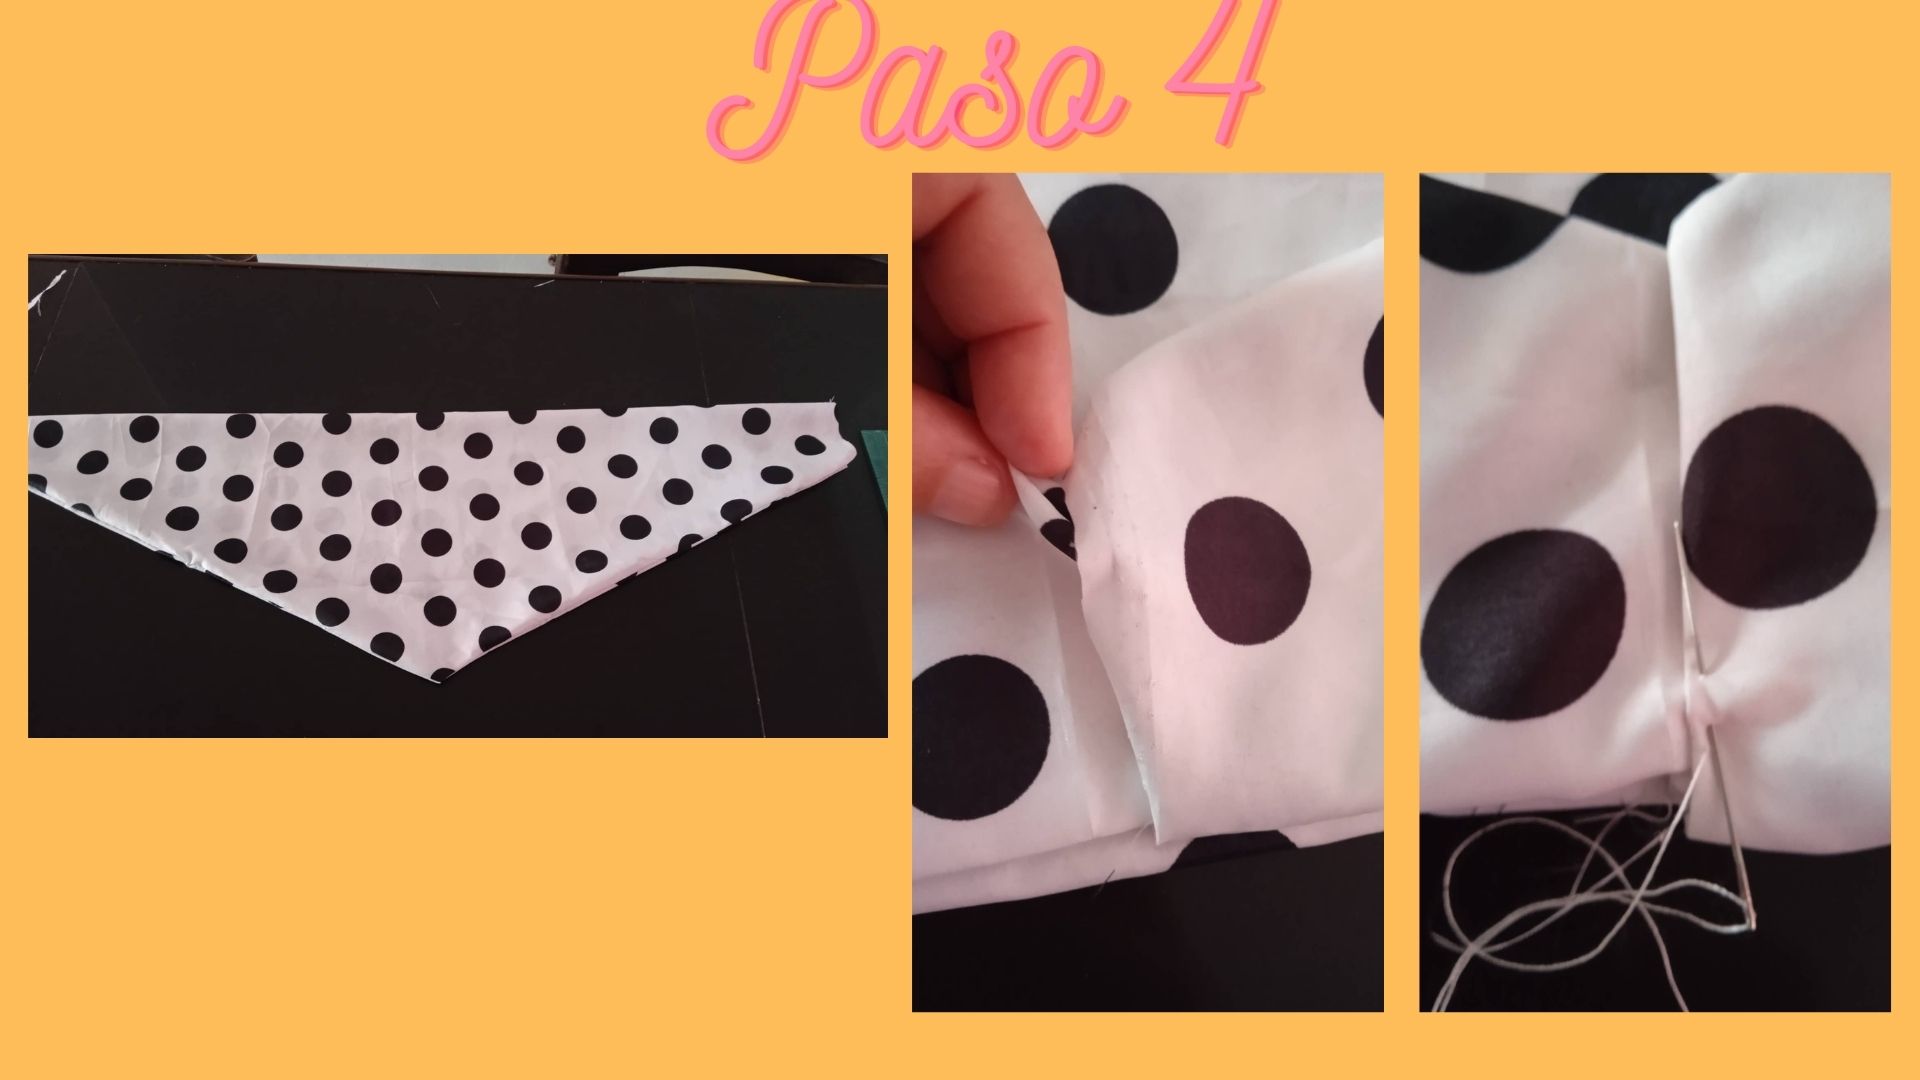
- Paso 4: Luego de coser por toda la orilla, volteamos del lado derecho, y agarramos uno de los extremos, doblamos 1 cm hacía adentro y el otro extremo lo introducimos dentro y luego cosemos.
- Step 4: After sewing all around the edge, turn right side out, take one of the ends, fold 1 cm inwards and insert the other end inside and then sew.
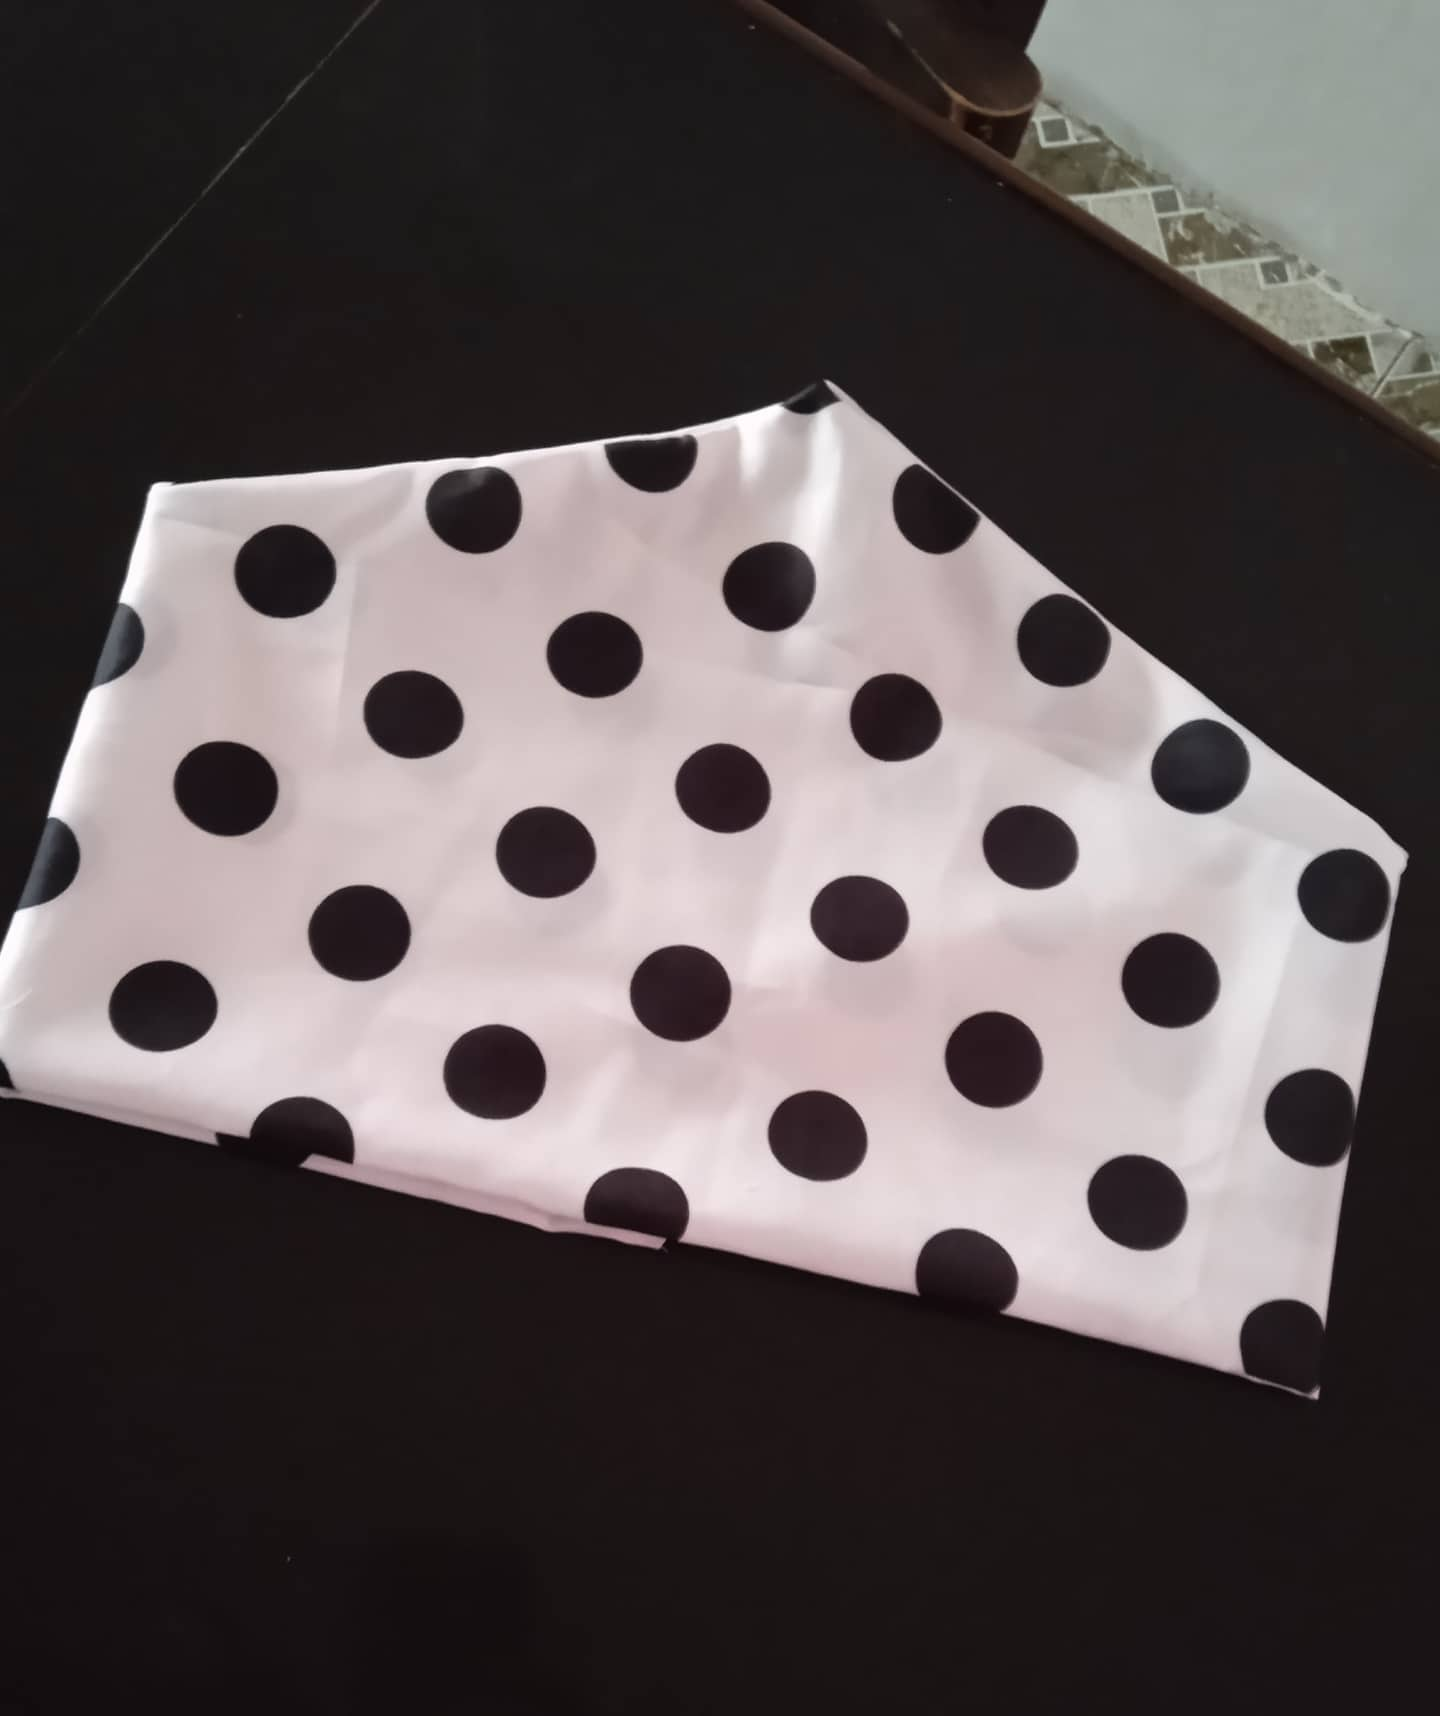
Aqui tenemos nuestro resultado final.
Here we have our final result.


 Todas las fotos son de mi autoría, y editadas desde canva.
All photos are of my authorship, and edited from canva.
Todas las fotos son de mi autoría, y editadas desde canva.
All photos are of my authorship, and edited from canva.

Thank you for your witness vote!
Have a !BEER on me!
To Opt-Out of my witness beer program just comment STOP below
View or trade
BEER.Hey @yannet80, here is a little bit of
BEERfrom @isnochys for you. Enjoy it!Do you want to win SOME BEER together with your friends and draw the
BEERKING.Thank you for sharing this simple but very elegant tutorial
Thanks to you for commenting
This is really beautiful @yannet80 really lovely thank for sharing @yannet80
My dear friend thank you very much for visiting my post, hugs and kisses for you.
Thank you for sharing this amazing post on HIVE!
Your content got selected by our fellow curator @rezoanulvibes & you just received a little thank you via an upvote from our non-profit curation initiative!
You will be featured in one of our recurring curation compilations and on our pinterest boards! Both are aiming to offer you a stage to widen your audience within and outside of the DIY scene of hive.
Join the official DIYHub community on HIVE and show us more of your amazing work and feel free to connect with us and other DIYers via our discord server: https://discord.gg/mY5uCfQ !
If you want to support our goal to motivate other DIY/art/music/homesteading/... creators just delegate to us and earn 100% of your curation rewards!
Stay creative & hive on!
Thank you for your support