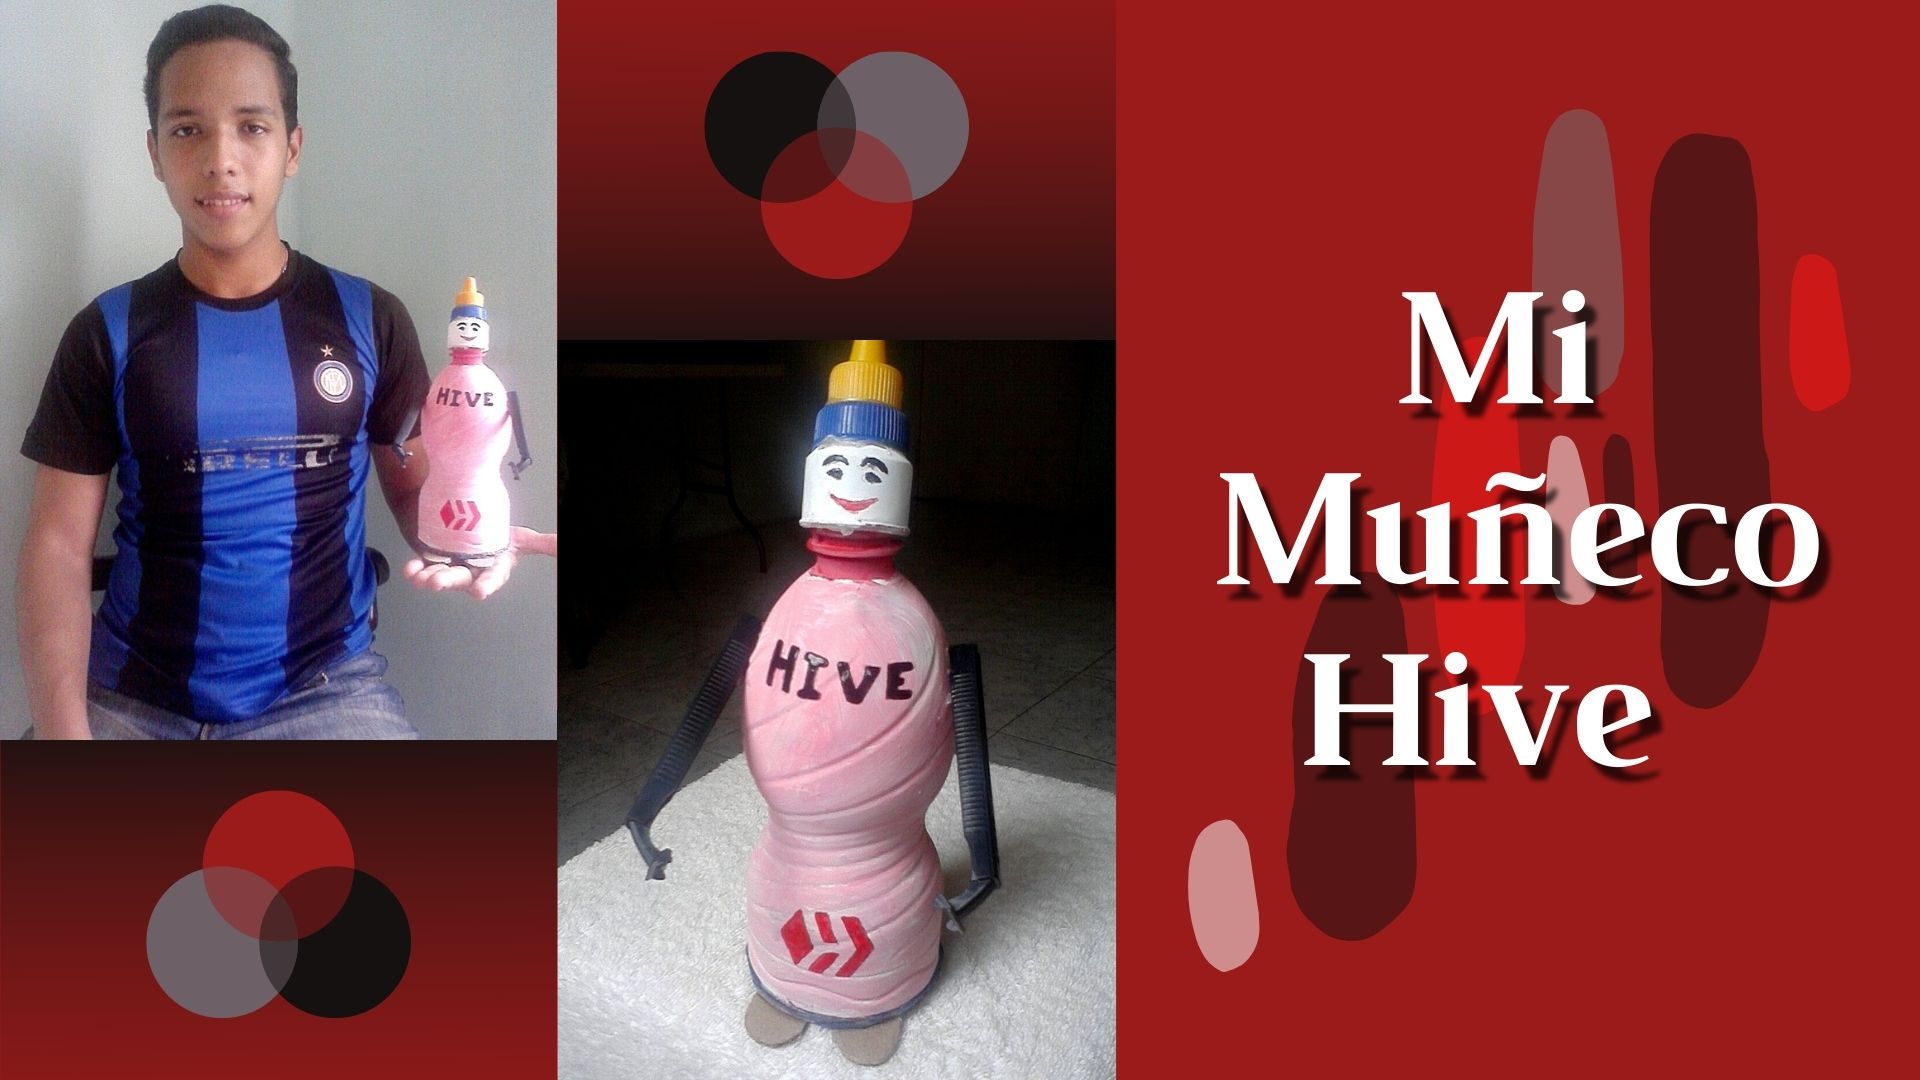
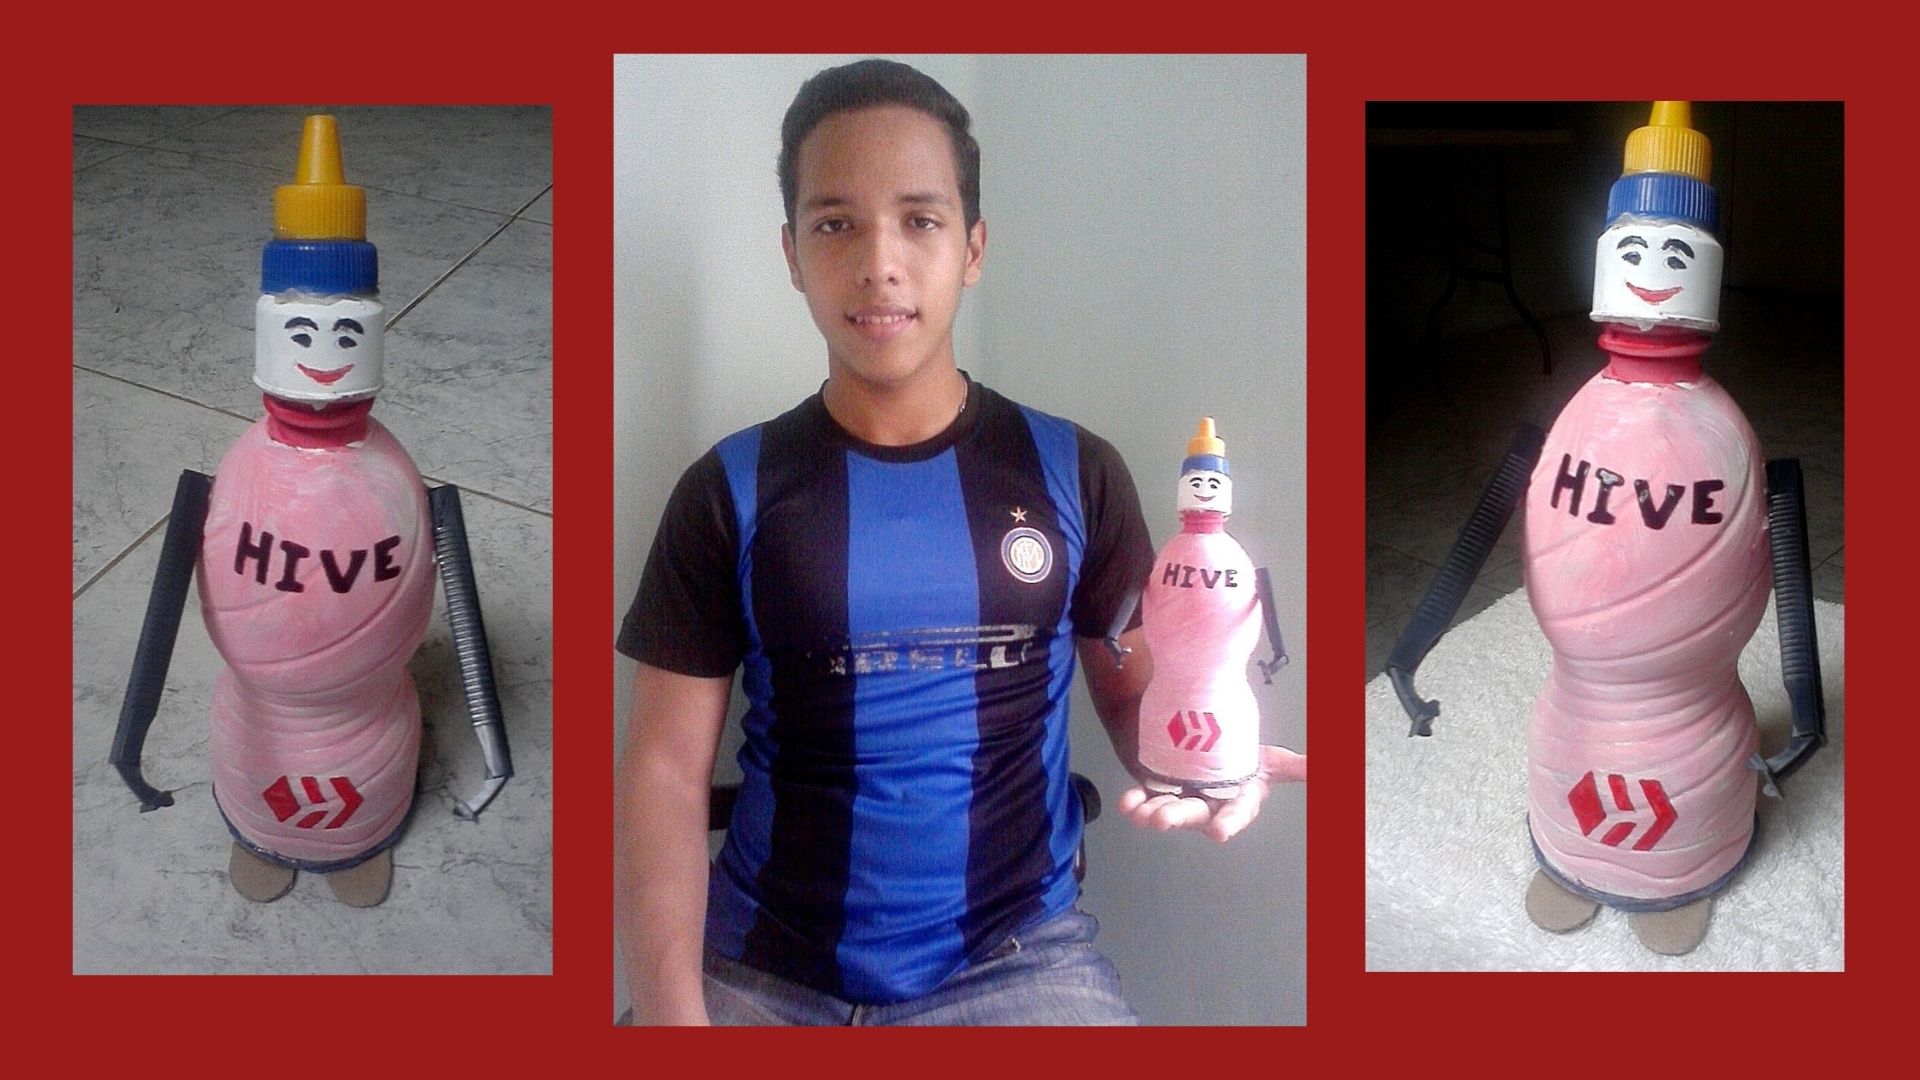
Hello family, today I present you my Hive doll, made from recycled material. It was a great idea to build this doll with plastic materials, because I learned that plastic containers can be reused to make different toys. There are no limits to our imagination and creativity.
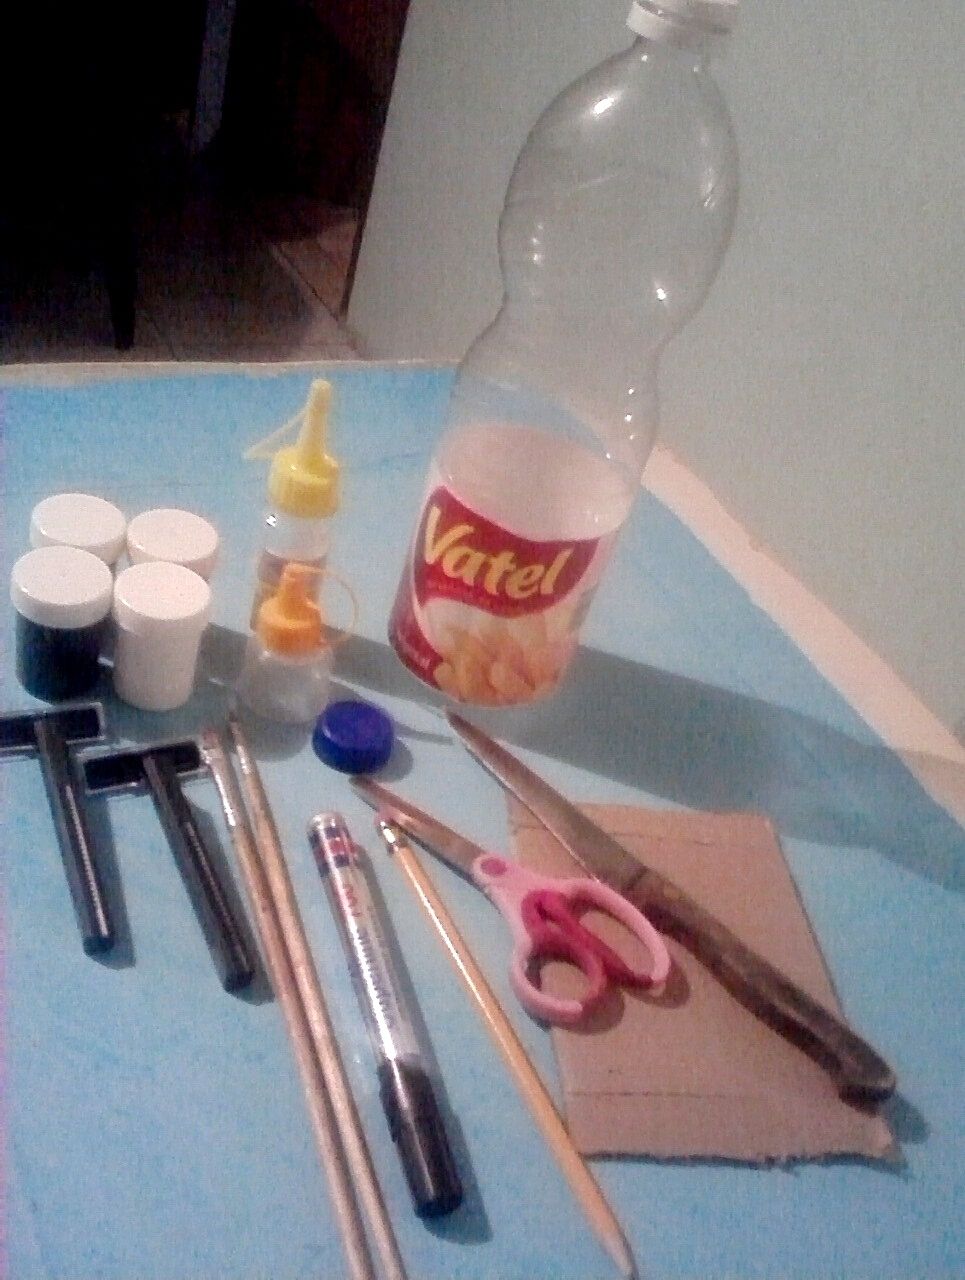
Materiales:
- 1 frasco plástico de aceite .
- 2 maquinas de afeitar desechable.
- 3 tapas de diferentes modelos, ( 1 para la cabeza y las otras para el gorro ).
- Cartón.
- Silicona.
- Pintura.
- Lápiz.
- Pincel.
- Tijera.
- Cuchillo.
- Marcador.
Materials:
- 1 plastic bottle of oil .
- 2 disposable razors .
- 3 caps of different models, ( 1 for the head and the others for the cap ).
- Cardboard.
- Silicone.
- Paint.
- Pencil.
- Paintbrush.
- Scissors.
- Knife.
- Marker.

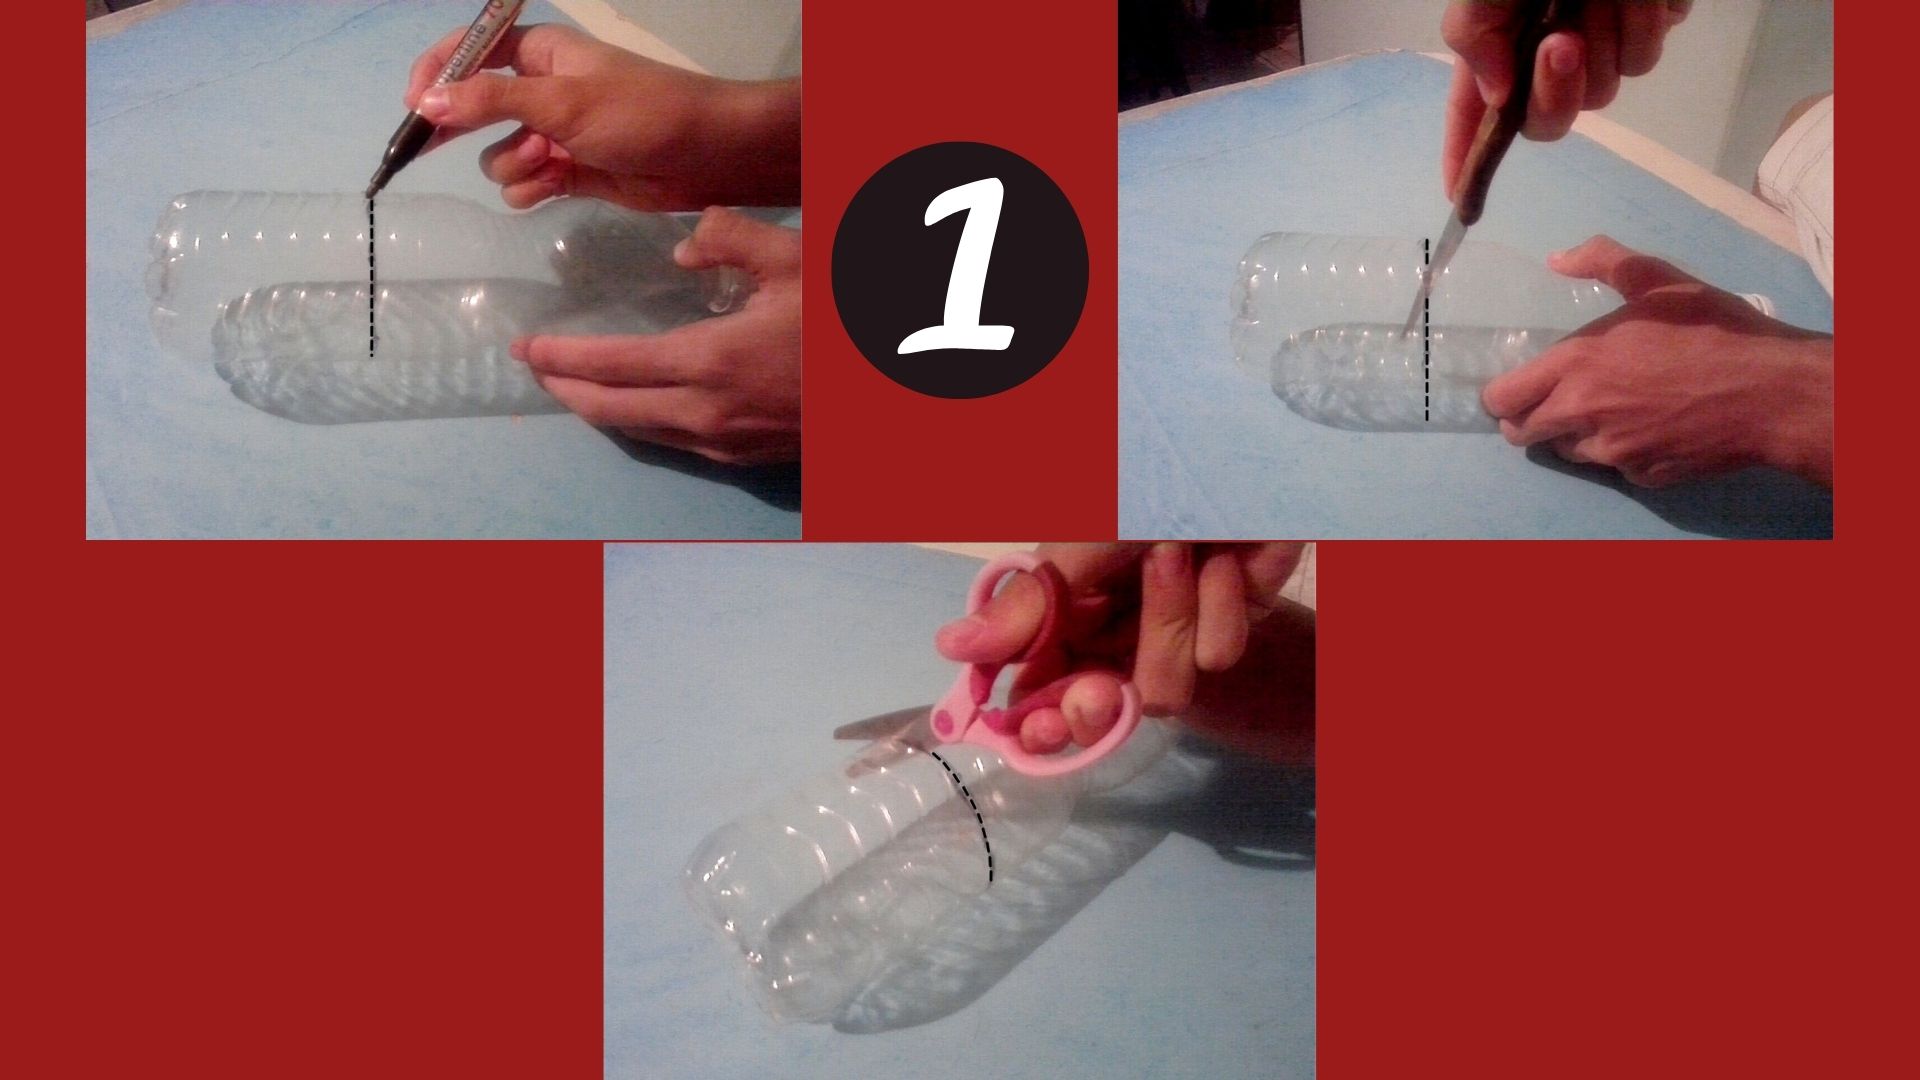
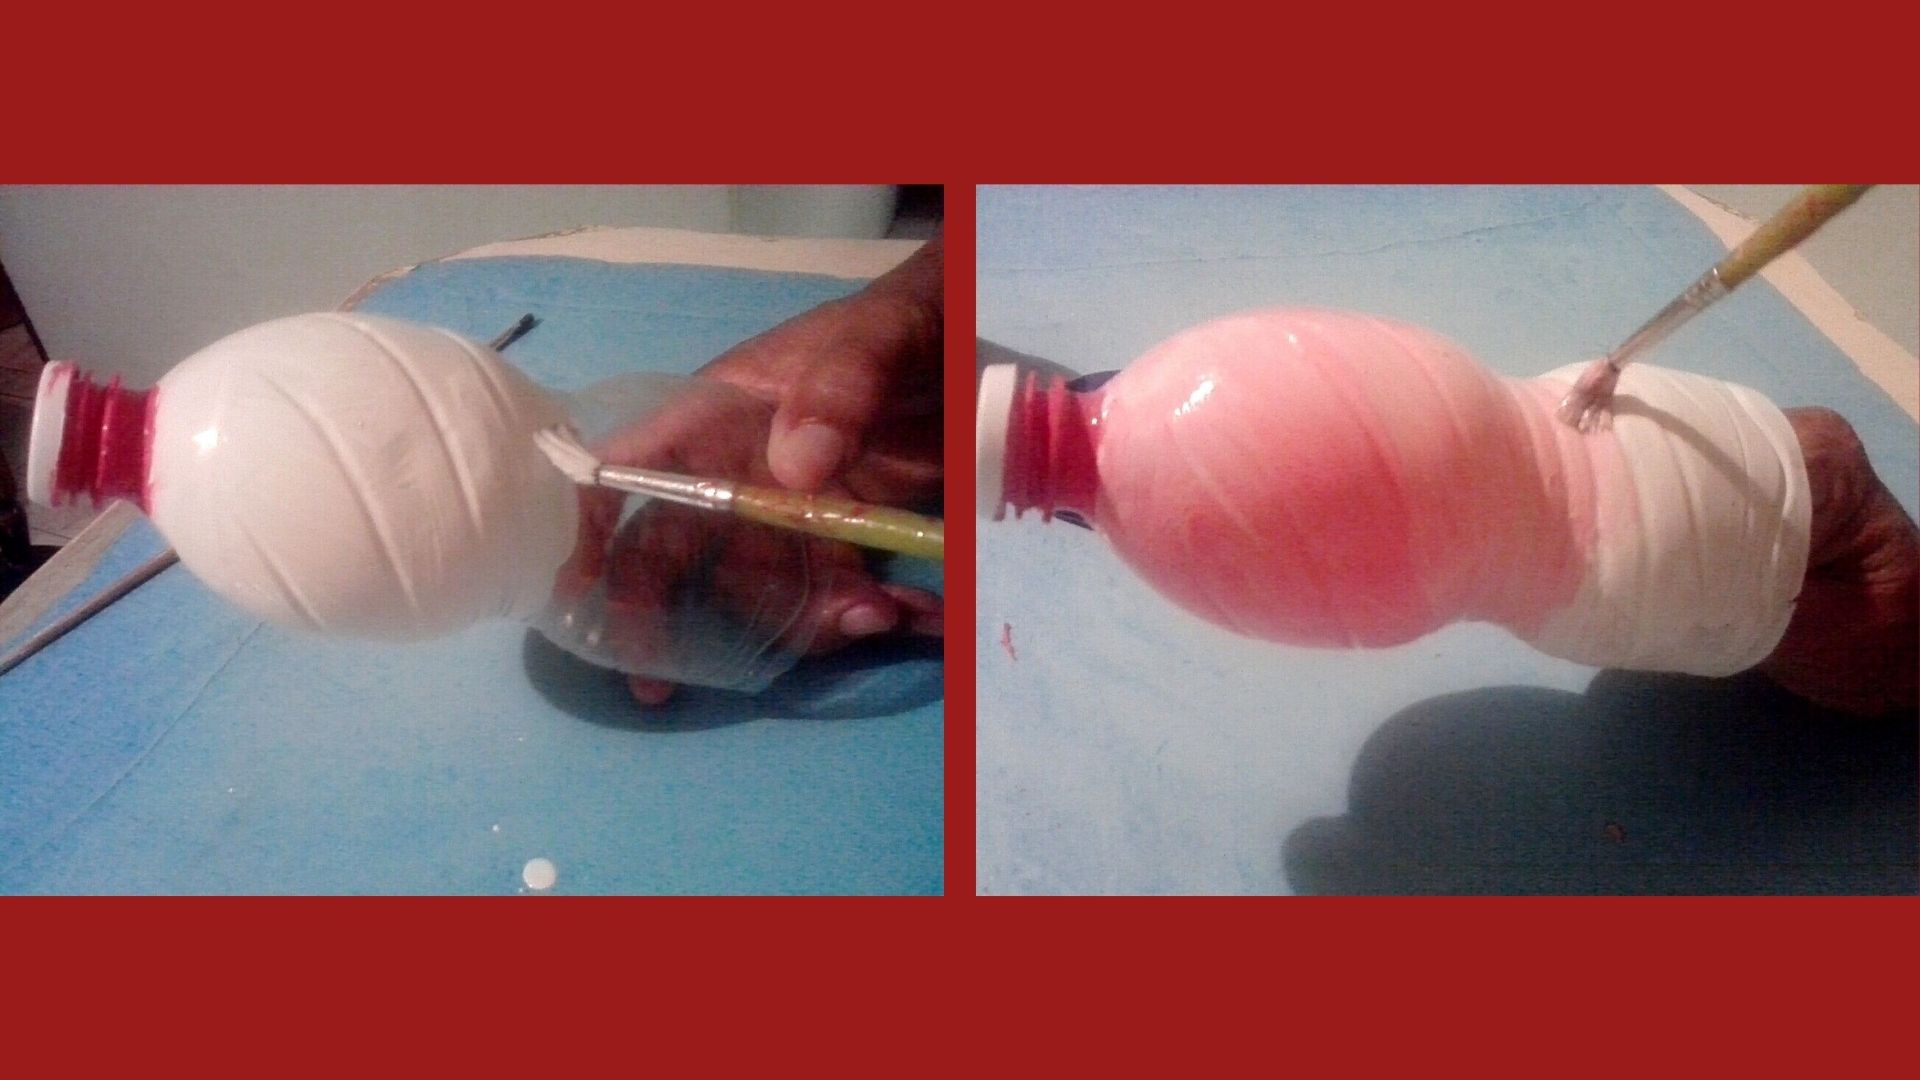
Paso 1:
Marcar y cortar el frasco a la altura de tu preferencia, (Se perfora primero con el cuchillo y luego se corta con la tijera).
Después se colorea.
Step 1:
- Mark and cut the jar to the height of your preference, (It is pierced first with the knife and then cut with the scissors).
- Then color it.
.jpg)
.jpg)
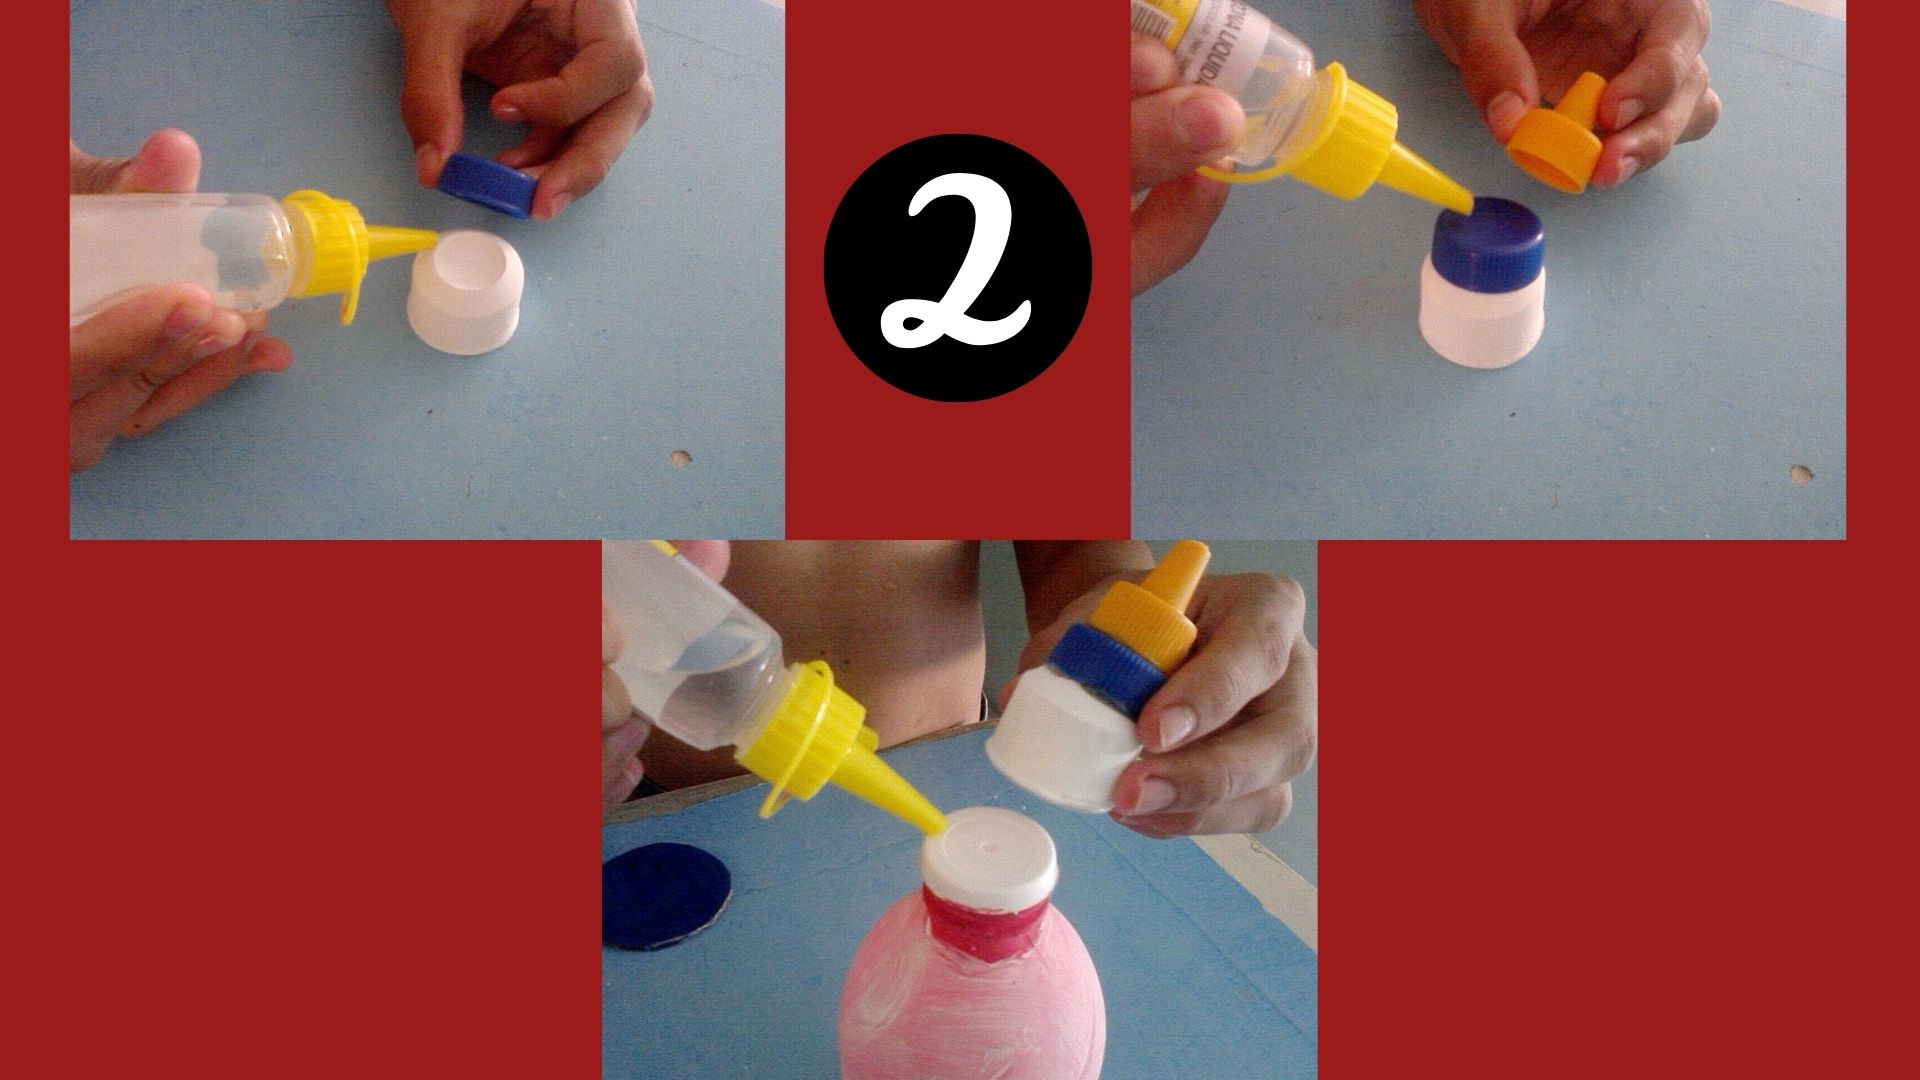
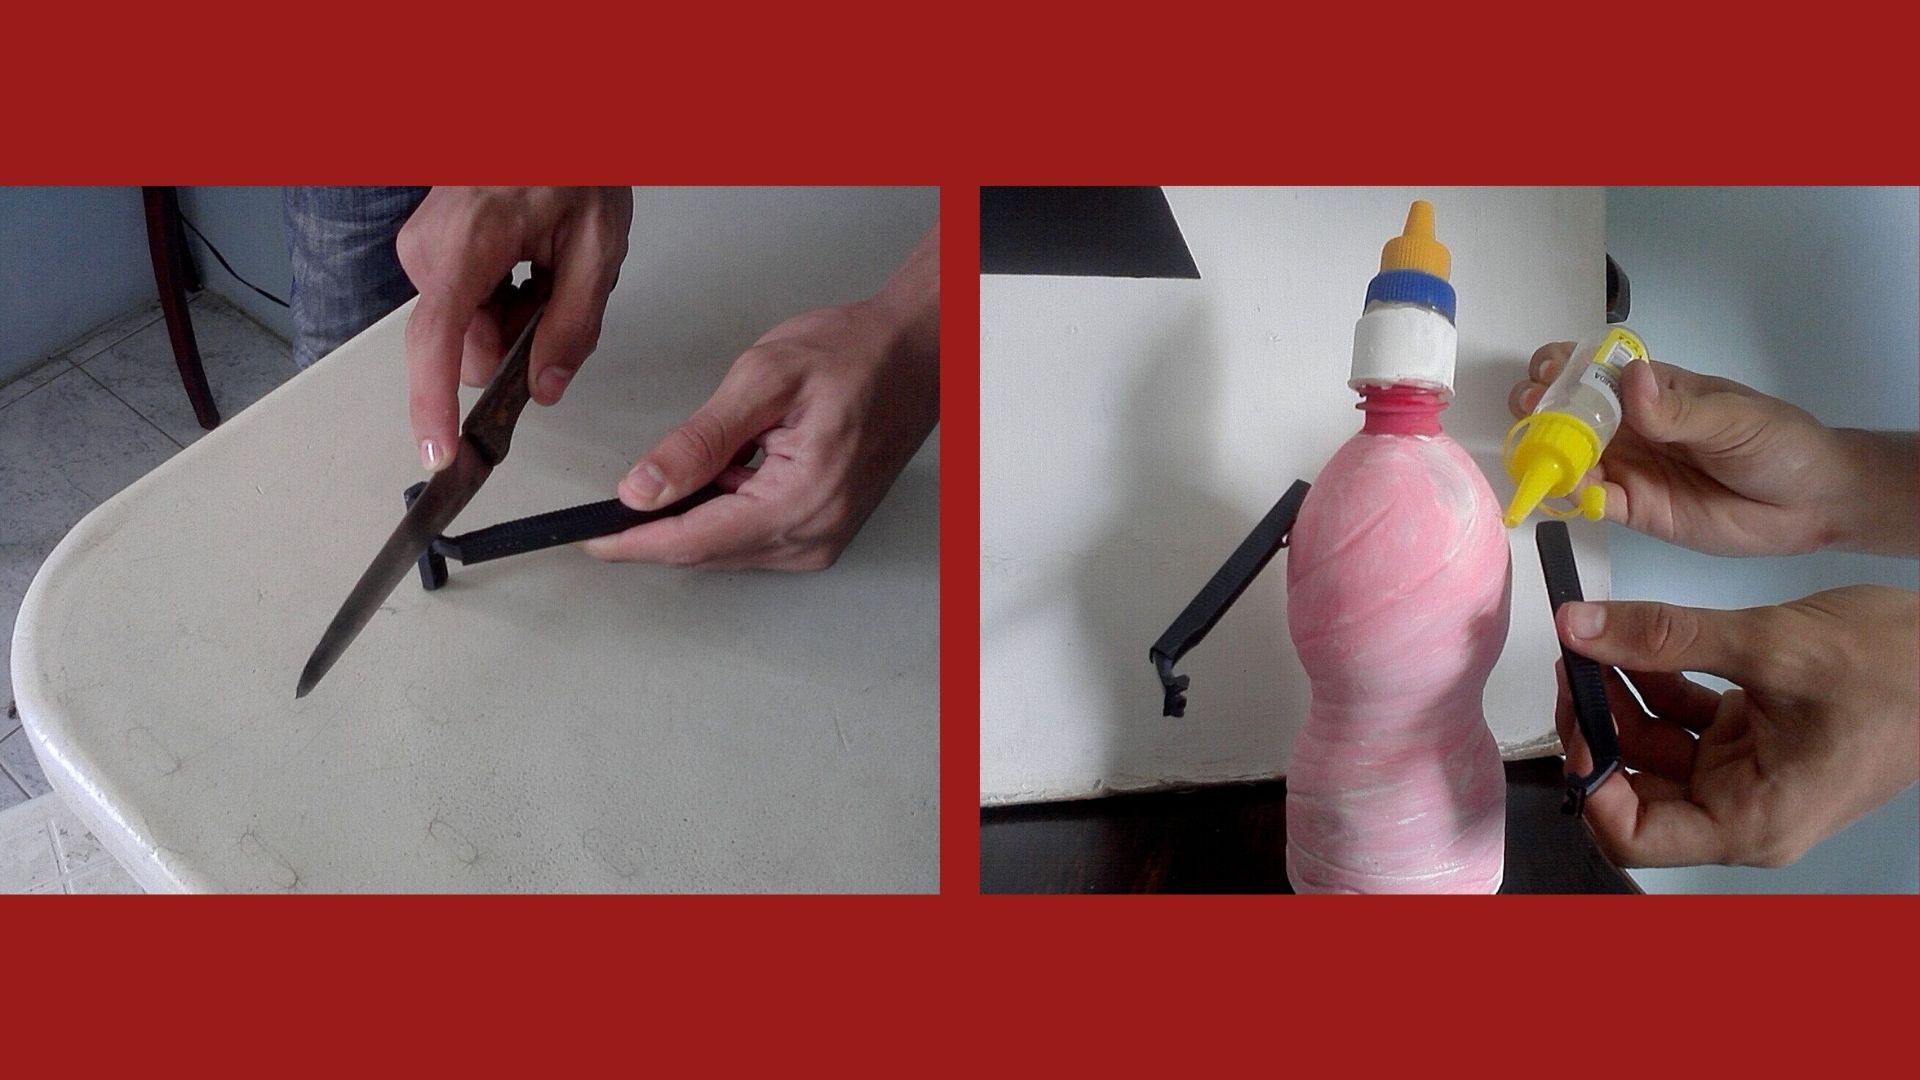
Paso 2:
Se pegan las tapas 1 encima de la otra para ser pegadas en el frasco, así construyo la cabeza del muñeco.
Después se le despega la parte donde están las hojillas a la maquina de afeitar, y se pegan a los laterales del frasco, que vendrían siendo los brazos.
Step 2:
- Glue the lids 1 on top of each other to be glued on the jar, so I build the head of the doll.
- Then peel off the part where the razor blades are, and glue them to the sides of the jar, which would be the arms.
.jpg)
.jpg)
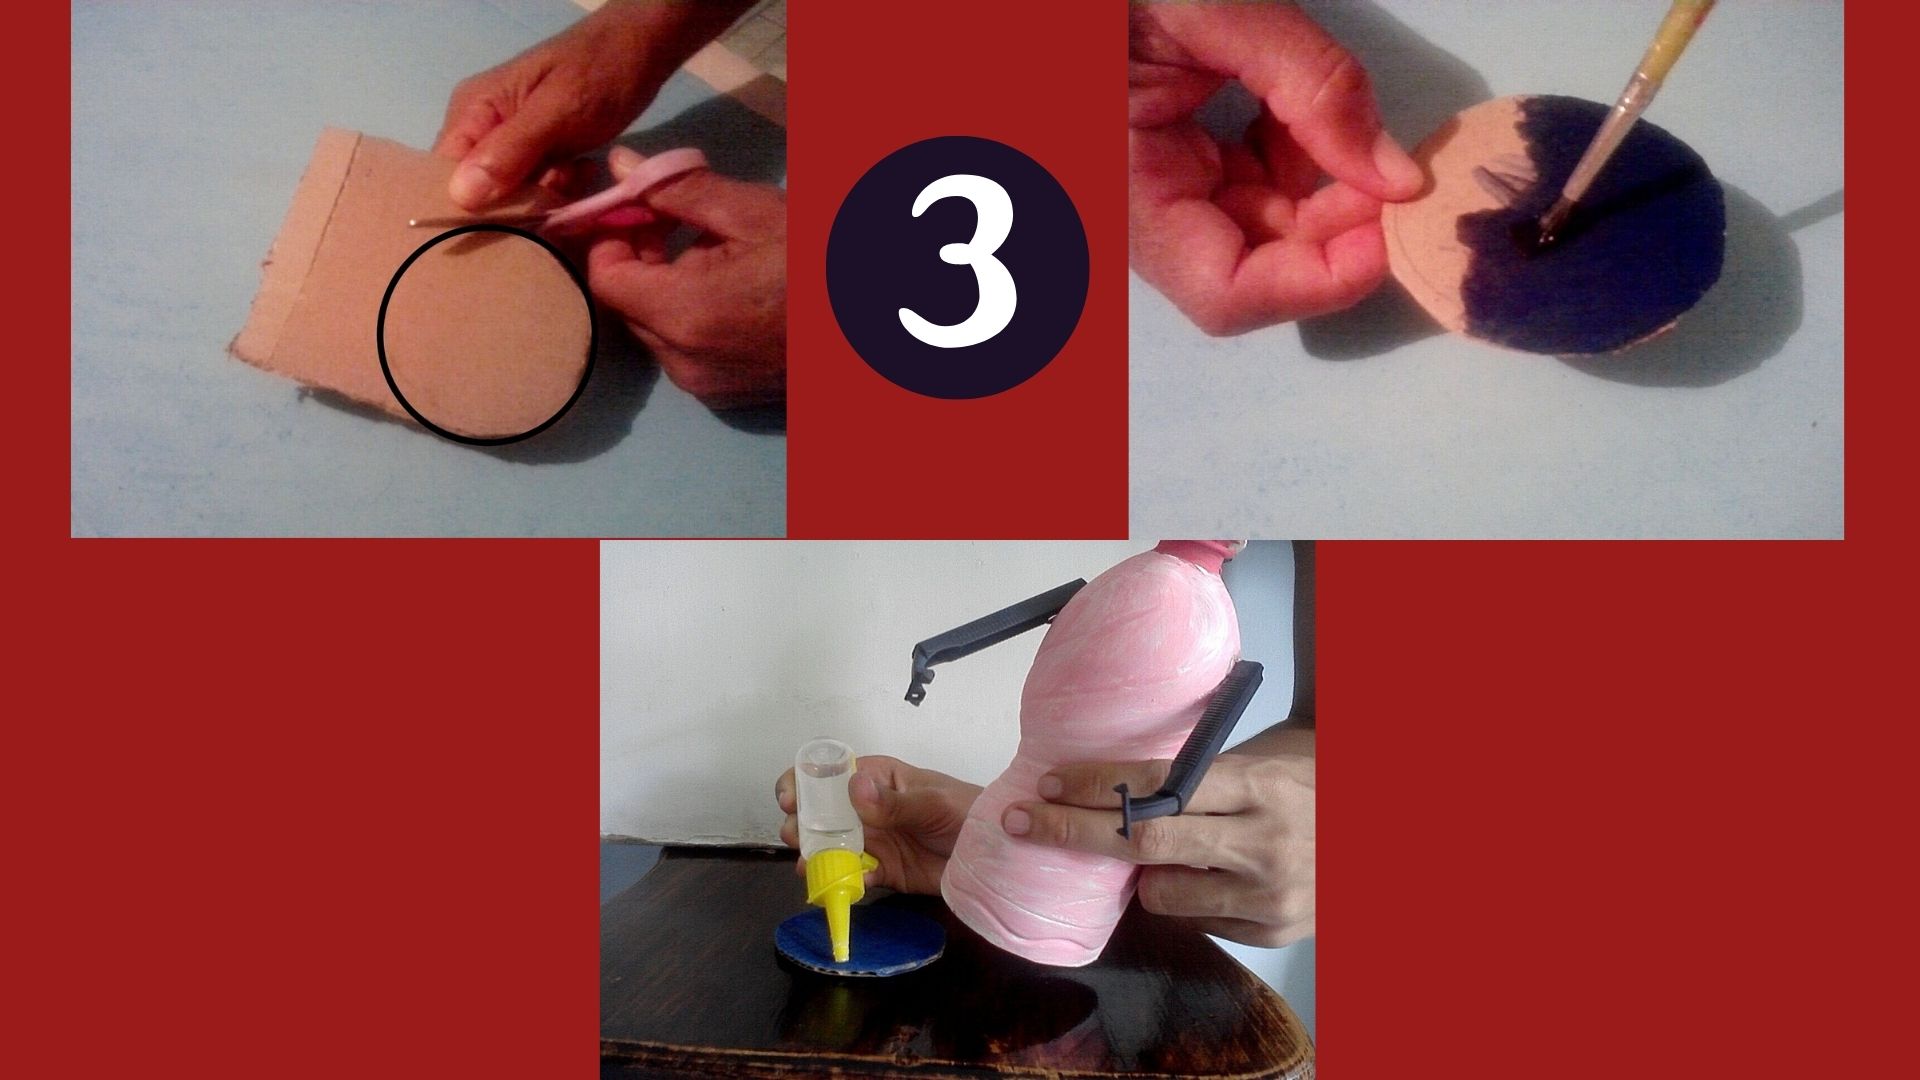
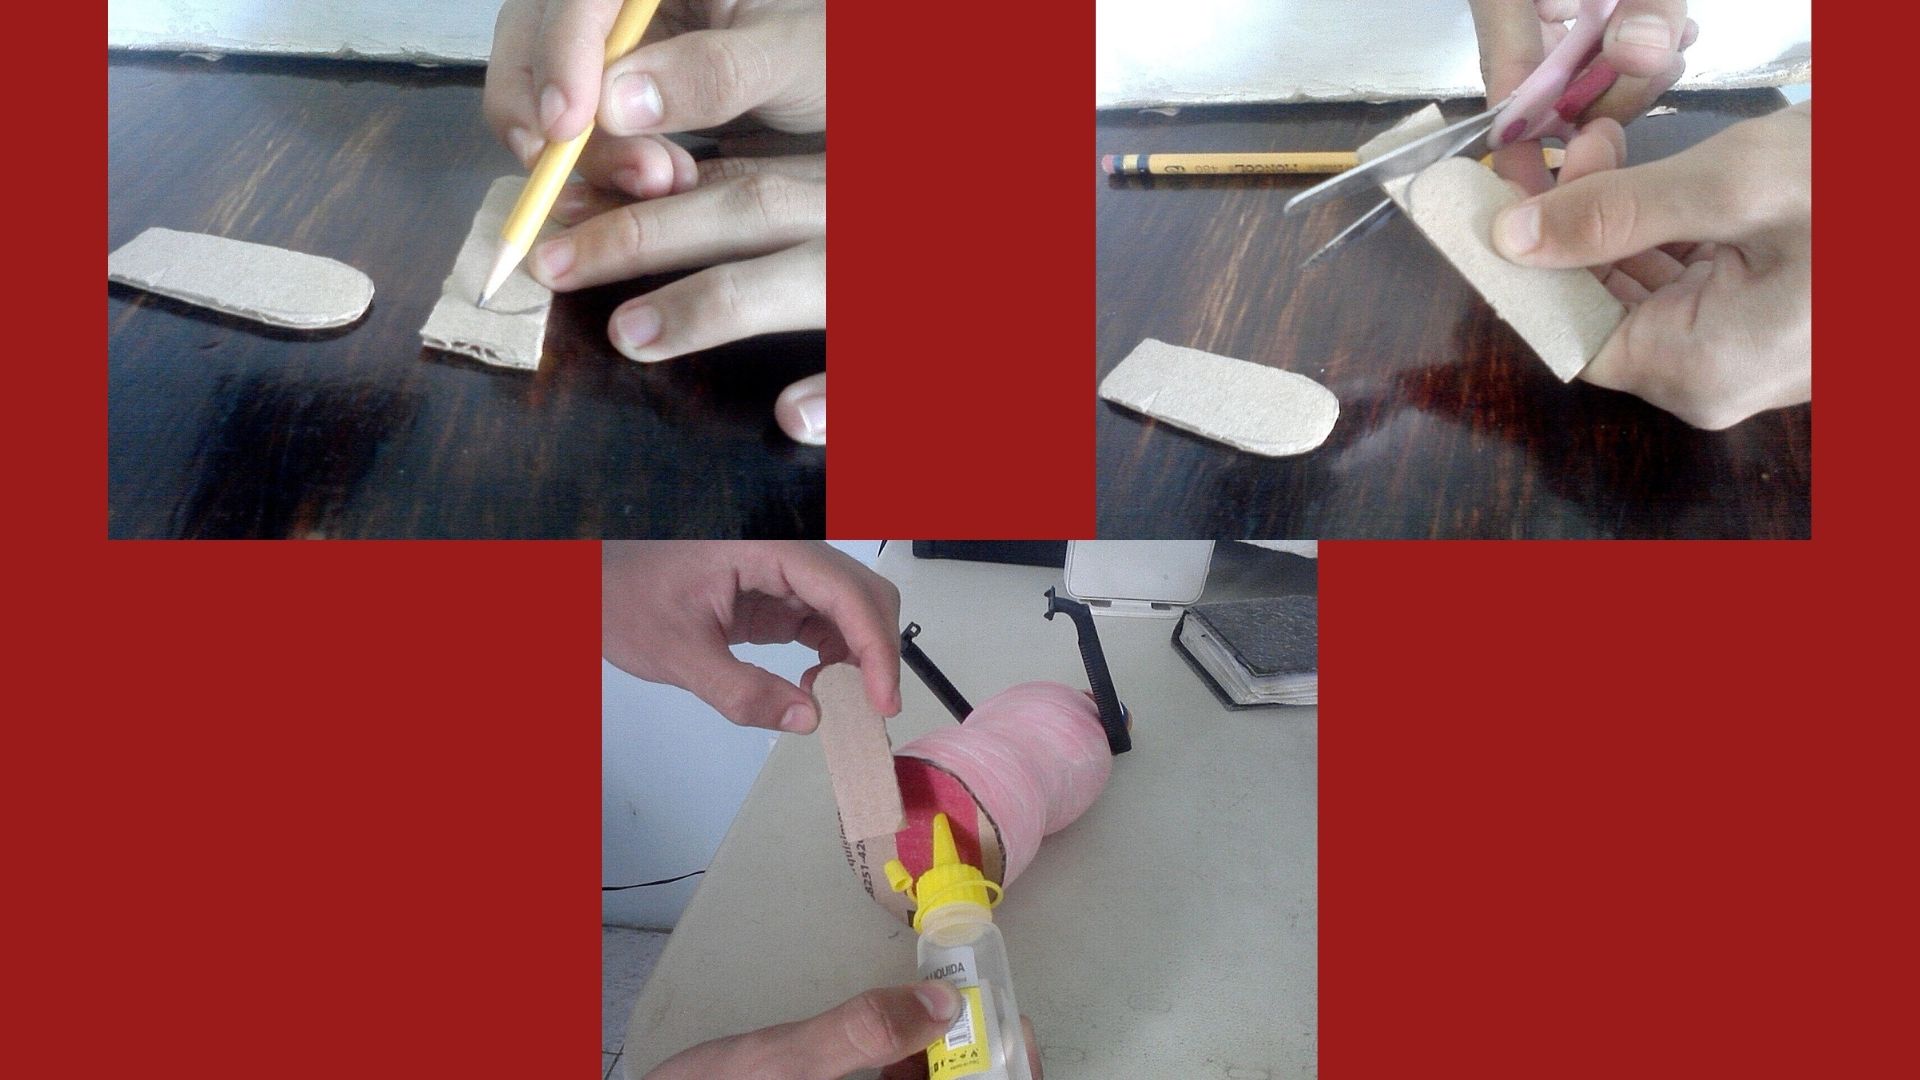
Paso 3:
Se marca, se recorta y se pinta en cartón en forma de círculo, para pegarlo como base del frasco.
Luego se dibujan en un pedacito de cartón los pies, se cortan y se pega debajo de la base.
Step 3:
- It is marked, cut out and painted on cardboard in the shape of a circle, to be glued as the base of the jar.
- Then draw the feet on a small piece of cardboard, cut them out and glue them under the base.
.jpg)
.jpg)
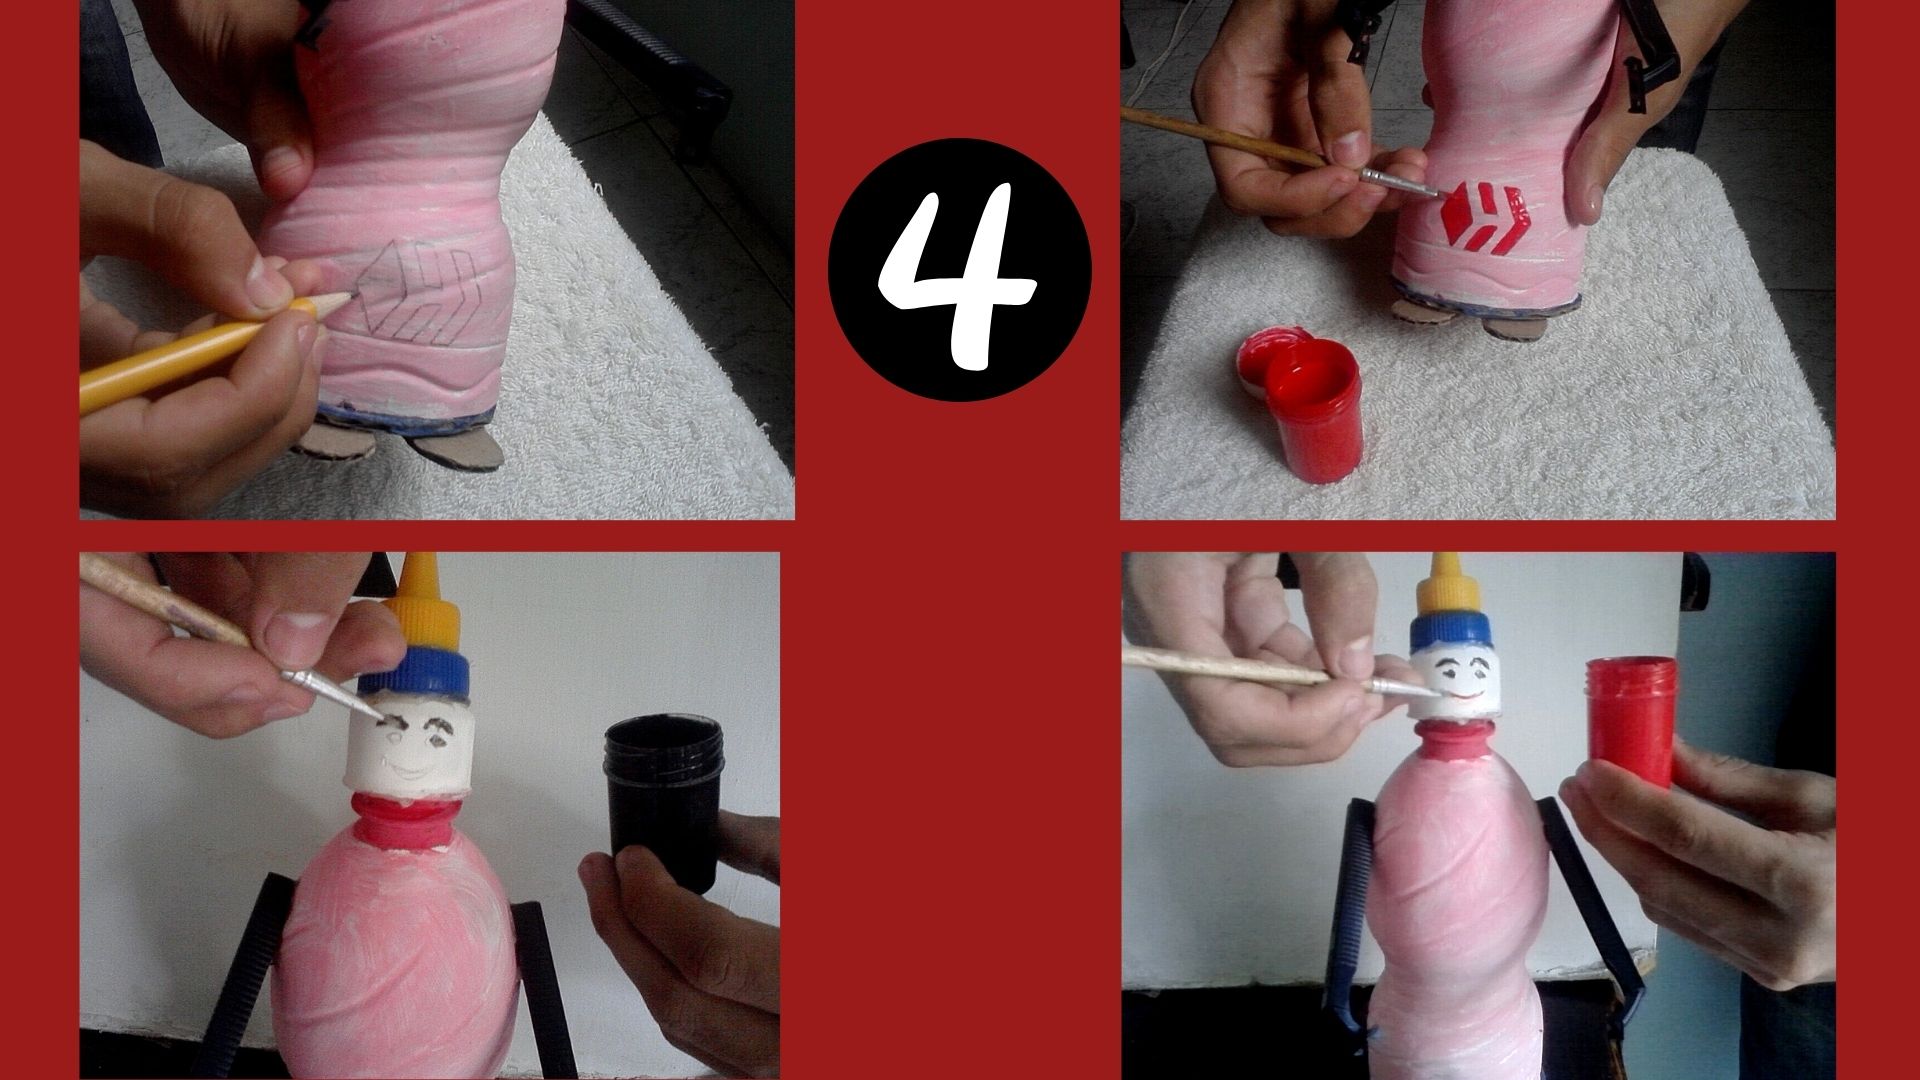
Paso 4:
- Se dibuja y se colorea el logo de Hive, para terminar dibujo los ojos y la boca.
Step 4:
- The Hive logo is drawn and colored, to finish I draw the eyes and mouth.
.jpg)
Así construí mi muñeco Hive, espero que les aya gustado.
This is how I built my Hive doll, I hope you liked it.
.jpg)
Todas la fotos son de mi pertenencia y editadas con canva.
All photos are my own and edited with canva.