Many blessings Hive family. Today being a very special day, when we celebrate the day of the Madres, I wanted to elaborate a small detail for my mom and I want to share it with all of you, I take this opportunity to wish many congratulations to all the Madres of the world.
.jpg)
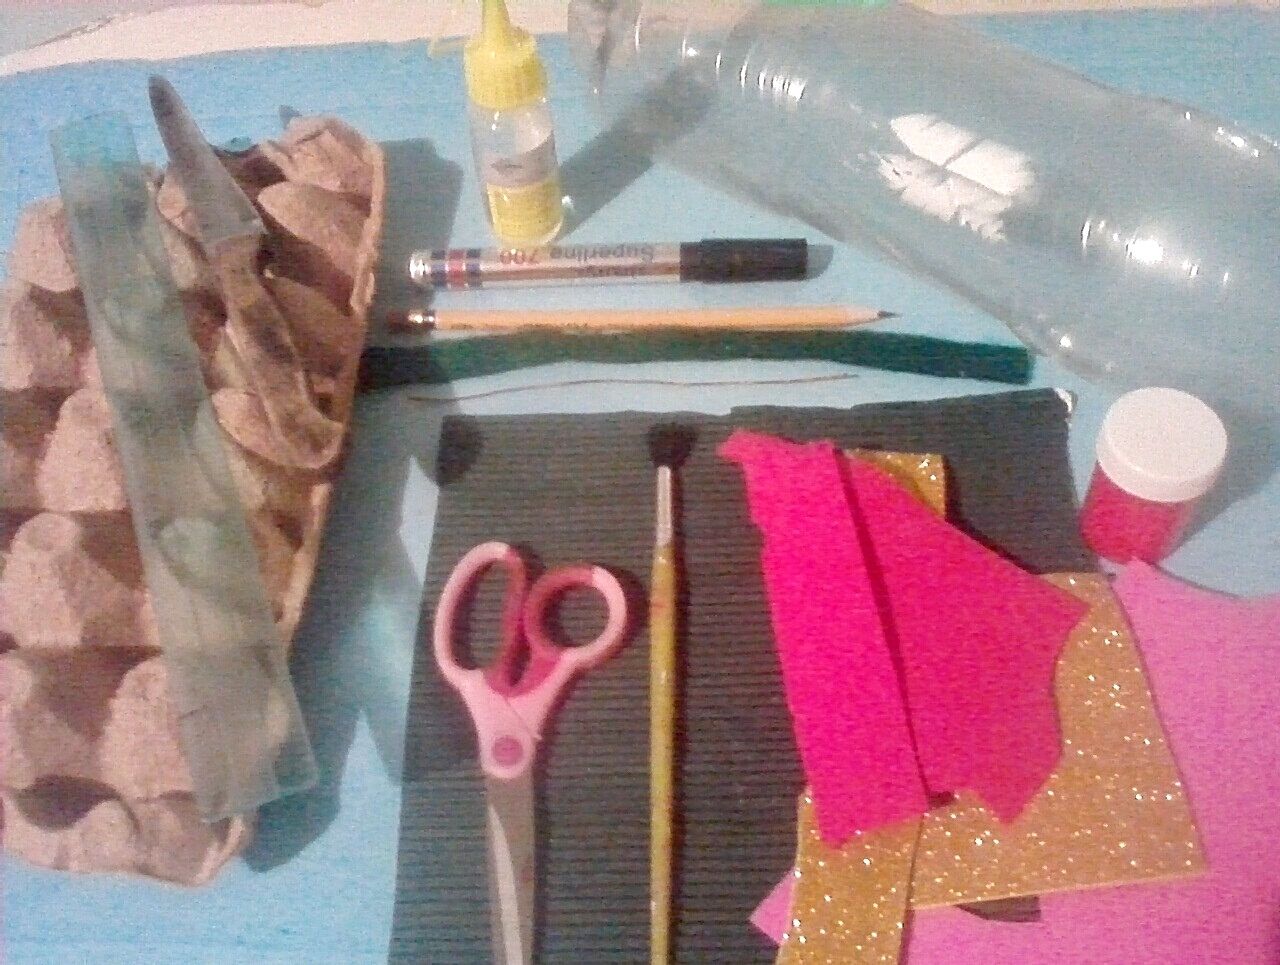
Materiales:
- 1 botella plástica de refresco.
- Cartón de huevo.
- Silicon.
- Regla.
- lápiz.
- Marcador.
- Tijera.
- Pincel.
- Foami (rojo, rosado y dorado).
- Pintura roja.
- Cuchillo.
- Cartulina corrugada, color verde.
- Alambre de cobre.
- 1 tira de fieltro verde.
Materials:
- 1 plastic soda bottle.
- Egg carton.
- Silicon.
- Ruler.
- Pencil.
- marker.
- Scissors.
- Paintbrush.
- Foami (red, pink and gold).
- Red paint.
- Knife.
- Corrugated cardboard, green color.
- Copper wire.
- 1 strip of green felt.

.jpg)
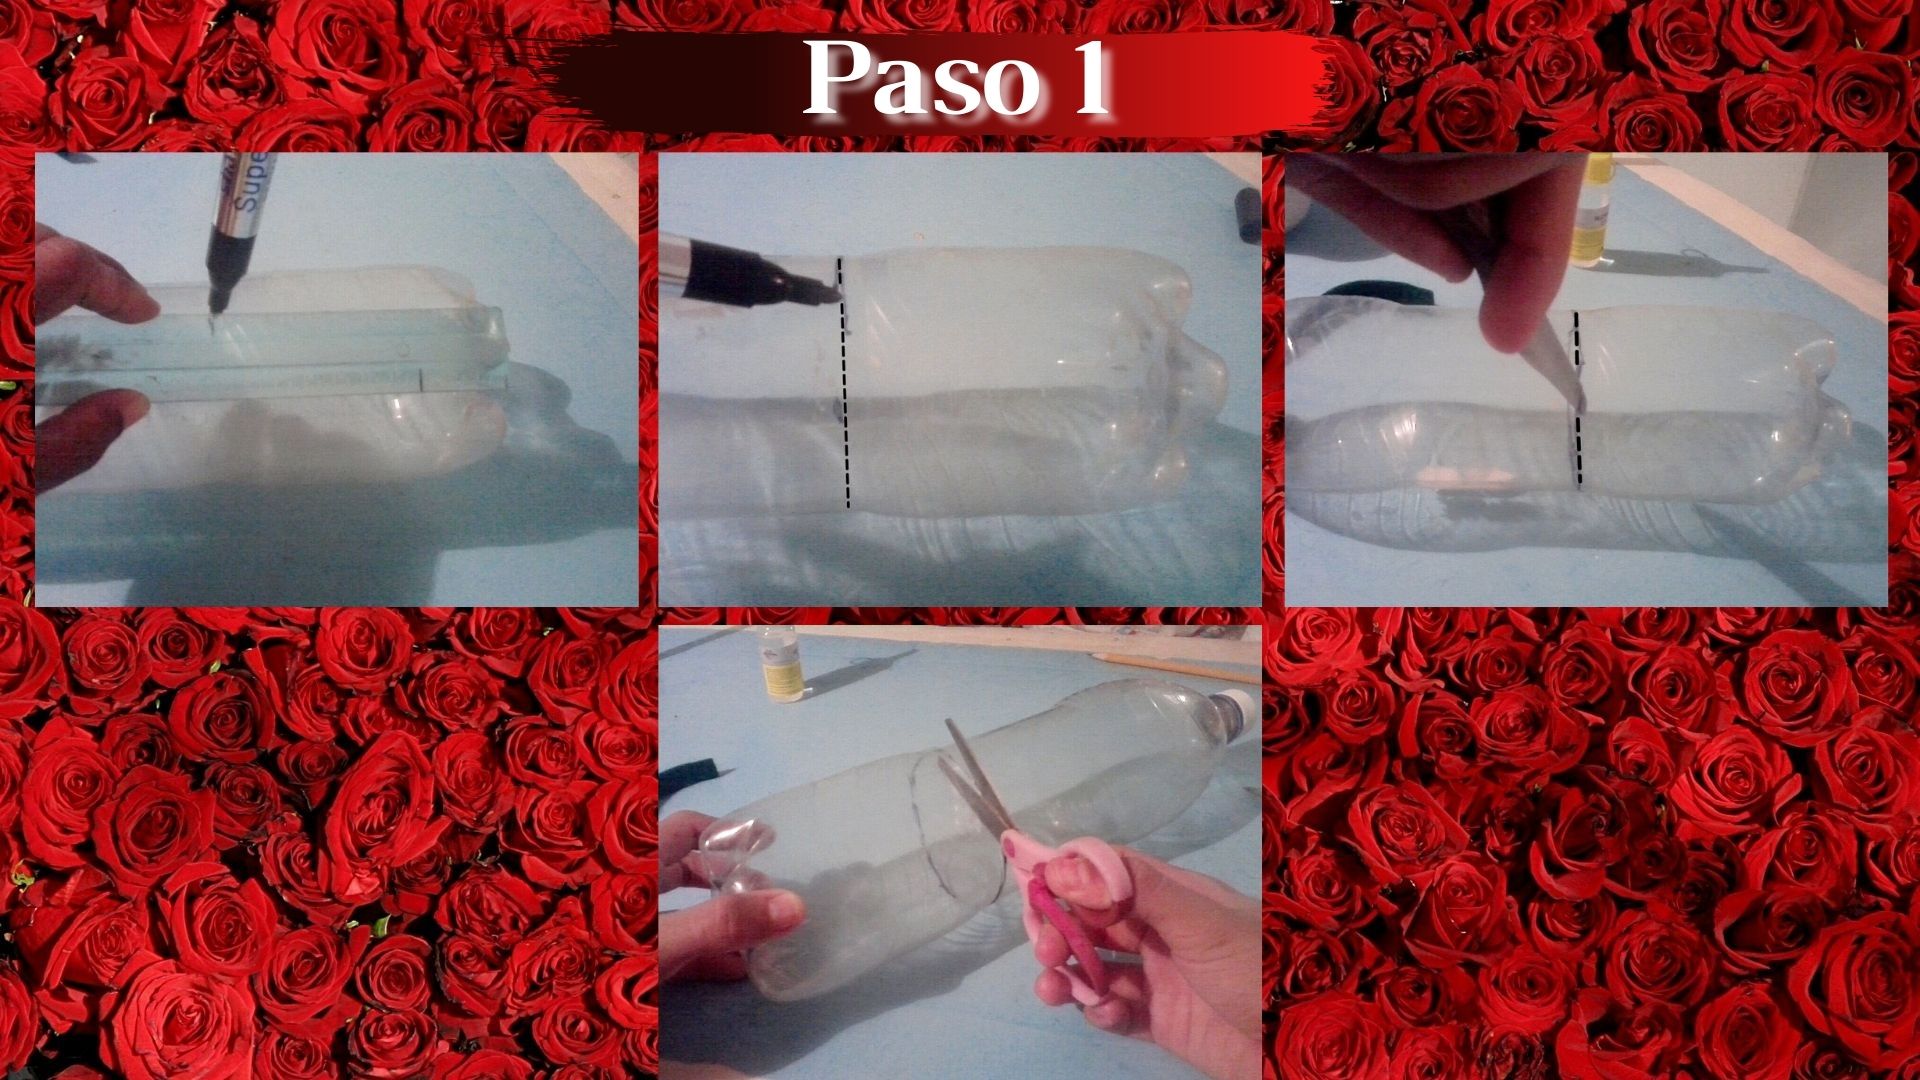
Paso 1:
Con la regla medí 12cm desde el fondo de la botella hacia arriba, luego se marca y se recorta.
Se comienza a cortar el cartón de huevo, para después recortar con la tijera los hoyitos del cartón en forma de cono, y se pica en 4 pétalos formando una figura de corazón .
Después se pintan con el color rojo.
Step 1:
- With the ruler I measured 12cm from the bottom of the bottle up, then mark and cut out.
- Start cutting the egg carton, and then cut out with the scissors the holes of the carton in the shape of a cone, and cut it into 4 petals forming a heart shape.
- Then they are painted with red color.
.jpg)

Paso 2:
Mientras se seca la pintura de la flor, dibujo y corto el cáliz junto con las hojas.
Después con el alambre de cobre se perfora el centro del cáliz de la flor y se hace un dobles en la punta del alambre.
Luego se pega la tira de fieltro al alambre en forma envolvente.
Con la regla marco y recorto un trocito de foami dorado.
Step 2:
- While the flower paint dries, I draw and cut out the calyx along with the leaves.
- Then with the copper wire I pierce the center of the calyx of the flower and make a bend in the tip of the wire.
- Then I glue the felt strip to the wire in a wrap-around shape.
- With the ruler I mark and cut a small piece of gold foami.
.jpg)
.jpg)
Paso 3:
Se pegan la 4 flores una encima de la otra para construir una rosa.
Luego se pega el palito de la rosa y las hoja.
En el centro del foami dorado se pegan con silicon el palo de la rosa.
Donde marcamos el círculo anteriormente en el foami dorado se pega la botella, quedando la rosa dentro.
Step 3:
- You glue the 4 flowers on top of each other to build a rose.
- Then glue the rose stick and the leaves.
- In the center of the golden foami glue the rose stick with silicon.
- Where we marked the circle previously in the golden foami we glue the bottle, leaving the rose inside.
.jpg)
.jpg)
.jpg)
Paso 4:
Marcar y cortar 1 tira de foami rosado de 18cm de largo x 3cm de ancho, luego se dobla las 2 puntas hacia el centro, luego se pegan y se cortan haciendo la forma del lazo.
Después en otro pedacito de foami de 15cm de lago x 3cm de ancho, se cortan las puntas simulando una (v) y se pega para formar el lazo.
En 1 tira pequeña de color morado se dobla y se pega en el centro del lazo.
A continuación se pega el lazo encima de la botella para terminar pegando 4 corazones de foami rojo, por los lados del lazo.
Step 4:
- Mark and cut 1 strip of pink foami 18cm long x 3cm wide, then fold the 2 ends towards the center, then glue and cut them making the shape of the bow.
- Then on another piece of foami 15cm long x 3cm wide, cut the ends to simulate a (v) and glue to form the loop.
- In 1 small strip of purple color is folded and glued in the center of the bow.
- Then glue the ribbon on top of the bottle and finish by gluing 4 red foami hearts on the sides of the ribbon.
Así quedo el lindo obsequio para mi mamá.
This is how the nice gift for my mom turned out .
.jpg)
Todas las fotos son de mi pertenencia y editadas con Canva.
All photos are my own and edited with Canva.
Congratulations @brahiam15! You have completed the following achievement on the Hive blockchain and have been rewarded with new badge(s) :
Your next target is to reach 30 posts.
Your next target is to reach 2000 upvotes.
You can view your badges on your board and compare yourself to others in the Ranking
If you no longer want to receive notifications, reply to this comment with the word
STOPSupport the HiveBuzz project. Vote for our proposal!