¡Hola amigos!
Hello friends!
Hoy les traigo un nuevo trabajo realizado con material reciclado cómo sabemos que el reciclaje es muy importante y es unas de las actividades diarias más sencilla significativas que podemos realizar. A pesar de que los seres humanos somos responsables de una gran cantidad de residuos parece que a veces todavía nos negamos a reciclar por lo tanto lo único que debemos hacer es causarnos daño nosotros mismos y al medio ambiente a corto plazo y en el futuro por ello es muy importante reciclar para ayudar a nuestro planeta y así contribuir a que el medio ambiente se mantenga libre de contaminación.
Today I bring you a new work made with recycled material as we know that recycling is very important and is one of the simplest meaningful daily activities we can do. Even though we humans are responsible for a lot of waste it seems that sometimes we still refuse to recycle so the only thing we have to do is to cause harm to ourselves and the environment in the short term and in the future so it is very important to recycle to help our planet and thus contribute to keep the environment free of pollution.
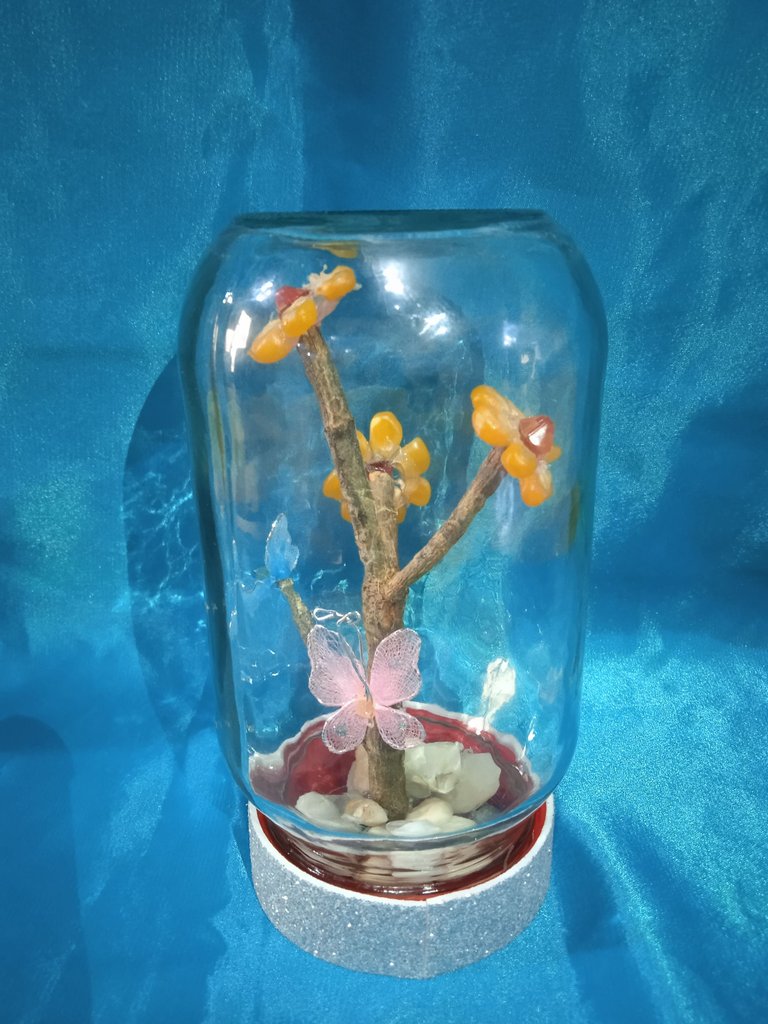
Centro de mesa realizado con material reciclado
Centerpiece made from recycled material
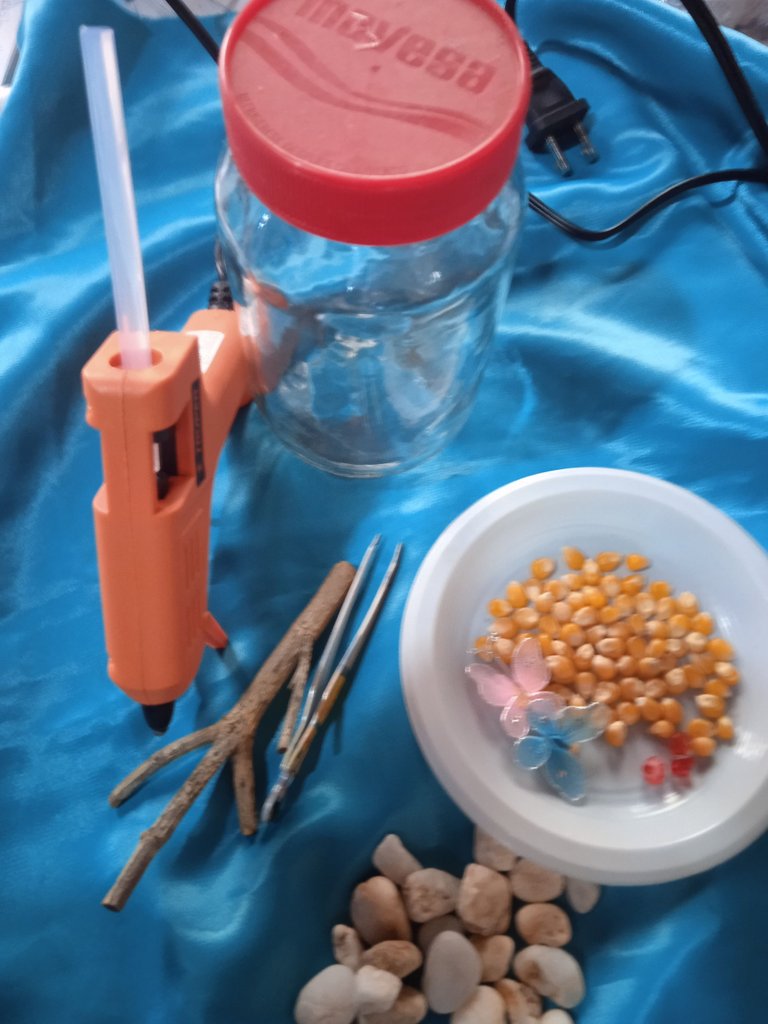
Materiales a utilizar // Materials to be used
- Pistola de silicón
- 1 frasco de vidrio
- Granos de maíz
- Una rama de manera
- Mariposas
- Piedras
- Silicone gun
- 1 glass jar
- Corn kernels
- A branch of way
- Butterflies
- Stones
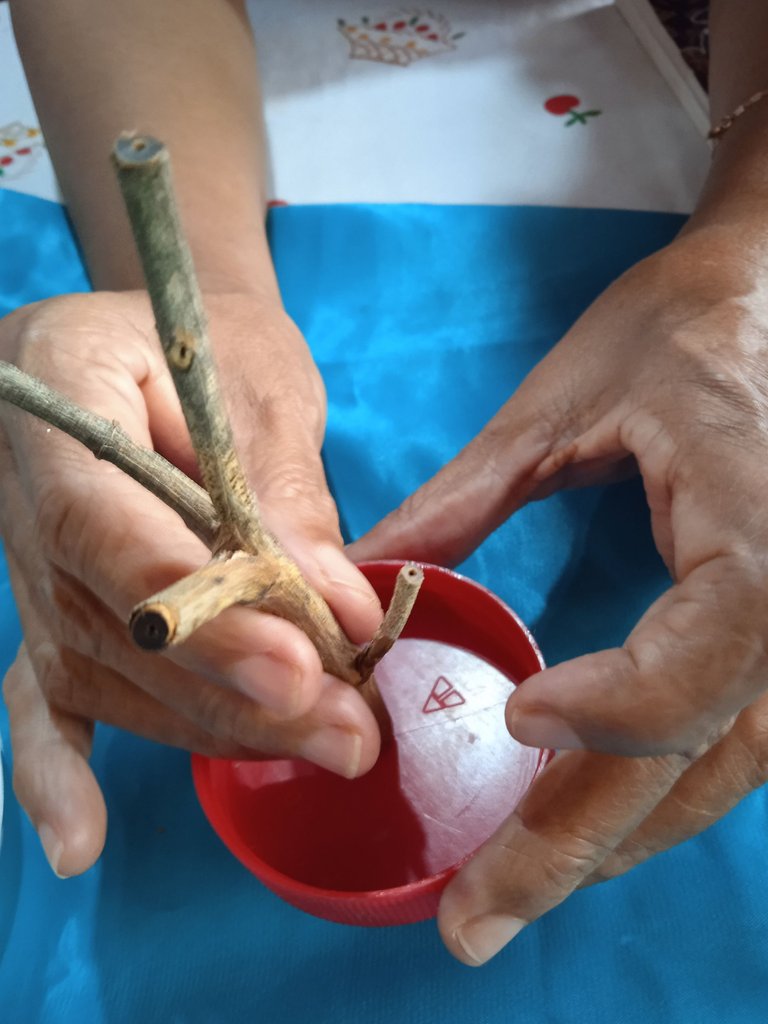
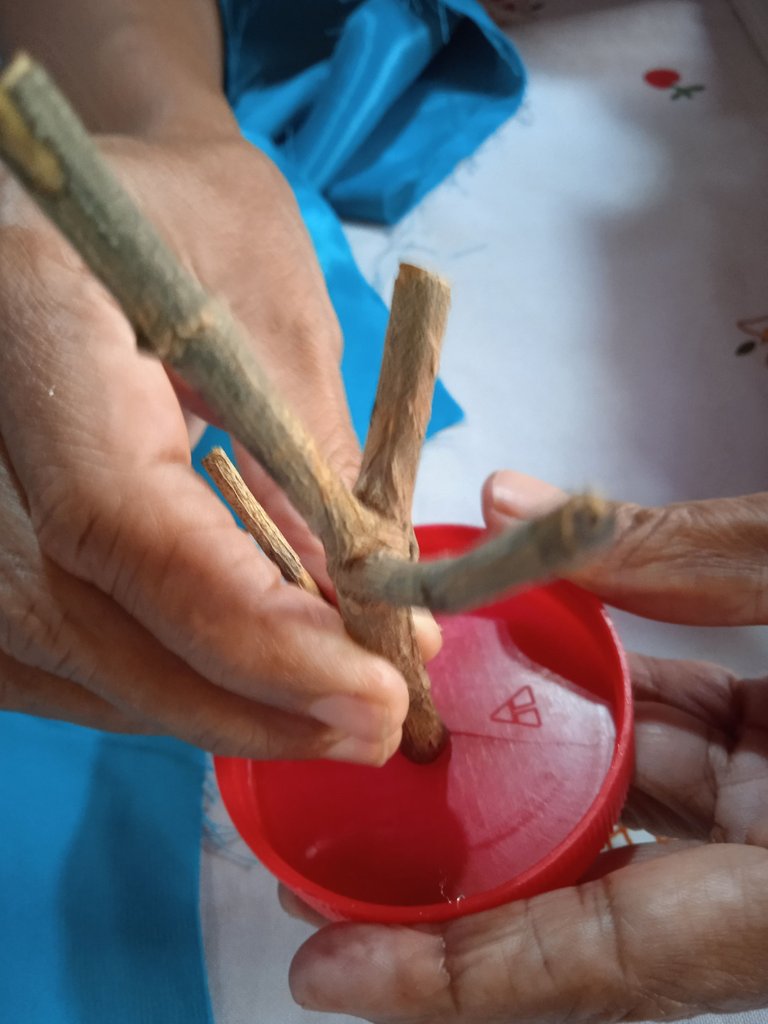
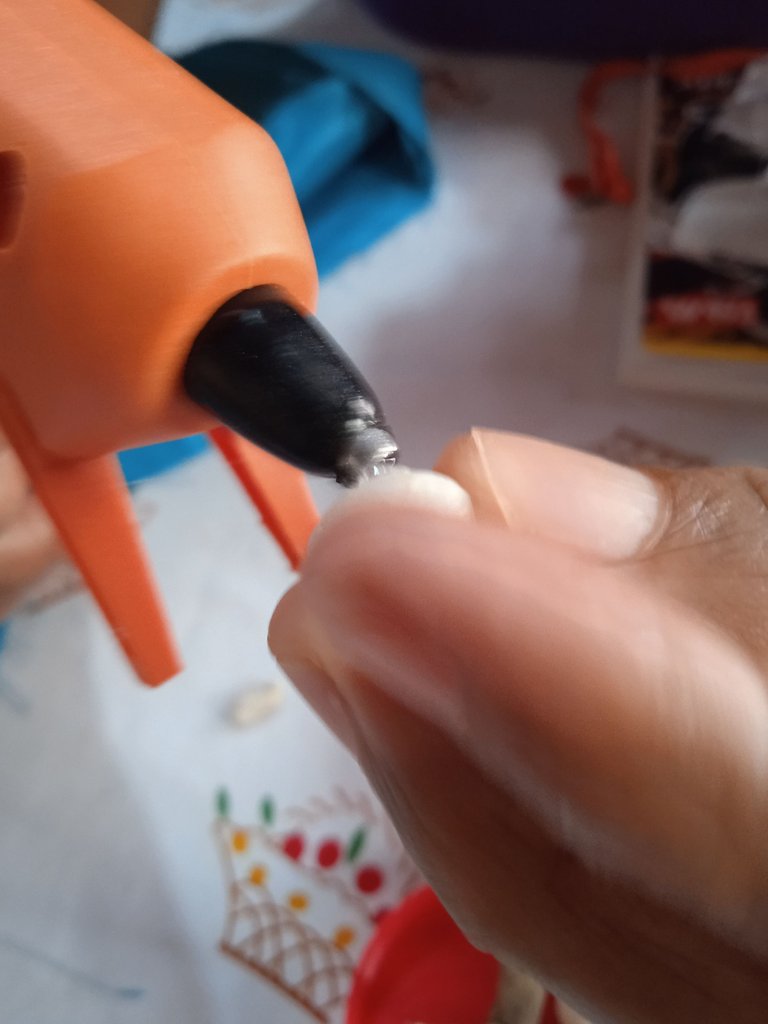
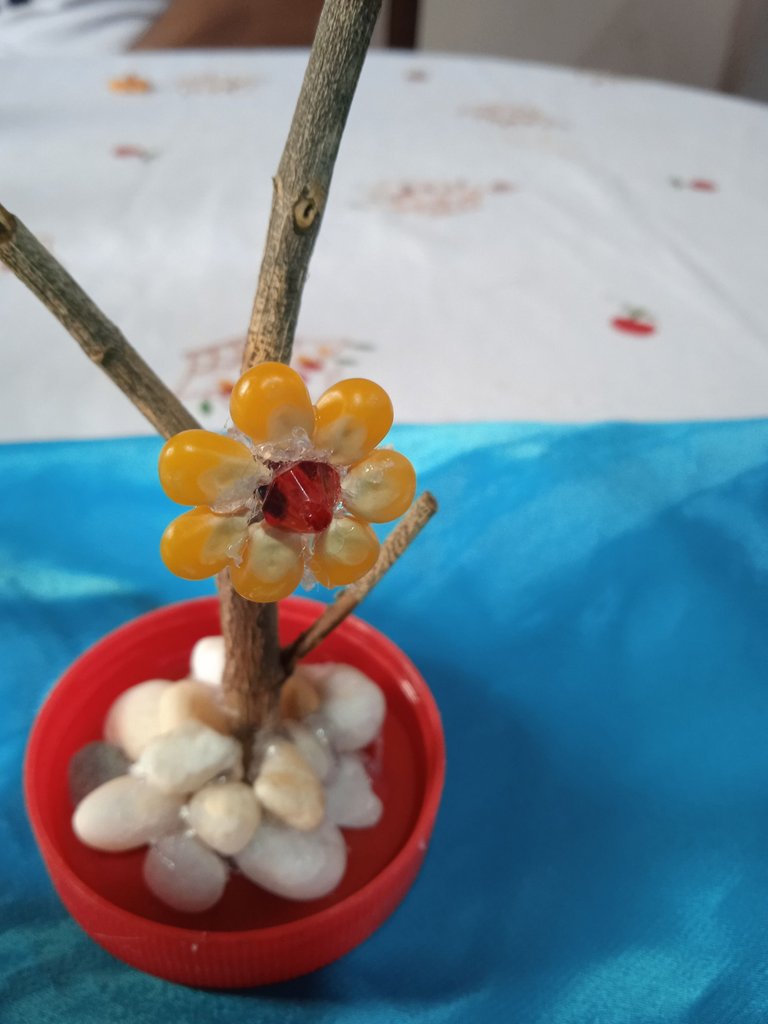
- Lo primero quitar la tapa del frasco y sobre ella debemos pegar el ramo de madera seca pegar con la pistola de silicón.
- The first thing to do is to remove the lid of the jar and on it we must glue the dry wooden bouquet with the silicone gun.
- Dejar secar hasta que se ponga duro.
- Let it dry until it becomes hard.
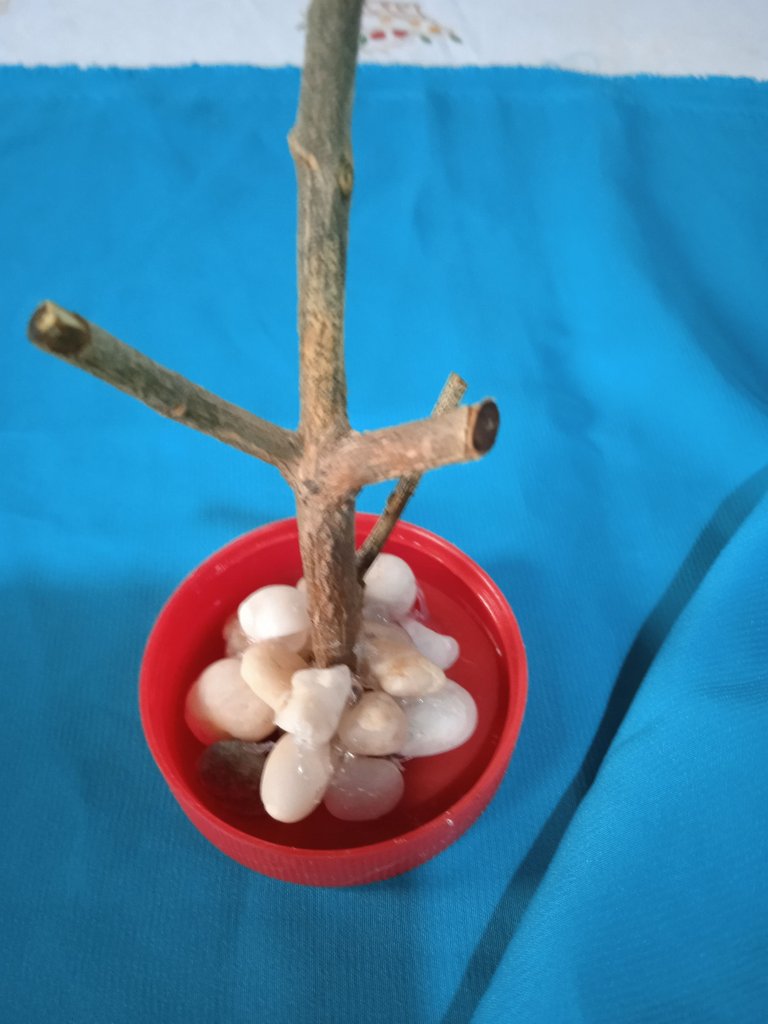
- Luego pegar cada una de las piedrita encima de la rama de madera.
- Then glue each of the pebbles on top of the wooden branch.
- Dejar secar y quedará de esta manera.
- Let it dry and it will look like this.
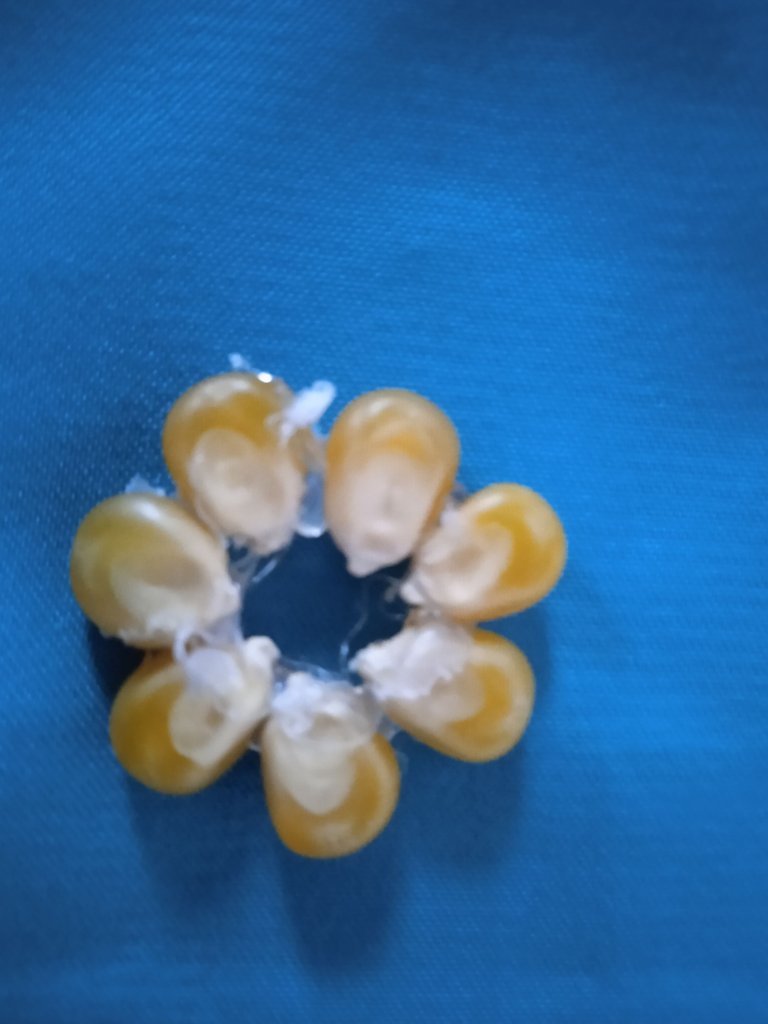
- Luego con los granos de maíz pegamos grano a grano para formar las flores.
- Then with the corn kernels we glue kernel by kernel to form the flowers.
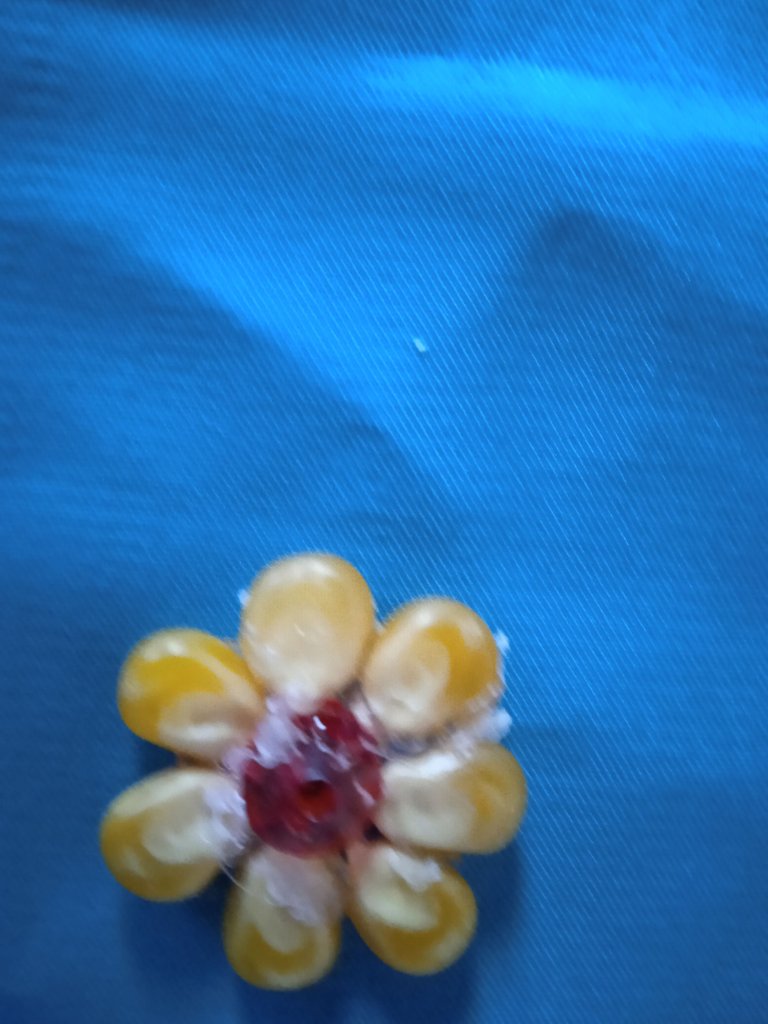
- Luego pegamos una piedrita roja en el medio y quedara así.
- Then we glue a red pebble in the middle and it will look like this.
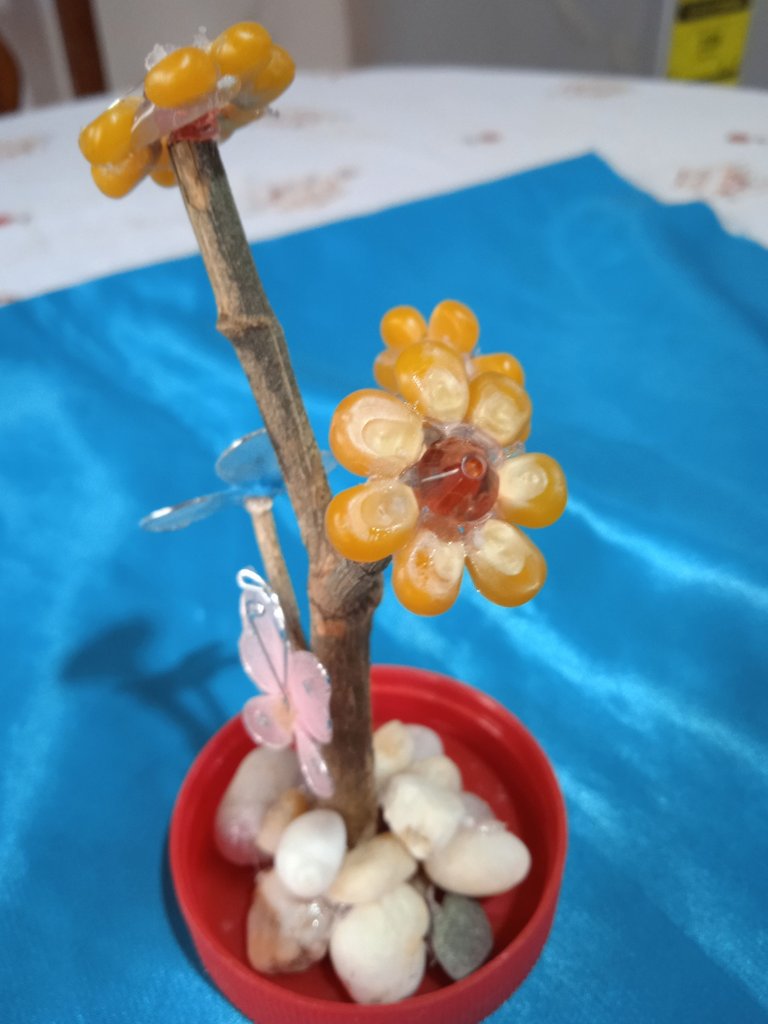
- Luego pegamos la flor en la rama.
- Then we glue the flower on the branch.
- Y seguimos pegando las otras flores y las mariposas.
- And we continue gluing the other flowers and butterflies.
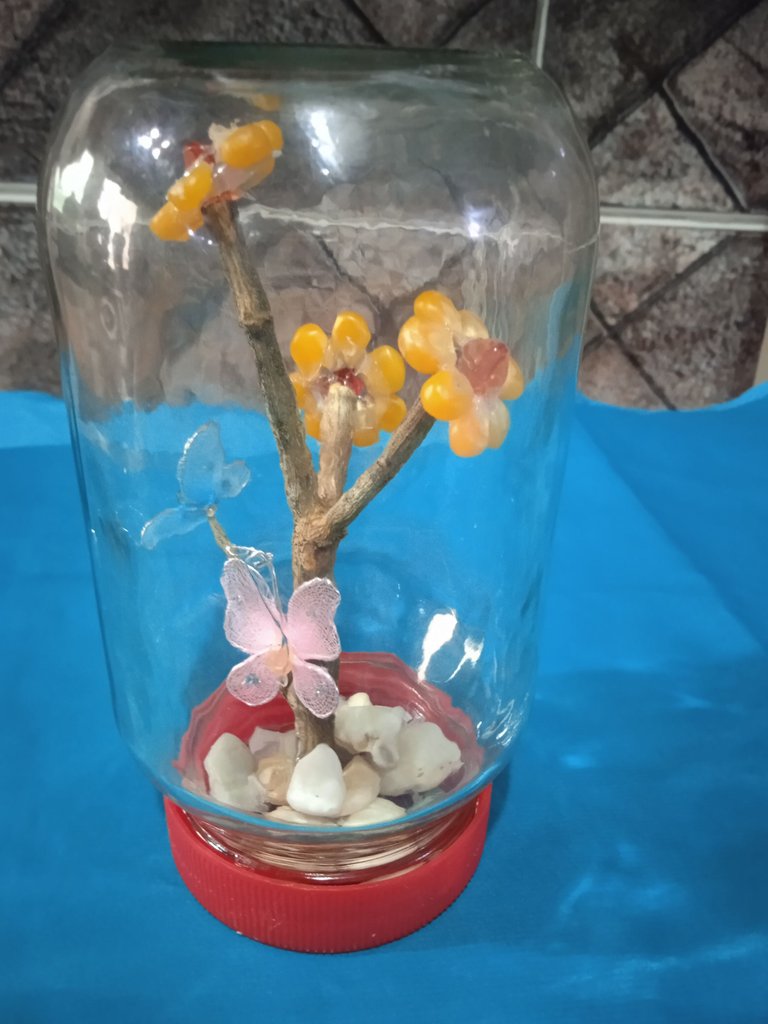
- Luego colocamos el frasco encima con mucho cuidado.
- Then carefully place the jar on top.
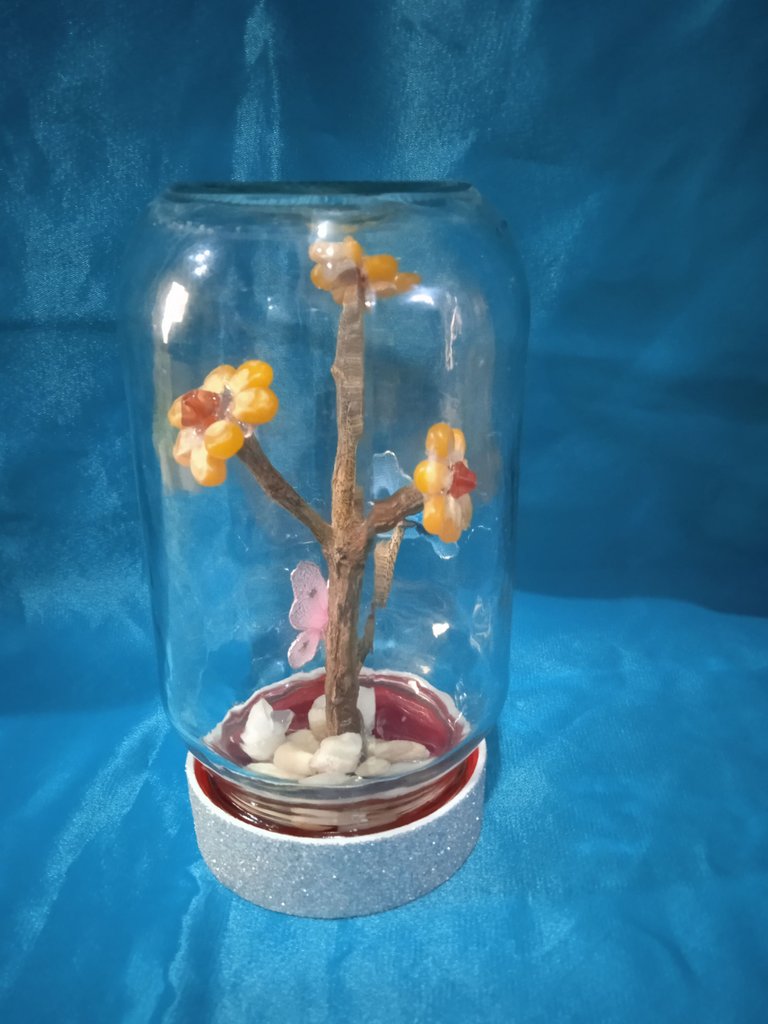
- Y al final le coloco una cinta escarchada a la tapa para darle un toque mas original.
- And at the end I put a frosted ribbon on the lid to give it a more original touch.
- Listo el centro de mesa.
- Ready centerpiece.
Gracias por leer//Thank you for reading
Todas las fotografías son de mi propiedad//All photographs are my property.

Exelente ti creatividad de las cosas más menospreciado podemos sacar grandes cosas el reciclaje debemos aprovechar al máximo cada botella cartón y todo lo que podamos reciclar