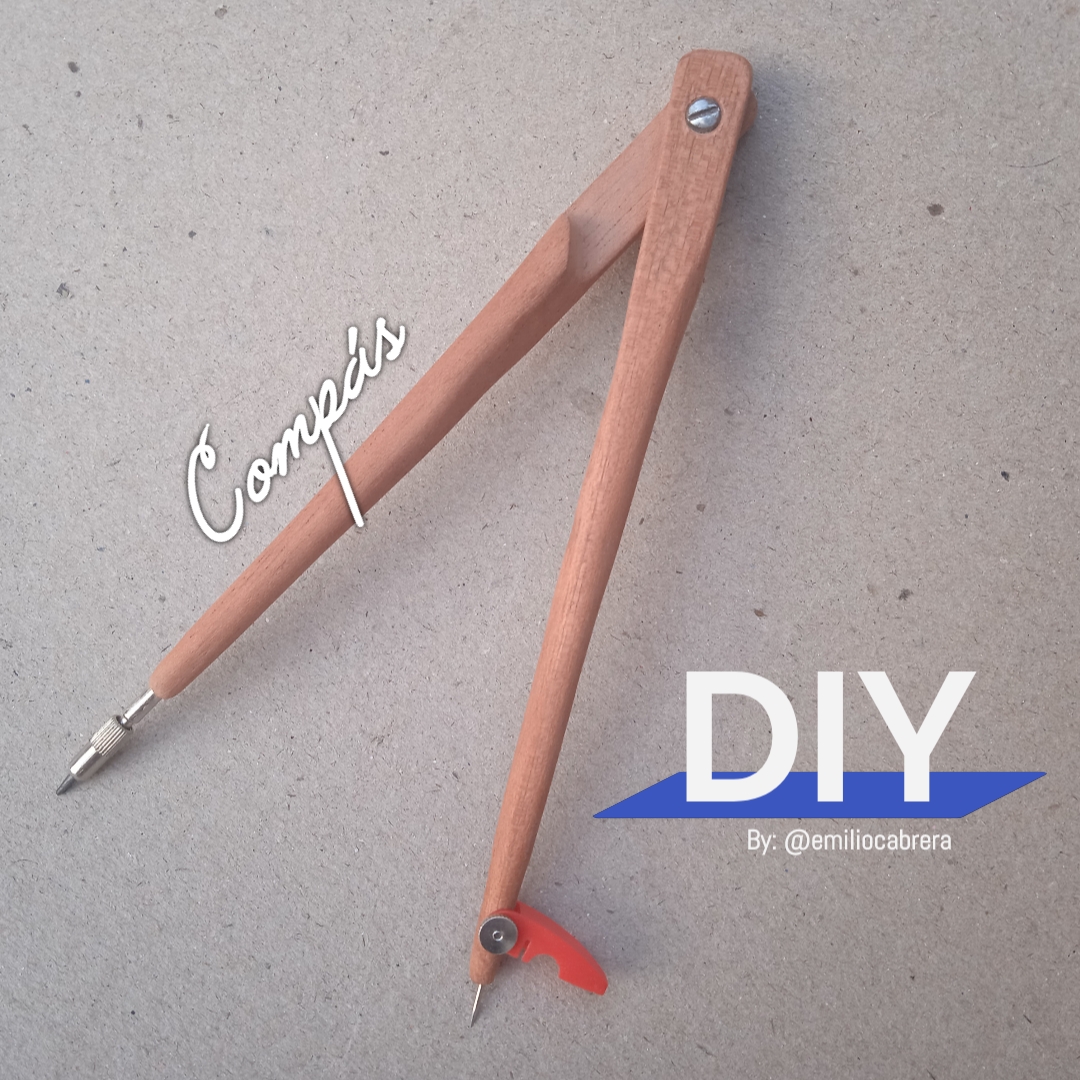
Hi Hivers!
Being creative keeps us alive, connects us with reality and takes us much further. I can be unhappy when my mind is blank, once I get the idea, the imagination leads me to creative action and therapy without side effects. Today I created a wooden compass with the remains of one that was damaged by a fall to the ground.
¡Hola Hivers!
Ser creativo nos mantiene vivos, nos conecta con la realidad y nos lleva mucho más lejos. Puedo ser infeliz cuando mi mente está en blanco, una vez que consigo la idea, la imaginación me lleva a la acción creativa y a una terapia sin efectos secundarios. Hoy creé un compás de madera con restos de uno que se dañó con una caída al suelo.
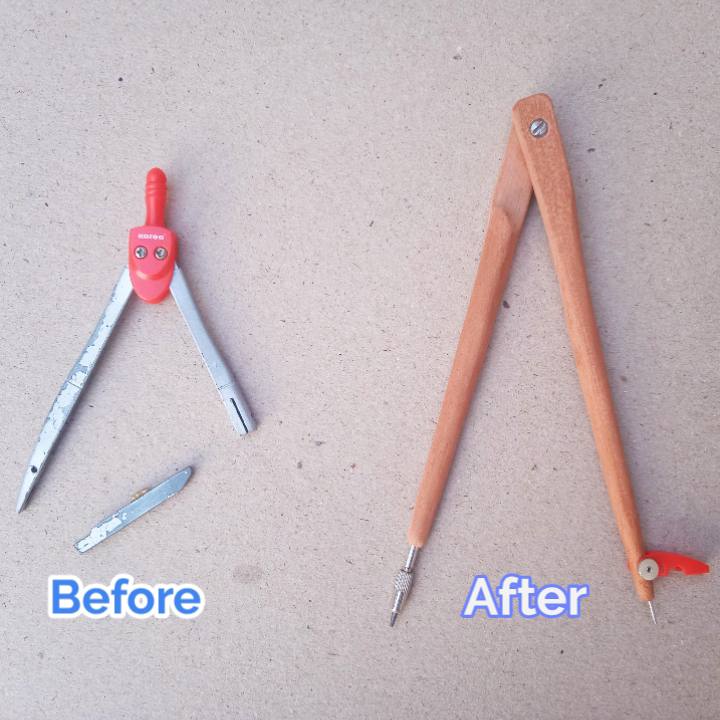
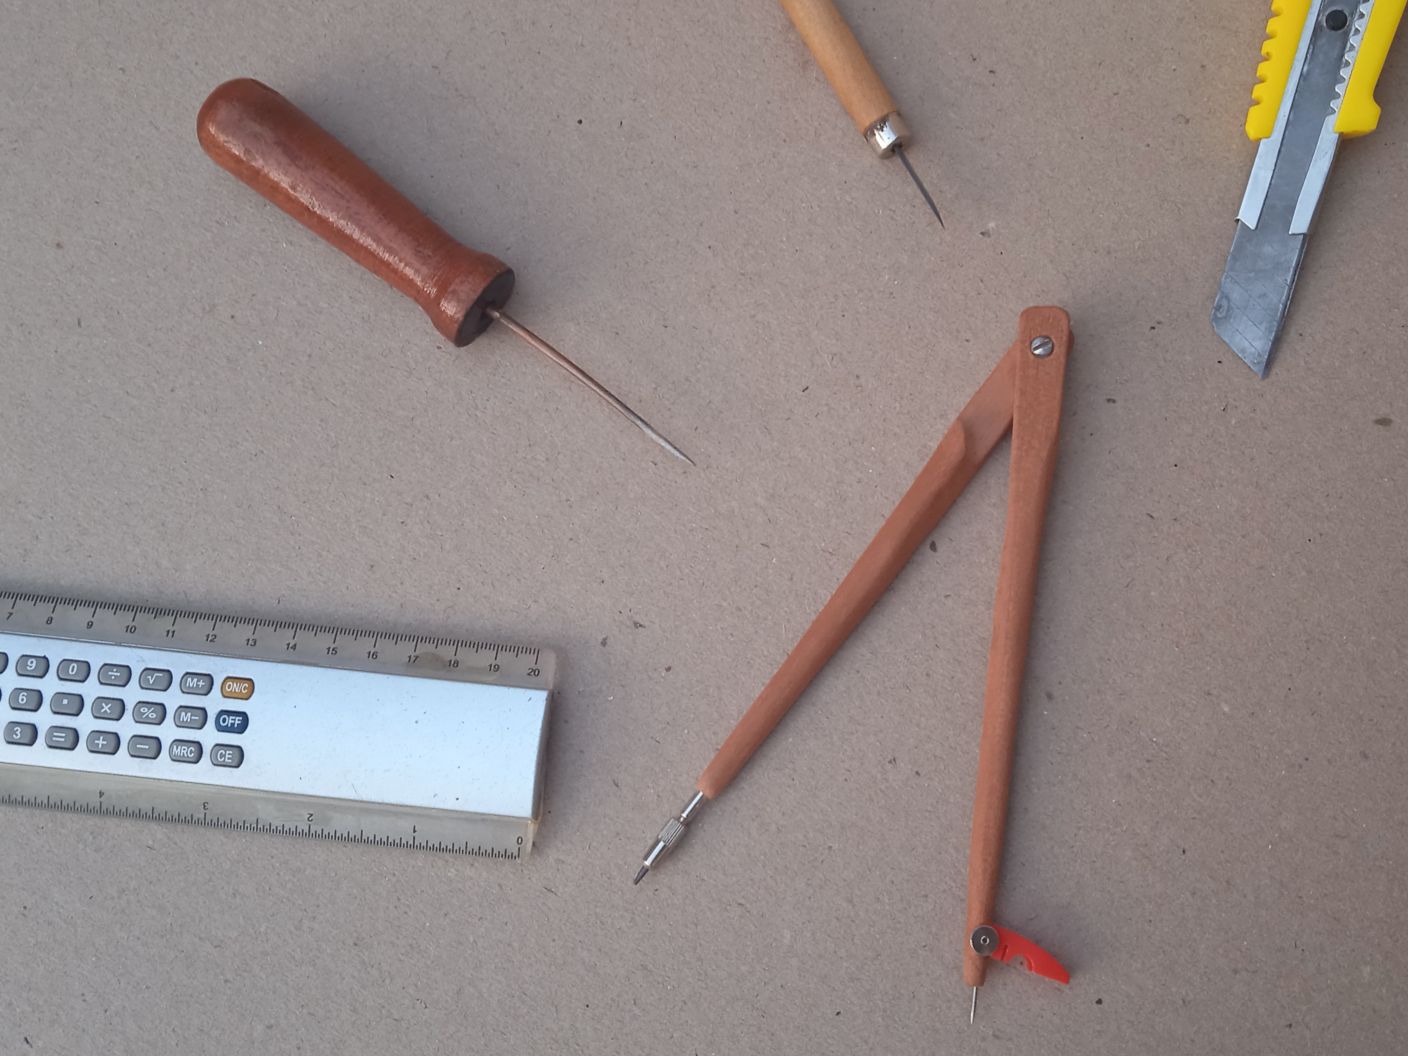
The image that follows shows a damaged compass and the restoration I made to it with an element as wonderful as wood.
La imagen que sigue muestra un compás dañado y la restauración que le hice con un elemento tan maravilloso como la madera.
As I said at the beginning, the idea came when I put consumerism aside and went to work to restore my old compass. Consumerism yelled at me "buy another one" but creativity told me "restore." XD.
Como dije al principio, la idea surgió cuando hice a un lado el consumismo y puse manos a la obra para restaurar mi viejo compás. El consumismo me gritaba " compra otro" pero la creativad me decía " restaura". XD.
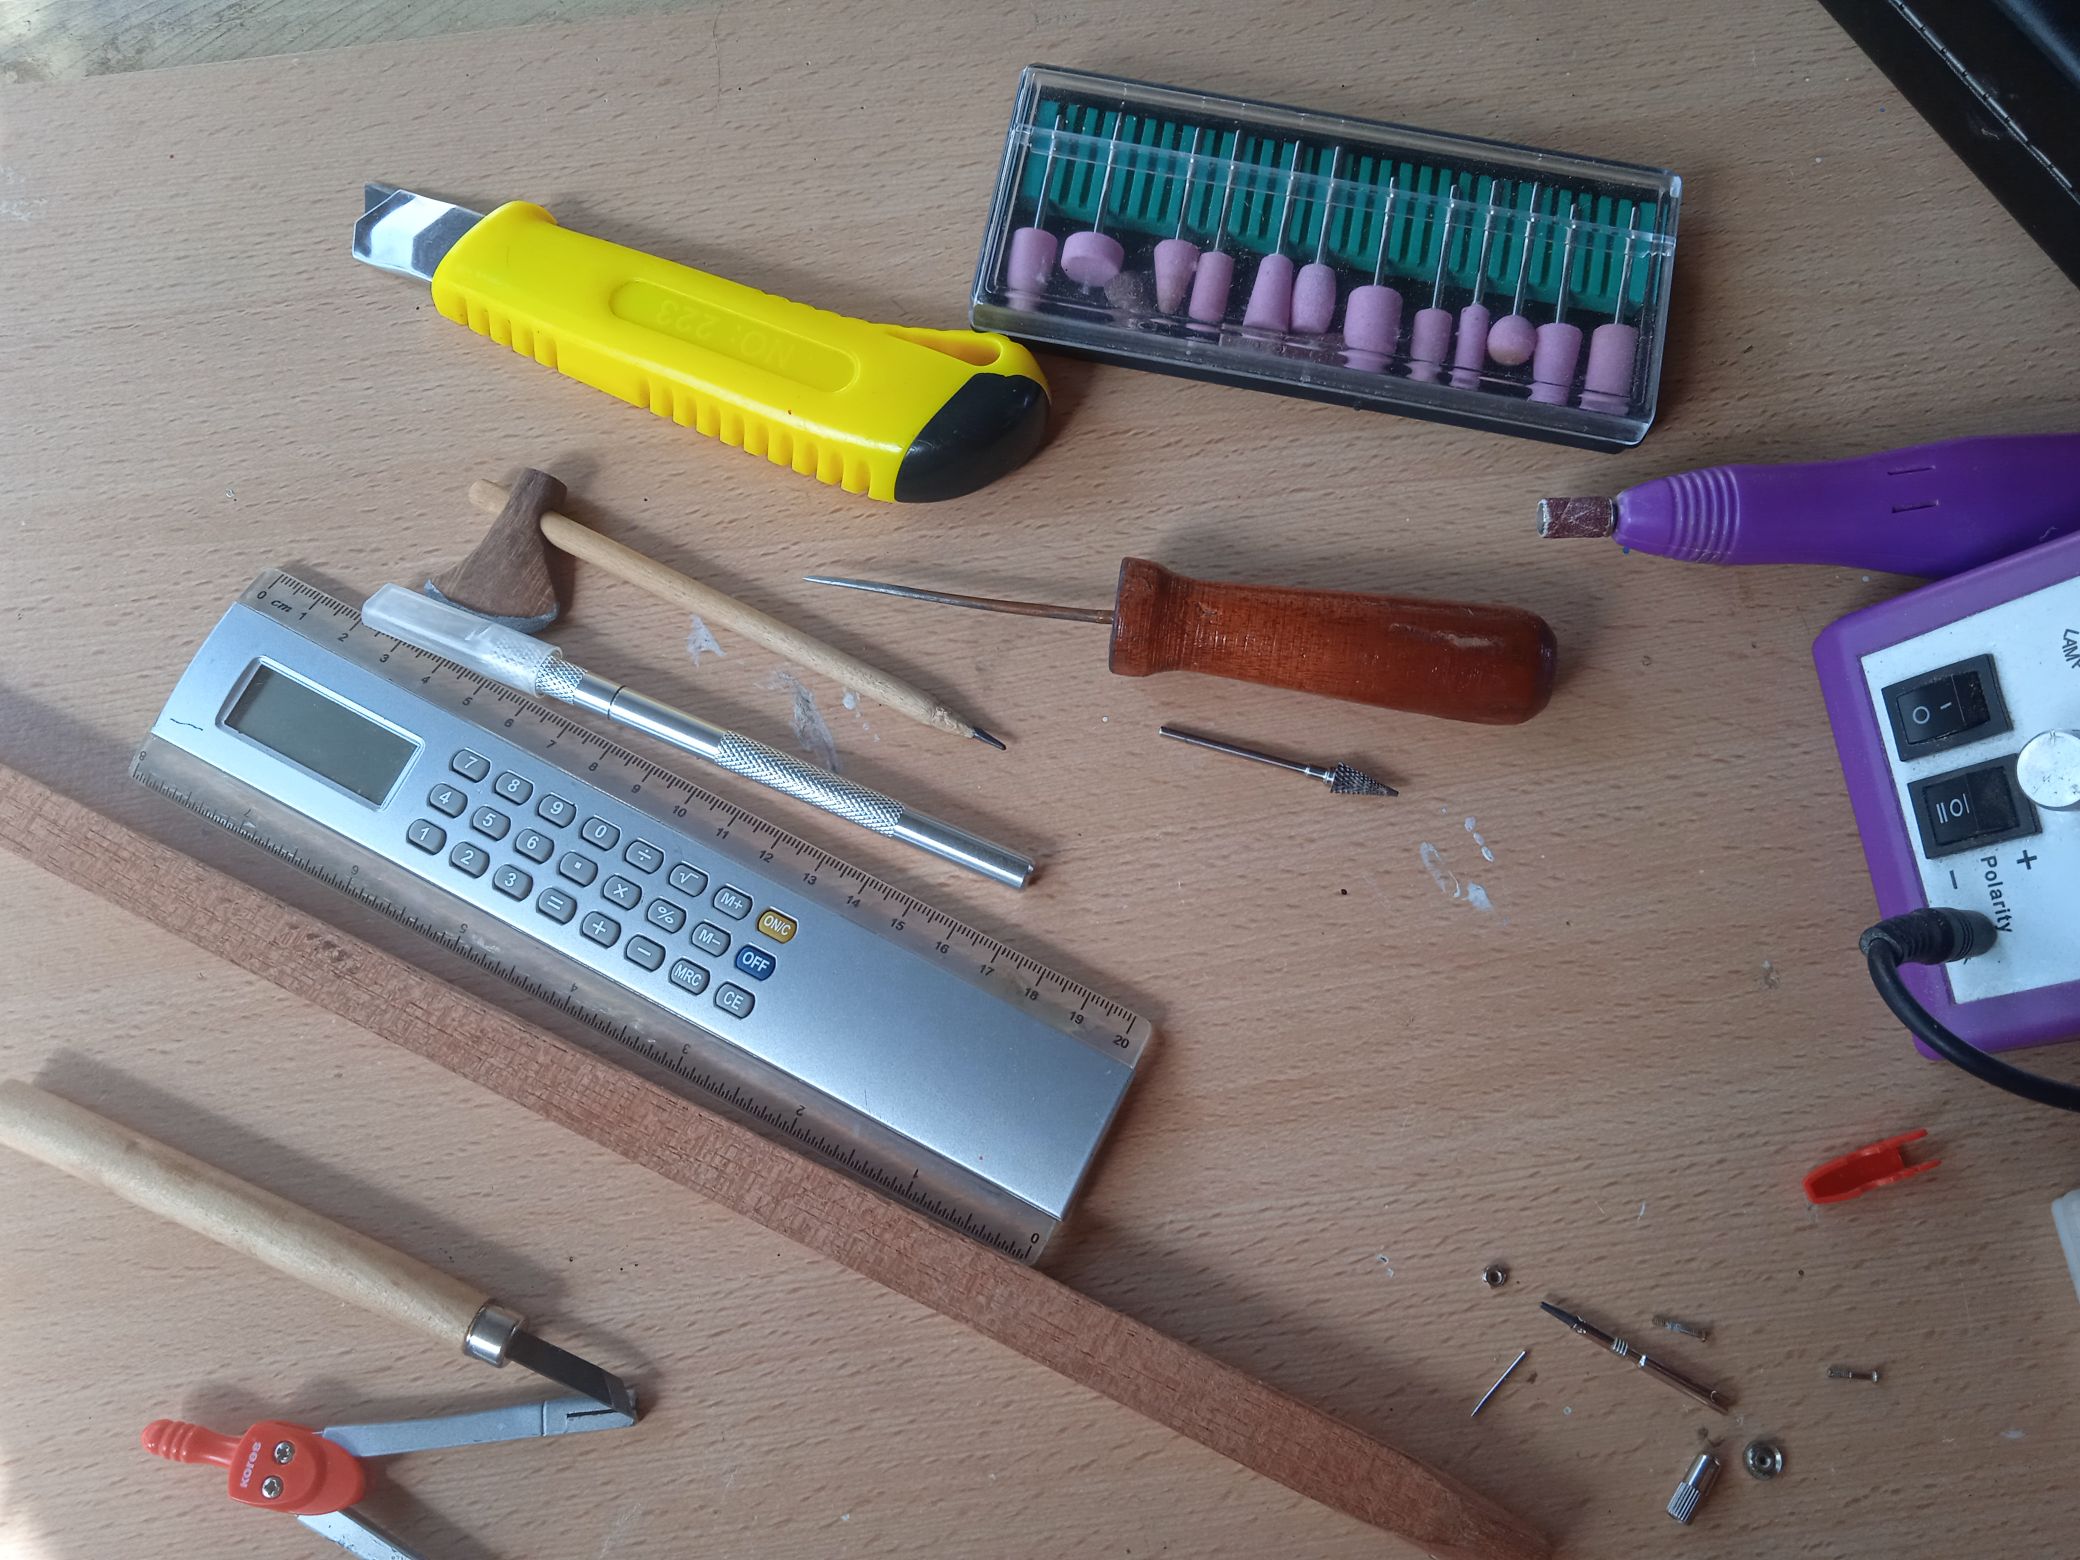
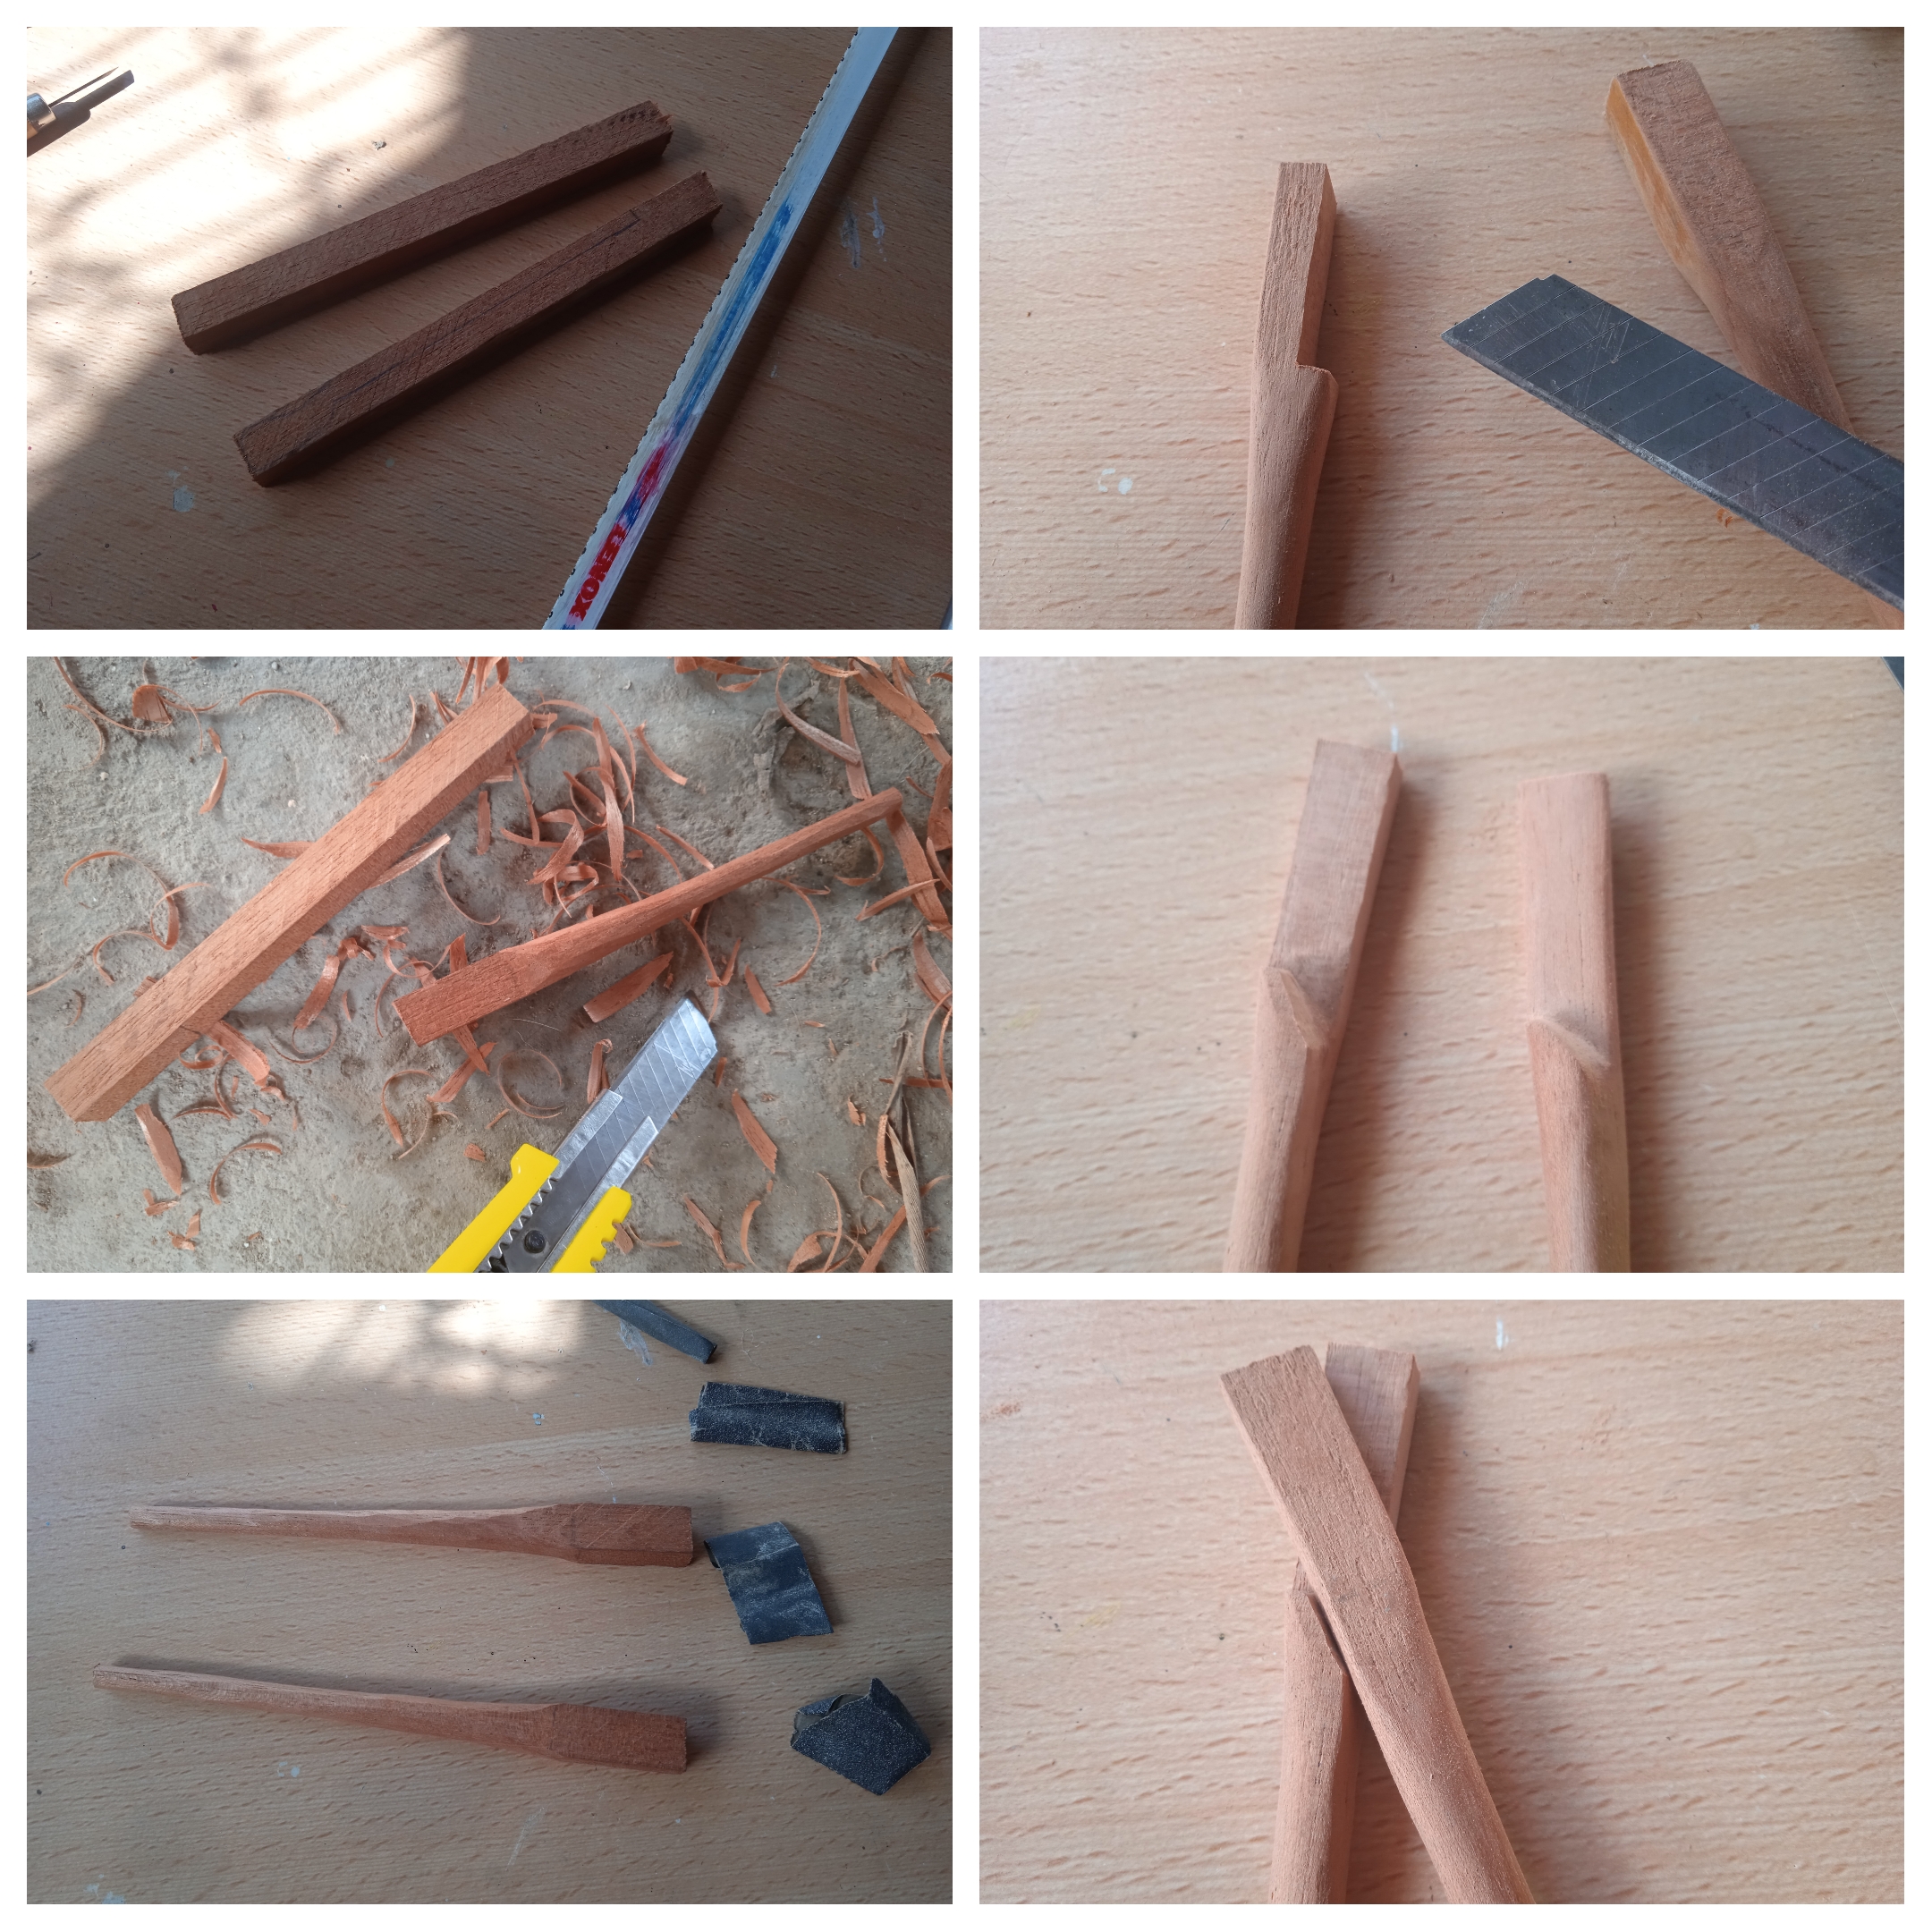
With a wooden strip I decided to create my own compass, for this I cut two pieces of 16 centimeters and began to sharpen and round both.
Then I made similar cuts at the top as a kind of hitch.
I sanded for a better finish.
Con un listón de madera me propuse crear mi propio compás, para ésto corté dos trozos de 16 centímetros y comencé a afilar y redondear ambos.
Seguidamente hice cortes similares en la parte superior como especie de enganche.
Lijé para mejor acabado.
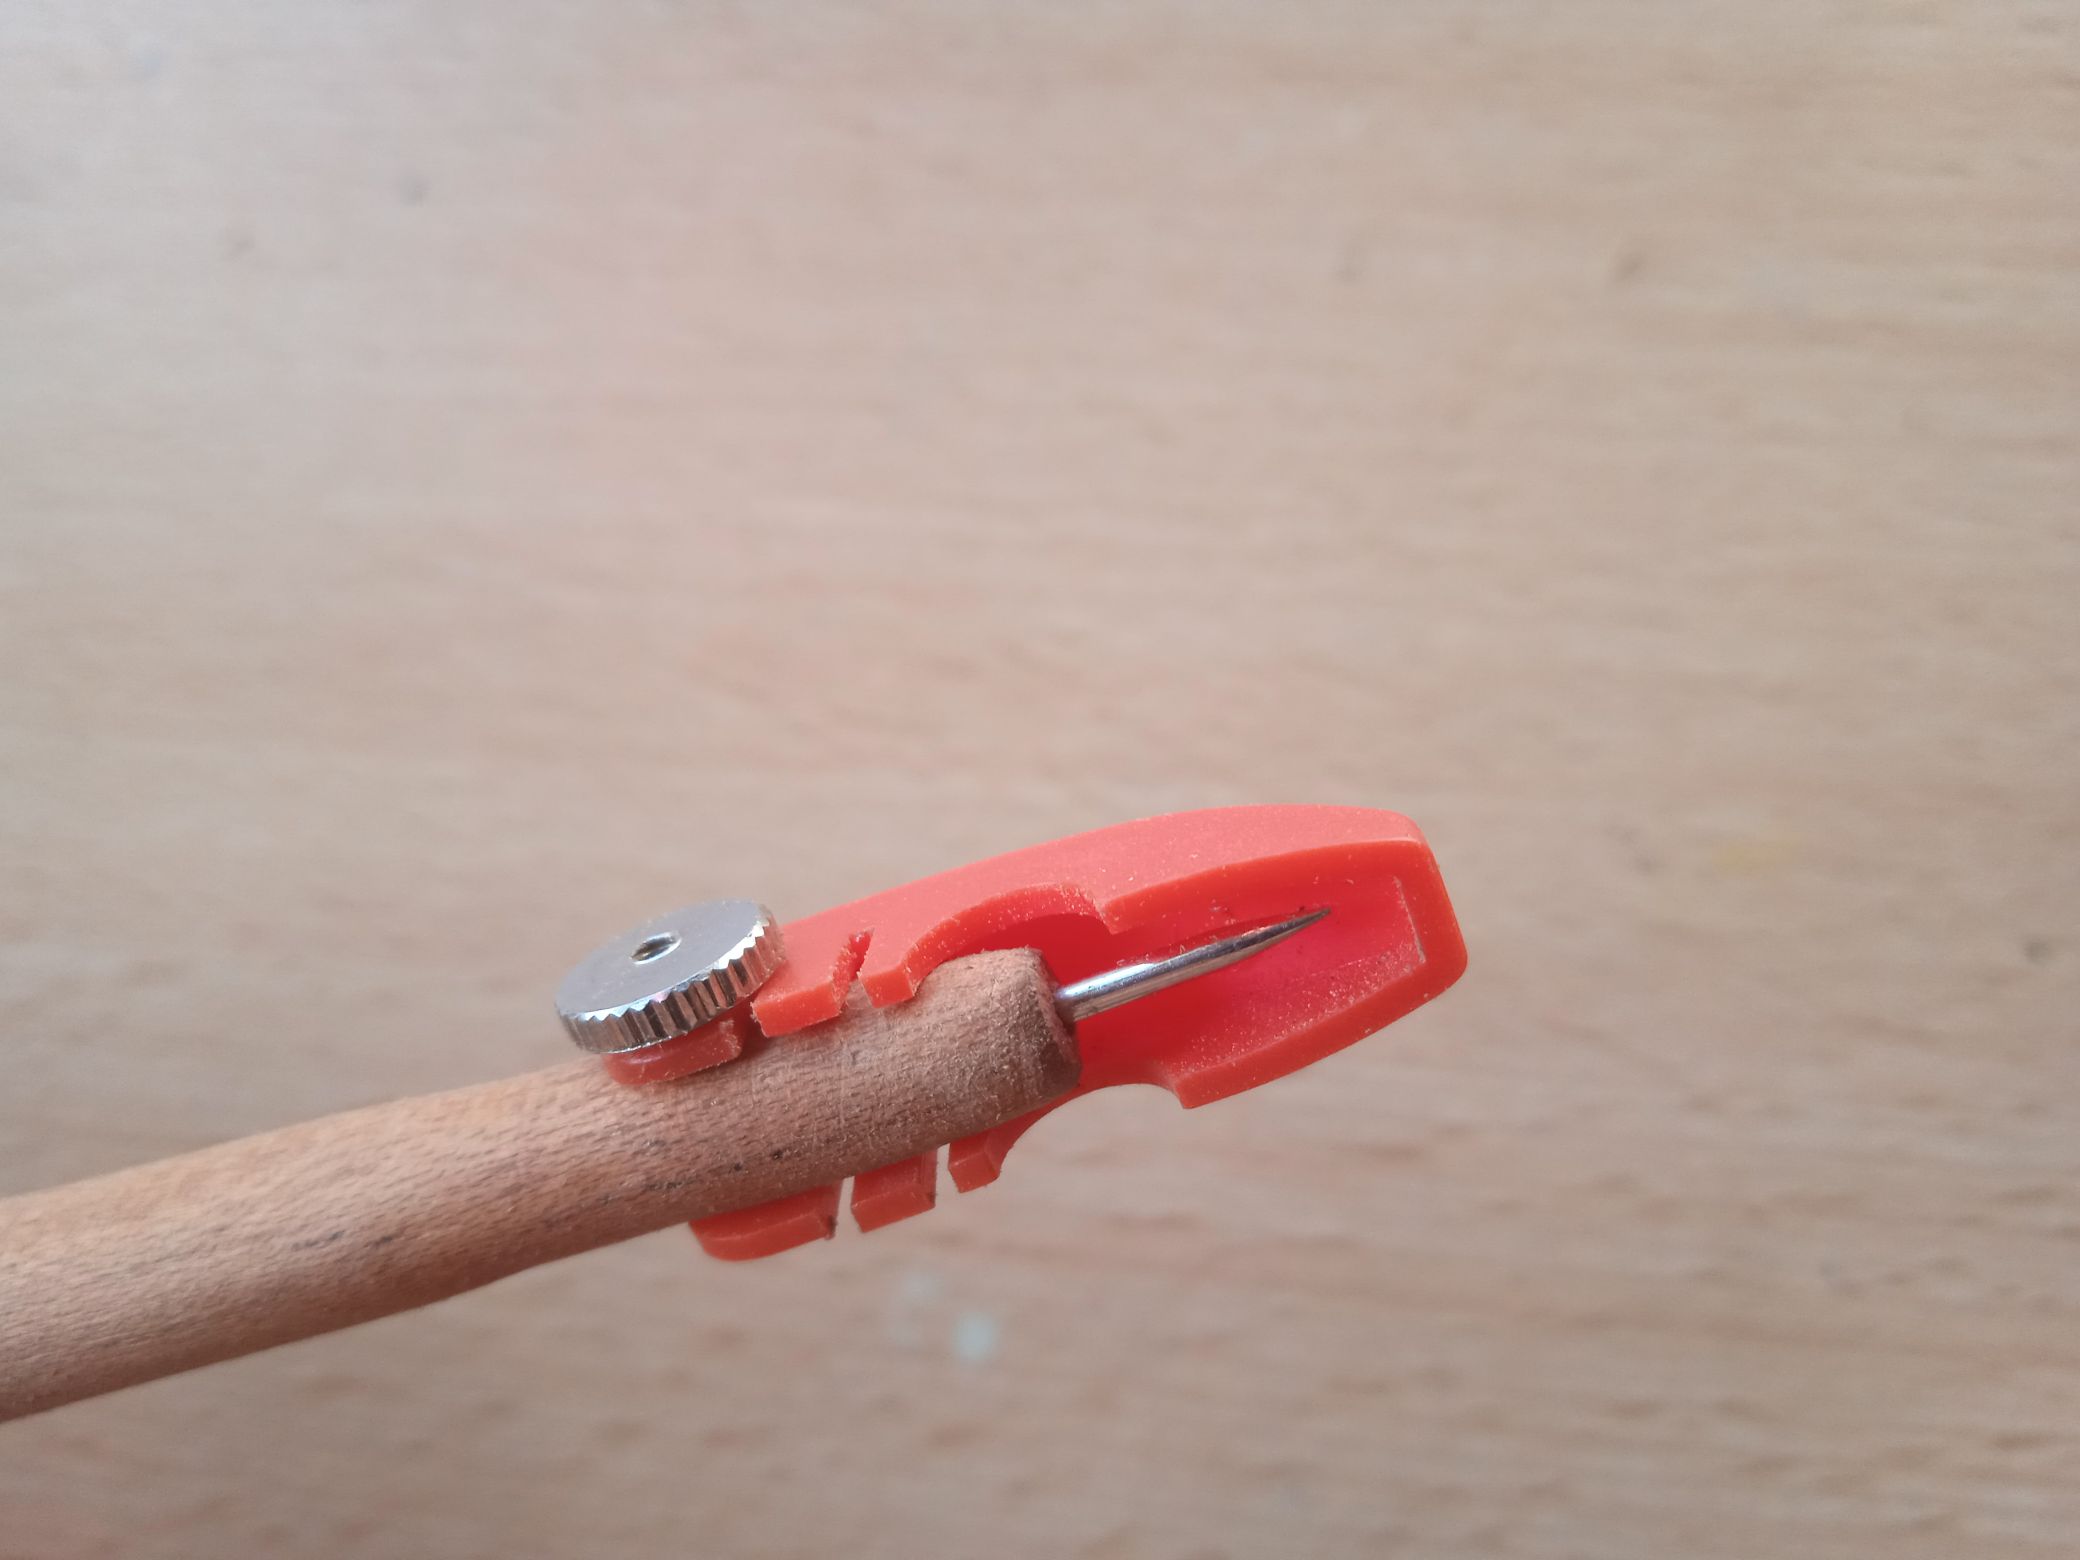
From the old compass I extracted the lead holder and the needle with its protector, with the help of a thin awl I drilled to insert said accessories.
On the other side I had to use a drill bit to press the lead holder in. Always taking care that they remain in parallels.
Del viejo compás extraje el porta mina y la aguja con su protector, con la ayuda de un punzón delgado perforé para insertar dichos accesorios.
Del otro lado tuve que usar una mecha de taladro para introducir a presión el porta mina. Siempre cuidando que quedaran en paralelos.
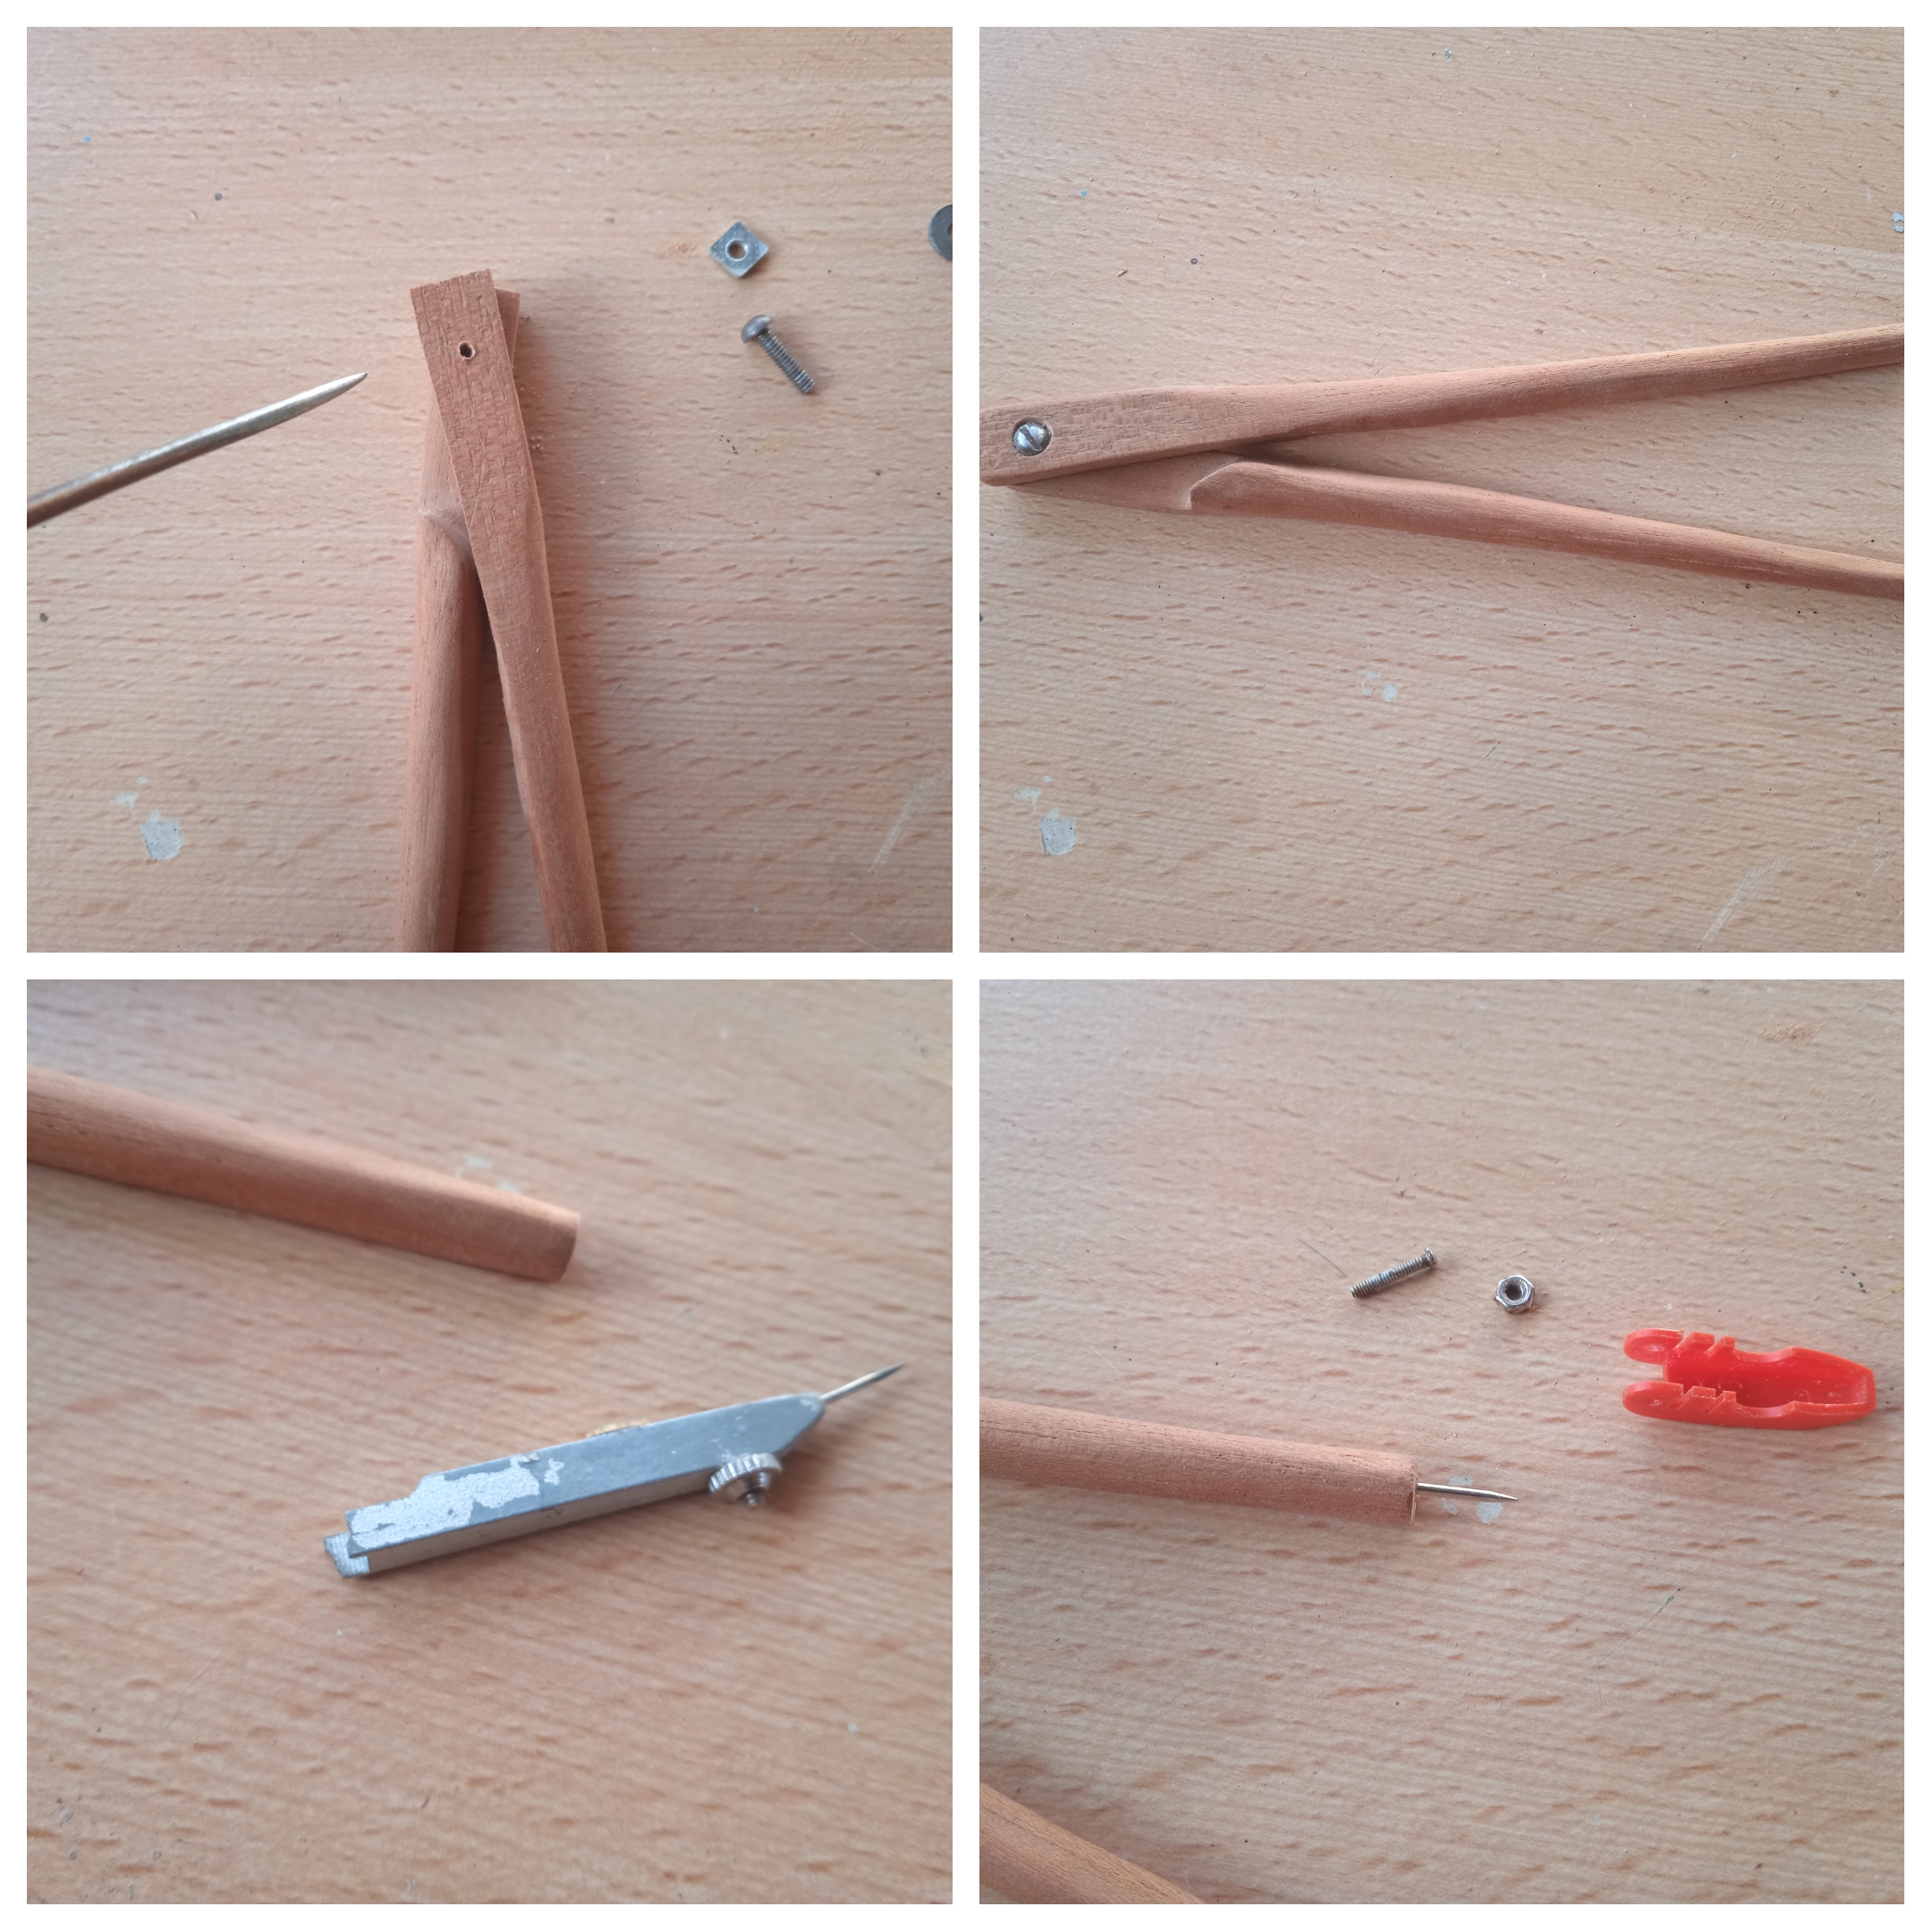
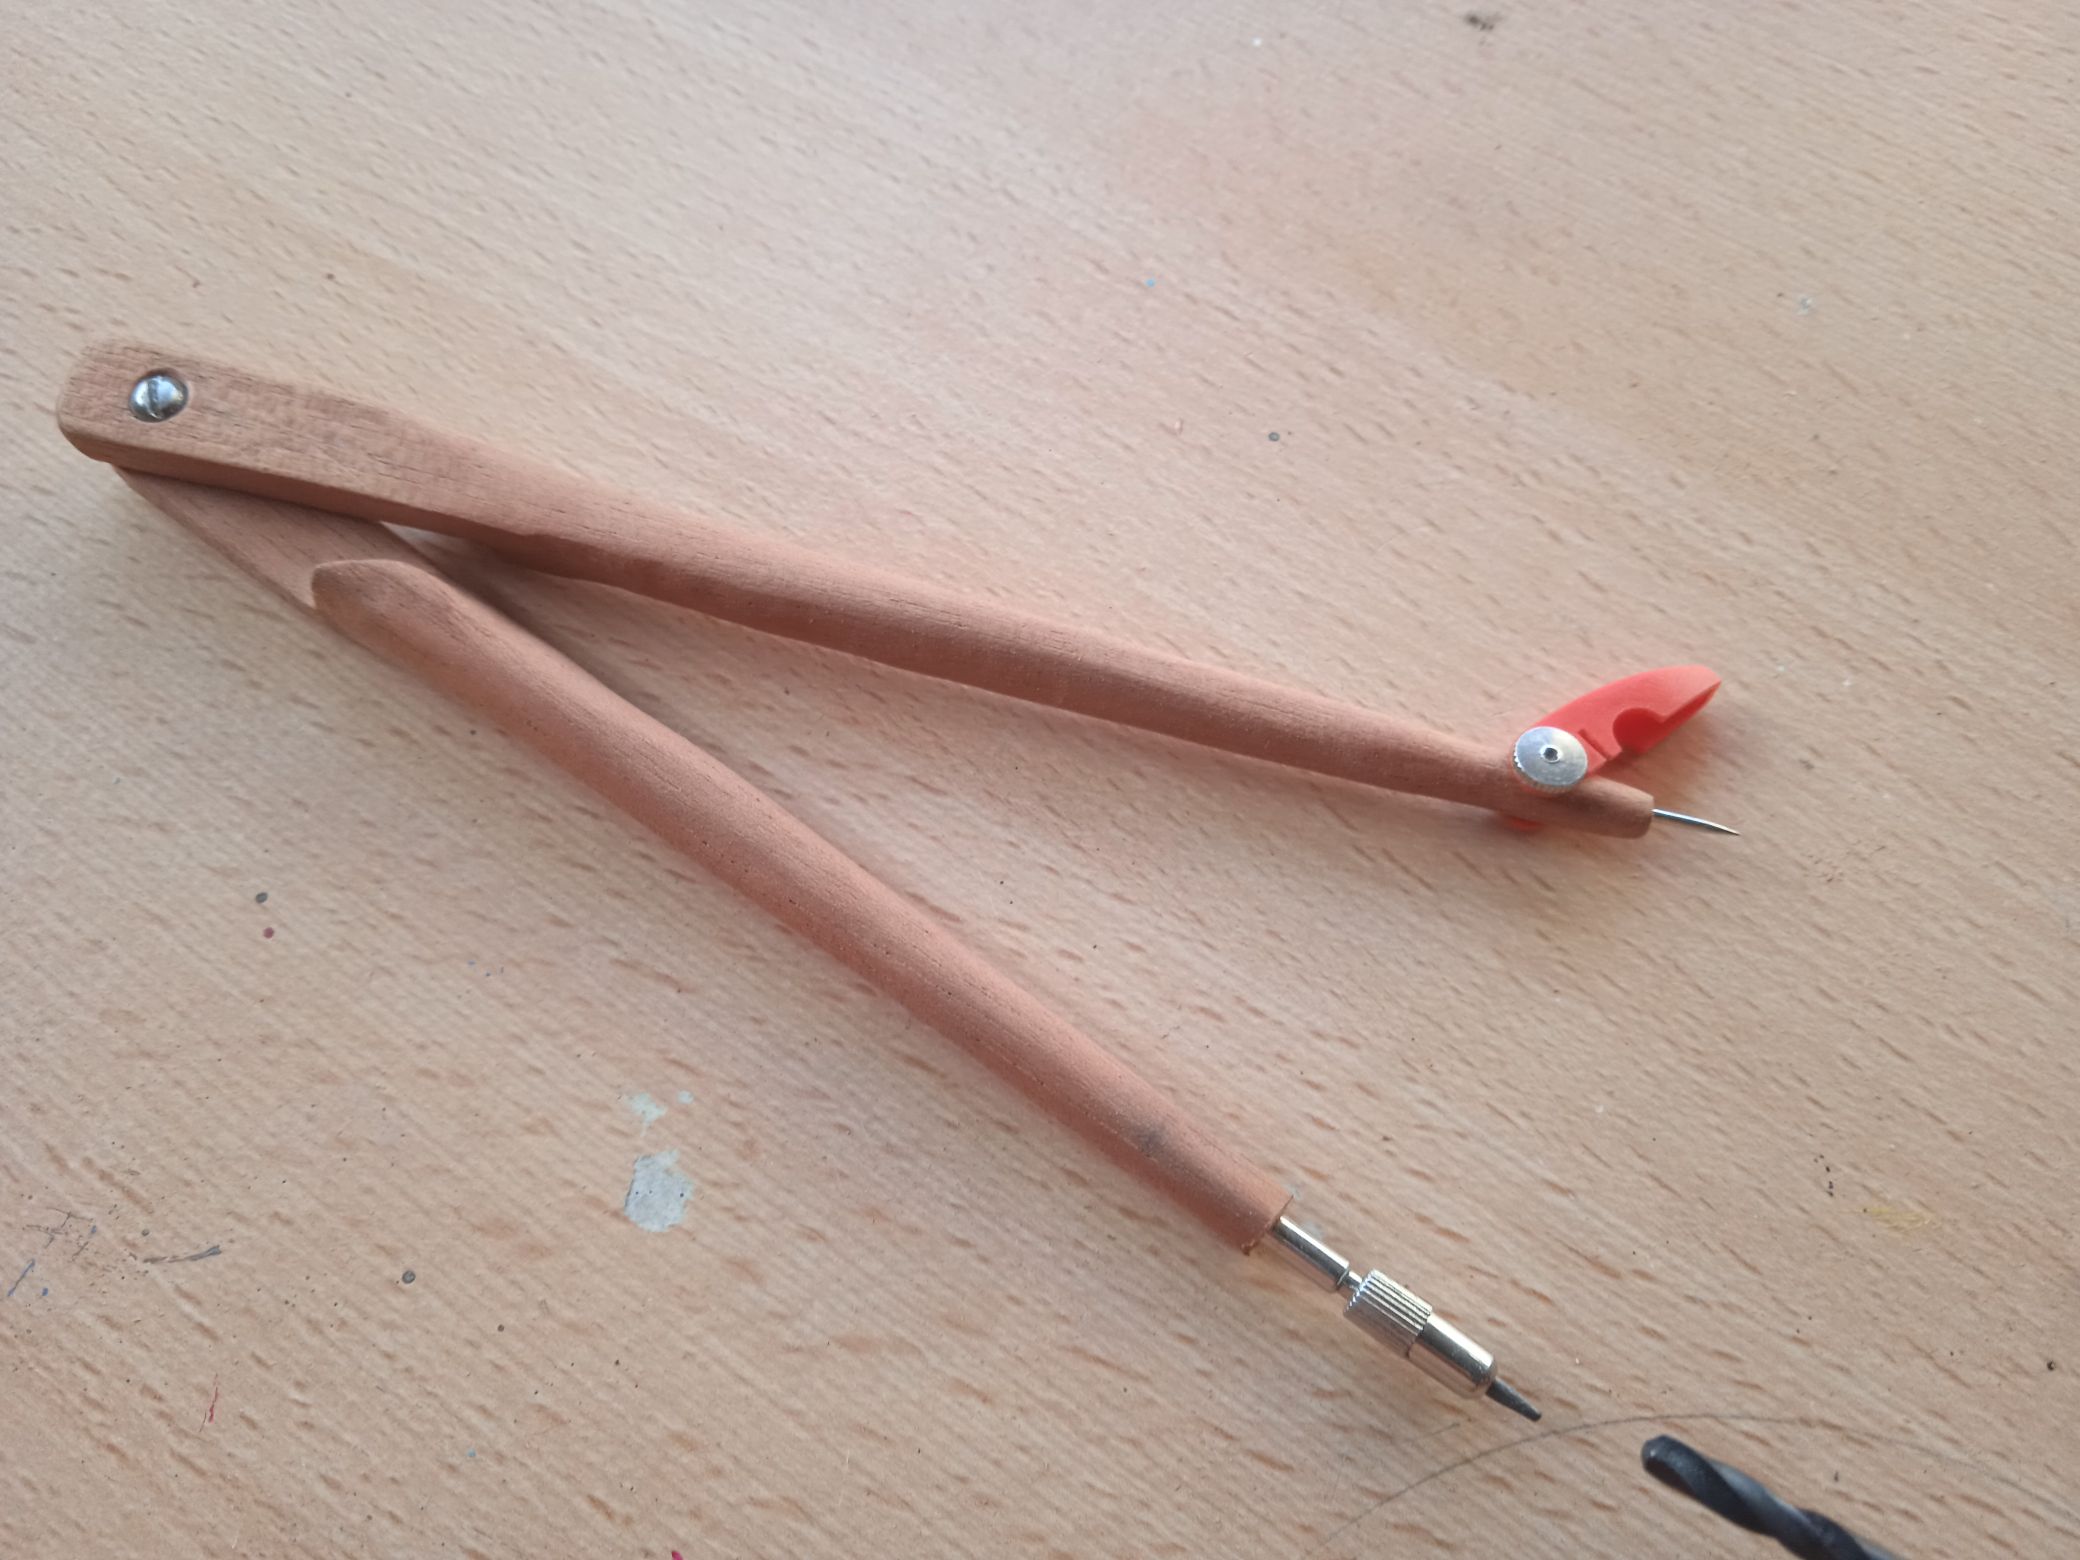
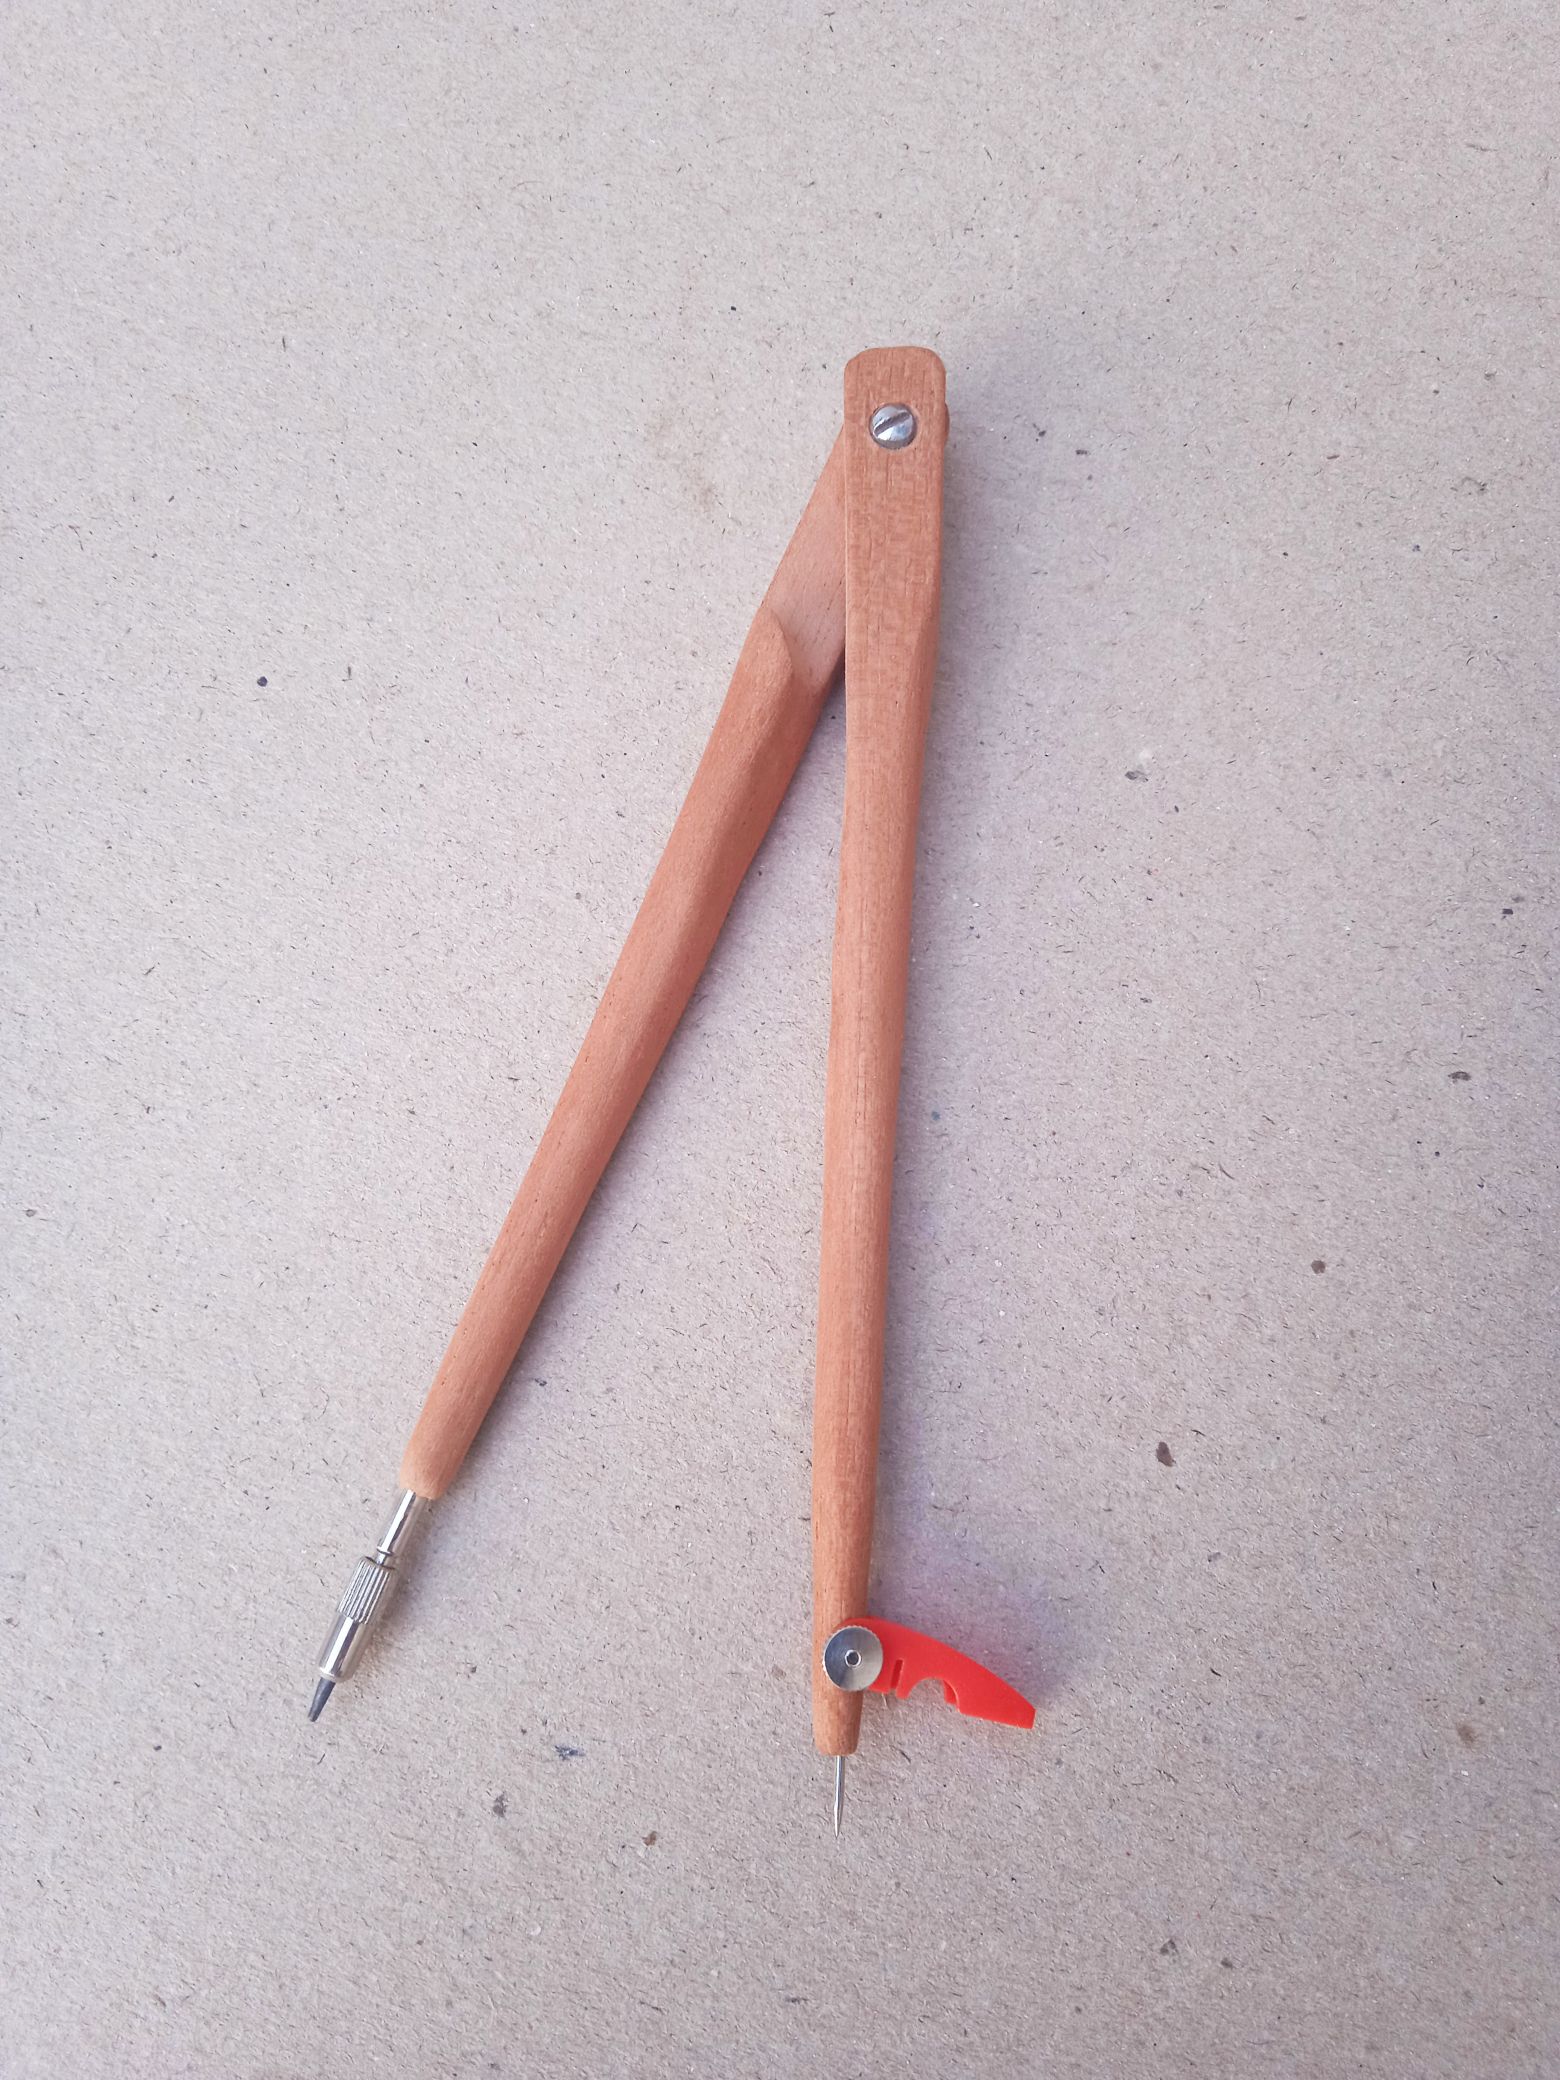
Finally I joined both slats with a screw and a nut.
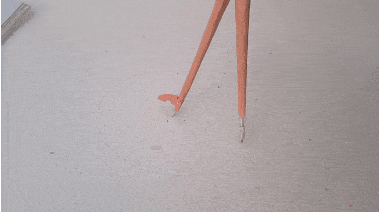
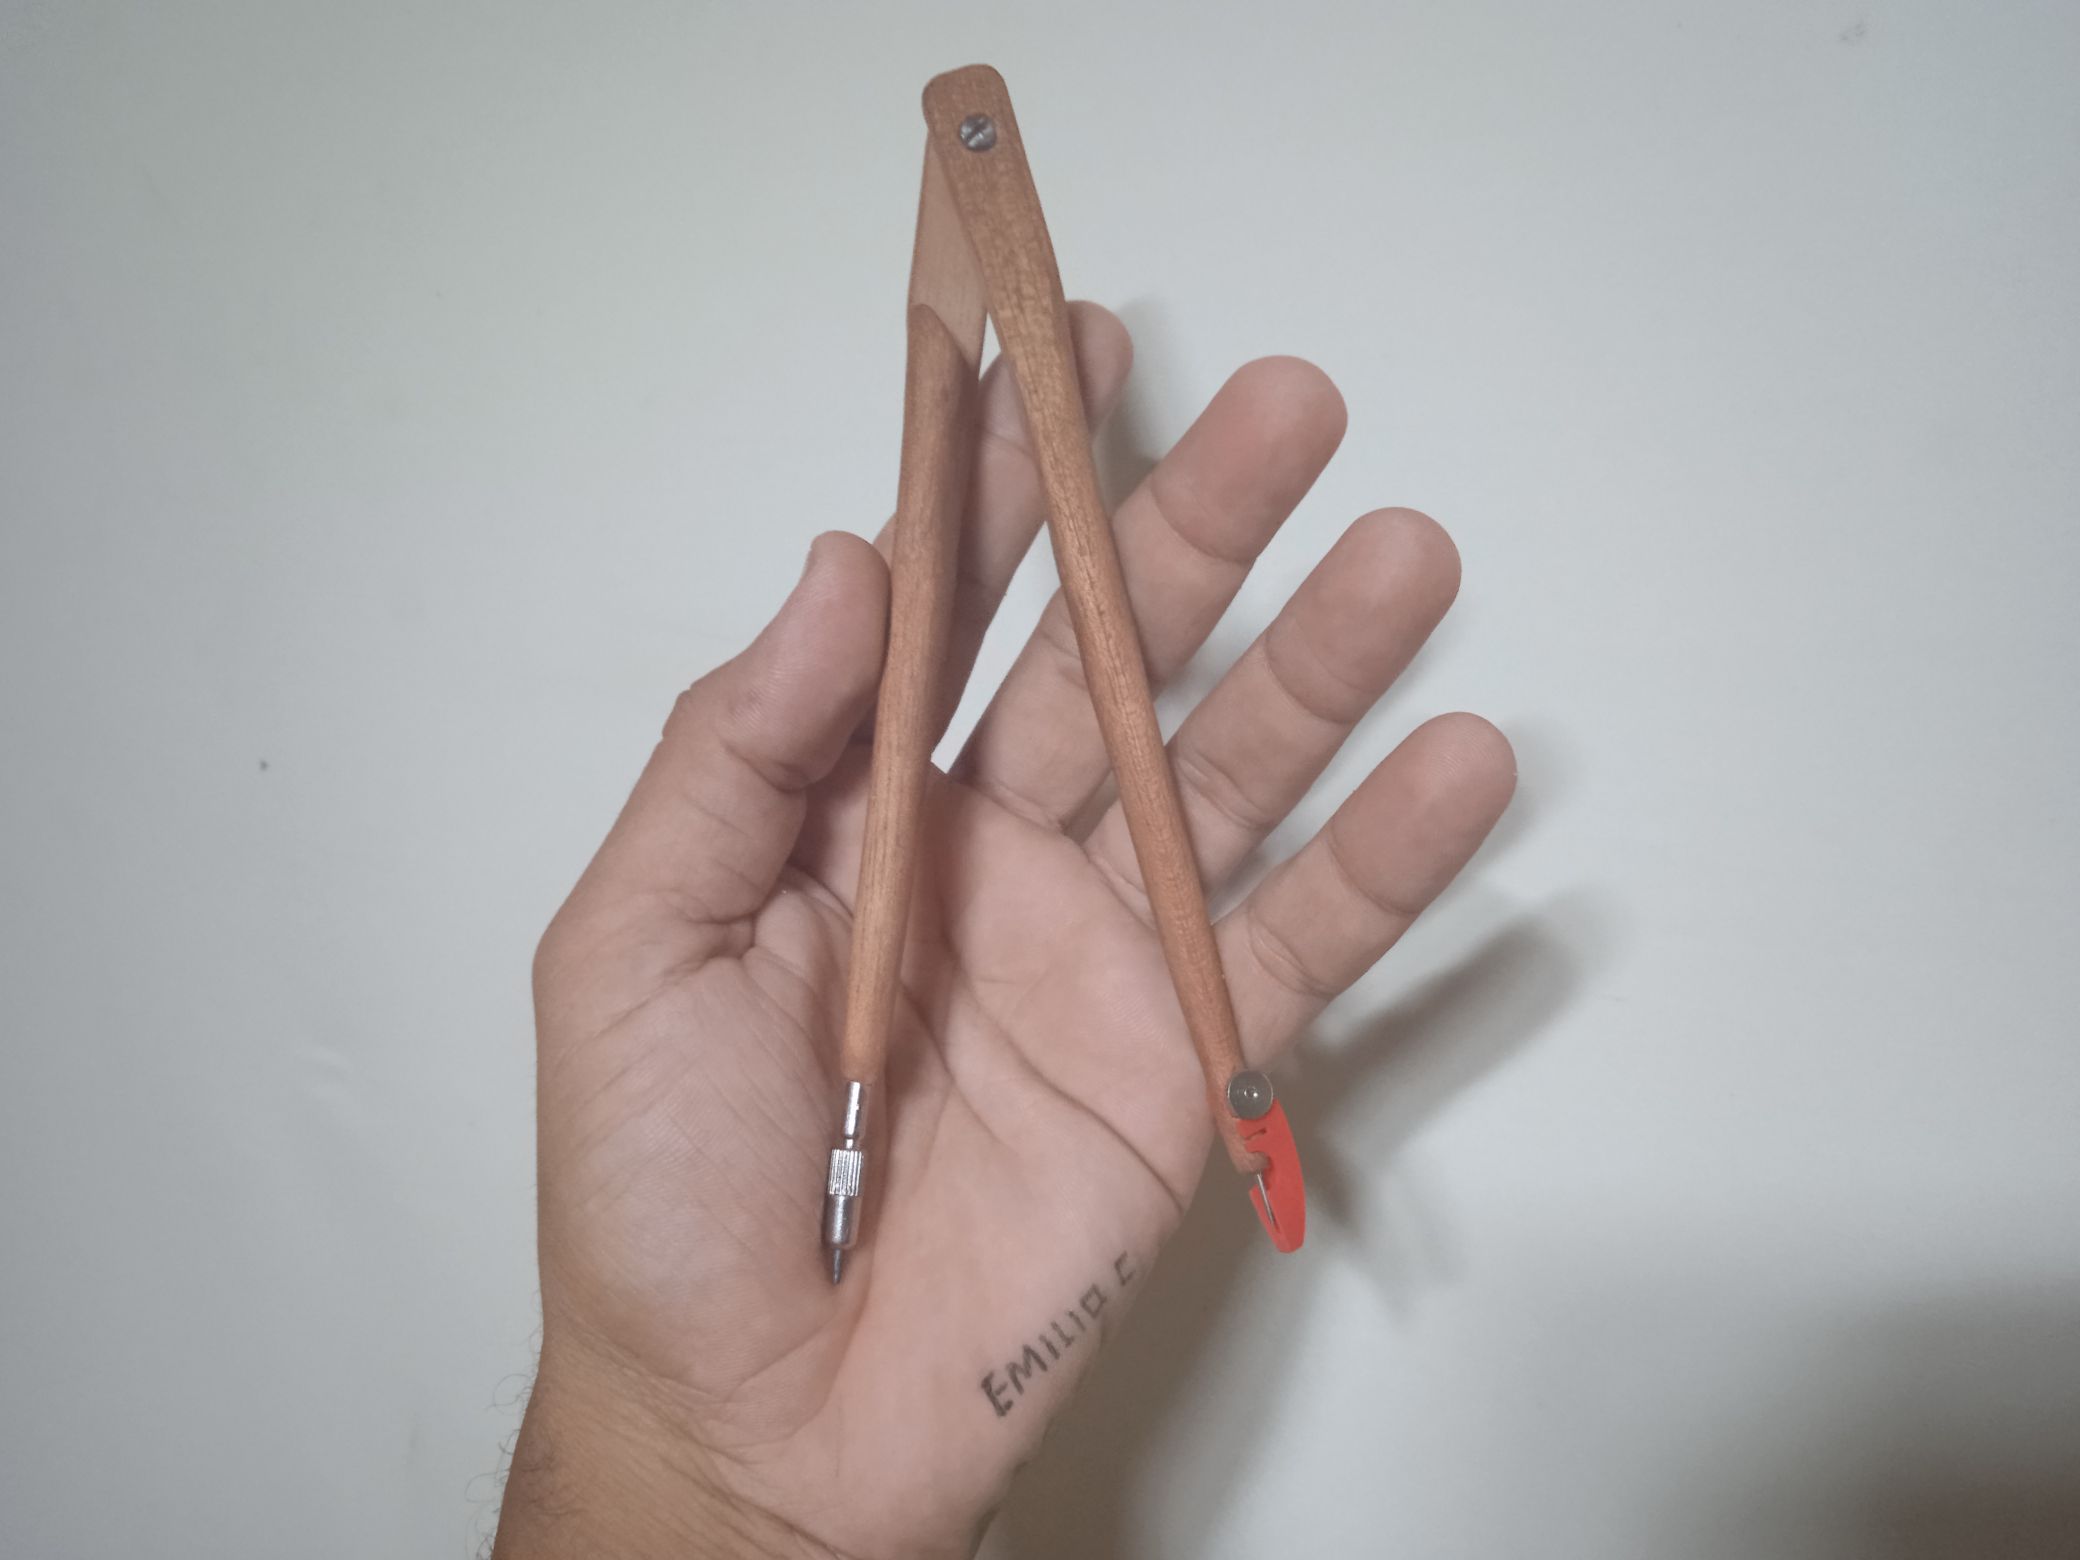
I did the corresponding test of circular tracing and it is very gratifying to get a new compass made by my hands. The following gif shows a test of the functionality of this tool.
Finalmente uní ambos listones con un tornillo y una tuerca .
Hice la prueba correspondiente de trazado circular y es muy gratificante obtener un nuevo compás hecho por mis manos. El siguiente gif muestra una prueba de lo funcional de ésta herramienta.
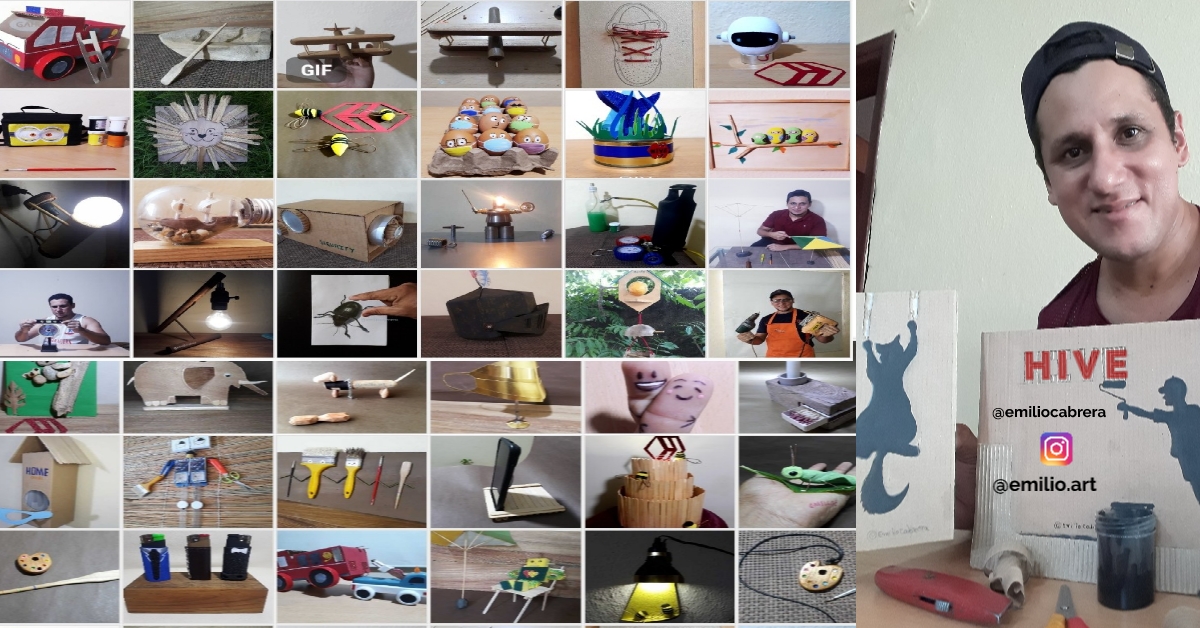
Thanks for your attention, if you want to see more of my DIY posts, feel free to visit my blog. Greetings!
Gracias por su atención, si desea ver más de mis publicaciones de bricolaje, siéntase libre de visitar mi blog. Saludos!

Hola @emiliocabrera demasiado hermoso y útil este compás, Creaciendo en el arte, Dios bendiga tus creaciones. 😀 😇
Muchas Gracias preciosa @naty16. me alegra que te haya gustado. Igual bendiciones
Original tu trabajo hermano.
Gracias hermano, saludos