

Greetings beautiful people, I hope you had a splendid weekend.
Today is craft Monday, a Monday that I dedicate to participate in my favorite contest held by the beautiful community of @build-it. So my dear ones, if you want to know more about this weekly contest, I invite you to visit their post and find out the contest rules. Participate! Show your creativity with crafts.
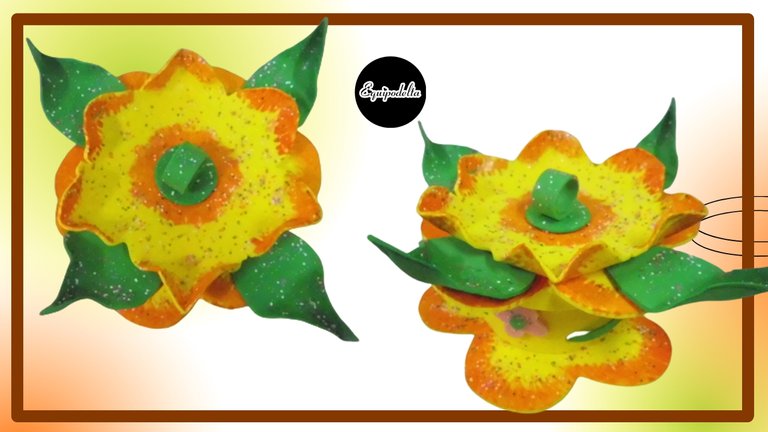
I invite you to this short tutorial on How to make this cute jewelry box that could also be a small organizer.
At the end of the post I leave the video process I made for your enjoyment.

Saludos gente bonita, espero pasaran un fin de semana espléndido.
Hoy es lunes de manualidades, lunes que dedico a participar en mi concurso favorito que lleva a cabo la hermosa comunidad de @build-it. Así que mis estimados, si quieres saber más sobre este concurso semanal, te invito a visitar su post y te enteres de la bases del mismo. ¡Participa! Expresa tu creatividad con manualidades.
Los invito a este breve tutorial de Cómo hacer este lindo joyero que además podría ser un pequeño organizador.
Al final del post dejo el vídeo proceso que realicé para tu disfrute.
PASO A PASO / STEP BY STEP

Materials:
- Foami.
- Cold ceramic paint.
- Scissors, brush.
- Silicone gun.
- Nail polish with frosting.
- Hair iron.
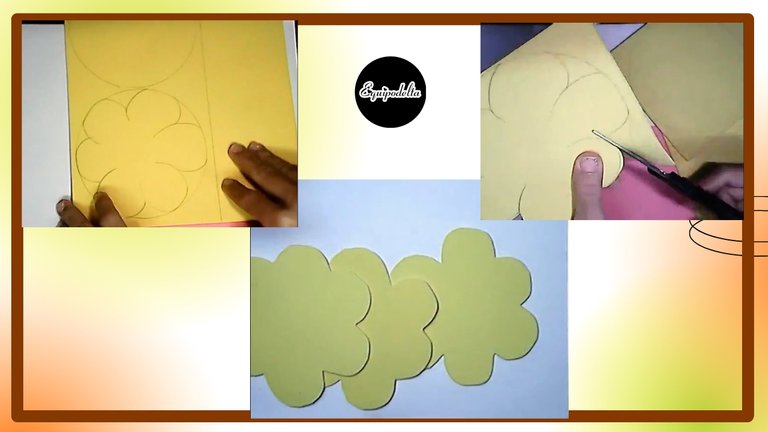
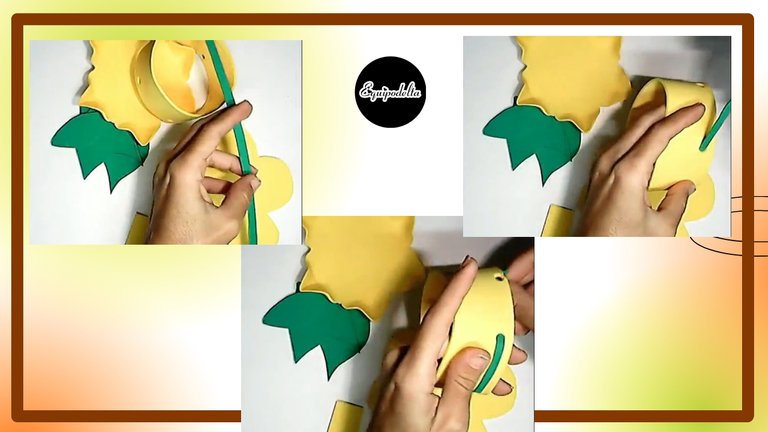
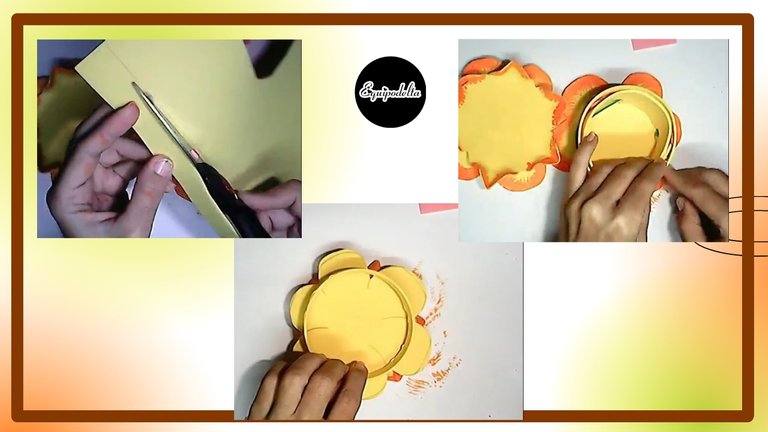
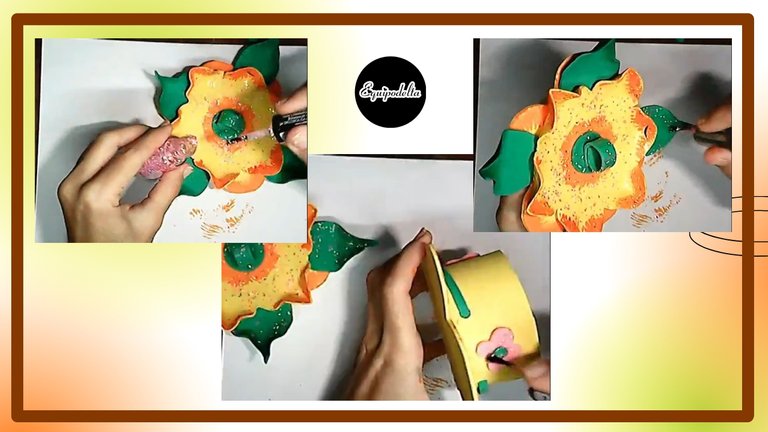
Step 1: Use any instrument you can trace a perfect circle, then draw some flower petals, trim around the edge and repeat this step three times. You can cut out the first one and use it as a shape to make them all the same.
Paso 1: Utiliza cualquier instrumento que puedas trazar un círculo perfecto, luego dibuja unos pétalos de flor, recorta por el borde y repite este paso tres veces. Puedes recortar el primero y para que queden todos iguales utilízalo como molde.
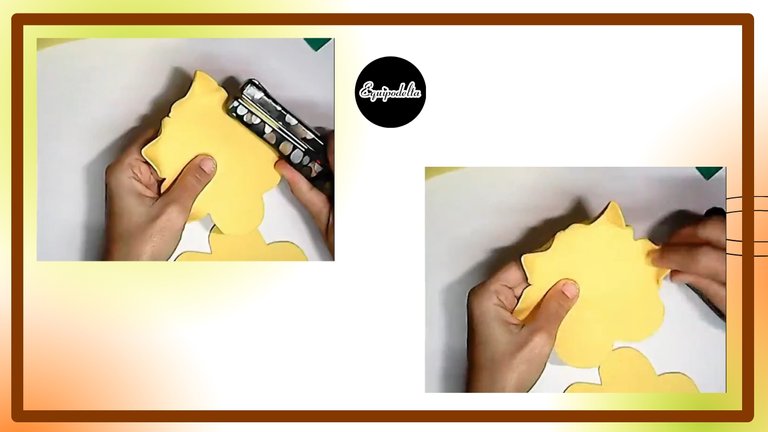
Step 2: Apply thermoforming on the tips of one of the pieces that we cut out, being very careful not to burn yourself or the piece, after it is hot but not so hot that you burn yourself, with your fingers, move those tips upwards and shape them.
Paso 2: Aplicamos termoformado en las puntas en uno de las piezas que recortamos, con mucho cuidado de no quemarte ni quemar la pieza, luego que esté caliente pero no tanto para quemarte, con tus dedos esas puntas hacia arríba y moldea.

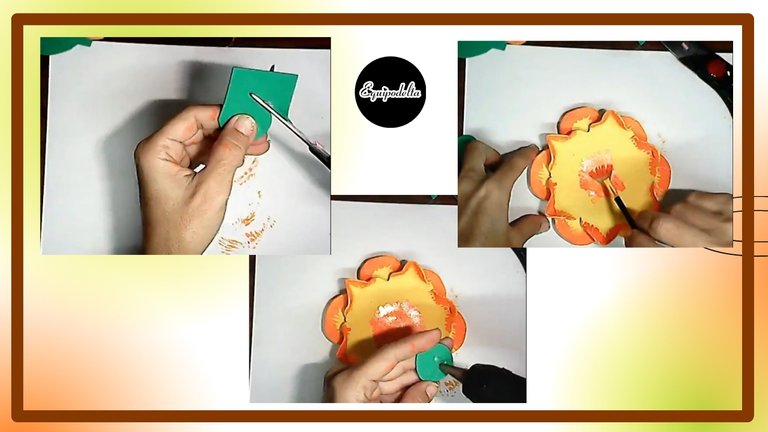
Step 3: Draw the shape of a leaf and cut out four pieces, cut out a rectangle of the width you prefer for your jewelry box and measure the width of the rectangle at the base, then glue with hot silicone.
With the help of a paper hole opener, punch several holes in the base, if you don't have a hole opener you can make a small vertical cut with the scissors, it also works.
Paso 3: Dibuja la forma de una hoja y recorta cuatro piezas, recorta un rectángulo del ancho que prefieras tu joyero y mide el ancho del mismo en la base, luego pega con el silicón caliente.
Con ayuda de un abre huecos de papel, perfora varios orificios en la base, si no tienes abre huecos puedes hacer un pequeño corte vertical con la tijera, también funciona.
Step 4: Cut a thin strip the size of the holes you just made, then weave the ribbon through each of them, this is for decoration, so it can be optional, you can also use fabric ribbons or string, whatever you have at your fingertips, I used the same foami.
Paso 4: Recorta una tira delgada del tamaño de los orificios que acabas de hacer, luego entrelaza la cinta en cada uno de ellos, esto es para decorar, así que puede ser opcional, también puedes usar cintas de tela o cordón, lo que tengas a tu alcance, yo usé el mismo foami.
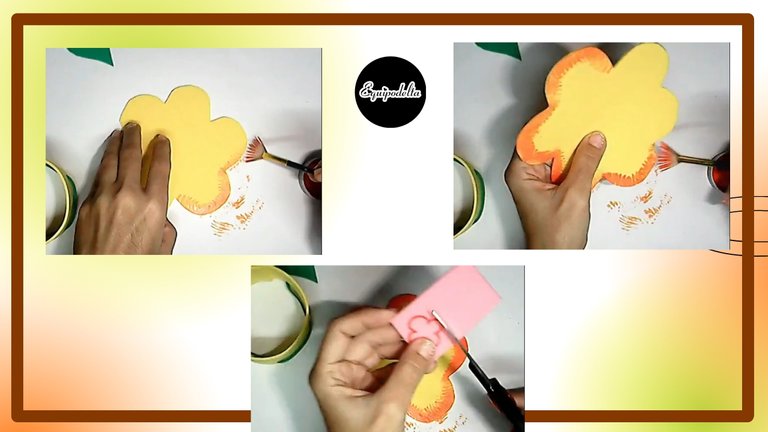
Step 5: With the brush and cold ceramic paint, paint the edges of what will be the lid of the jewelry box. If you don't have cold ceramic paint, you can use tempera or watercolor.
Draw three small flowers on a different color foami, I chose pink, cut around the edges.
Paso 5: Con el pincel y la pintura de cerámica al frío, pinta los bordes de la lo que será la tapa del joyero. Si no tienes pintura de cerámica al frío puedes usar temperas o acuarelas.
Dibuja tres pequeñas flores en un foami de otro color, yo elegí rosado, recorta por los bordes.
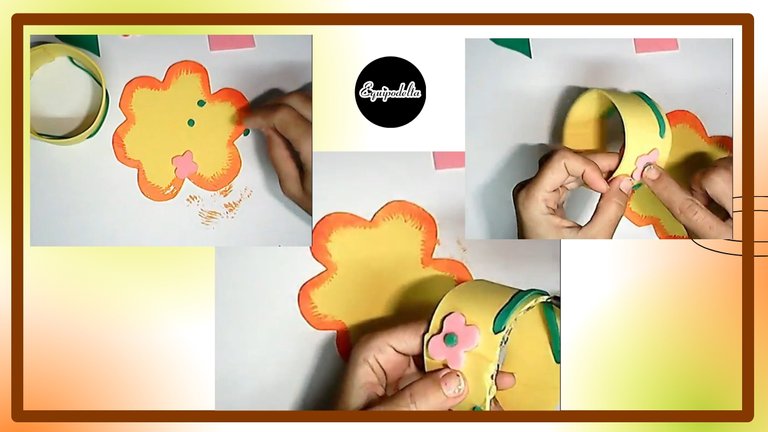
Step 6: with the help of the hole cutter we can cut out three small circles that will be the center of each flower. Then proceed to glue them around the sides of the jewelry box, then glue the base.
Paso 6: con ayuda del abre huecos podemos recortar tres círculos pequeños que serán el centro de cada florecita. Luego procede a pegarlas al rededor de los lados del joyero, seguidamente pega la base.
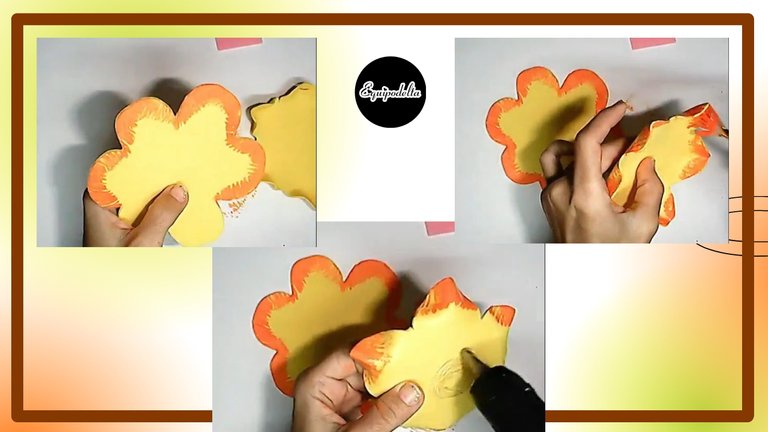
Step 7: Paint the edges of the other base of the jewelry box lid and the edges of the other lid to which we applied the thermoforming with the hair iron, then place some glue in the center and glue both covers.
Paso 7: Pintamos los bordes de la otra base de la tapa del joyero y los bordes de la otra tapa a la que aplicamos el termoformado con la plancha de cabello, luego colocas un poco de pega en el centro y pega ambas tapas.
Step 8: Cut a 1.5 centimeter strip of foami, measure the edge of the jewelry box circle so that it is neither too loose nor too tight, trim the excess and glue the circle closed. Then glue this circle to the lids we just glued.
Paso 8: Recorta una tira de foami de 1,5 centímetros, mide el borde del círculo del joyero que no quede ni muy suelto ni muy ajustado, recorta el exceso y pega cerrando el círculo. Luego pega este circulo a las tapas que acabamos de pegar.
Step 9: Cut out a small circle that will be the center of our flower, I chose a green color. With the paint give a few small touches in the center of the lid, let dry and glue the small circle to the lid, we have the center of our flower.
Paso 9: Recorta un círculo pequeño que será el centro de nuestra flor, yo elegí un color verde. Con la pintura da unos pequeños toques en el centro de la tapa, deja secar y pega el círculo pequeño a la tapa, Ya tenemos el centro de nuestra flor.
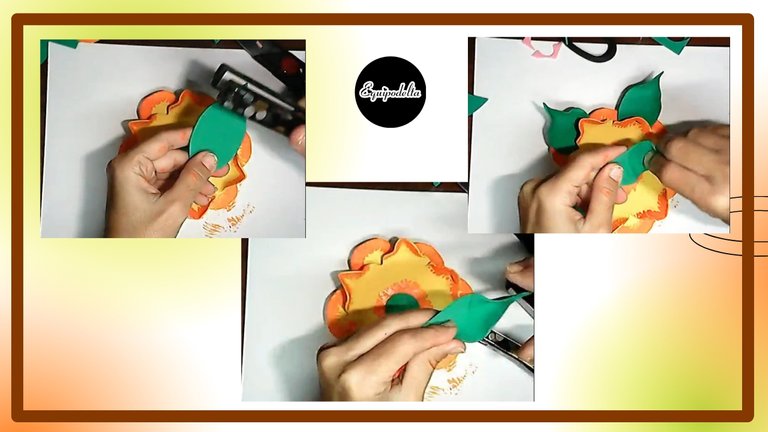
Step 10: Apply thermoforming on the sheets we cut out, repeat step 1 which consists of heating the edges without being very careful not to burn yourself or the material, then shape with your fingers.
Paso 10: Aplica termoformado en las hojas que recortamos, repite el paso 1 que consiste en calentar los bordes sin con mucho cuidado de no quemarte ni quemar el material, luego da forma con los dedos.
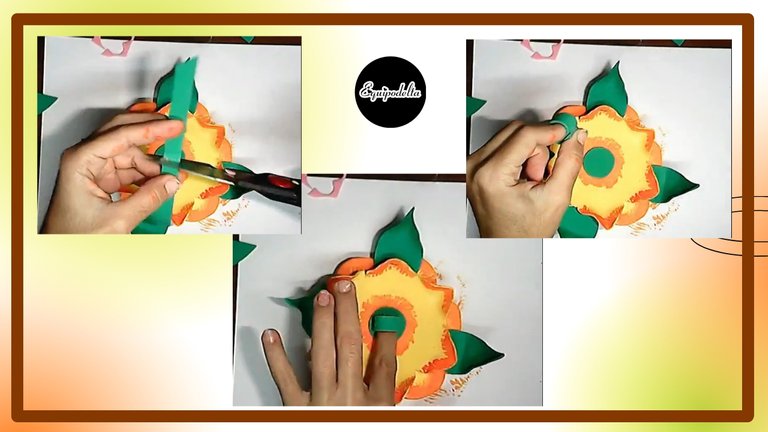
Step 11: glue the sheets between the edges of the covers. Cut a small strip of the diameter of your finger, this will be to make it easier to open our jewelry box whenever we want. Attach the ring and then glue it to the cover.
Paso 11: pega las hojas entre los bordes de las tapas. Recorta una pequeña tira del diámetro de tu dedo, esto será para facilitar abrir nuestro joyero cada vez que queramos. Une el aro y luego pégalo a la tapa.
Step 12: Apply glitter and frost with the frosted nail polish, this will work to give it personality and protect it from dust. Apply to the tops, the small flowers on the sides and the base.
That's it folks, you now have a cute jewelry box or organizer. Great for gift giving, it occurs to me to fill it with candy and give it as a gift, this project is lovely to give as a gift for mom's day, a birthday, a special occasion.
I hope you like it and enjoy it as much as I do. I invite you to participate.
Remember: "I give you an idea and you improve it".
Paso 12: Aplica brillo y escarcha con la pintura de uñas escarchada, esto funcionará para darle personalidad y lo protegerá del polvo. Aplica a las tapas, las pequeñas flores de los lados y la base.
Es todo amigos, ya tienes un lindo joyero u organizador. Excelente para regalar, se me ocurre que lo llenes de dulces y lo obsequies, este proyecto está precioso para regalar el día de mamá, un cumpleaños, una ocasión especial.
Espero te guste y lo disfrutaras tanto como yo. Te invito a participar.
Recuerda: "Yo te doy una idea y tú la mejoras."
Detalles Técnicos / Technical Details
Program: MediBang Paint Pro.
Graphics tablet: Huion (Usb Pen Tablet).
Pictures and vídeo of my own. Web Cam Omega.
Designs and images courtesy of Canva
Music Vídeo:
––––––––––––––––––––––––––––––
Purple by Roa
Creative Commons — Attribution 3.0 Unported — CC BY 3.0
Music promoted by Audio Library
––––––––––––––––––––––––––––––
My Youtube Channel
Mi canal Youtube, tiene un montón de tutoriales muy útiles para ti.
My Youtube channel, has a lot of very useful tutorials for you.
![]() 👉
👉 ![]() 👉
👉 ![]() 👉
👉  👉
👉 ![]() 👉
👉 
Really look simple to do but it will be a little bit hard for someone that just starts or want to stsrt
Greetings, I try to use the most accessible materials for everyone. Every beginning is always a little difficult, it doesn't have to be the same or a faithful copy of the tutorial, it's about doing the best you can, remember: I show you an idea, you improve it as you can, little by little. I'm sure you will do well and better, then tell me about it.
Saludos amiga @equipodelta, el joyero te quedo bello el joyero, muchas gracias por compartir tu tutorial.
Es un placer amigo <3
Hola, un gusto en saludarte, gran trabajo. Mi esposa es buena haciendo este tipo de cosas y yo soy pro reciclaje. Ahora solo faltan las joyas.
Holaaaa! bienvenido!.
A mí hasta se me ocurre llenarlo de bombones y regalarlo, de hecho lo obsequié a una sobrina y esta se flipó, lástima que en las fotos no se aprecie tanto como en persona, gracias por tu visita y por tomar tu tiempo para comentar, un abrazo.
Congratulations @equipodelta! You have completed the following achievement on the Hive blockchain and have been rewarded with new badge(s) :
Your next target is to reach 210000 upvotes.
You can view your badges on your board and compare yourself to others in the Ranking
If you no longer want to receive notifications, reply to this comment with the word
STOPCheck out the last post from @hivebuzz: