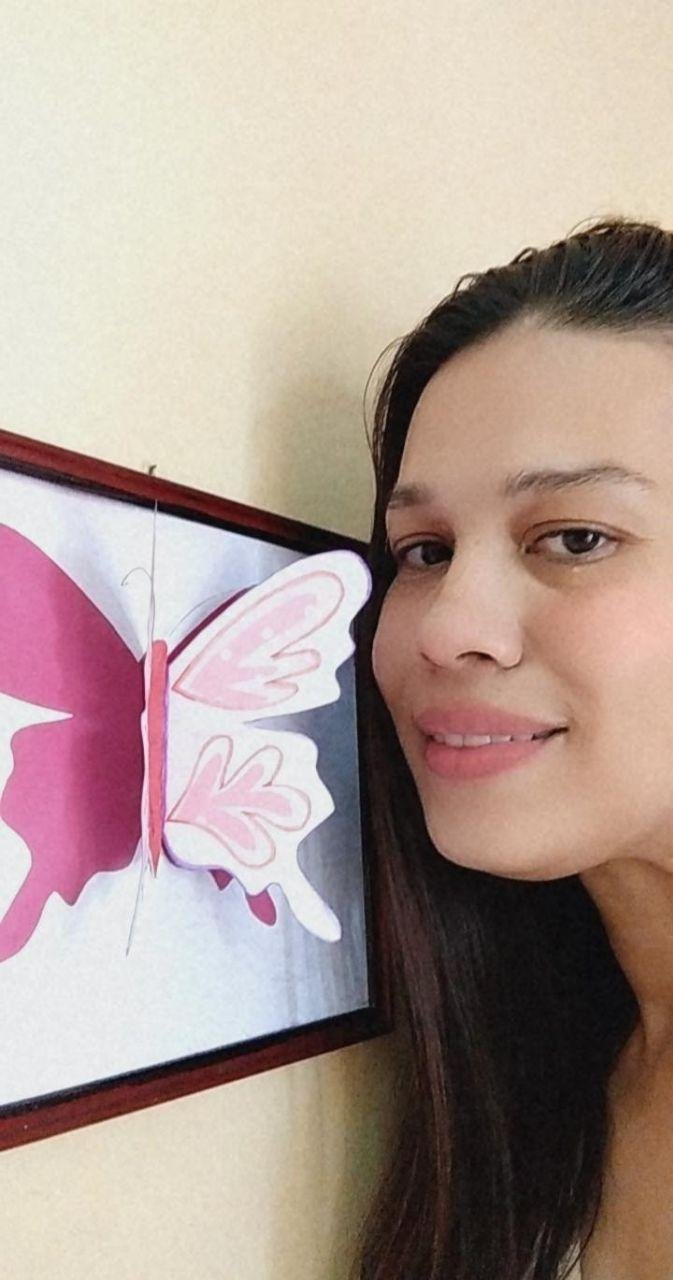
Hermoso cuadro de mariposa elaborado con material reciclado //Beautiful butterfly painting made from recycled material
Entusiasmada de poder participar en este challenge que pone a prueba nuestras habilidades creativas y la importancia del reciclaje le agradezco a @jennyzer por tan bella iniciativa y apoyar el incentivo del reciclaje ,
Aprovechando varias hojas recortadas de colores podemos armar un bello cuadro en este caso hice una mariposa, busque colores que combinen yo escoji rosado, morado y fucsia , reciclaremos un marco viejo que tengo en casa y vamos a ver el procedimiento de como lo hago
Excited to be able to participate in this challenge that tests our creative skills and the importance of recycling I thank @jennyzer for such a beautiful initiative and supporting the recycling incentive ,
Taking advantage of several cut out sheets of colours we can make a beautiful picture in this case I made a butterfly, look for colours that combine I chose pink, purple and fuchsia, we will recycle an old frame that I have at home and we will see the procedure of how I do it
Materiales// Materials
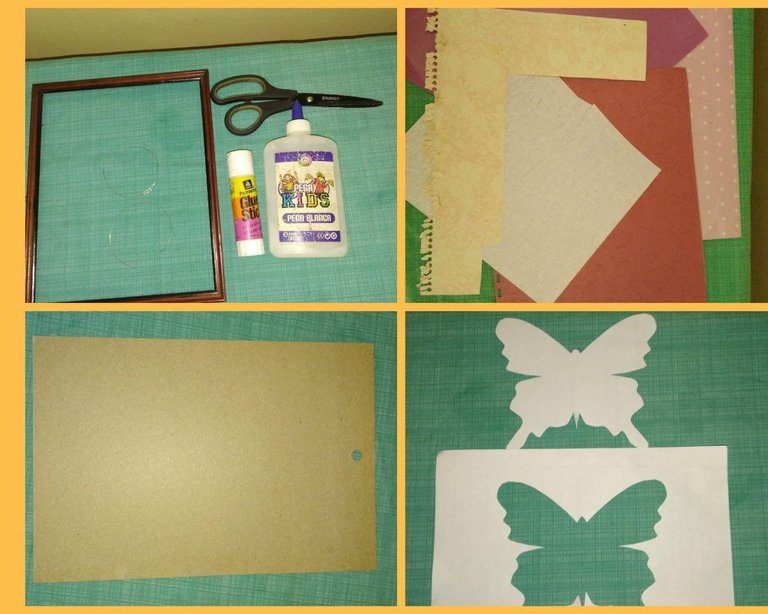
Marco de cuadro a reciclar
Tijeras
Pegamento
Hojas de colores
Cartón para hacer una tapa al marco del cuadro
Alambre finito para las antenas, yo use uno de una pulsera que ya había reciclado
Molde o figura de mariposa
Recycled picture frame
Scissors
Glue
Coloured sheets
Cardboard to make a cover to the frame
Finite wire for the antennas, I used one from a bracelet I had already recycled
Mould or butterfly figure
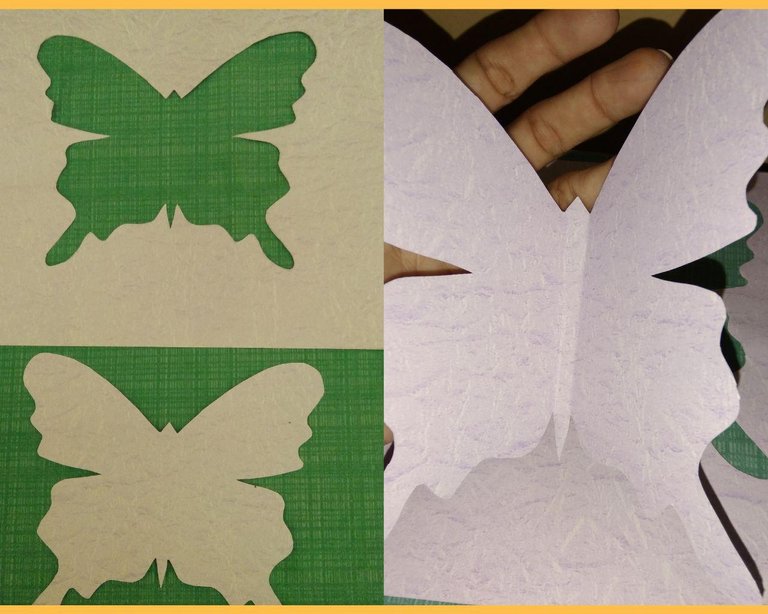
Paso 1:
Hacer nuestra mariposa en una hoja de color que pueda abarcar todo el cuadro, la recortaremos con mucho cuidado y le daremos forma tridimensional doblando las alas hacia los lados
Step 1:
Make our butterfly on a coloured sheet that can cover the whole painting, we will cut it out very carefully and give it a three-dimensional shape by folding the wings to the side
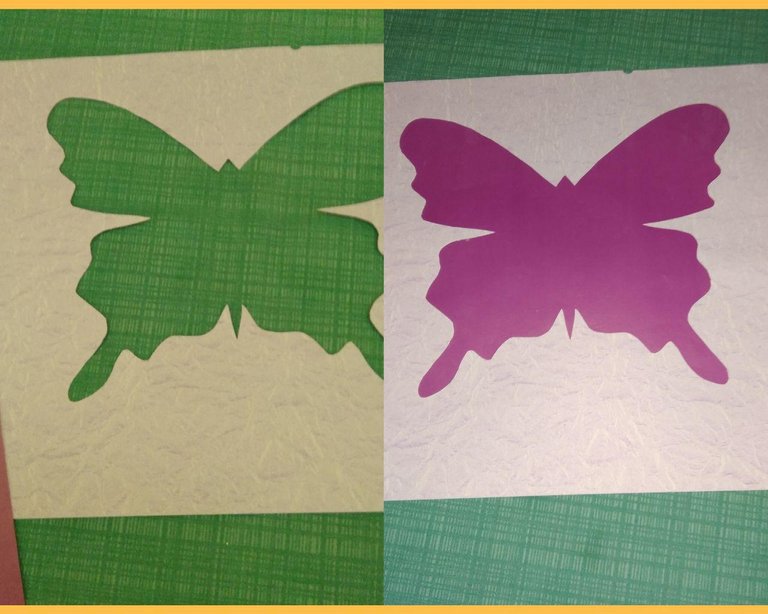
Paso 2:
Le colocamos al dibujo vacío un color que combine con el cuadro, en este caso usé morado
Step 2:
We put a colour to the empty drawing that matches the painting, in this case I used purple
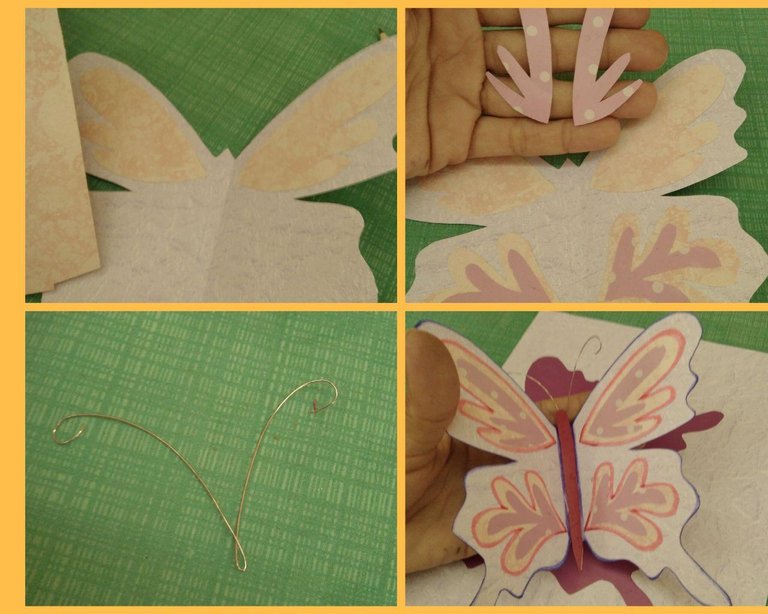
Paso 3:
En las alas de la mariposa recortaremos piezas pequeñas para decorar y realzar la belleza de sus alas, al terminar colocamos las antenas , puedes agregar algunos detalles como hacerle un sombreado con marcadores, ya lista la mariposa la pegaremos justo arriba de la otra que tenemos de fondo
Step 3:
On the wings of the butterfly we will cut out small pieces to decorate and enhance the beauty of its wings, at the end we will place the antennas, you can add some details like shading with markers, once the butterfly is ready we will stick it right on top of the other one we have in the background
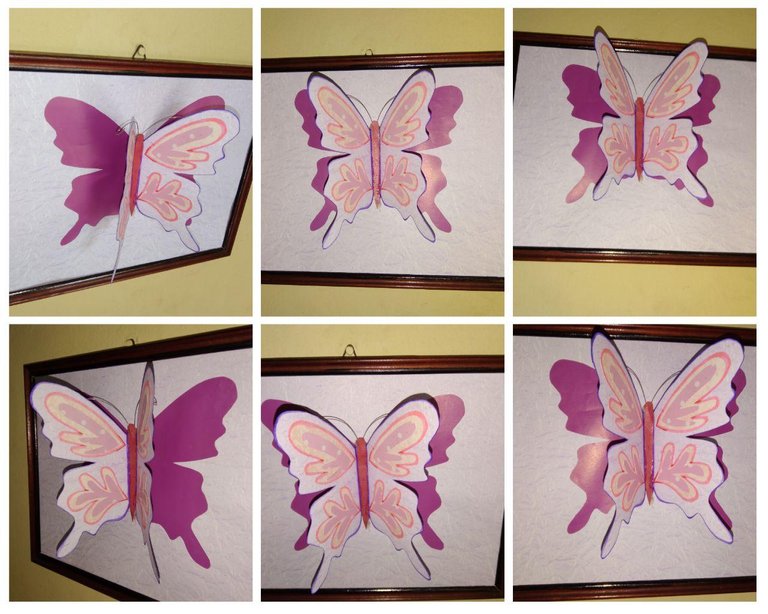
Hemos llegado al final de este tutorial , espero les haya agradado este post de reciclaje espero vernos en una próxima publicación, gracias por leer !!
We have reached the end of this tutorial, I hope you liked this recycling post and I hope to see you in a future publication, thanks for reading!
Congratulations @ileart! You have completed the following achievement on the Hive blockchain and have been rewarded with new badge(s) :
You can view your badges on your board and compare yourself to others in the Ranking
If you no longer want to receive notifications, reply to this comment with the word
STOPTo support your work, I also upvoted your post!
Esta idea esta genial muchas veces tenemos trozos de cartulinas o papeles usados y no sabemos que hacer con ellas, magnífico trabajo. Gracias por participar, sólo te falta agregar el link de tu participación en los comentarios del concurso!
Gracias