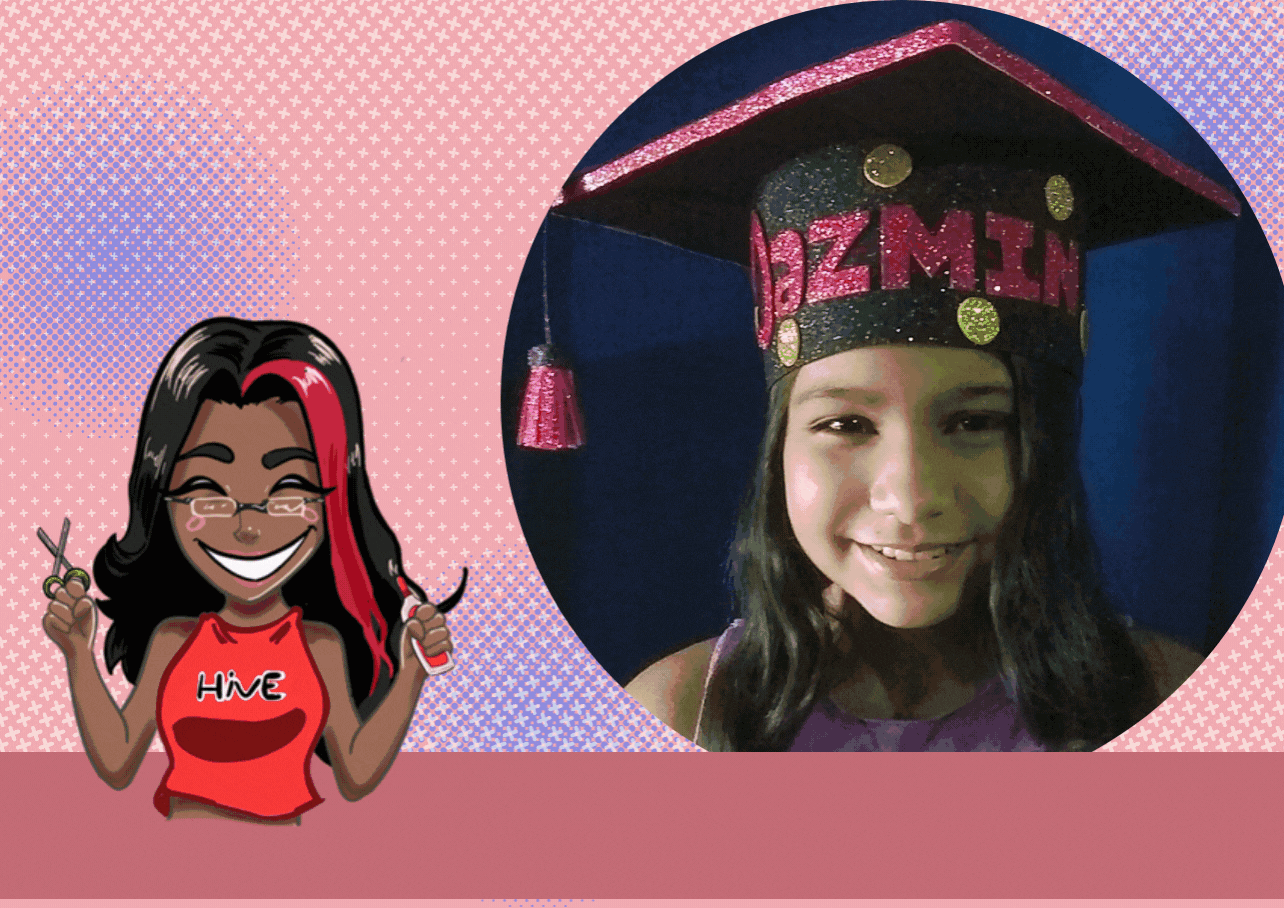
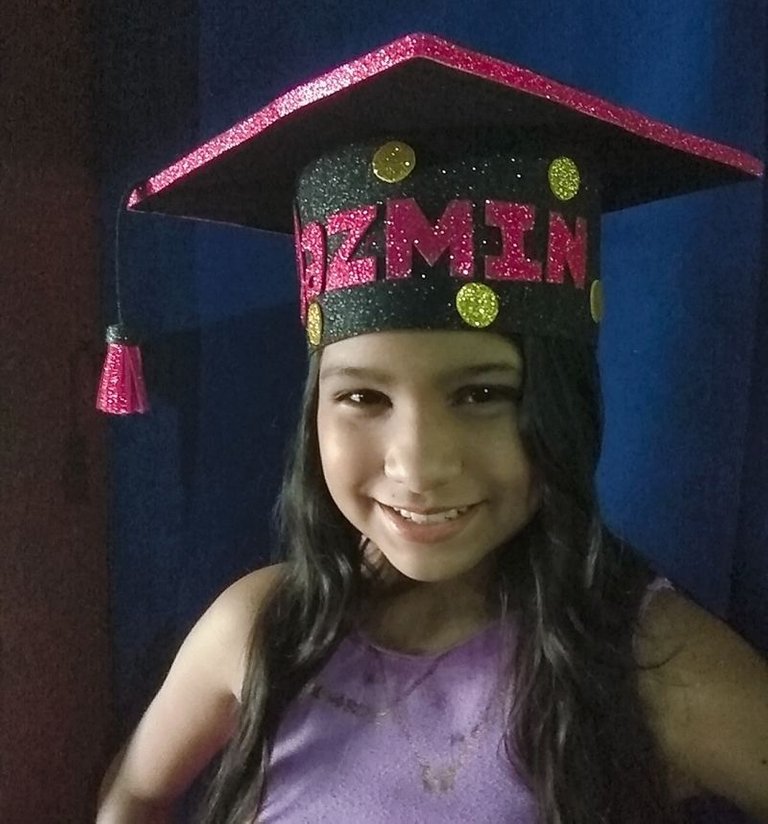
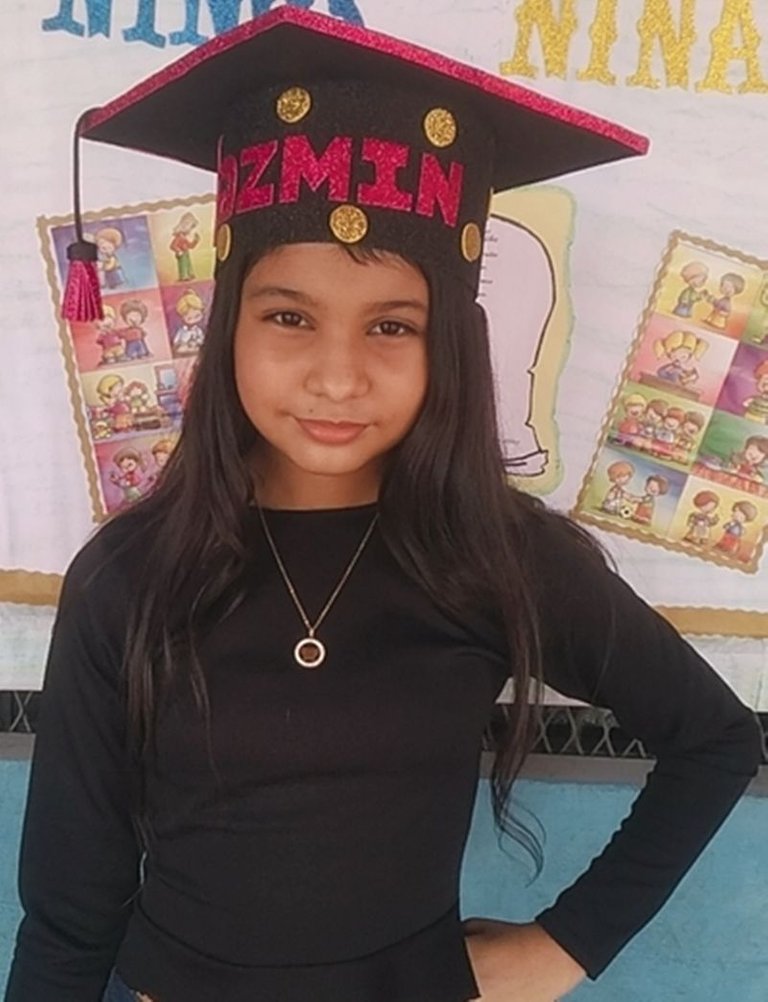
Inició mi semana de publicaciones en #hive, regreso con una nueva manualidad reciclada esta creación la hice para una personita muy especial mi sobrina, el tiempo ha pasado muy rápido ya mi sobrina tiene 11 años y fue promovida a 1er año de secundaria, mi familia esta muy orgullosa de este logro. El día de ayer tuvo una intima ceremonia por motivos ya conocidos (pandemia), y para esa ocasión le hice un birrete con materiales reciclados, en las fotos notarán lo feliz que se veía.
I started my week of publications in #hive, I return with a new recycled craft this creation I made for a very special person my niece, time has passed very fast and my niece is 11 years old and was promoted to 1st year of high school, my family is very proud of this achievement. Yesterday she had an intimate ceremony for already known reasons (pandemic), and for that occasion I made her a biretta with recycled materials, in the pictures you will notice how happy she looked.

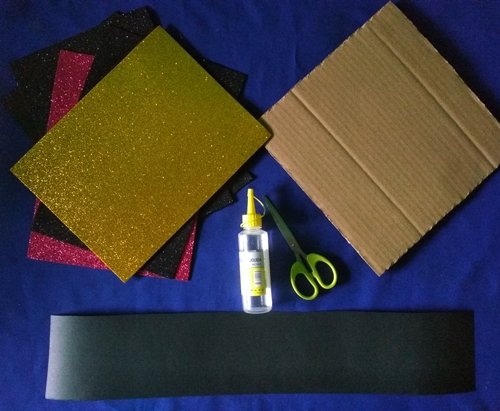
Materiales: Materials:

Cartón, foamis (3 negros, 1 dorado, 1 fucsia), cartulina negra, pegamento, tijeras, pintura negra y pincel.
Cardboard, foamis (3 black, 1 gold, 1 fuchsia), black cardboard, glue, scissors, black paint and brush.
Paso a paso: || Step by step:
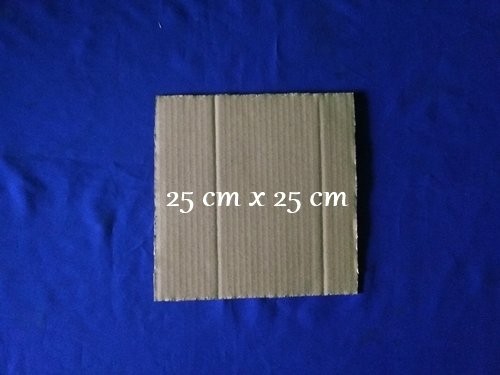
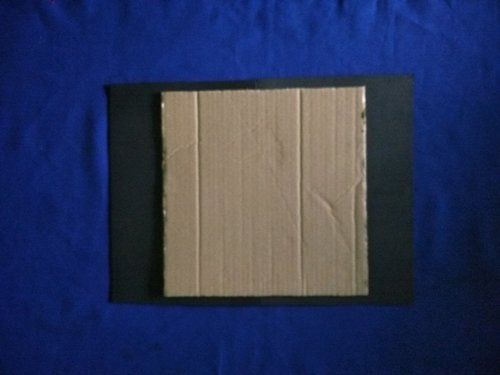
El primer paso es recortar un cuadrado de cartón con las siguiente medidas.
The first step is to cut out a square of cardboard with the following measurements.
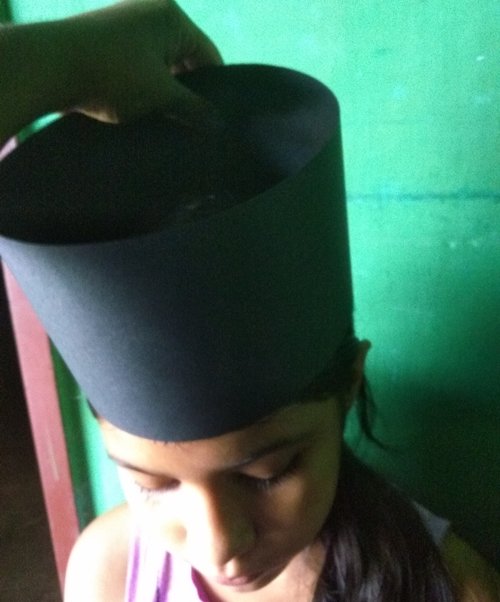
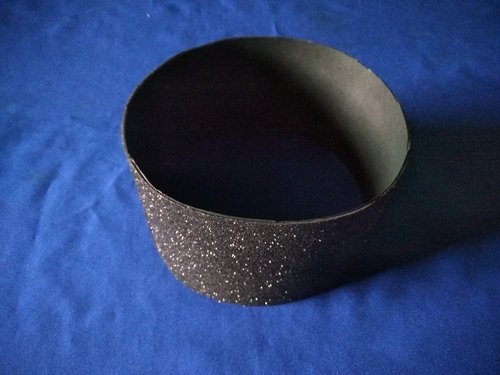
El siguiente paso fue recortar una tira de cartulina negra, las medidas dependerán del diámetro de la cabeza del niño.
The next step was to cut out a strip of black cardboard, the measurements will depend on the diameter of the child's head.
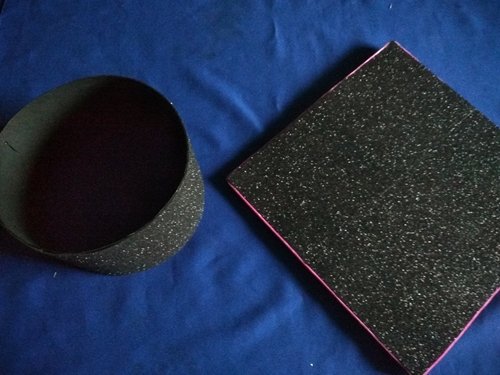
Luego agregué pegamento al cuadrado de cartón y pegué dos de los foamis negro para cubrir una de las caras del cuadrado.
I then added glue to the cardboard square and glued two of the black foamis to cover one side of the square.
El paso lo repetí en la tira de cartulina, y luego pegué los extremos.
I repeated the step on the cardboard strip, and then glued the ends together.
La cara sin cubrir del cartón la pinté en color negro, luego recorté una tira de foami fucsia y la pegué al contorno del cuadrado.
I painted the uncovered side of the cardboard black, then cut out a strip of fuchsia foami and glued it to the outline of the square.
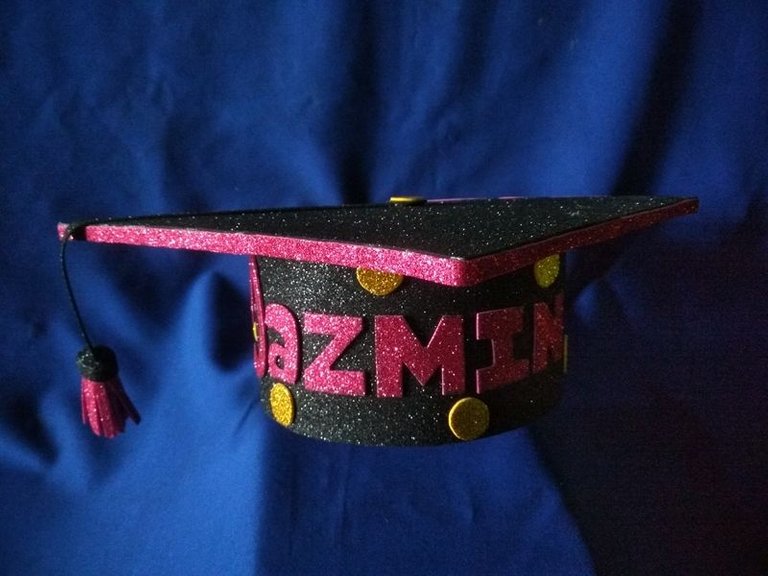
Como siguiente paso esta unir ambas piezas, comenzar a decorar, recorté el nombre de mi sobrina en foami fucsia y lo pegué al birrete.
The next step was to join the two pieces together and start decorating, I cut out my niece's name in fuchsia foami and glued it to the biretta.
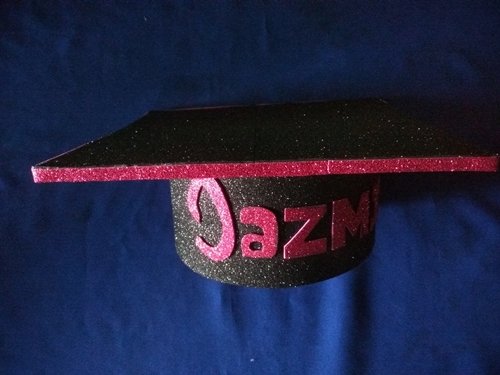
Los últimos toques decorativos fueron unos lunares dorados y un cordón hecho con foami negro y fucsia.
The final decorative touches were gold polka dots and a cord made with black and fuchsia foami.

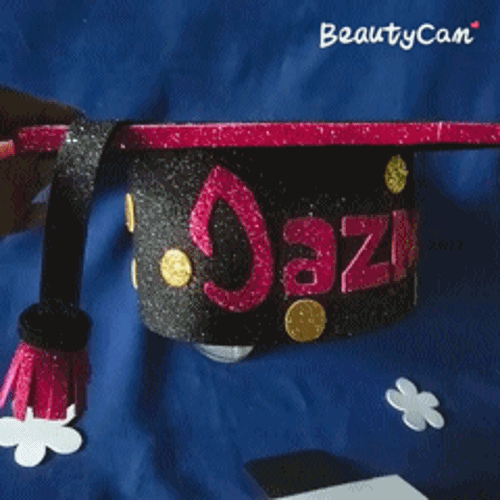
Birrete para graduación. || Graduation birette.

Imágenes tomadas desde mi Alcatel One Touch Idol 4. || Images taken from my Alcatel One Touch Idol 4.
Separadores hechos en PhotoScape. || Dividers made in PhotoScape.
Ediciones hechas en Photoscape. || Editions made in Photoscape.
Translator Deepl.
The rewards earned on this comment will go directly to the person sharing the post on Twitter as long as they are registered with @poshtoken. Sign up at https://hiveposh.com.
Que lindooo, lo amé, que gran talento tiebnes, bendiciones.
Mi sobrina quedó fascinada es lo más importante, gracias por comentar y disculpa por responder tan tarde.
Que lindo quedo y fácil de hacer. Te felicito.
Super fácil de hacer, gracias por comentar y disculpa por responder tan tarde.
Hola amiga esta hermoso y facil, exelente
Hola amiga esta hermoso y facil, exelente
Y muy útil puesto que mi sobrina lo necesitaba para su graduación, gracias por comentar y disculpa por responder tan tarde.
Hola que lindo te quedo, buen trabajo.
Agradezco tus palabras, gracias por comentar y disculpa por responder tan tarde.