

▪️ Fieltro (fucsia y azul).
▪️ Estambre blanco.
▪️ Hilo negro y aguja.
▪️ Tijeras.
▪️ Lapicero.
▪️ Silicón.
▪️ Hoja de papel.
▪️ Felt (fuchsia and blue).
▪️ White yarn.
▪️ Black yarn and needle.
▪️ Scissors.
▪️ Pencil.
▪️ Silicone.
▪️ Sheet of paper.

Primer paso: || First step:
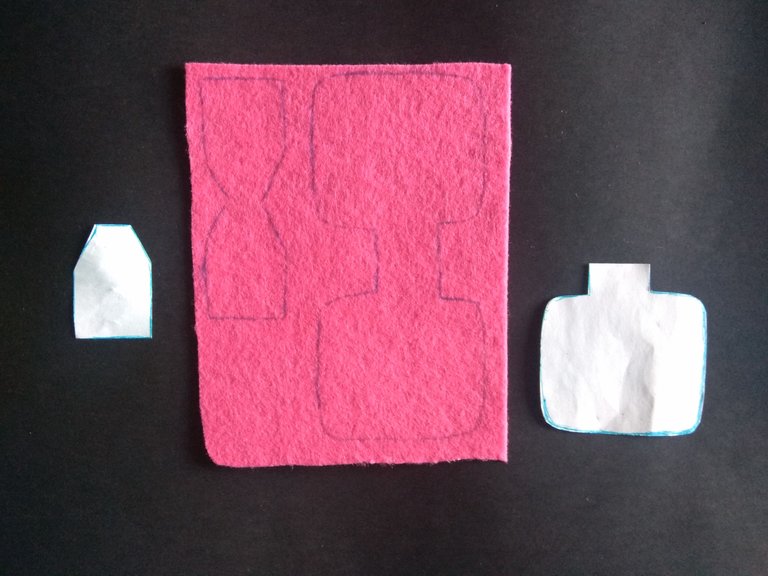
▪️ Si queremos que el separador quede parejo debemos crear un patrón en hoja de papel, para ello dibujamos una taza y la bolsita de té, luego lo recortamos.
If we want the separator to be even, we must create a pattern on a sheet of paper, for this we draw a cup and the tea bag, then we cut it out.
Segundo paso: || Second step:
▪️ Luego tracé los patrones en el fieltro, nótese que tracé el patrón doble para obtener un separador más resistente.
I then traced the patterns on the felt, note that I traced the double pattern to obtain a stronger separator.

Tercer paso: || Third step:
▪️ Seguido, recorté las piezas de fieltro.
Next, I cut out the felt pieces.
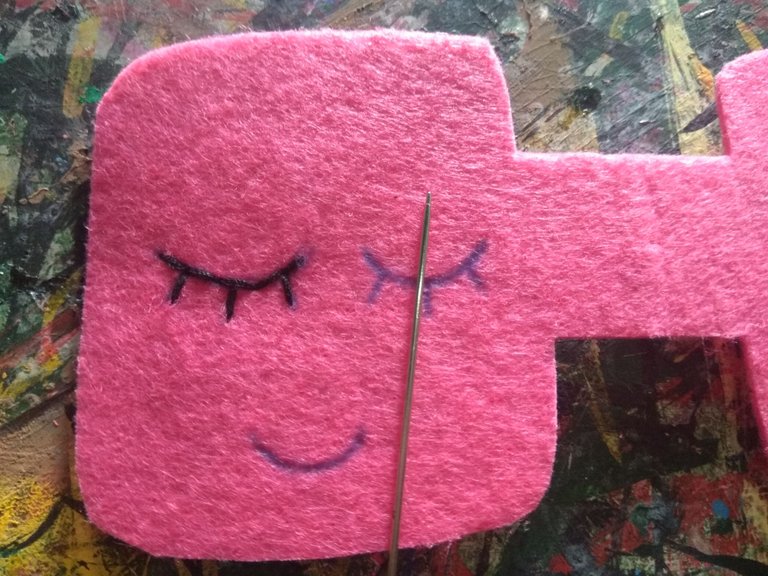
Cuarto paso: || Fourth step:
▪️ El patrón de taza de té, dibujé una carita usando lapicero y paso siguiente bordé usando hilo y aguja.
The teacup pattern, I drew a little face using pencil and next step I embroidered using thread and needle.
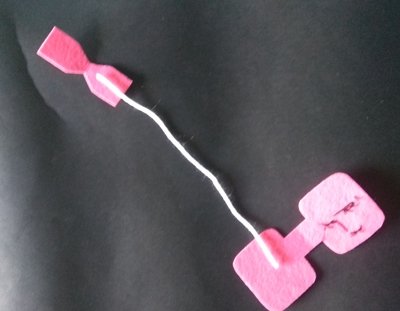
Quinto paso: || Fifth step:
▪️ Recorté un trozo de estambre de 10 cm y lo pegué usando silicón frío en el lado interno de las piezas.
I cut a 10 cm piece of yarn and glued it using cold silicone on the inner side of the pieces.
Sexto paso: || Sixth step:
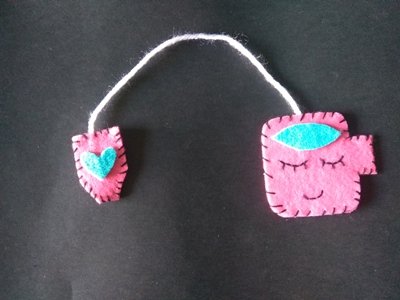
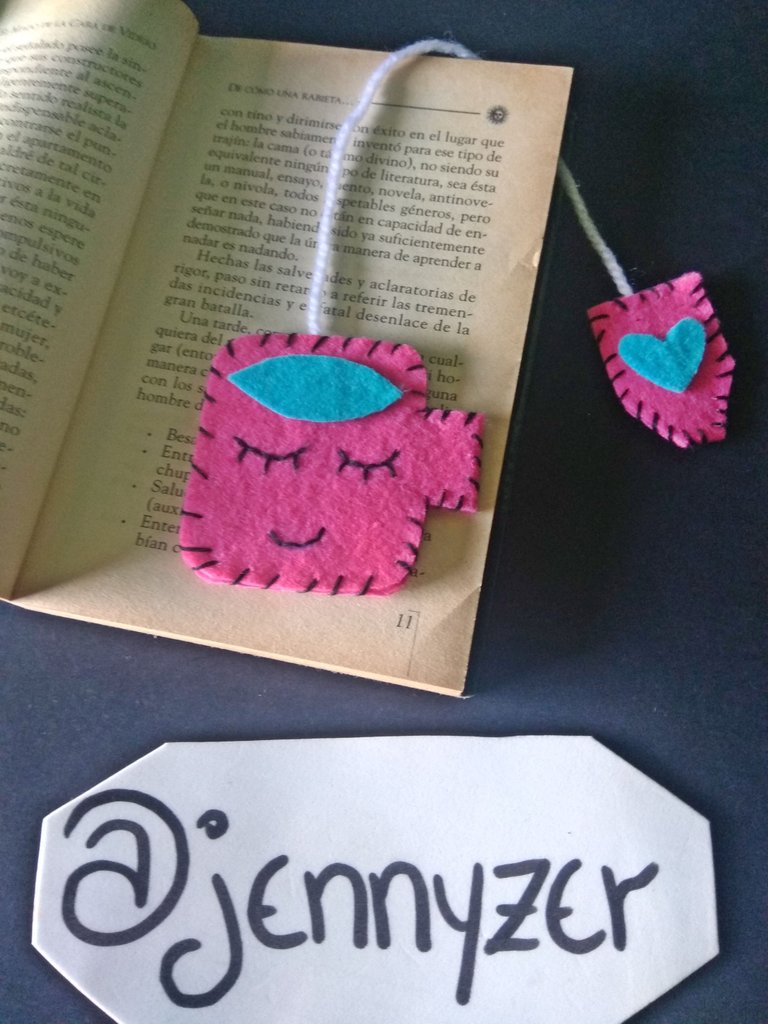
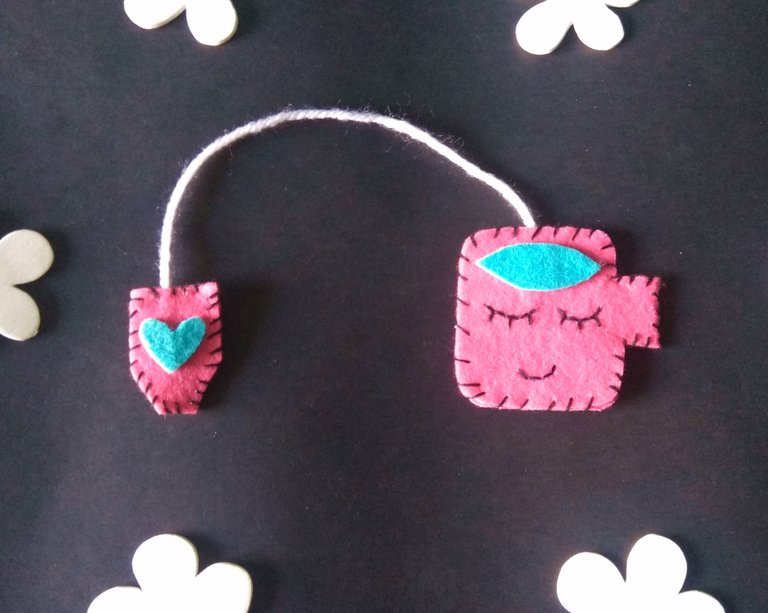
▪️ Cerré ambas piezas y procedí a coser todo el contorno, finalmente decoré con un corazón y un pequeño pedazo de fieltro.
I closed both pieces and proceeded to sew all around, finally I decorated with a heart and a small piece of felt.


Imágenes tomadas desde mi Xiaomi Redmi Note 4. || Images taken from my Xiaomi Redmi Note 4.
Separadores hechos en PhotoScape. || Dividers made in PhotoScape.
Ediciones hechas en Photoscape. || Editions made in Photoscape.
Translator Deepl.
Te quedo muy lindo y original amiga, saludos 🤗
Hola, lindo separador de pagina, muy ingenioso.
The rewards earned on this comment will go directly to the person sharing the post on Twitter as long as they are registered with @poshtoken. Sign up at https://hiveposh.com.
Muy sencillo y lindo te felicito.
Está bello, me encanta porque hace práctico y bonita la lectura de cualquier libro, muchas gracias por tu idea <3