De vuelta con todos ustedes mis queridos amigos de #hive, en esta oportunidad vamos a realizar un pequeño pero hermoso detalle para ese ser especial, para Tí Mamá; de igual manera puede ser adaptado para cualquier ocasión, todo depende de su creatividad y momento indicado para su elaboración. Sin más que decir, ven a disfrutar de este hermosa manualidad.

Back with all of you my dear friends from #hive, this time we are going to make a small but beautiful detail for that special being, for You Mom; in the same way it can be adapted for any occasion, it all depends on your creativity and the right moment for its elaboration. Without more to say, come and enjoy this beautiful craft.

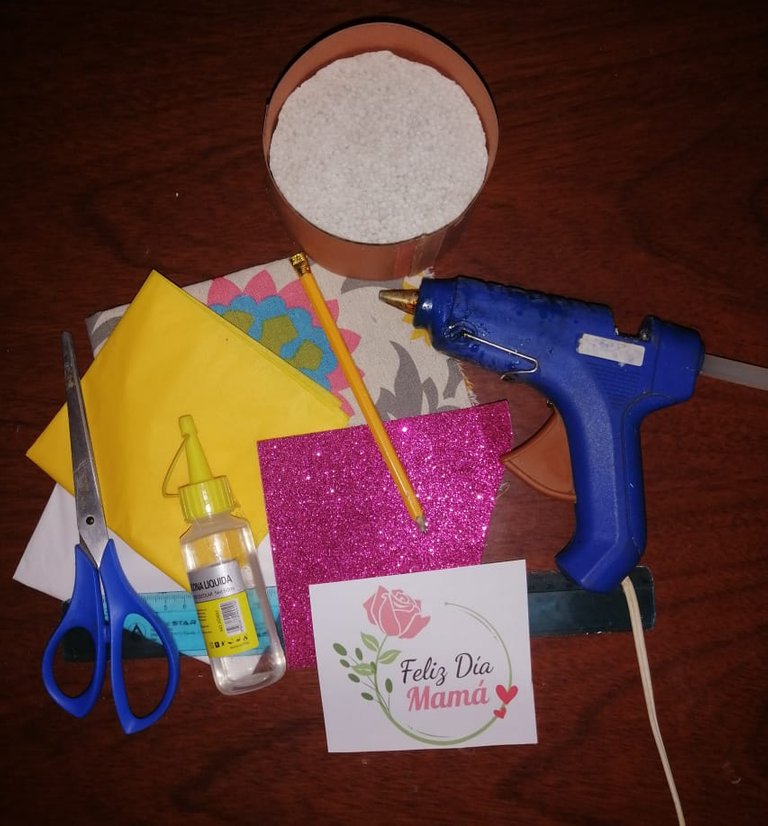
- Cartón delgado
- Anime
- Pistola de silicón
- Silicón líquido
- Tela floreada (opcional)
- Papel de seda blanco y amarillo
- Foami fucsia escarchado
- Tijera
- Palillos de altura
- Impresión de una imagen referente al día de las madres ( o de la ocasión que deseen)
What do I need
- Thin cardboard
- Anime
- Silicone gun
- Liquid silicone
- Flowered fabric (optional)
- White and yellow tissue paper
- Frosty fuchsia foam
- Scissor
- Height chopsticks
- Printing an image referring to Mother's Day (or whatever occasion they wish)
Procedure
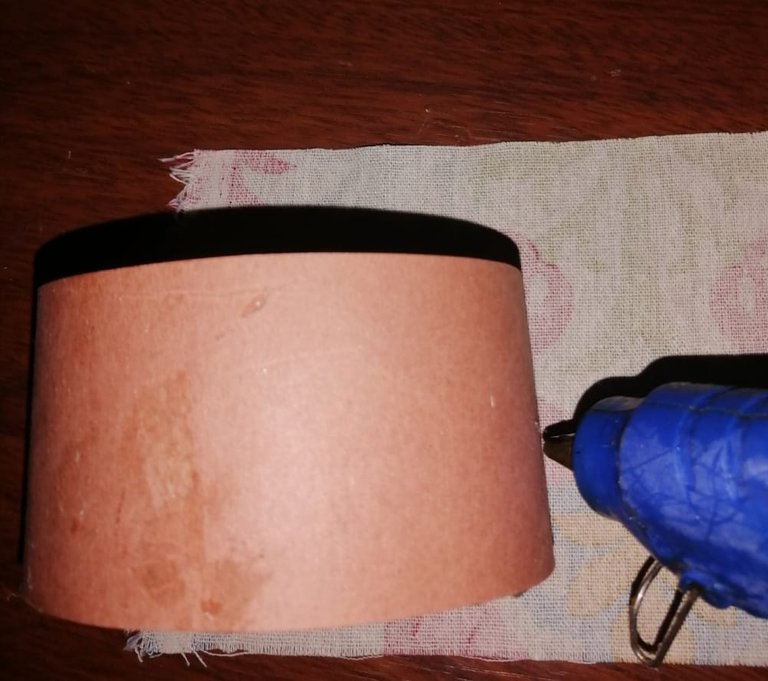
Paso 1 Para hacer esta cajita, sacamos un círculo de cartón del tamaño que guste, y otros dos círculos pero de anime del mismo tamaño de la base de cartón. Ahora procedemos ha hacer una tira larga de cartón delgado para el borde de nuestra caja, quedando está así.

Step 1 To make this box, we take out a cardboard circle of the size you like, and another two anime circles of the same size from the cardboard base. Now we proceed to make a long strip of thin cardboard for the edge of our box, remaining like this.
Paso 2 Con ayuda de la pistola de silicón vamos forrando nuestra caja con la tela floreada.
Step 2 With the help of the silicone gun we are covering our box with the flowered fabric.
Paso 3 Así quedaría nuestra cajita floreada.
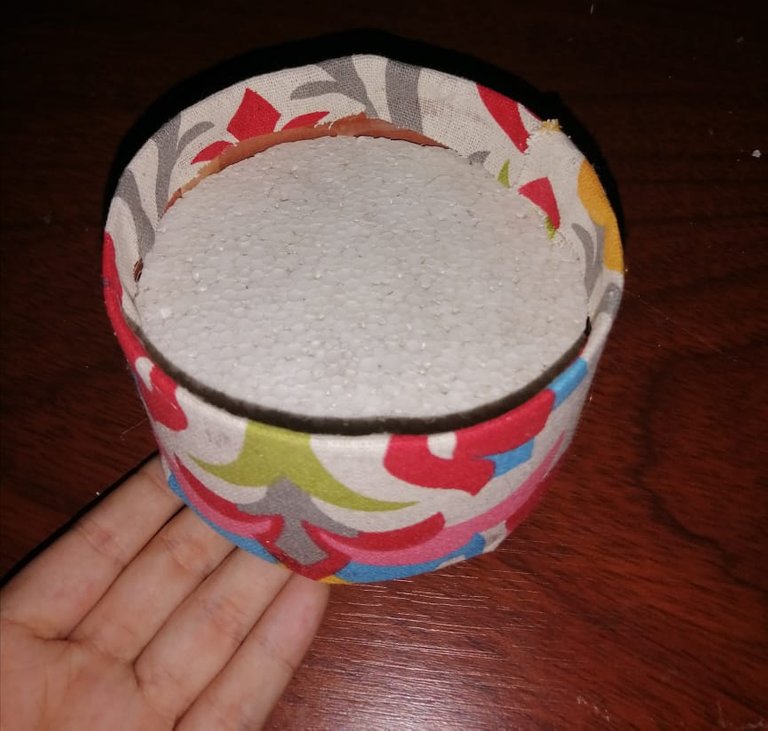
Step 3 This is how our flowery box would look.
Paso 4 Recortamos varios cuadros de papel de seda amarillo y blanco.
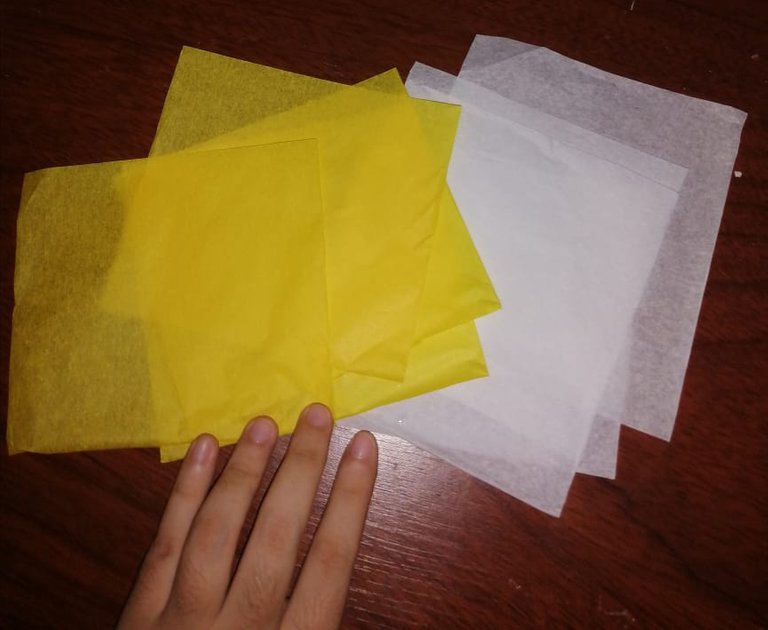
Step 4 We cut out several squares of yellow and white tissue paper.
Paso 5 Agregamos en el centro del papel de seda amarillo silicón líquido, y luego colocamos el papel de seda blanco en todo el centro.
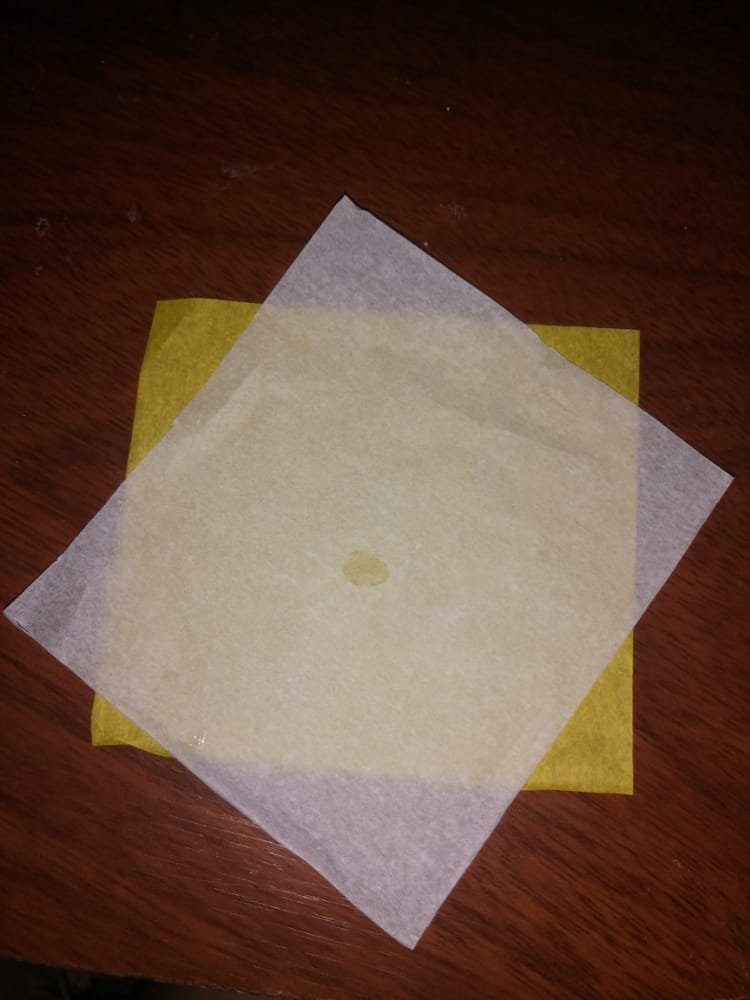
Step 5 Add liquid silicone to the center of the yellow tissue paper, and then place the white tissue paper across the center.
Paso 6 Y vamos haciendo una florecita, desde el centro vamos subiendo y la vamos formando.
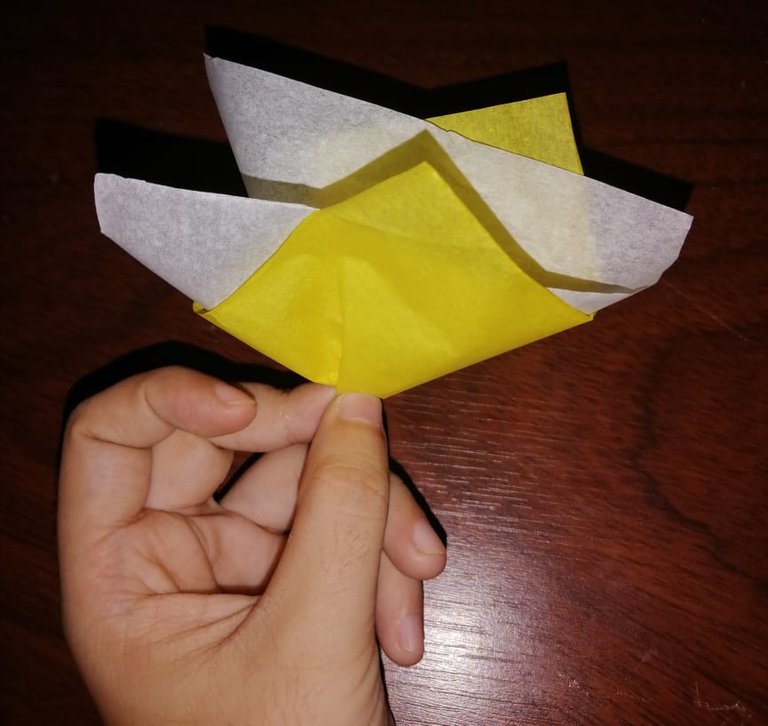
Step 6 And we are making a little flower, from the center we are going up and we are forming it.
Paso 7 Vamos pegando todas nuestras florecitas en el anime, hasta quedar así.
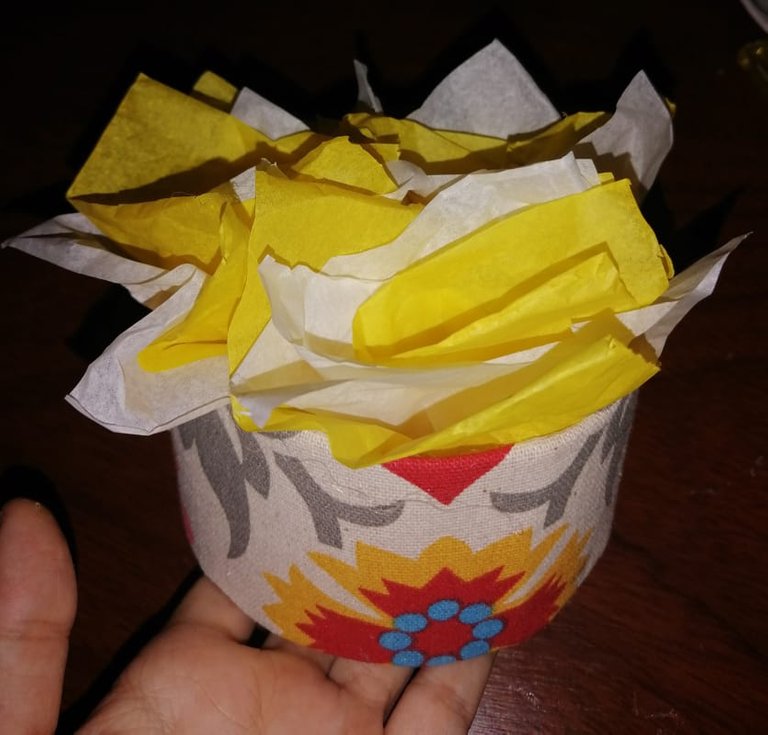
Step 7 We are sticking all our little flowers in the anime, until we look like this.
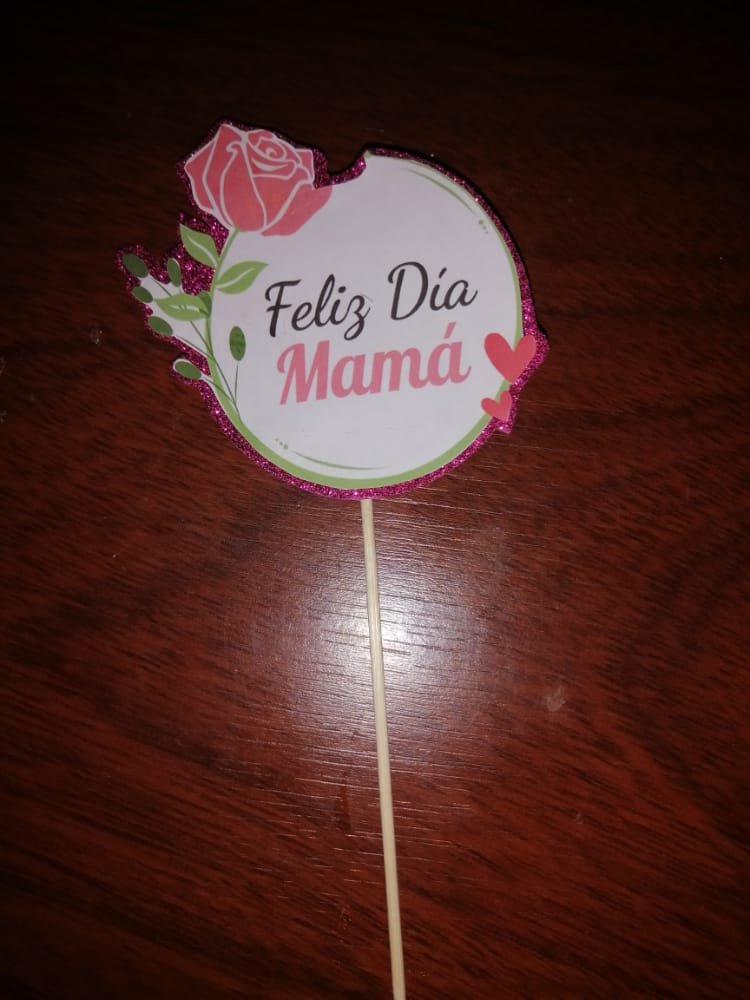
Paso 8 Pegamos nuestra impresión en el foami y recortamos.

Step 8 We glue our print on the foami and cut out.
Paso 9 Quedando así nuestro Topper.
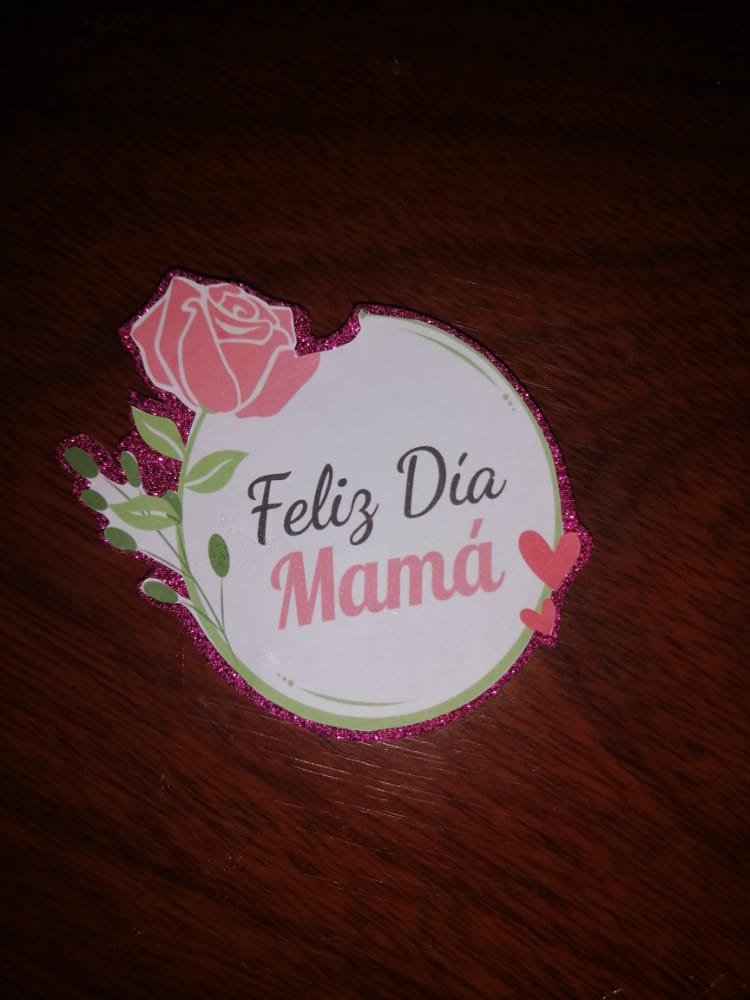
Step 9 Thus leaving our Topper.
Paso 10 Cuando ya esté listo, pegamos con la pistola de silicón el palillo de altura.
Step 10 When it is ready, we stick the height stick with the glue gun.
Paso 11 Este es nuestro resultado final.
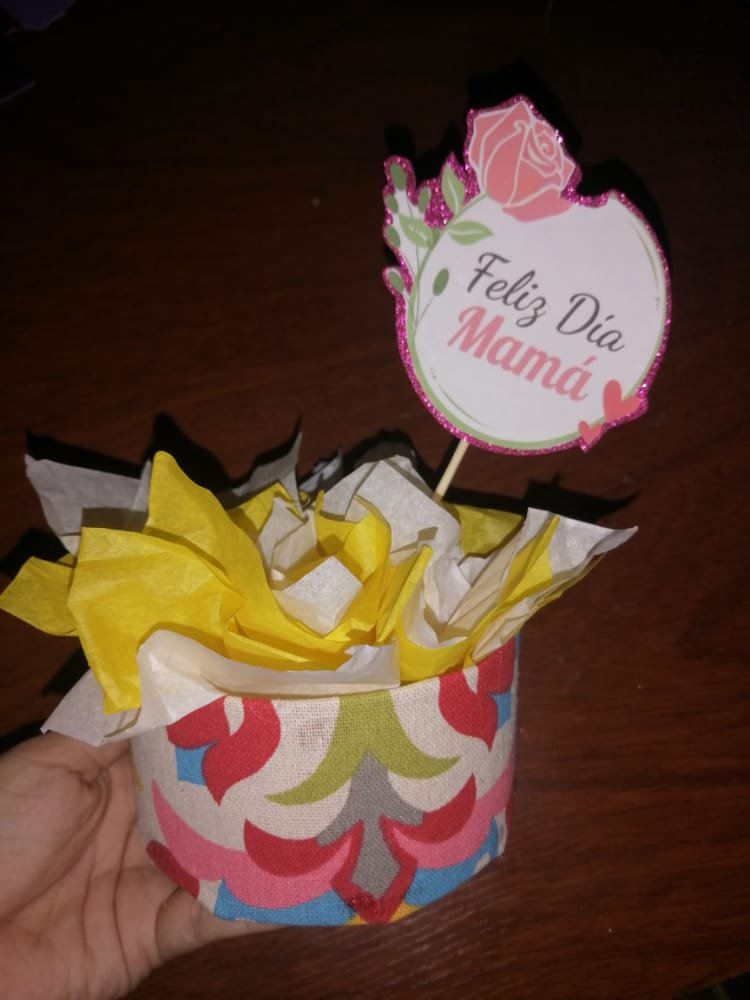
Step 11 This is our bottom line.
Mis amores, hasta aquí este hermoso paso a paso; preciosas #manualidades especialmente diseñadas para tí, espero se animen e inicien en este maravilloso mundo; esto es fabuloso, creativo y motivante. Adelante bellezas, saludos. Espero verlos de nuevo por aquí.
My loves, up to here this beautiful step by step; precious #manualidades specially designed for you, I hope you will cheer up and start in this wonderful world; this is fabulous, creative and motivating. Go ahead beauties, greetings. I hope to see you here again.
...Gracias Por Visitar...
...Thanks for visiting...
Imágenes Fotográficas, tomadas por Ronmel Nuñez.
Photographic images, taken by Ronmel Nuñez