Hola como están mis amores, el día de hoy les traigo otro de mis paso a paso. En esta oportunidad se trata de la elaboración de un precioso arreglo que puede ser adaptado para cualquier ocasión. Éste ha sido confeccionado para los 60 años de mi abuela. Ustedes pueden escoger el motivo que deseen. Sin más mis amores vamos a lo nuestro. Síganme y disfruten.
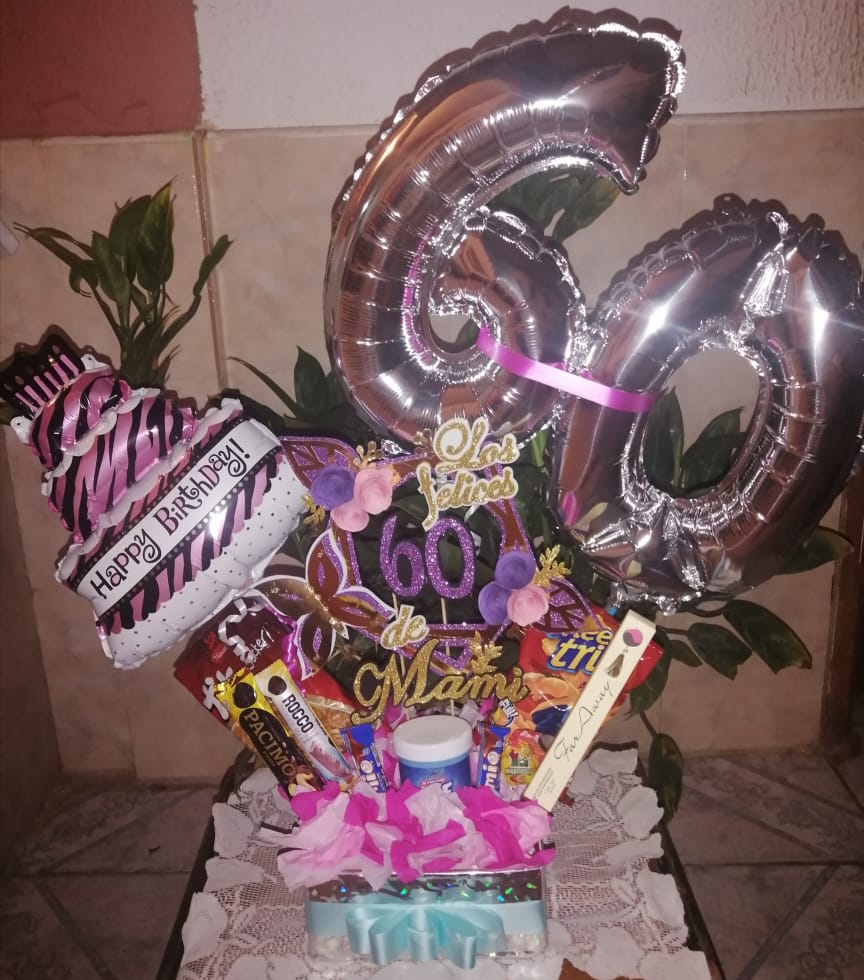
Hello how are my loves, today I bring you another of my step by step. This time it is about the elaboration of a beautiful arrangement that can be adapted for any occasion. This one has been made for my grandmother's 60 years. You can choose the reason you want. Without more, my loves, we will do our thing. Follow me and enjoy.

- Una caja del tamaño de su preferencia.
- Cartulina espejo dorada, cartulina escolar rosa y morada.
- Papel metalizado.
- Foami escarchado morado y dorado; foami normal blanco y negro.
- Papel de seda blanco, rosa y fucsia.
- Cinta gruesa turquesa para hacer lazos.
- Tijera, silicón líquido, regla y lápiz.
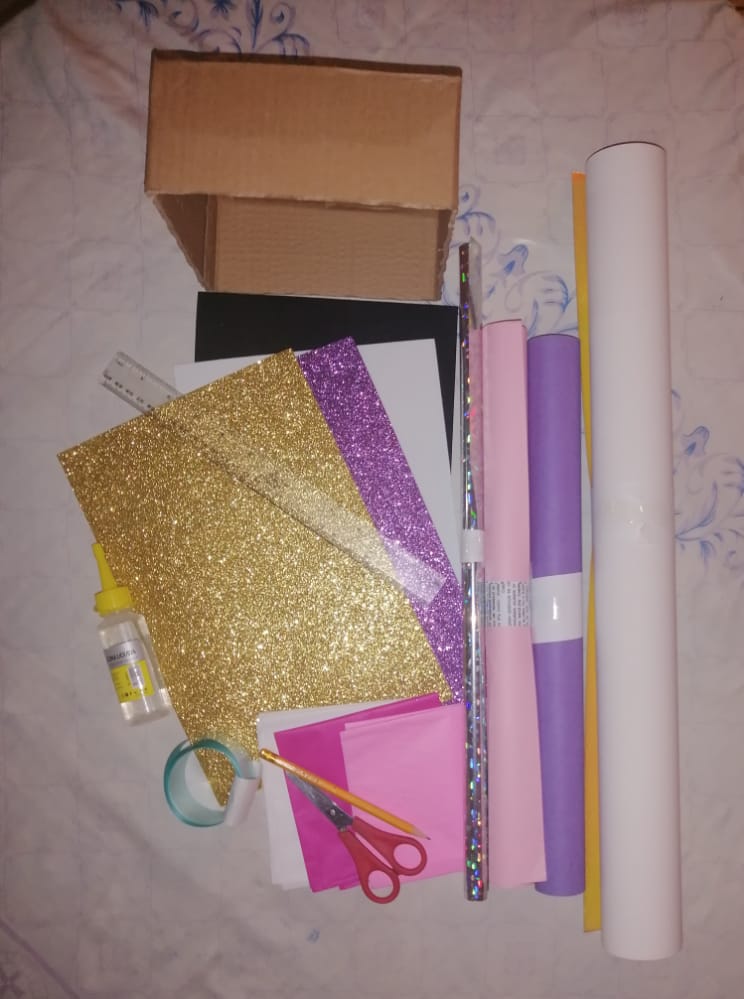
What do I need
- A box of the size of your preference.
- Gold mirror cardstock, pink and purple school cardstock.
- Metallic paper.
- Purple and gold frosted foam; black and white normal foami.
- White, pink and fuchsia tissue paper.
- Thick turquoise ribbon to make bows.
- Scissors, liquid silicone, ruler and pencil.
Procedure
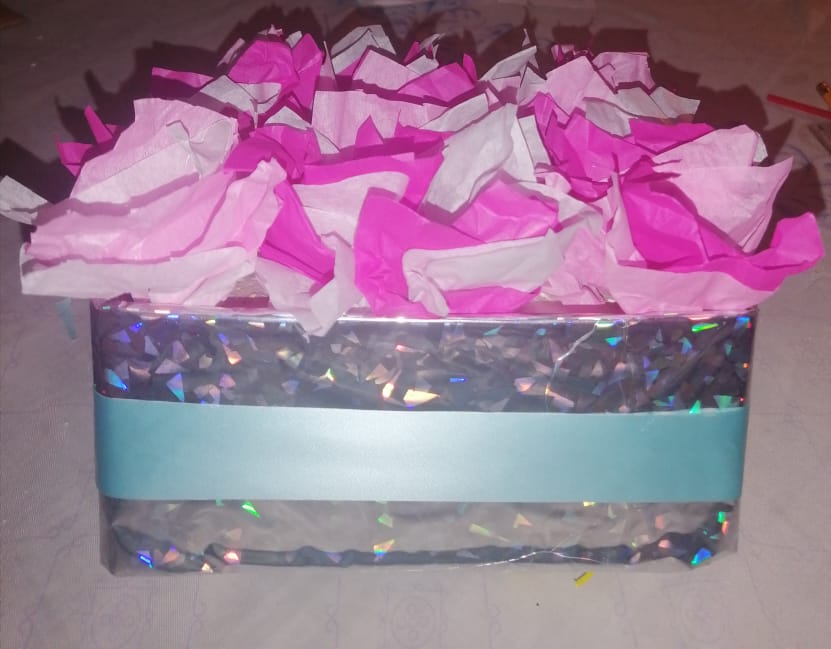
Paso 1 Comenzamos realizando nuestra base, la cual sería nuestra caja. Con ayuda del silicón líquido vamos forrando la caja con el papel metalizado. Una vez realizado, colocamos adentro tres cuadros de anime, el tamaño depende de la medida de la caja que escogieron.
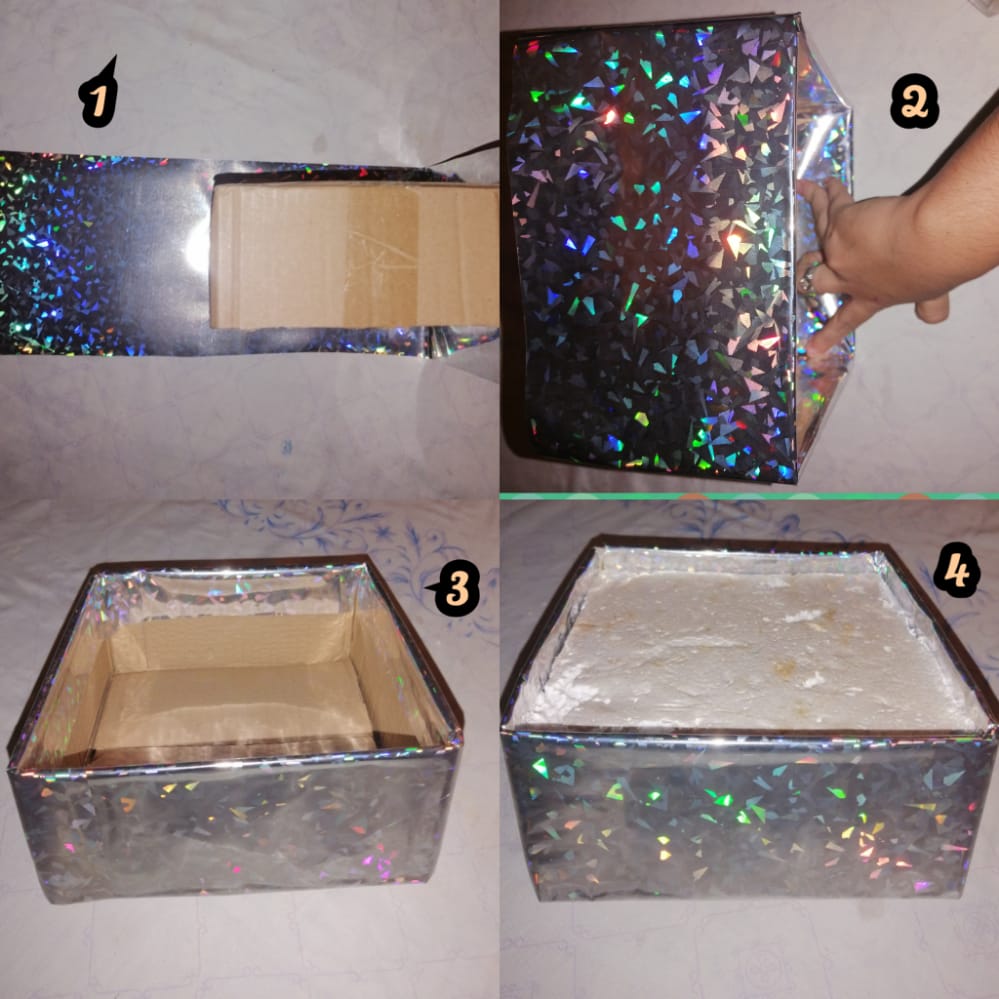
Step 1 We begin by making our base, which would be our box. With the help of the liquid silicone we are covering the box with the metallic paper. Once done, we put three anime pictures inside, the size depends on the size of the box you chose.
Paso 2 Ahora vamos a hacer una parte de la decoración de nuestra caja. Recortamos cuadros de los tres colores de papel de seda escogidos, en el medio de uno de los cuadros agregamos una gota de silicón y pegamos otro cuadro de papel de seda de distinto color, y a este papel también le agregamos una gota de silicón líquido, y comenzamos con la parte de abajo formando una punta, y así vamos formando muestra floresita.
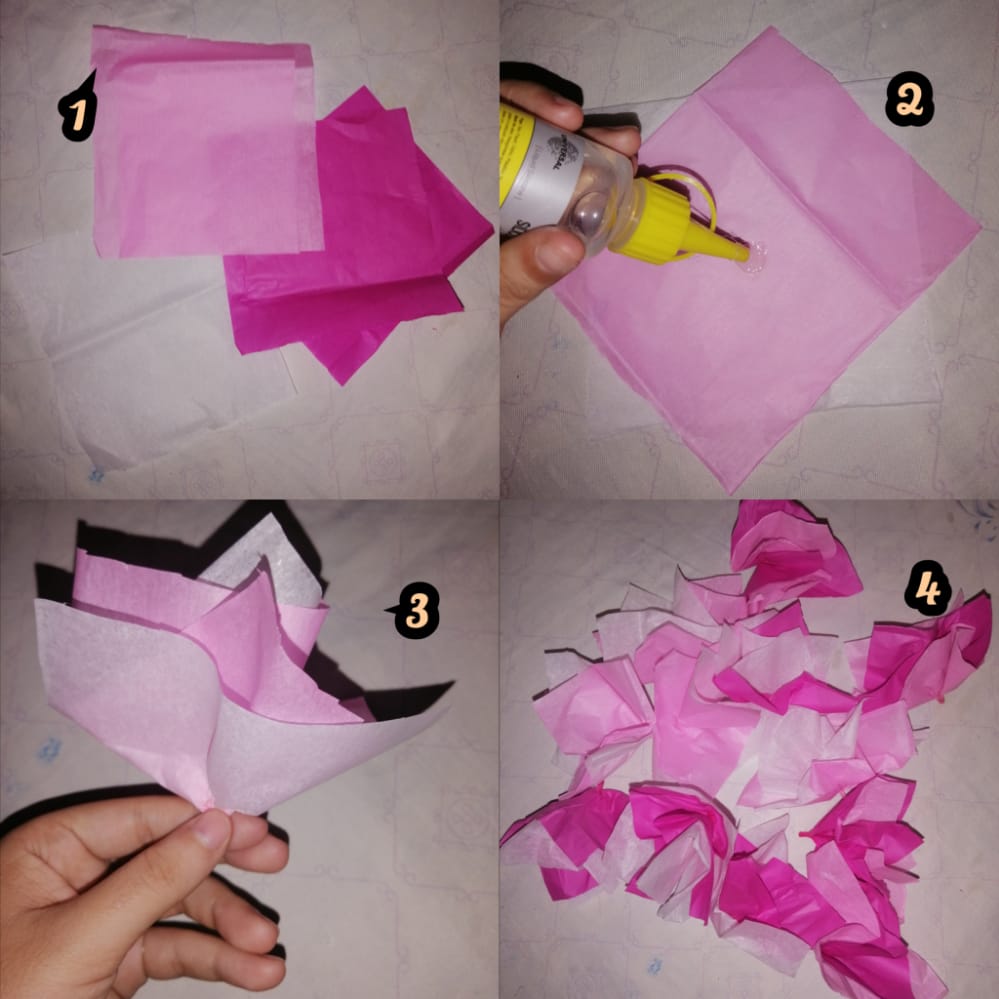
Step 2 Now we are going to make a part of the decoration of our box. We cut out squares of the three colors of tissue paper chosen, in the middle of one of the squares we add a drop of silicone and stick another square of tissue paper of a different color, and to this paper we also add a drop of liquid silicone, and we start with the bottom part forming a point, and thus we form a sample of flowers.
Paso 3 Pegamos nuestros copitos arriba del anime, no podemos dejar espacios libres.

Step 3 We glue our little cups on top of the anime, we can not leave free spaces.
Paso 4 Rodeamos con la cinta, todo el centro de la caja quedando de esta manera.
Step 4 We surround with the tape, the entire center of the box being this way.
Paso 5 Debemos recortar tres tiras de diferentes tamaños, una pequeña, otra mediana y la última tiene que ser grande para formar nuestro lazo, cada una de las tiras se van a pegar a cada extremo, haciendo un círculo a los círculos mediano y grande, hay que agregarle un toque de silicón formando un mini lazo, y solo hay que pegarlos unos encima de otro, es demasiado fácil.
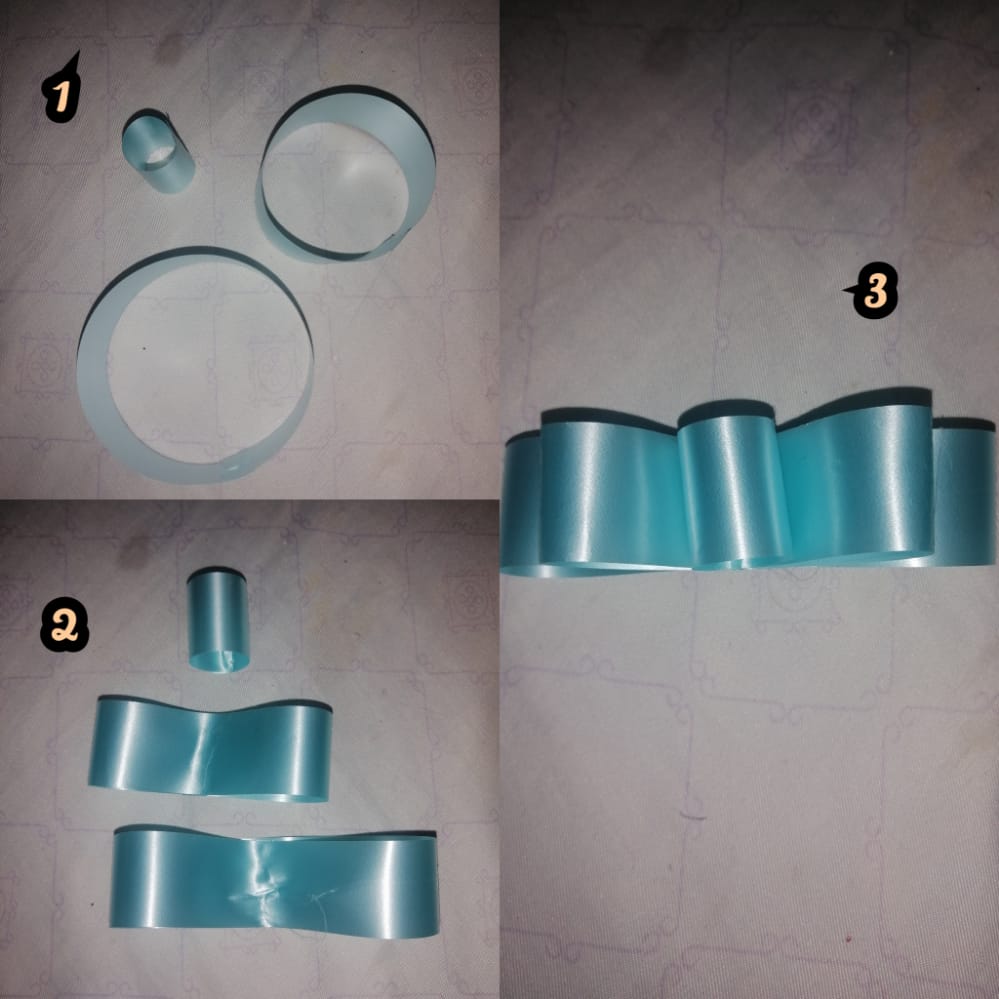
Step 5 We must cut three strips of different sizes, one small, another medium and the last one has to be large to form our loop, each of the strips will be glued to each end, making a circle to the medium and large circles, you have to add a touch of silicone forming a mini loop, and you just have to stick them on top of each other, it's too easy.
Paso 6 El resultado de nuestro lazo en el frente de la caja.
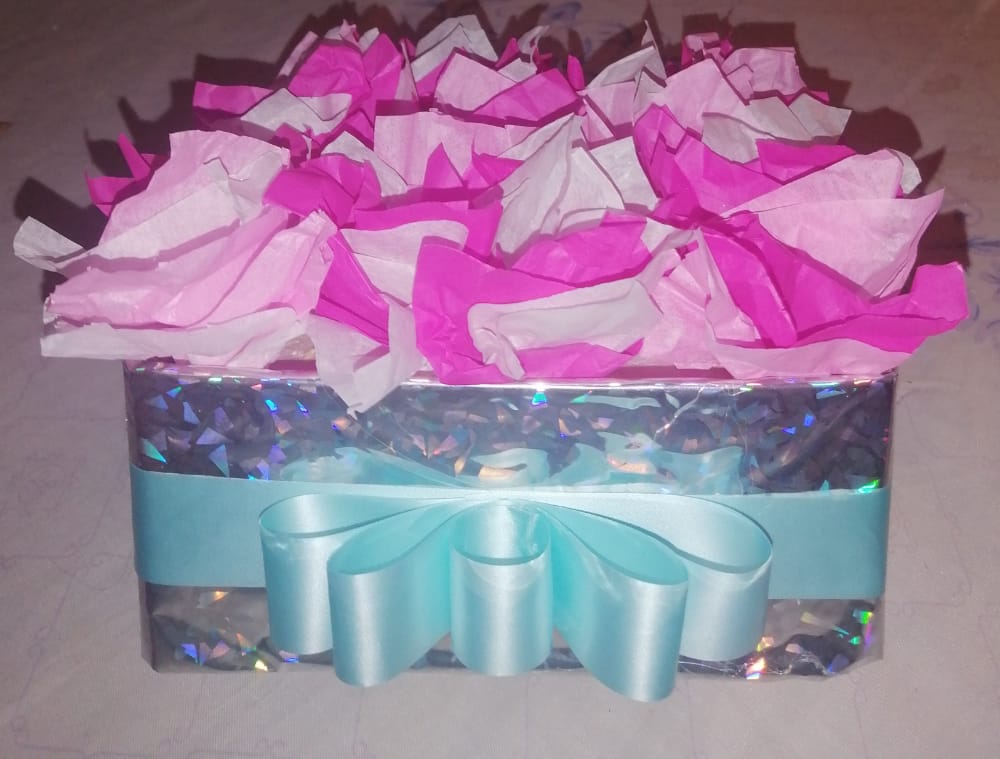
Step 6 The result of our tie on the front of the box.
Paso 7 Procedemos a realizar estás letras, las cuales van a ser la base de nuestro Topper. Esto dependerá de su motivo.
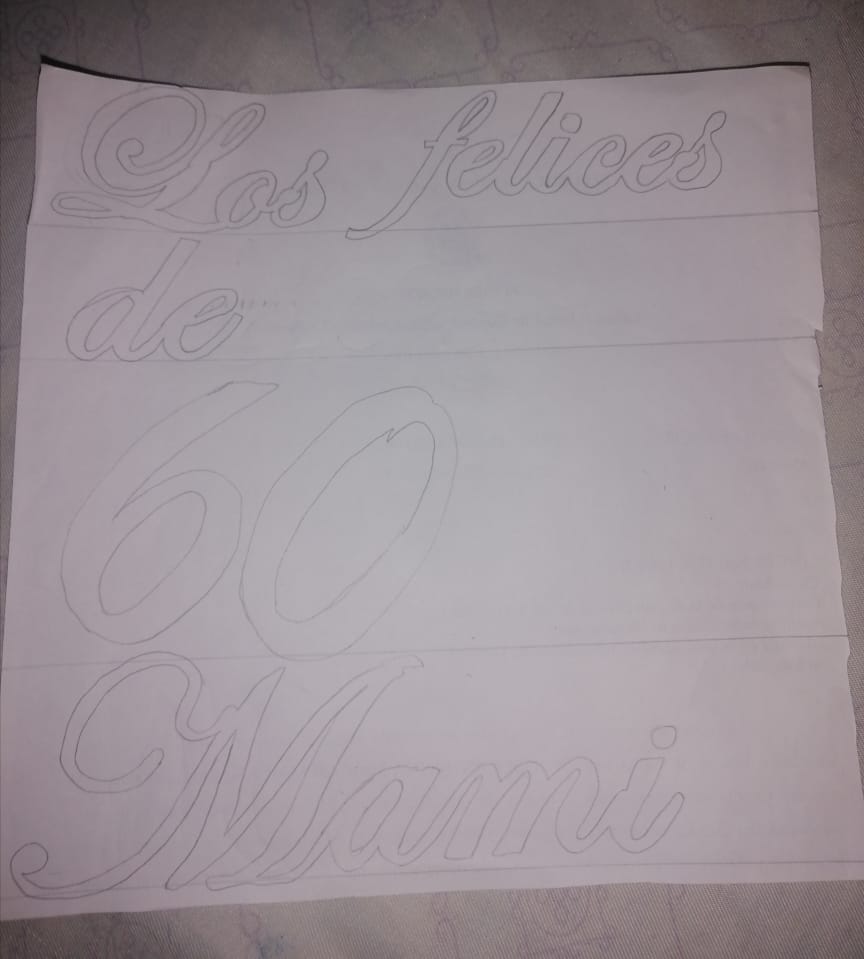
Step 7 We proceed to make these letters, which will be the basis of our Topper. This will depend on your reason.
Paso 8 Nuestras letras las sacamos en el foami escarchado, las palabras "los" "felices" "de" "mami" corresponden a el foami escarchado dorado y el 60 al foami escarchado morado.
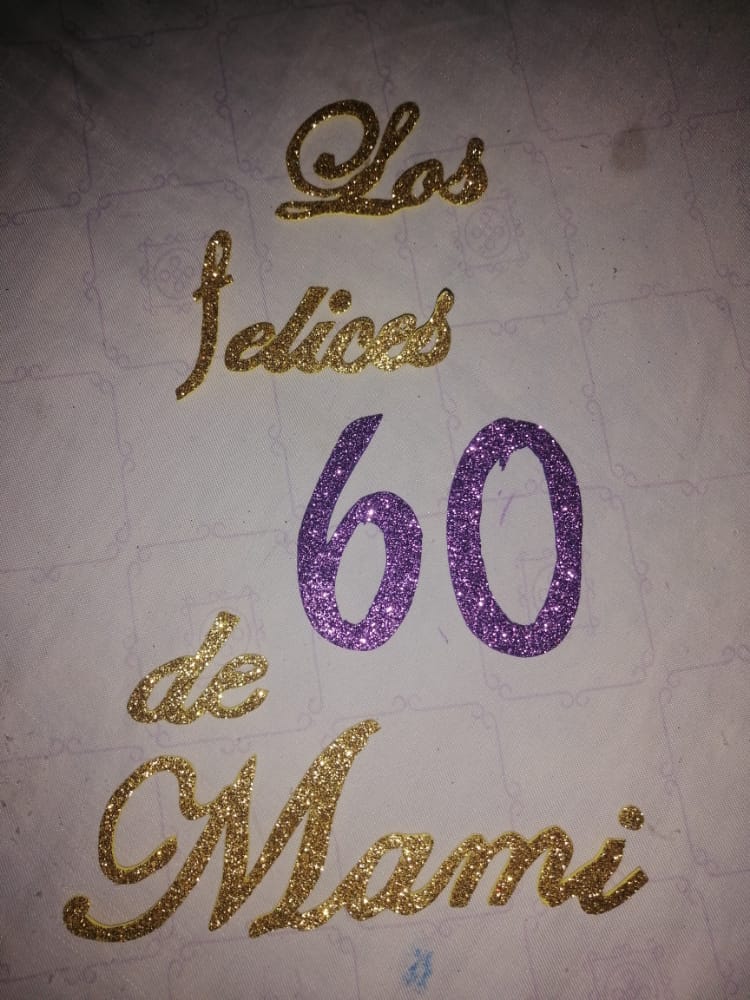
Step 8 We get our letters in the frosted foami, the words "the" "happy" "of" "mommy" correspond to the golden frosty foami and 60 to the purple frosty foami.
Paso 9 Para el fondo las palabras "los" "felices" "de" tienen el fondo blanco, solo hay que recortar dejando un mínimo borde y el 60 y la palabra "mami" tienen el fondo negro.
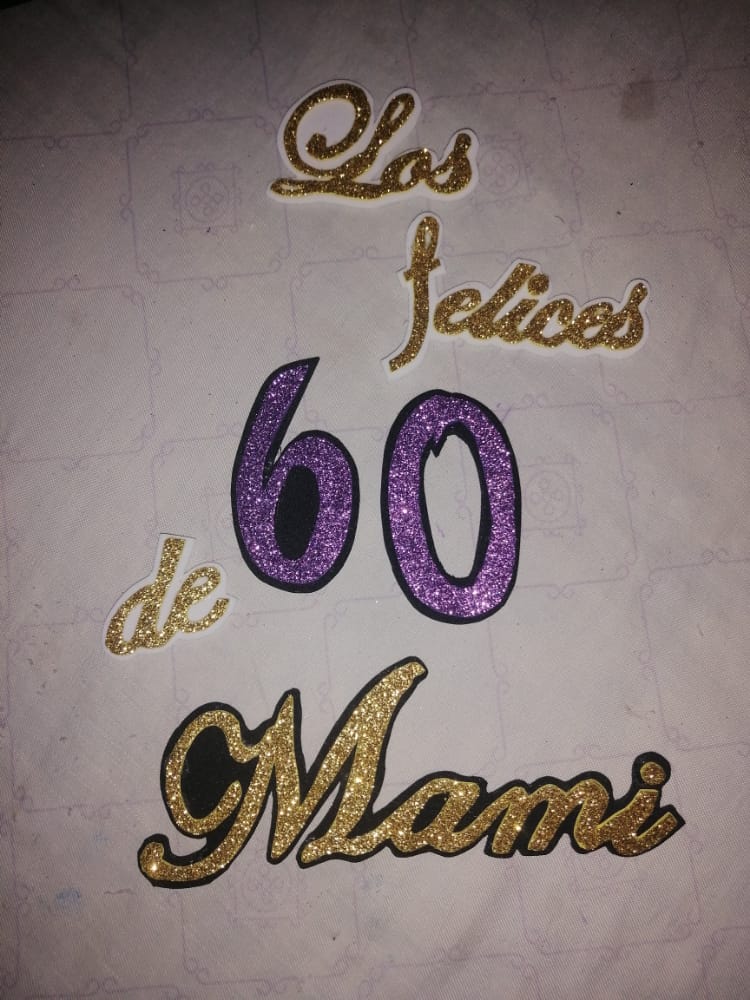
Step 9 For the background the words "the" "happy" "from" have a white background, you just have to cut out leaving a minimum border and the 60 and the word "mommy" have a black background.
Paso 10 Con la cartulina espejo dorada, hacemos este dibujo.
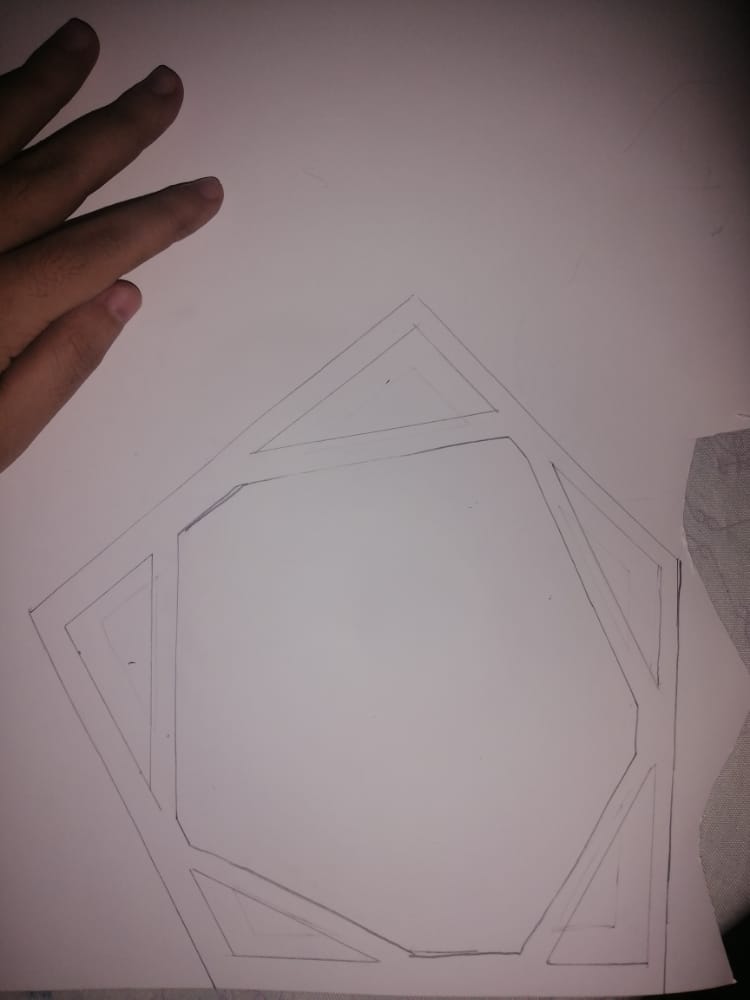
Step 10 With the gold mirror cardboard, we make this drawing.
Paso 11 Cuando recortemos, esta forma debe quedar así, es como adstracto.
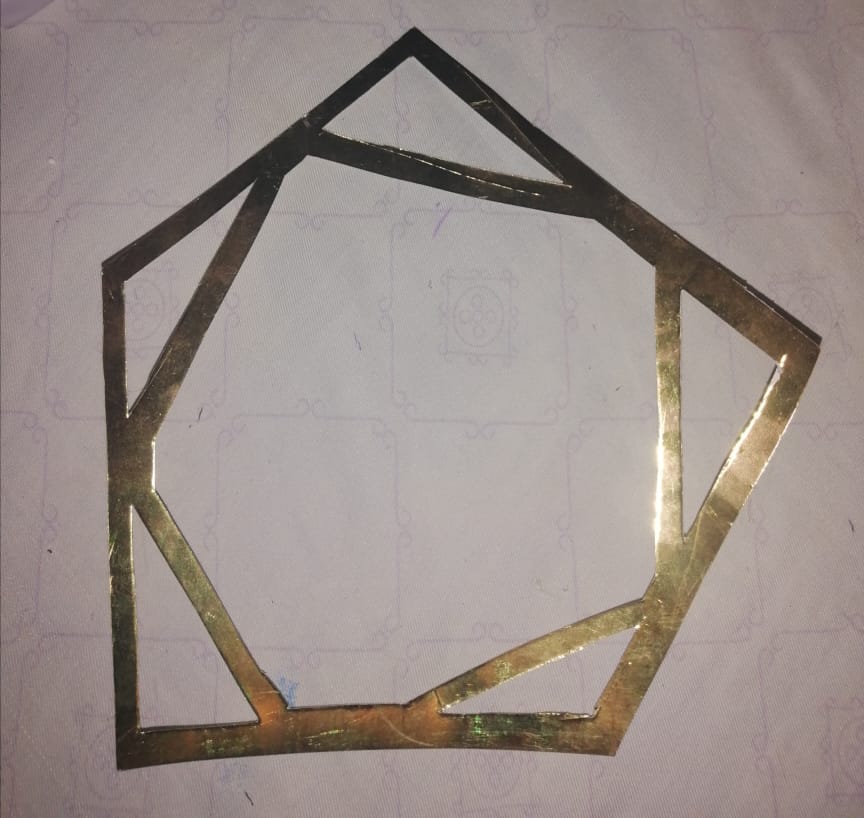
Step 11 When we cut, this shape should look like this, it is like adstract.
Paso 12 El fondo de nuestra forma es foami escarchado morado, solo hay que dejar un pequeño borde para que resalte.
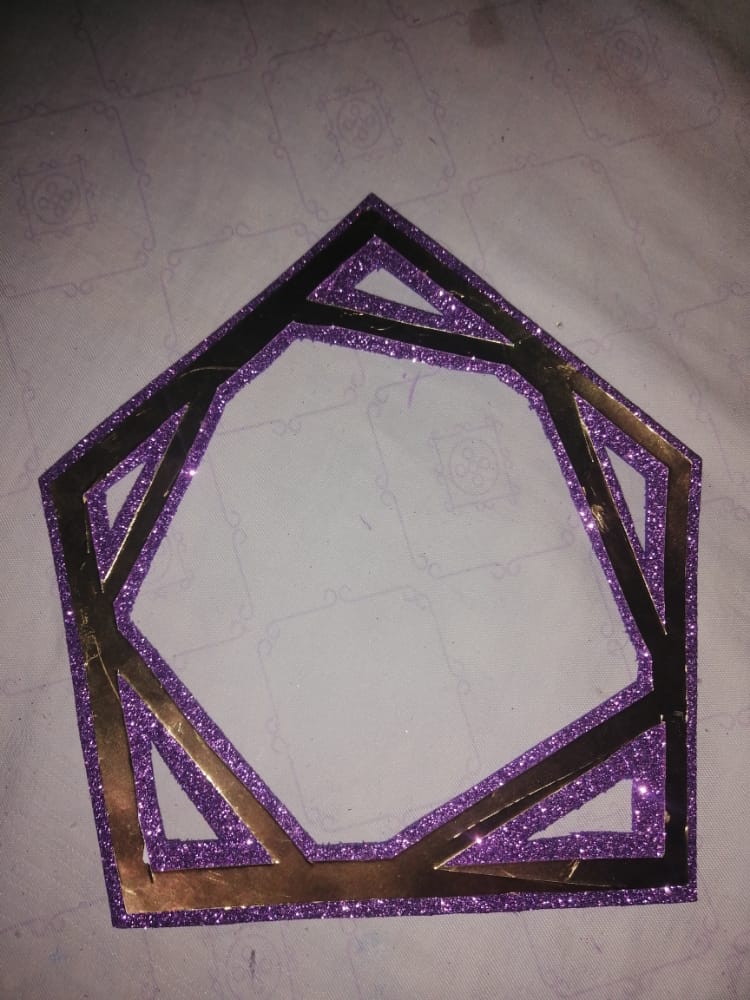
Step 12 The bottom of our shape is purple frosted foami, you just have to leave a small border to make it stand out.
Paso 13 Para nuestras 6 flores, hay que hacer 6 círculos, pero les voy a mostrar el procedimiento con dos ya que son de distinto color y forma, hacemos un círculo morado del tamaño que guste, y realizamos un espiral pero con forma de pétalos de una flor, no tiene que quedar perfecto así que no se preocupen; y para el rosa, el círculo tiene que ser del mismo tamaño, pero lo que cambia es la forma, siendo este un espiral.
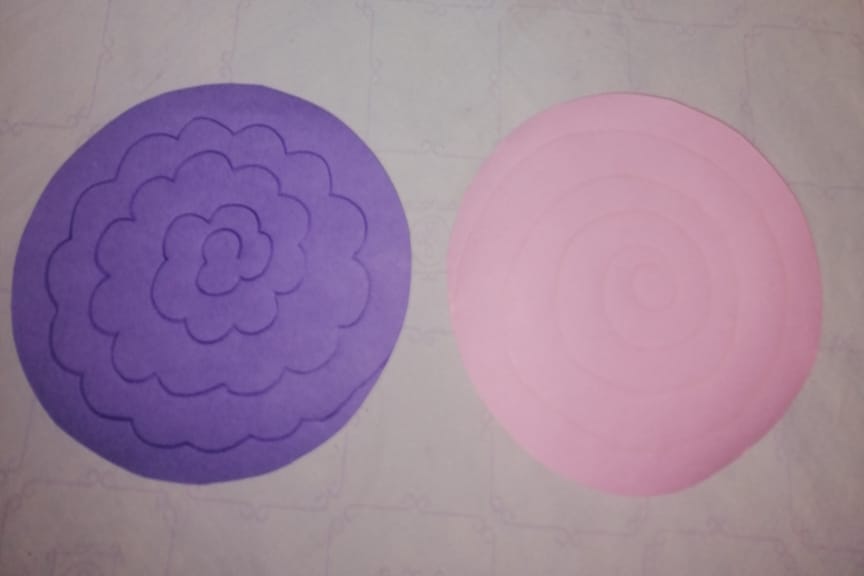
Step 13 For our 6 flowers, we have to make 6 circles, but I am going to show you the procedure with two since they are of different color and shape, we make a purple circle of the size you like, and we make a spiral but in the shape of flower petals It doesn't have to be perfect so don't worry; and for pink, the circle has to be the same size, but what changes is the shape, this being a spiral.
Paso 14 Recortamos.
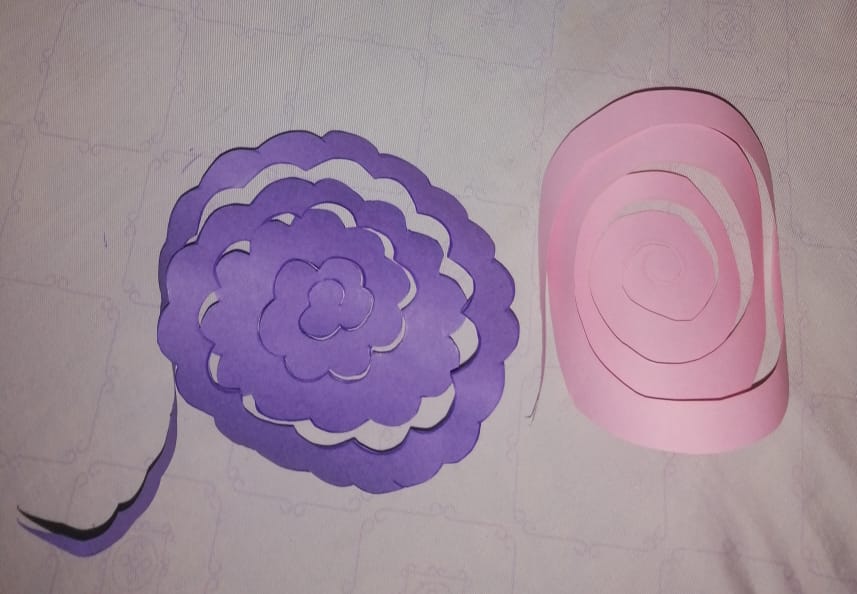
Step 14 We cut.
Paso 15 En este paso utilizaremos la ayuda de un palillo de altura, tomamos la punta de donde comienzan estos espirales, y solo vamos enrrollando, no sé asusten si ven que está quedando pequeñas, ellas después de agrandan, solo hay que moverlas un poco, y lo último que quede se pega con ayuda del silicón a la base de la flor, para que todo quede intacto.
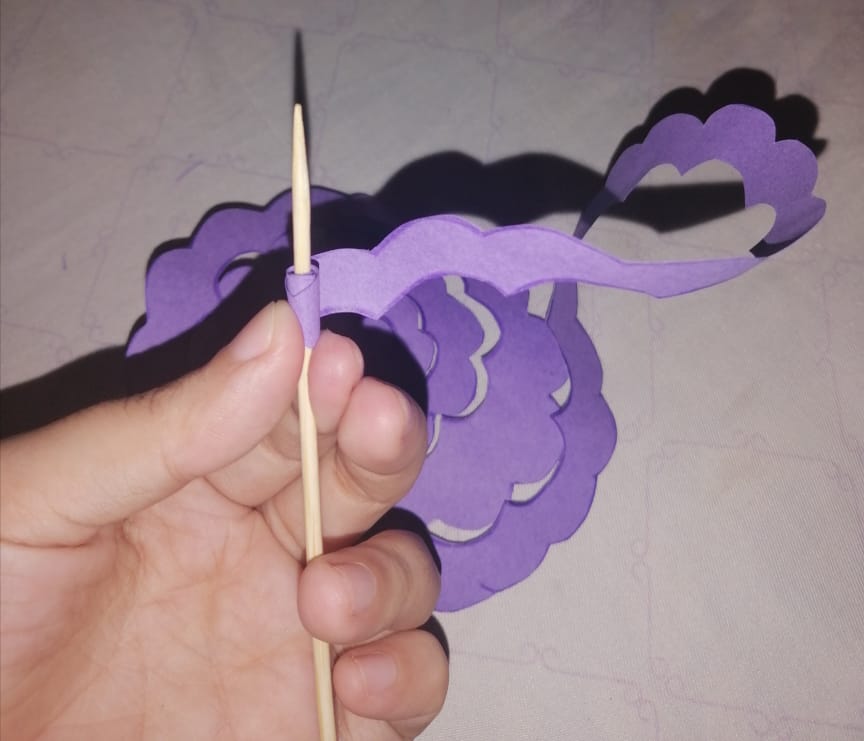
Step 15 In this step we will use the help of a tall toothpick, we take the tip from where these spirals begin, and we only go winding, I do not know scare if you see that it is getting small, they enlarge afterwards, you just have to move them a little, and it The last one that remains is glued with the help of the silicone to the base of the flower, so that everything remains intact.
Paso 16 Y aquí nuestras flores.
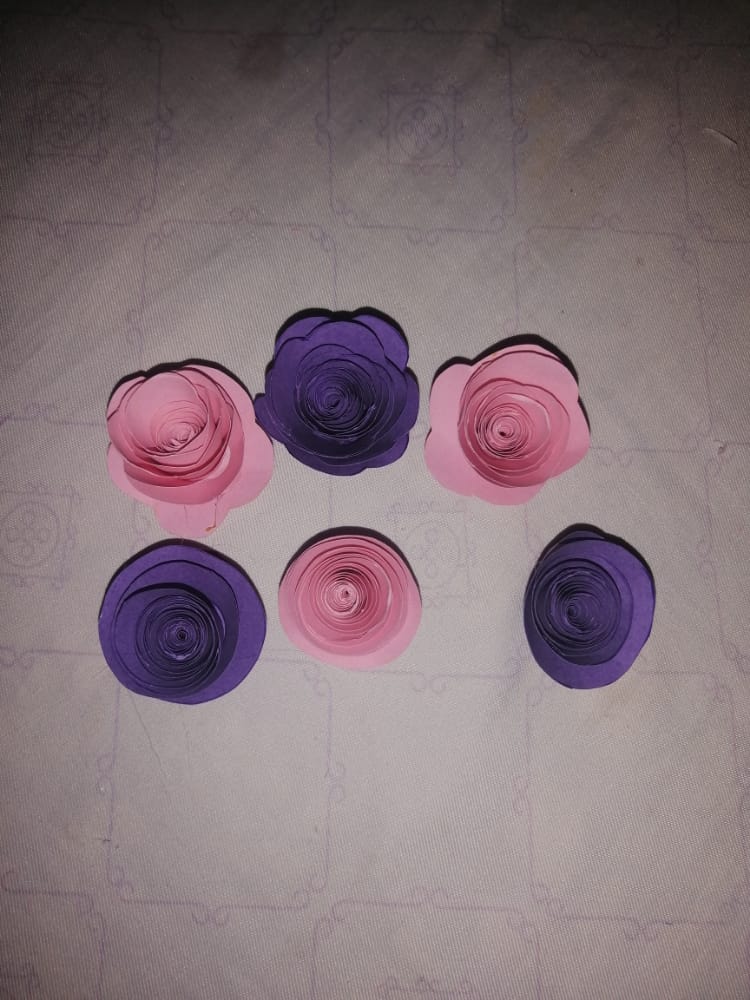
Step 16 And here our flowers.
Paso 17 Comenzamos esta vez por nuestra hermosa mariposa, hacemos nuestro molde, y con este mismo molde, sacamos uno en la cartulina espejo dorada y otra en el foami escarchado dorado, pegamos la cartulina encima del foami, pero hay que doblar un poco la cartulina para que se vea como que la mariposa tiene vida; para finalizar, atrás del foami escarchado morado hacemos un fondo blanco, para que esta sea más llamativa y le pegamos en los lugares que gustes, pequeños apliques plateados.
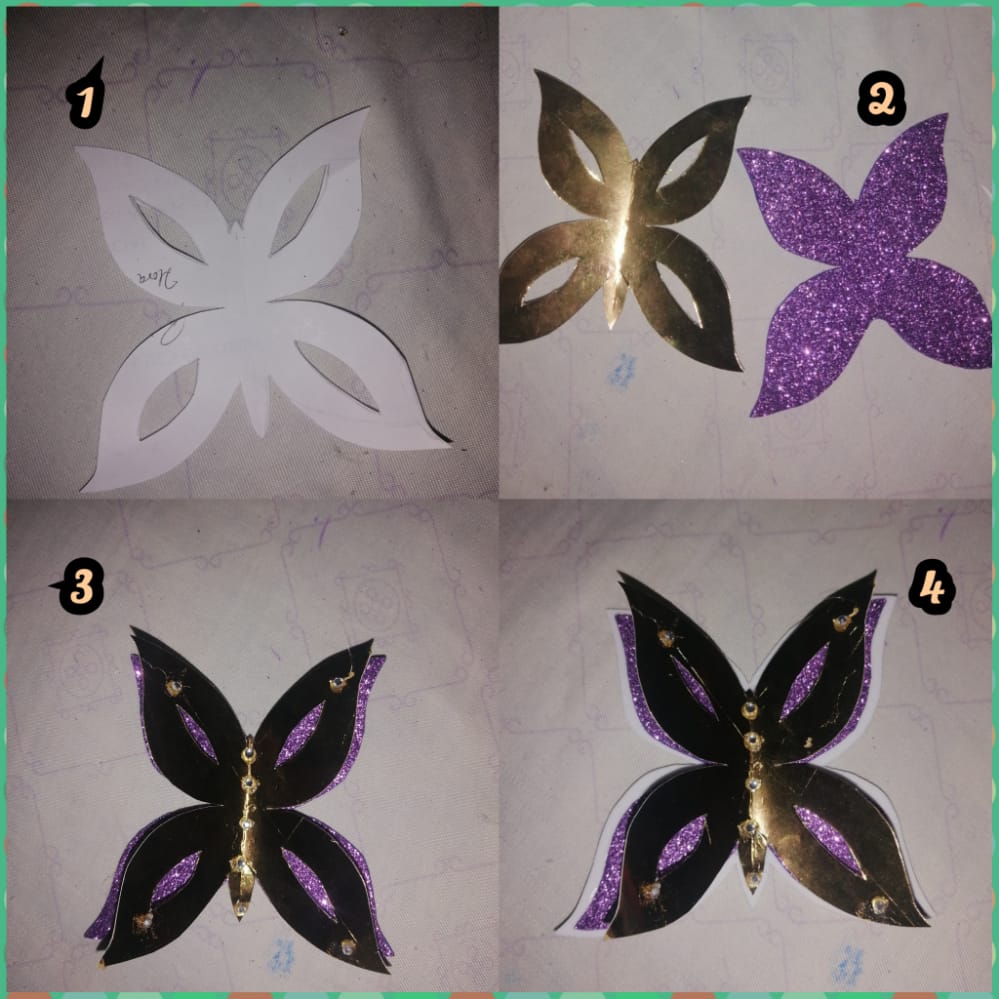
Step 17 We start this time with our beautiful butterfly, we make our mold, and with this same mold, we take one out of the golden mirror cardboard and another in the golden frosted foam, we glue the cardboard on top of the foam, but you have to bend the cardboard a little so that it looks like the butterfly has life; Finally, behind the purple frosted foami we make a white background, so that it is more striking and we stick small silver appliques in the places you like.
Paso 18 Cuando ya terminemos con nuestra mariposa, procedemos a hacer las dos hojas; con el mismo molde sacamos dos hojas en cartulina espejo dorada, luego vamos a hacer nuestro fondo con foami escarchado morado, como les expliqué antes dejen un pequeño borde, y eso sería todo.
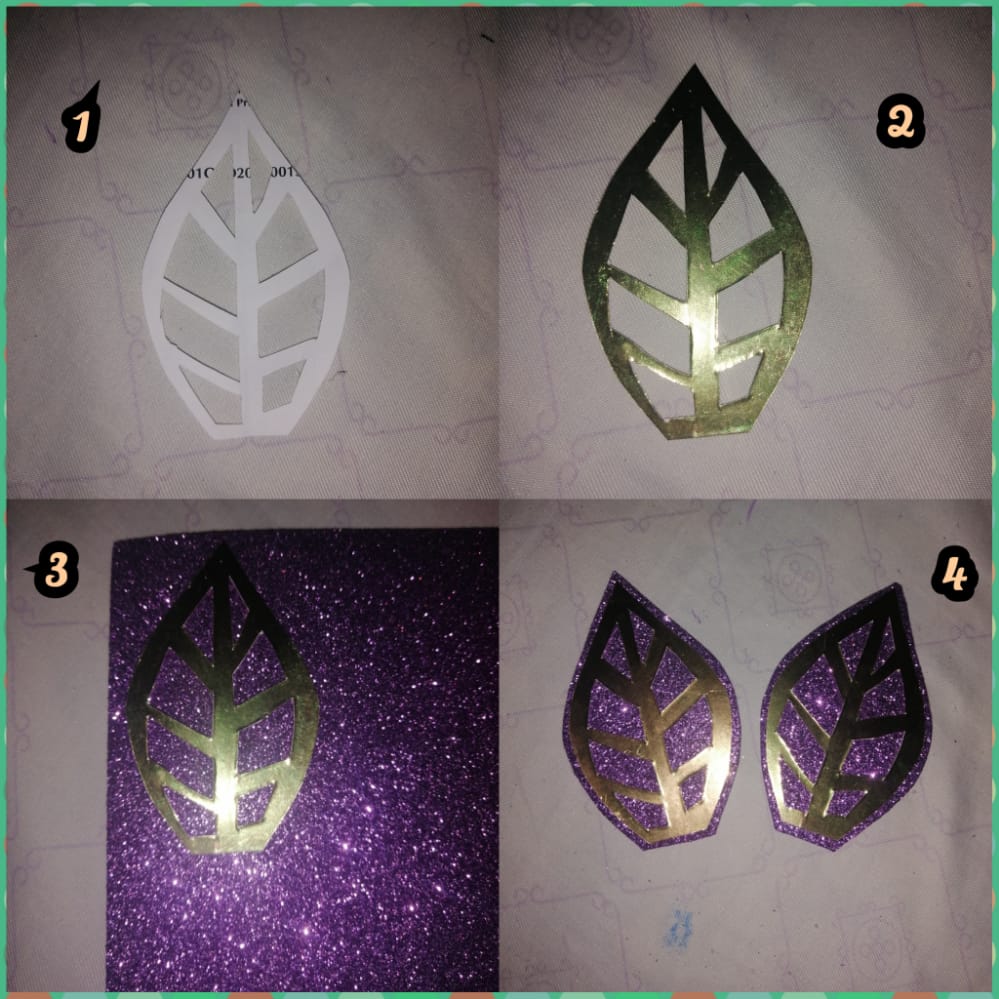
Step 18 When we finish with our butterfly, we proceed to make the two leaves; With the same mold we take out two sheets of gold mirror cardboard, then we are going to make our background with purple frosted foami, as I explained before, leave a small border, and that would be it.
Paso 19 En cartulina espejo dorada hacemos 6 hojas, ramas o como quieran llamarlo.
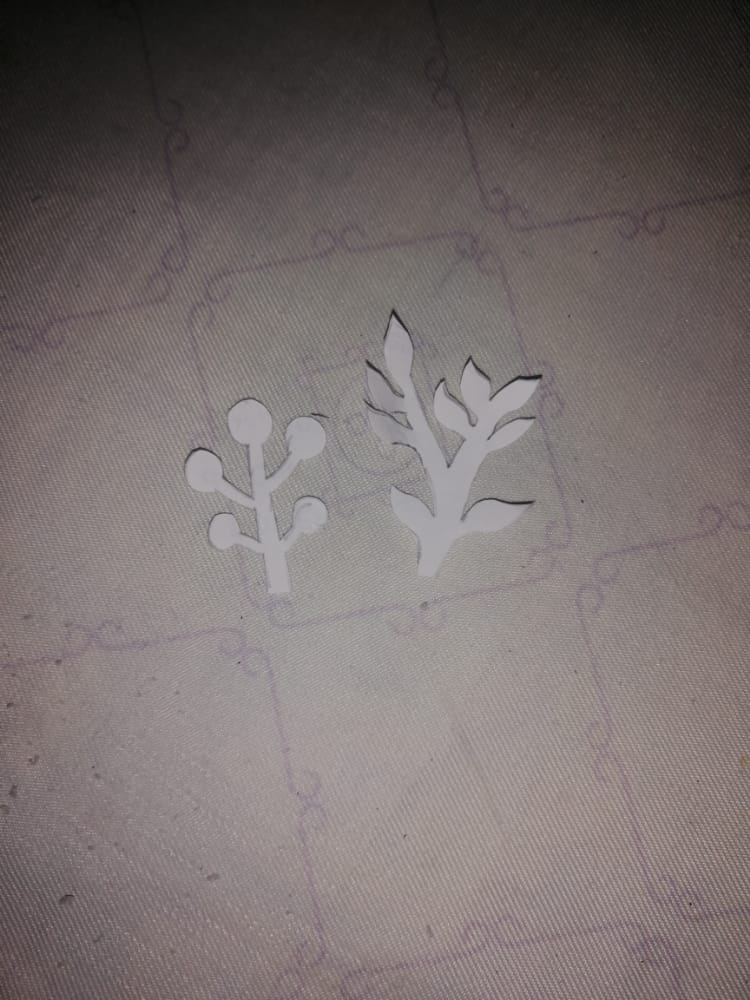
Step 19 In gold mirror cardboard we make 6 leaves, branches or whatever you want to call it.
Paso 20 Quedando estas así.
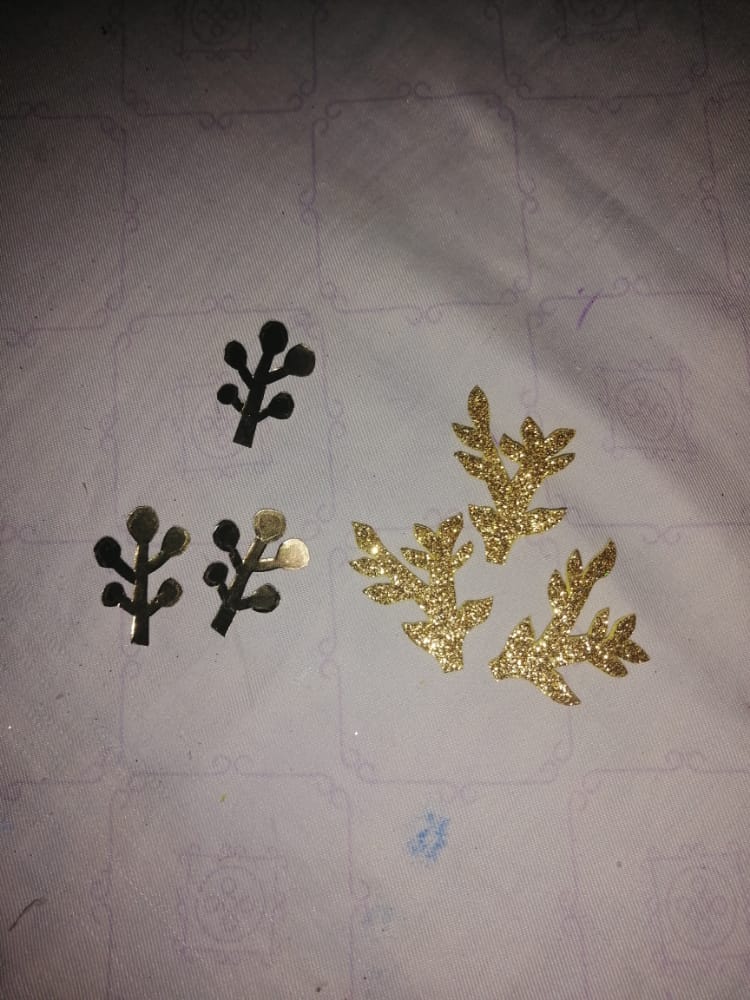
Step 20 Staying like this.
Paso 21 Pegamos todos los elementos.
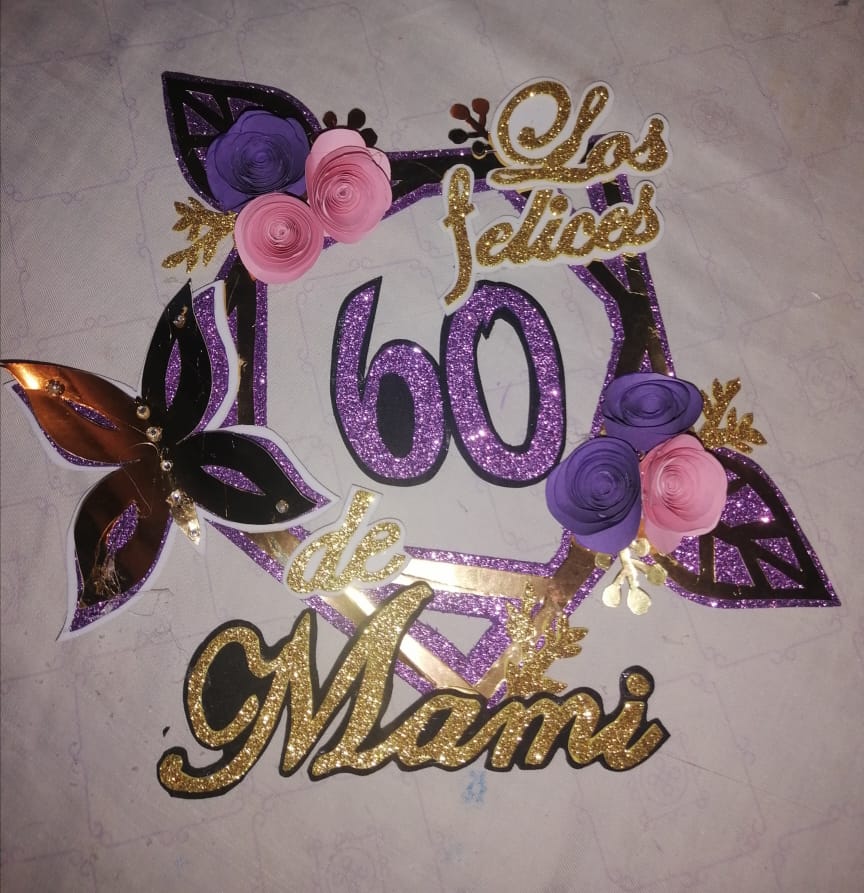
Step 21 We glue all the elements.
Paso 22 Con ayuda del silicón líquido pegamos los dos palillos de altura, que serían los soportes.
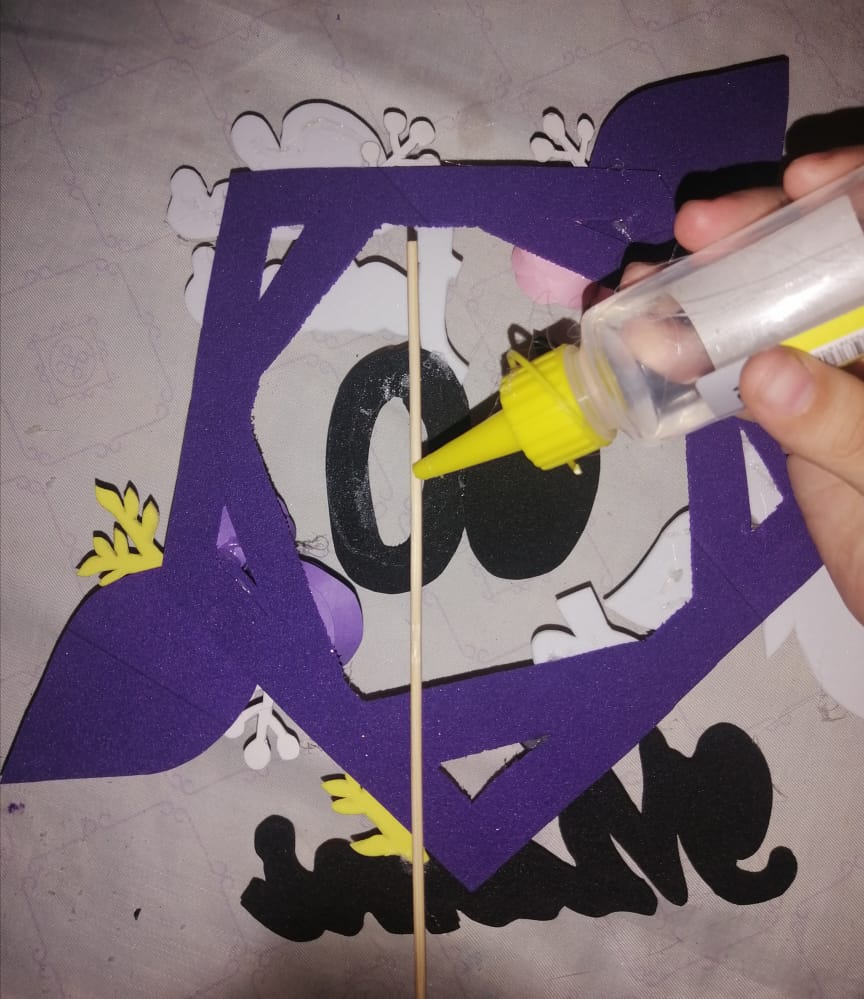
Step 22 With the help of the liquid silicone we glue the two height sticks, which would be the supports.
Paso 23 Así quedaría nuestro hermoso Topper.
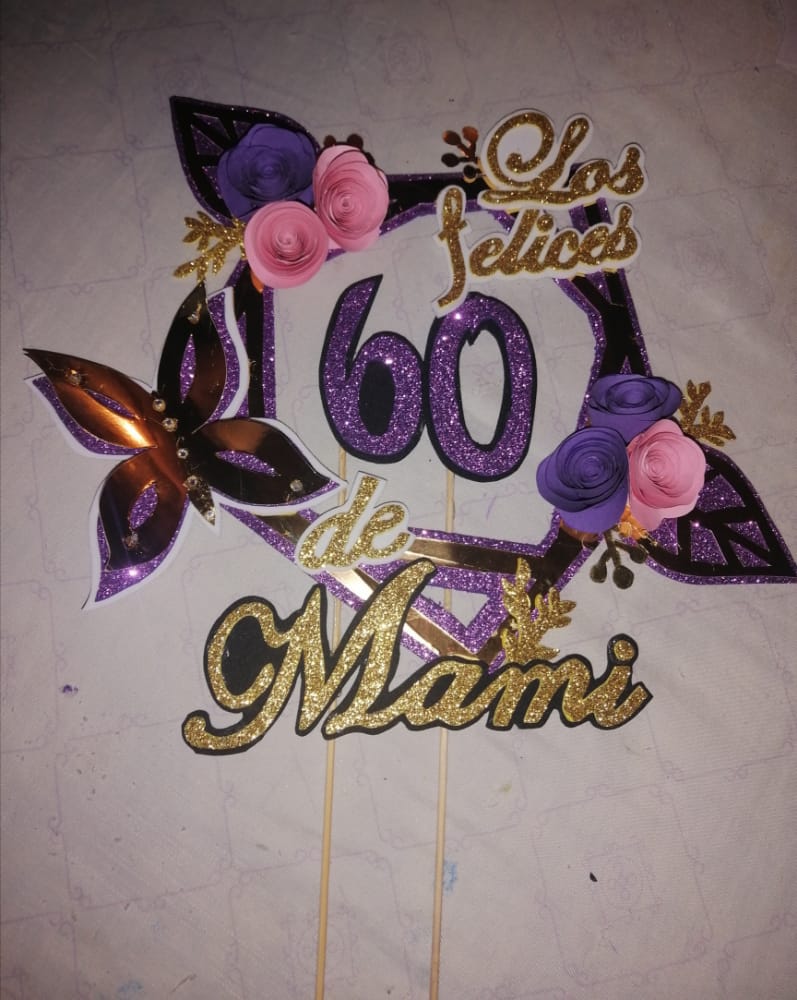
Step 23 This is how our beautiful Topper would look.
Paso 24 Y ya tenemos el resultado que tanto hemos esperado. Nuestro arreglo finalizado hermosa creación. Admiren.
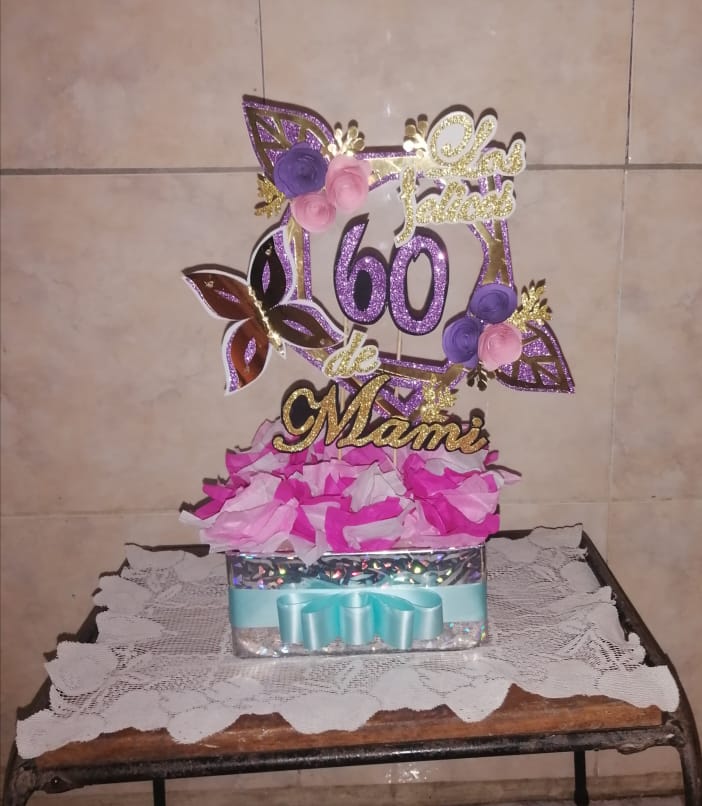
Step 24 And we already have the result that we have waited for so long. Our finished beautiful creation arrangement. Admire.
Mis amores, finalizamos una nueva entrega de nuestro tutorial, hermosas #manualidades especialmente diseñadas y construidas para todos ustedes, espero se animen e inicien en este maravilloso mundo; chao chao.
My loves, we finished a new installment of our tutorial, beautiful #crafts specially designed and built for all of you, I hope you will cheer up and start in this wonderful world; bye bye.
...Gracias Por Visitar...
...Thanks for visiting...
Las imágenes en collage, son de mi propiedad y editadas con Photogrid
The collage images are my property and edited with Photogrid
Imágenes Fotográficas, tomadas por Ronmel Nuñez.
Photographic images, taken by Ronmel Nuñez
Congratulations @nancytarojas! You have completed the following achievement on the Hive blockchain and have been rewarded with new badge(s):
Your next target is to reach 50 upvotes.
You can view your badges on your board and compare yourself to others in the Ranking
If you no longer want to receive notifications, reply to this comment with the word
STOPCheck out the last post from @hivebuzz:
Support the HiveBuzz project. Vote for our proposal!