Hello Hive! Welcome to another post about one lunatic assembling something meant to be done with two or more people!
If you're a regular reader, you might have caught a brief mention of this mid-sized pop-up garage in one of my previous posts. I bought this... oh, about 5 years ago now, on sale at 40% off. At the time I didn't have the space to set it up, but I knew I would make space eventually and the deal was too good to let it pass!
Of course, because it sat for so long, I was a little skeptical that it would still be in usable shape. It has been sitting outside the basement door, still in its box, since the day I brought it home. Okay, to say that it was inside the box might be a bit of an exaggeration... it was definitely already on its way out of the box.
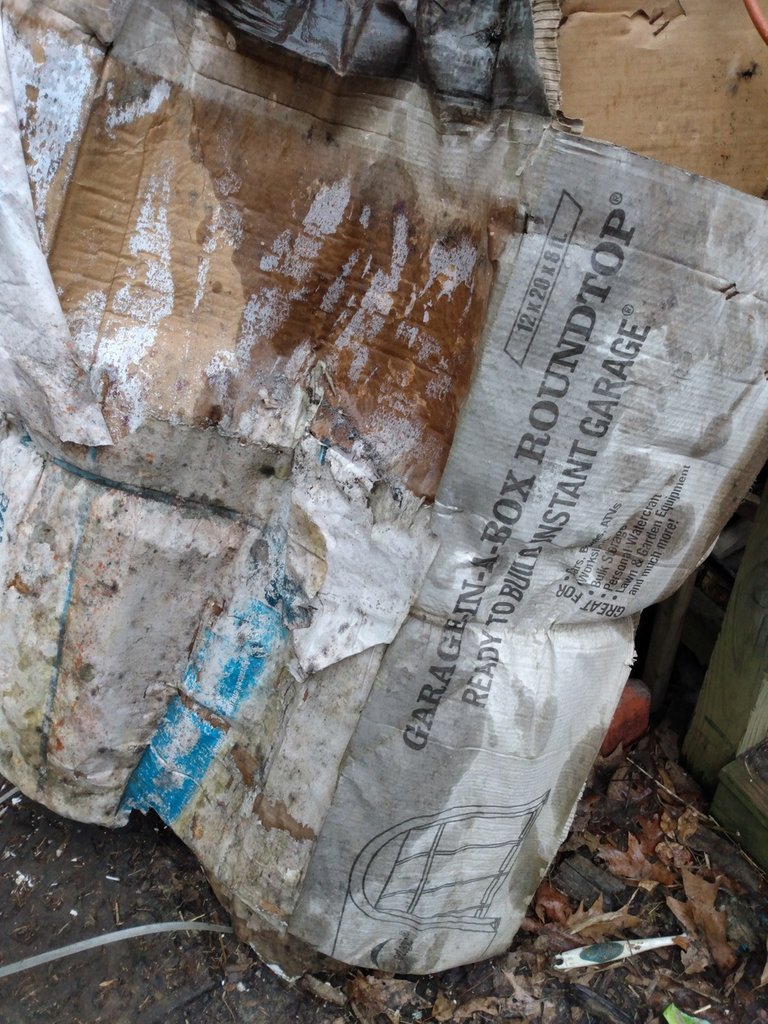
I knew it wasn't going to magically repair itself because I waited and wished long enough, so it was time to peel back the cardboard and...
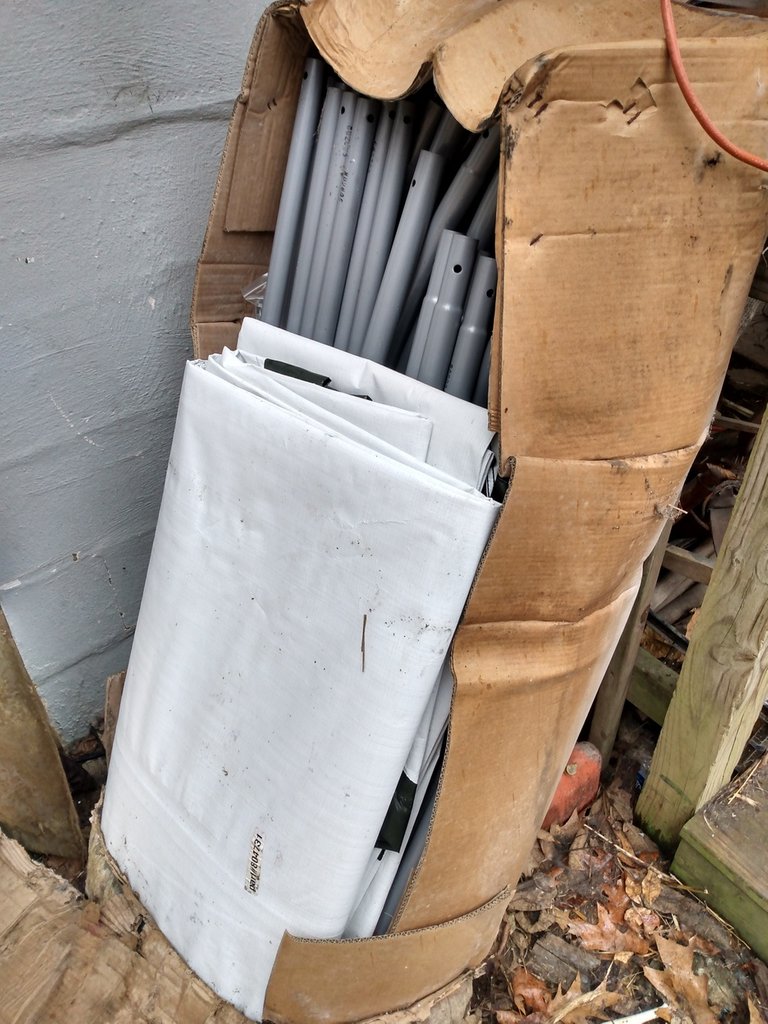
Alright, the first obstacle has been overcome! Everything inside still looked like new, other than a little mud here and there, and a few insect eggs. I hadn't really been too worried, I know that this heavy duty corrugated cardboard is fairly weather resistant, as long as you don't touch it too much, and the garage itself is made to be set up outdoors.
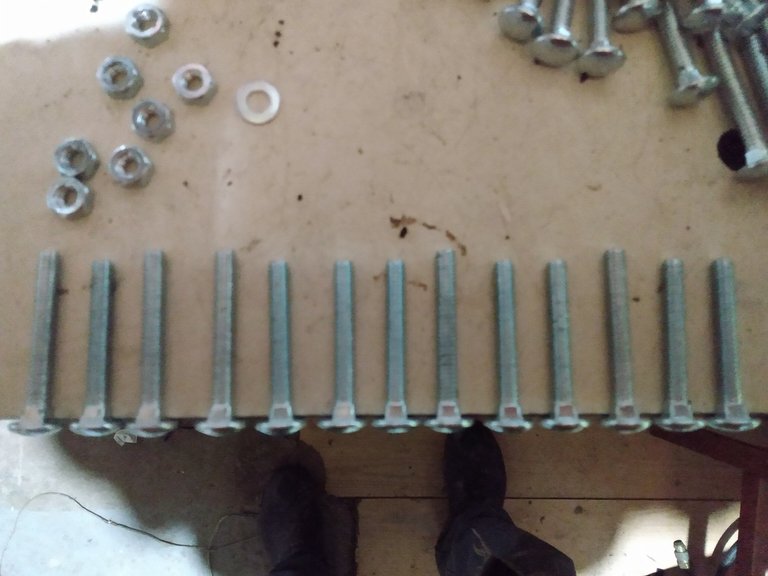
With the easy part out of the way, it was time to get into the nuts and bolts of this project... literally. All of the connecting hardware came in a single bag and needed to be sorted. Normally, this is a super easy task for me, but this pile of hardware had two bolt sizes that were too close for me to just eyeball. Using the edge of my bench to line them up and then sort them made this go a lot faster. As you can see, with the heads of the bolts lined up flush with the edge of the table, it's quickly apparent which bolts are which.
The structure of the garage is pretty simple, just a bunch of metal hoops with some tarps stretched on it. I assembled the first hoop right where all the parts were, then carried it down to the driveway. That turned out to be a bad idea, and after this first one I carried all the parts and tools down to the driveway and began assembling everything in place.
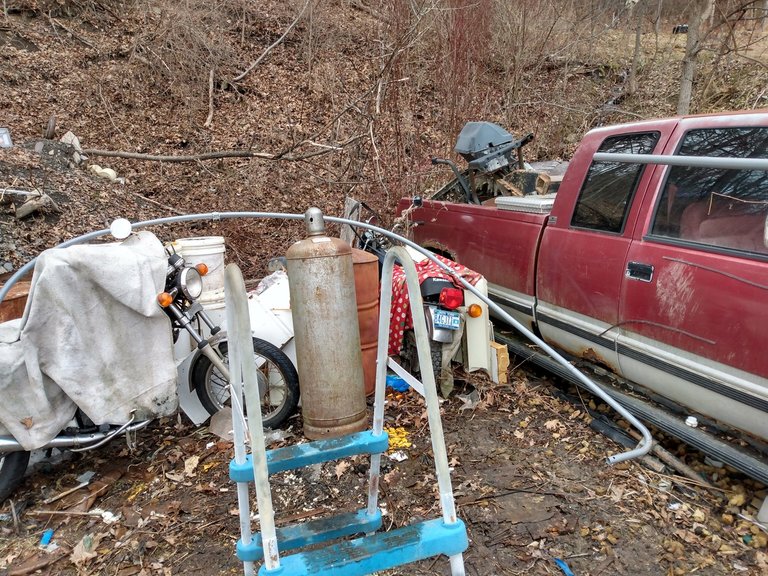
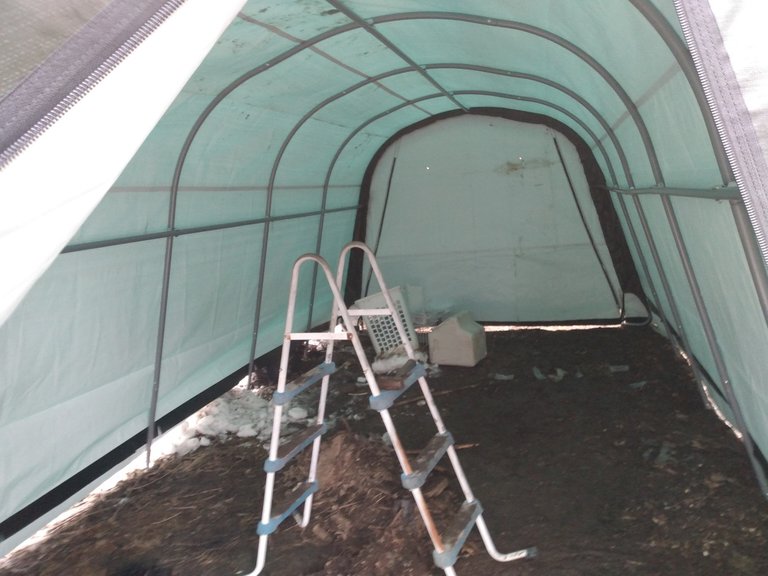
Getting the first two hoops connected and standing was a bit of chore because of their unwieldy size, but they were light weight enough that I was able to manage. Once I had the first two assembled and standing, adding on the others was easy-peasy. The little pool ladder in the pic is something that I refused to throw out years ago, when the wife was still here. She thought it was too wobbly and dangerous for me to use, but I've found it to be far superior to a normal stepladder for tasks like this. It's lighter, easy to move, easier to work from, and self-stabilizes very well on uneven ground.
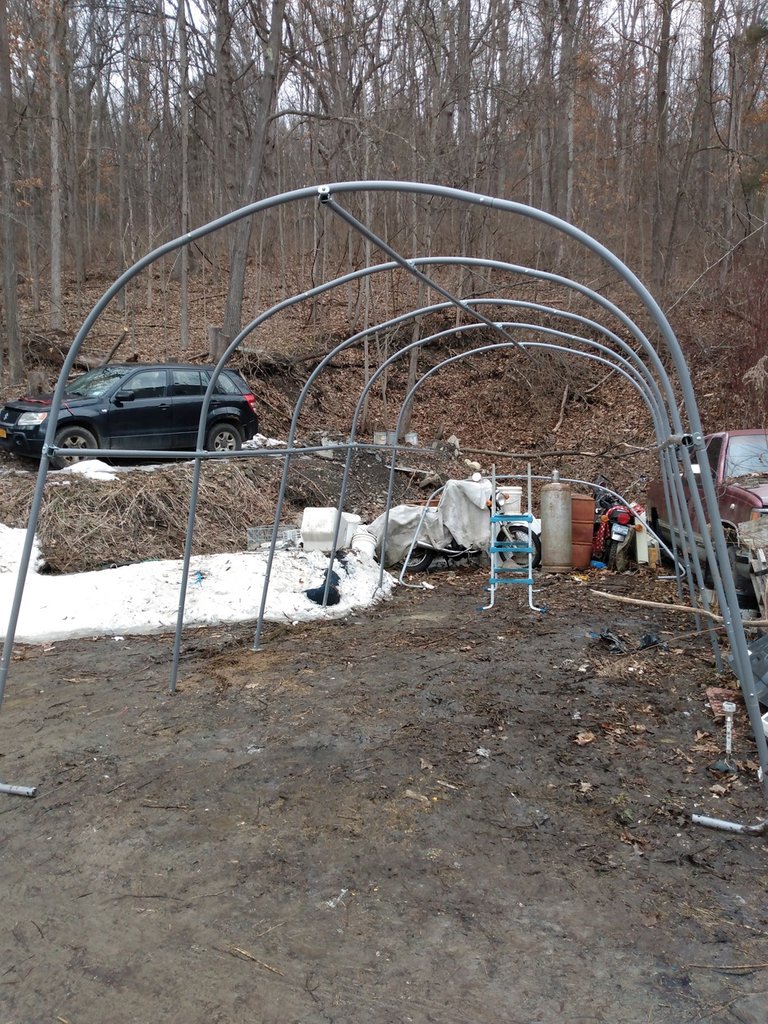
Getting all the pieces bolted together was the easy part. I hadn't been able to clear quite enough area for the garage, so it was time to start chipping away at the snow, ice, and frozen erosion socks.
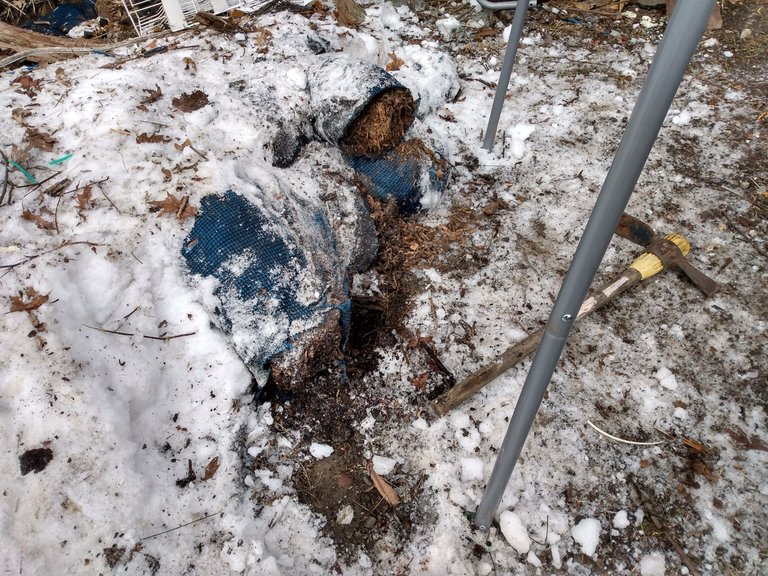
I've used brick hammers as ice picks for years, and it once again proved to be very effective. It still astounds me that I can break ice faster by chipping at it with this little hammer than I can by swinging a full sized pick.

Several cart loads of ice and snow had to be removed to make space, but I didn't have to move it very far and though it was a pretty intense work out, it only took an extra 2 hours.
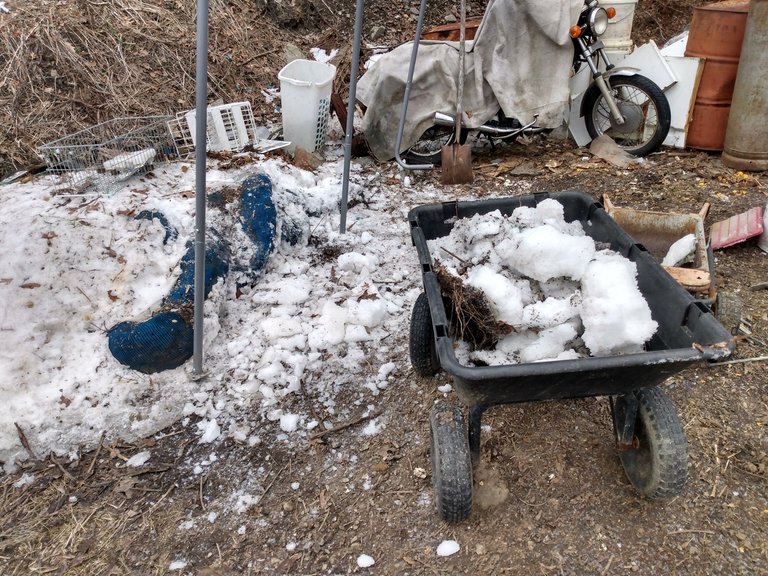
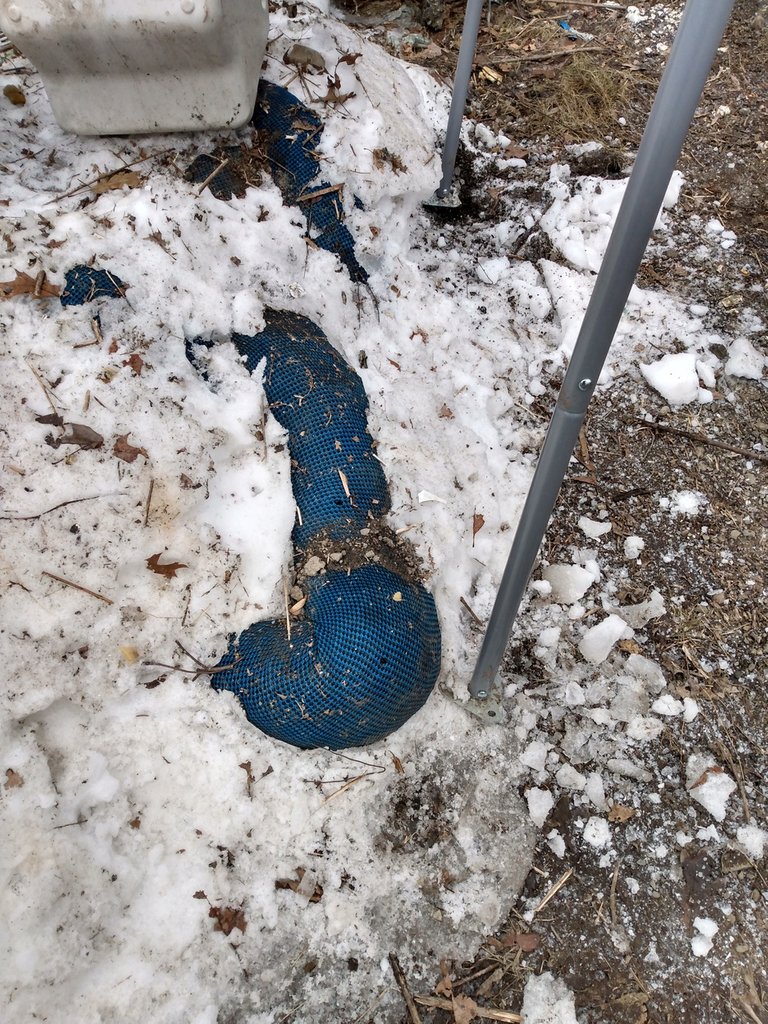
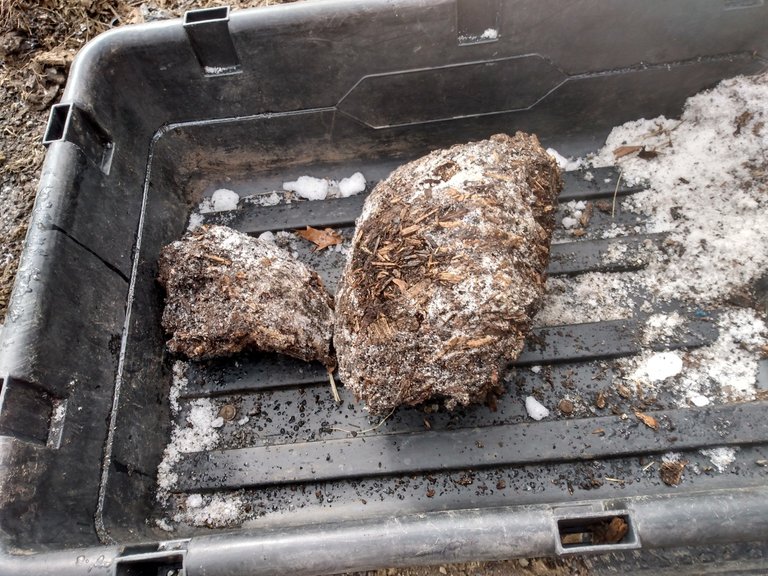
Getting the erosion sock removed was a different story entirely. These are filled with wood chips, and this thing was frozen SOLID. By beating on it and prying at it with the pick, I was able to get it to fracture in a few spots that I could then cut free.
I took out another couple cart loads of these frozen mulch balls, and added them to the pile I began making when I first started trying to clear the driveway enough to get the garage set up. These are partially composted wood chips, which are loaded with mycorrhizae, and we've been using them as mulch around the homestead with great effect.
Once the frame was all set, I started putting on the covers. This is the part where the extra hands would have come in really handy, but I have to work with what I have, not with what I wish. I chose a nice, mild day, to make this part of the setup as easy as possible. We've had lots of days with 50mph wind gusts lately, and I don't think I'd have been able to accomplish this on that kind of day, even with the help!
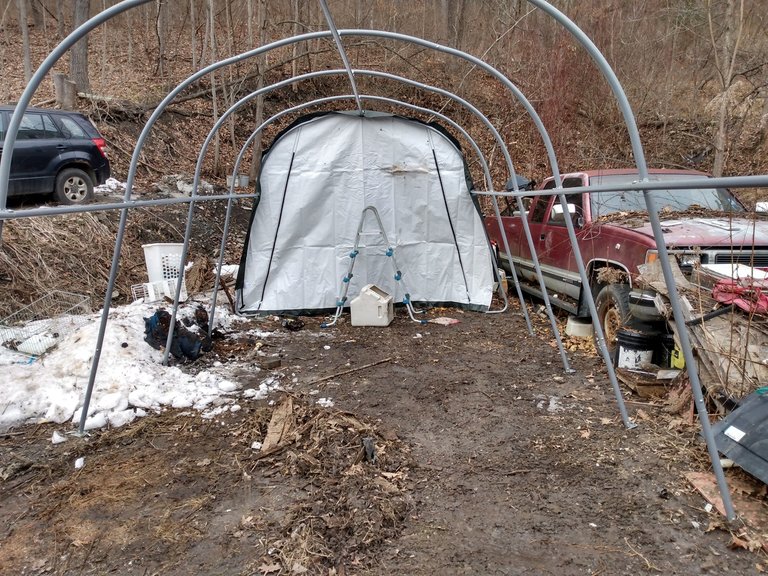
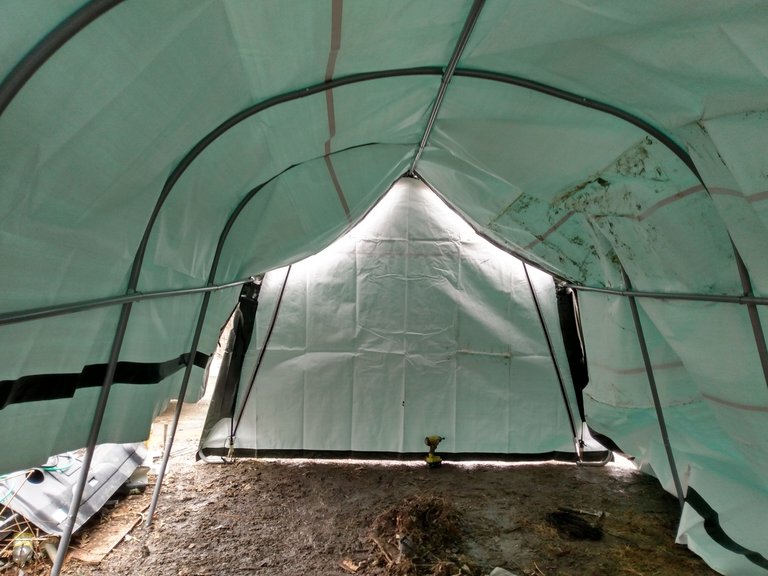
Even with just the two ends on, it was starting to feel like something useful. One of the things that has always fascinated me about building things is how the progress is perceived. For two days of work, it looks like almost nothing has happened, but after just 20 minutes of hanging tarps it looks almost complete.
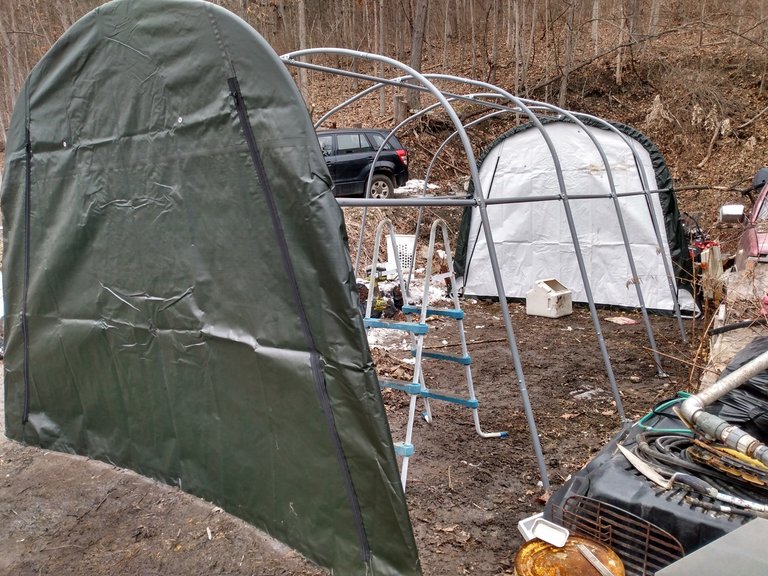
The top cover seemed daunting, and I thought I might have to actually wait for some reinforcements before getting it installed, but then decided I might as well give it a go. Using some ropes, and parts of the garage frame as pulleys, I was able to get the cover on, by myself, in a little under an hour.
There was still plenty of work left to do after getting the top on, but at least now it could be finished regardless of the weather. Good thing, too, because it started raining again about an hour after I got the top cover on!
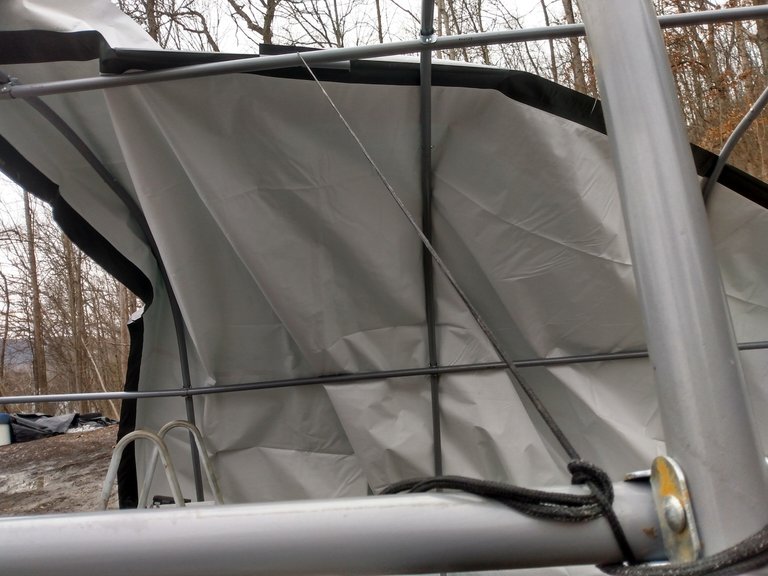
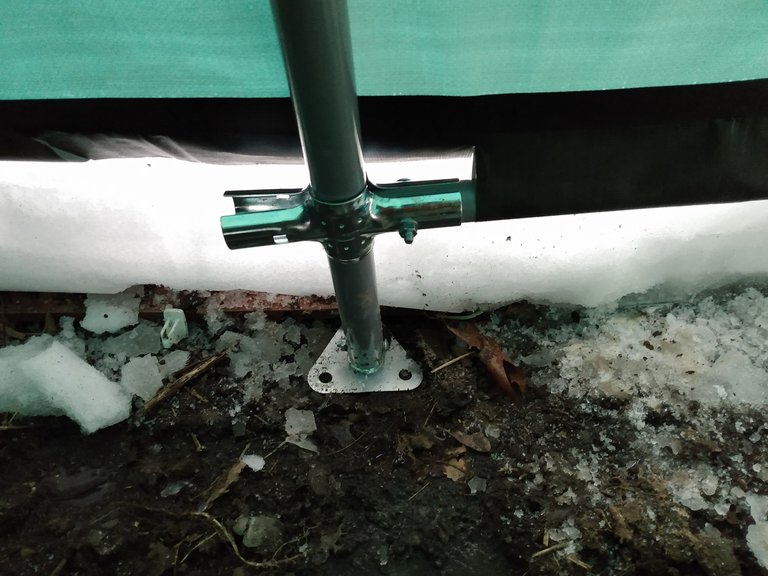
Finishing the garage at this point was just meant installing these poles along the bottom, and using them to stretch the cover tight. It doesn't sound like much, but in many ways this is the most important part of the assembly, and it took almost a full day to complete.
It was a day well spent, and before the sun went down I had a 'new', 'indoor' work space where I can tackle projects that are too big (or smelly) to work on in the basement, without having to wait for a break in the weather. It's not a perfect space, but for $300 and a couple days of my time, I really couldn't ask for anything more.
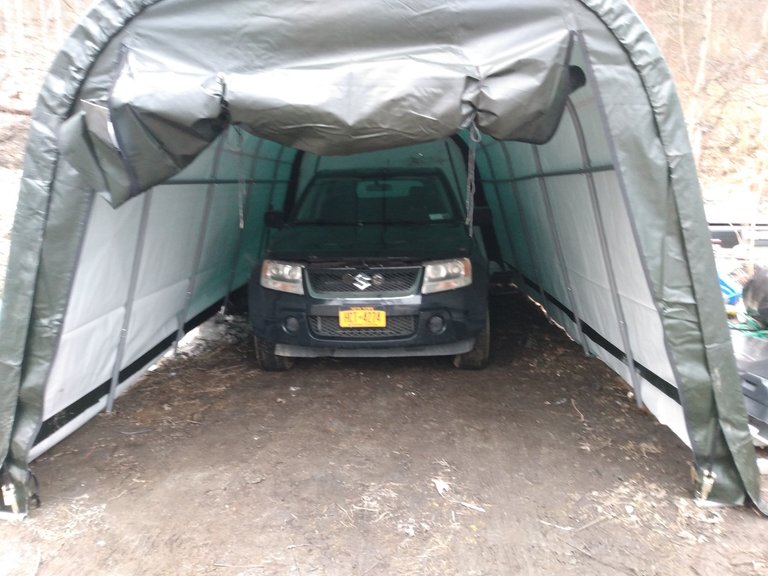
I got the old Suzuki pulled in as soon as it was set up, before I got the garage too filled with junk 😁. This will be a major project, taking up space in here for some time while I pull the engine and finish rebuilding the bottom end. The garage is 20' long, so I still have room in front of the Suzuki for working on smaller projects, as you'll get to see in my next sawmill post.
I just finished this set up 2 weeks ago, and as far as I'm concerned, the garage has already paid for itself. Stay tuned to see what sort of fun things I get up to under this cover.
Thanks for stopping by, hope to see you again soon!
Wow, that's really cool! Congrats on the new garage!
Only $300? That's crazy affordable housing. I wonder if it's legal to live in one of those in the woods. !PIZZA
It would depend on where you are, I guess, and whose woods they are. They are not a real long term solution, unless they can be made more durable with UV resistant treatments. After 2-3 years in the sun in western NY, I've seen that the tops of these become pretty porous. If you painted it with roof sealer, that would probably help a lot. They also aren't always that cheap for this size... as I said, I couldn't let the deal pass. I think they are typically $400-$600, still a pretty good deal.
I was half-joking but it still sounds like a pretty decent temporary solution. Better than a tent maybe :)
PIZZA Holders sent $PIZZA tips in this post's comments:
@brandt(2/5) tipped @paradoxtma (x1)
Join us in Discord!
Looks awesome dude! One thing I would edit would be the last pic to blur or remove the license plate lol
I love getting those types of steals! I’ve been toying with the idea of getting one and setting it up at the lake house, we need some type of covered space to put a car to work on! We’ve got the space for it.. kind of. Tough part about our space is it’s an upside down L and we park in a way that would make it tricky, the bottom of the L (or in the upside down case, the top) because of where the septic field is.
The brick hammers are awesome for quick things that need a good smack but don’t want to use something heavy like the mattock pick for sure!
I thought about blurring that plate, but then remembered that it doesn't come back to my name, or even my address (if I remember correctly), and by the time this vehicle goes back on the road, it will have a different one.
If you can find the right deal on one, they do make a great temporary garage, but they'll need some maintenance if you leave them up more than two years. One of the benefits is that you can actually assemble this over top of a vehicle that you can't move... I thought about putting it over the truck first, but then I wouldn't have had room for anything else, and I needed some space for smaller outdoor projects.
I've had a couple of these and they didn't last very long. First one had the cover disintegrate on the 3rd year. 2nd one was starting to get a few tiny holes from the UV too and the wind demolished that one on year 2. For temporary storage, you can't beat them for the price, but the operative term there is temporary.
Yeah, I've been saying that to a few people in the comments who've asked about their usefulness as housing. If I find the time and ambition, I'm going to experiment with some UV protective coatings on it.