Hello, curious people from around the internet, I hope this post finds you well! If you just want help fixing your brakes, skip ahead until after the first picture. If you're a follower and enjoy all the extra words I use...
It's a little weird to hope people are well in the intro of a DIY post, isn't it? I mean, if you stumble across this while searching, chances are something is wrong with your brakes and you can't afford to pay someone else to fix them. 'Sorry to see you here...' seems like the wrong foot to start off on... I'll work on it.
Some of you may think I'm nuts for doing another auto repair post, and for you guys (or gals, or whatever, it's a generalization and I by no means mean to assume anyone's assumed gender) I'll explain my reasoning here. First, I recognize that auto repair posts are by far the most thoroughly ignored of all my posts. Even my D.Buzz posts generate more interest and rewards. To that point I will remind you that I'm not here for rewards or recognition, more of a cross between public service and personal journal. If that seems confusing, read the rest of my posts. It won't clear anything up, but it will keep you distracted for a while before you ask me to explain myself. Also to that point I would like to add that while there may not be much of an auto-repair interested community on Hive currently, there is a HUGE online auto-repair community, and posts like these just might get some of that attention, so although they currently generate little in the way of rewards or attention, they will hopefully someday attract enough people to the platform that new posts will generate some rewards and attention. Don't swoon at the selflessness of this long-term thinking, remember, in NY I really don't have access to my rewards anyway 😉.
For another paragraph on the thinking behind these posts, read on!
I'm starting the auto repair posts with brake work because, in my opinion, this is the work that is most often overpayed for. A typical brake job will run you at least $60 in any shop, well over $100 in most, and is usually less than $20 in parts and a half hour or less of unskilled labor. Every tool you could need to do the job can be bought for less than the price of paying someone else to do it, and then you'll have those tools forever (if you don't lose or break them). After this, I plan a series on muffler repair, because this is where people are most commonly gouged for over $1000. I have photos of literally dozens of major repairs, just waiting to be put together and posted, and I add at least a couple more every year. If you have a particular repair you need help with, mention something in the comments, I may already have a post to cover it!
Moving on...
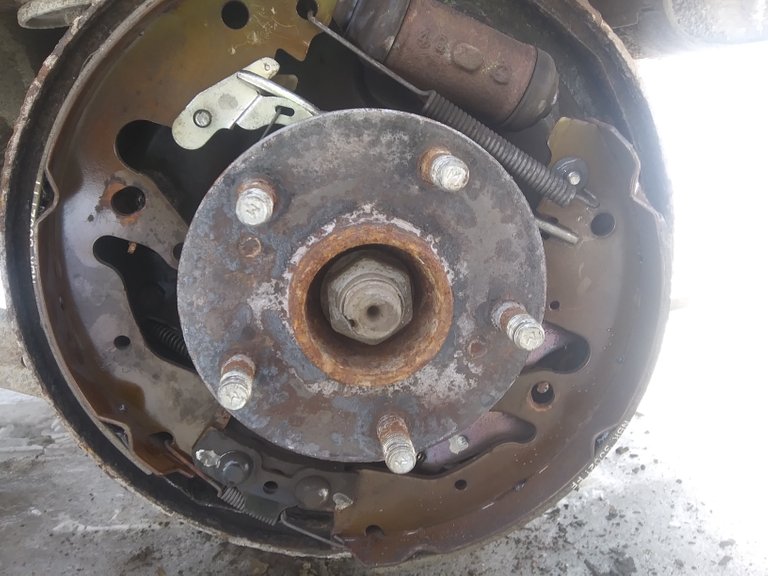
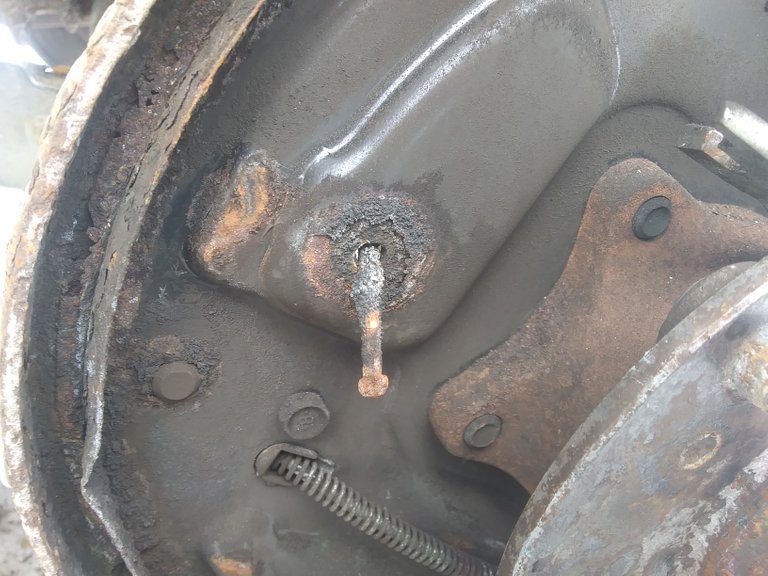
The picture below is what the brake assembly looks like with the rotor off, the springs disconnected, and the retainer clips removed. I recommend taking pictures as you go if it's your first time attempting anything like this, they can be a great reference for figuring out how things go back together! If you came here trying to fix some brakes that don't look more or less like this, you're in the wrong place, and there's a link below to my previous post about disk brakes. These drum brakes are very similar to the air brakes used on many commercial trucks, and many of the replacement procedures for the brake shoes are the same.
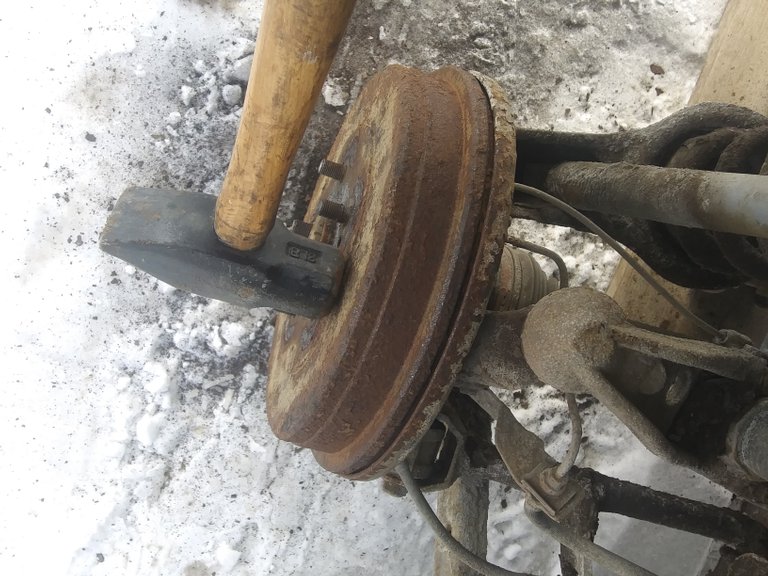
We'll start diving into this post with the car jacked up and the wheel already off. If you need help getting to that point, see my previous post on disk brakes here. On modern passenger vehicles, drum brakes are exclusively found on the rear wheels. Some vehicles from the 70's and earlier may also have drum brakes on the front, but if you own that kind of classic you probably don't need my blog for help. Commercial trucks with air brakes often have a drum brake system on all wheels, but I do not recommend this as a guide for air brake systems. The drum is likely to be corrosion-welded to the wheel hub, so it will need a little 'persuasion' to come loose. MAKE SURE THAT YOUR EMERGENCY BRAKE IS NOT ON! If the emergency brake is engaged, the brake shoes will hold the drum in place. Rather than trying to hit the drum outward, hit into the face of the drum as shown in the picture below. Work your way around the drum in a circle, being careful not to strike the lug nuts. This may take several dozen hits, depending on the condition of your wheels. You will hear the sound change once it starts to break free, and at that point the drum will usually bounce right off. If it does not, work it out slowly once it has enough wobble to move by hand.
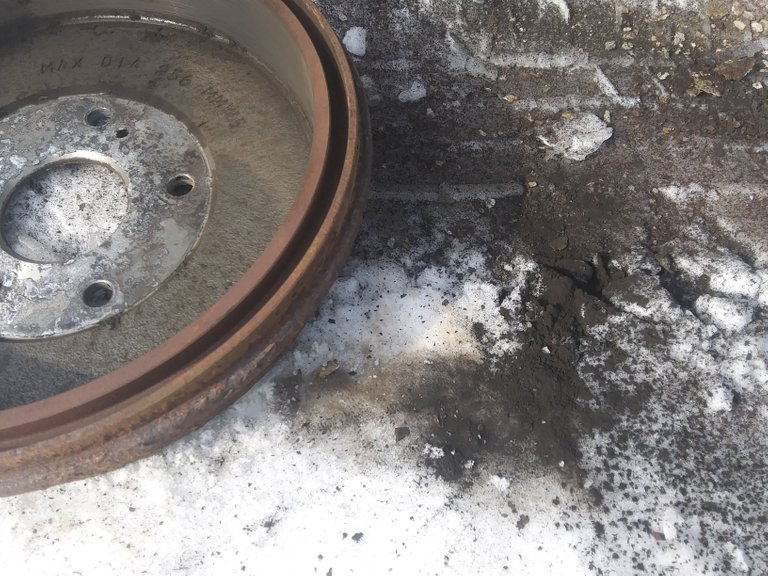
Besides rust, there's likely to be a lot of accumulation of this fine black powder inside the drum. This is mostly asbestos, and you should probably avoid breathing too much of it. I like to put on a mask and blow all this dust off before I start disassembling the brakes, but it isn't absolutely necessary. These drums are only a few years old, and nowhere near needing machining or replacement. That 'MAX DIA' number is the maximum inside diameter of the drum, and most drums will have this number stamped inside. If the inside diameter is greater than that number, the brake shoes will not engage the drum properly and the brakes won't be as effective, or may fail altogether.
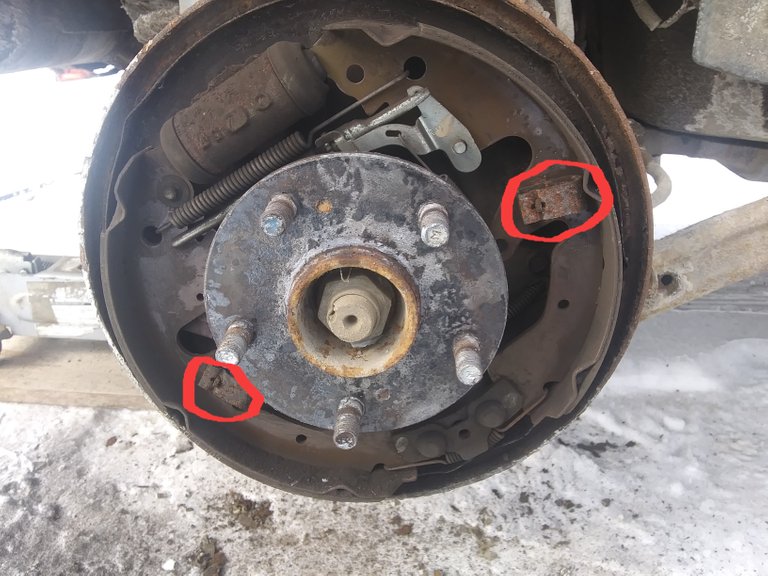
The first step to removing the old shoes is to remove the retaining clips, which are circled below. On many vehicles, these clips will be round with a coiled spring, instead of rectangular with an integrated hinge spring like these. In both cases, you remove them by pushing down on them and giving them 1/4 turn, so the top of the pin can pass through the slot you see in the picture. They make special tools for this, but I usually do it with standard needle-nose or lineman's pliers
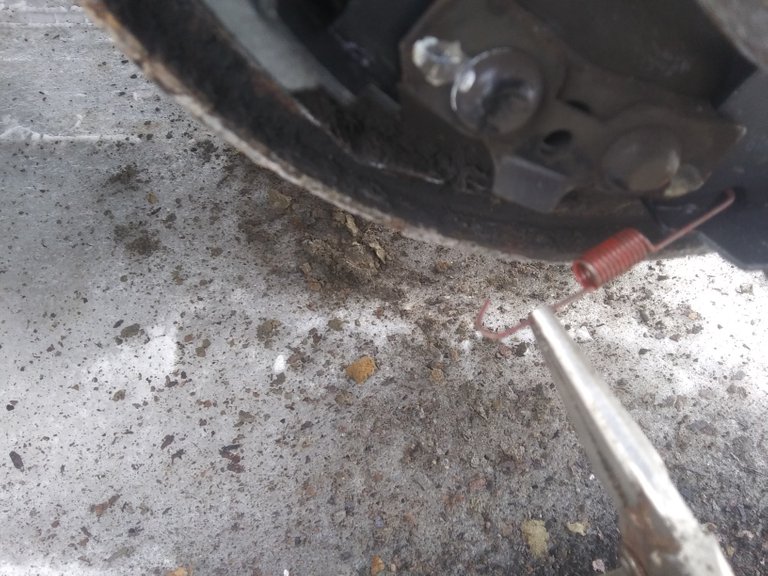
The second step is to disconnect all the springs. Again, there are special tools to help with this, but I usually just get behind one end with an old flat head screwdriver and pry them out. If you need to re-use the old springs for the new shoes, hold the other end of the spring with some pliers while you do this, sometimes they fly off and get lost. I recommend this even if you have new springs, just so it doesn't end up in your eyeball or some other unfortunate spot. Nearly all shoes will have at least an upper and a lower spring that pulls the two sides together, and many will have a third spring on the automatic adjuster, which is the hidden spring on the right side of the picture below.
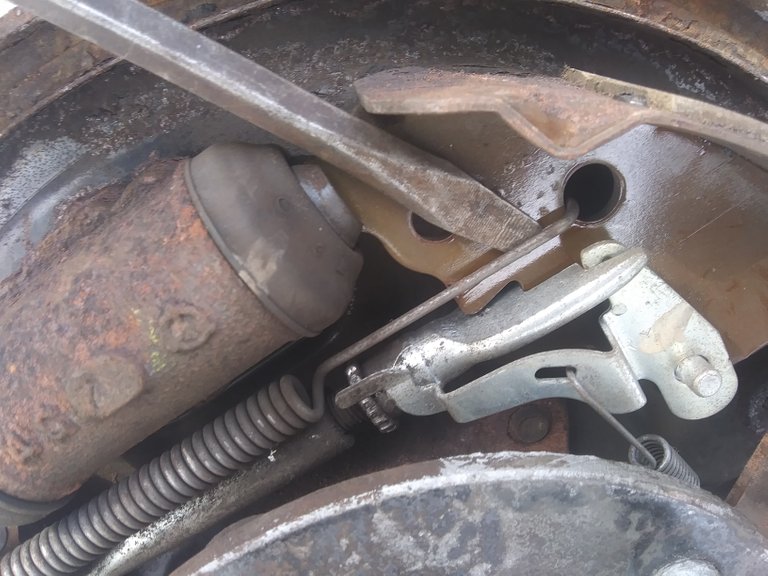
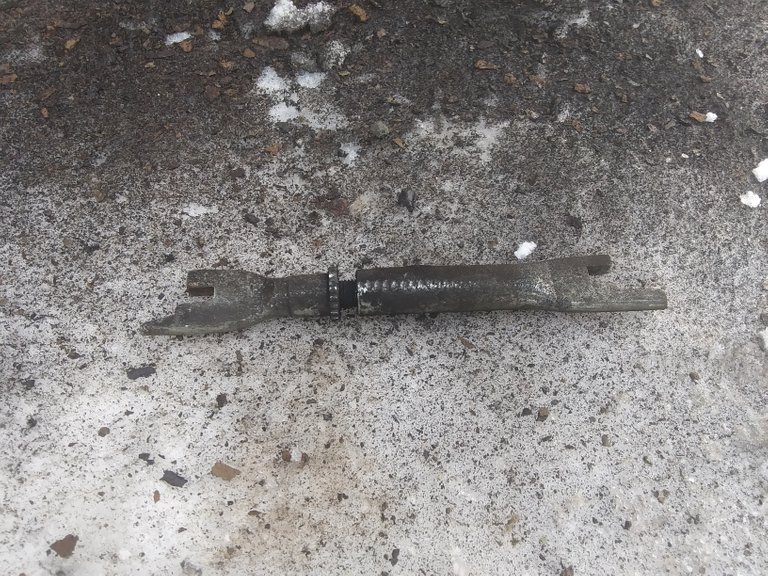
Once these things are disconnected, the shoes should come off the wheel assembly fairly easily. The adjustment assembly, shown in the picture below, will most likely fall when you remove the shoes. You want to make a note of which way it is installed before that happens. Whether the short stubs on the ends face in or out can vary from vehicle to vehicle, as well as whether the threaded end is on the left or right. Most repair kits will not come with a replacement for this part, so you'll want to be careful with this, and clean and lubricate it really well before re-installing. Every part on this should move freely.
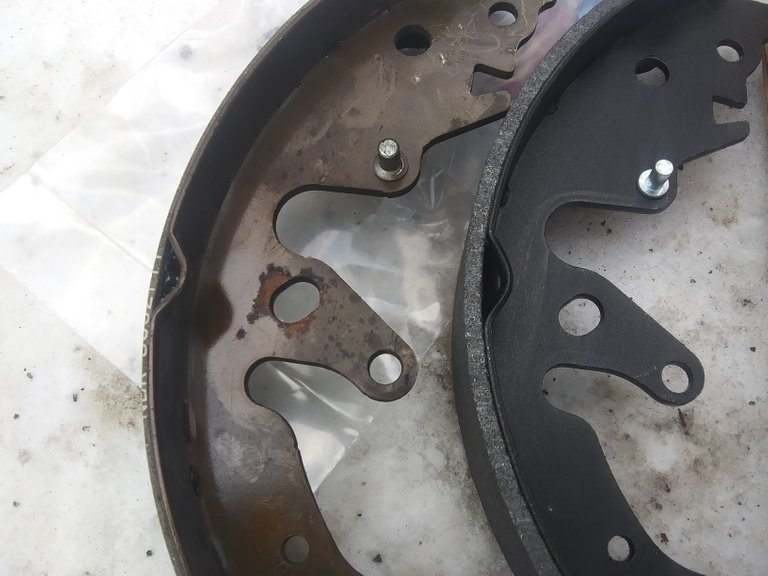
Brake shoes are not usually interchangeable the way most brake pads are. You'll want to make sure that you have exactly the right shoe in the right place when you install the new ones. Mostly, you'll be looking for the placement of the posts you see on the shoes below, which is what holds the automatic adjuster lever. Some shoes may have more (or less) noticeable differences than this, but the differences are almost always related to the attachment of the automatic adjusters or the emergency brake.
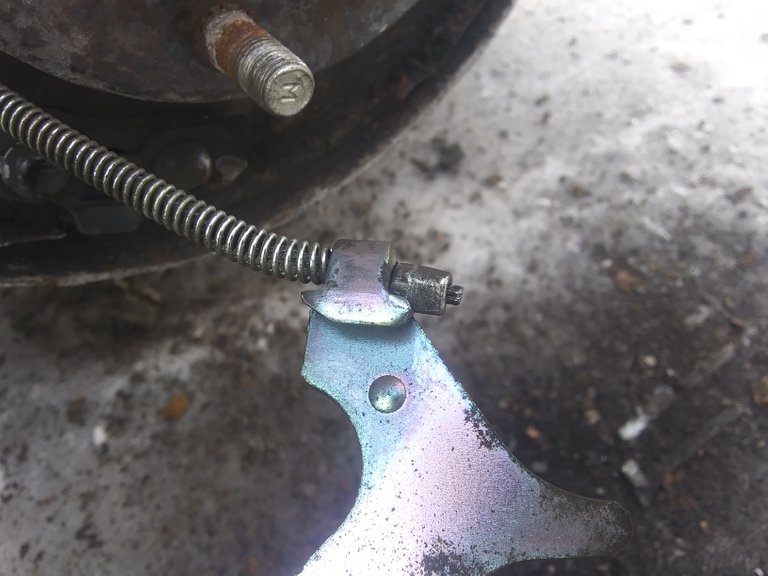
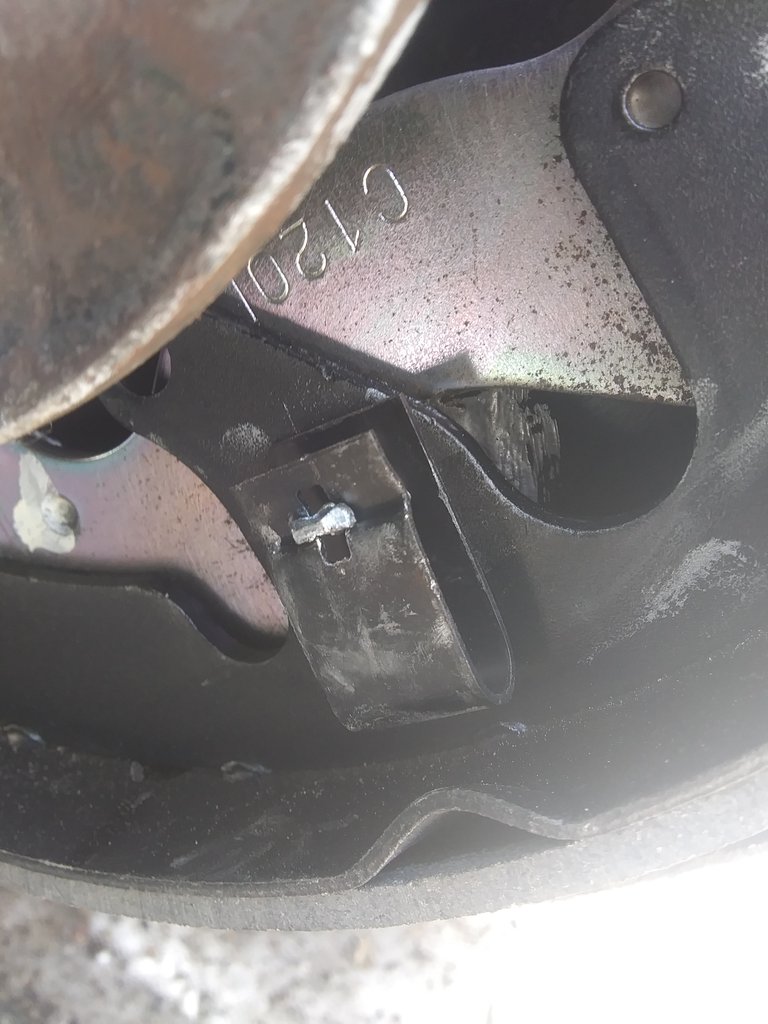
On most vehicles, one of the shoes will be attached to the emergency brake cable, usually through an extra plate, like in the picture below. Sometimes the new shoes will come with this plate already attached, and you simply have to disconnect the cable from the old one and install it on the new one.
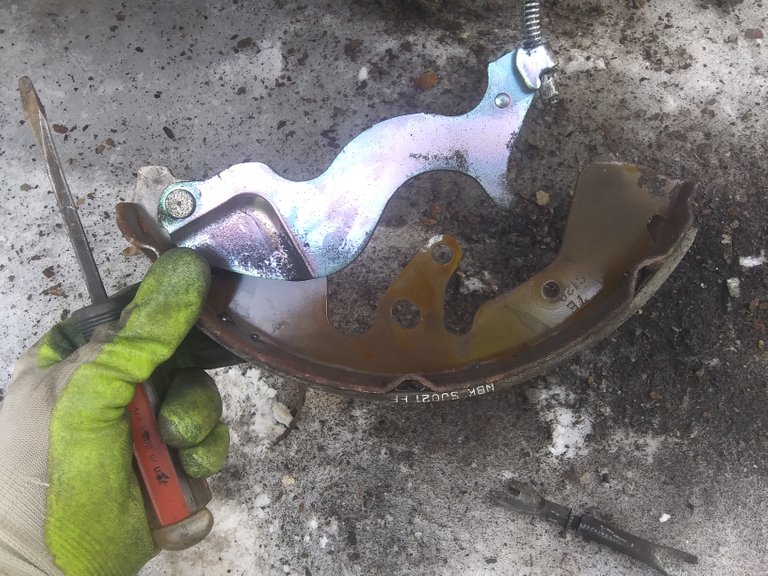
To remove this, just pull the end of the cable past that little metal tab and it will come free. My new brakes did not come with a new plate, so for this job I'll be leaving the cable attached and removing the plate.
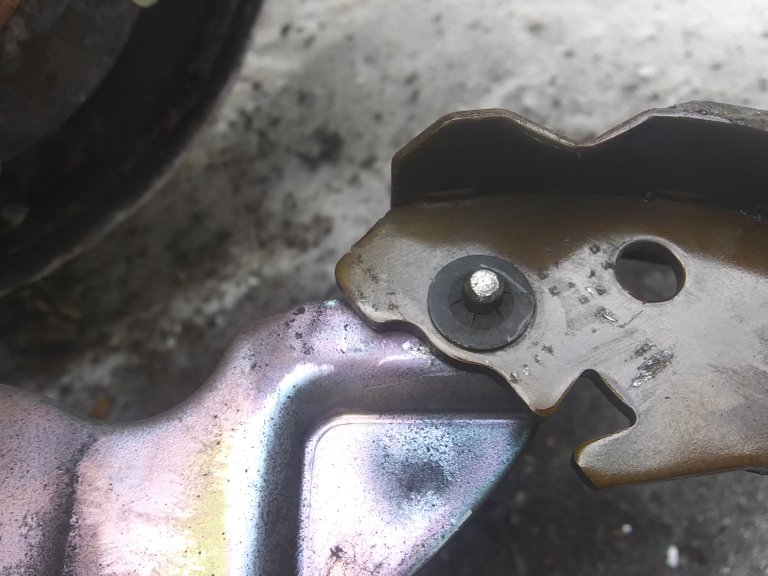
The plate is attached by an integrated pin that slips through a hole in the frame of the brake shoe, and is held in place by this simple retainer clip. If your brake shoes did not come with the plate attached, they should come with new retainer clips similar to this. Make sure you have new clips before prying the old ones off, because they almost always get destroyed when you remove them.
I like to put a little anti-seize lubricant on moving parts before I reassemble them. It helps reduce corrosion, which extends the life of the parts and makes future removal a lot easier.
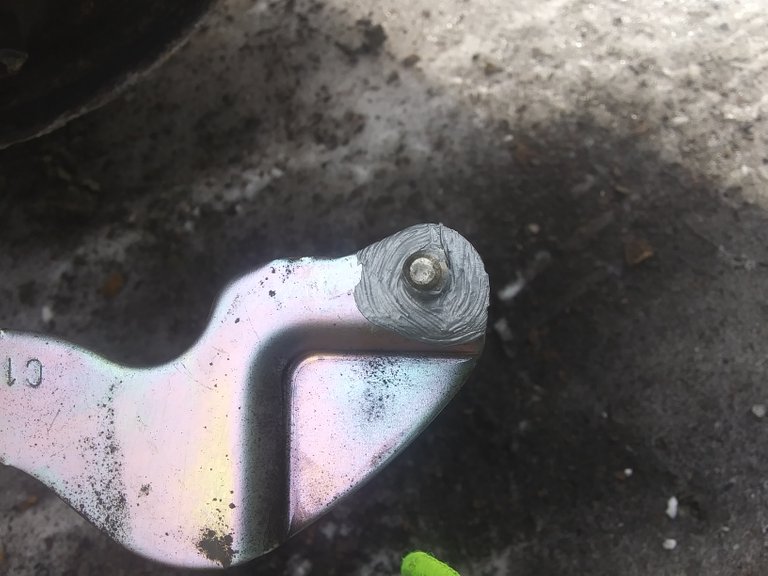
The new retainer ring will go on a certain way, with the teeth angled up towards the top of the post. It should slip on fairly easily, but be harder to remove. Sometimes they will lock into place, but on this vehicle they do not.
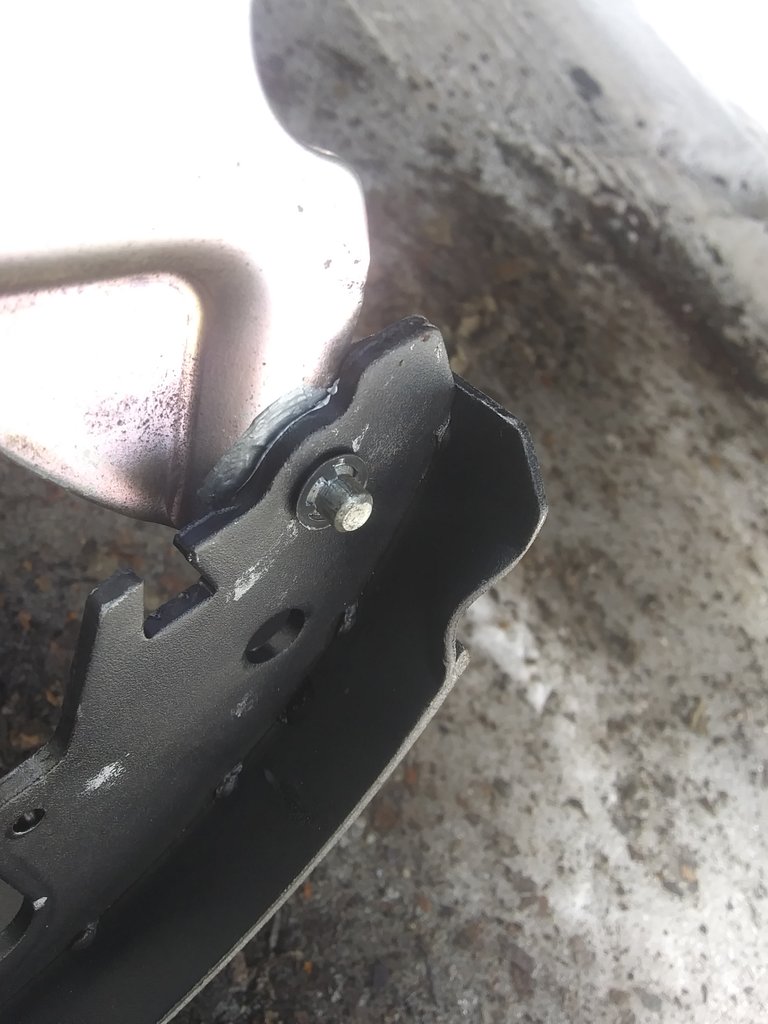
Most brake shoe kits will come with new retainer pins, and I highly recommend using new ones if you have them. These will just be inserted through a hole, and you just push the old ones out and stick the new ones in. This is another area that I like to clean up and apply anti-seize lubricant to.
Installing the new clips can be a little tricky, because you will need to hold the new pins in place from the back. They make special tools that do actually help a little with this, but I find it easy enough to reinstall them with needle-nose pliers. Install the retainer clips on both brake shoes before installing the springs.
The special tool for installing the springs also helps a little, but I prefer to do this with a pair of long-nosed locking pliers. You can reinstall the springs with regular pliers, or even a screwdriver, but I recommend against it. These little springs are fairly powerful, and if you lose your grip on one while you're stretching it out, it's very likely to go flying off to a new life where you'll never find it again. Attach the bottom spring first.
You'll want to compress the brake actuator on the upper side before installing the adjustment assembly. Just squeeze the ends together, they will usually go in pretty easily by hand. Make sure you push in equally from both sides, if you just push on one side you can push the other side right out. Don't worry too much if this happens, it can all be put back together easily, but you'll want to bleed the brake like if that happens. If you don't lose any fluid doing this repair, bleeding the line shouldn't be necessary. On this vehicle, the actuator ends are slotted and seat around a tab on the shoe frame. Make sure the shoe frames are seated properly if you have slotted ends on the actuator, or the shoes will be out too far and you won't be able to reinstall the drum.

I didn't take pictures of the reassembled top part, but everything goes together the same way it comes out. When reinstalling the adjustment assembly, start with the adjustment threaded all the way in, and turn it out only if you have to for things to stay in place during assembly. If everything is put together correctly, the shoes will fine-tune themselves over time. Older vehicle had access ports on the back side of the wheel assembly for adjusting the brakes by hand after installation, but this vehicle doesn't have them. If the auto-adjusters are working properly, hand adjustment should be unnecessary.
Replacing the drum and wheel should be easy enough to figure out at this point. If you have a hard time putting the drum back on, then something isn't seated properly with your shoes. If you're trying a job like this and get stuck, hit me up in comments. It may take me a day or two, but I will do my best to answer any questions.
That'll do it for this post, and will probably be the last serious post about brakes. Hopefully the Hive will find mufflers and exhaust to be a tad more exciting 🤣
Have fun out there, and don't be afraid to take things apart! Hope to see you all again soon!
I have the brake drum tool and I can tell you that I’ve had the most issues and swearing while doing a drum change! It’s definitely one of the more challenging repairs to do, it’s not difficult but it takes time to get the things in the right spot and connected properly and all that. I’m glad that my brakes are all disc on both our cars now but I’m going to get an old truck one of these days and it will have drums again so I’ll have to do this in my future lol.
I know the car community online is huge indeed! I like the DIY community here but I am thinking of trying to start a car dedicated one if I can’t find one that fits the bill. Some of these car people love to post and talk about their car stuff all day every day, getting them to hive would be huge!
Once there is some morer repair related content on here, I'm going to start dropping links. Right now, not much point laying out bait before the trap is set. 😁
Excellent read, I haven't worked on my car like this for many years. Well put together steps with detailed photos. !BEER
Thanks for the compliment! I felt like I could have done a better job detailing the putting-back-together process, but it was getting dark and cold fast when I was wrapping up. 😁
View or trade
BEER.Hey @paradoxtma, here is a little bit of
BEERfrom @kiwibloke for you. Enjoy it!Learn how to earn FREE BEER each day by staking your
BEER.