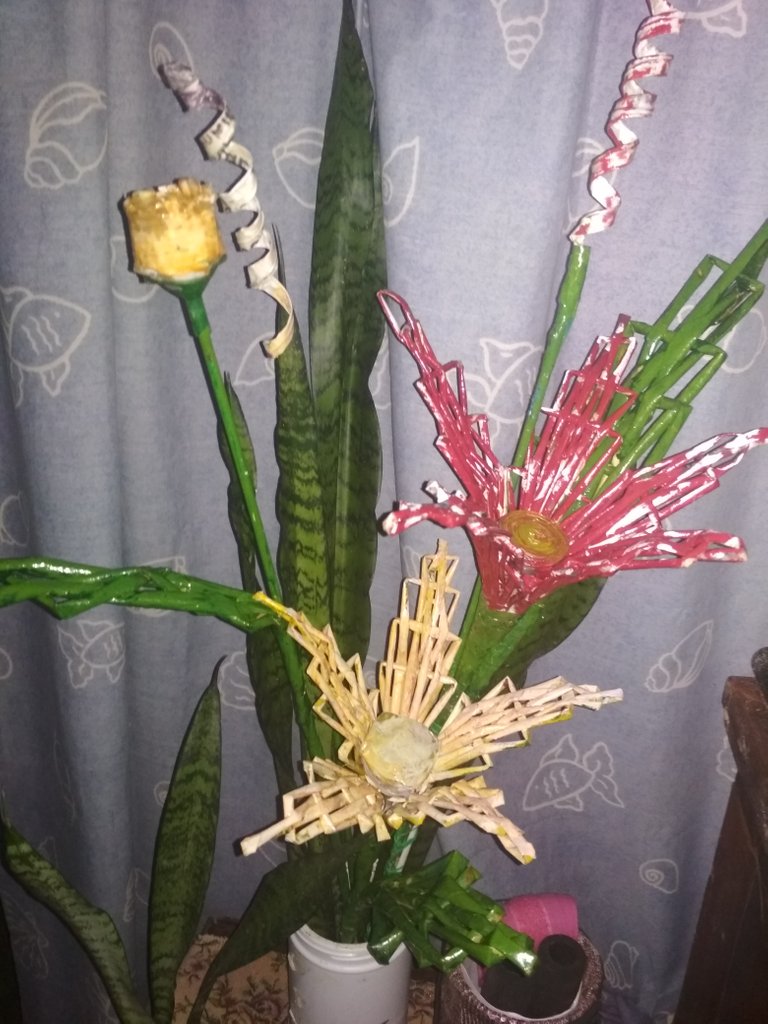
(Photo: My finished product.)
Hello there my fellow Builders! I would like to show my new creation. It's something I've seen in one of the classrooms when I got Antonia's Home Learning Materials. It was only a glimpse but it readily caught my attention. I said to myself: WOW! Just what I needed for my next project! I just looked at the details and did some mental counting, with something in mind for some alternatives. In times like this, our imagination and creativeness is greatly challenged! :)
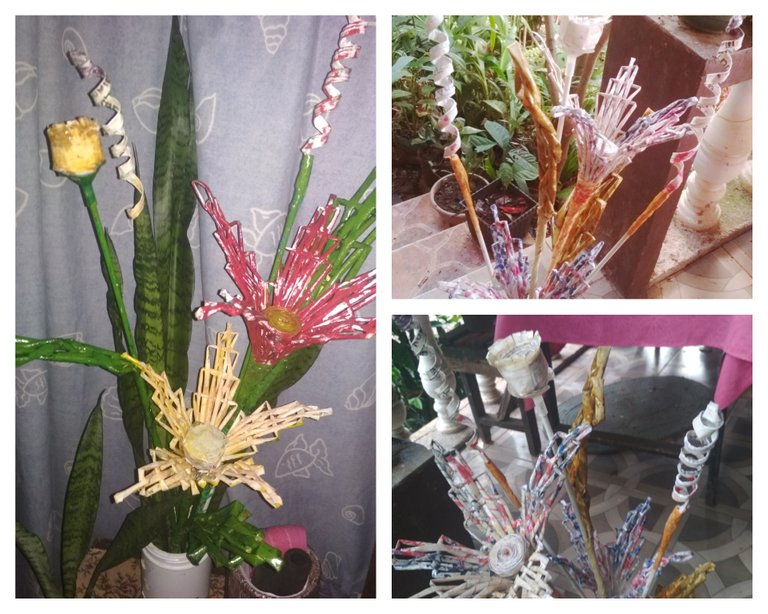
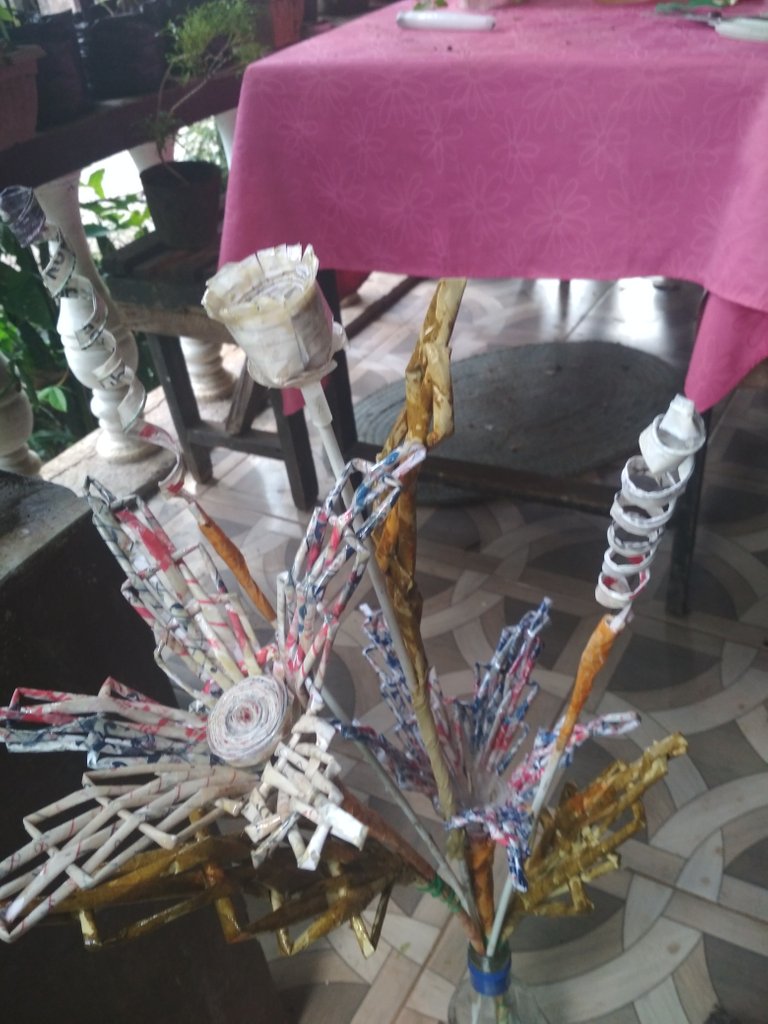
The above Photos are the final stages of my creations. Below are the details on how I made them.
Materials needed:
- Paper strips (from my old calendar)
- Elmer's Glue
- tie wire or thread
- Plastic Varnish
- Paint, small can only (colors , your choice)
- Balloon stick with holder
Instructions:
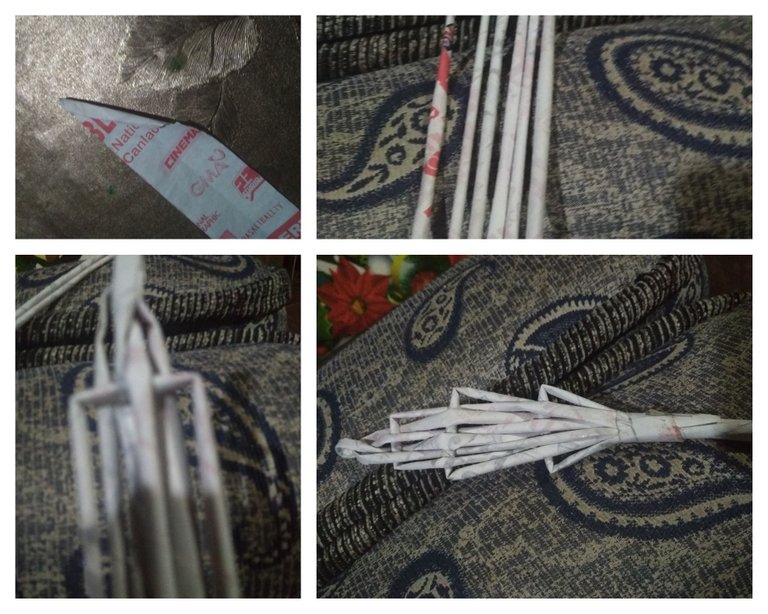
- Fold and cut the paper into strips for about 1.5 to 2 inches wide. Fold in slant position and roll until the end and paste the tip to close it.
- Make at least five sticks good for one leaf.
- One flower should contain at least five-6 petals as desired.
- Fold the first stick equally, followed by the other. This time, make a fold for about 1 inch then fold again. Insert the second stick alternately, followed by the rest. The fold will go wider while progressing. Insert the sticks like you are weaving a mat. Close when the desired length is acquired. You may add more sticks if you want a wider petal.
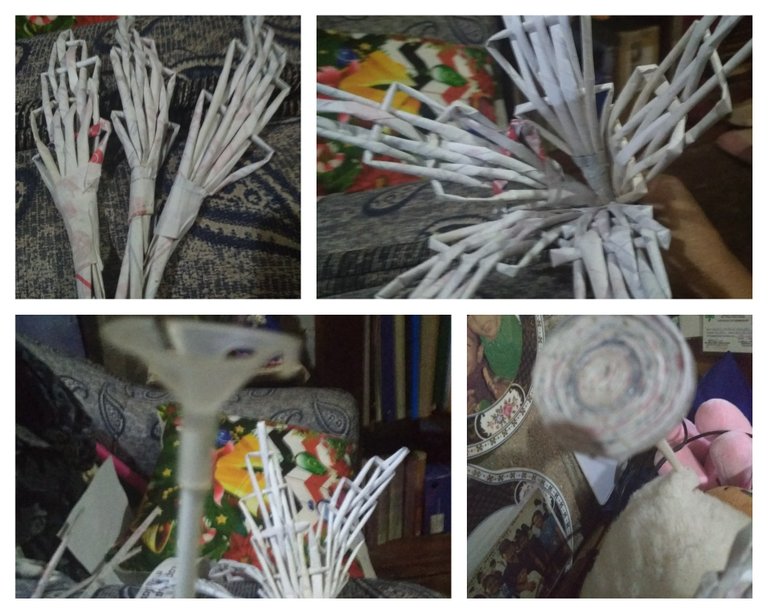
- Tie the five petals temporarily to see if the image is good to look at.
- For the center part, I use smaller strips, fold then and rolled it until the needed circumference is achieved. This will serve as 'pollen' of the flower. The last piece should be wider then apply a little glue on the reverse side to let it stick to the holder of the balloon stick. Actually, those sticks were kept after Antonia's 6th birthday celebration!
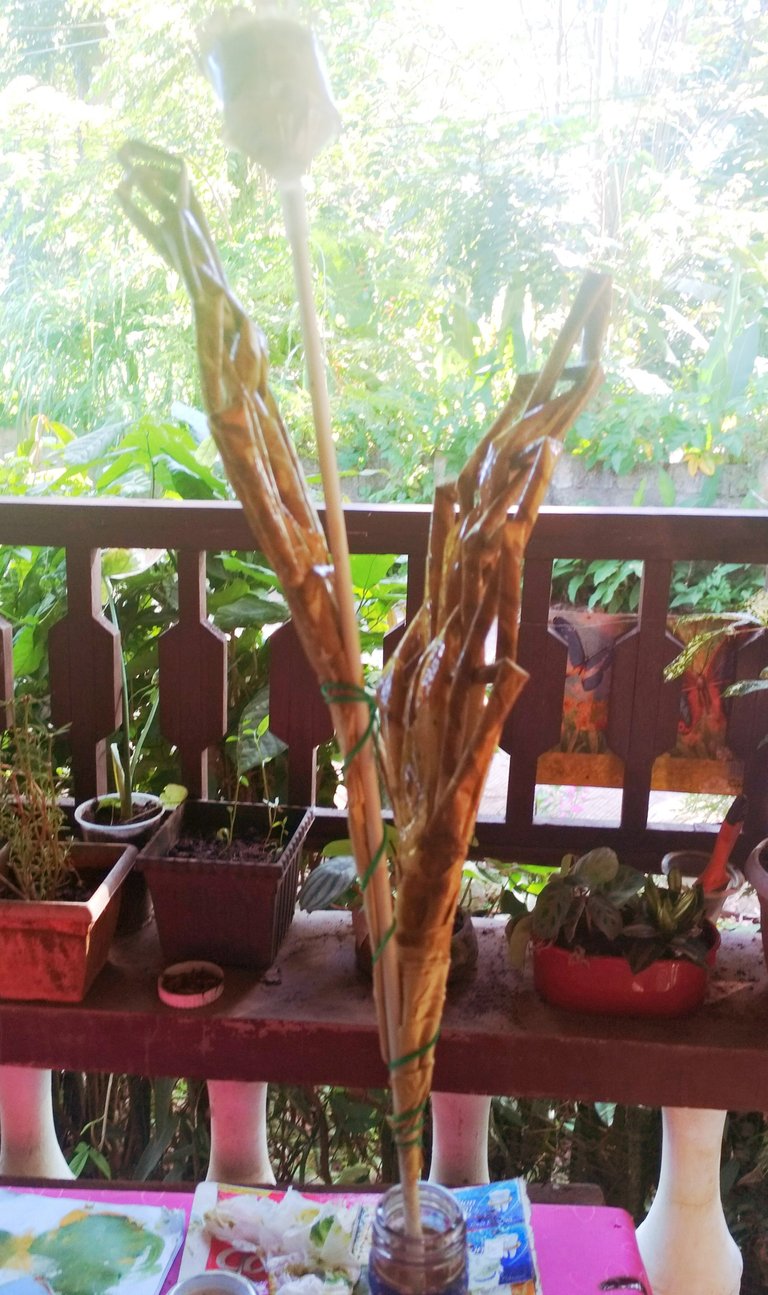
- Let it dry before applying plastic varnish.
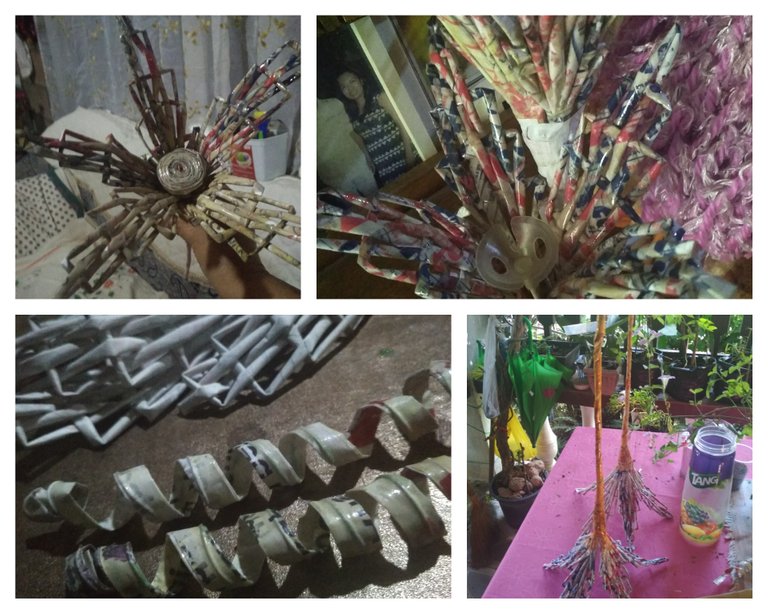
- Cut another two strips of paper, fold each and apply glue to the whole strip. Insert the thin tie wire and paste in between the folded strip. Let it dry first before making the curls using your finger.
- I already applied the plastic varnish, hence the marks of the paper calendar became visible.
- Afterwards, I let it dry in reverse facing the table.
I tied the stem and leaves while applying the plastic varnish.
As you can see, the brown leaves were from my used pattern sheets when I made those band uniforms.
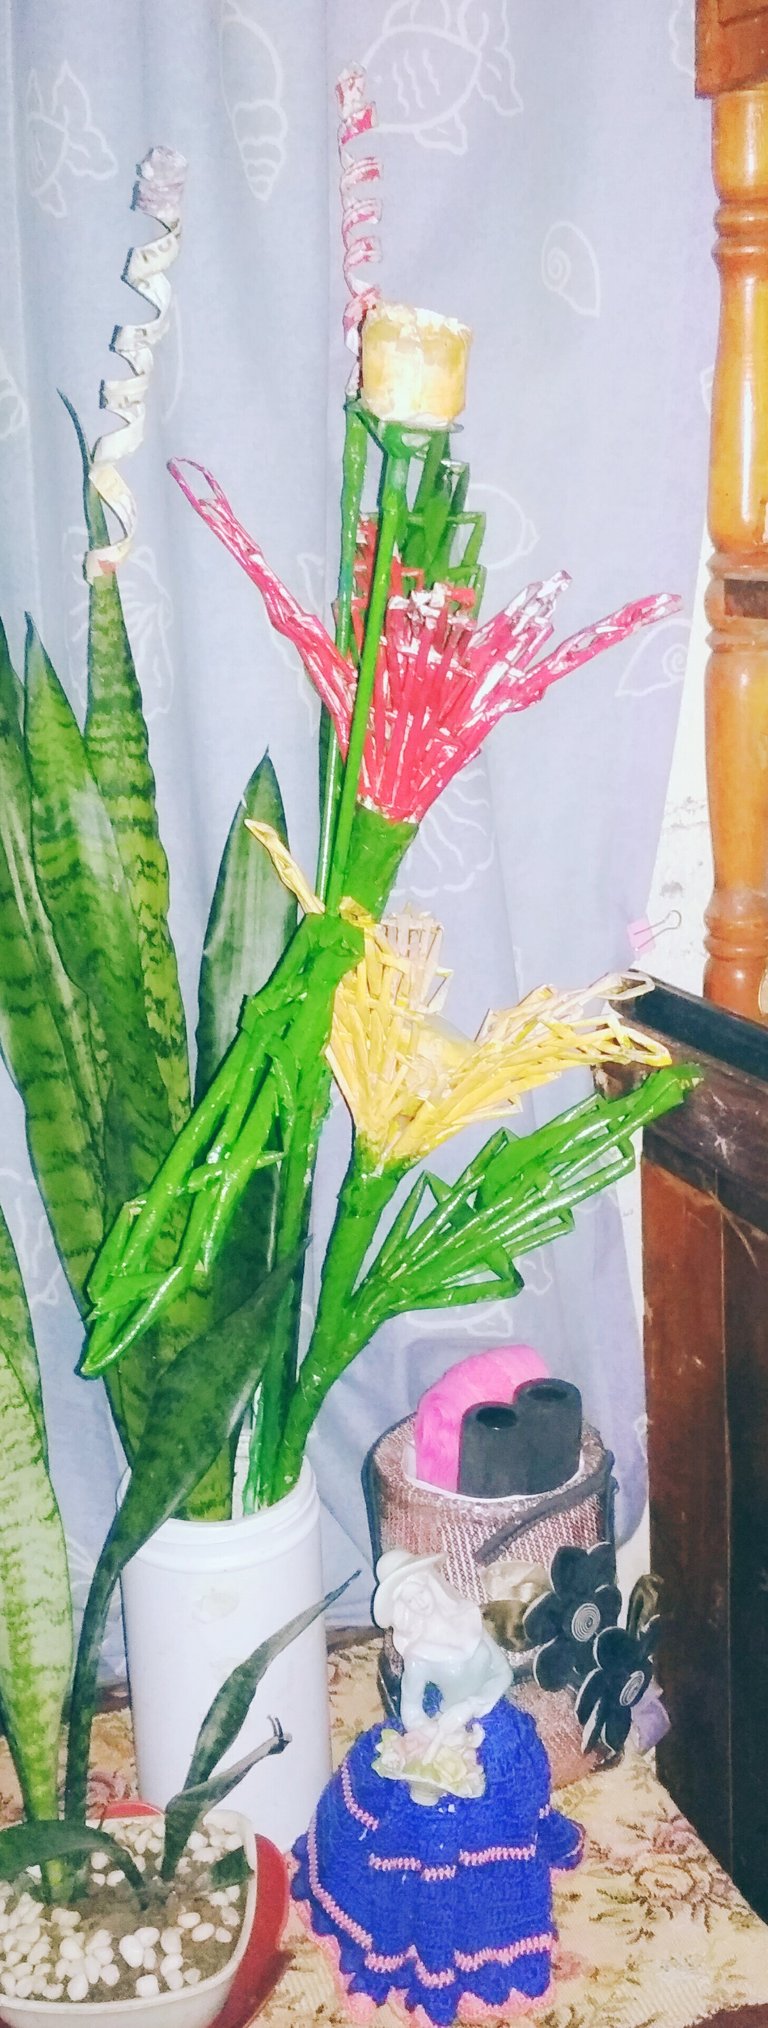
My finished product. Sorry guys, I couldn't take pictures while painting them as my hands were full of paint smudge!:)
Until here guys! I hope you liked it.
Thanking @build-it for this Community and the people behind this endeavor.
Till then,

WOW, that is a very beautiful paper flowers.
Thanks! Your kids can do it too. It's a good family bonding during your free hours at home.
You're welcome but I'm already a kid.
I know but I've read that your parents are the ones posting in your behalf until you reach the right age. Lol!
This technique is super interesting, and the result is very beautiful and delicate. Greetings and blessings.
Thank you for appreciating my work of Art. Try it dear, the kids will love it especially the teachers in lower levels.