
Español:
Un saludo creativos de la colmena, hoy les traigo un tutorial de bisutería, ¿han escuchado hablar del árbol de la vida?, pues ese es mi tutorial en un dije.
El árbol de la vida le han dado muchos significados, pero como yo lo veo representa el ciclo de vida que ha tenido una persona, las raíces representan el nacimiento, el tronco que va hacia el cielo representa la vida que ha llevado, y las ramas que van en diferentes direcciones significa las decisiones que se han tomado y los caminos andados.
Así que cada quien puede representar su árbol según como halla sido su vida.
English
A creative greeting from the beehive, today I bring you a jewelry tutorial, have you heard about the tree of life, because that is my tutorial in a pendant.
The tree of life has been given many meanings, but as I see it, it represents the cycle of life that a person has had, the roots represent birth, the trunk that goes up to the sky represents the life that they have led, and the branches that go in different directions represent the decisions that have been made and the paths that have been walked.
So everyone can represent their tree according to how their life has been.
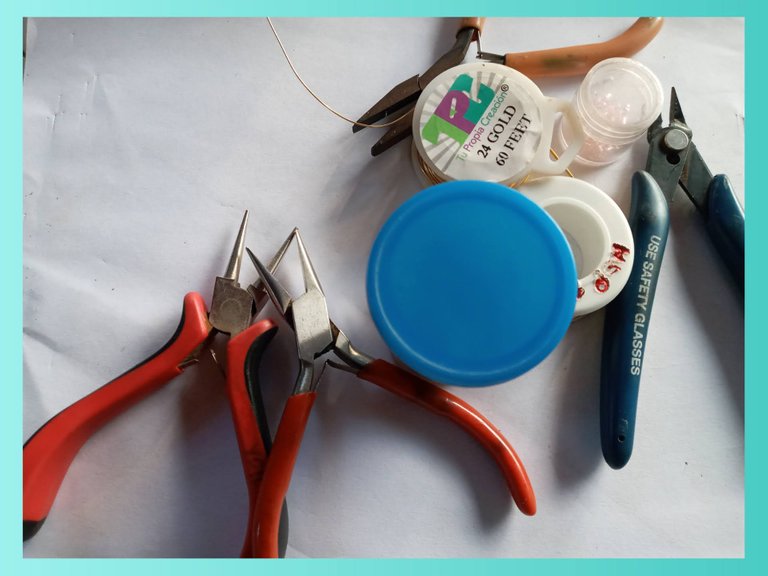
Materiales:
- Hilo de bisutería #18, #24 y #22
- Pinzas de Bisutería.
- Cilindro para dar forma.
- Piedras de cristal checo.
Materials:
- Jewelry thread #18, #24 and #22
- Fashion jewellery clips.
- Cylinder for shaping.
- Czech glass stones.
Paso a paso / Step by step:
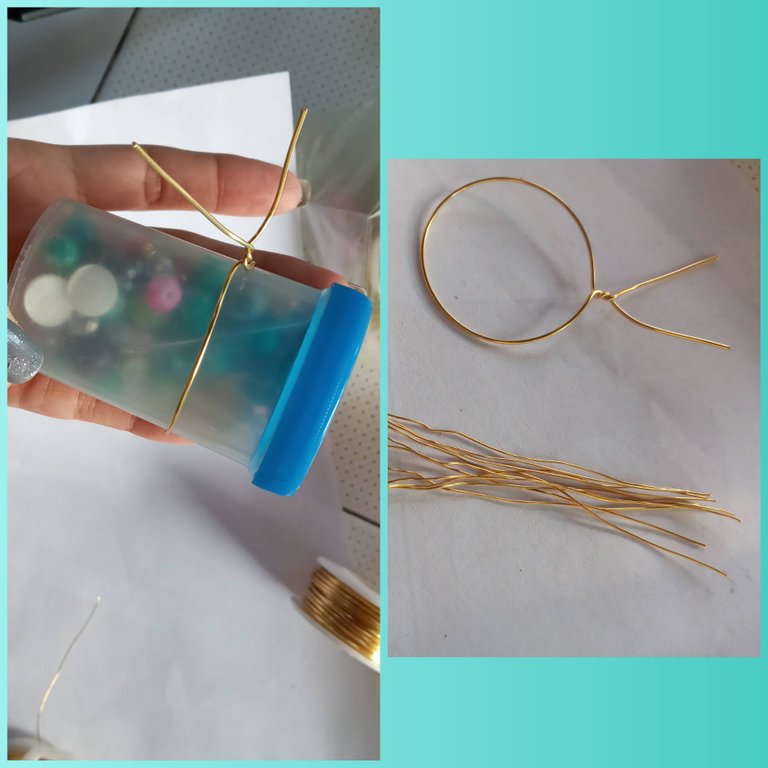
Lo primero es tomar nuestro alambre #18 y vamos a tomar una forma de cilindro que nos sirva para realizar el circulo principal donde vamos a formar nuestro árbol, y vamos a realizar la forma redonda damos vuelta para que no se salga, a su vez debemos dejar como aproximadamente 6 cm de cada lado.
A parte cortamos 10 tiras de alambre #24 de 17cm aproximado, esto dependerá del tamaño del circulo que formaron.
The first thing is to take our wire #18 and we will take a cylinder shape that will serve us to make the main circle where we will form our tree, and we will make the round shape we turn so that it does not come out, in turn we must leave about 6 cm on each side.
We cut 10 strips of wire #24 of 17cm approximately, this will depend on the size of the circle they formed.
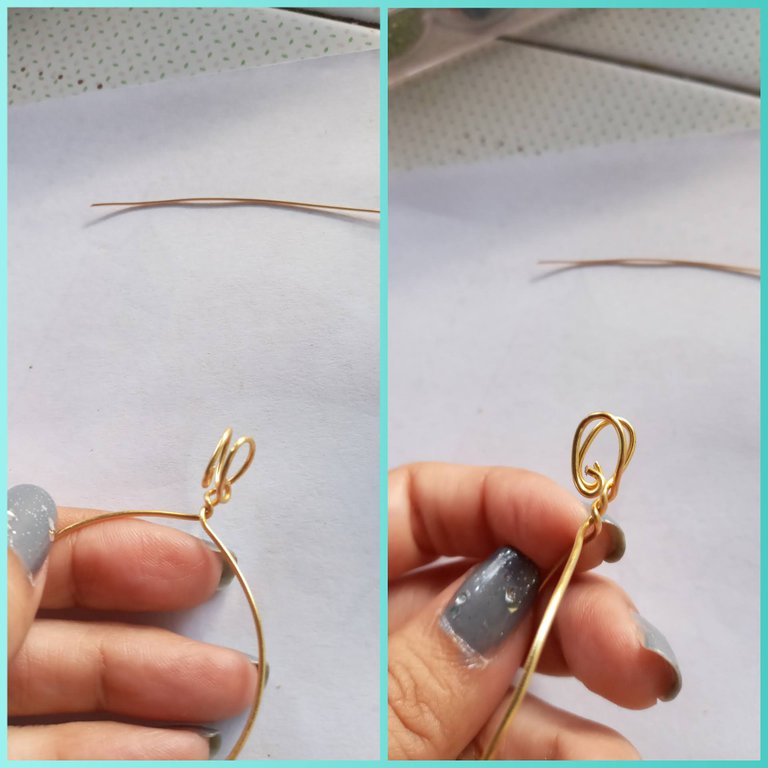
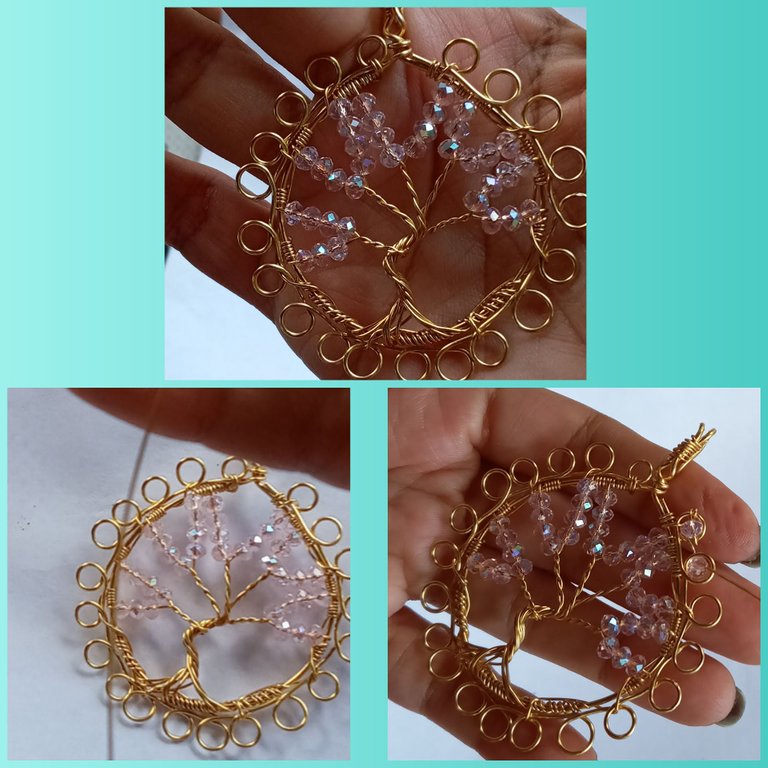
Con nuestra pinza redonda vamos a tomar los alambres que quedaron y vamos a darle forma redonda hacia atrás, u luego en las puntas también pero mas pequeña. como se muestra en la foto. Luego podemos con alambre #24 lo forramos un poco para que no se vea mal, es decir lo envolvemos con alambre #24.
With our round clip we will take the remaining wires and give them a round shape backwards, or later on the tips too but smaller. as shown in the picture. Then we can with wire #24 we cover it a little so that it does not look bad, that is to say we wrap it with wire #24.
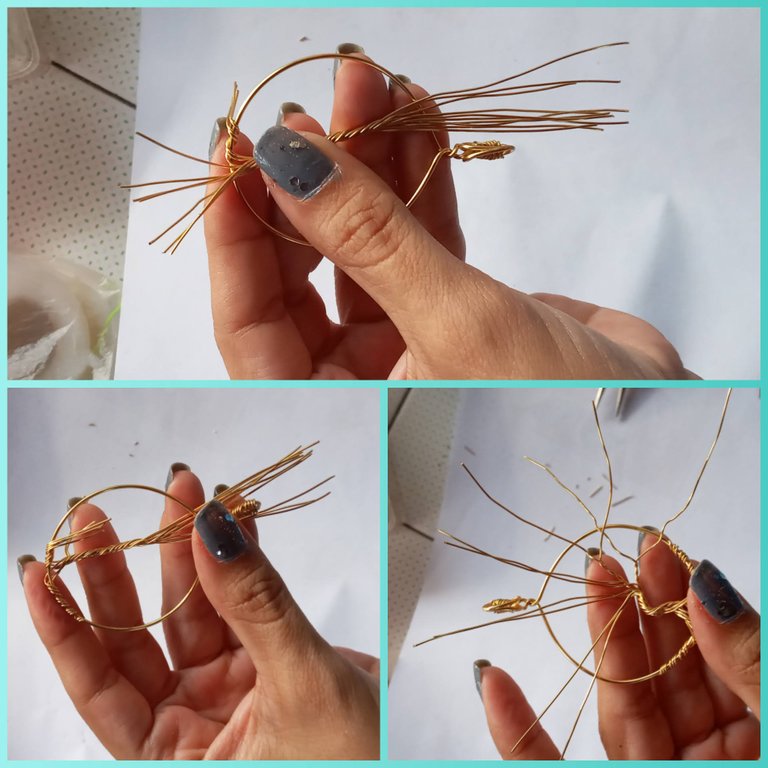
Entorchamos los alambres en el medio dejando una parte abajo sin entorchar y arriba, la parte más pequeña será la raíz y la entorchamos en la parte baja de nuestro circulo poco a poco, luego de entorchar todo podemos ver nuestra raíz y la doblamos un poco, los alambres de arriba vamos a tomar 2 formando 5 y entorchamos un poquito, separamos de 2 en dos.
We twist the wires in the middle leaving a part below without twisting and above, the smaller part will be the root and twist at the bottom of our circle little by little, after twisting everything we can see our root and bend it a little, the wires above we will take 2 forming 5 and twist a little, separated by 2 in two.
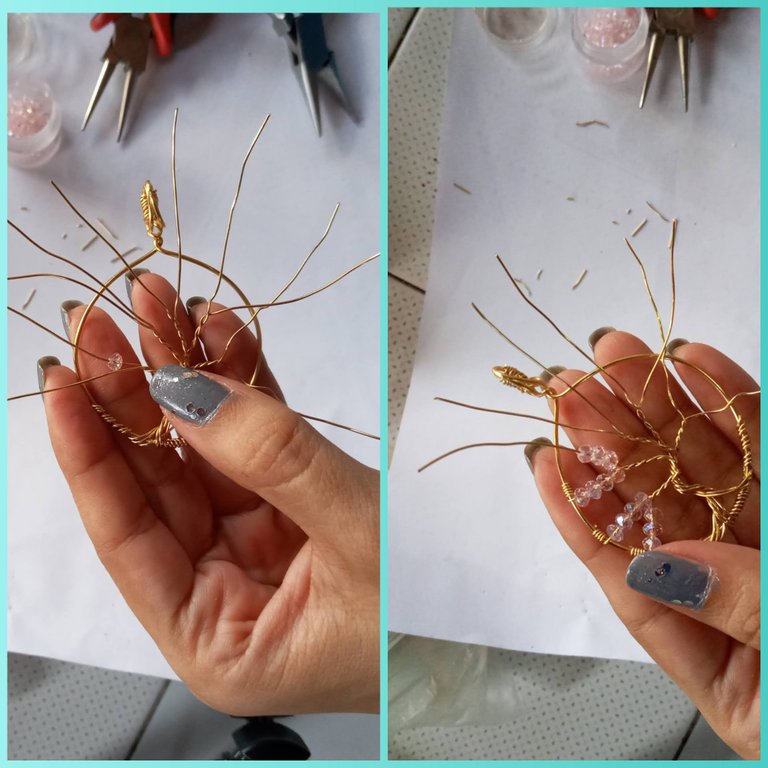
Después de entorchar un poquito la parte de arriba vamos introduciendo nuestro cristal checo y vamos entorchando al circulo el excedente.
After twisting the top part a little bit, we introduce our Czech glass and we twist the surplus to the circle.
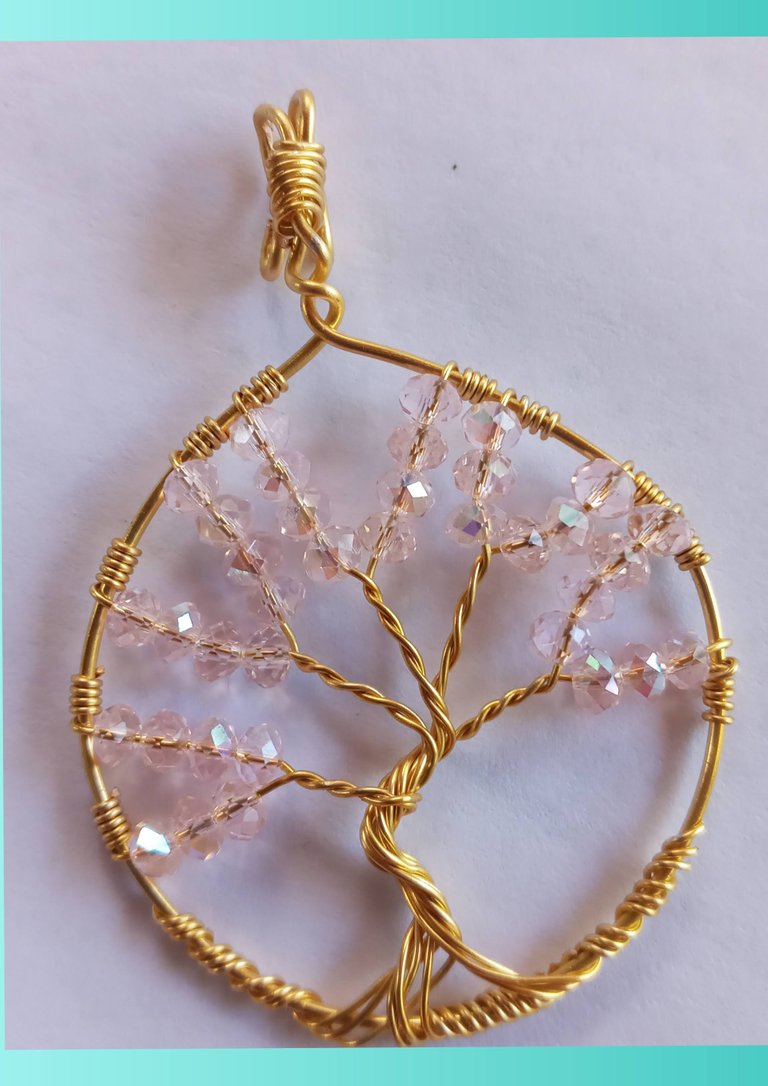
Y debe quedar así, lo puedes dejar de esta manera pero para hacerlo un poco más llamativo vamos a colocarle un entorchado alrededor.
And it should look like this, you can leave it this way but to make it a little more eye-catching we are going to put a braid around it.
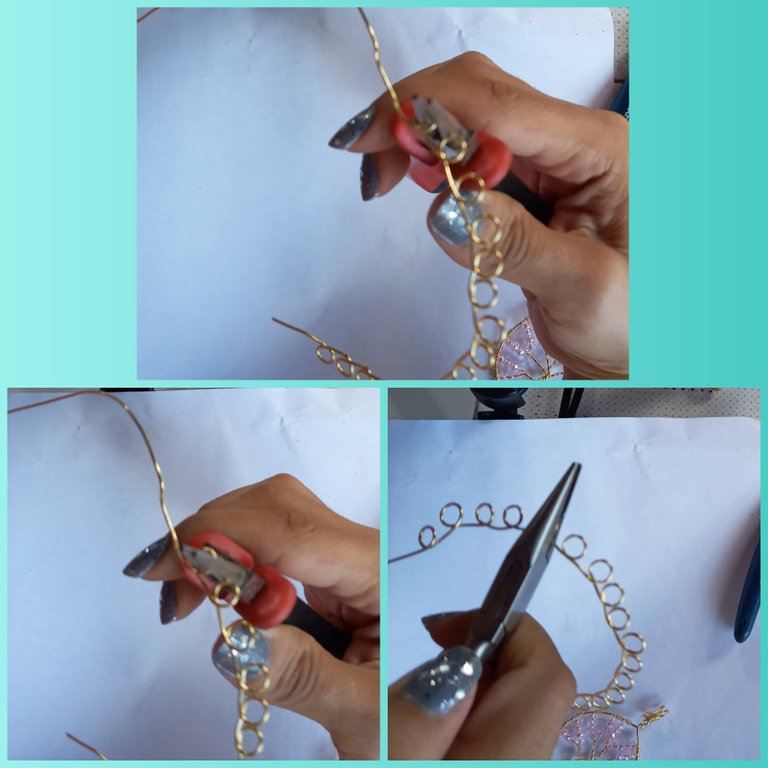
Con la pinza redonda vanos a hacer circulos dándole vuelta al alambre, pueden marcar la pinza la medida del circulo para hacerlos igual todos, esto lo hacemos con alambre #22 y con la pinza plana aplanamos los circulos para que quede mejor, la medida dependerá del tamaño del circulo inicial, que cubra todo completo.
With the round pliers to make circles by turning the wire, you can mark the measure of the circle to make them all the same, this is done with wire #22 and with the flat pliers we flatten the circles to make it better, the measure will depend on the size of the initial circle, which covers everything complete.
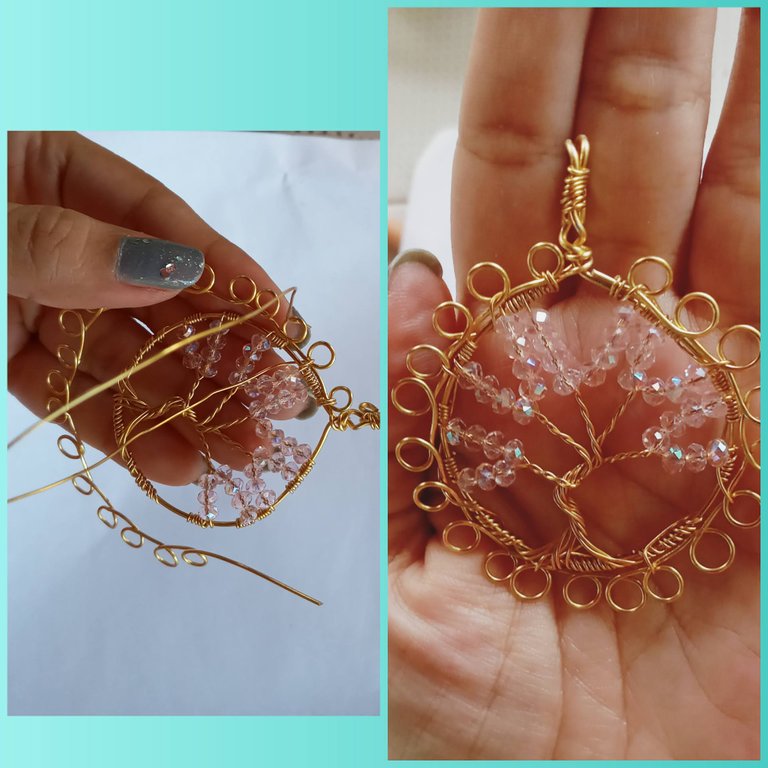
Ahora con el alambre #24 vamos a entorchar a la pieza el engaste que acabamos de realizar. como se muestra en la imagen.
Ahora con el alambre #24 vamos a entorchar a la pieza el engaste que acabamos de realizar. como se muestra en la imagen.
Ahora con mi alambre #24 voy a introducir cristales por los círculos que realizamos inicialmente, para darle un aspecto más elegante a la pieza.
Now with my #24 wire I am going to introduce crystals through the circles we made initially, to give a more elegant look to the piece.
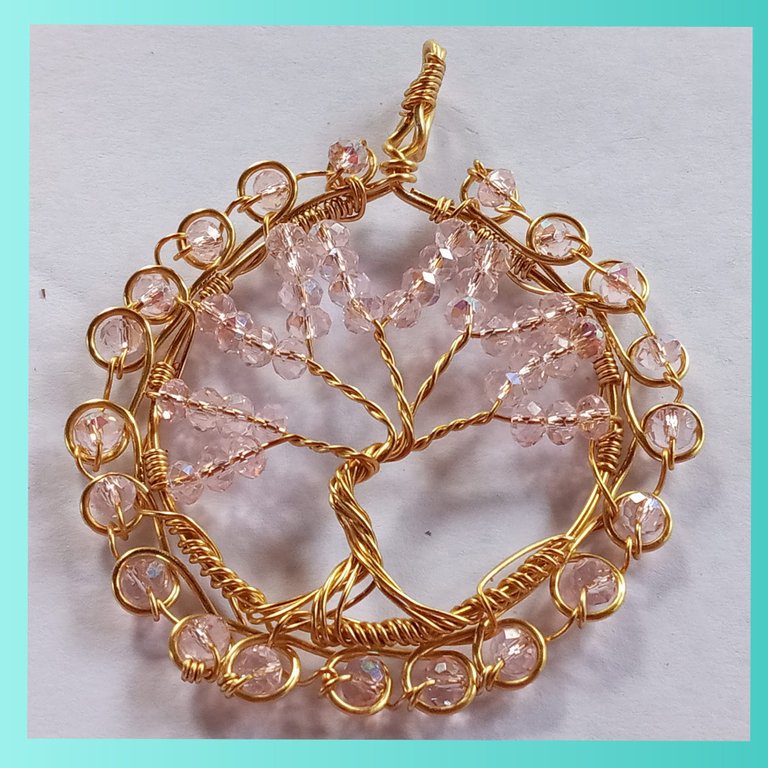
Este es el resultado de la pieza terminada, espero que les gustará tanto como a mi. Un dije hermoso.
This is the result of the finished piece, I hope you will like it as much as I do. A beautiful pendant.
Nos vemos en un próximo post Bendiciones!! 💛💙❤️
See you in a next post Blessings!💛💙❤️
Algunos de mis proyectos // Some of my projects:


Te ha quedado sumamente precioso 💕 y lo explicaste todo tan detalladamente 😍 me encanto tu post.
Muchas gracias mi bella, un honor viniendo de ti
¡Ay que linda! No sabes lo mucho que me han emocionado tus palabras 💕.