English
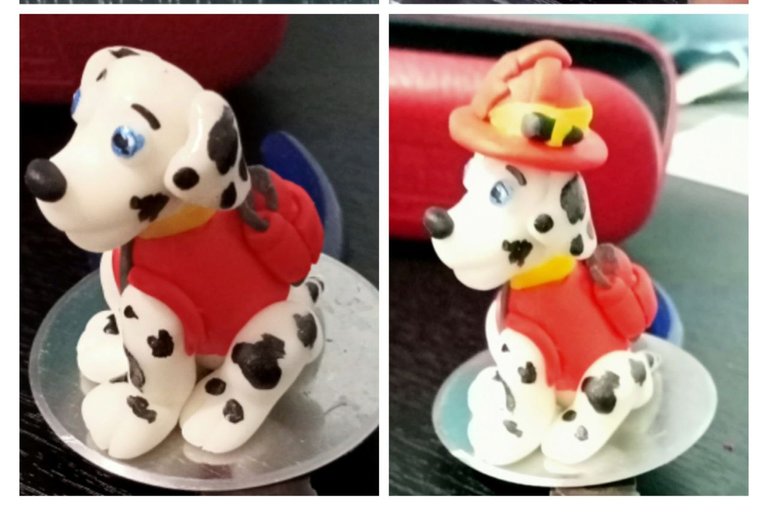
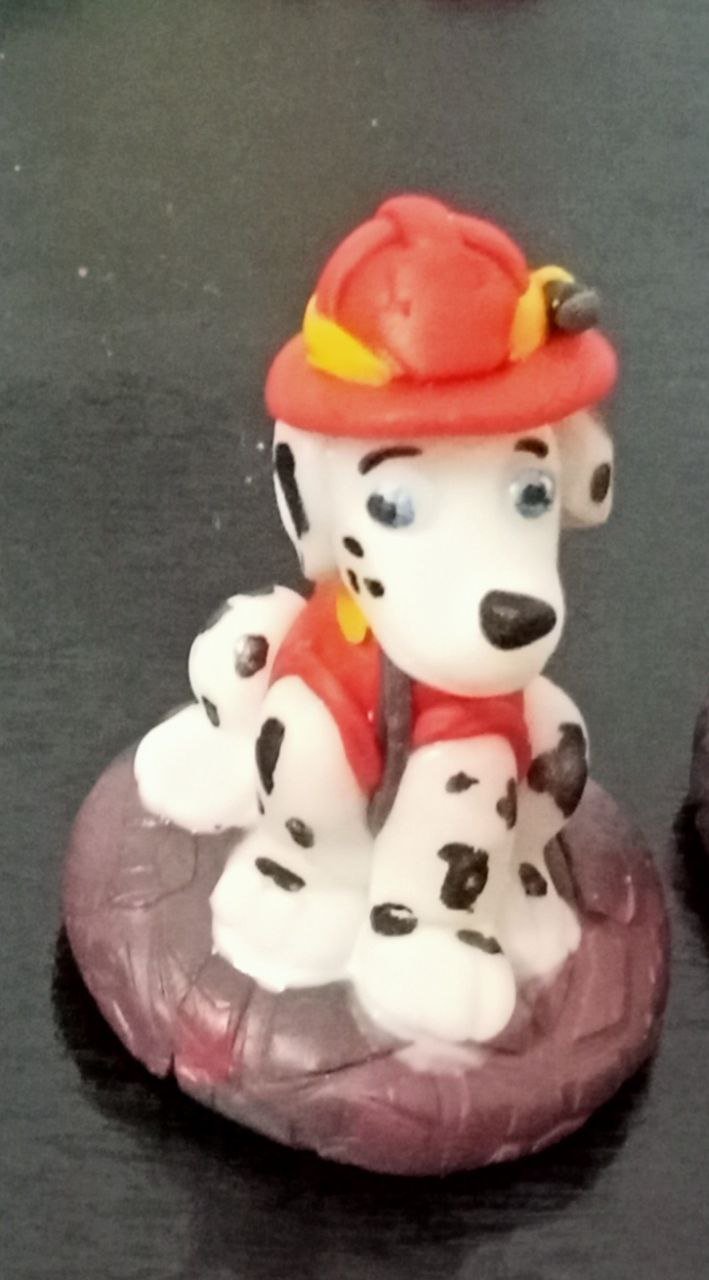
Good morning, beautiful Hive family, today I want to share with you the step by step of Marshall, one of the paw patrol characters made in porcelain. This character is a 6-year-old Dalmatian puppy, he plays the role of a firefighter as well as a doctor puppy; his duties are based on rescuing people with his ladder, putting out fires and checking the health status of any person.
Spanish
Buenos días hermosa familia de Hive el día de hoy quiero compartir con ustedes el paso a paso de Marshall uno de los personajes de patrulla canina hecho en porcelanicron este personaje es un cachorro de 6 años dálmata desempeña el papel de bombero así como de cachorro médico; sus deberes se basan en el rescate de personas con su escalera, apagar incendios y controlar el estado de salud de cualquier persona.
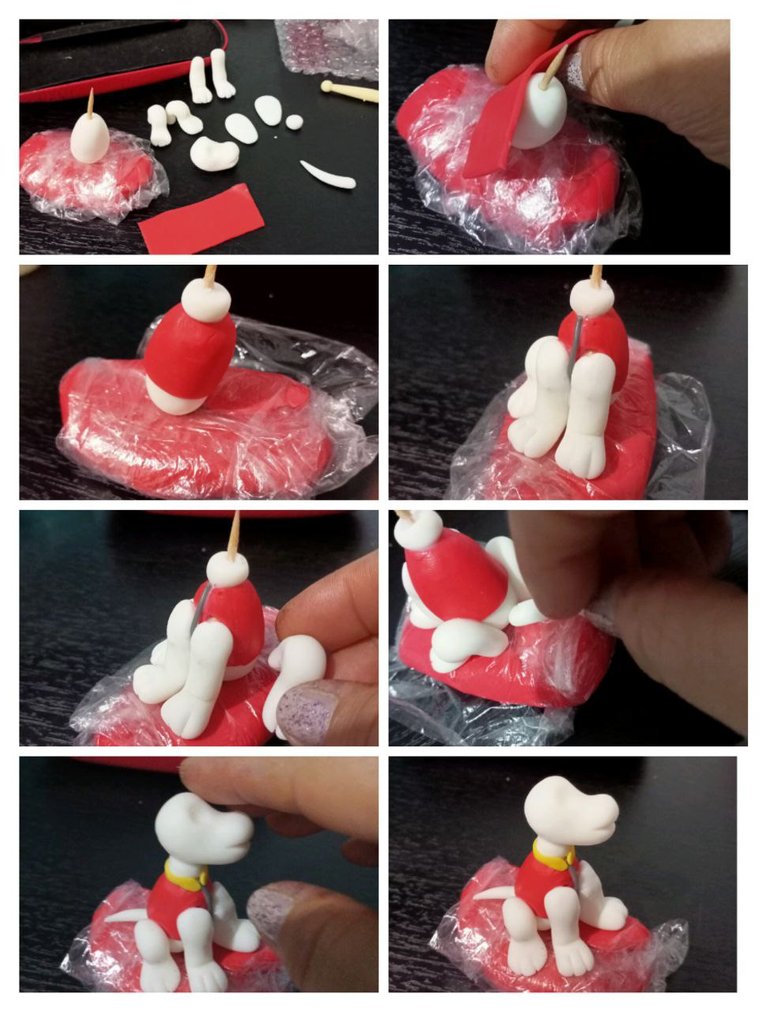
First we dye the dough white, red, yellow, gray and black. we mold a sphere with white dough and give it a pear shape to make the body, we model four cylinders of white dough for the legs, we leave two cylinders straight for the front legs and the other two cylinders we bend to make the back legs, the We make the head starting from a small sphere of white dough which we give it a slight double where we will place the eyes, we make the ears with two spheres that we will mold in the shape of a drop, we flatten them, the tail with a small portion of thin tear-shaped dough and the neck with a small ball of slightly flattened dough, stretch red dough and cut a rectangle to make the shirt, line the body, place the neck, glue the front and rear legs securing them with toothpicks, glue the glue with carpentry glue, after letting it air for an hour we proceed to glue the head, we place a strip of yellow porcelain for the neck of the shirt and a thin strip of gray dough to simulate the closure of the jacket.
Primero tinturamos la masa de color blanco, rojo, amarillo, gris y negro. moldeamos una esfera con masa blanca y le damos forma de pera para hacer el cuerpo, modelamos cuatro cilindros de masa blanca para las patas, dos cilindros los dejamos rectos para las patas delanteras y los otros dos cilindros los doblamos para hacer las patas traseras, la cabeza la hacemos partiendo de una pequeña esfera de masa de color blanco la cual le damos un ligero dobles donde colocaremos los ojos, las orejas las hacemos con dos esferas que le moldearemos en forma de gota , las aplanamos, la cola con una pequeña porción de masa en forma de lagrima delgada y el cuello con una pequeña bolita de masa ligeramente aplanada, estiramos masa roja y cortamos un rectángulo para hacer la camisa, forramos el cuerpo, colocamos el cuello, pegamos las patas delanteras y traseras asegurándolas con palillos, pegamos la cola con pegante de carpintería, después de dejar orear por una hora procedemos a pegar la cabeza, colocamos una tira de porcelanicron amarillo para el cuello de la camisa y una tira delgada de masa gris para simular el cierre de la chaqueta.
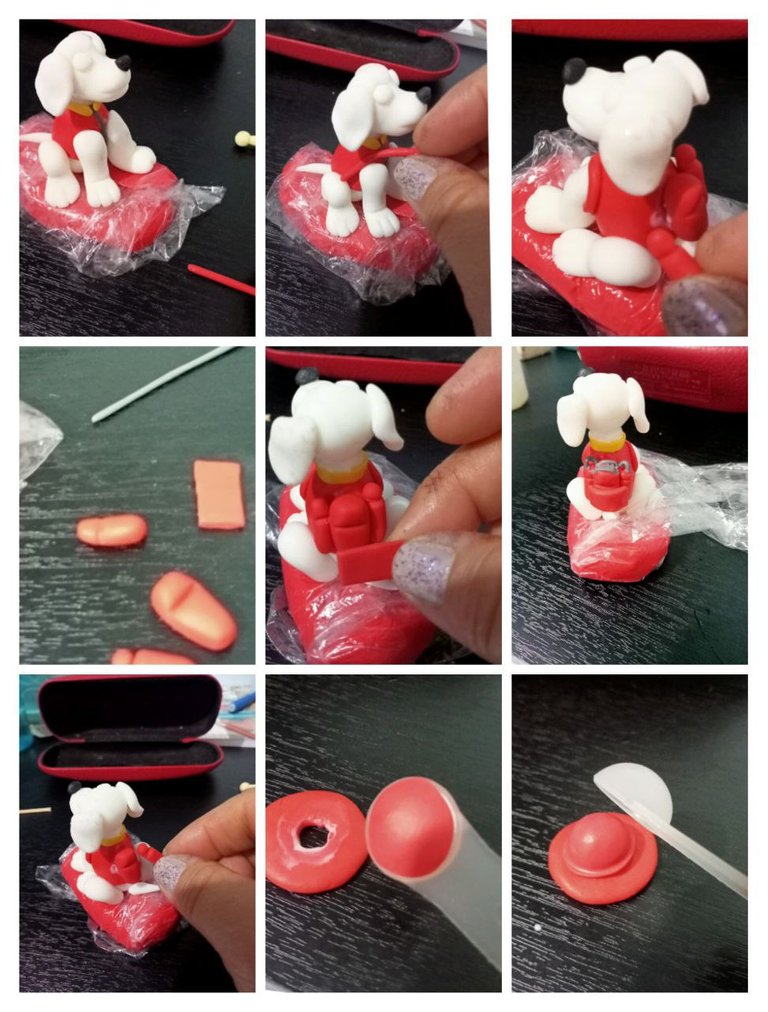
Le colocamos la nariz una mini bolita de masa negra, en el borde de las patas delanteras colocamos dos tiras de masa roja para simular las mangas de la chaqueta, en la espalda modelamos la maleta con tres cuadrados de color rojo, hacemos unos pequeños detalles con masa gris como podemos observar en la foto, hacemos el gorro realizando un circulo aplanado y sobre colocando en el un trozo de masa roja.
We put a mini ball of black dough on the nose, on the edge of the front legs we put two strips of red dough to simulate the sleeves of the jacket, on the back we model the suitcase with three red squares, we make some small details with gray dough as we can see in the photo, we make the hat by making a flattened circle and placing a piece of red dough on it.
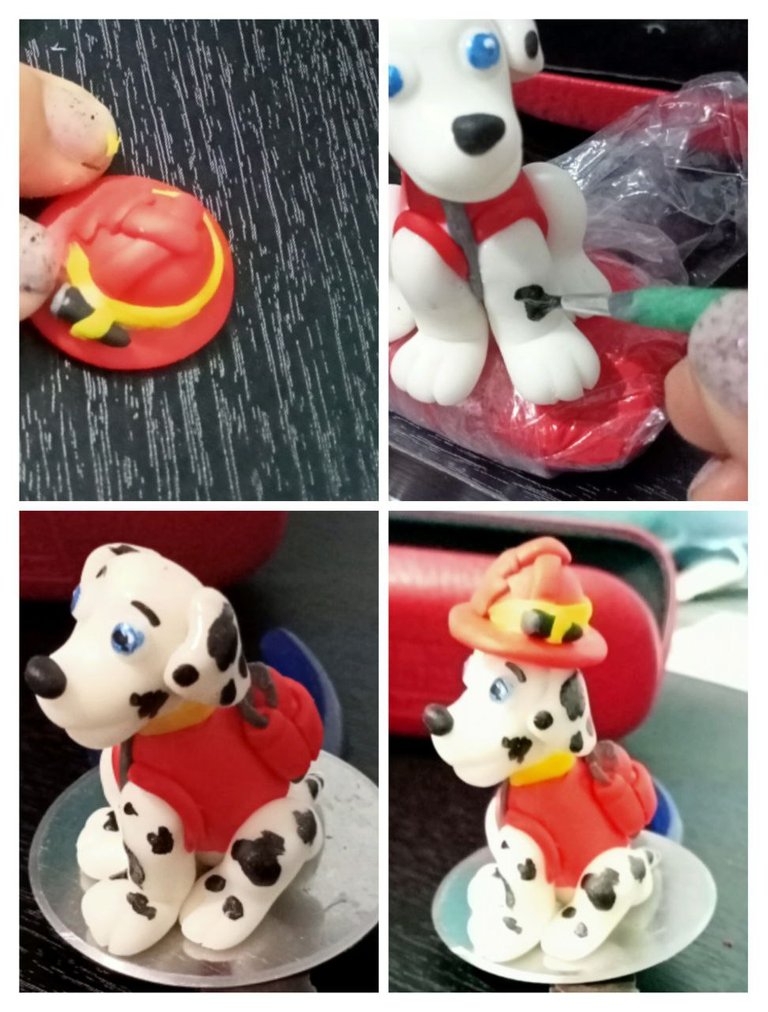
Ahora moldeamos una mini linterna con masa negra y gris, haciendo un palito aplanando un extremo le pegamos un puntico de masa gris simulando el vidrio, colocamos al rededor del sombrero una tira amarilla, pintamos las manchas del perro con vinilo negro, haciendo trazos grandes y pequeños, para los ojos colocamos dos mini esferas de masa blanca las cuales aplanamos ligeramente y pintamos sobre ellas sus ojos con vinilo azul y las cejas las pintamos con vinilo negro , pegamos el sombrero con pegante de carpintería.
Now we mold a mini flashlight with black and gray dough, making a stick by flattening one end, we glue a dot of gray dough simulating glass, we place a yellow strip around the hat, we paint the dog's spots with black vinyl, making large strokes and small, for the eyes we place two mini spheres of white dough which we flatten slightly and paint their eyes on them with blue vinyl and paint the eyebrows with black vinyl, we glue the hat with carpentry glue.
Para hacerle la base a marshall tome una esfera de masa el doble del tamaño del personaje y la coloque sobre la carpeta que acostumbro tener en mi comedor y la aplane sobre esta me encanta la textura que le da, ese grabado me gusta mucho, esa es una manera de hacer diferentes diseños con carpetas o individuales que tengamos en casa.
<To make the base for Marshall, take a sphere of dough twice the size of the character and place it on the folder that I usually have in my dining room and flatten it on top of it, I love the texture it gives it, I like that engraving a lot, that is a way to make different designs with folders or individual ones that we have at home.
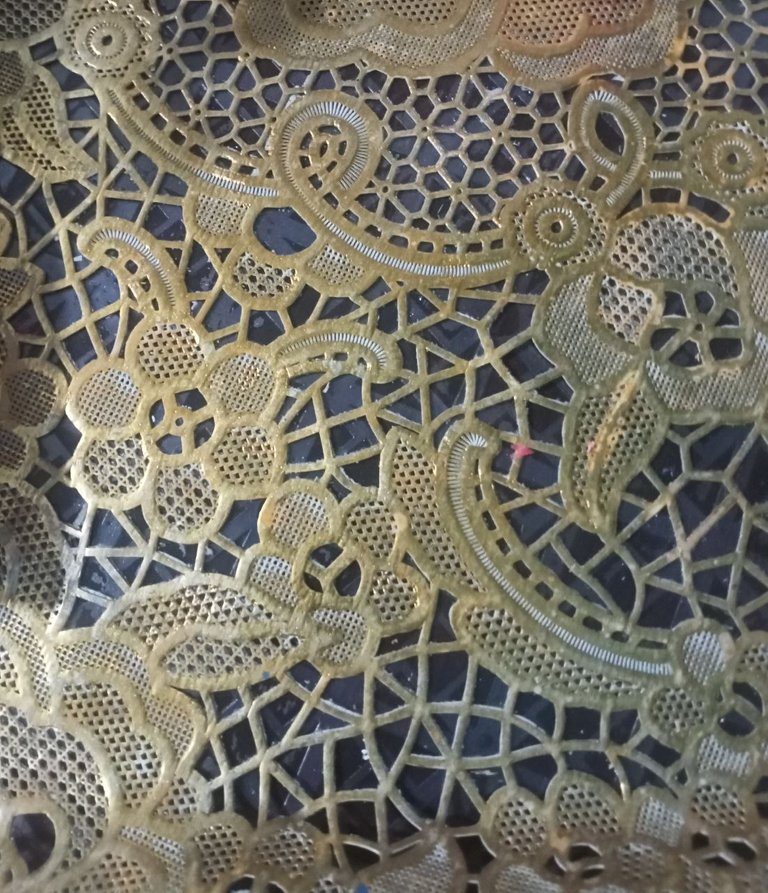
Esta es mi carpeta favorita esta hecha de plástico cada vez que la utilizo debo aplicarle vaselina para que la masa de porcelanicron no quede pagada en los huequitos, luego la lavo con agua y jabón.
This is my favorite folder. It is made of plastic. Every time I use it, I have to apply Vaseline to it so that the porcelain mass does not get stuck in the little holes, then I wash it with soap and water.
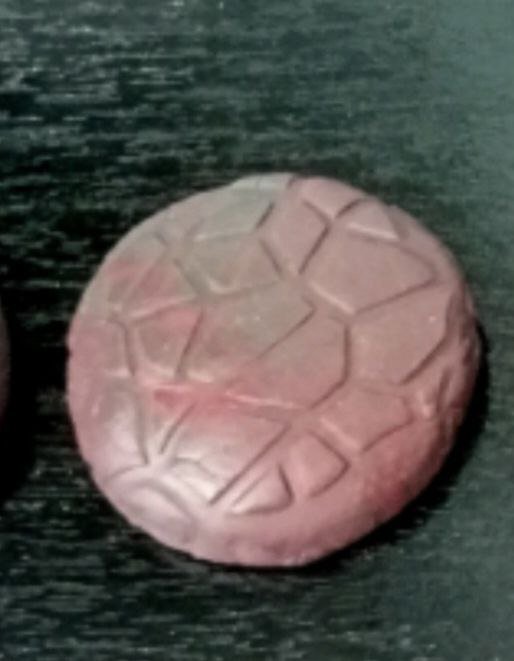
A si queda la base debe ser gruesa y al modelarla debemos dejar secar por una hora y luego si colocar sobre ella la figura que hallamos elaborado, ya es al gusto de cada uno si pintar o dejar con el color base de la masa de porcelanicron.
If the base remains, it must be thick and when modeling it we must let it dry for an hour and then place the figure that we have made on it, it is up to each one's taste whether to paint or leave with the base color of the porcelain mass.
 -
- 
#diy #art #handmade #crafts #arte #posh #spanish #english #manualidades #creativecoin
Te ha quedado muy hermoso
Hola @paovaler03 espero te encuentres muy bien, muchas gracias por tu comentario, que tengas un maravilloso y bendecido día.
Thank you for sharing this amazing post on HIVE!
Your content got selected by our fellow curator @rezoanulvibes & you just received a little thank you via an upvote from our non-profit curation initiative!
You will be featured in one of our recurring curation compilations and on our pinterest boards! Both are aiming to offer you a stage to widen your audience within and outside of the DIY scene of hive.
Join the official DIYHub community on HIVE and show us more of your amazing work and feel free to connect with us and other DIYers via our discord server: https://discord.gg/mY5uCfQ !
If you want to support our goal to motivate other DIY/art/music/homesteading/... creators just delegate to us and earn 100% of your curation rewards!
Stay creative & hive on!
Good morning, @diyhub , @rezoanulvibes thank you very much for your support.
You're welcome!
Have a great day!
For you and your family also a beautiful, wonderful and blessed day.
@aichel so cute🥰🥰 you are very clever!!!
Beautiful and blessed day for you, @sujatha thank you very much for visiting my post, a hug from a distance.