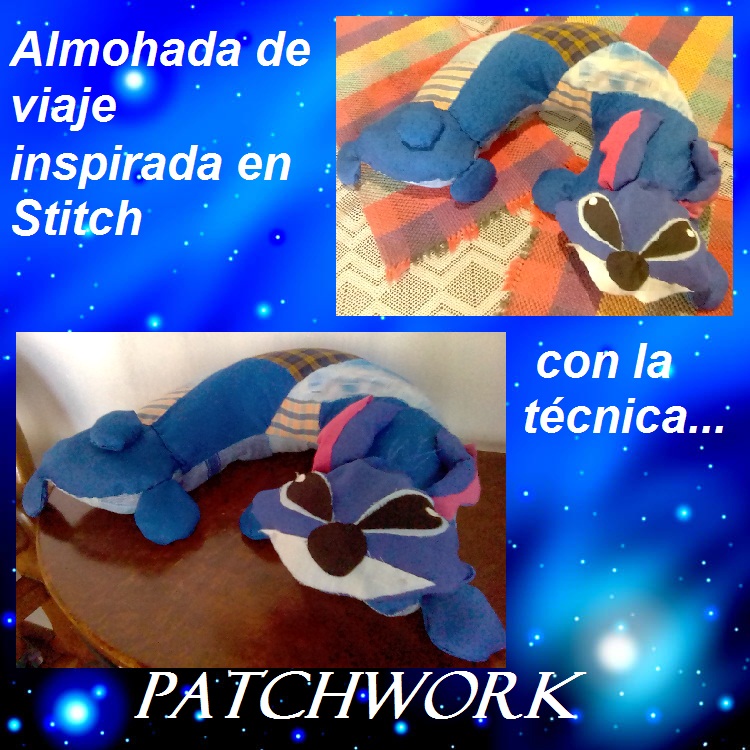
¡Hola hola queridos amigos! Siéntanse cómodos en este nuevo espacio, por que el día de hoy les voy a compartir una manera increíble y útil de elaborar una almohada de viaje utilizando la técnica Patchwork, cuya textura y colores en diversos retazos de tela forman así el perfil de Stitch, un personaje simpático conocido por su pelaje azul, su apariencia tierna, divertida y un tanto alocada clásica de los dibujos animados.
Hello hello dear friends! Feel comfortable in this new space, because today I am going to share with you an incredible and useful way to make a travel pillow using the Patchwork technique, whose texture and colors in various pieces of fabric thus form the profile of Stitch, a nice character known for his blue fur, his cute, funny and somewhat crazy classic cartoon appearance.
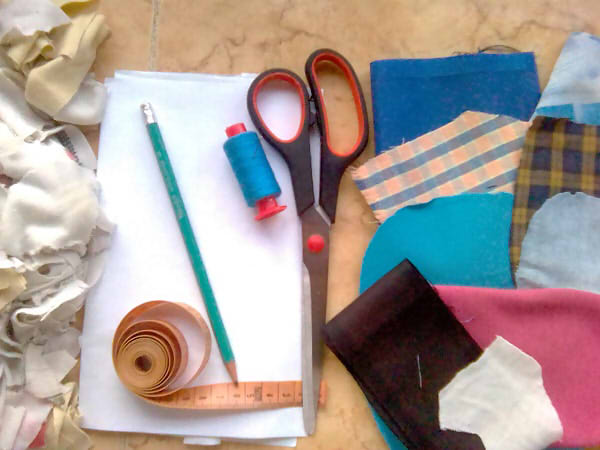
Materiales:
- Retazos de tela (previamente planchados).
- Tijera.
- Hilo y aguja.
- Lápiz.
- Papel.
- Cinta métrica.
- Relleno.
Materials:
- Scraps of fabric (previously ironed).
- Scissors.
- Thread and needle.
- Pencil.
- Paper.
- Measuring tape.
- Filling.
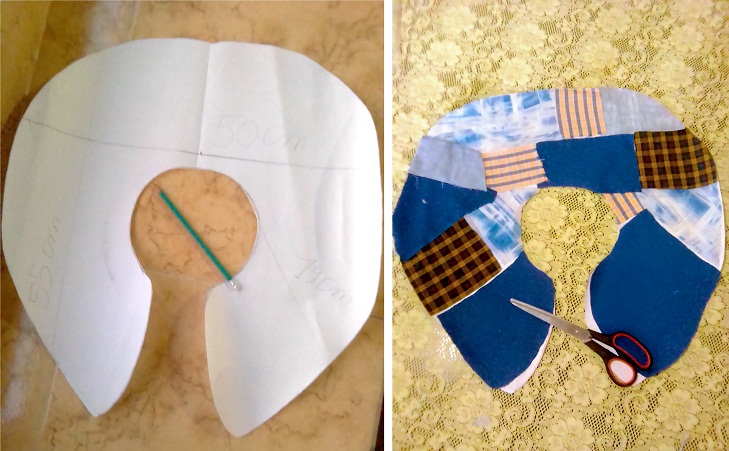
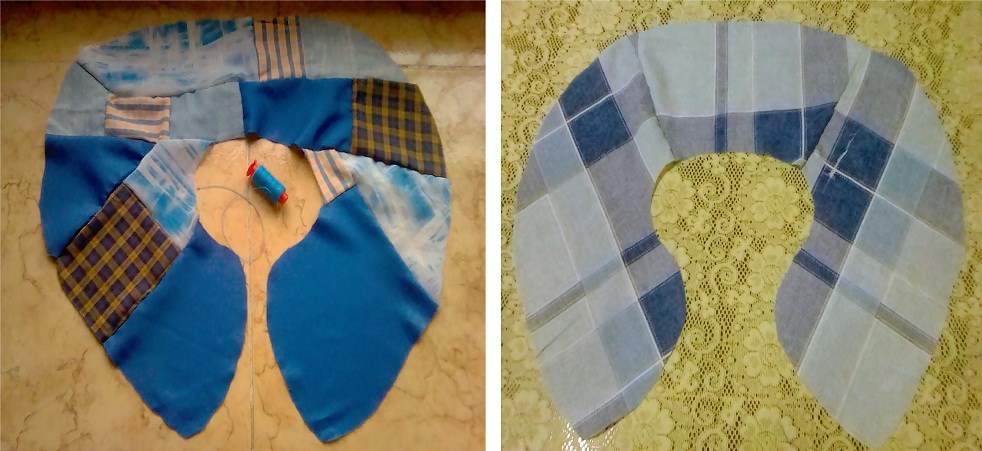
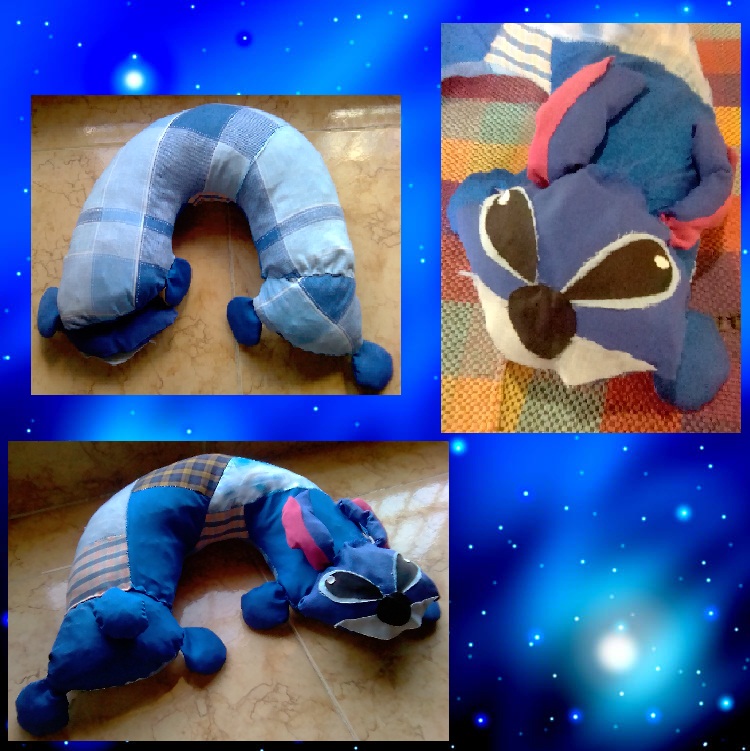
Para dar inicio a esta obra, trazamos y recortamos en el papel el patrón de nuestra almohada, la cual tiene forma de “U” con las medidas de “50cm de ancho” y “55cm de largo”, luego cortamos los retazos de tela de tonos azules en diferentes formas y tamaños hasta tener completa la figura de la almohada.
To start this work, we traced and cut out the pattern for our pillow on the paper, which is in the shape of a “U” with the measurements “50cm wide” and “55cm long”, then we cut the pieces of fabric from blue tones in different shapes and sizes to complete the figure of the pillow.
Ahora procedemos a coser dichos retazos, y para no confundirnos vamos a dividir la almohada en tres piezas principales.
Now we proceed to sew these pieces, and in order not to get confused we are going to divide the pillow into three main pieces.
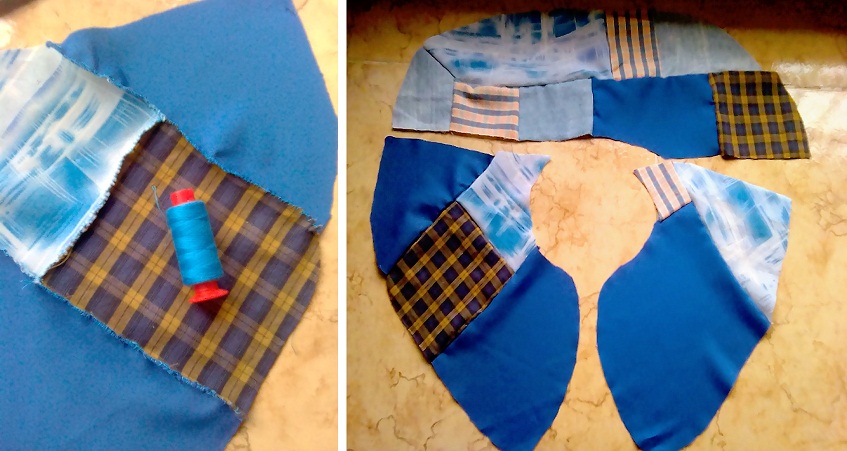
Una vez tengamos listas las tres piezas las unimos y damos vuelta para así ocultar las costuras, y de esta manera ya tenemos lista la parte superior de nuestra almohada de viaje, seguidamente recortamos otros retazos de tela con un diseño diferente basados en el patrón anterior para crear la parte inferior de la almohadilla.
Once we have the three pieces ready, we join them and turn them over to hide the seams, and in this way we already have the upper part of our travel pillow ready, then we cut other pieces of fabric with a different design based on the previous pattern to create the bottom of the pad.
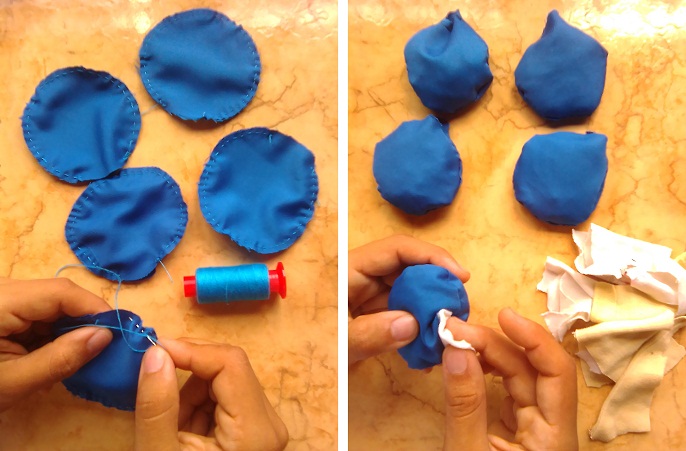
A continuación recortaremos en tela azul cinco pares de círculos, los cosemos, damos vuelta y seguidamente los rellenamos, estos nos servirán para crear las patas y la cola de Stitch.
Next we will cut five pairs of circles out of blue fabric, sew them, turn them over and then fill them, these will serve to create Stitch's legs and tail.
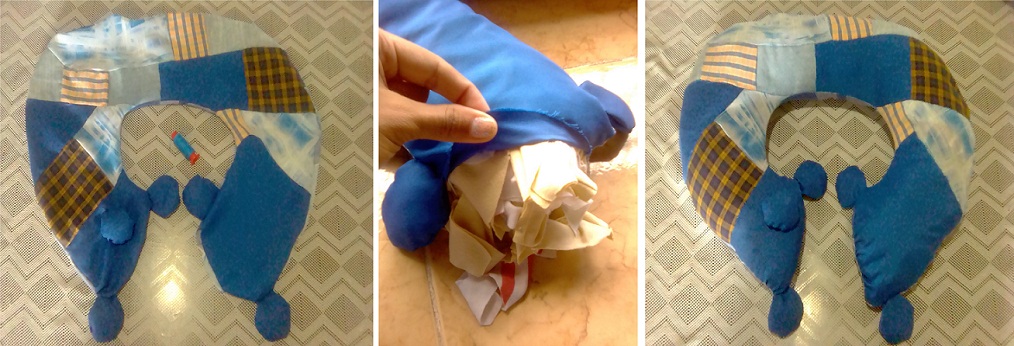
Ya finalizado el paso anterior, cosemos nuevamente ambas piezas de la almohada incluyendo las patas del Stitch pero dejando una apertura para que al momento de dar vuelta a la almohada, las costuras de esta queden por dentro y así ocultamos esos detalles, luego rellenamos y sellamos la apertura y en un extremo le colocamos la colita, de esta manera nuestra almohadilla esta casi lista.
Once the previous step is finished, we sew both pieces of the pillow again including the legs of the Stitch but leaving an opening so that when turning the pillow, the seams of it are inside and thus we hide those details, then we fill and seal the opening and at one end we place the tail, in this way our pad is almost ready.
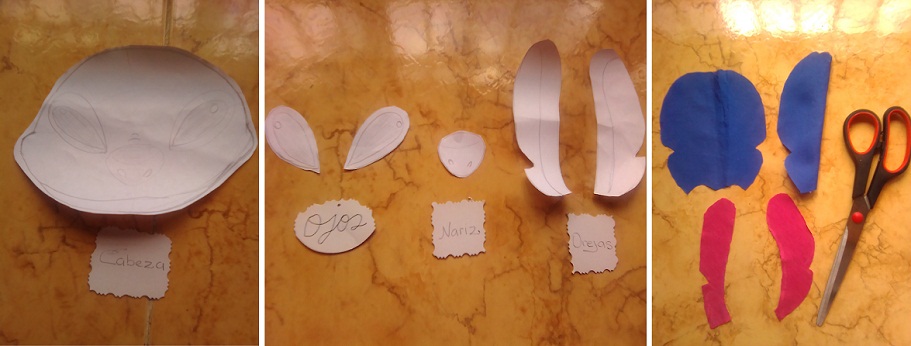
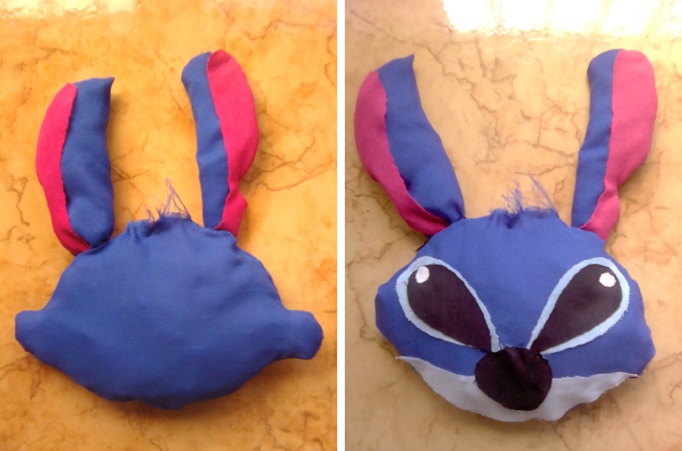
Para este paso dibujamos y recortamos los patrones de la cabeza, los ojos, la nariz y las orejas del stitch, luego los pasamos para los retazos de tela azul, negra y rosa que servirán para resaltar los detalles de los ojos, la nariz y las orejas.
For this step we draw and cut out the patterns of the stitch's head, eyes, nose and ears, then pass them to the blue, black and pink fabric scraps that will serve to highlight the details of the eyes, nose and ears. ears.
Cosemos y nuevamente rellenamos la cabeza y las orejas, también podemos destejer un poco la parte superior de la cabeza para darle parecido al mechón de cabello que tiene Stitch, luego cosemos esa parte y procedemos a complementar el resto de la cabeza.
We sew and stuff the head and ears again, we can also unravel the top of the head a bit to give it a resemblance to the lock of hair that Stitch has, then we sew that part and proceed to complement the rest of the head.
Como ya hemos finalizado la cabeza de Stitch, es hora de colocarla en la almohadilla la cual representa el cuerpo de este simpático personaje, y este es el resultado final de esta obra empleando la técnica Patchwork, espero que les sirva tanto como a mí en mi búsqueda del aprendizaje.
As we have already finished Stitch's head, it is time to place it on the pad which represents the body of this nice character, and this is the final result of this work using the Patchwork technique, I hope it will serve you as much as it did for me. pursuit of learning.
Y esto es todo por el día de hoy, les hago la cordial invitación para que se animen a realizar esta almohada, la cual es muy útil a la hora de hacer un viaje o si solo quieres descansar por un momento esta idea te ayudara ¡Que pasen un buen día y hasta pronto!
And this is all for today, I cordially invite you to be encouraged to make this pillow, which is very useful when making a trip or if you just want to rest for a moment, this idea will help you! have a good day and see you soon!

💜 Las fotografías 📷 son de nuestra autoria y fueron tomadas con un teléfono inteligente (ZTE Blade L130) y editadas en Paint y Paint Tool SAI por @albakriz.
💜 The photographs 📷 are of our authorship and were taken with a smartphone (ZTE Blade L130) and edited in Paint and Paint Tool SAI by @albakriz.
💜 Traducción: traductor de Google.
💜 Translation: translate Google.
Your content has been voted as a part of Encouragement program. Keep up the good work!
Use Ecency daily to boost your growth on platform!
Support Ecency
Vote for new Proposal
Delegate HP and earn more
Thank you very much @ecency 😊 I appreciate your constant support greetings! 💓 💕 💜
Que bonito trabajo amiga @albakriz y una técnica impecable, suerte en el concurso 🌸🌹❤️
¡Muchas gracias @lileisabel! 💓 💕 💜 me alegra muchísimo que le haya gustado y aprecio sus buenos deseos 💮 ¡saludos y éxitos amiga! 😊
Me gusto mucho tu trabajo😍 @albakriz, excelente, te dejo mis buenos deseos para este lindo concurso🌻🌻🌼🌹🥀🌷🏵️💮😘😘.
¡Buenos días! @taniagonzalez 💜 ¡Muchas gracias amiga! 💮 te agradezco tu apoyo al igual que tus buenos deseos ¡saludos! 💕
Gran trabajo amiga @albakriz. Te quedó muy lindo. Mucha suerte en el concurso 🤗😘
Hola amiga @dayadam 💕 que bueno que esta idea haya sido de su agrado ¡gracias amiga por tus buenos deseos! 💜 ¡saludos! 😊
Te quedo demasiado genial este cojín de viaje. ♥
¡Muchas gracias @estefania3! me alegra que le haya gustado 😉 ¡saludos y éxitos amiga! 💓 💕 💜
Que bonito trabajo hiciste amiga, felicidades.
Hola amiga @gabimramirez, muchas gracias que bueno que te guste 💕 ¡saludos y éxitos! 😊
Que original @albakriz me gustó mucho... Suerte
¡Buenos días! 💮 amiga @yennysferm71 💜 me alegra muchísimo que esta idea le haya gustado ¡gracias y saludos! 😊
HERMOSO TRABAJO, ME ENCANTAN ESAS MANUALIDADES. SALUDOS