¡¡¡Hola mis queridos amigos de Hive.!!!
Hello my dear Hive friends!!!
Espero tengan todos un lindo y productivo día, lleno de mucha salud y creatividad. Para que cada día podamos encontrarnos en esta linda plataforma y seguir compartiendo nuestras creaciones, ideas y todo aquello que nos permita crecer como artesanos. Dejando siempre nuestro cariño y dedicación en lo que hacemos.
El crear con nuestras manos es una labor tan bonita y relajante, que resulta hasta terapéutico, lo cual nos hace tan bien sobre todo en estos tiempos que estamos viviendo. Bueno al menos a mi me ha servido, y cuando vemos el producto terminado vemos que valió la pena el tiempo que le dedicamos.
I hope you all have a nice and productive day, full of good health and creativity. So that every day we can meet on this beautiful platform and continue sharing our creations, ideas and everything that allows us to grow as artisans. Always leaving our love and dedication in what we do.
Creating with our hands is such a beautiful and relaxing task, that it is even therapeutic, which is so good for us, especially in these times we are living. Well at least it has worked for me, and when we see the finished product we see that it was worth the time we spent on it.
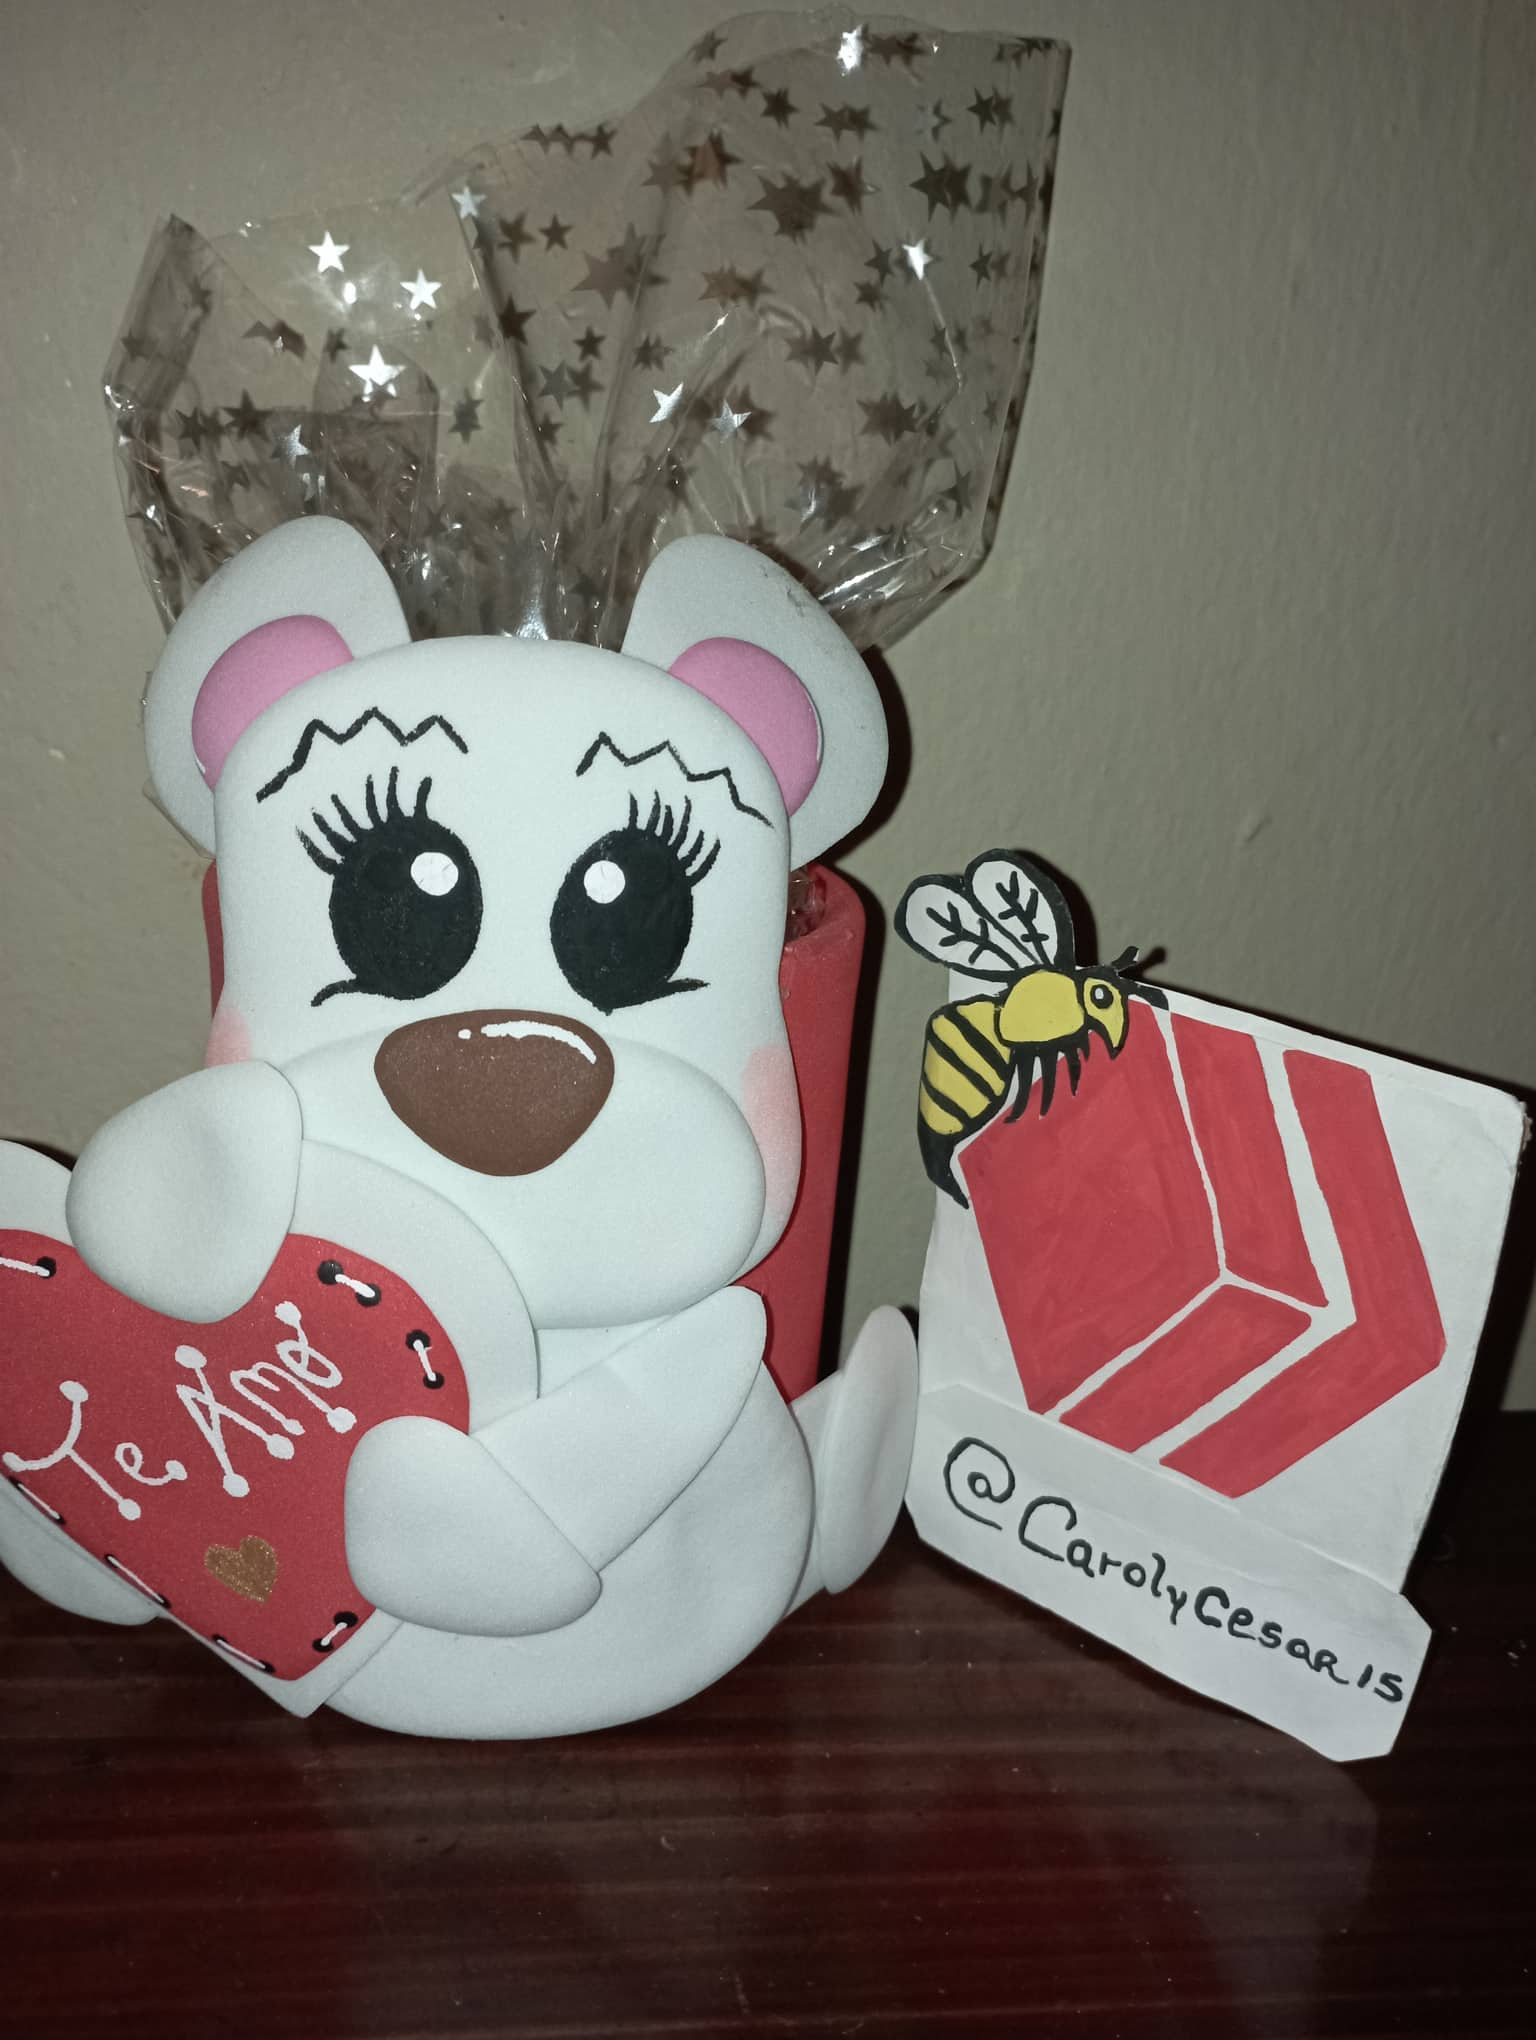
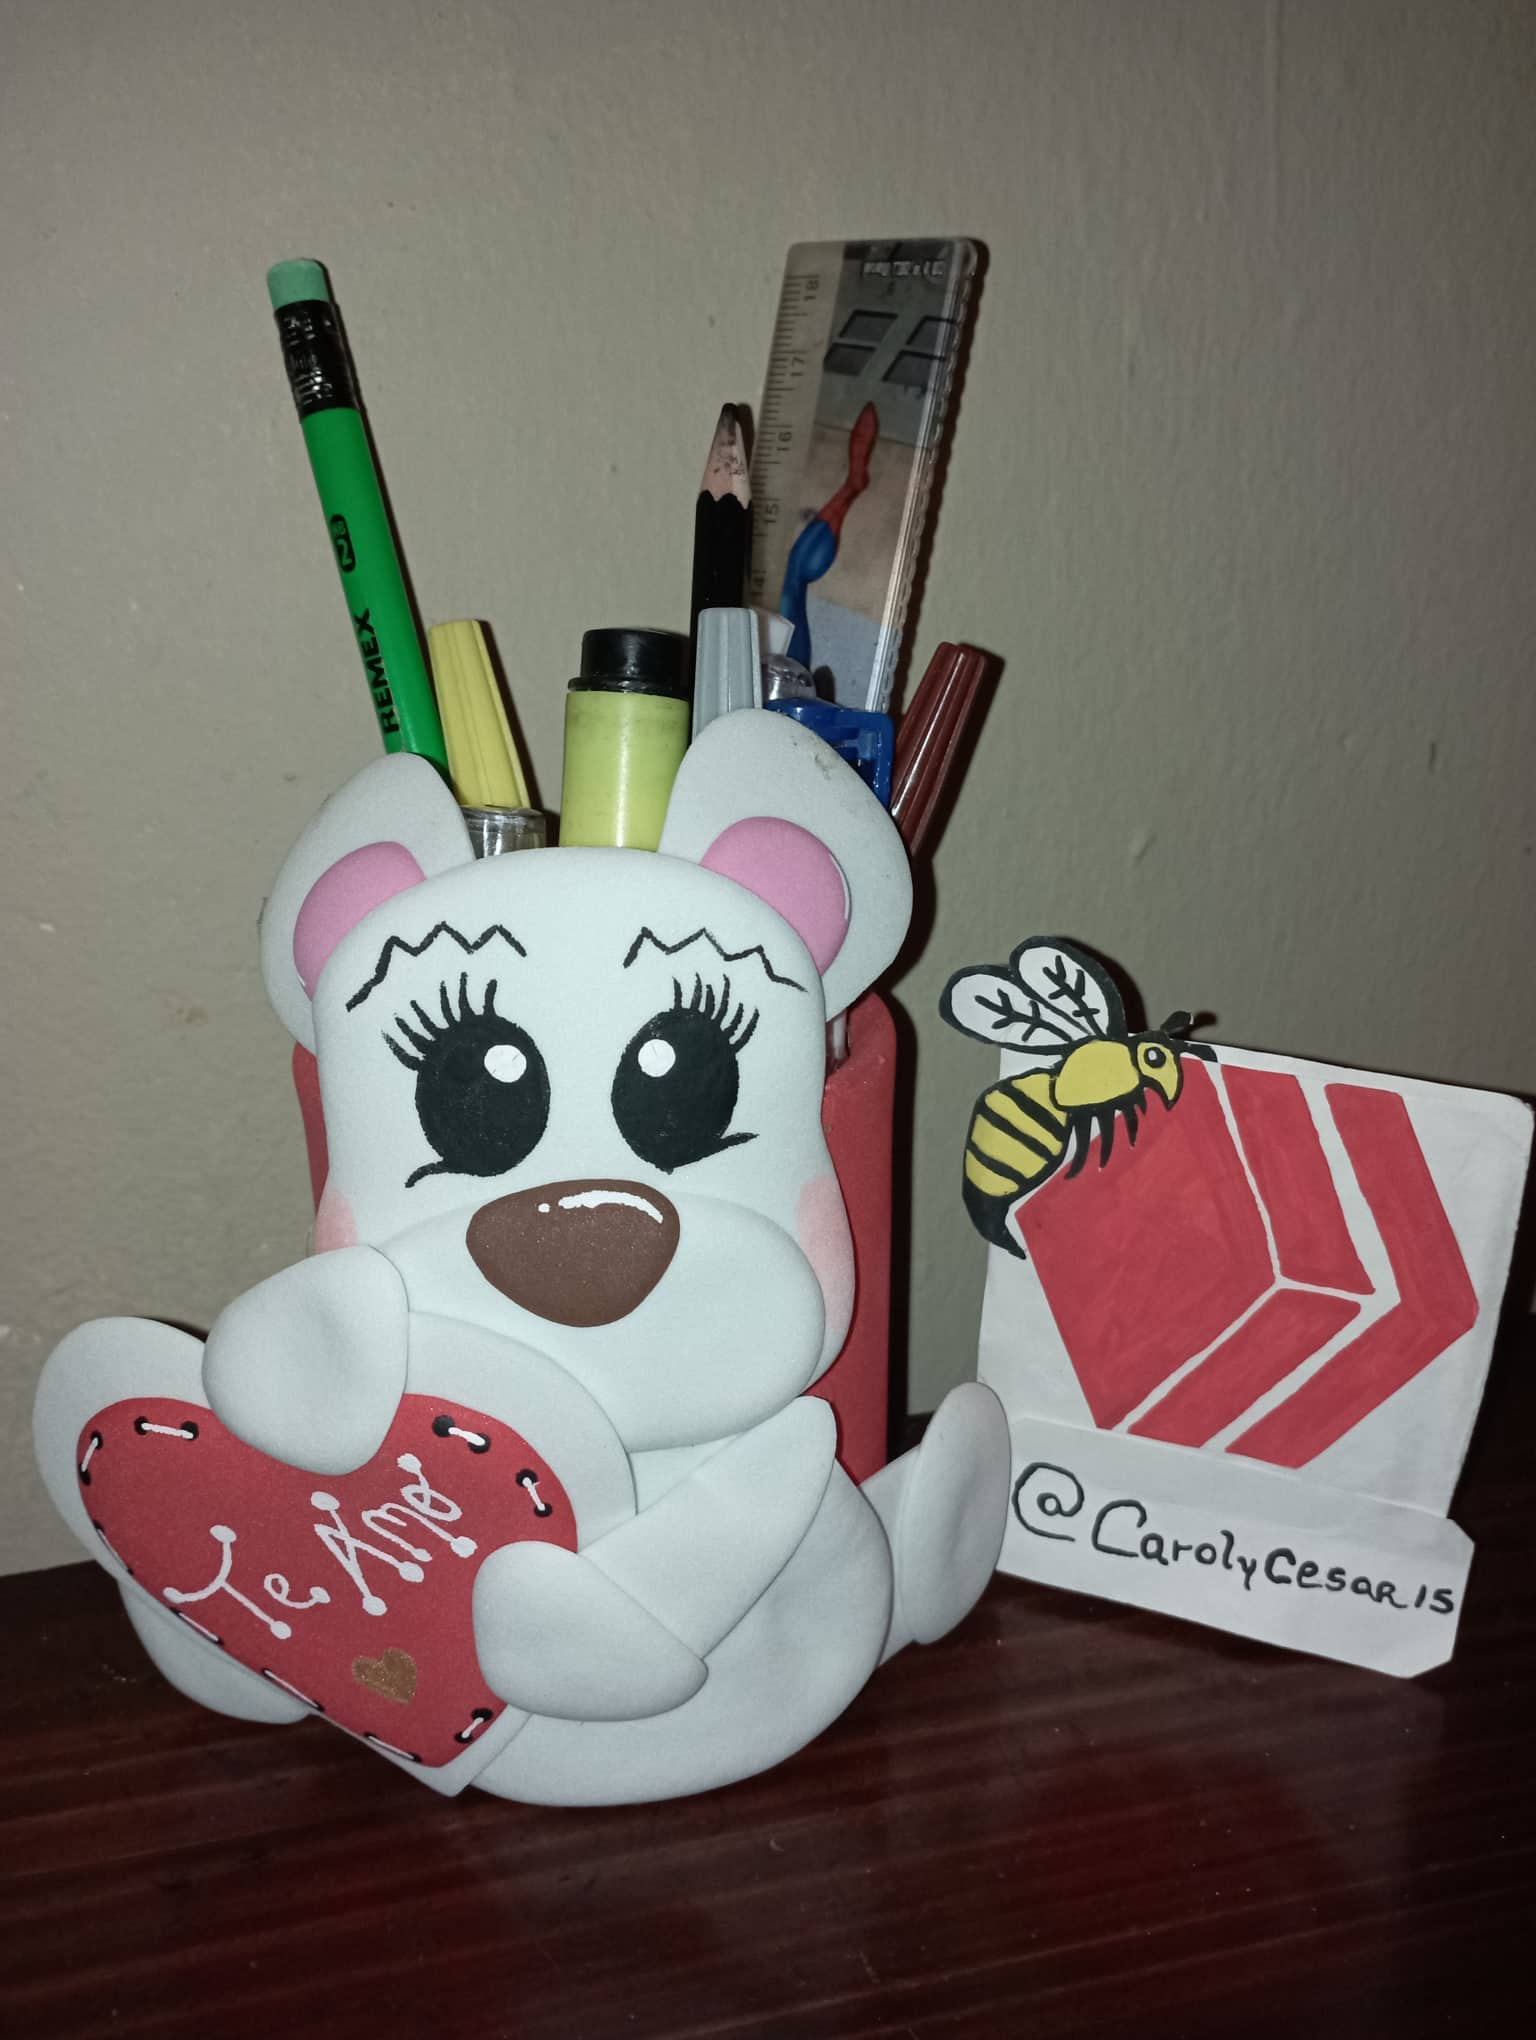
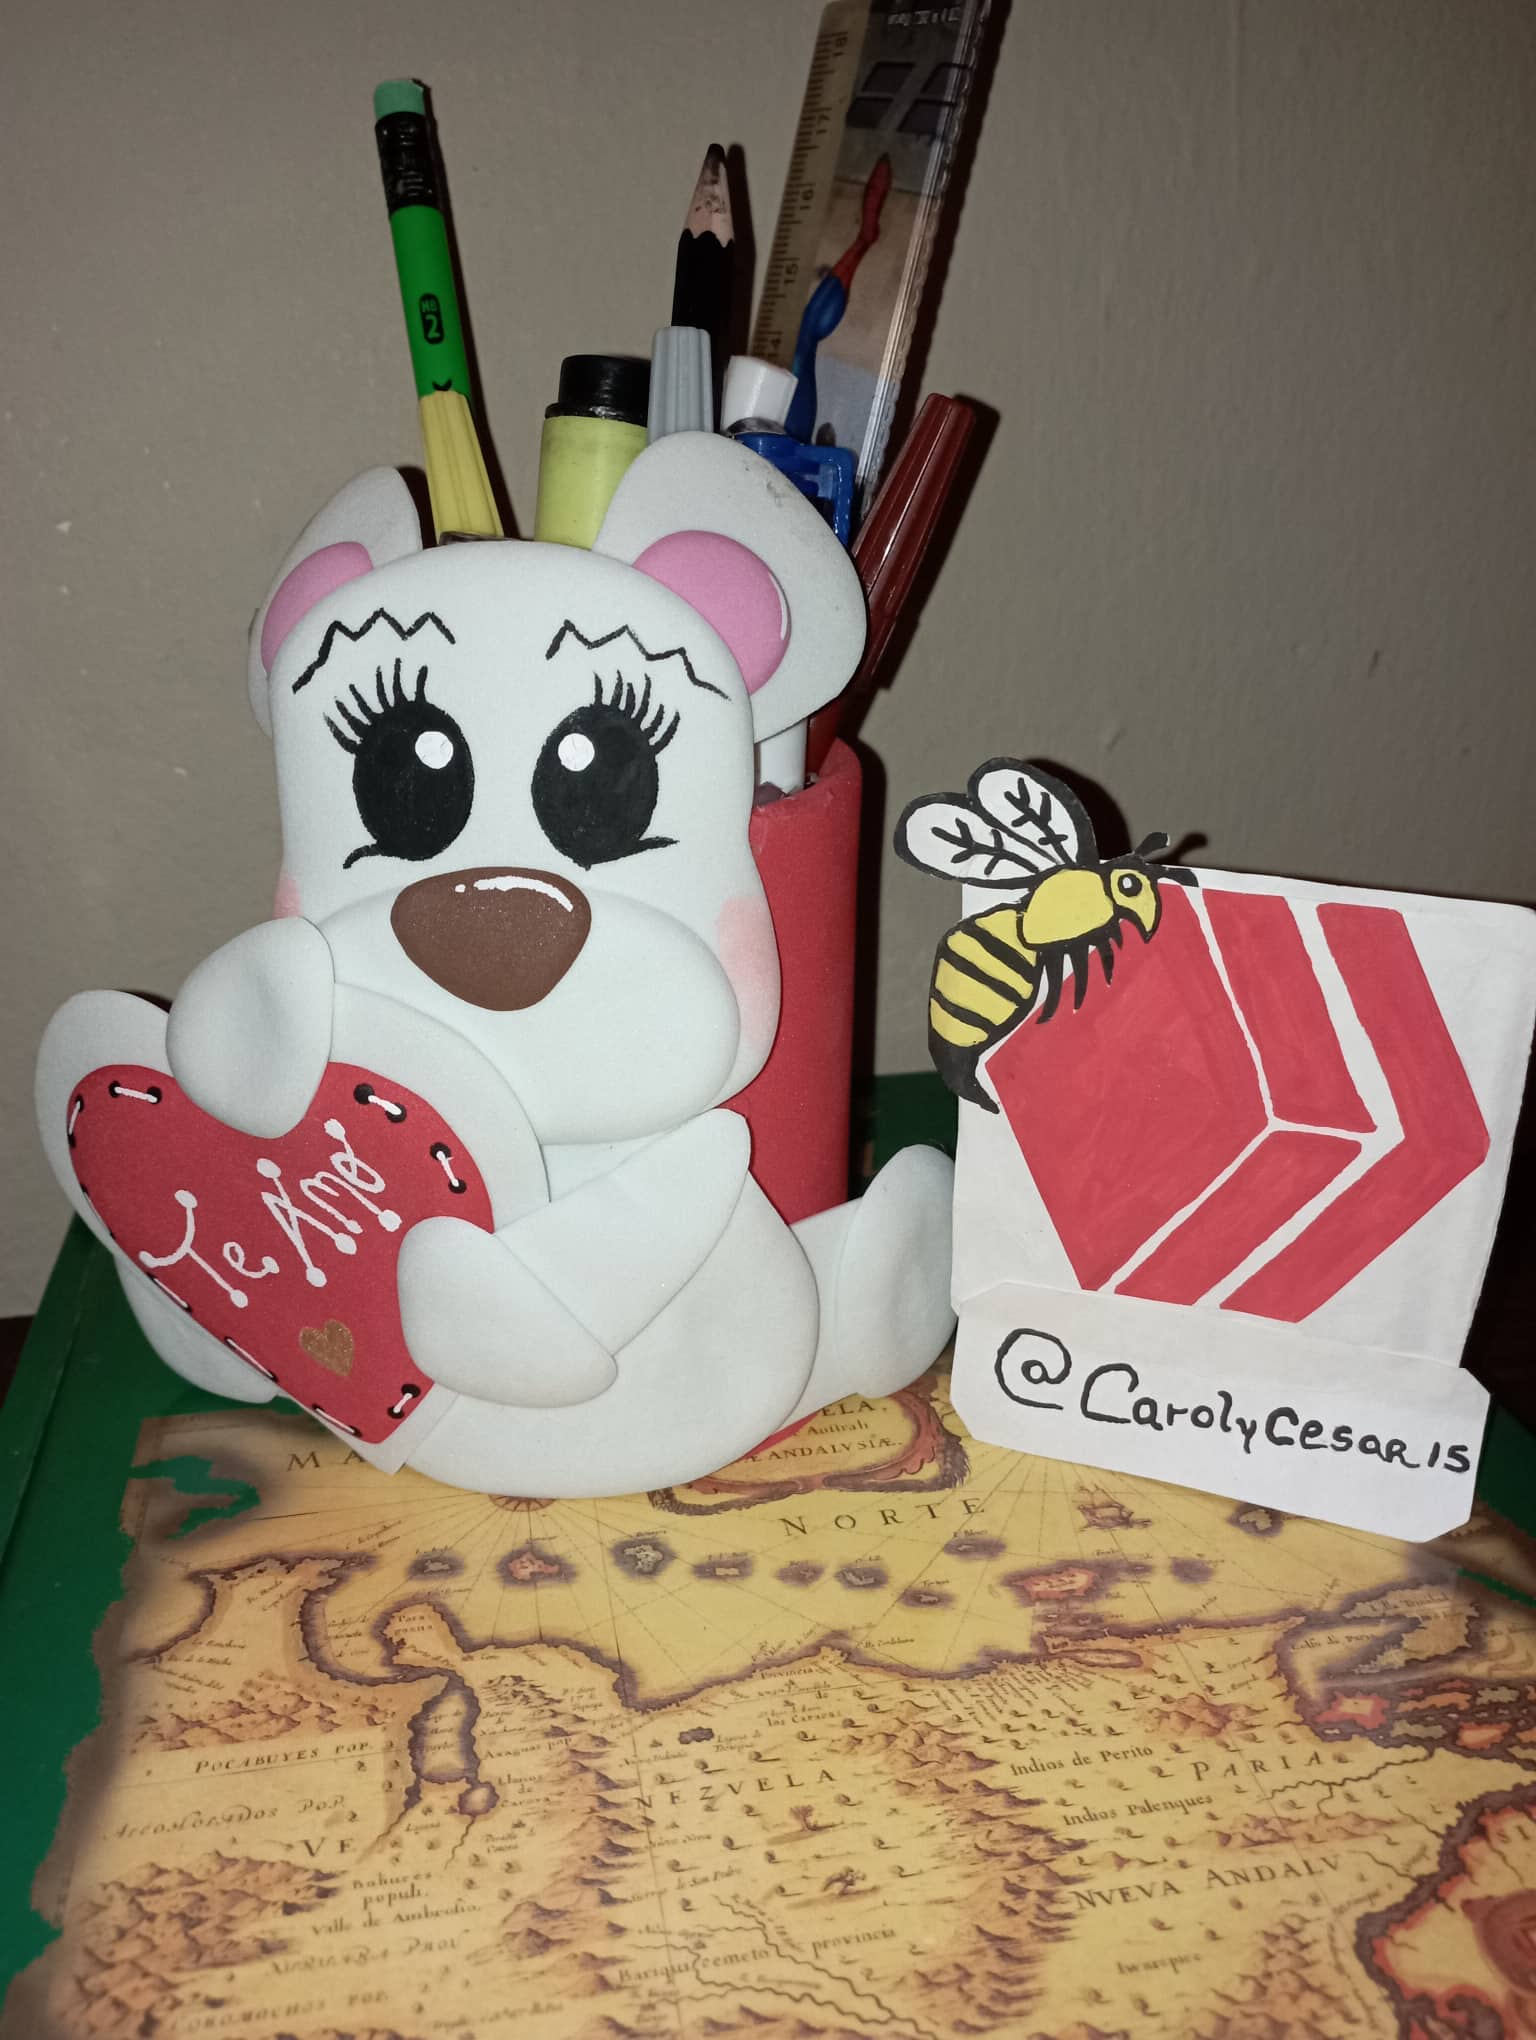
En esta oportunidad les quiero compartir un pequeño contener decorado con un lindo y tierno osito blanco diciéndote “ Te Amo “, el cual lo podemos utilizar como un organizador para nuestros lápices o podemos hacer un dulcero para obsequiar. De seguro servirá para ambas cosas, además de verse muy bonito.
This time I want to share a small container decorated with a cute and tender white bear saying "I love you", which we can use as an organizer for our pencils or we can make a candy box to give away. Surely it will do both, in addition to looking very nice.
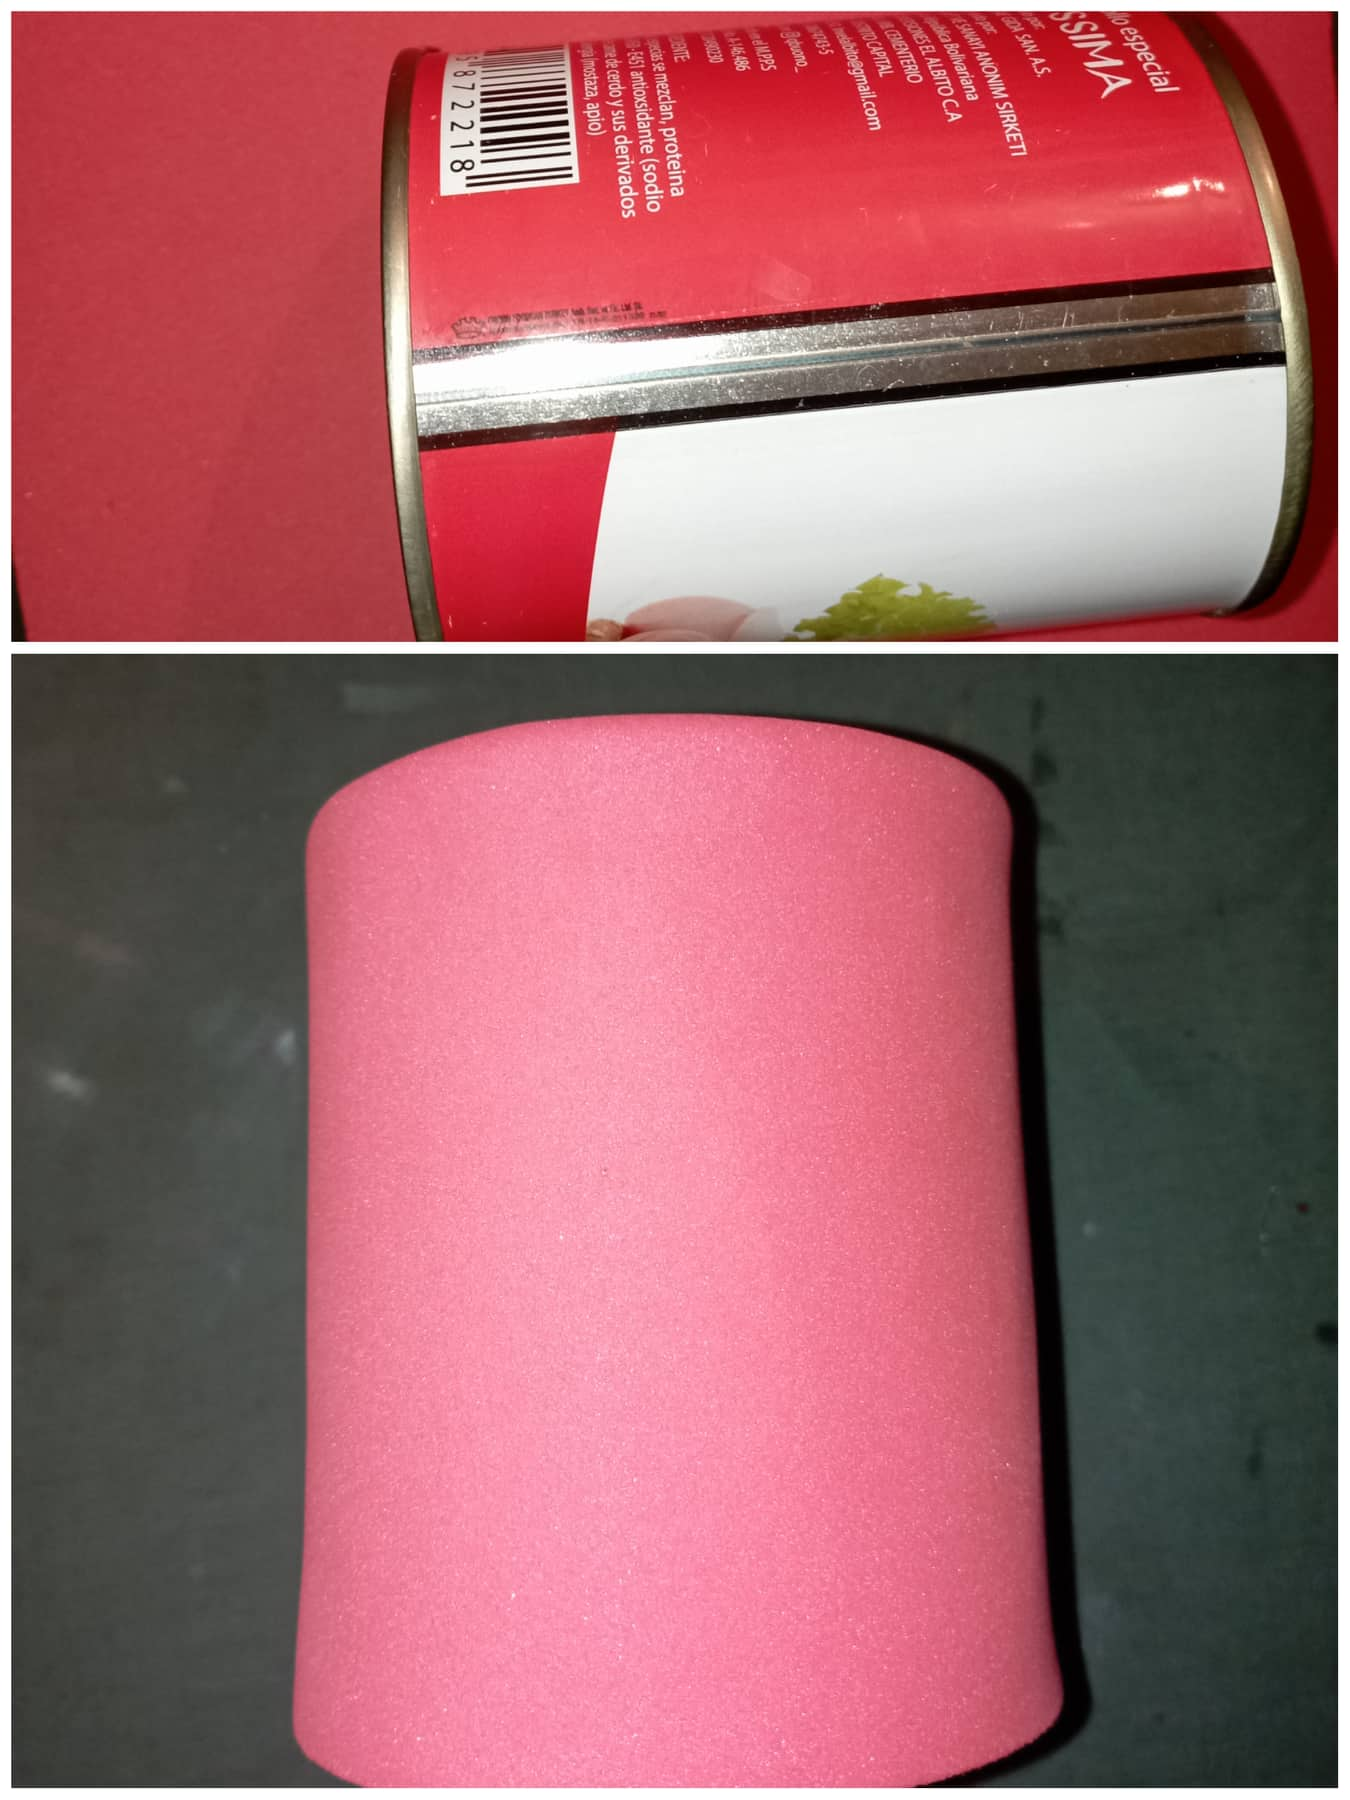
Y están son manualidades que nos permiten también poner en práctica el reciclaje. Ya que en este trabajo utilice una lata de jamonada, la cual me pareció ideal para realizar esta manualidad. Tomando en cuenta el ancho y la altura de la lata.
And these are crafts that also allow us to put recycling into practice. Since in this work I used a can of jamonada, which seemed ideal for this craft. Taking into account the width and height of the can.
Ahora les cuento todo lo que utilicé y como la hice:
Now I tell you everything I used and how I did it:
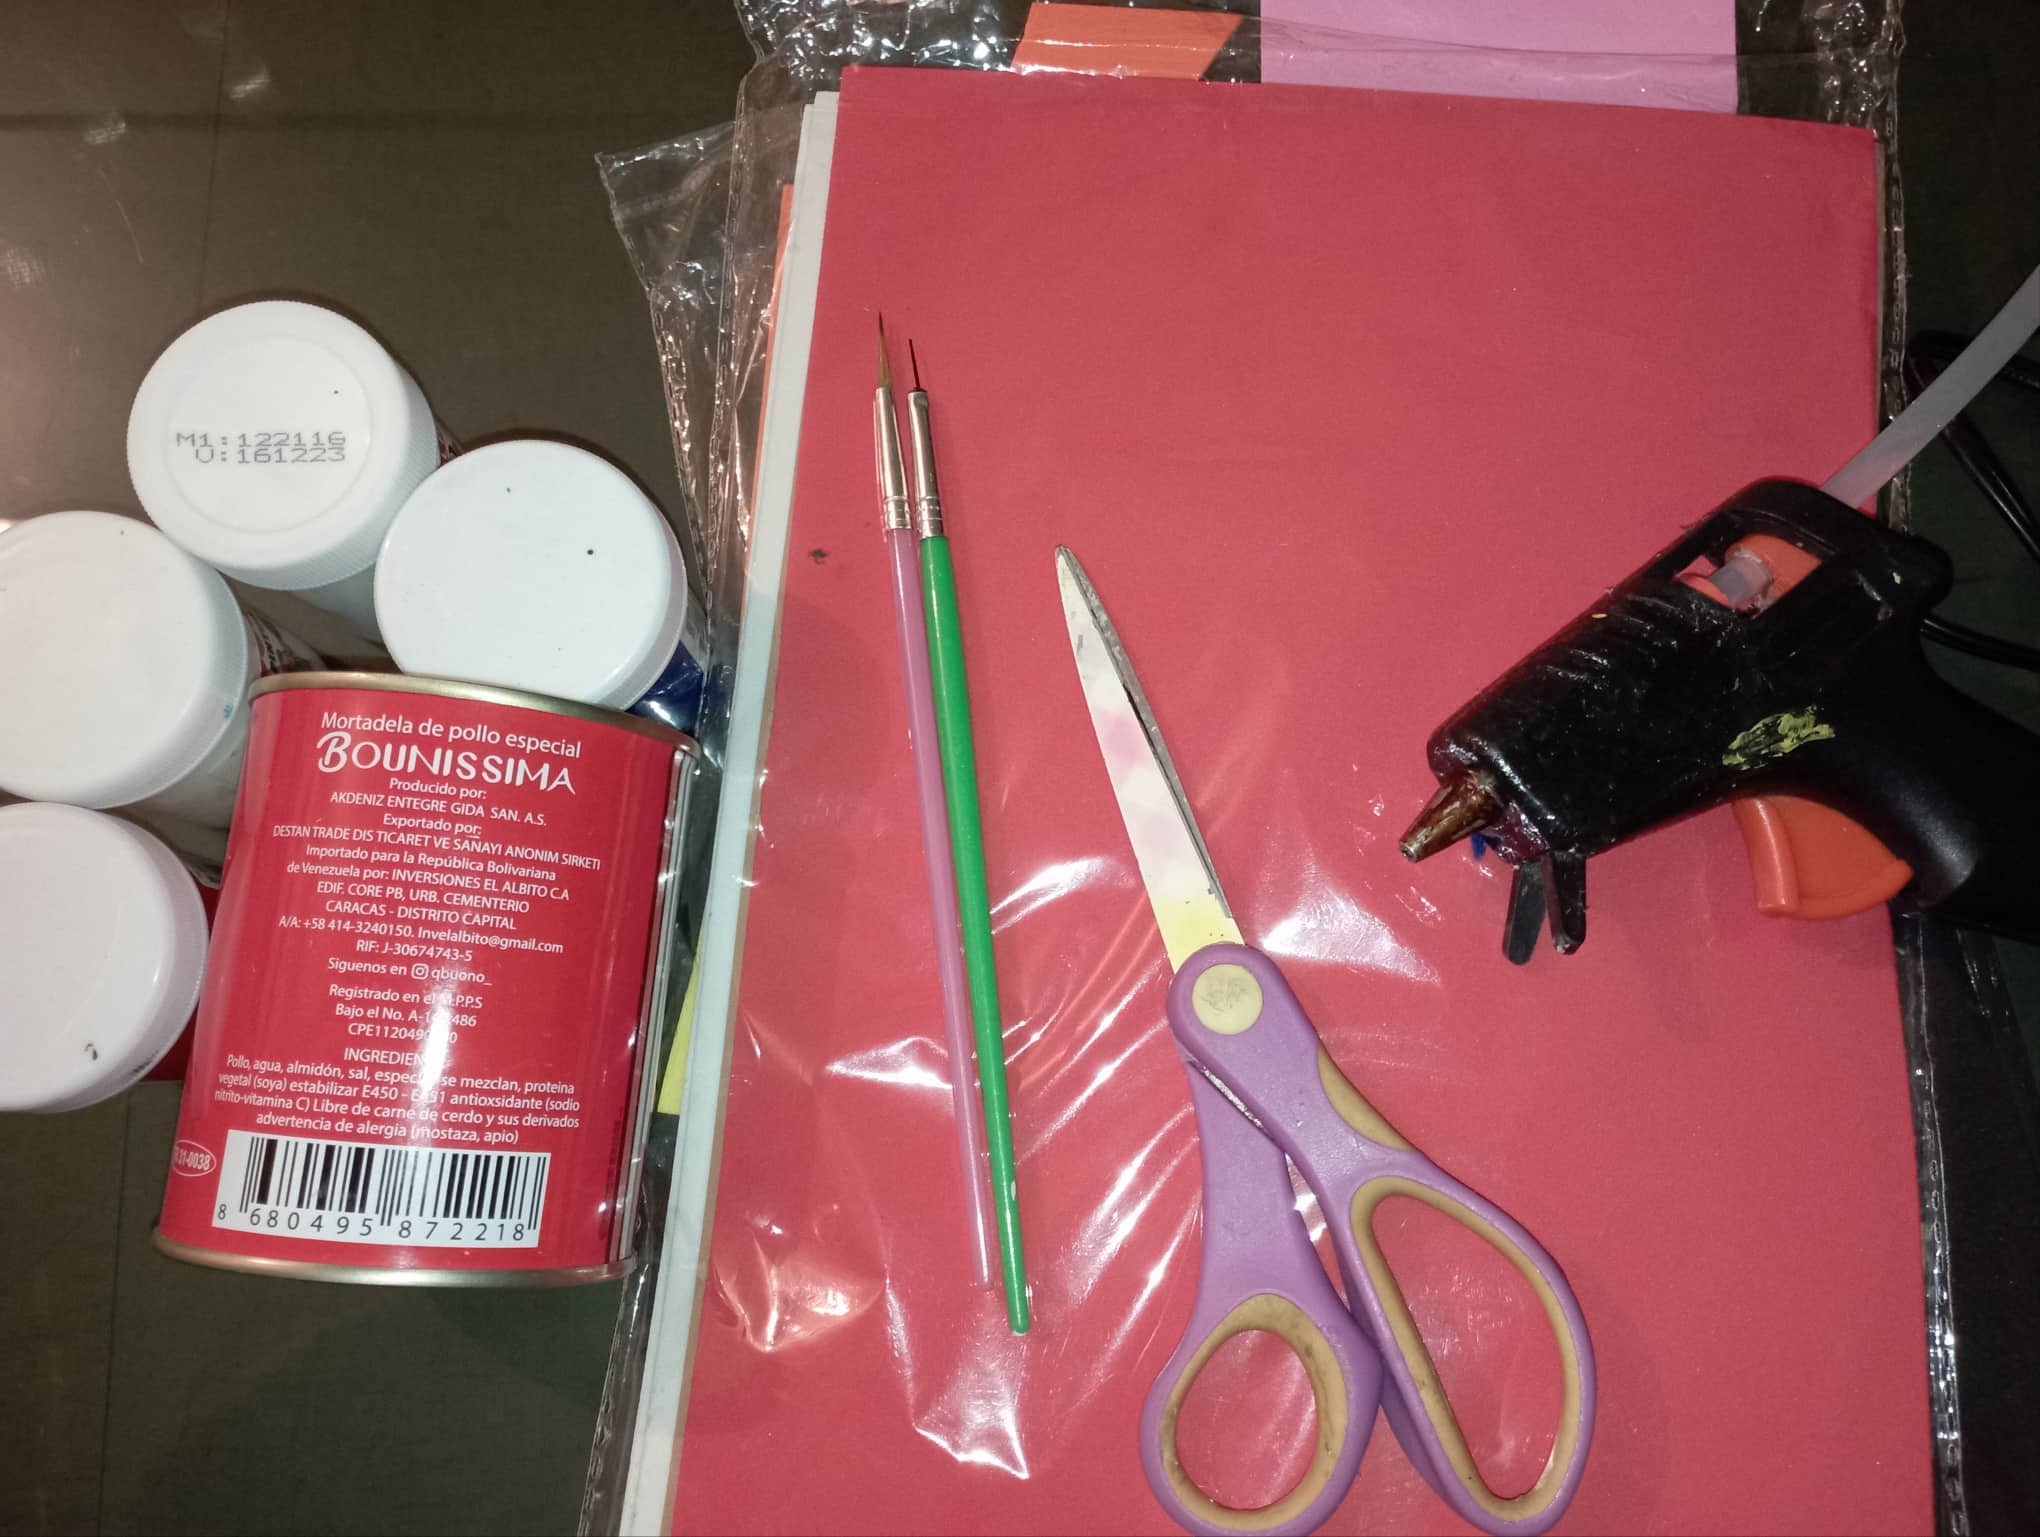
Materiales:
- Una lata.
- Foami.
- Silicon caliente.
- Papel celofan.
- Pinturas y pinceles.
Materials:
- A tin.
- Foami.
- Hot silicone.
- Celofan paper.
- Paints and brushes.
Pasos...
Steps...
- Lo primero que hice fue forrar la lata con el foami rojo.
- The first thing I did was line the can with the red foami.
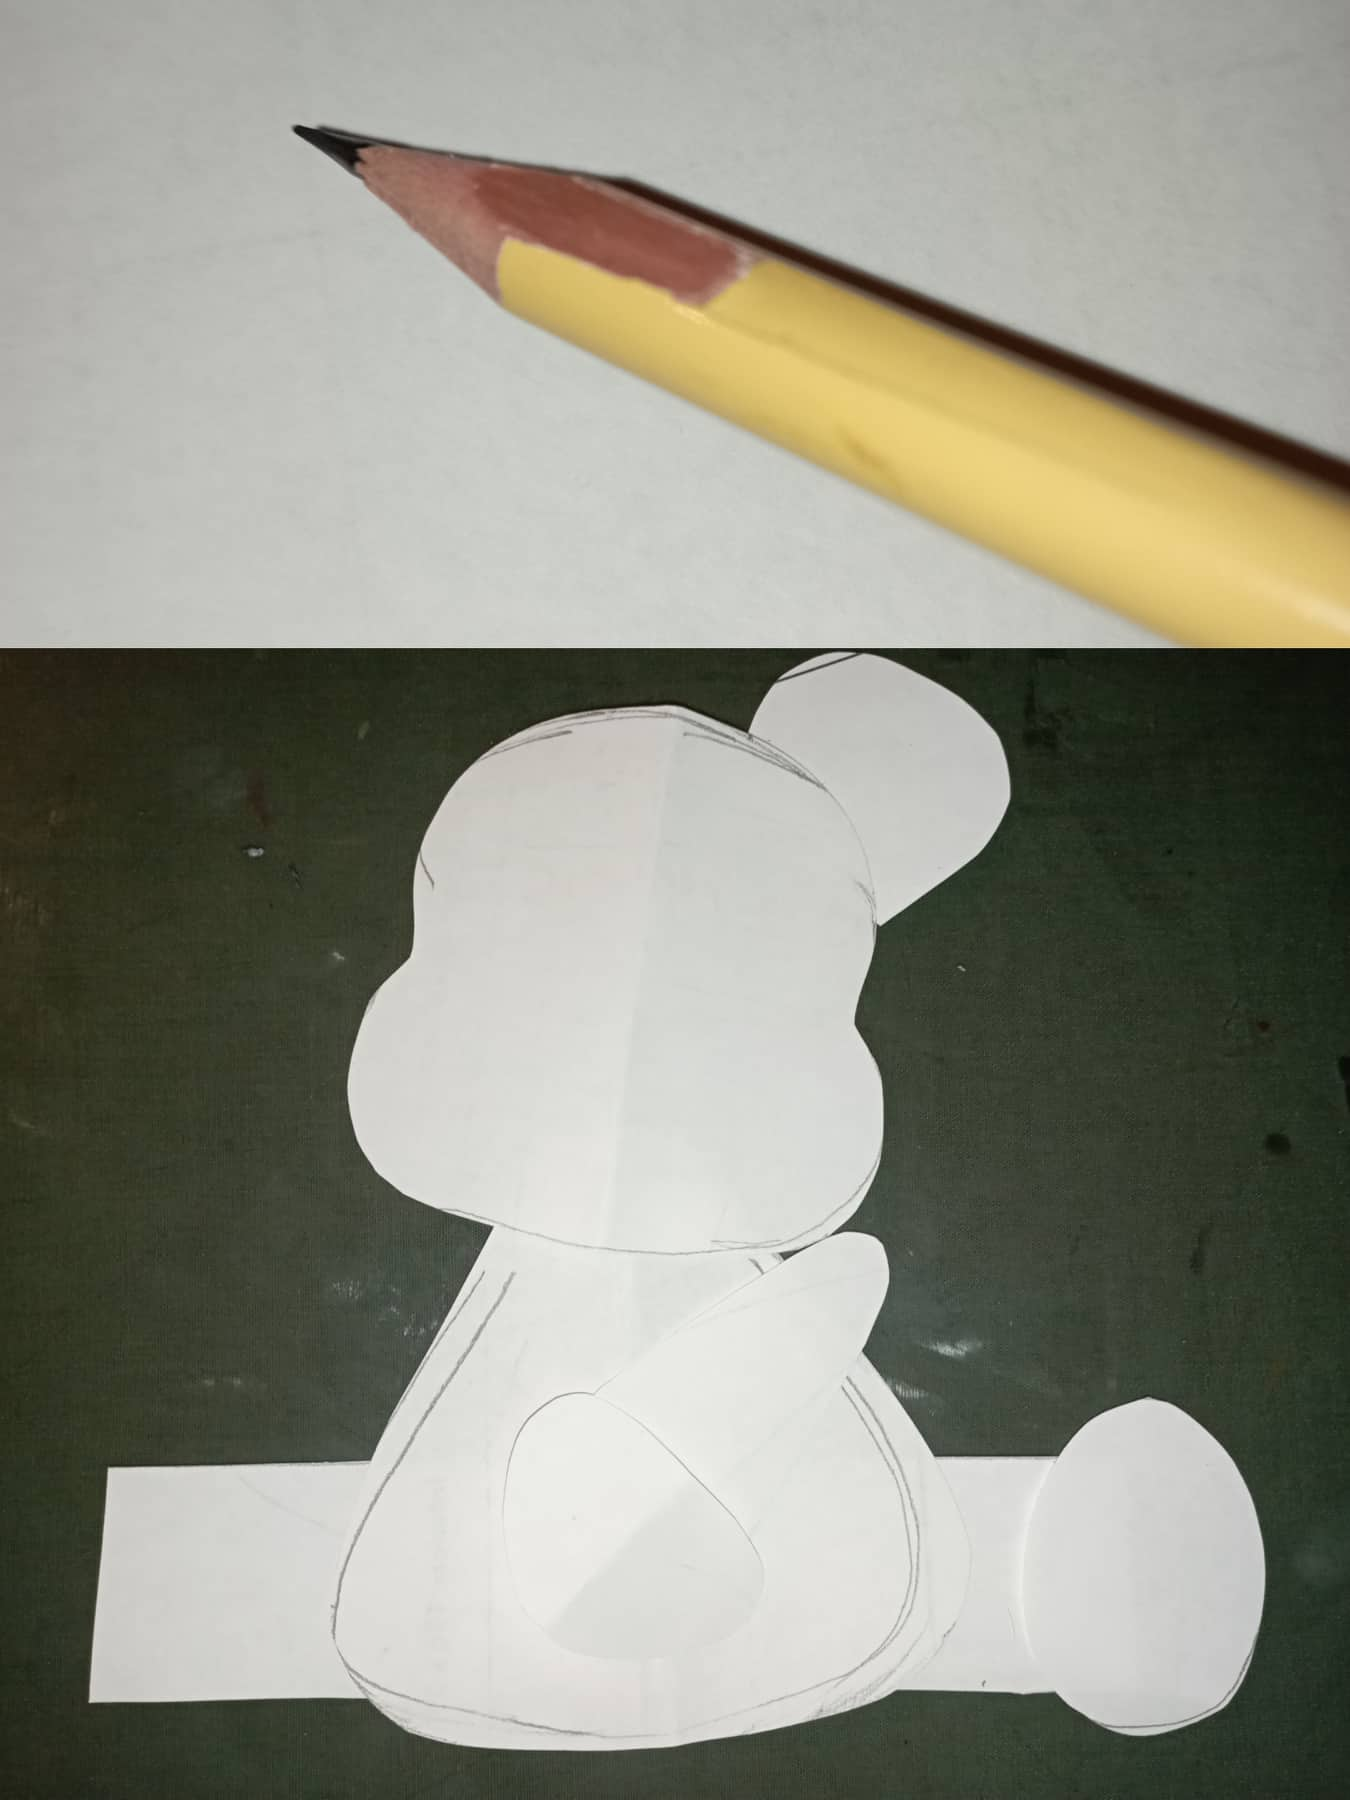
- Luego dibuje y recorte en una hoja de papel las piezas para hacer un lindo oso. como: (El cuerpo la cabeza, orejas, y una figura rectangular, 4 figuras ovaladas y un corazon.)
- Then draw and cut out the pieces to make a cute bear on a sheet of paper. like: (The body the head, ears, and a rectangular figure, 4 oval figures and a heart.)
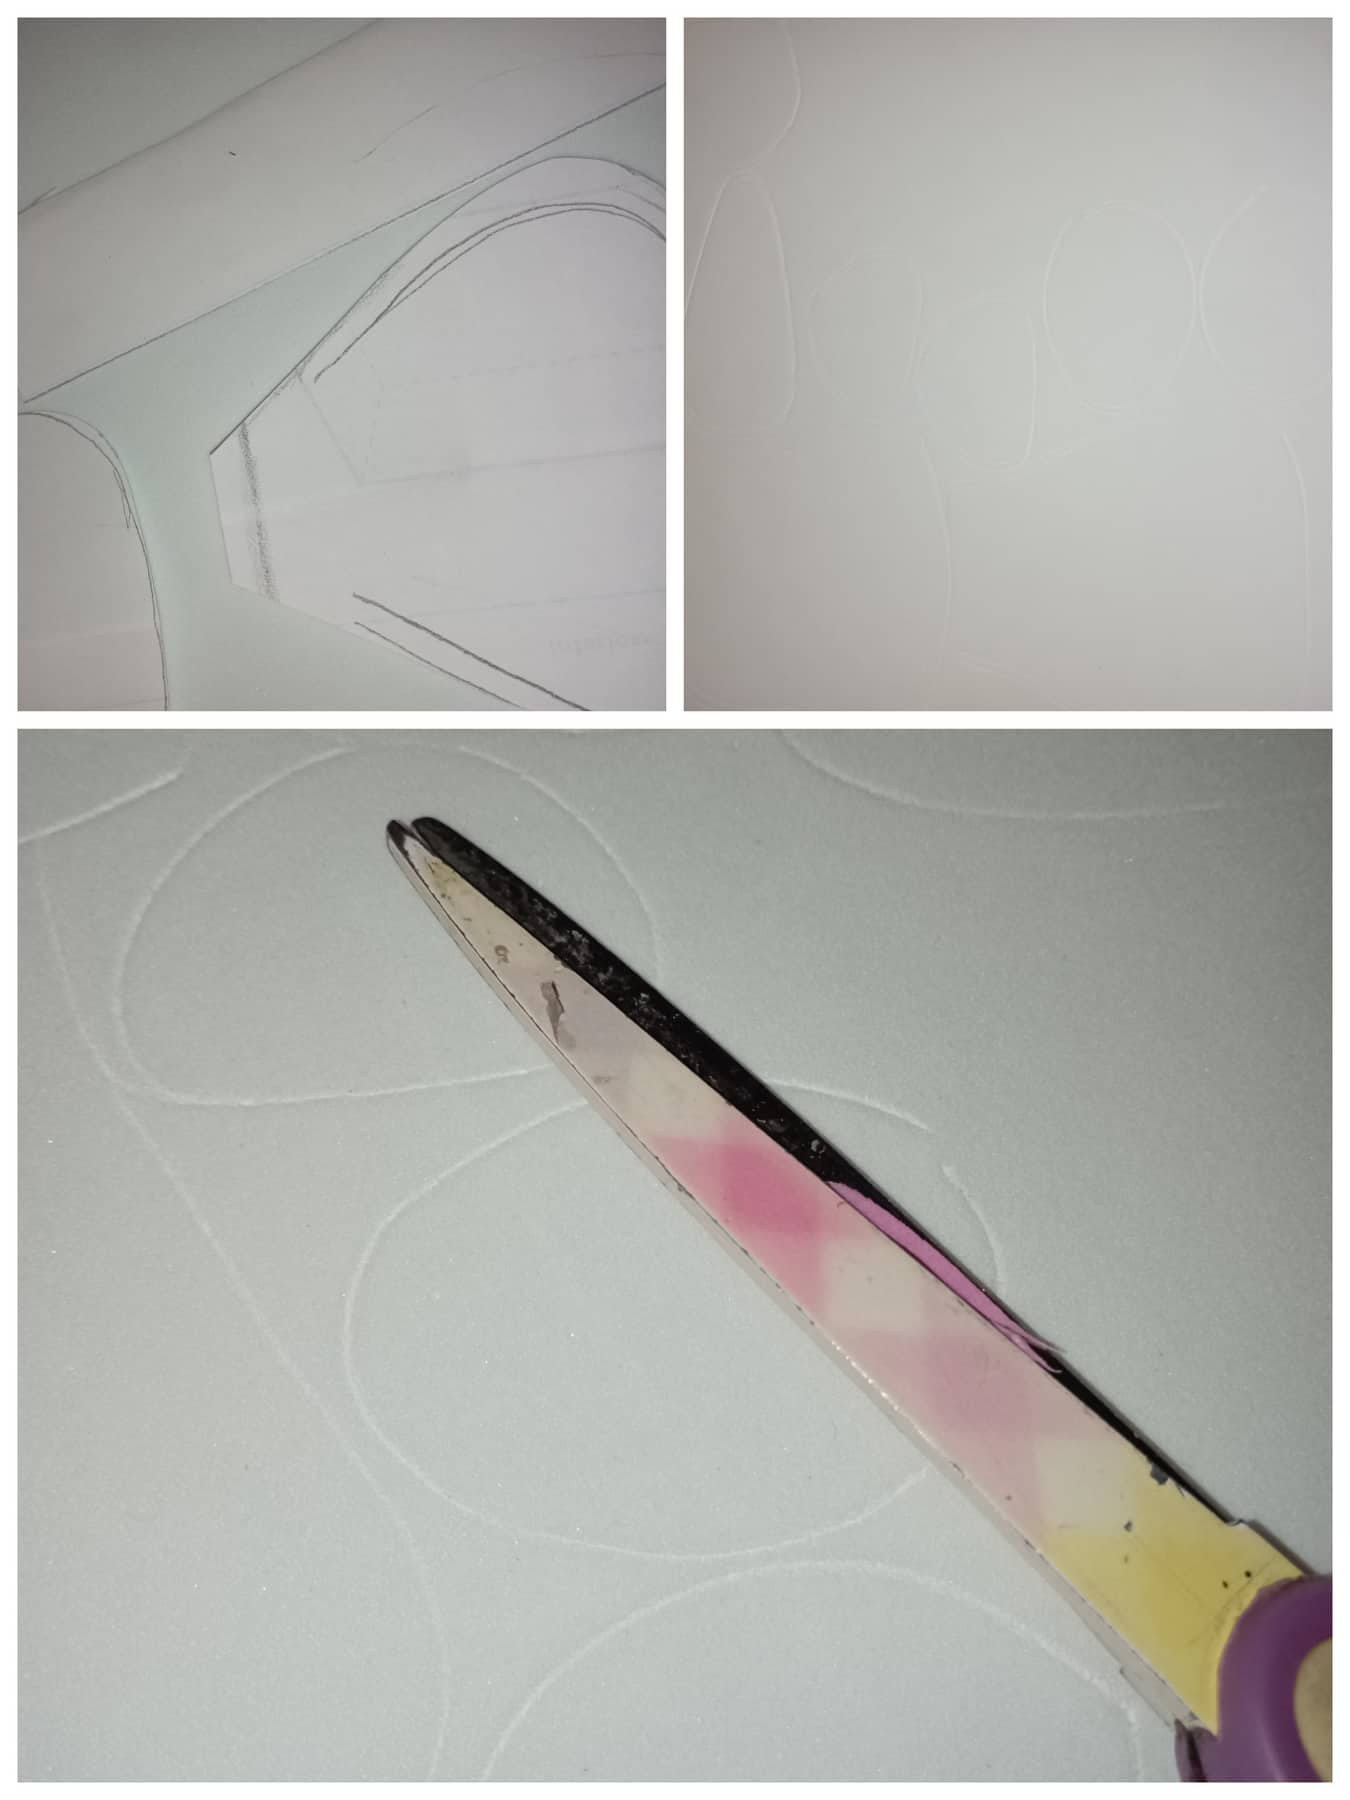
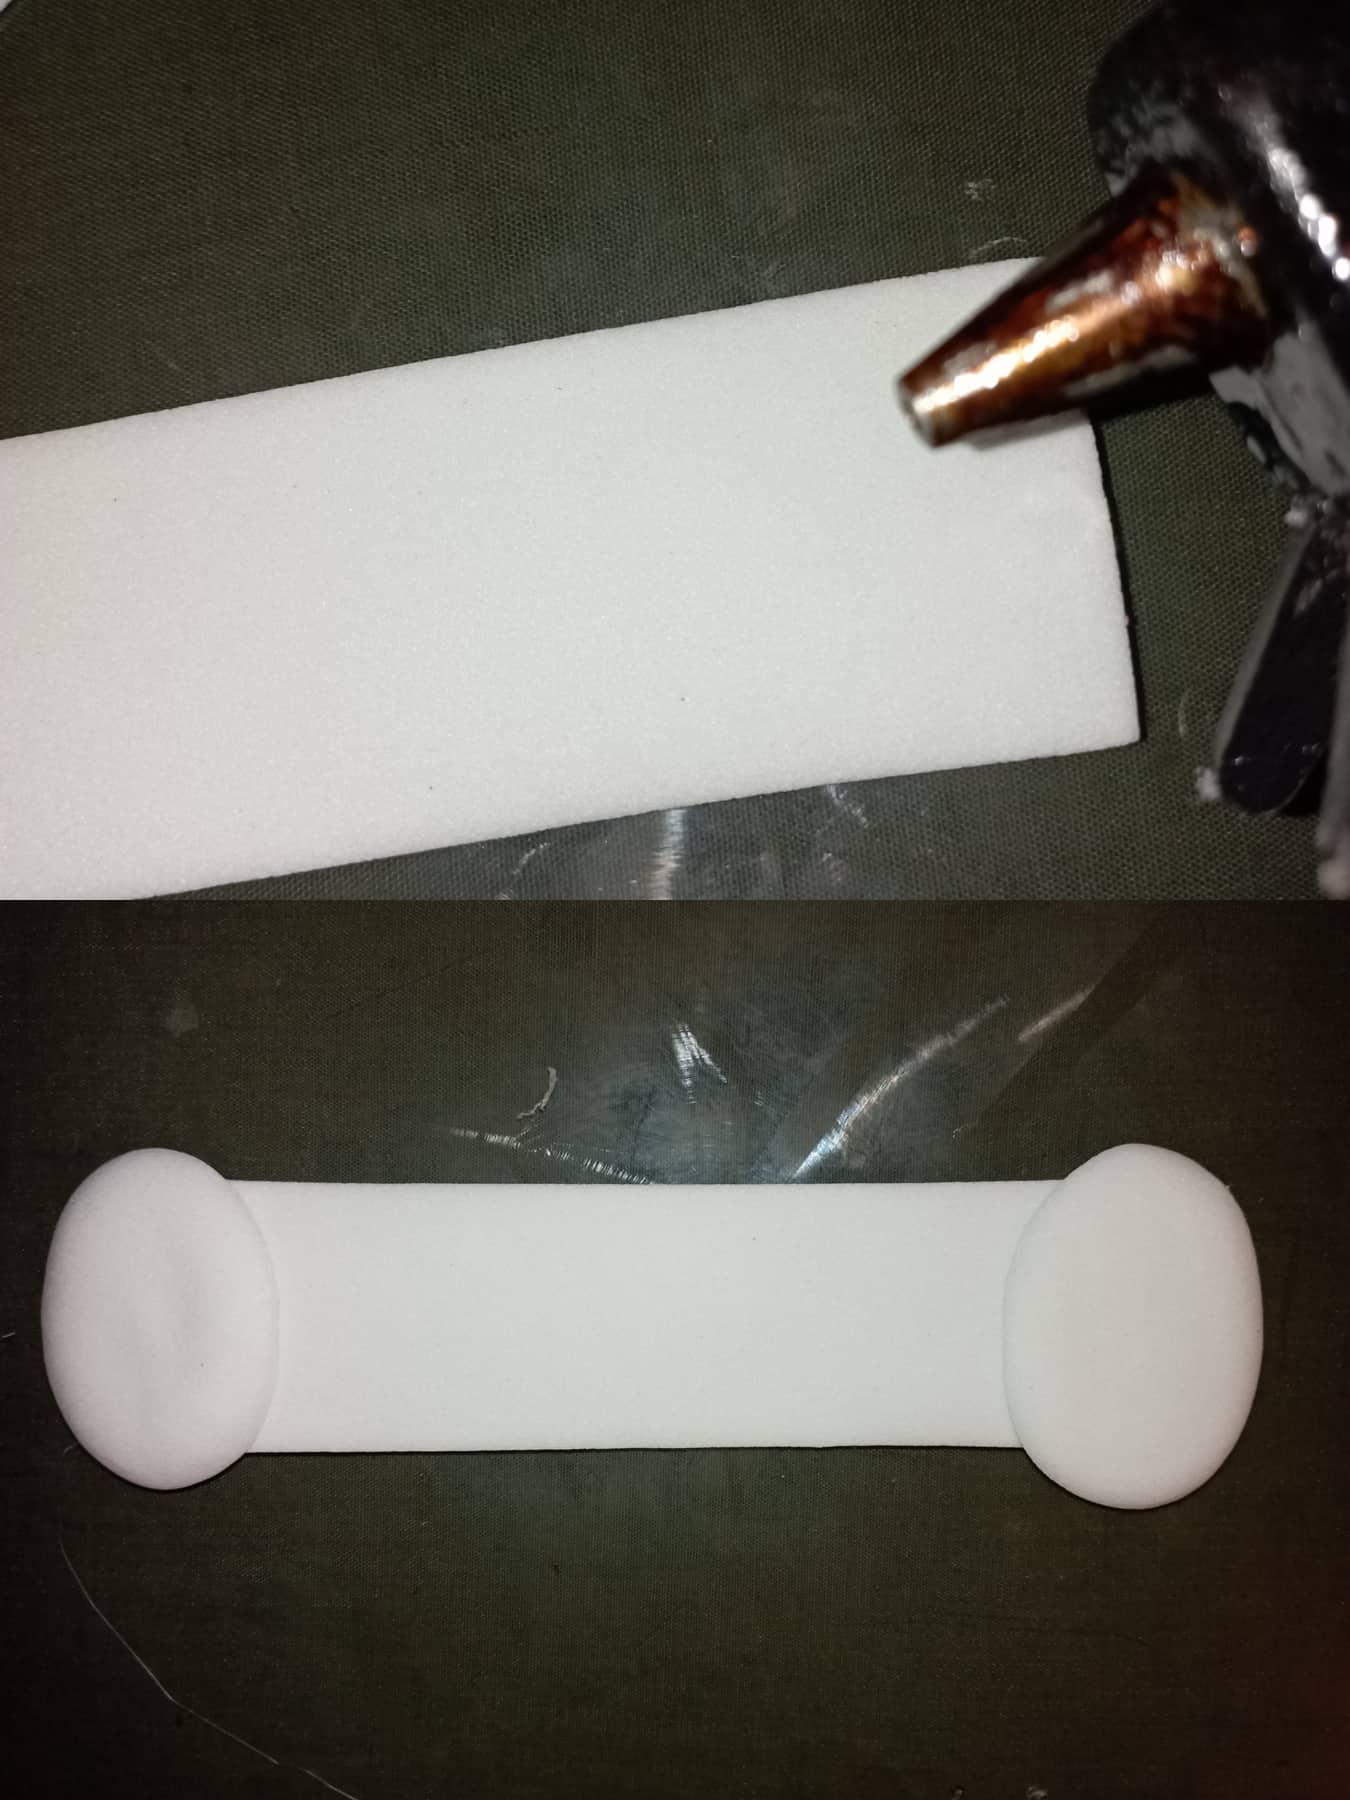
- Con los patrones listos procedi a marcarlos en foami y los recorte como se indica en la foto.
- With the patterns ready, I proceeded to mark them on foami and cut them out as indicated in the photo.
- Pase cada una de las piezas por una plancha caliente para de estar manera moldearlas mas facil.
- Pass each of the pieces through a hot iron to mold them easier.

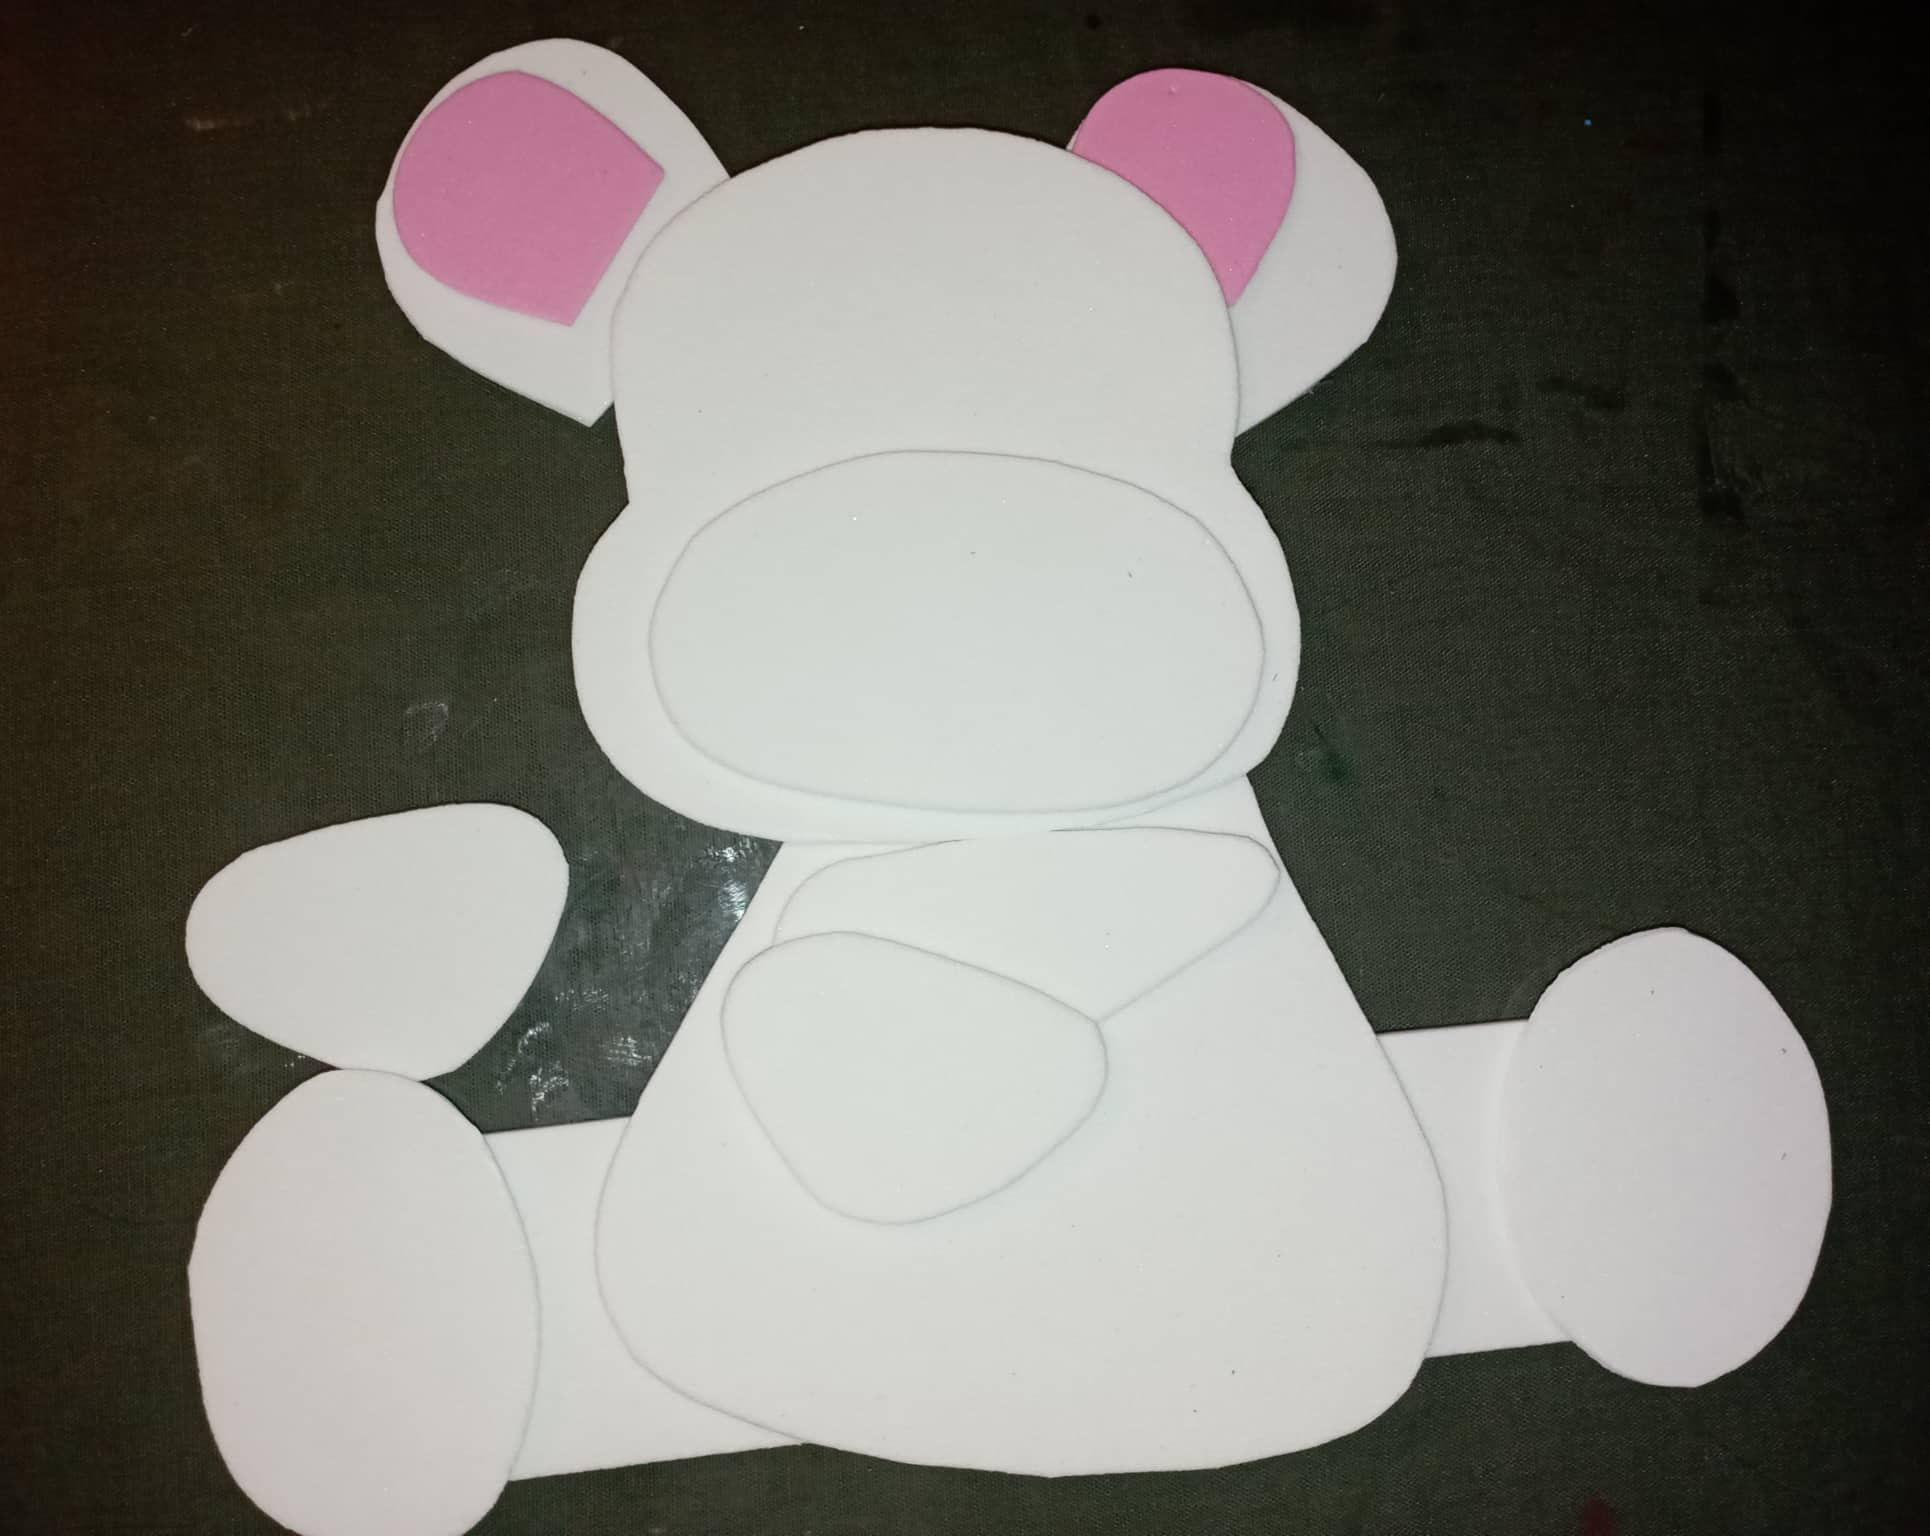
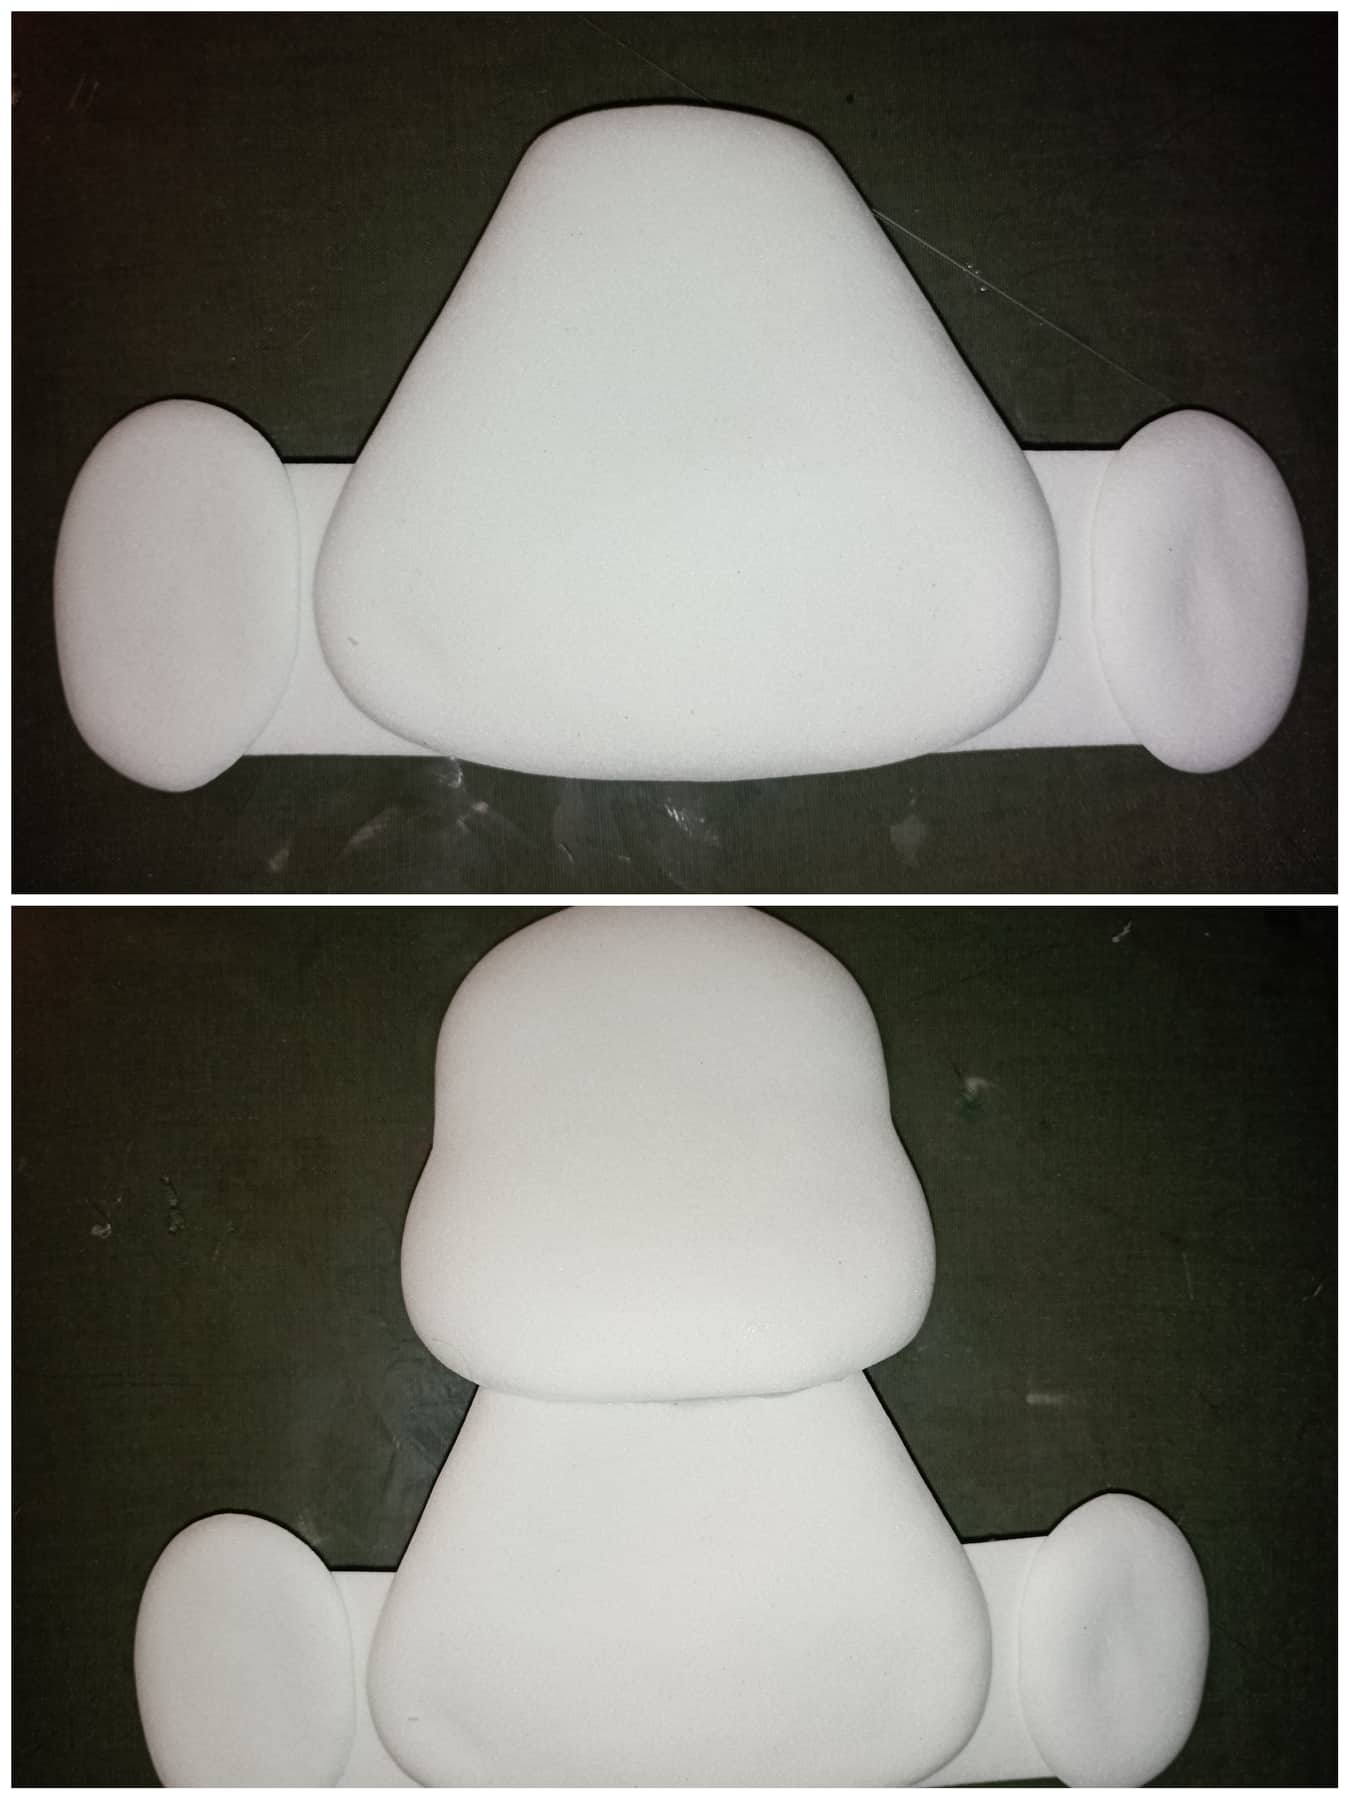
- Con las piezas completamente listas. comence armar el oso, pegue 2 de la figura ovaladas a la figura rectangular, luego en el centro lo que sera el cuerpo y encima la cabeza.
- With the pieces completely ready. start assembling the bear, glue 2 of the oval figure to the rectangular figure, then in the center what will be the body and on top the head.
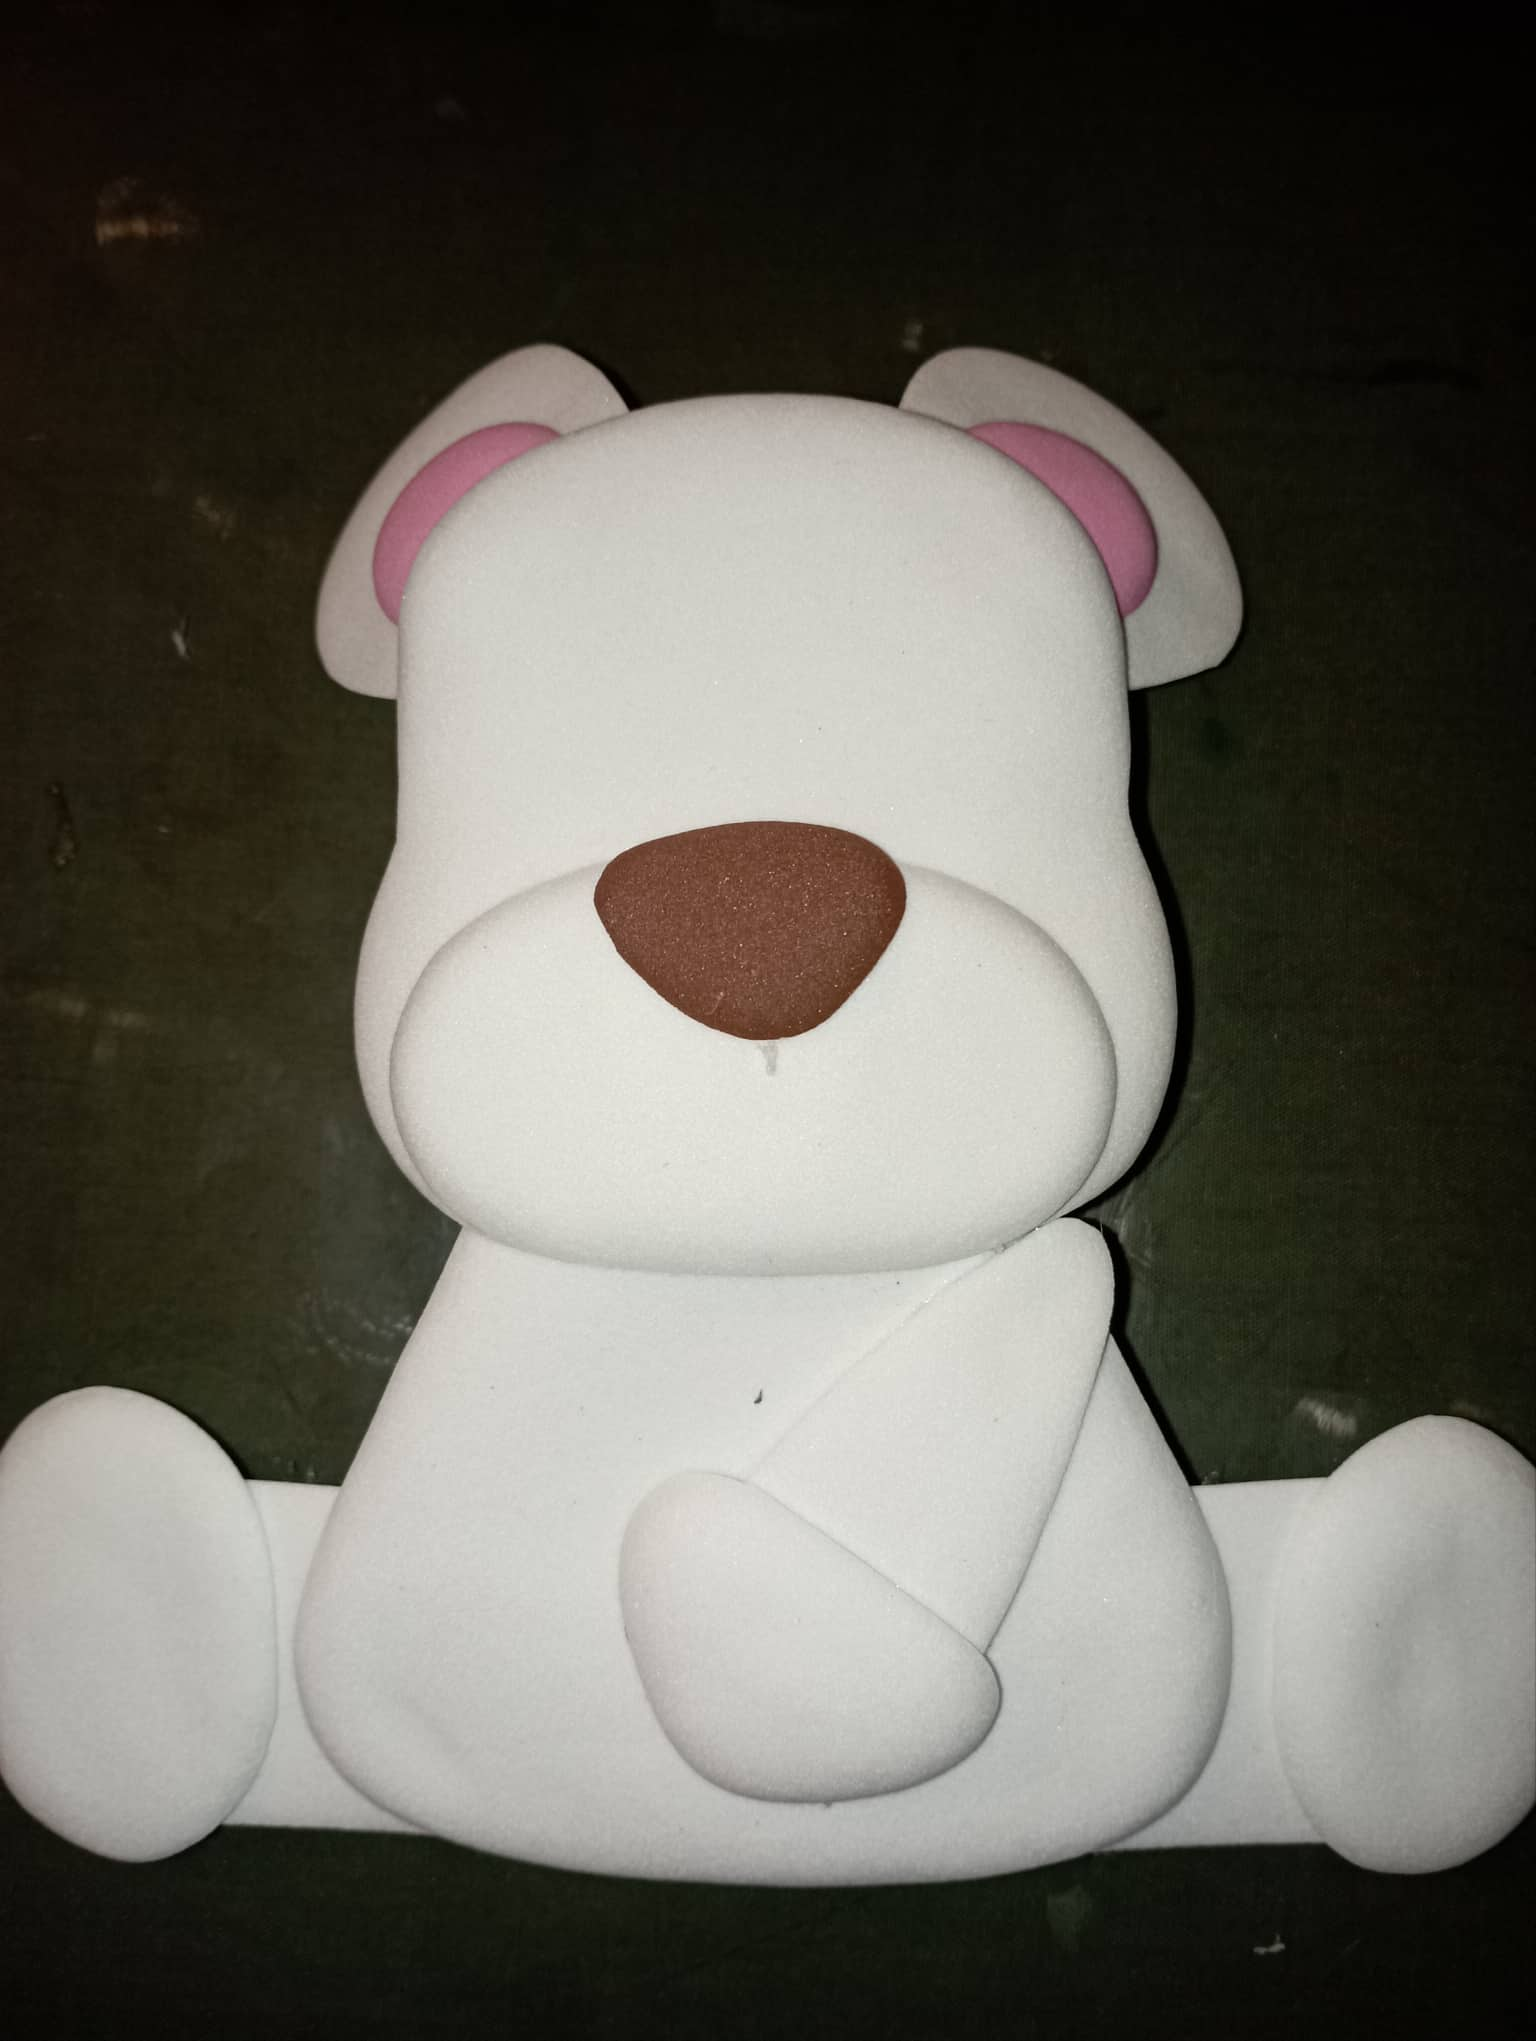
- Luego pegue lo que sera uno de los brazos del oso, el hocico, las orejas y nariz.
- Then glue what will be one of the bear's arms, snout, ears and nose.
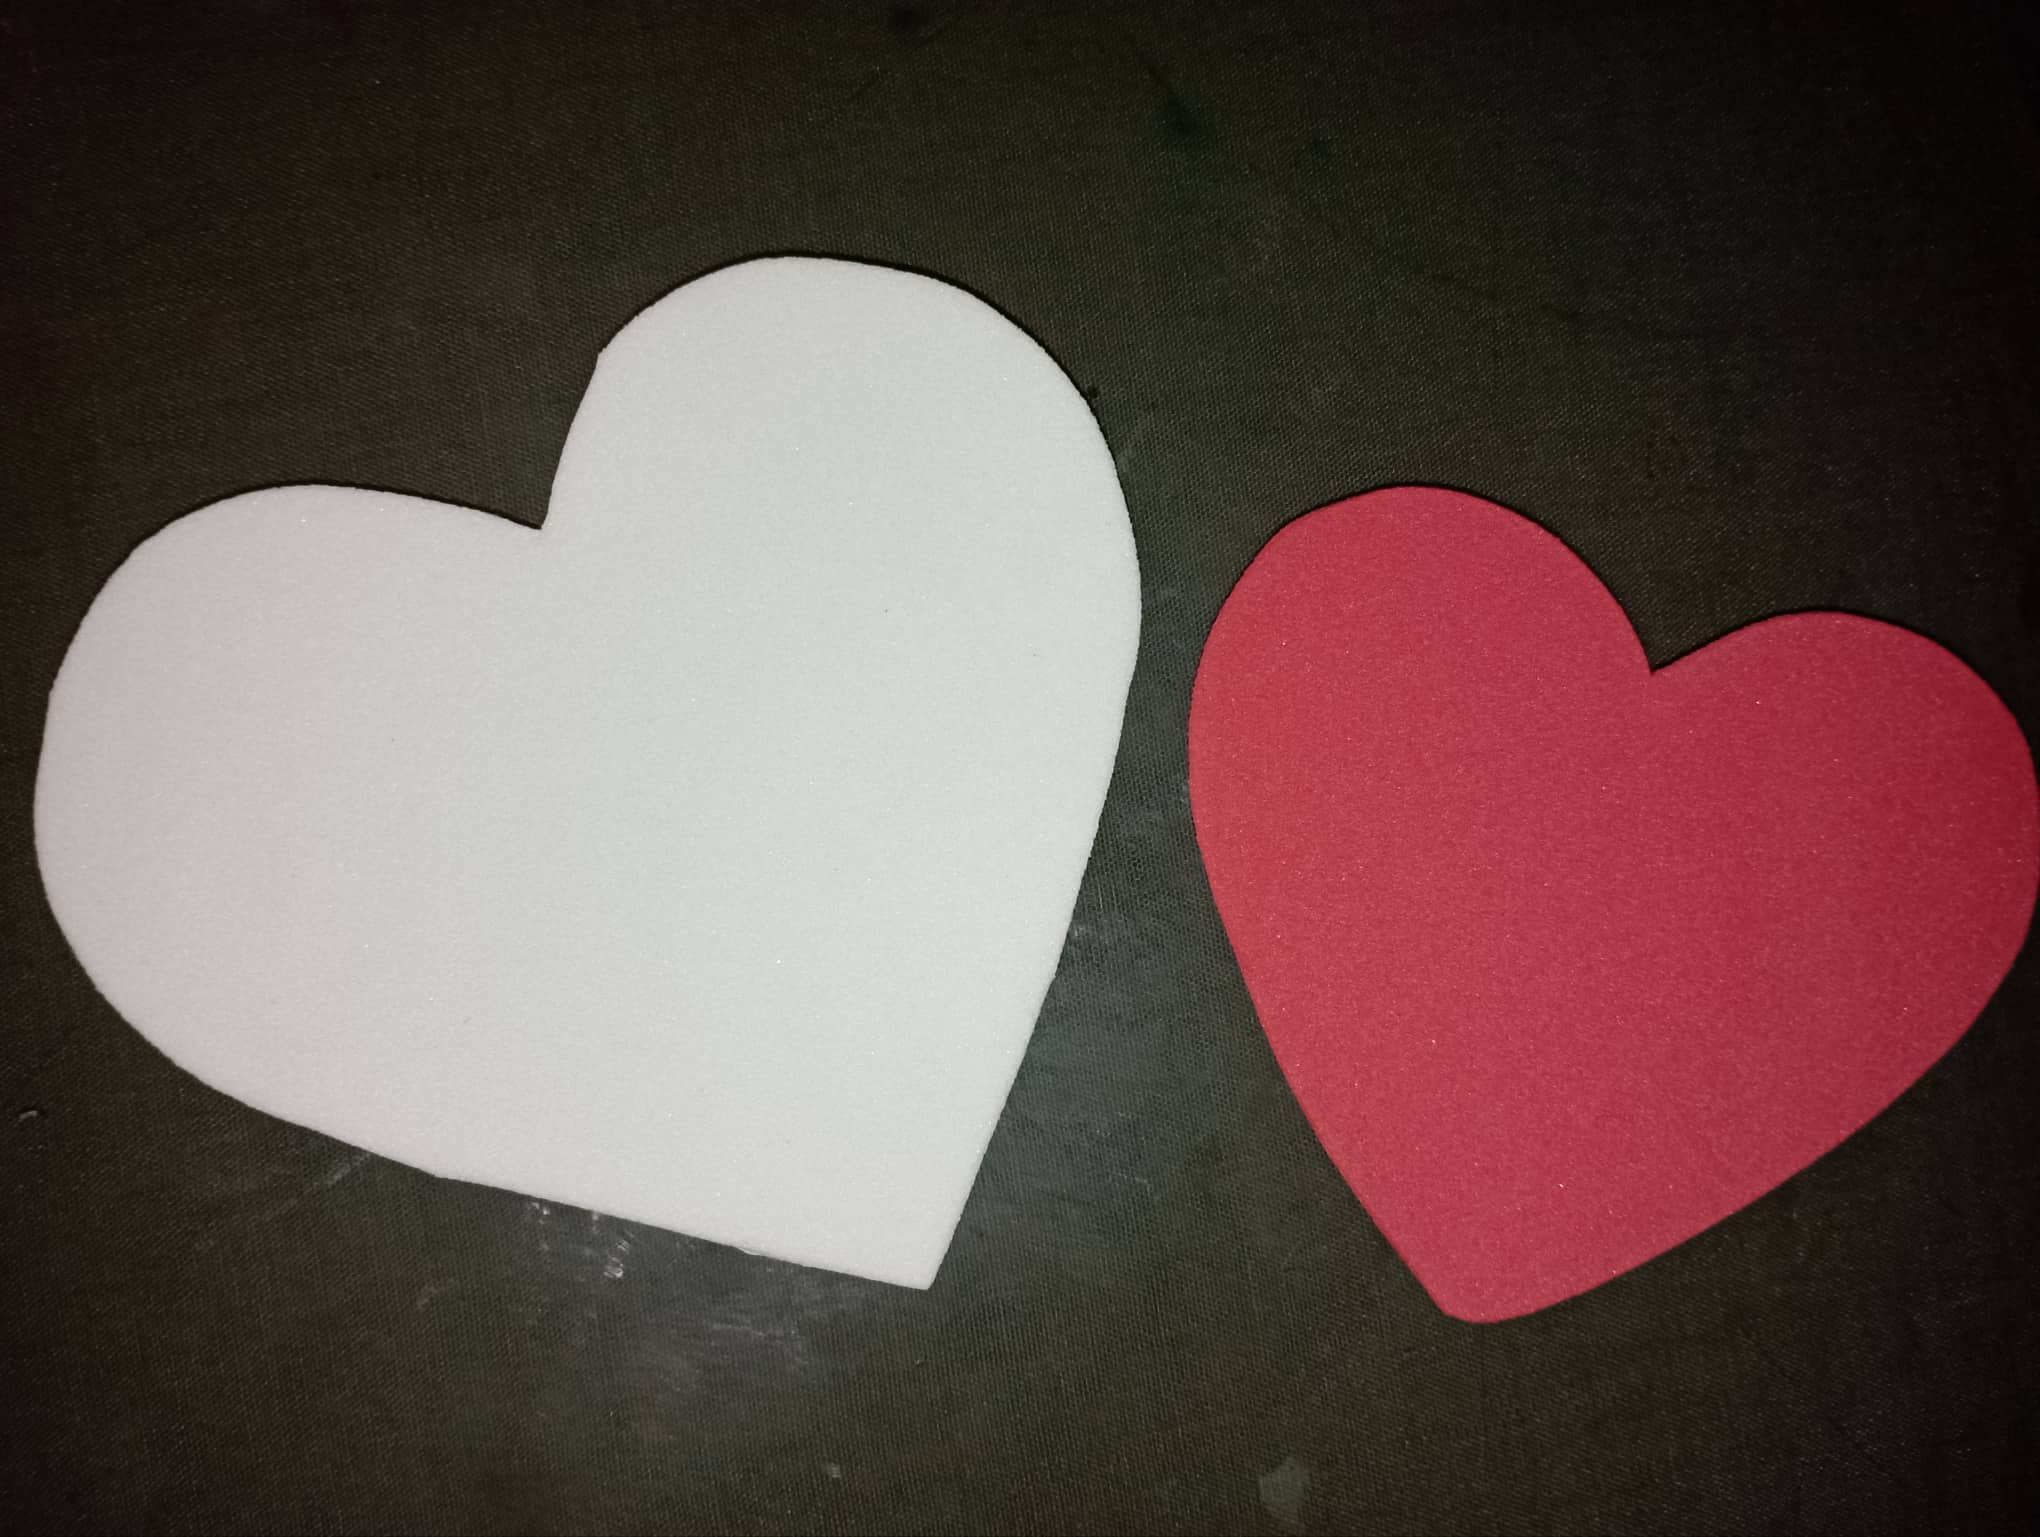
- Luego pegue el corazon al oso. encima del corazon una de las figuras ovaladas, para de estar manera parezca que el oso esta sentado abrazando el corazon.
- Then glue the heart to the bear. above the heart one of the oval figures, so that it looks like the bear is sitting hugging the heart.
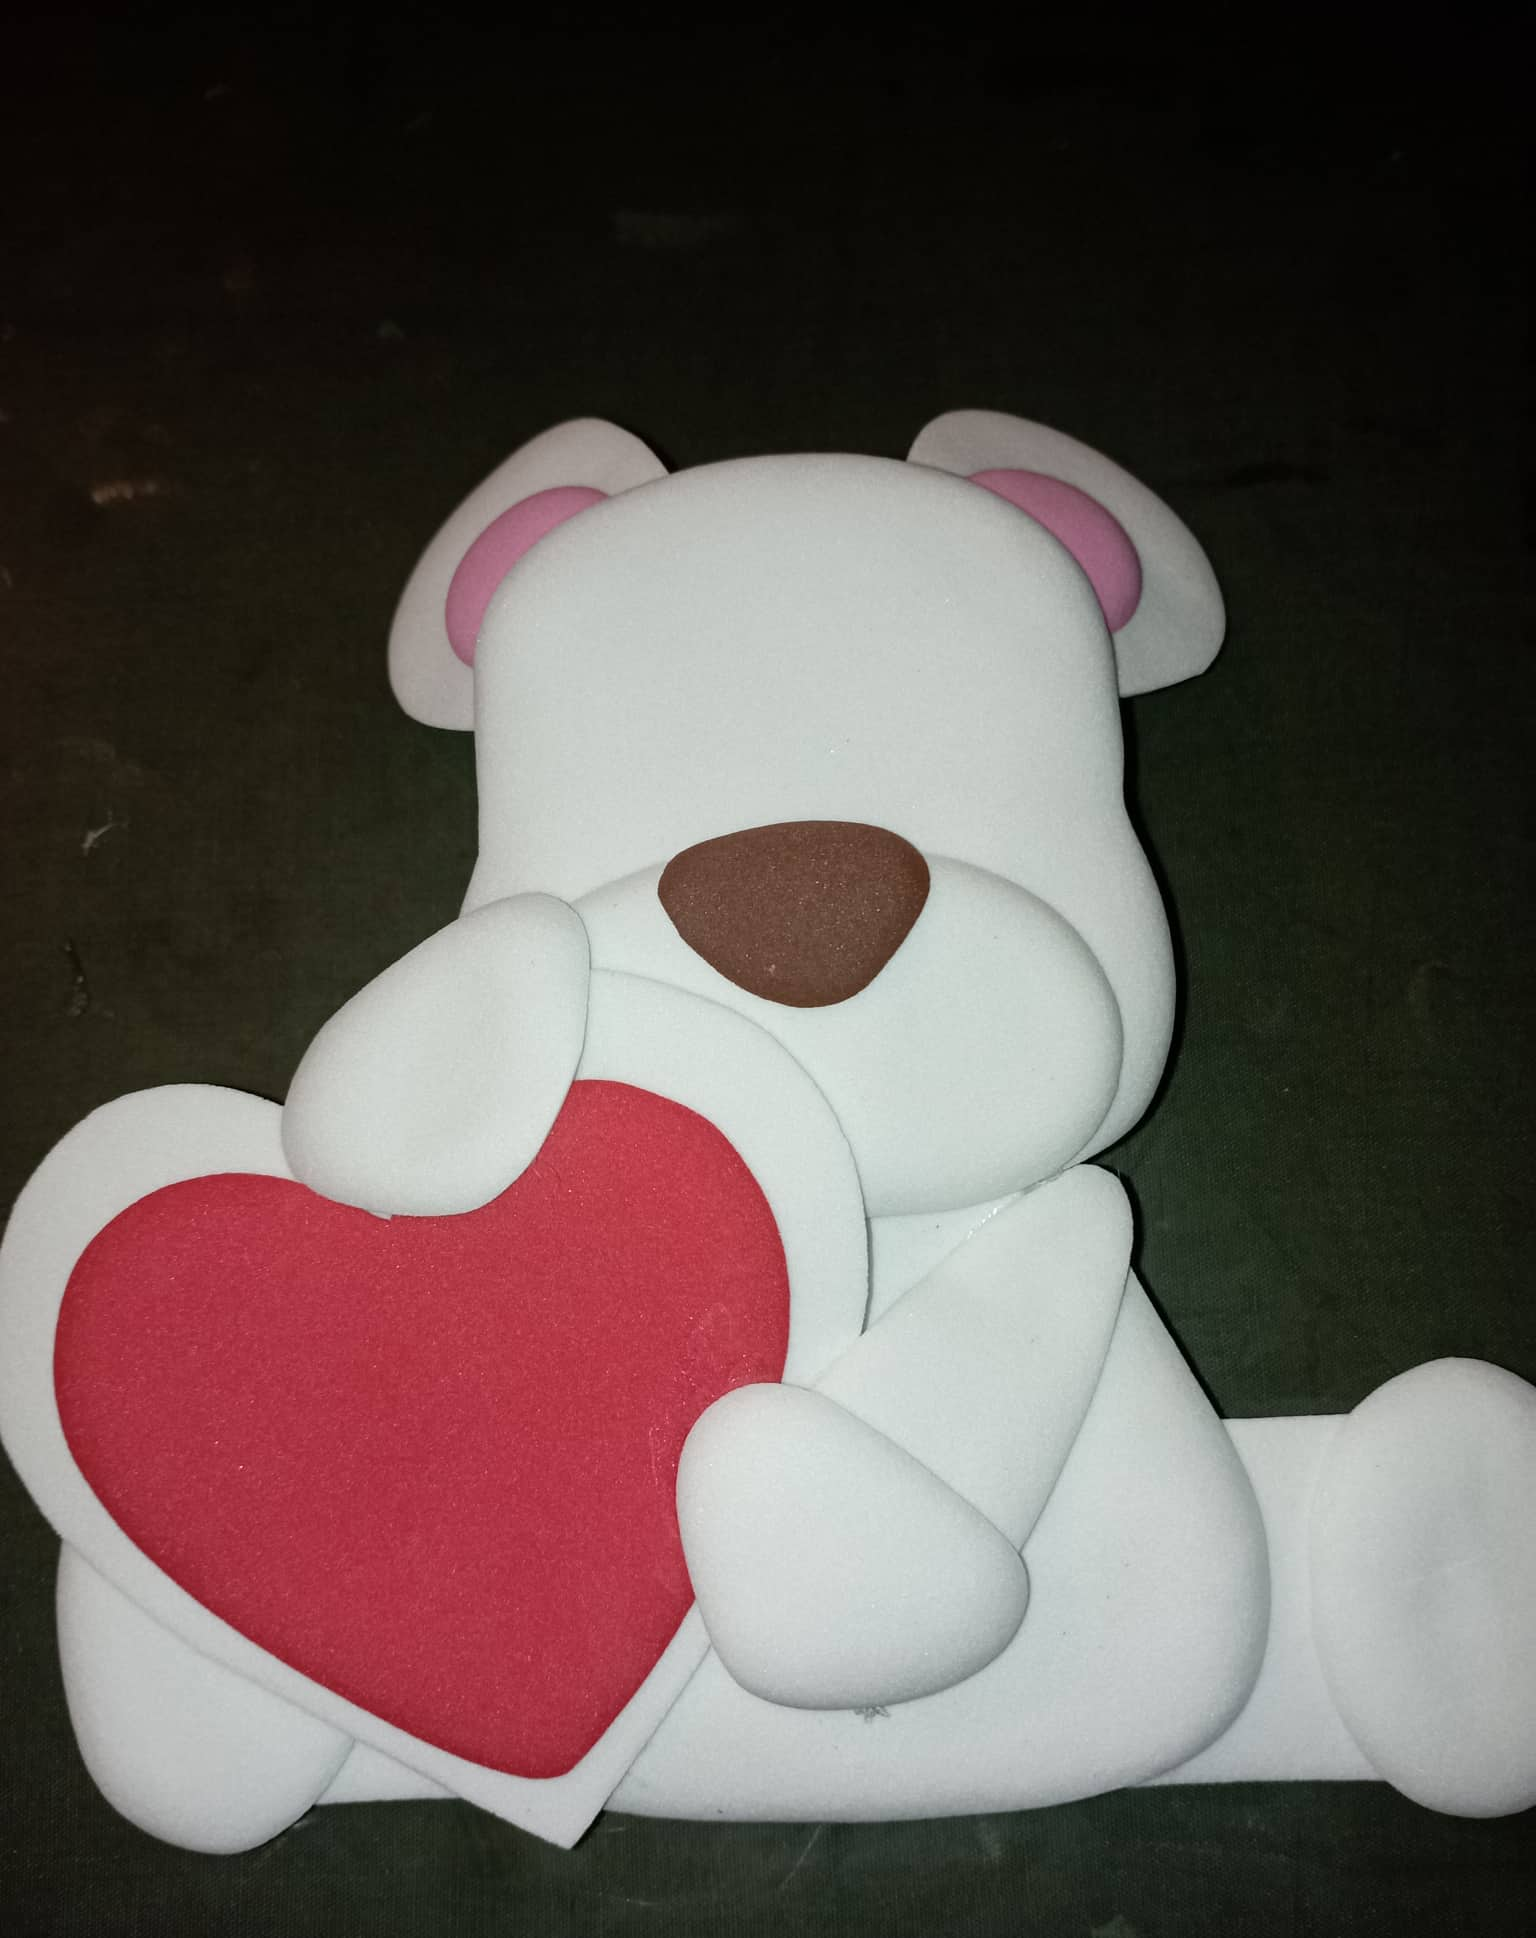
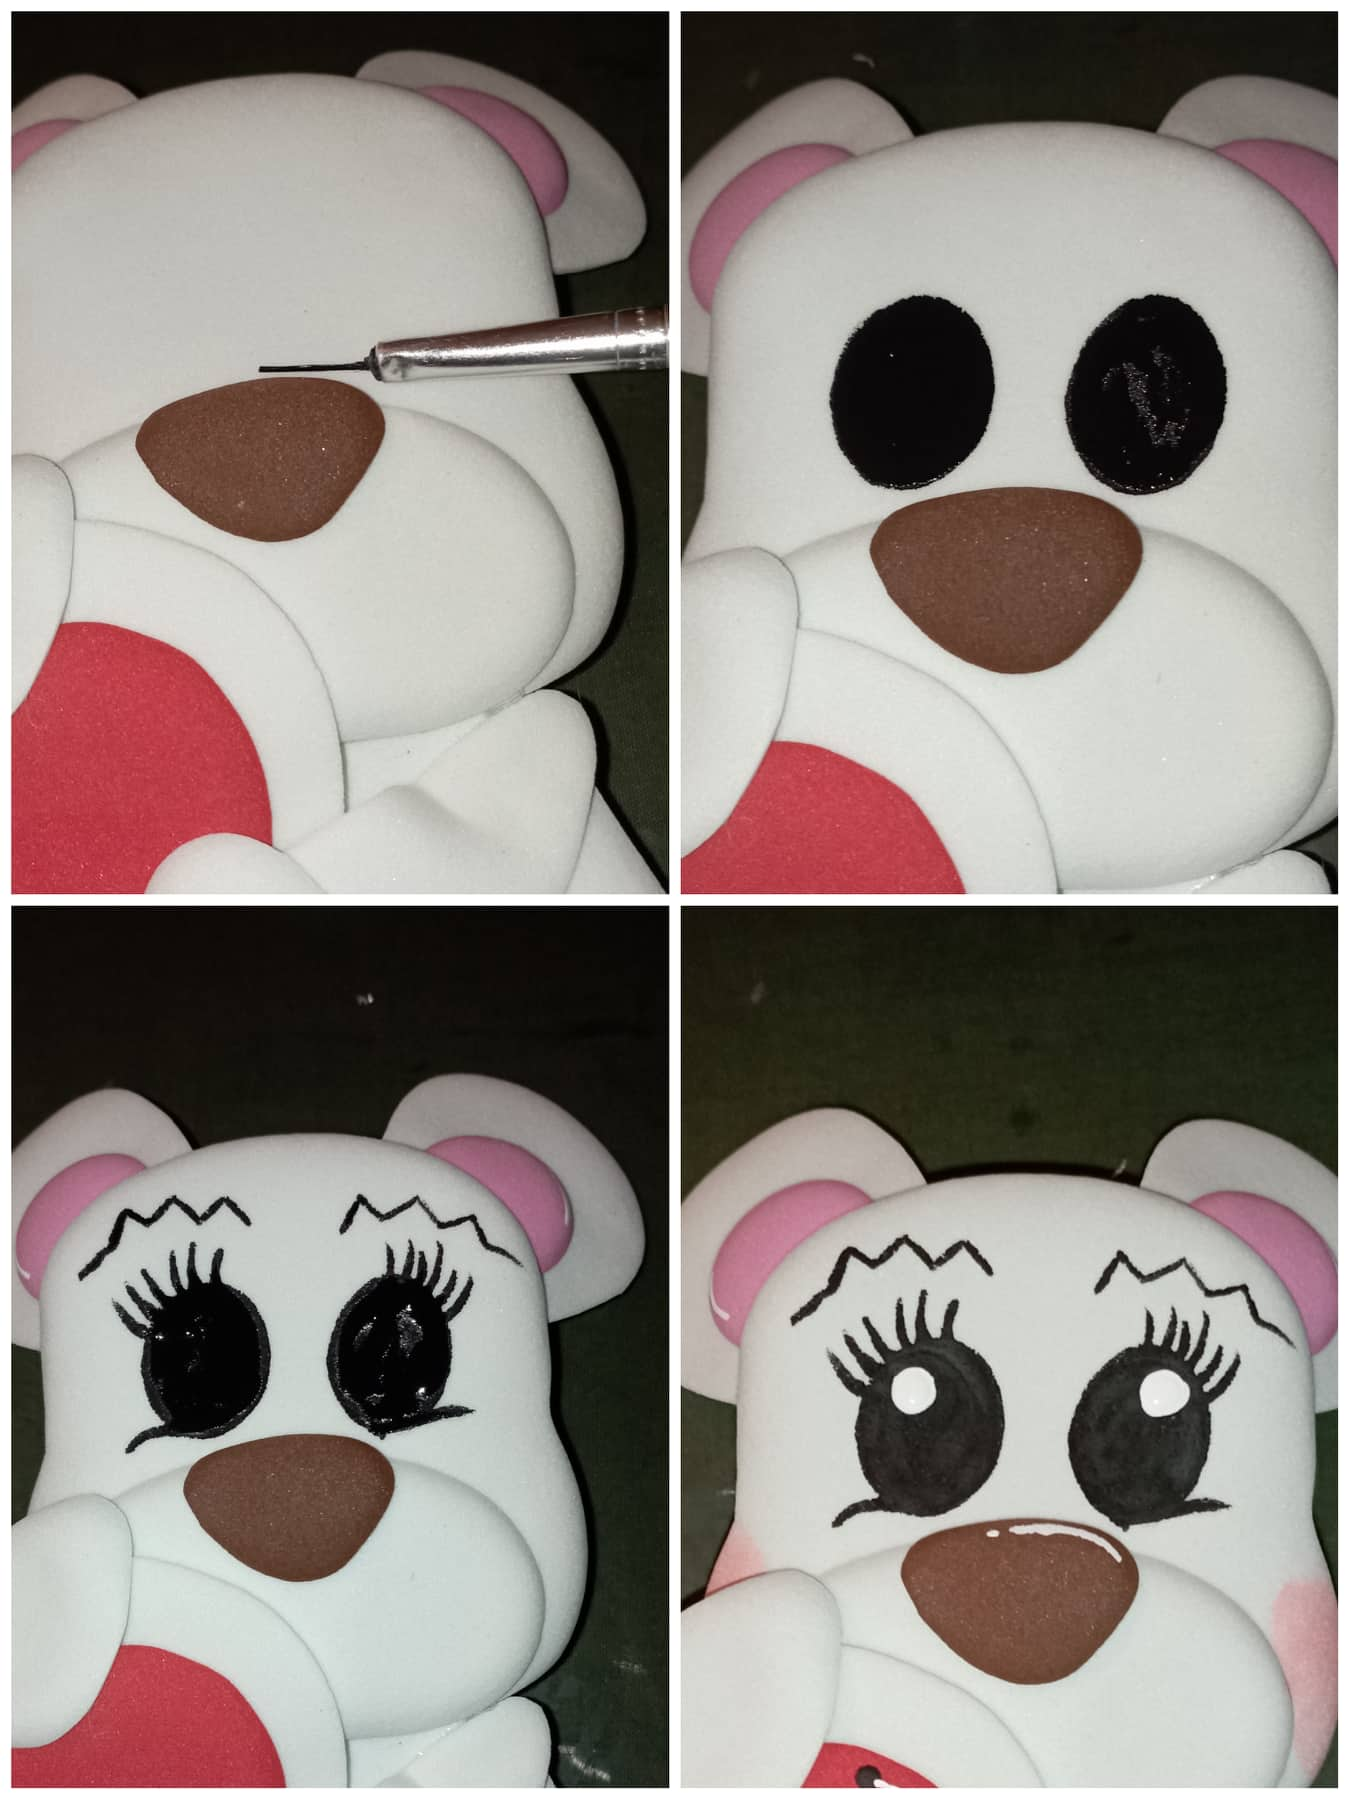
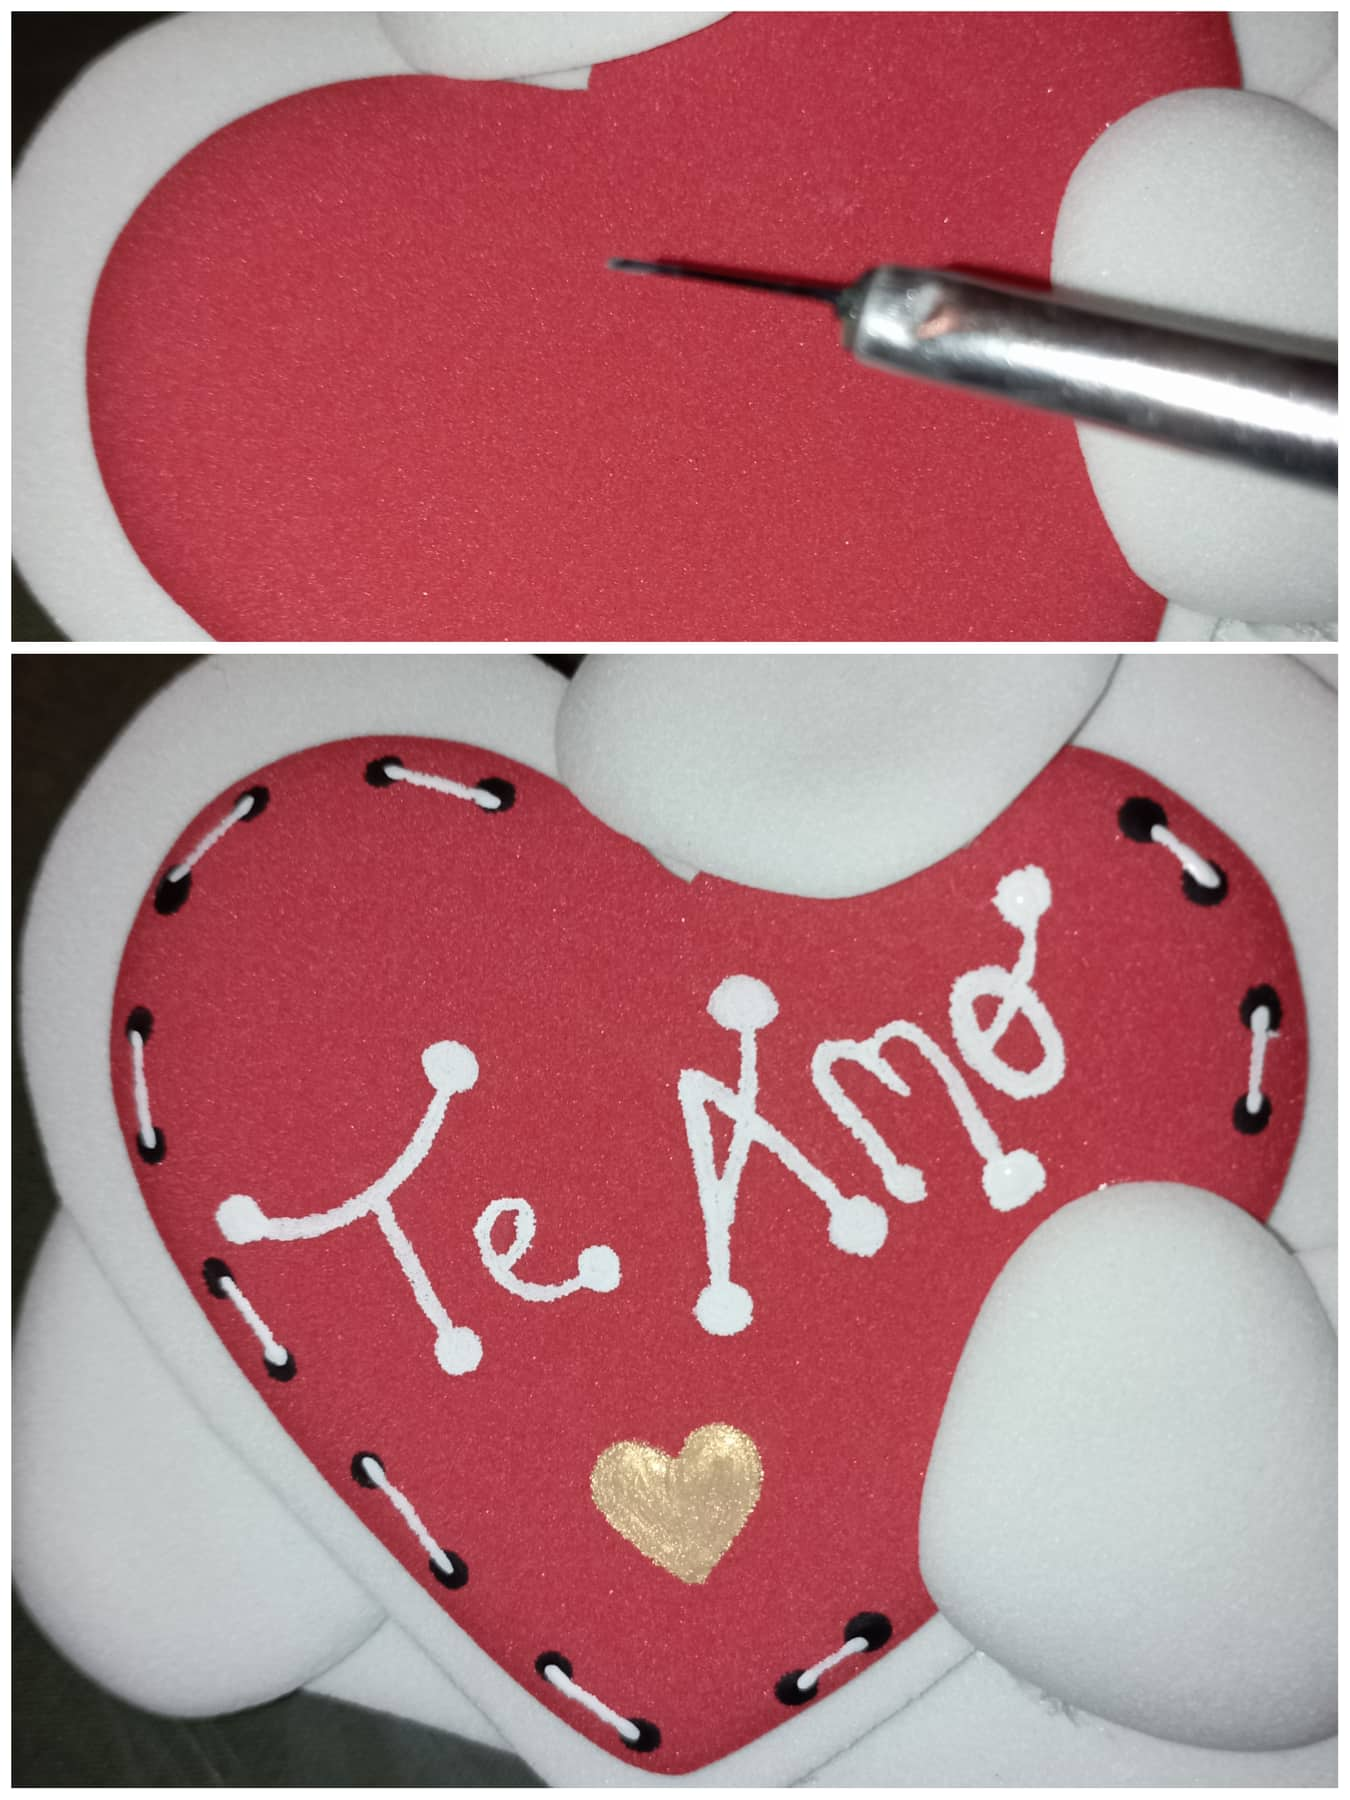
- Luego procedi a pintar los ojos, las cejas al oso. y en el corazon unos puntos y lineas dando la impresion de costura y en el centro un TE AMO.
- Then proceeded to paint the eyes, the eyebrows to the bear. and in the heart some points and lines giving the impression of sewing and in the center an I LOVE YOU.
- Pegue el oso a la lata.
- Glue the bear to the can.
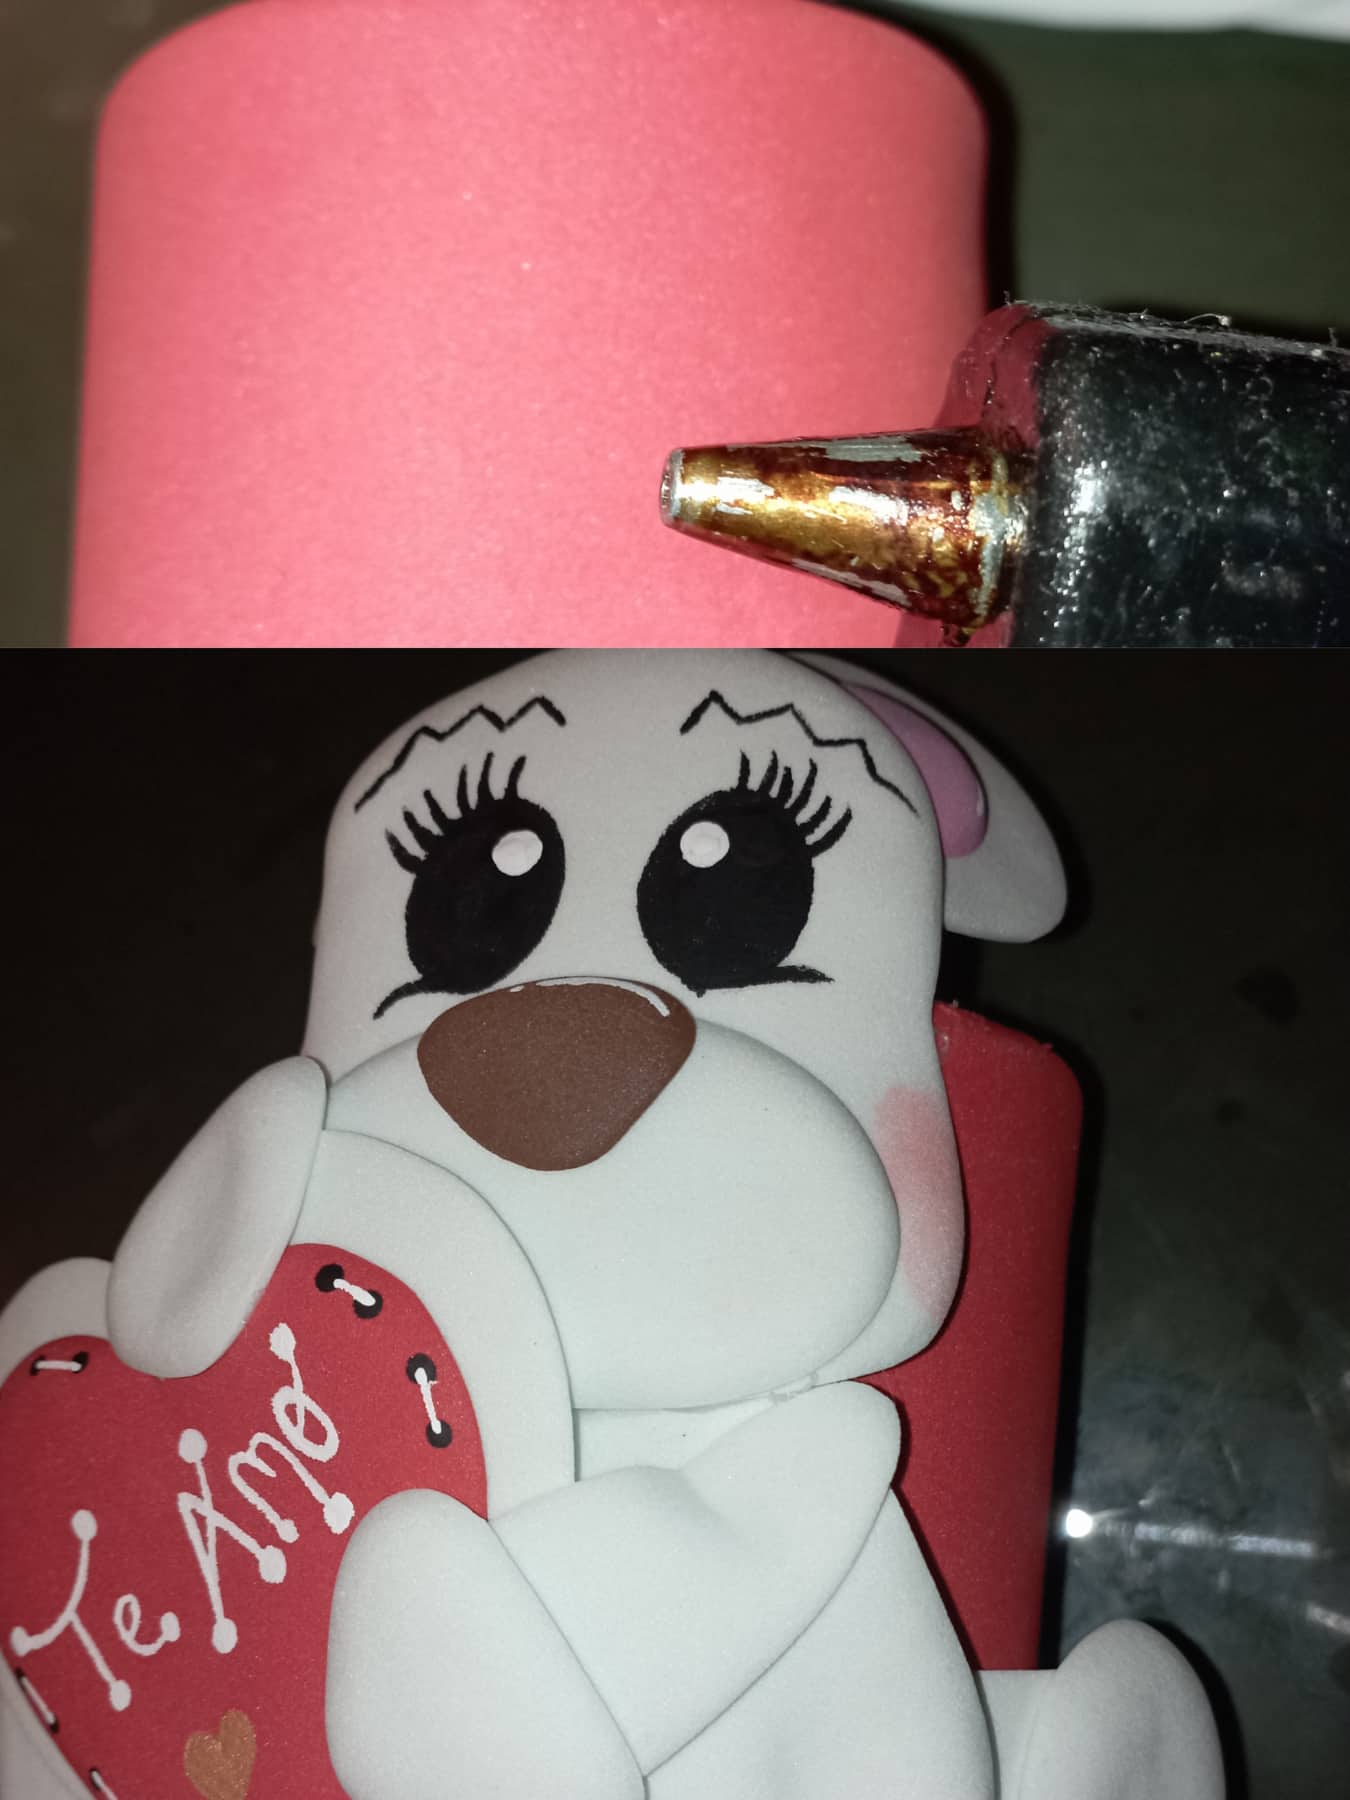
- Luego Por todo le borde pegue el papel celofan.
- Then around the edge paste the cellophane paper.
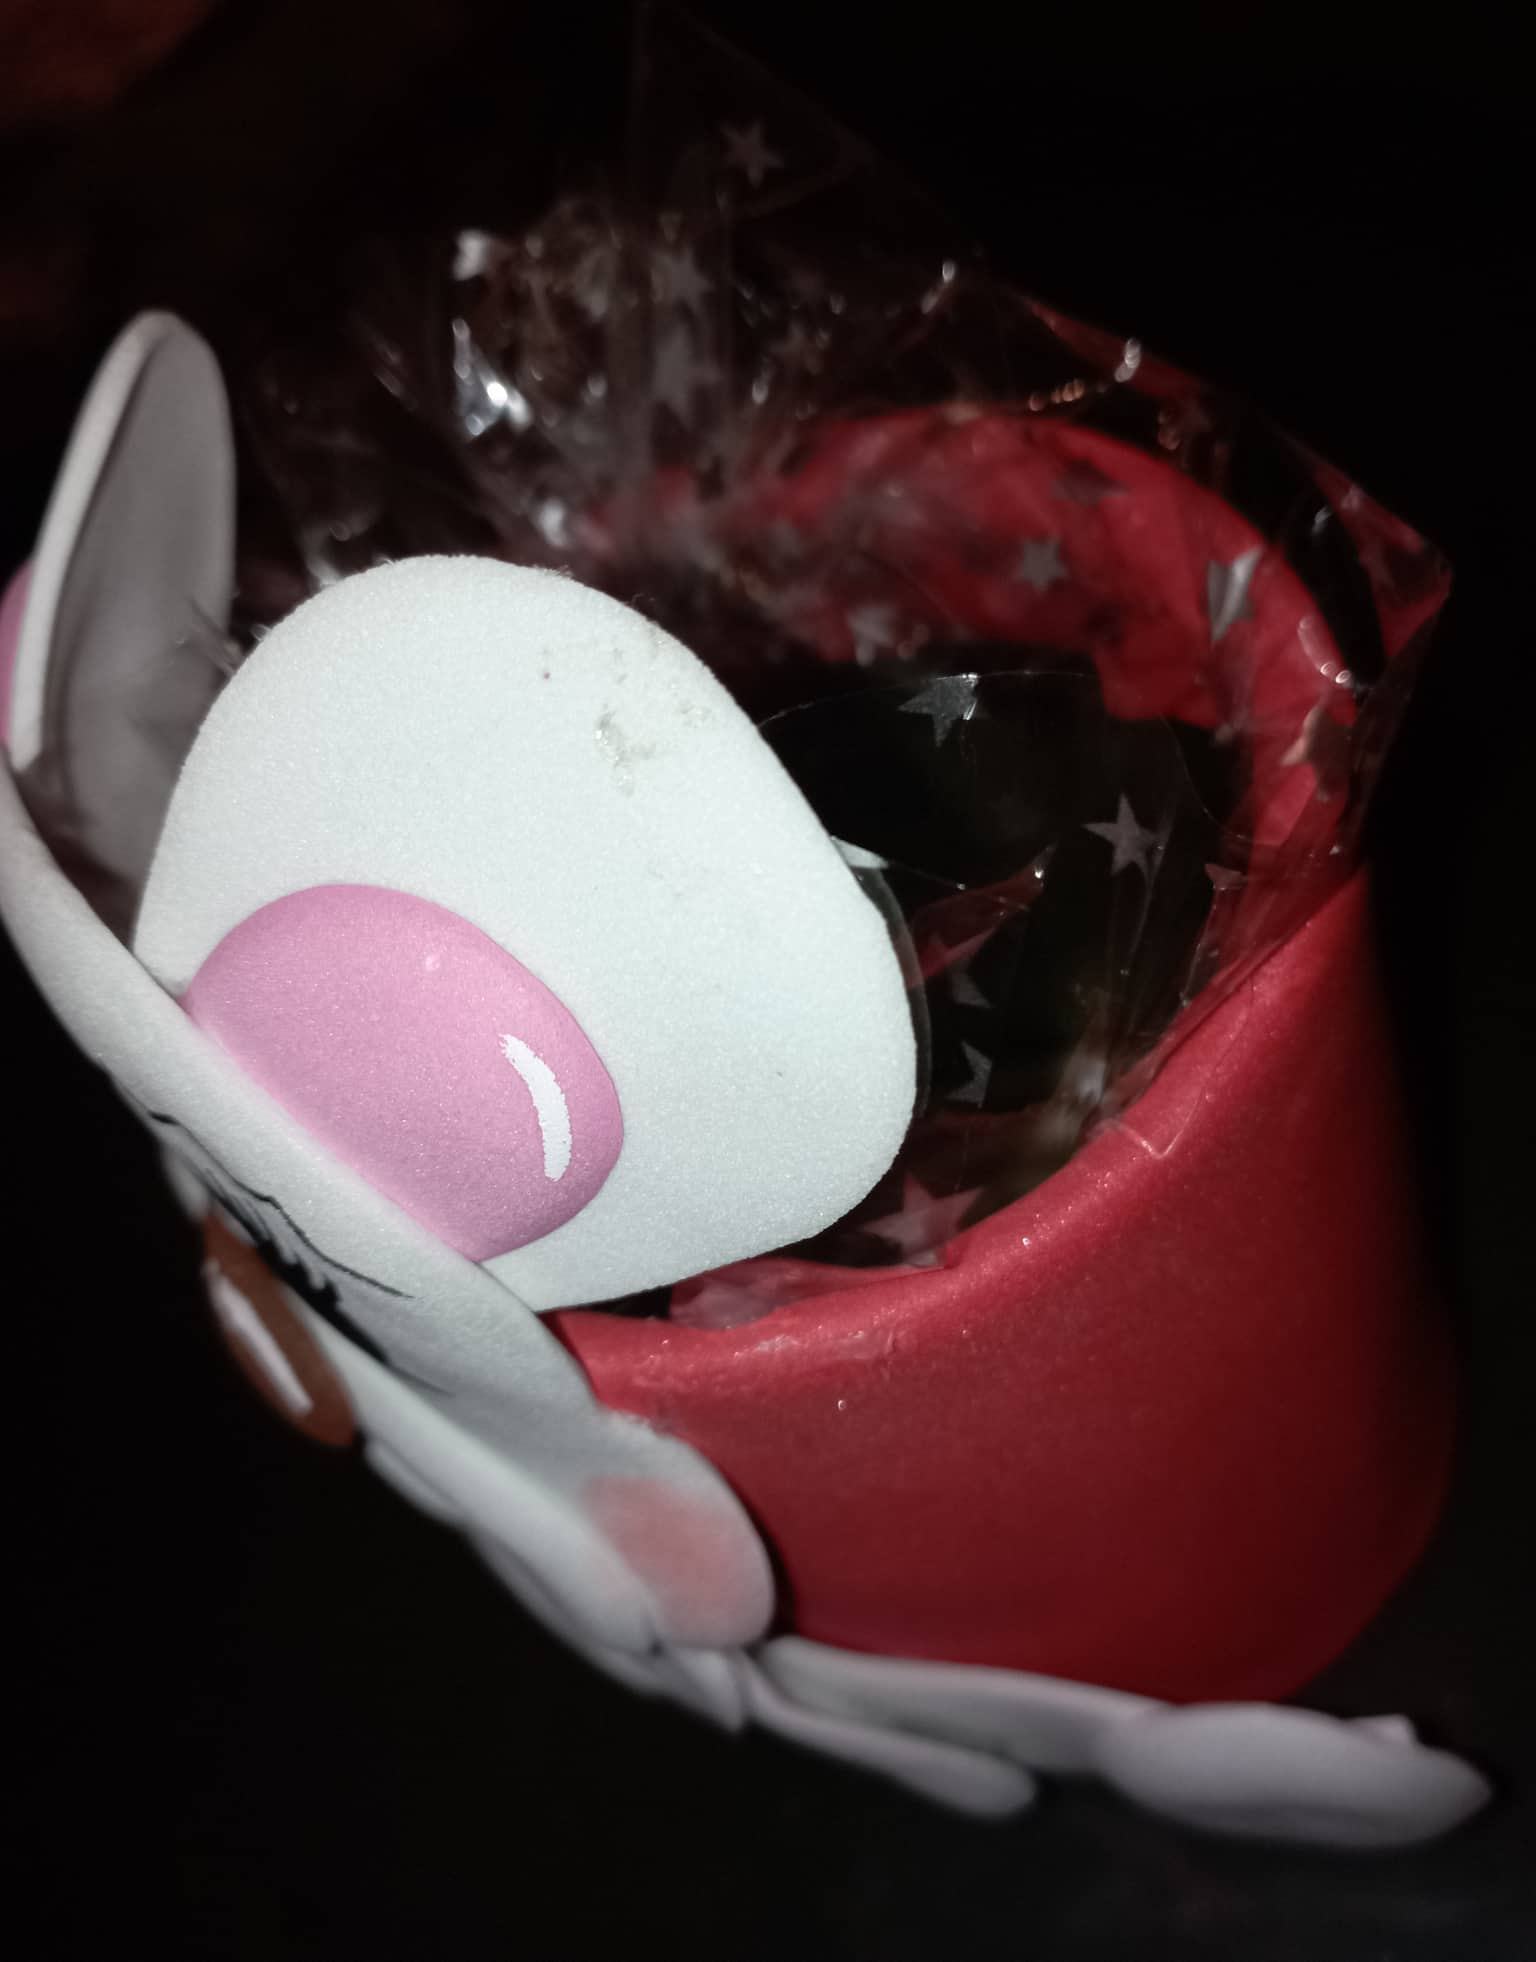
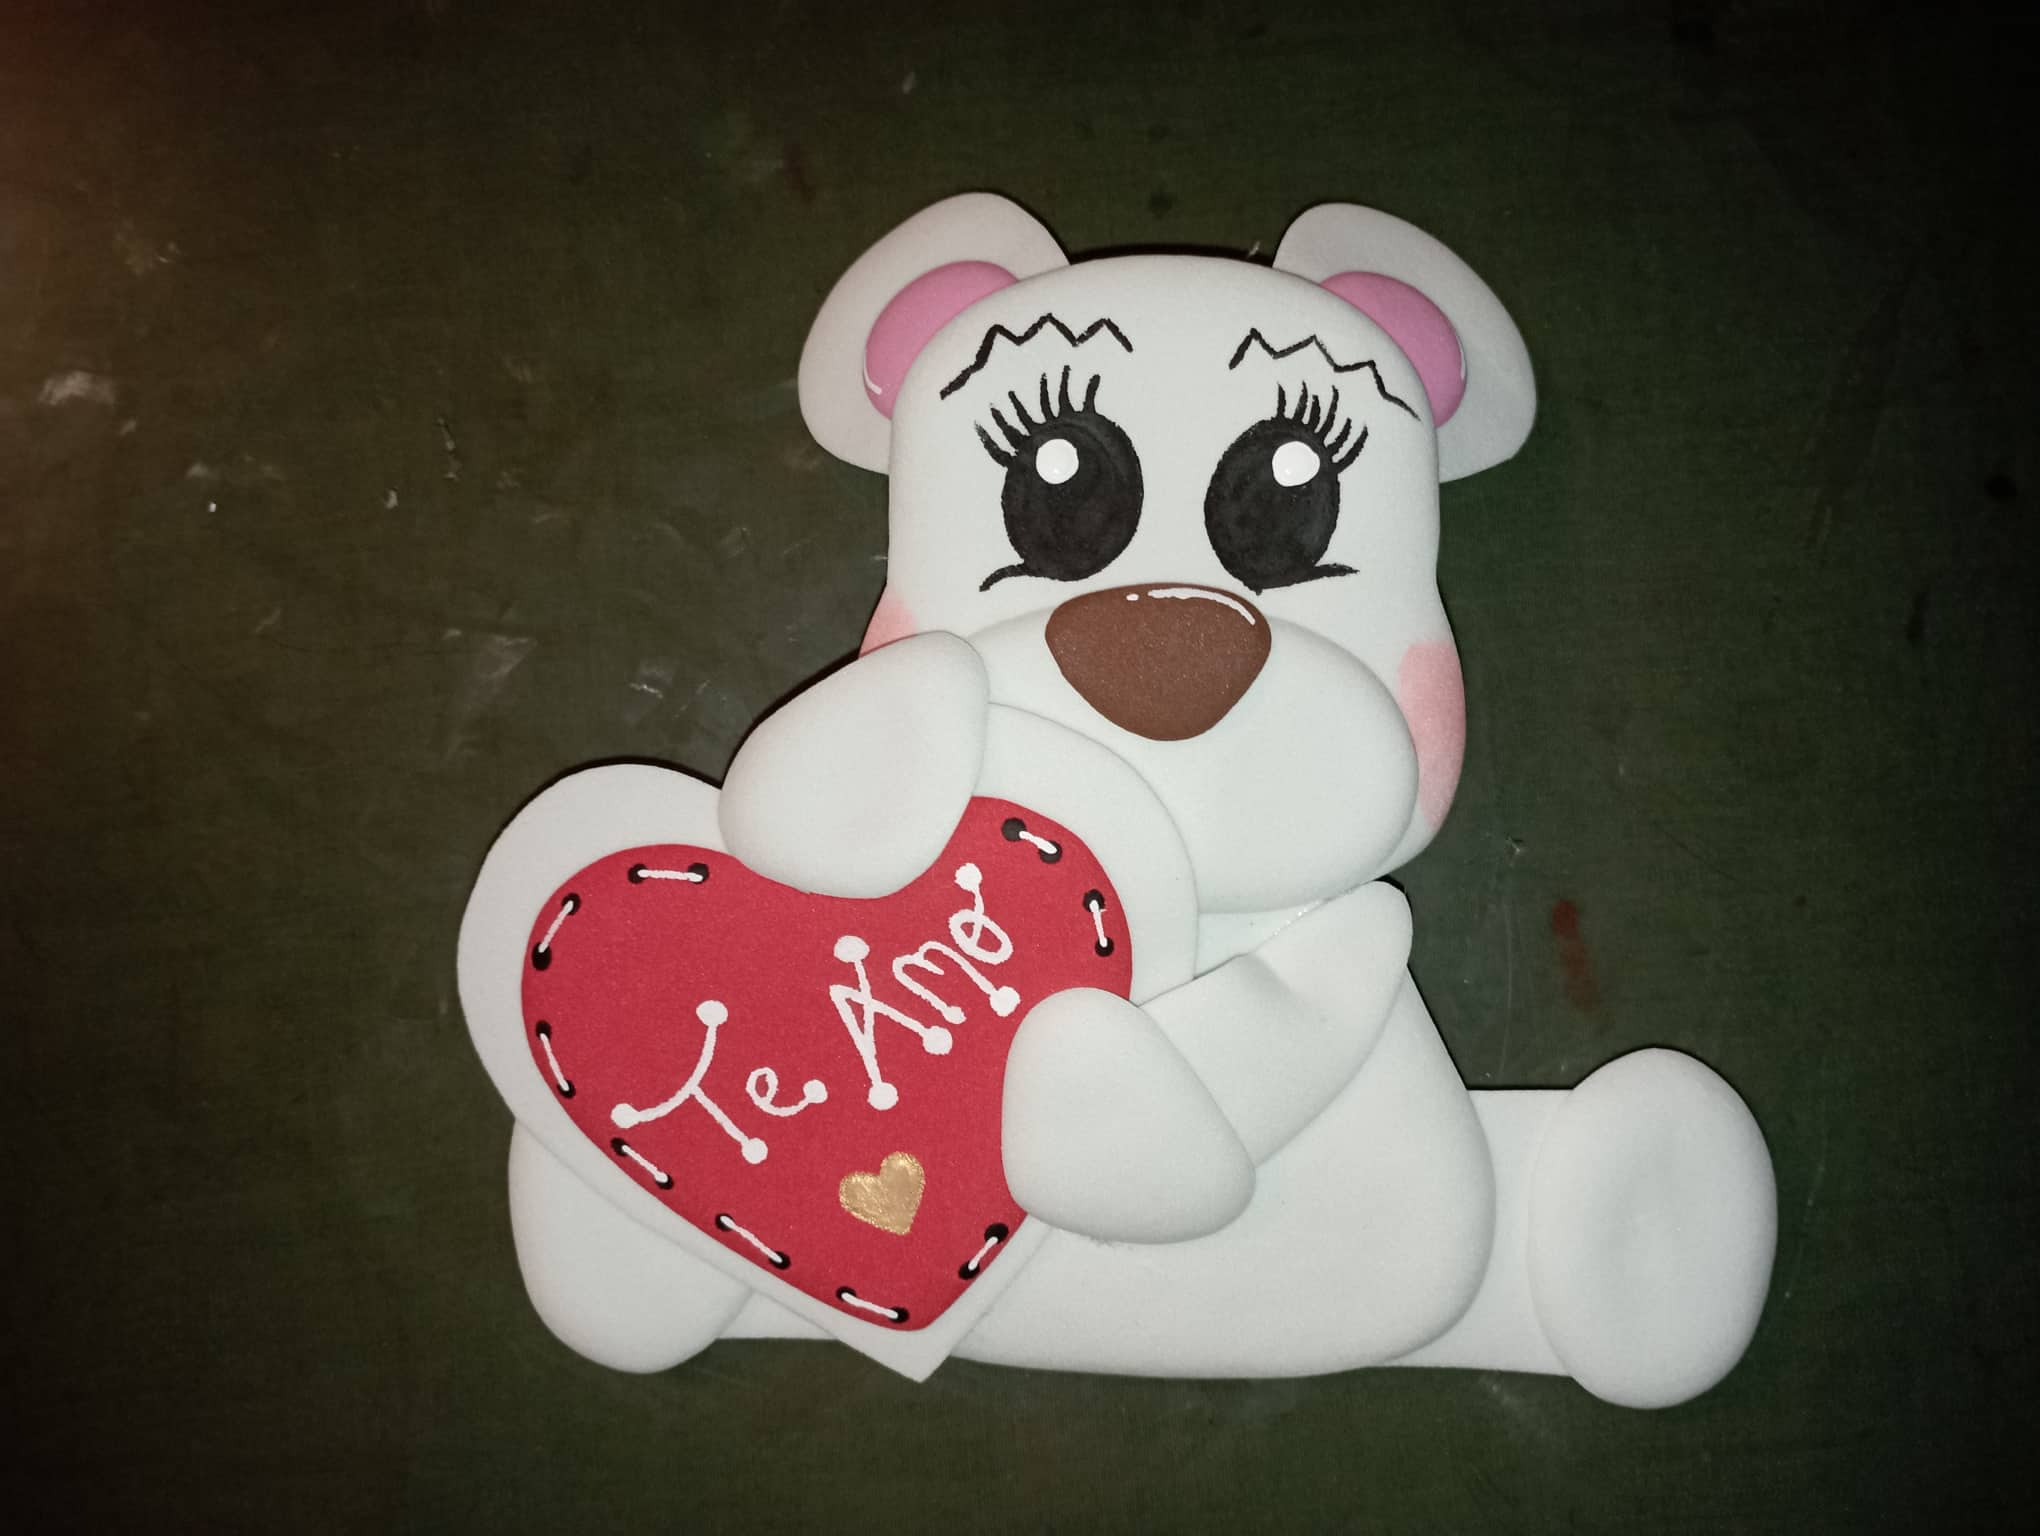
El resultado final de este lindo osito blanco.
The end result of this cute little white bear.
Gracias por acompañarme hasta el final.... Hasta una nueva publicacion.
Thank you for accompanying me until the end.... Until a new publication.
Dios los bendiga.
God bless you.
Las Fotografias son de mi autoria capturadas desde mi telefono inteligente Redmi 8a.
The Photographs are of my authorship captured from my smartphone Redmi 8a.
Maravillosa ésta creación, me gusta la expresión del osito es muy adorable. Un accesorio genial, hermoso trabajo de pintura. Bendiciones y mucho éxito para ti 🌹
Thank you for sharing this amazing post on HIVE!
Your content got selected by our fellow curator @rezoanulvibes & you just received a little thank you via an upvote from our non-profit curation initiative!
You will be featured in one of our recurring curation compilations and on our pinterest boards! Both are aiming to offer you a stage to widen your audience within and outside of the DIY scene of hive.
Join the official DIYHub community on HIVE and show us more of your amazing work and feel free to connect with us and other DIYers via our discord server: https://discord.gg/mY5uCfQ !
If you want to support our goal to motivate other DIY/art/music/homesteading/... creators just delegate to us and earn 100% of your curation rewards!
Stay creative & hive on!