Happy day beautiful family, today I want to share with you a beautiful decorative ornament, ideal for decorating as a centerpiece or other space at home, easy to make and with useful material.

Español:
Materiales:
- Foami colores varios.
- Cartulina corrugada verde.
- 2 tapas de mantequilla.
- La mitad de una botella plástica pequeña, la parte inferior ya recortada.
- Regla.
-Silicon en barra. - Lápiz.
- Tijera.
- 1 bola de desodorante.
English:
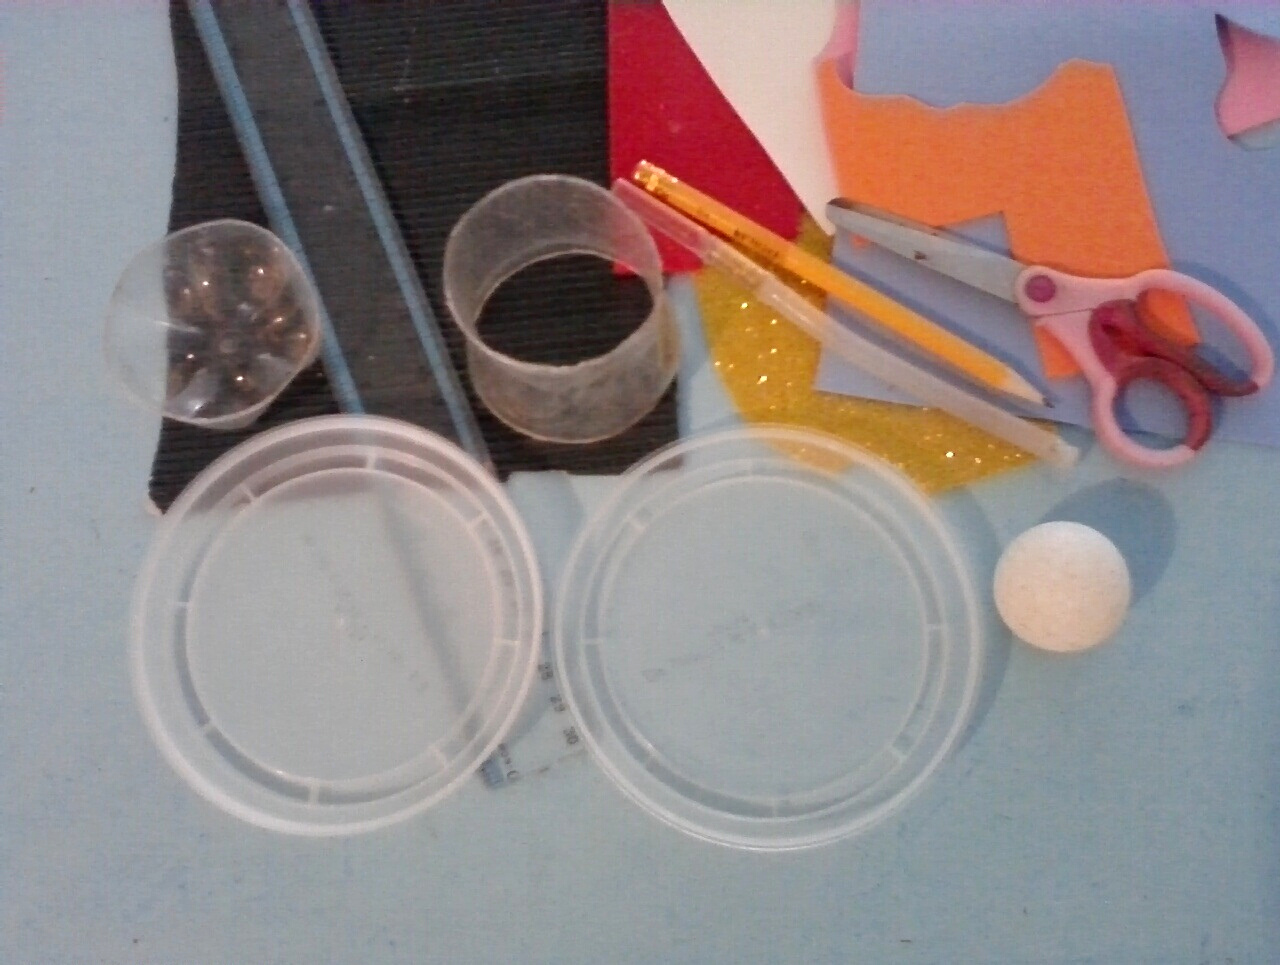
Materials:
- Foami in various colors.
- Green corrugated cardboard.
- 2 butter caps.
- Half of a small plastic bottle, the bottom part already cut out.
- Ruler.
-Silicone stick. - Pencil.
- Scissors.
- 1 deodorant ball
Español:
Paso: 1
- Marco y recorto la cartulina corrugada con una medida de (14cm x 8cm) en (2) mitad, luego enrollo en forma de tubo, después pegamos con silicon la base de nuestro adorno con el trozo de la botella plástica, colocando la tapa encima.
English:
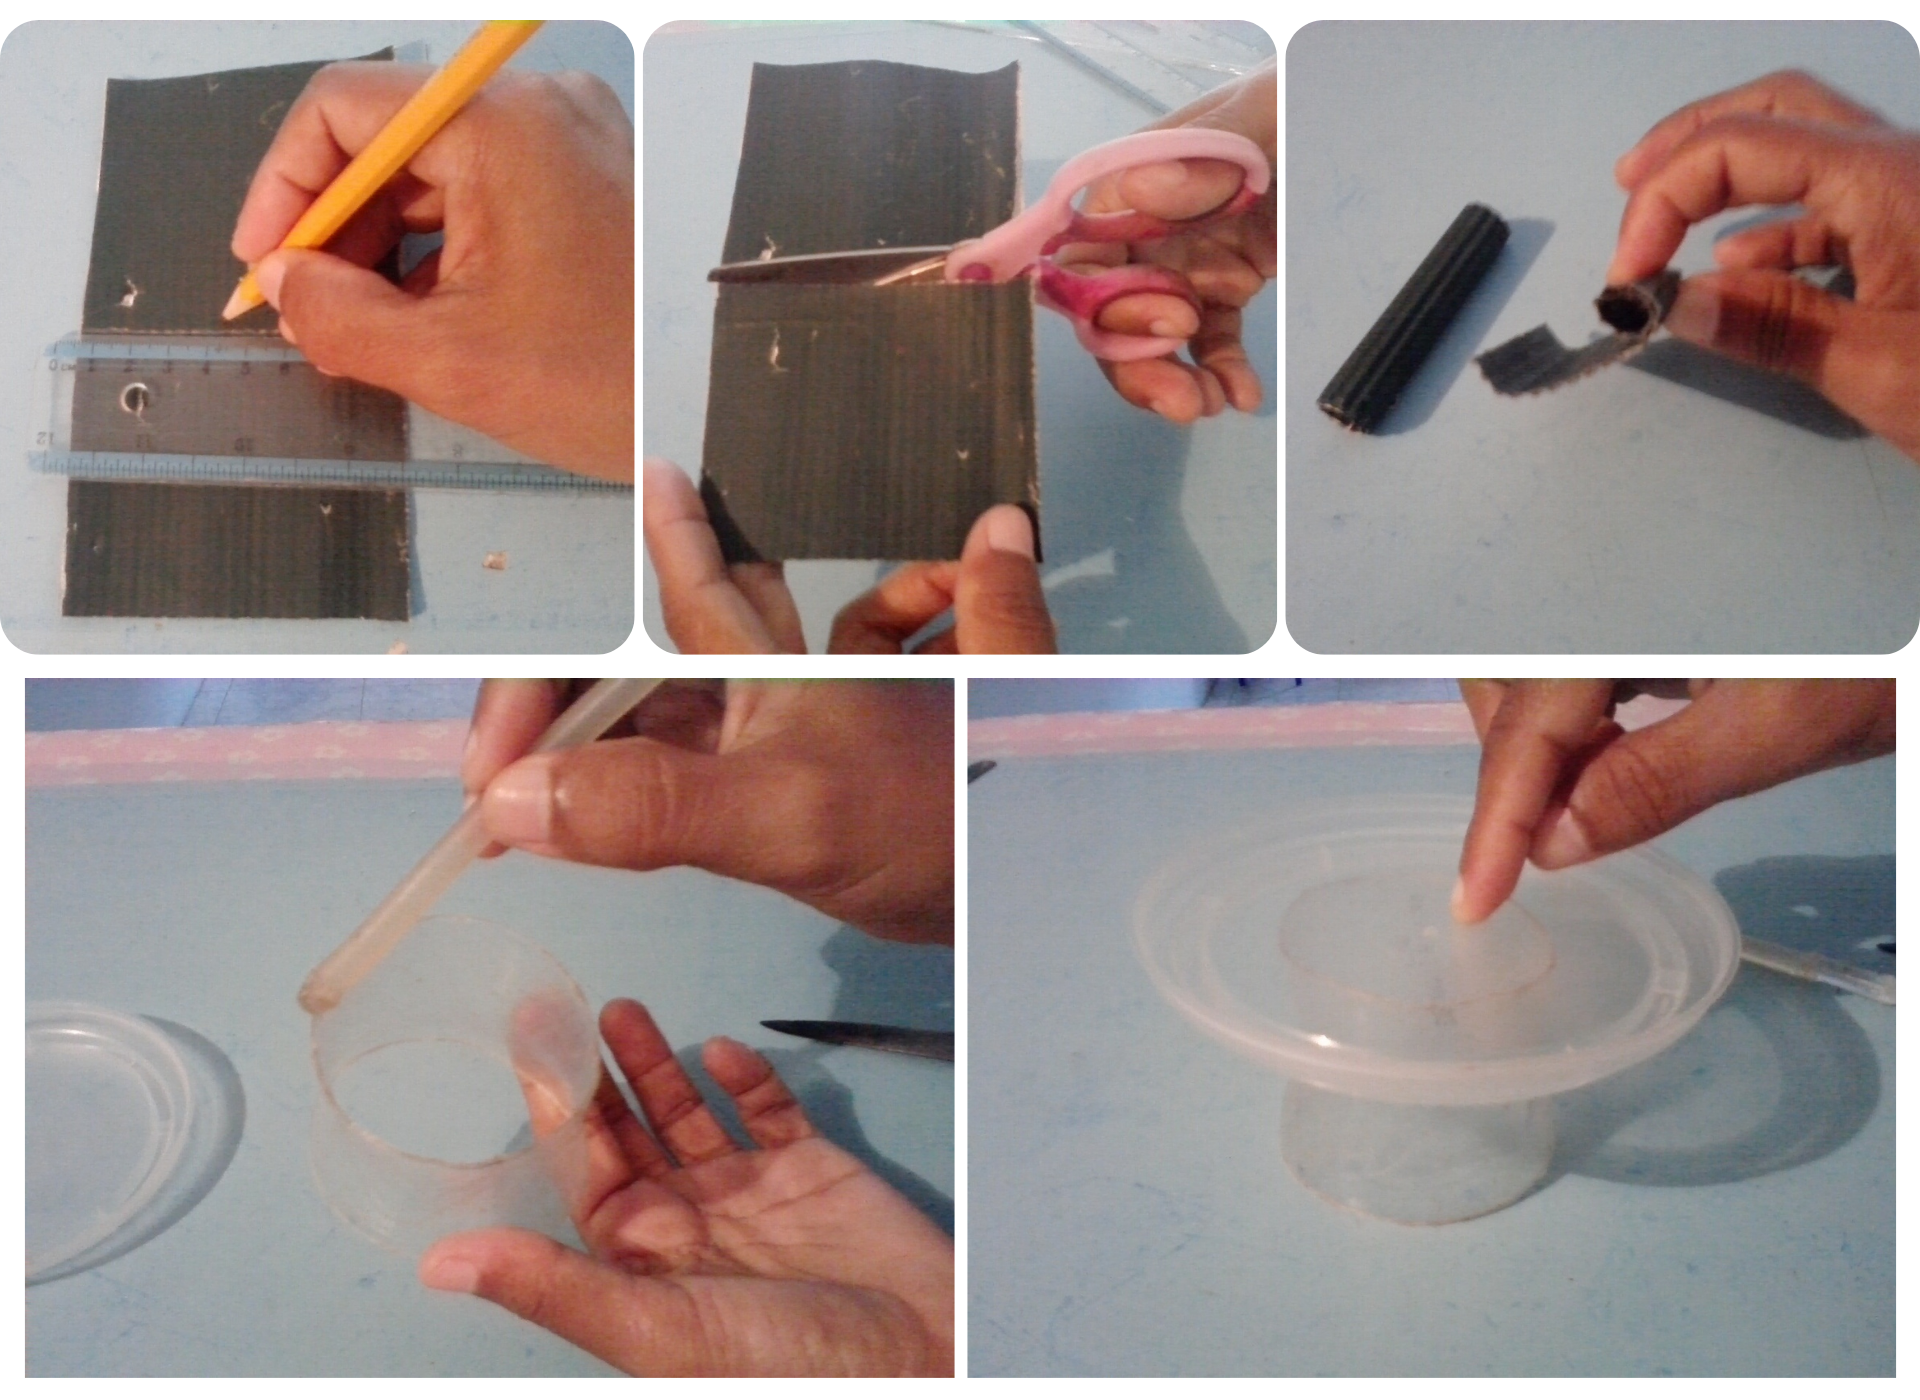
Step: 1
- I mark and cut the corrugated cardboard with a measure of (14cm x 8cm) in (2) half, then I roll it into a tube shape, then I glue with silicone the base of our ornament with the piece of the plastic bottle, placing the lid on top.
Español:
Paso: 2
- Ahora pegamos el tubo de cartulina en el centro de la tapa, para después pegar la segunda tapa, y luego el otro pedacito de la botella terminando de pegar la bola del desodorante.
English:
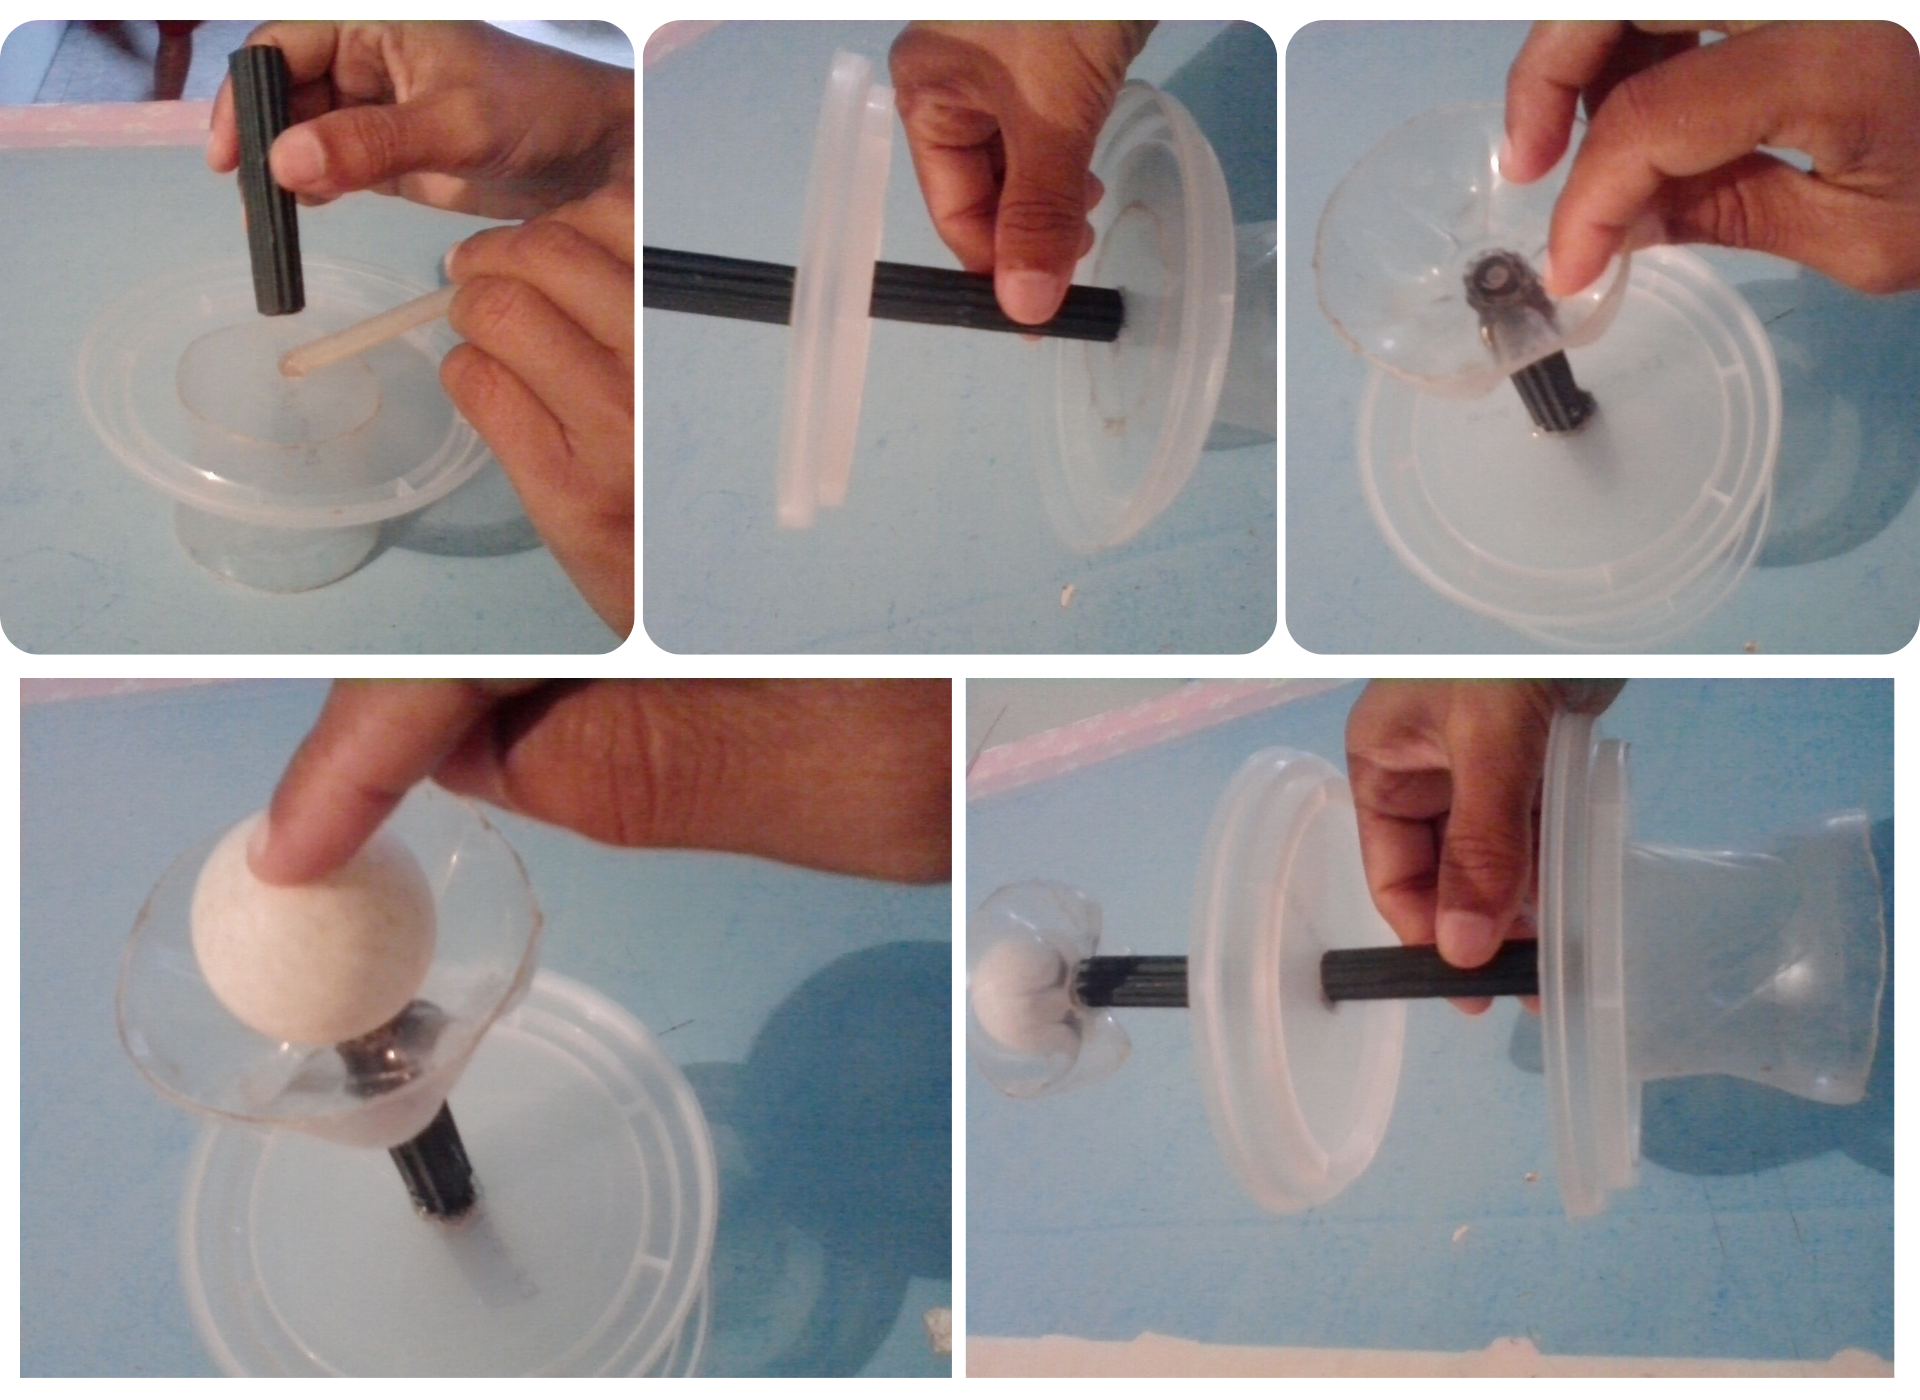
Step: 2
- Now we glue the cardboard tube in the center of the cap, then glue the second cap, and then the other piece of the bottle, finishing by gluing the deodorant ball.
Español:
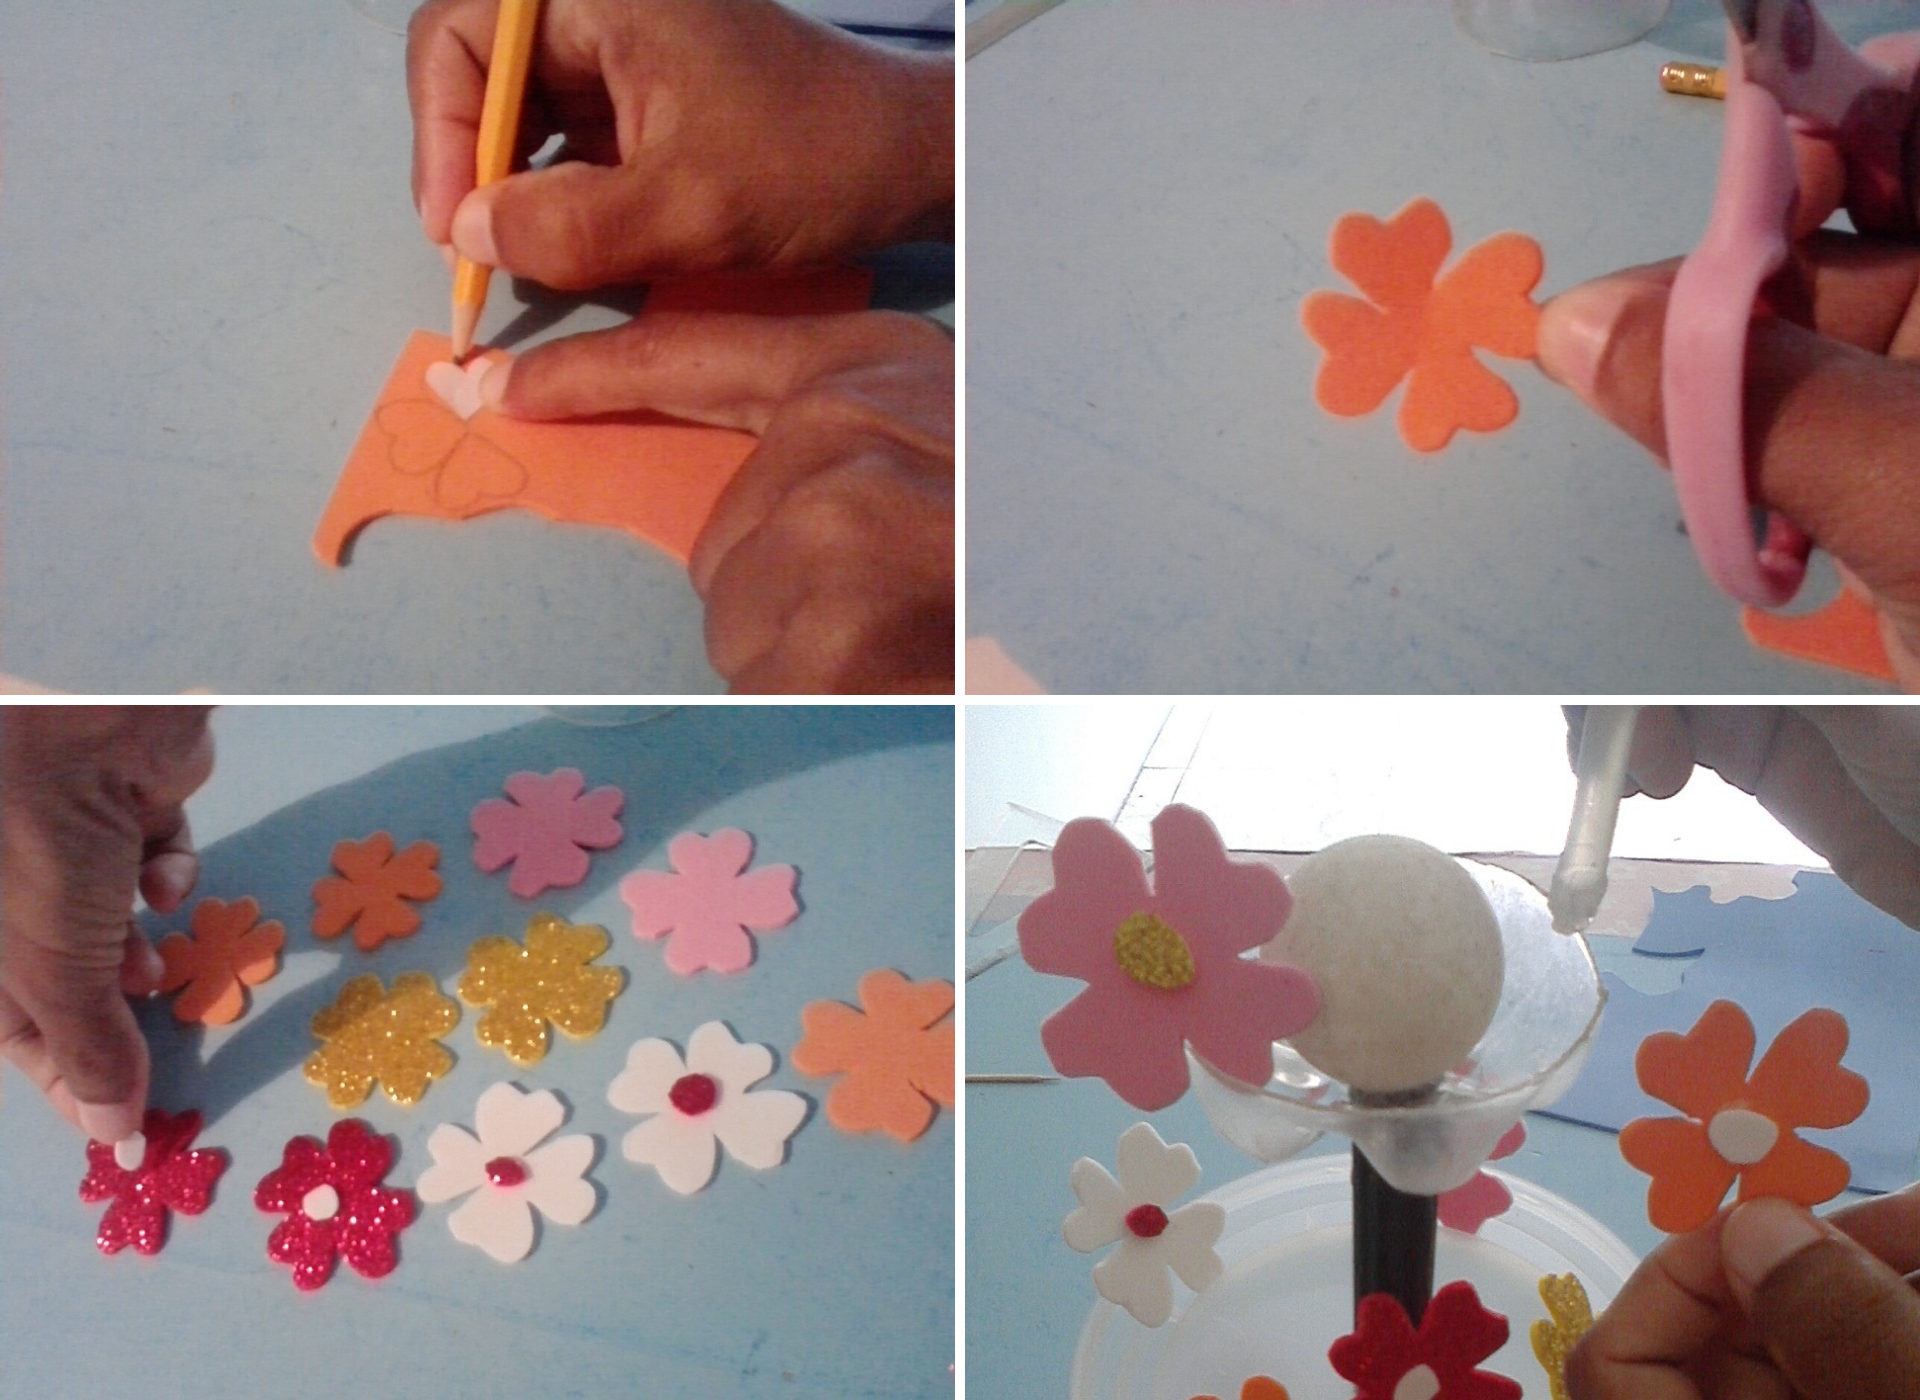
Paso: 3
- Con nuestra base ya completamente armada, comenzamos a elaborar las flores con el foami de diferentes colores, dibujando con la ayuda de un corazón marcamos y recortamos varias flores, para pegarlas en las diferentes partes de la base.
English:
Step: 3
- With our base completely assembled, we begin to make the flowers with the foami of different colors, drawing with the help of a heart we mark and cut out several flowers, to glue them in the different parts of the base.
Español:
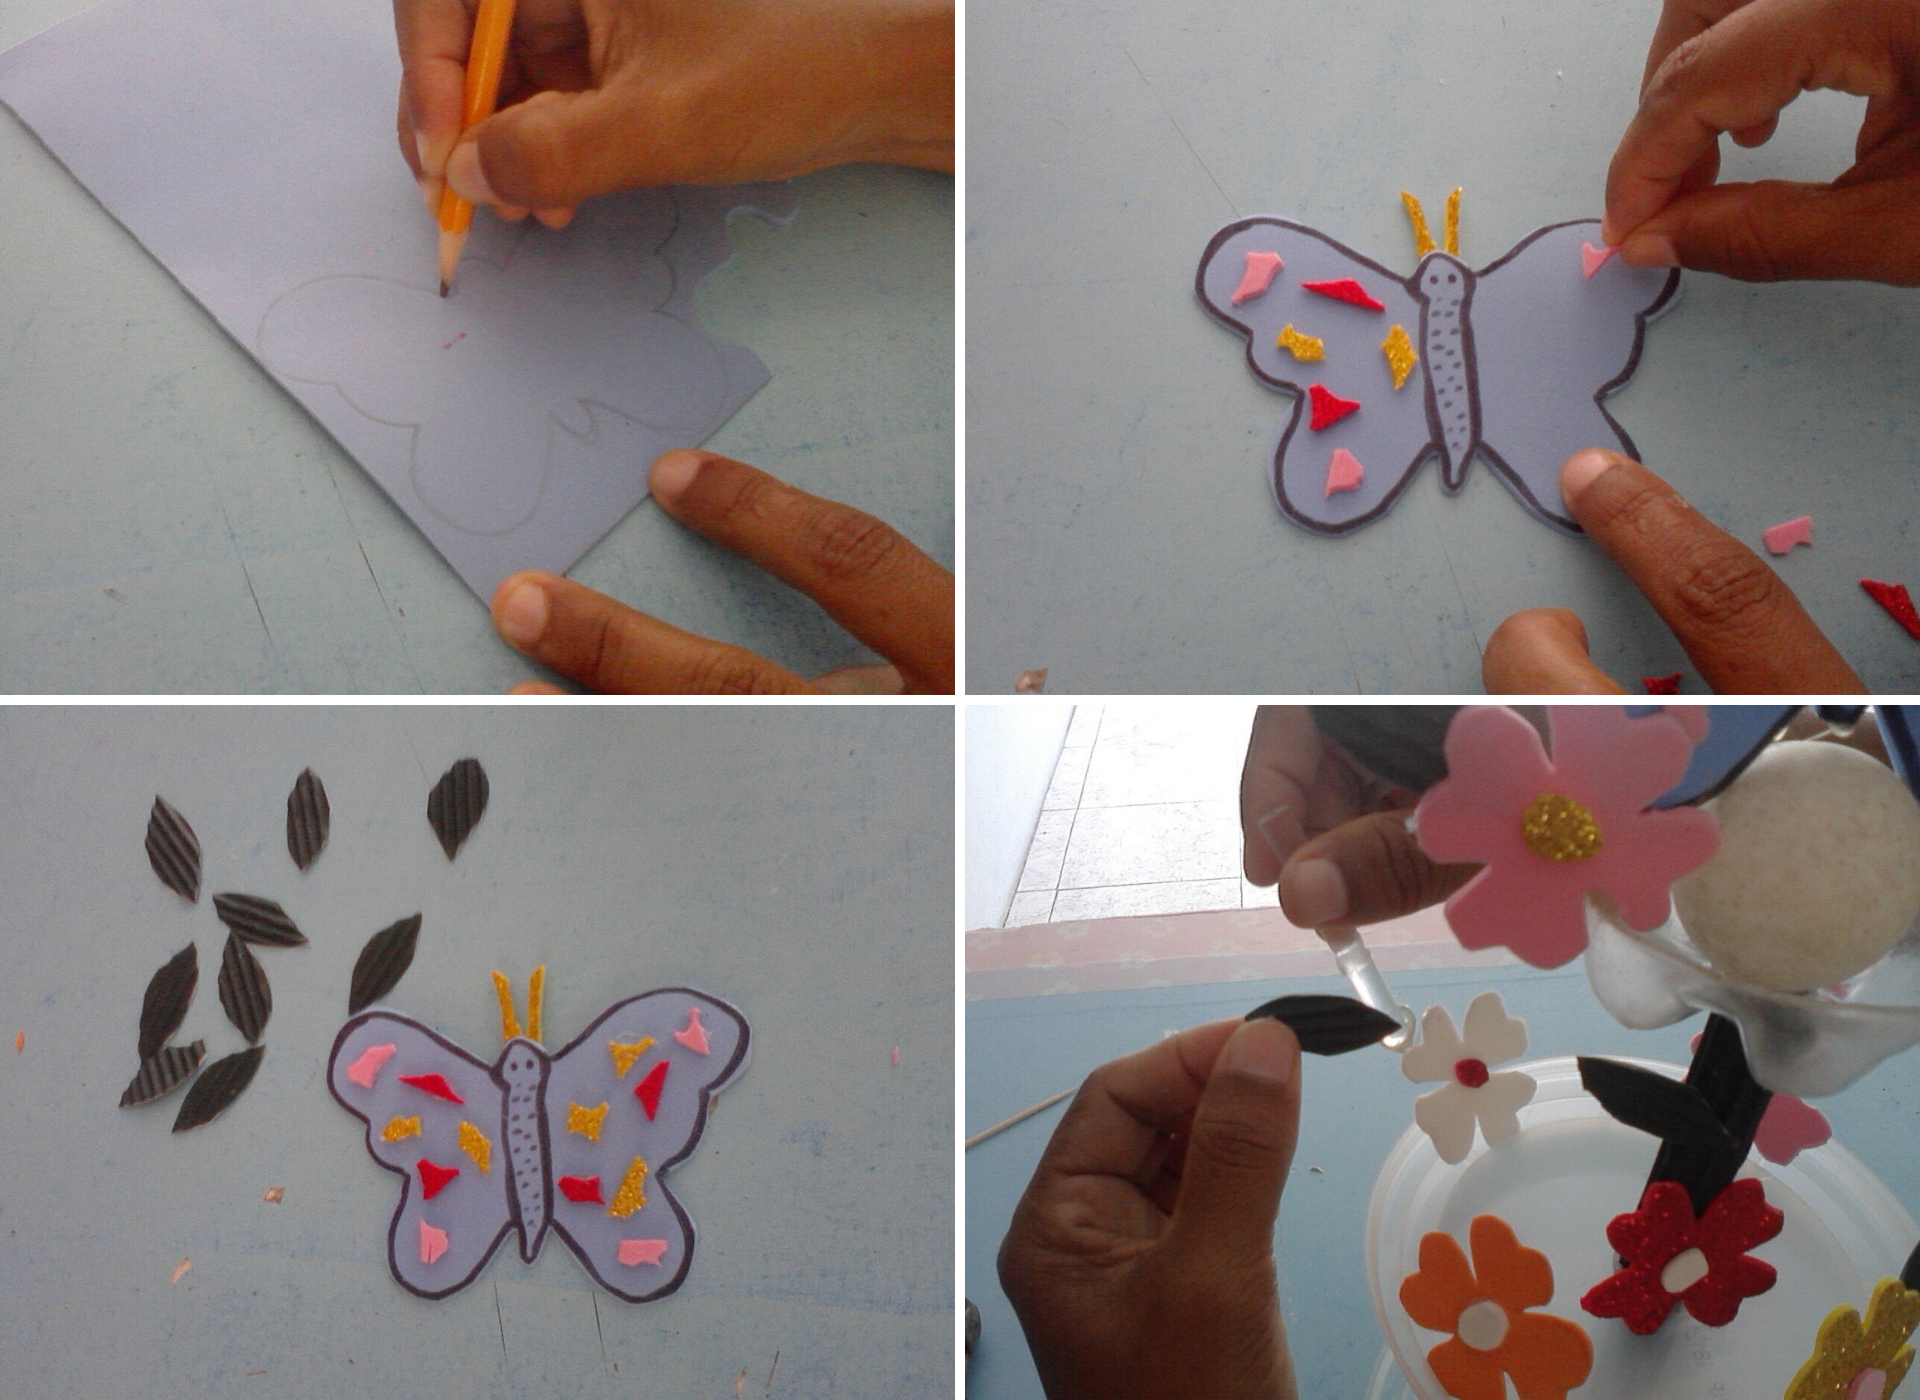
Paso: 4
- Para terminar dibujamos una mariposa en el foami azul, colocando varios trocitos de foami, después recortamos algunas hojas con la cartulina verde y la pegamos en algunas flores, por ultimo pegamos la mariposa arriba de la bola de desodorante.
English:
Step: 4
- To finish we draw a butterfly on the blue foami, placing several pieces of foami, then we cut out some leaves with the green cardboard and glue it on some flowers, finally we glue the butterfly on top of the deodorant ball.
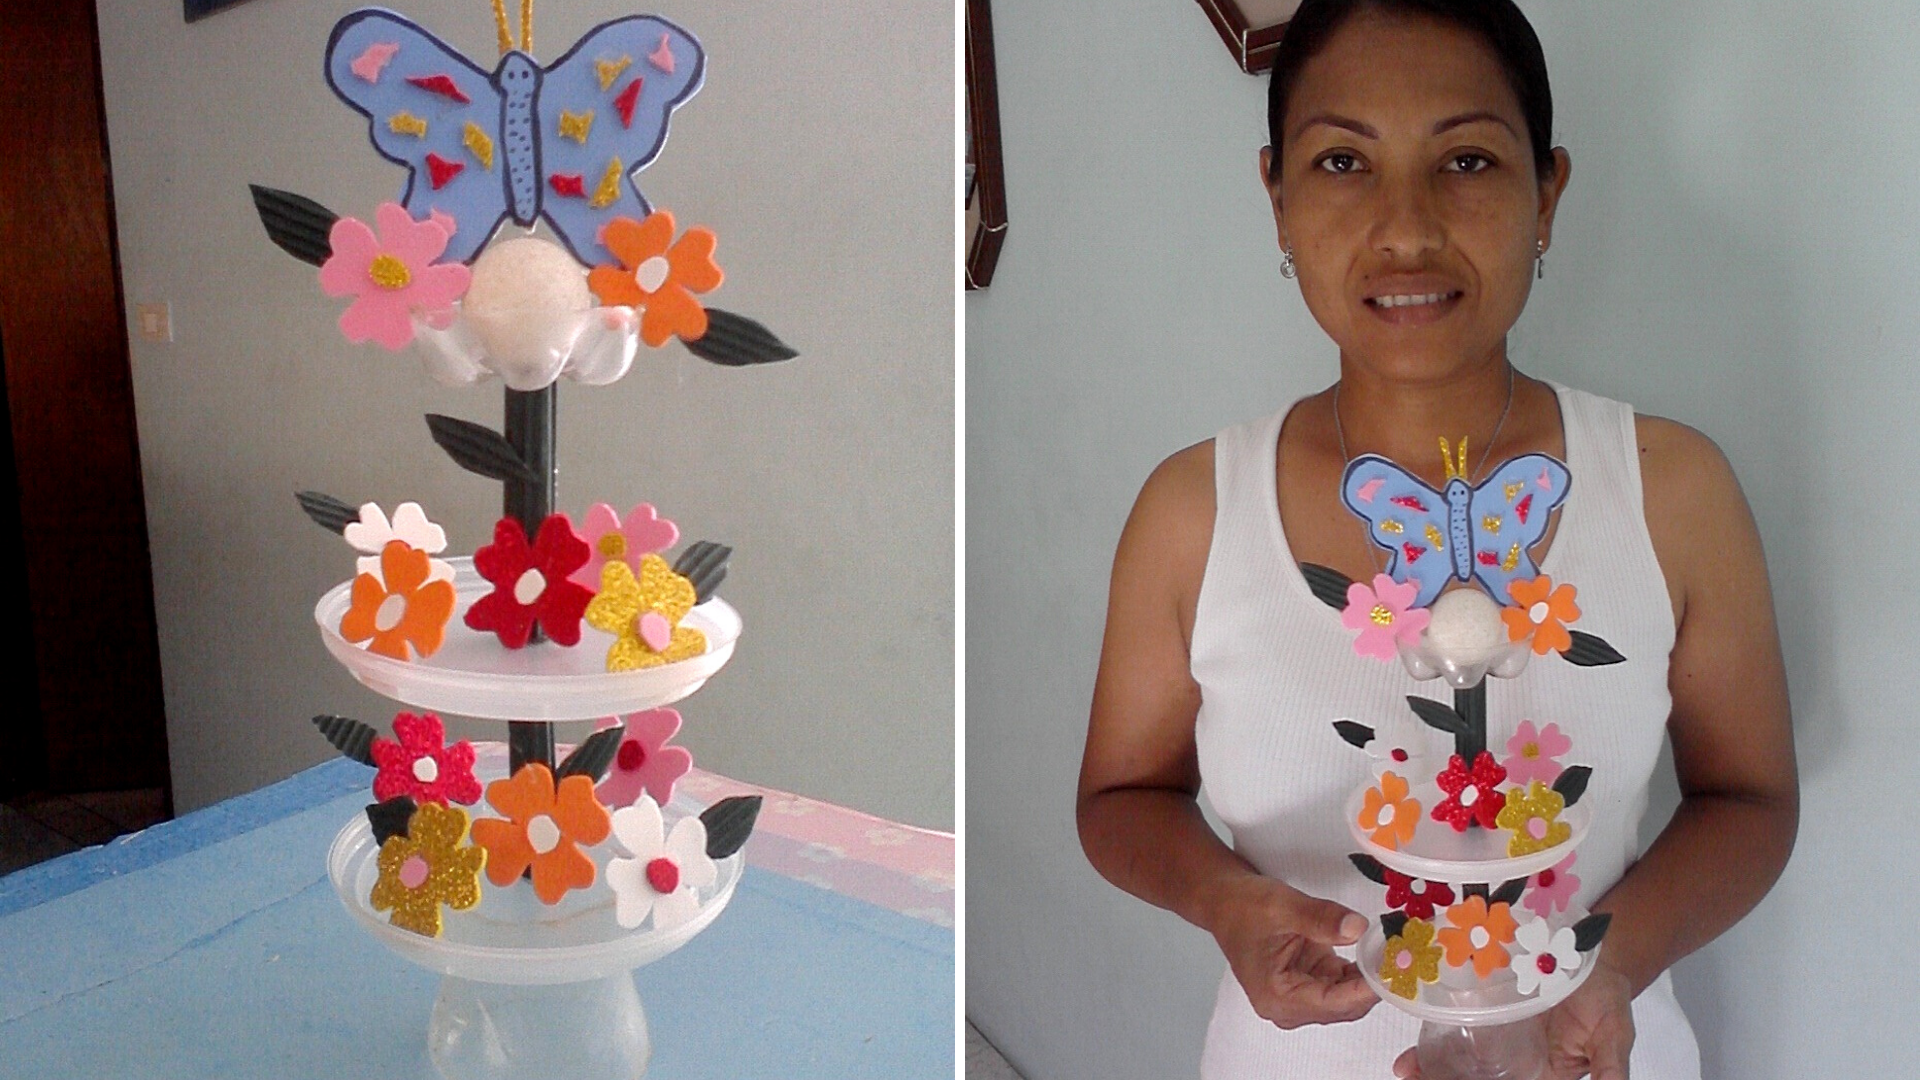
Aquí esta mi resultado final.
Here is my final result.
.png)
.png)
.png)
.png)
Todas las fotos son de mi autoria y editadas con Canva.
All the photos were taken by me and edited with Canva.

Congratulations @coromoto20! You have completed the following achievement on the Hive blockchain and have been rewarded with new badge(s) :
Your next target is to reach 50 comments.
You can view your badges on your board and compare yourself to others in the Ranking
If you no longer want to receive notifications, reply to this comment with the word
STOPTo support your work, I also upvoted your post!
Check out the last post from @hivebuzz: