Buenos días, amigos creativos de esta comunidad Hivediy. Antes que todos quiero enviarles un saludo a todos ustedes y deseándoles que estén muy bien, que es lo más importante. Dios los bendiga a todos y que pasen un excelente dia. Mi proyecto del dia de hoy es mostrarle como elaborar un bonito y practico porta-encendedor, es muy facil sencillo de hacer y ademas esta elaborado con materiales economicos y muy facil de conseguir. Sin mas que decir, manos a la obra y comencemos con el paso a paso, espero les guste y les sea de mucha utilidad como lo es para mi.
Good morning creative friends of this Hivediy community. Before anyone else, I want to send a greeting to all of you and wish you the best, which is the most important thing. God bless you all and have a great day. My project today is to show you how to make a beautiful and practical lighter holder, it is very easy to do and it is also made with cheap materials and very easy to get. Without further ado, let's get to work and start with the step by step, I hope you like it and it will be very useful to you as it is for me.

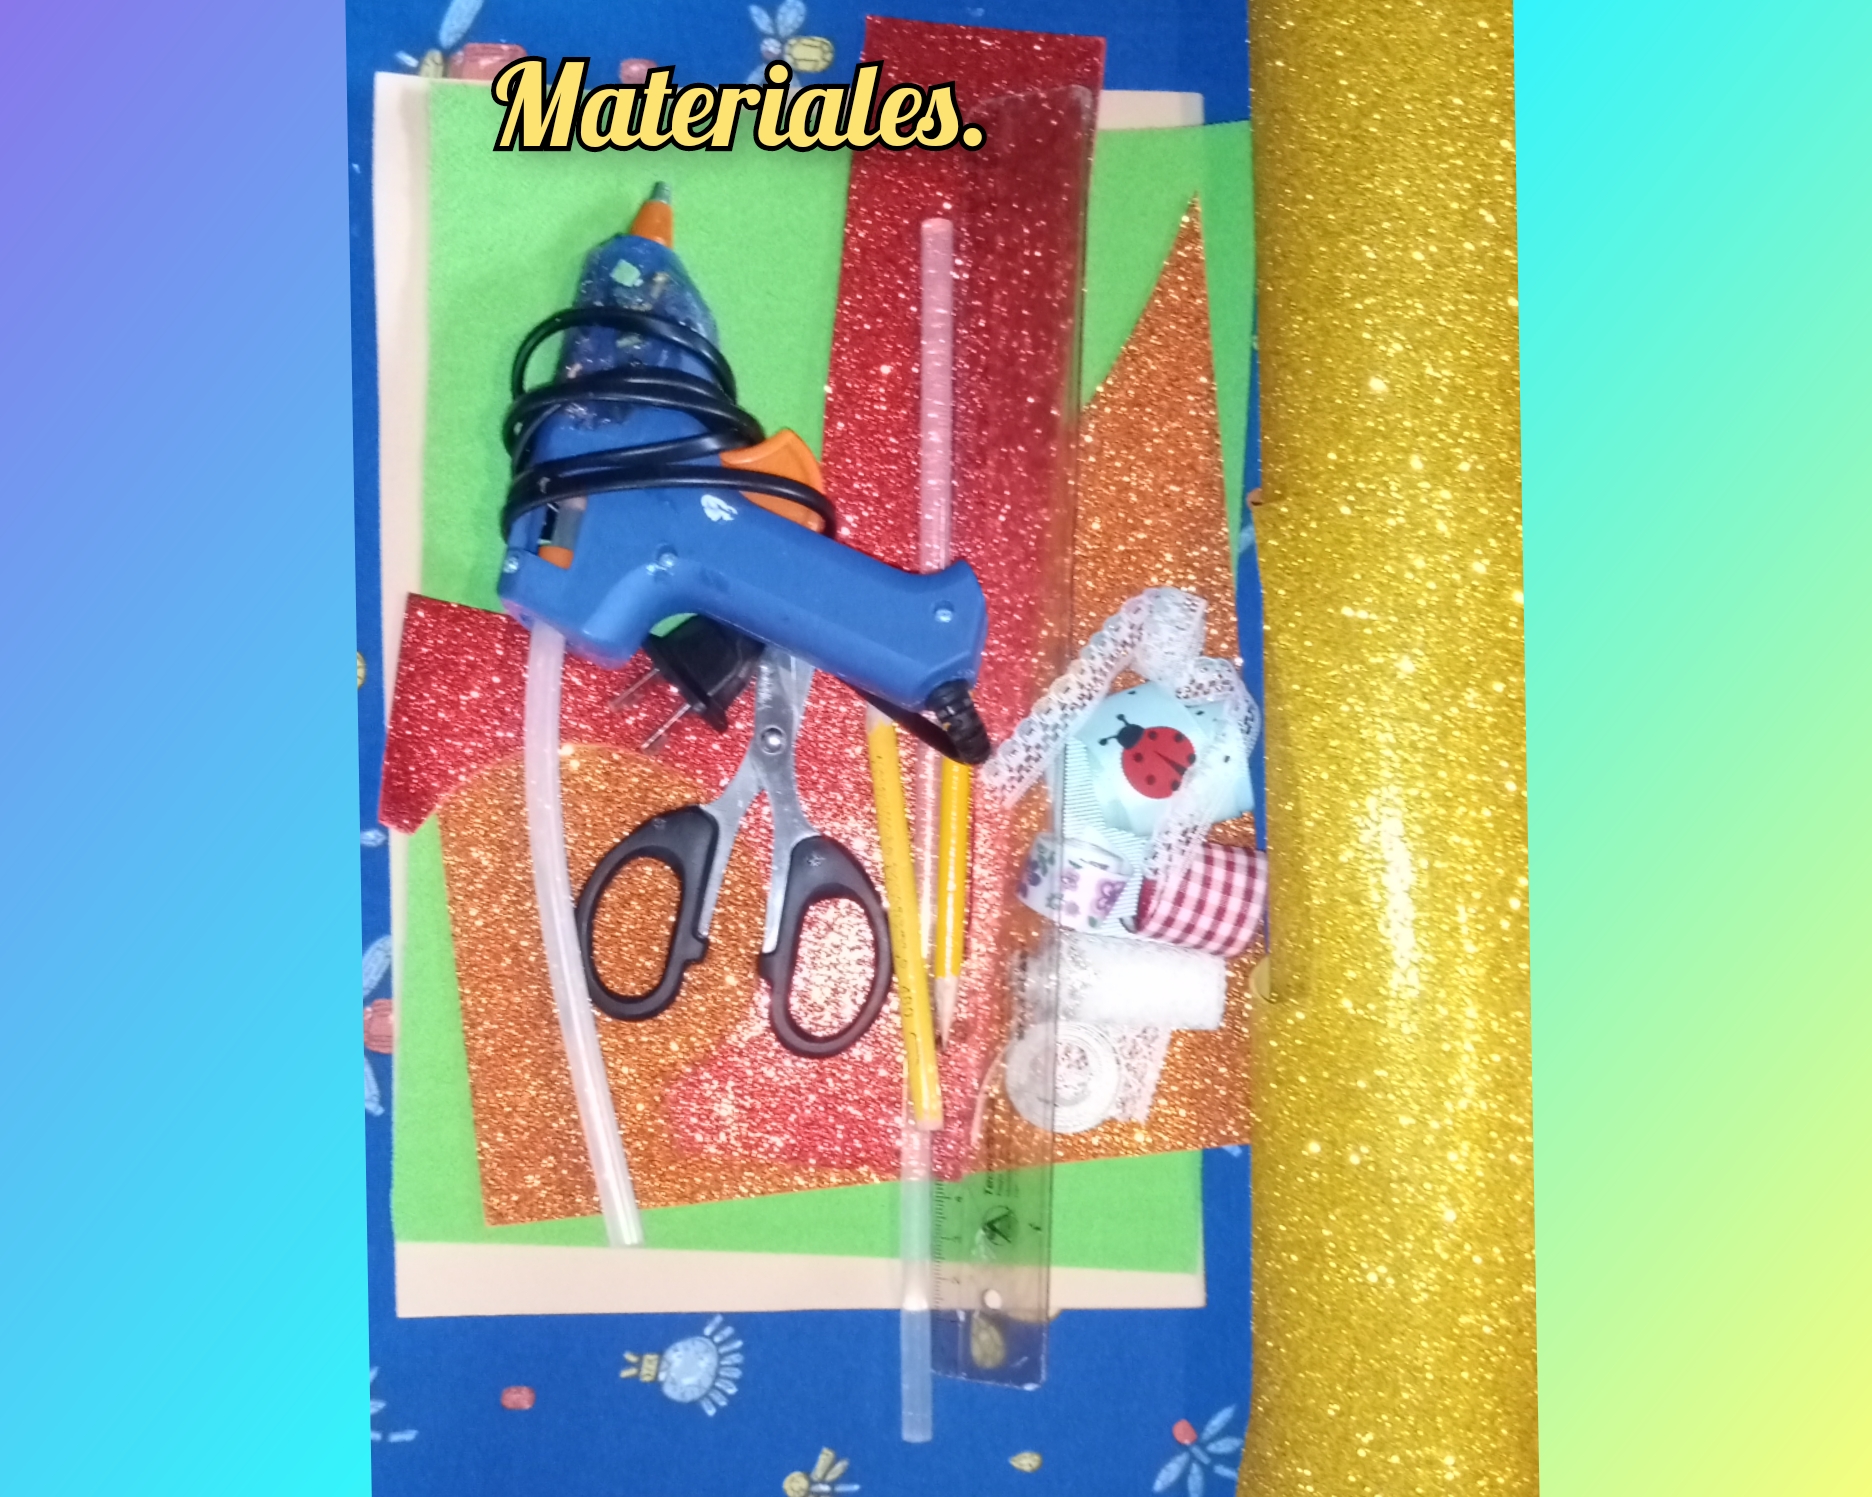
Para poder elaborar este bonito y practico porta-encendedor, vamos a necesitar los siguientes materiales y herramientas.
*Foamis de varios colores y diferentes texturas.
*1 tijera.
*1 lápiz.
*Cinta y encajes de tela.
*Pistola de silicona caliente.
*Hojas de papel de uso reciclable.
*Pintura al frio.
To make this beautiful and practical lighter holder we are going to need the following materials and tools.
*Foams of various colors and different textures.
*1 scissors.
*1 pencil.
*Bow and fabric lace.
*Hot glue gun.
*Recyclable use paper sheets.
*Cold painting.
Let's start with the step by step to make this beautiful and practical lighter holder.

Step 1. To make this beautiful and practical lighter holder, the first thing we are going to do is take a sheet of recyclable paper and draw the figure that we are going to use to make the paper patterns, then we mark it on the foamis in their corresponding colors, see the images.

Step 2. Once we have marked all the pieces in green and skin-colored foami with a smooth texture, we cut them with the help of scissors and then, to finish, we glue all the pieces with hot silicone so that they are smooth. very strong.

Step 3. Now in this step we are going to take fabric ribbons and lace to decorate the piece, to start with silicone we start to curl the ribbon around the bottom edge of the piece, then we glue fabric lace fabric on the top and to finish we stick a thin strip of fabric in the center of the piece, see the images.
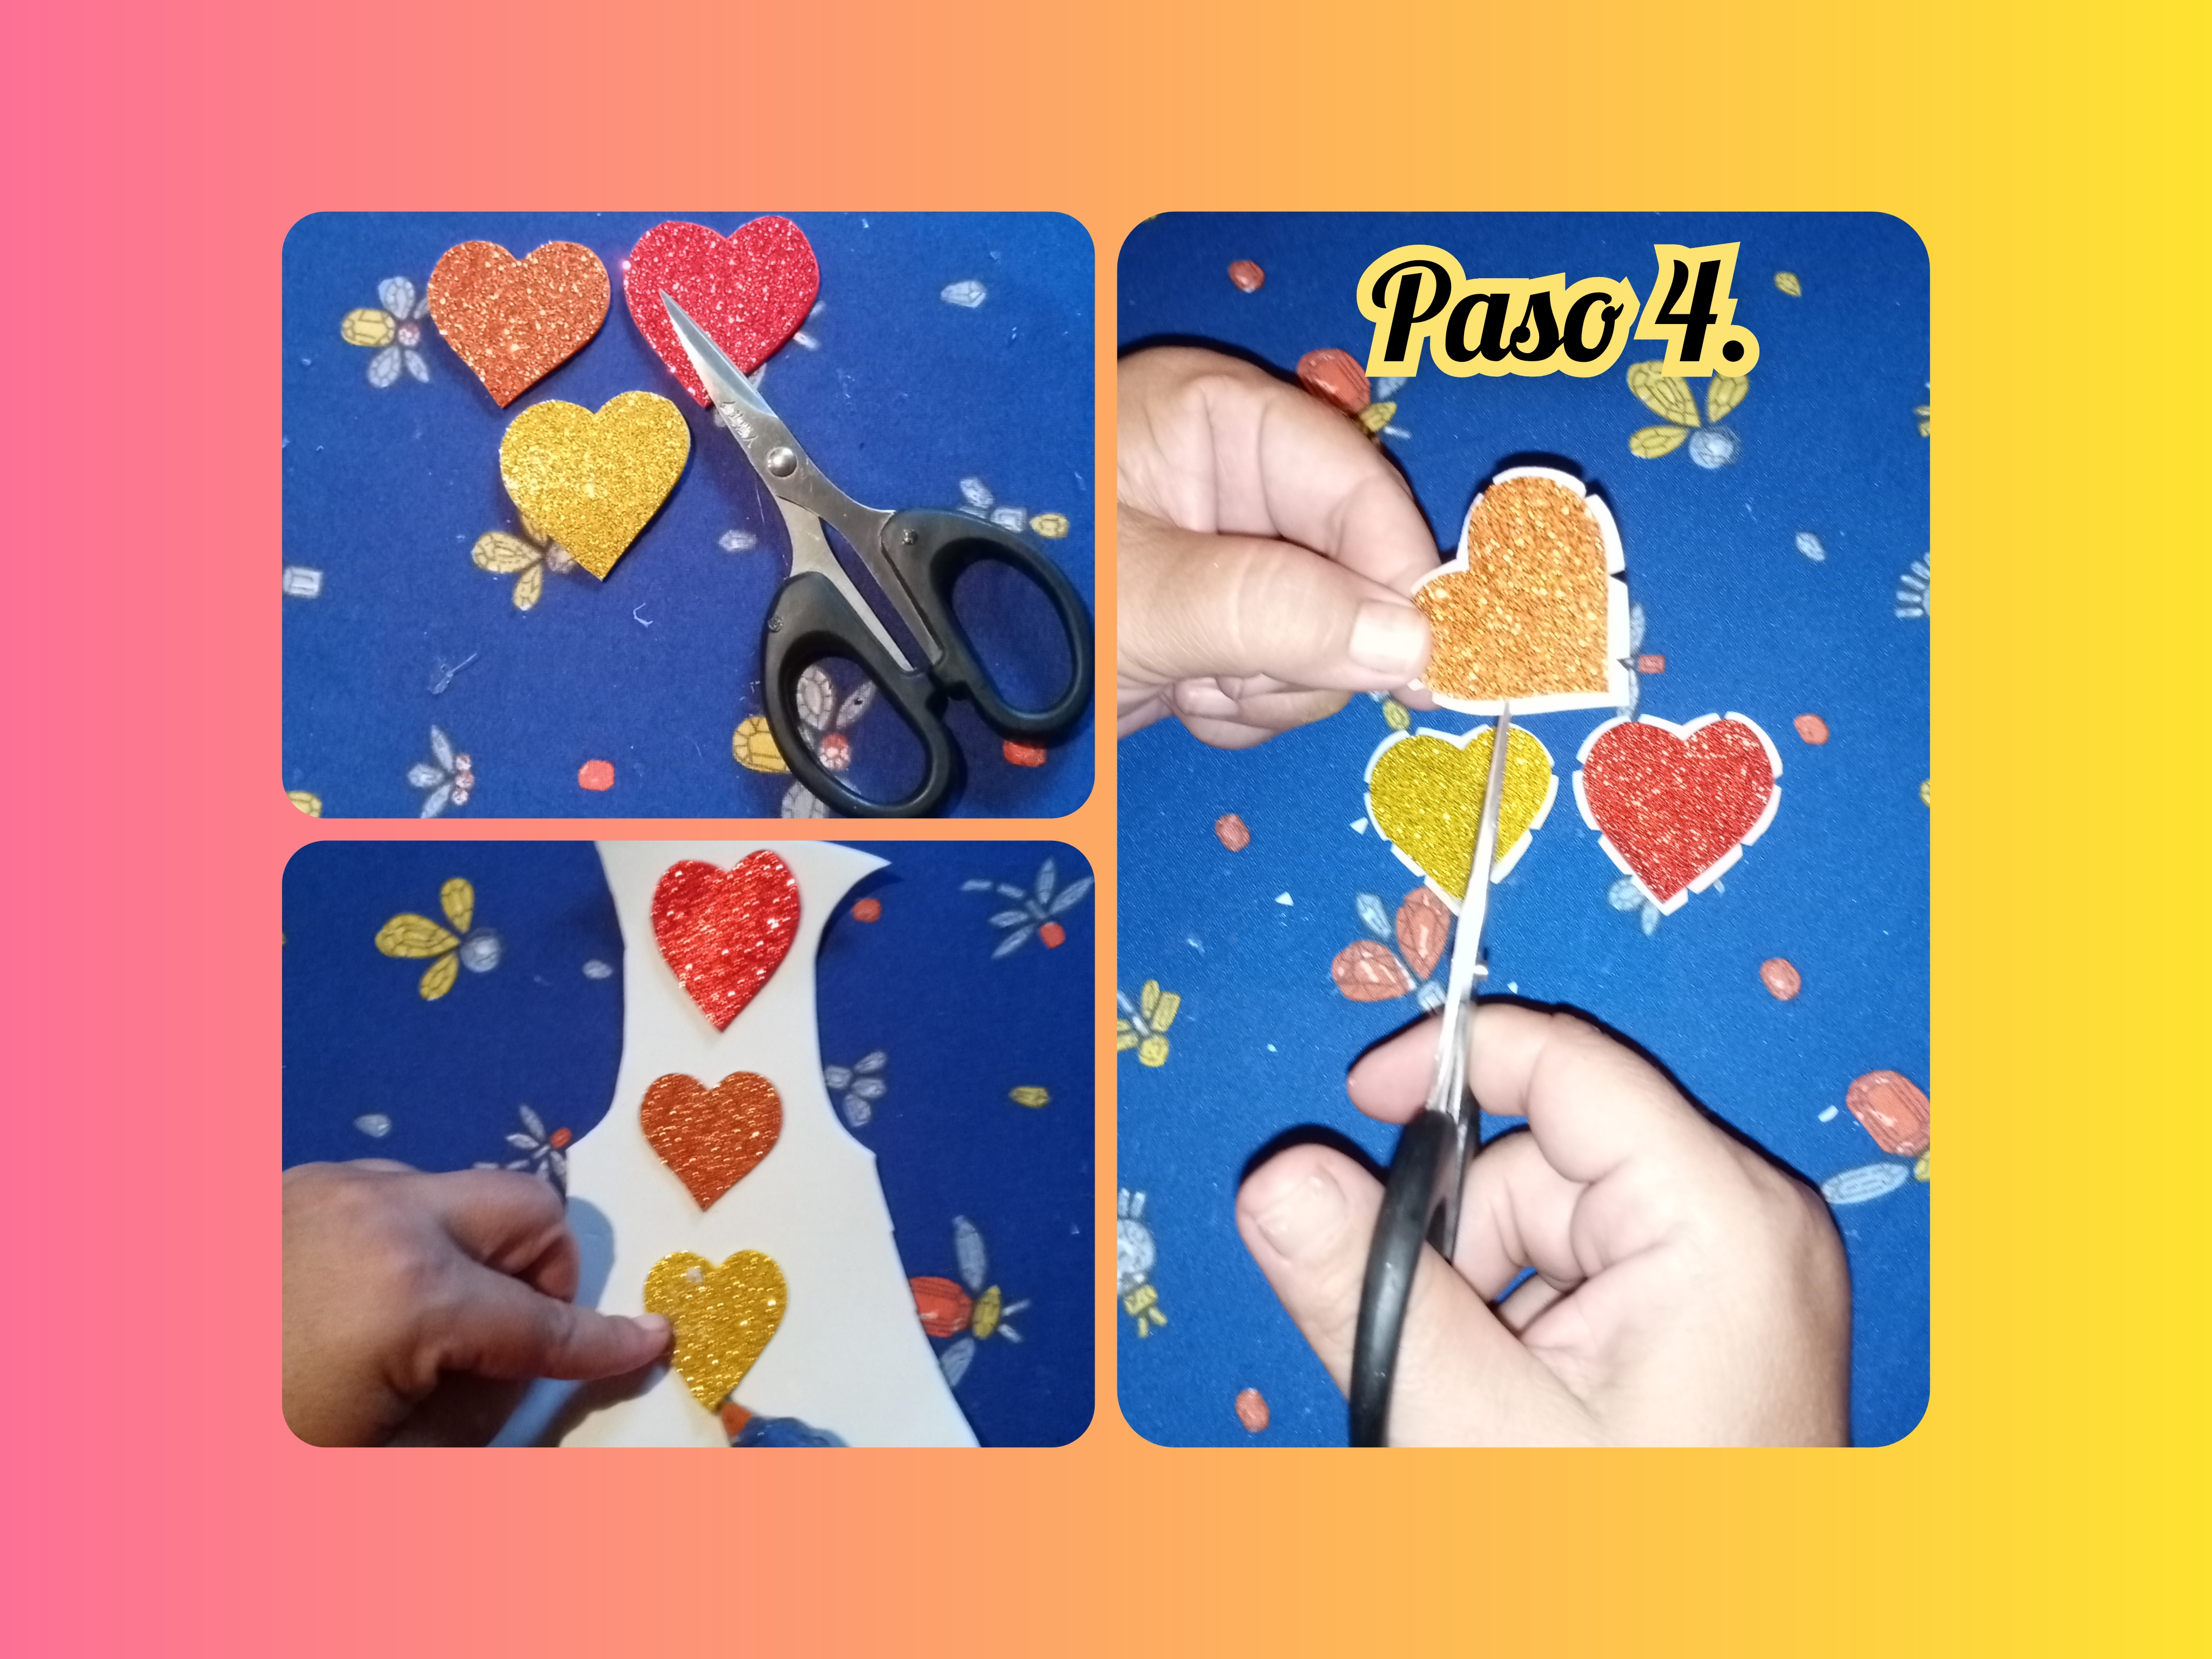
Step 4. In this step we mark hearts of various colors on diamond foam, then with the help of scissors we cut them out and glue them on a white foam with a soft texture and then cut them leaving half a centimeter apart. the edge that remains in relief and to finish with the tip of the scissors we remove the fringes along the entire edge.
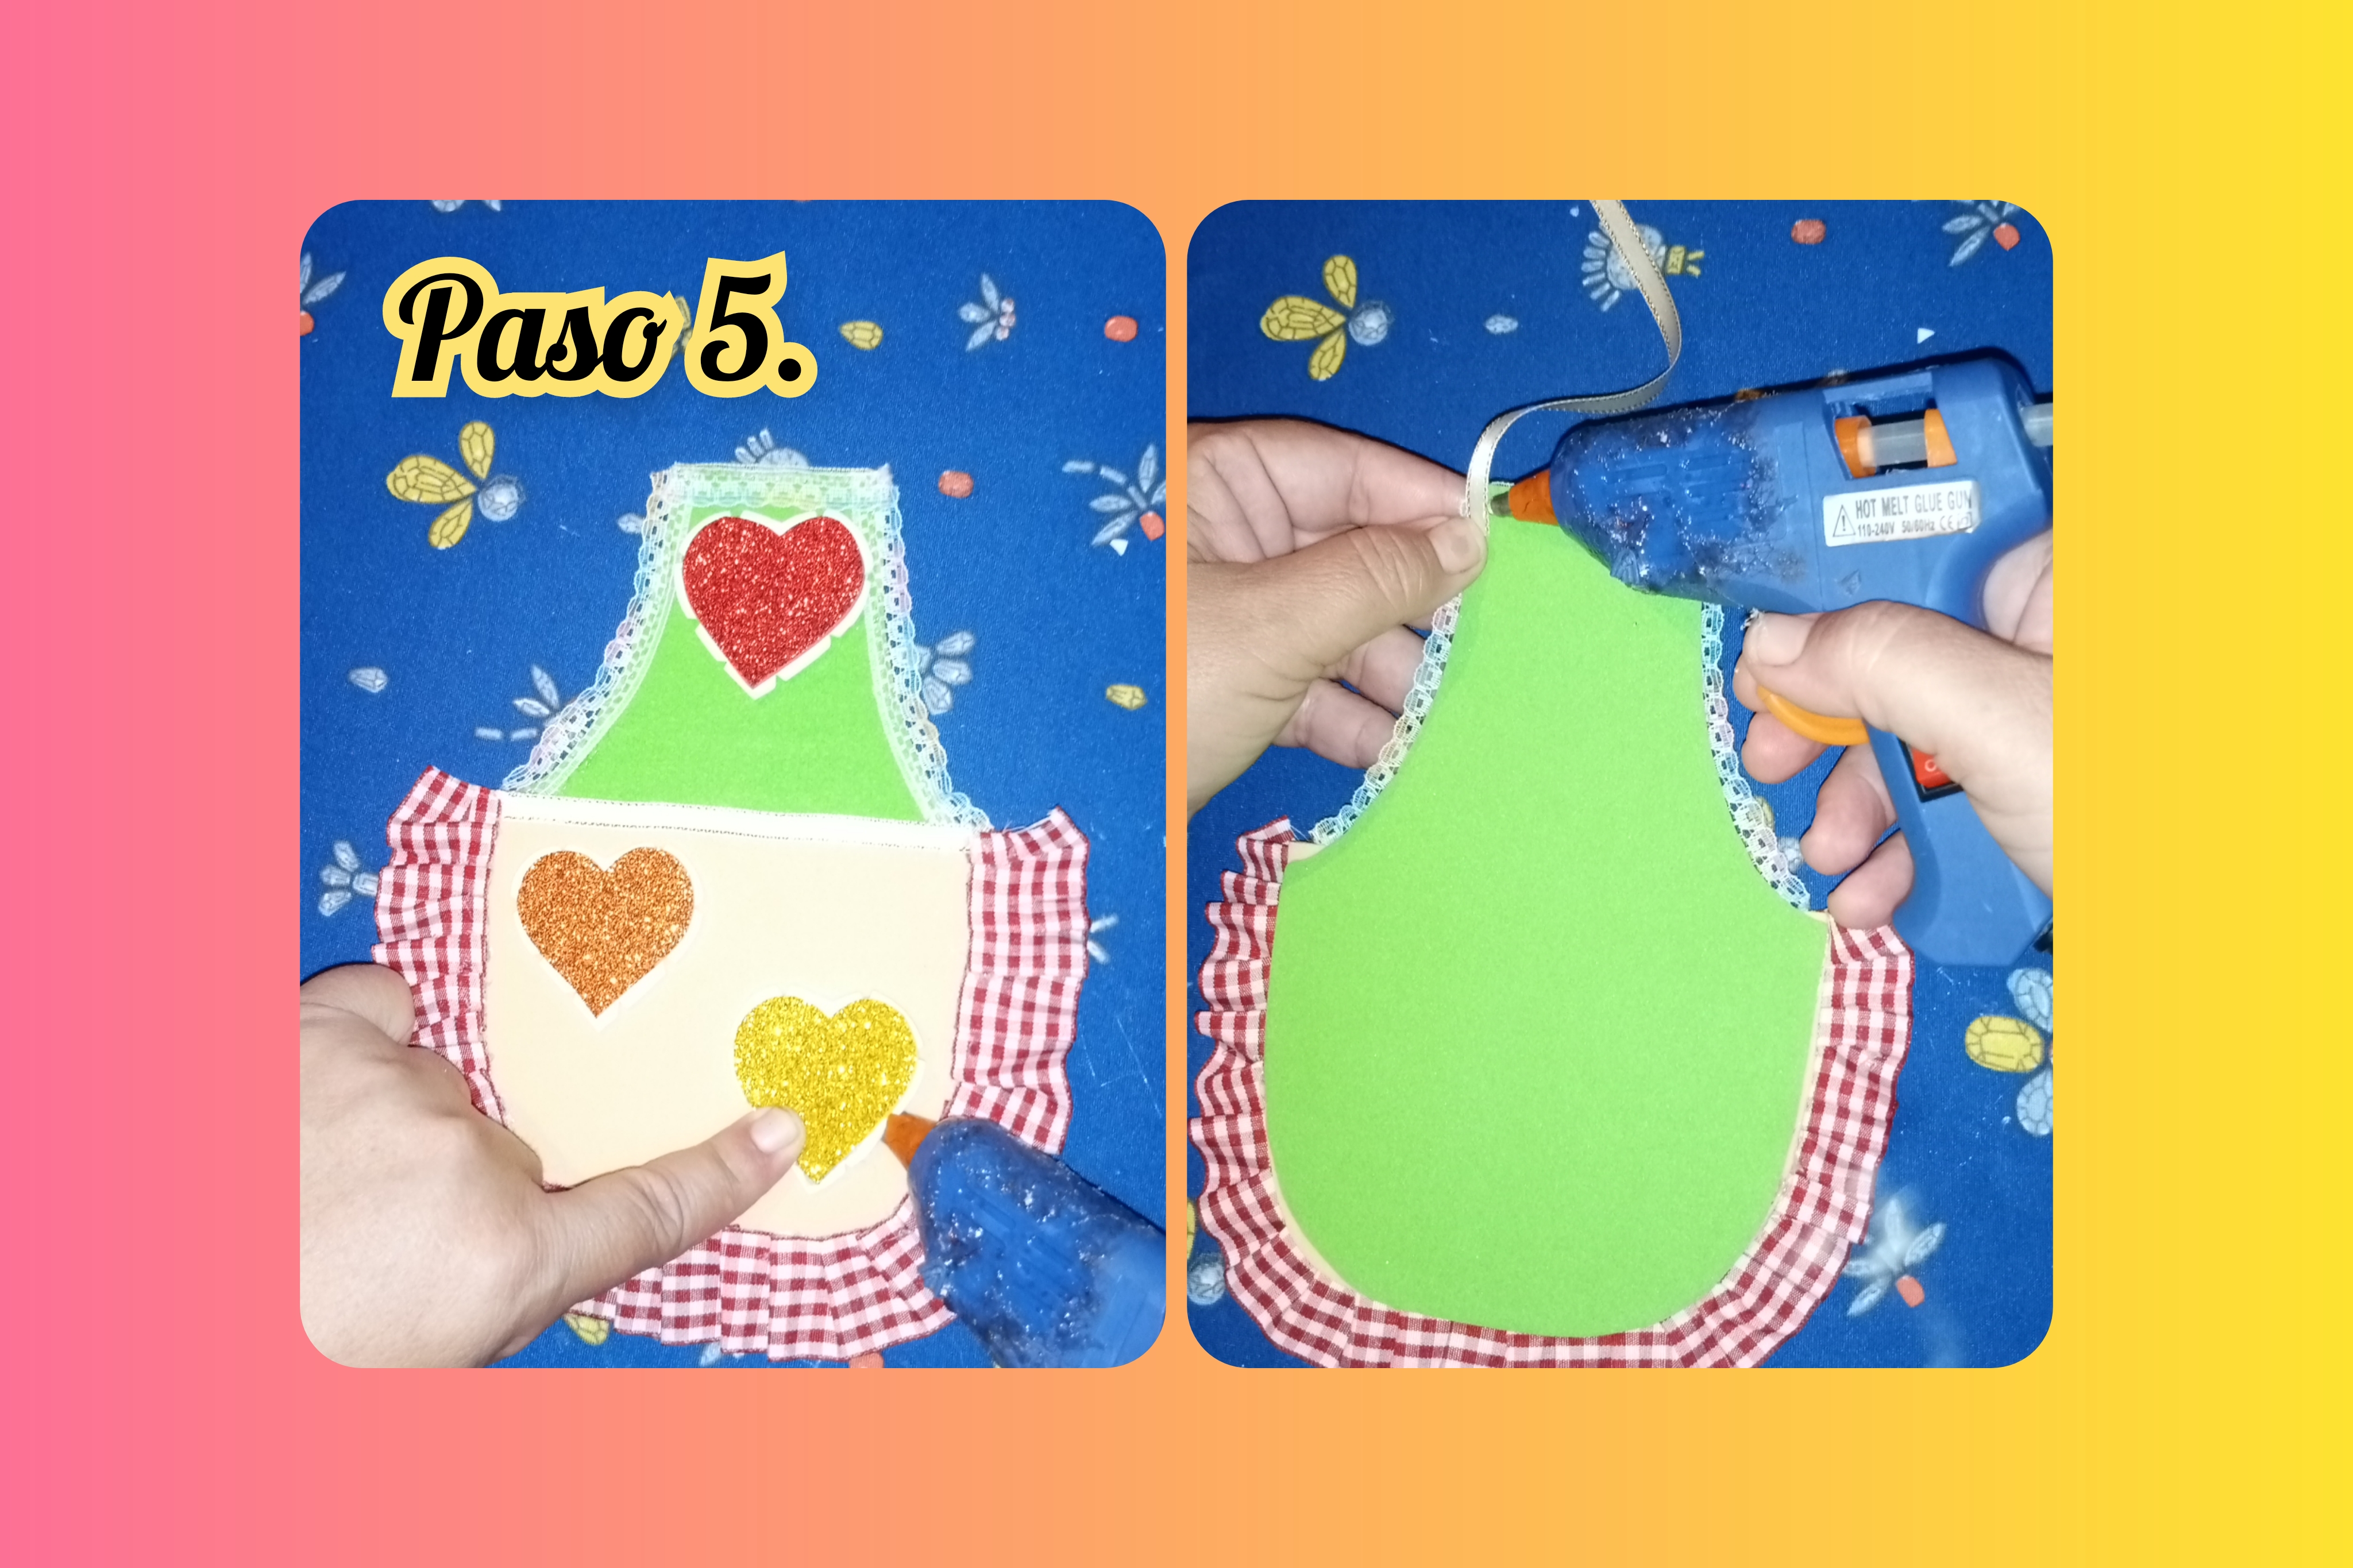
Step 5. In this step we stick all the hearts in the shape of the lighter holder with hot silicone to continue decorating it and to finish we take a piece of very thin fabric tape and stick it on the back, which would be to hang it , see photos.
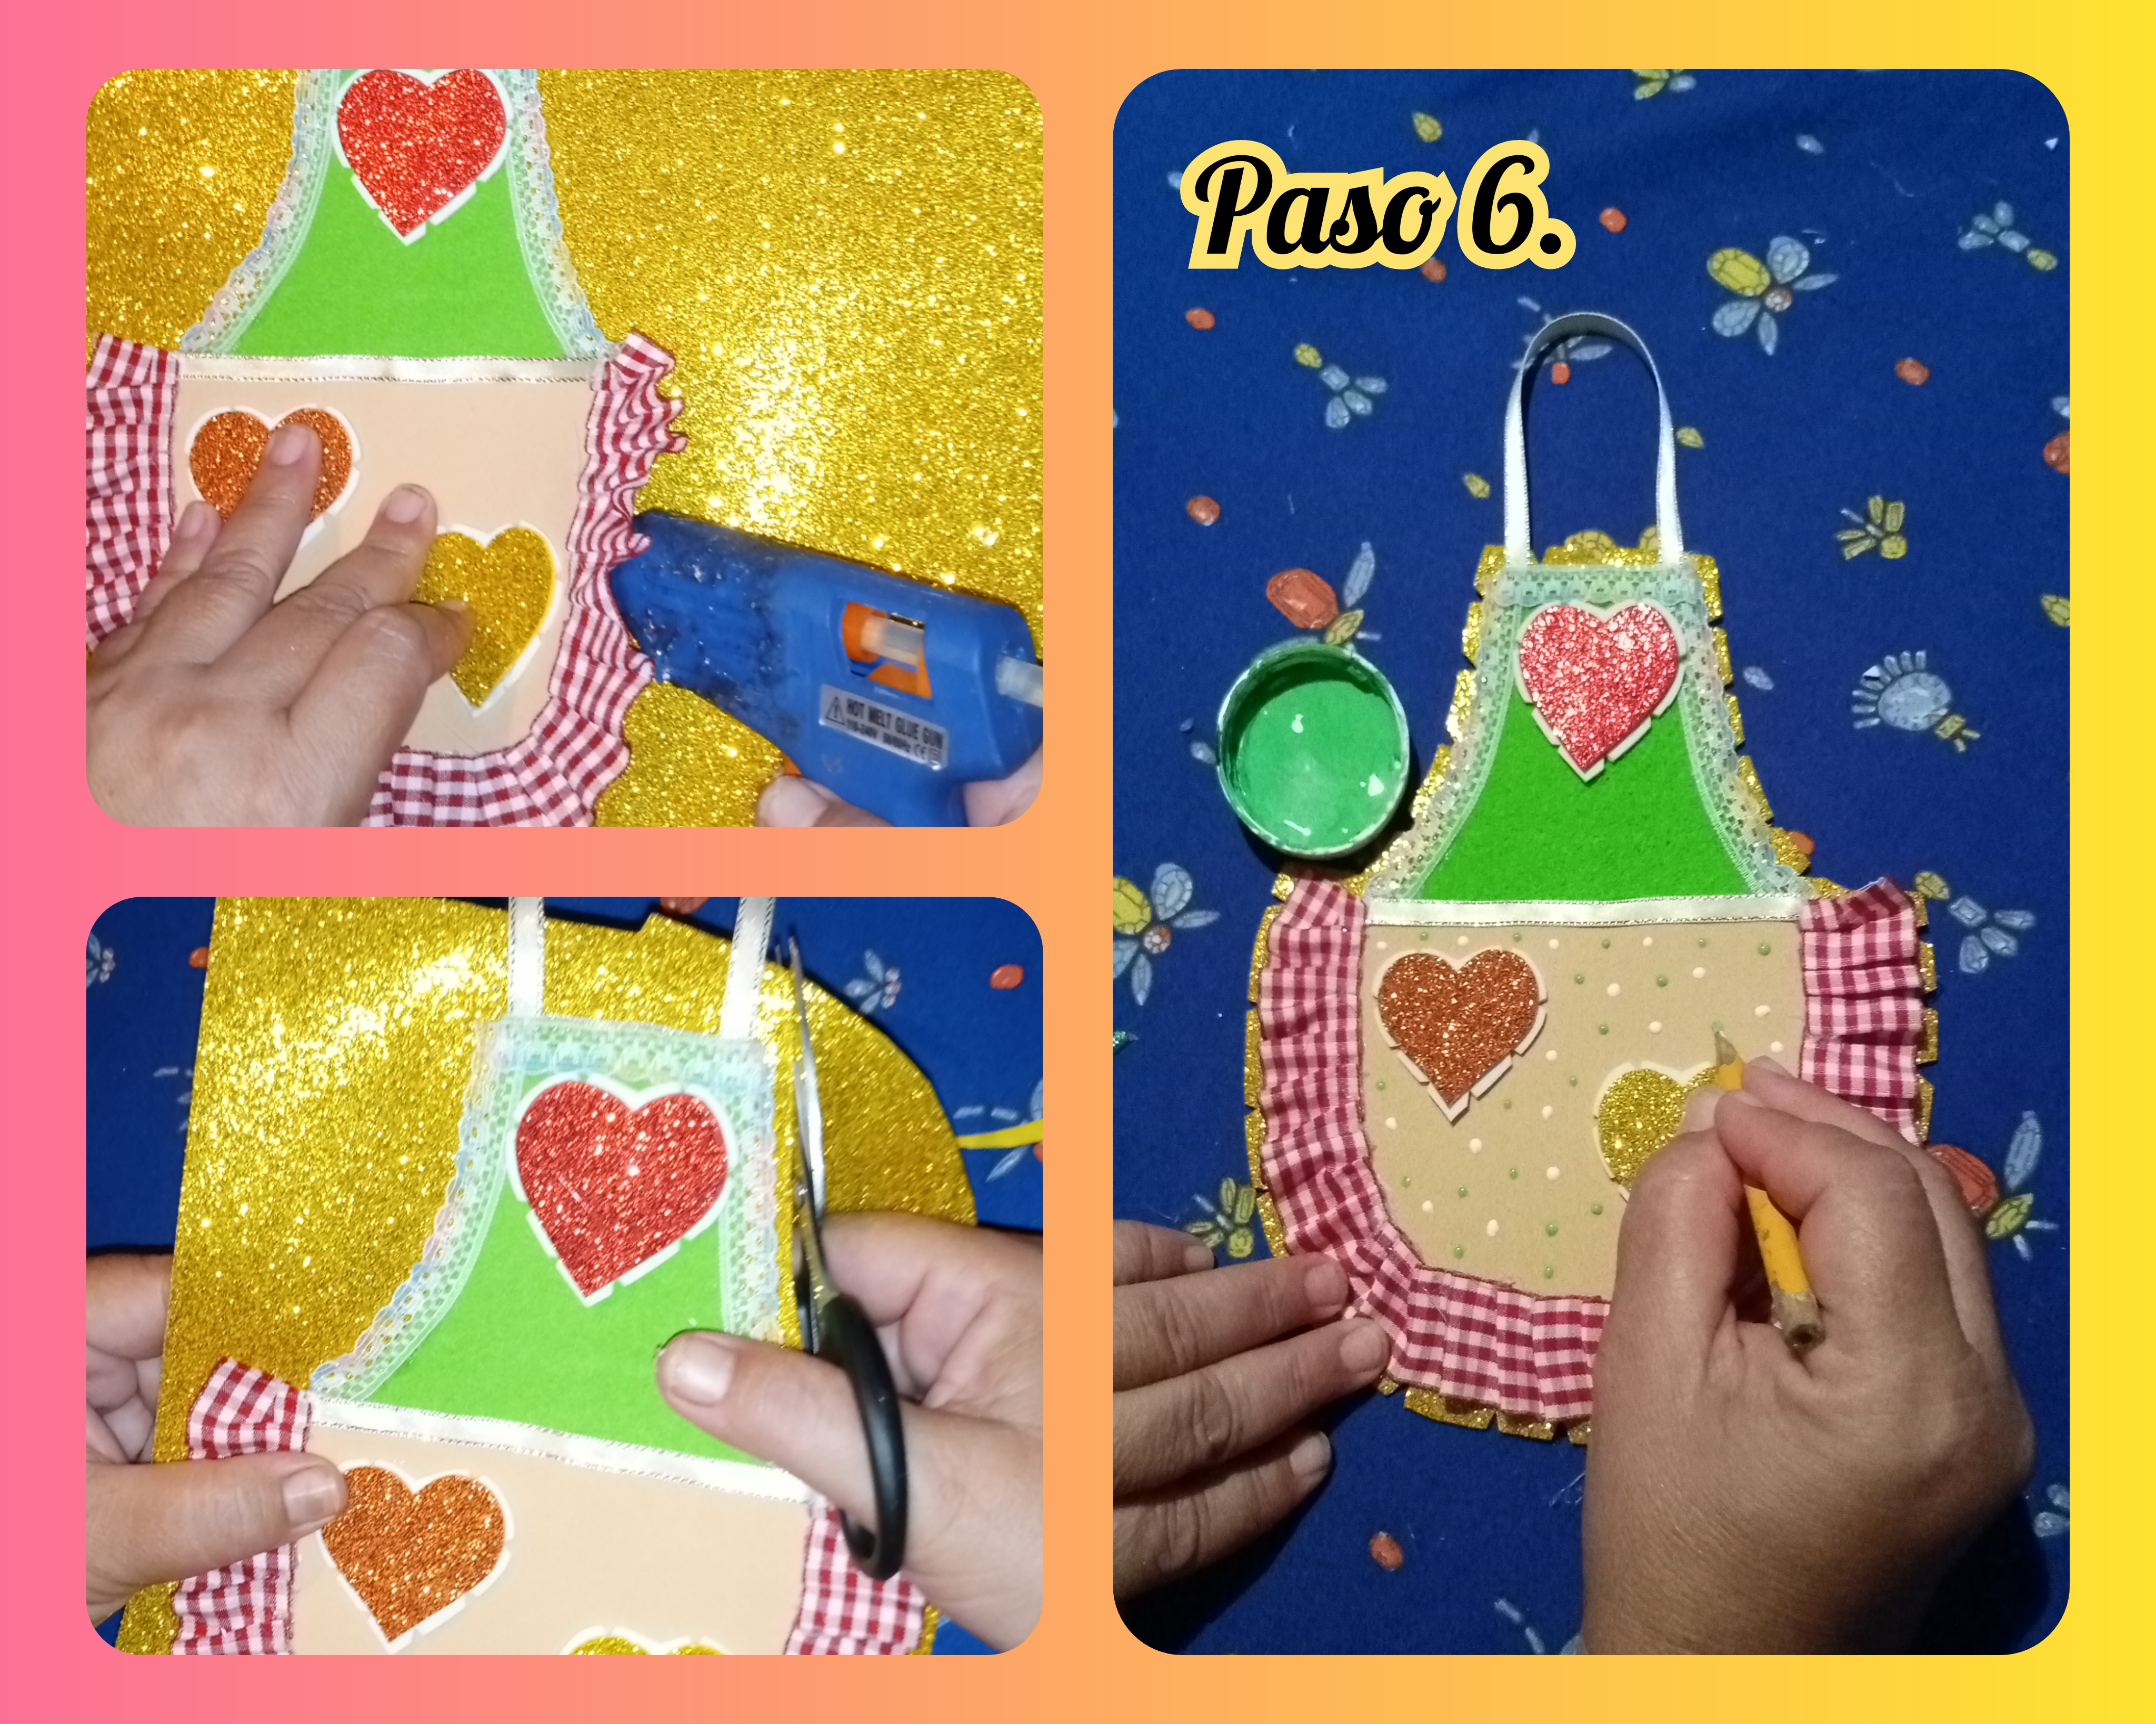
Step 6. Almost finished all the steps, now we take a gold-colored diamond foami, and stick the figure of the lighter holder, and then with the help of scissors we cut along the edge leaving half a centimeter of distance and then we take it out fringes all over the edge with the tip of the scissors and to finish it we finish decorating it by placing dots with green and white cold paint, see the images.
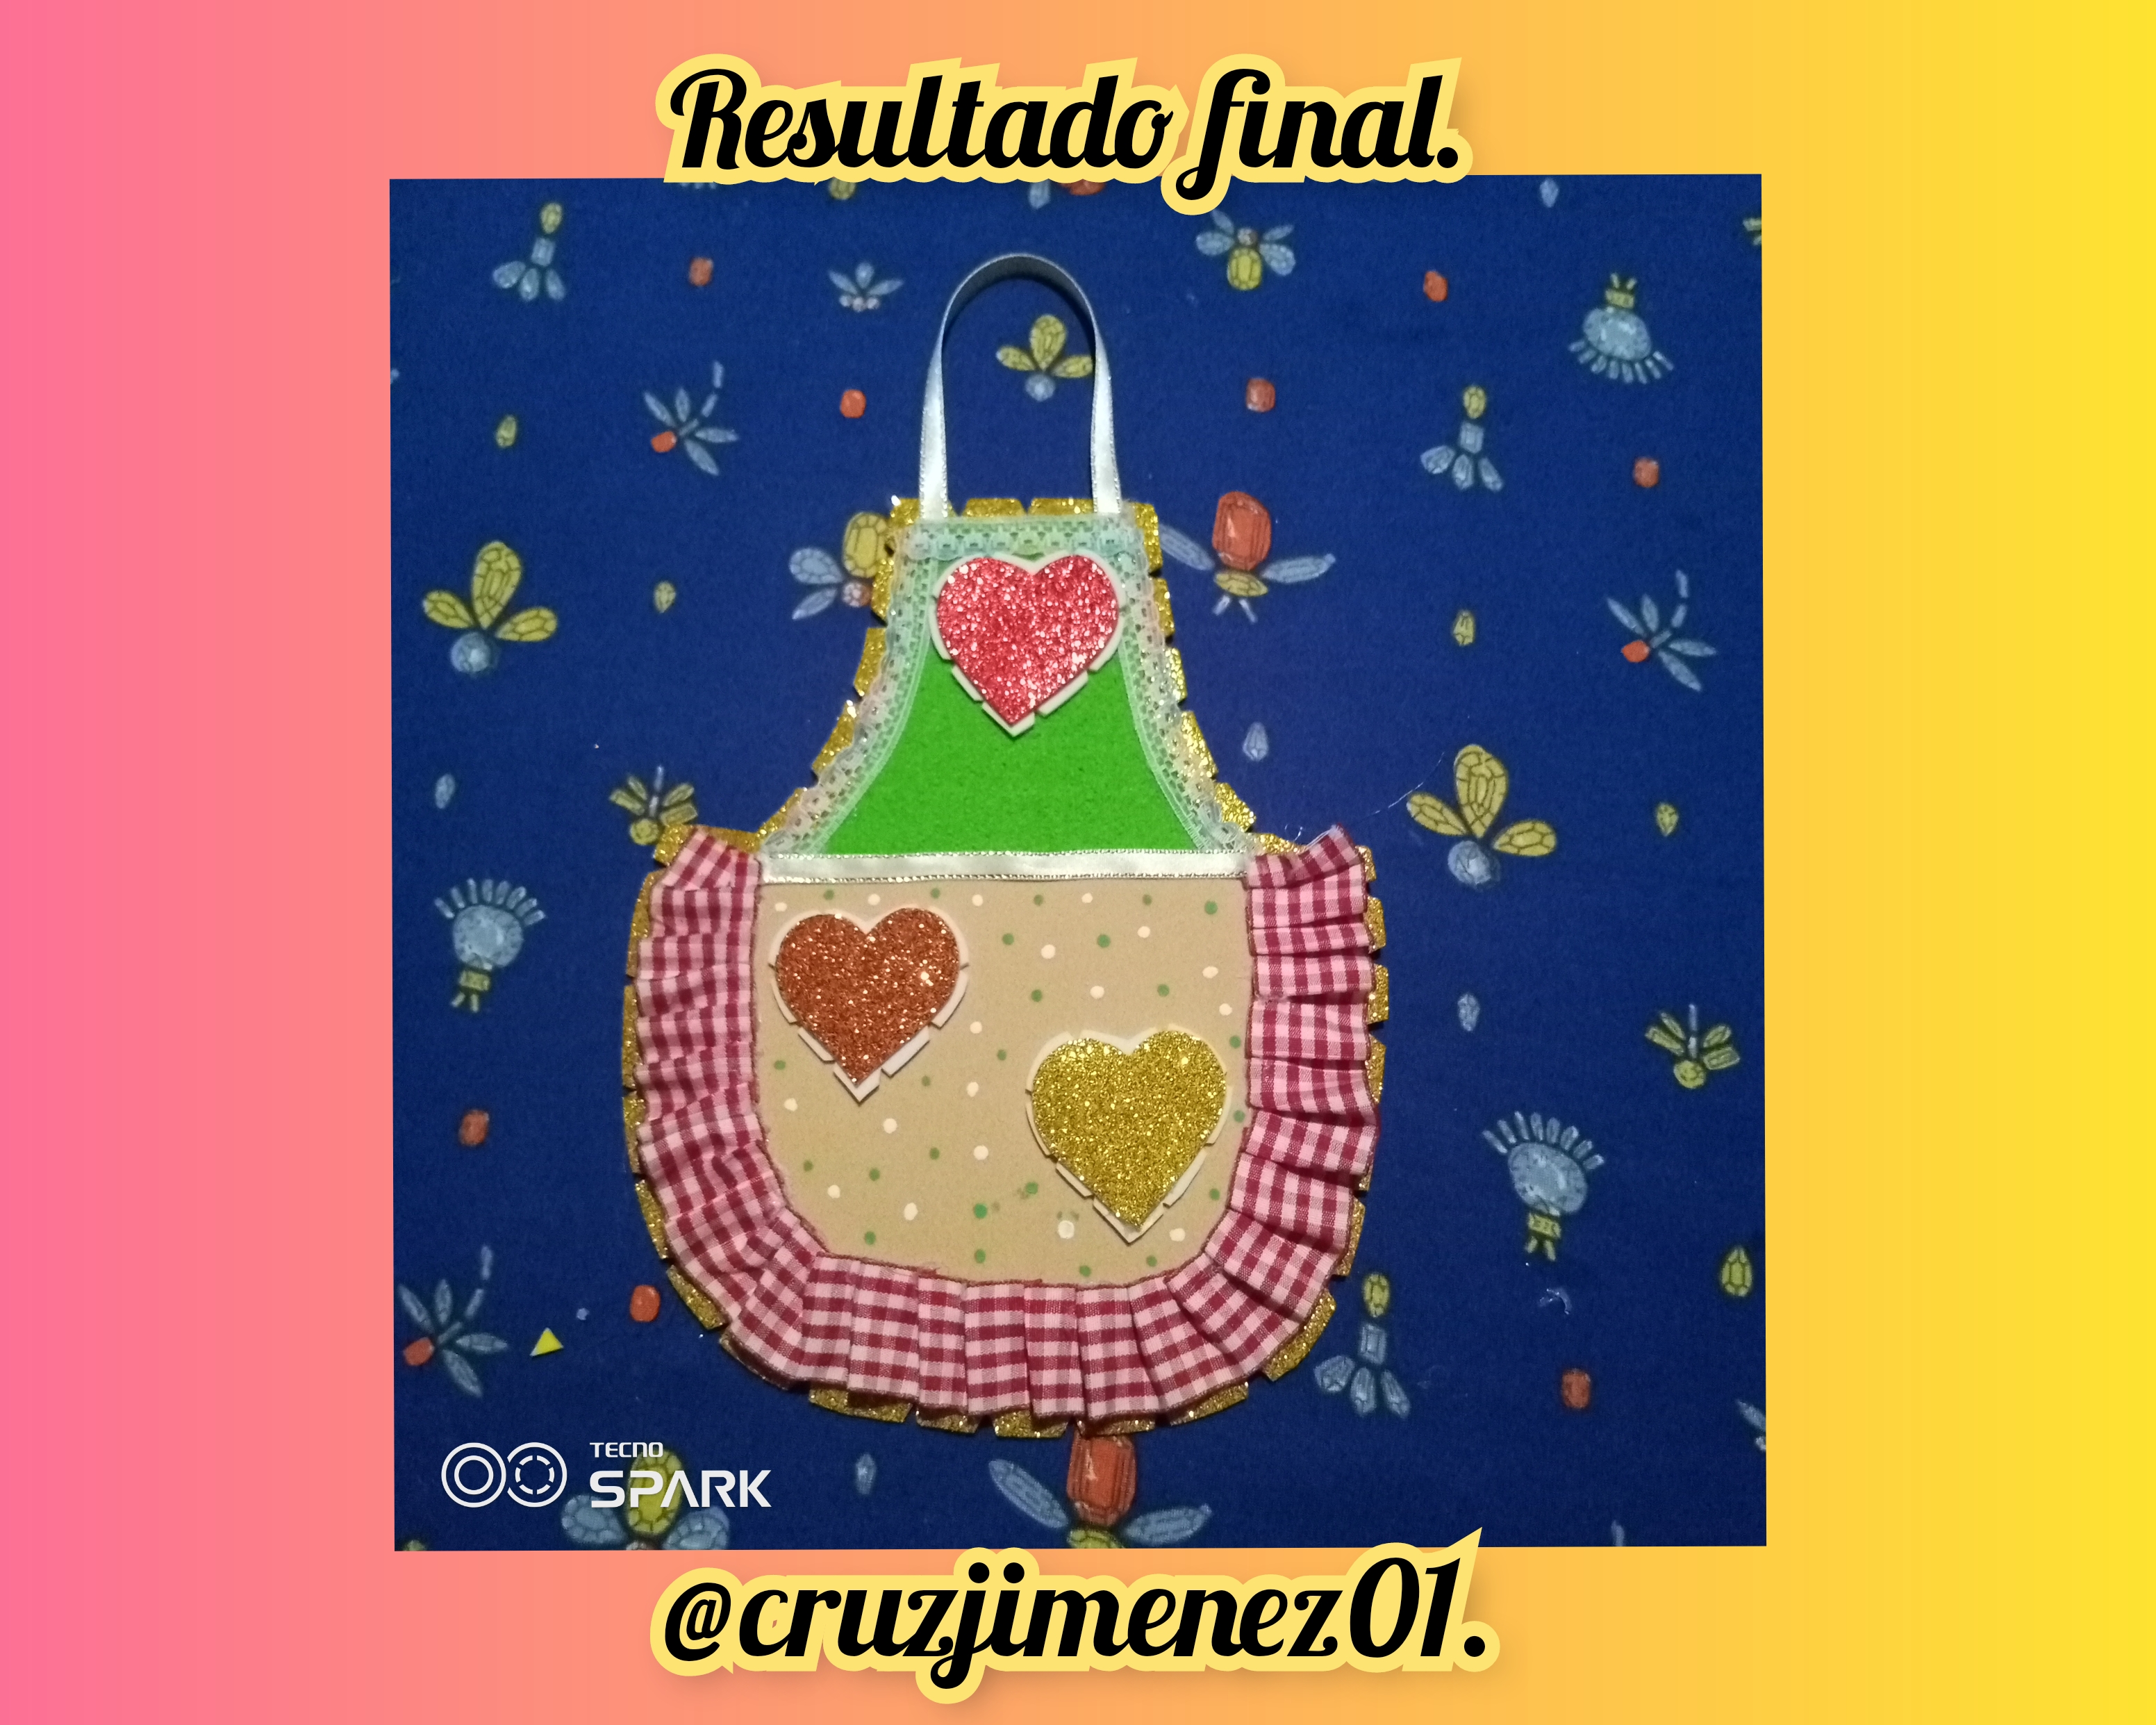
This is the final result, this beautiful and practical lighter holder, ideal for storing our lighters in our kitchen and it is also very decorative for our kitchen. Thanks for watching until the end. God bless you and see you very soon with another creative idea. See you later.
Las fotos fueron tomadas, con mi dispositivo androide TECNO SPARK 6 GO y editadas con la aplicación GRIDART.
The photos were taken with my TECNO SPARK 6 GO android device and edited with the GRIDART application.
Te quedo muy bonito, a mi mamá le encantan este tipo de cosas. Se lo voy a mostrar y si le gusta me voy a copiar del tuyo.. Jejjejeje
No no nooo, esto esta espectacularrrrrr sobretodo para mi casa donde vive perdiendose este artefacto jajajjaa es increible como se pierde, asi que esto ayudara, ademas que se ve lindisimo☺️