
Happy Saturday dear community, blessed and prosperous day for all, today I am participating in the weekly contest moderated by the friend @equipodelta, mundo de fieltro.
This time I made a beautiful pincushion 📍in the shape of a Cupcake 🧁 I show you how!
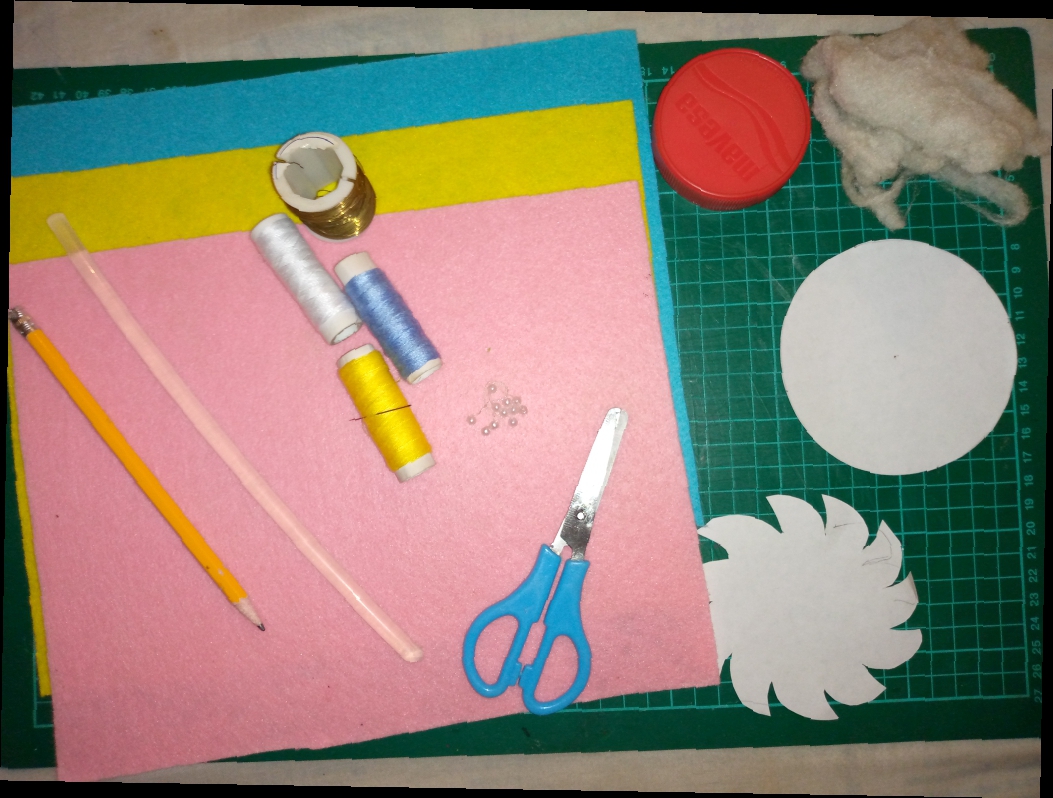
• Felts, pink, light blue,
and yellow
• Silicone
• Scissor
• Pillow filling
• Threads and needle
• Decorative pearls
• Golden thread
• Plastic top
• Molds
Feliz sábado querida comunidad, bendecido y próspero día para todos, hoy me encuentro participando en el concurso semanal moderado por la amiga @equipodelta, mundo de fieltro.
En esta ocasión realice un hermoso alfiletero 📍en forma de Cupcake 🧁les muestro como!
• Fieltros, rosa, celeste,
y amarillo
• Silicóna
• Tijera
• Relleno de almohada
• Hilos y aguja
• Perlas decorativas
• Hilo dorado
• Tapa plástica
• Moldes
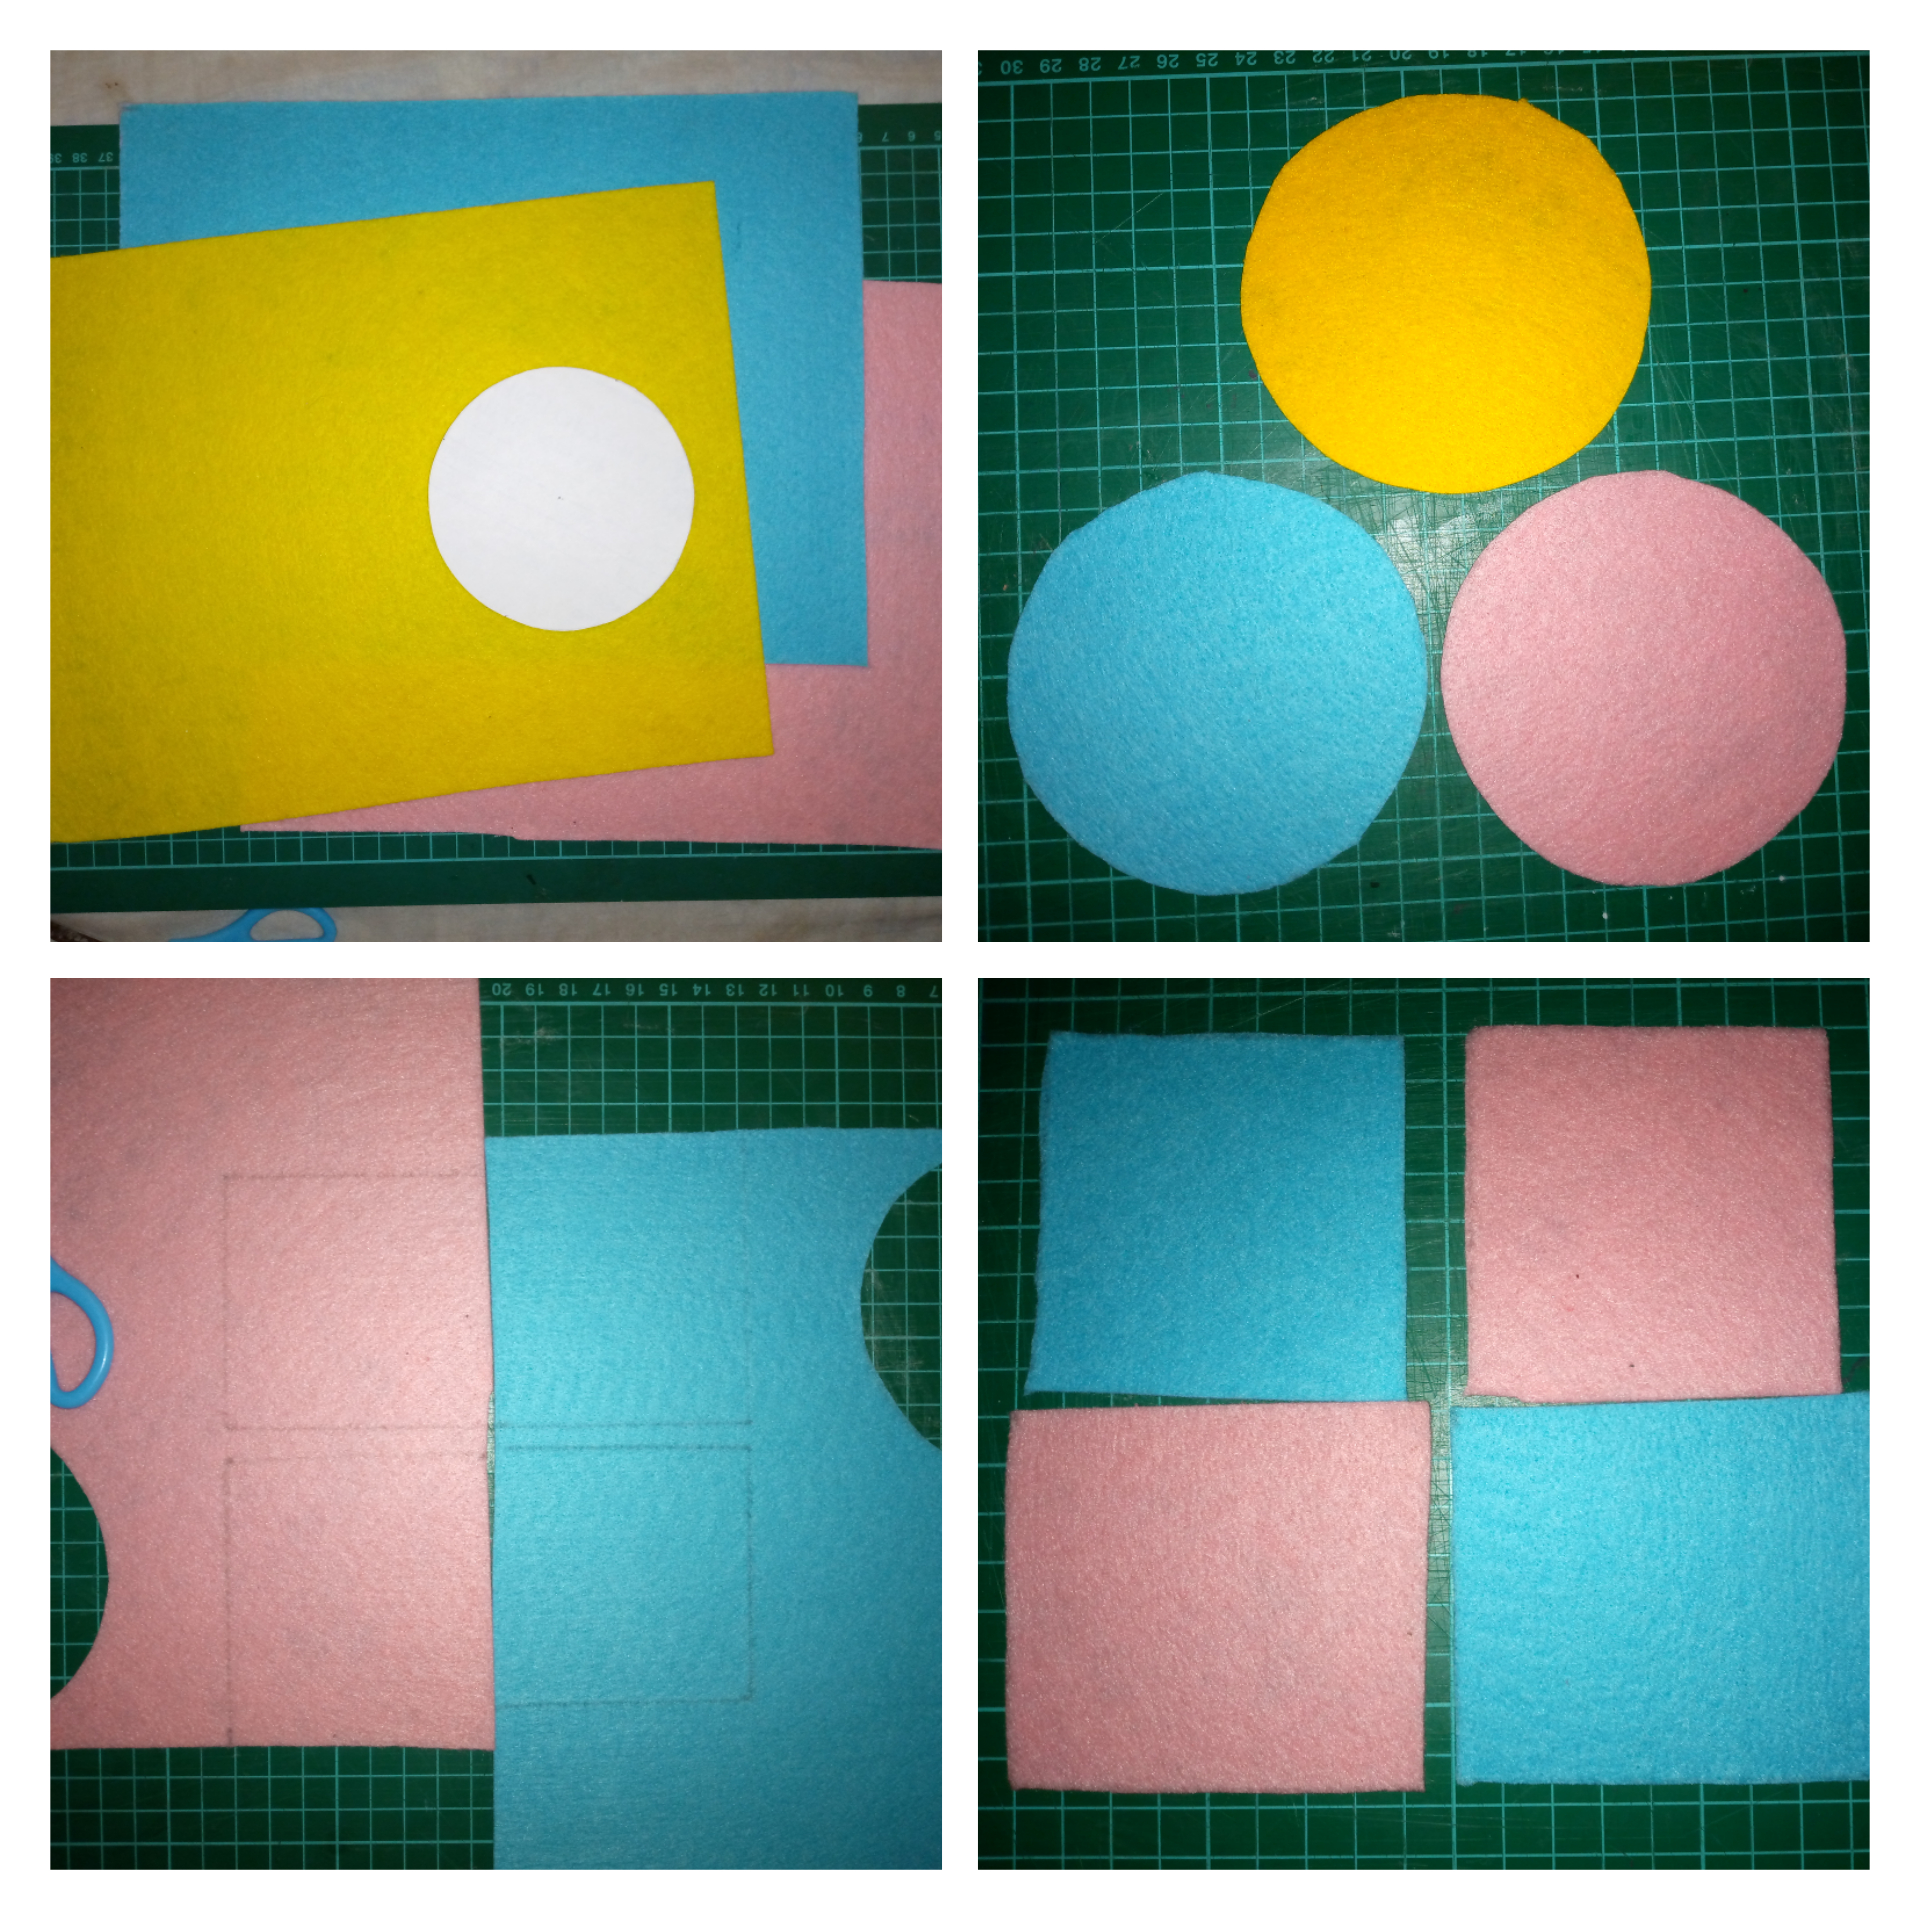
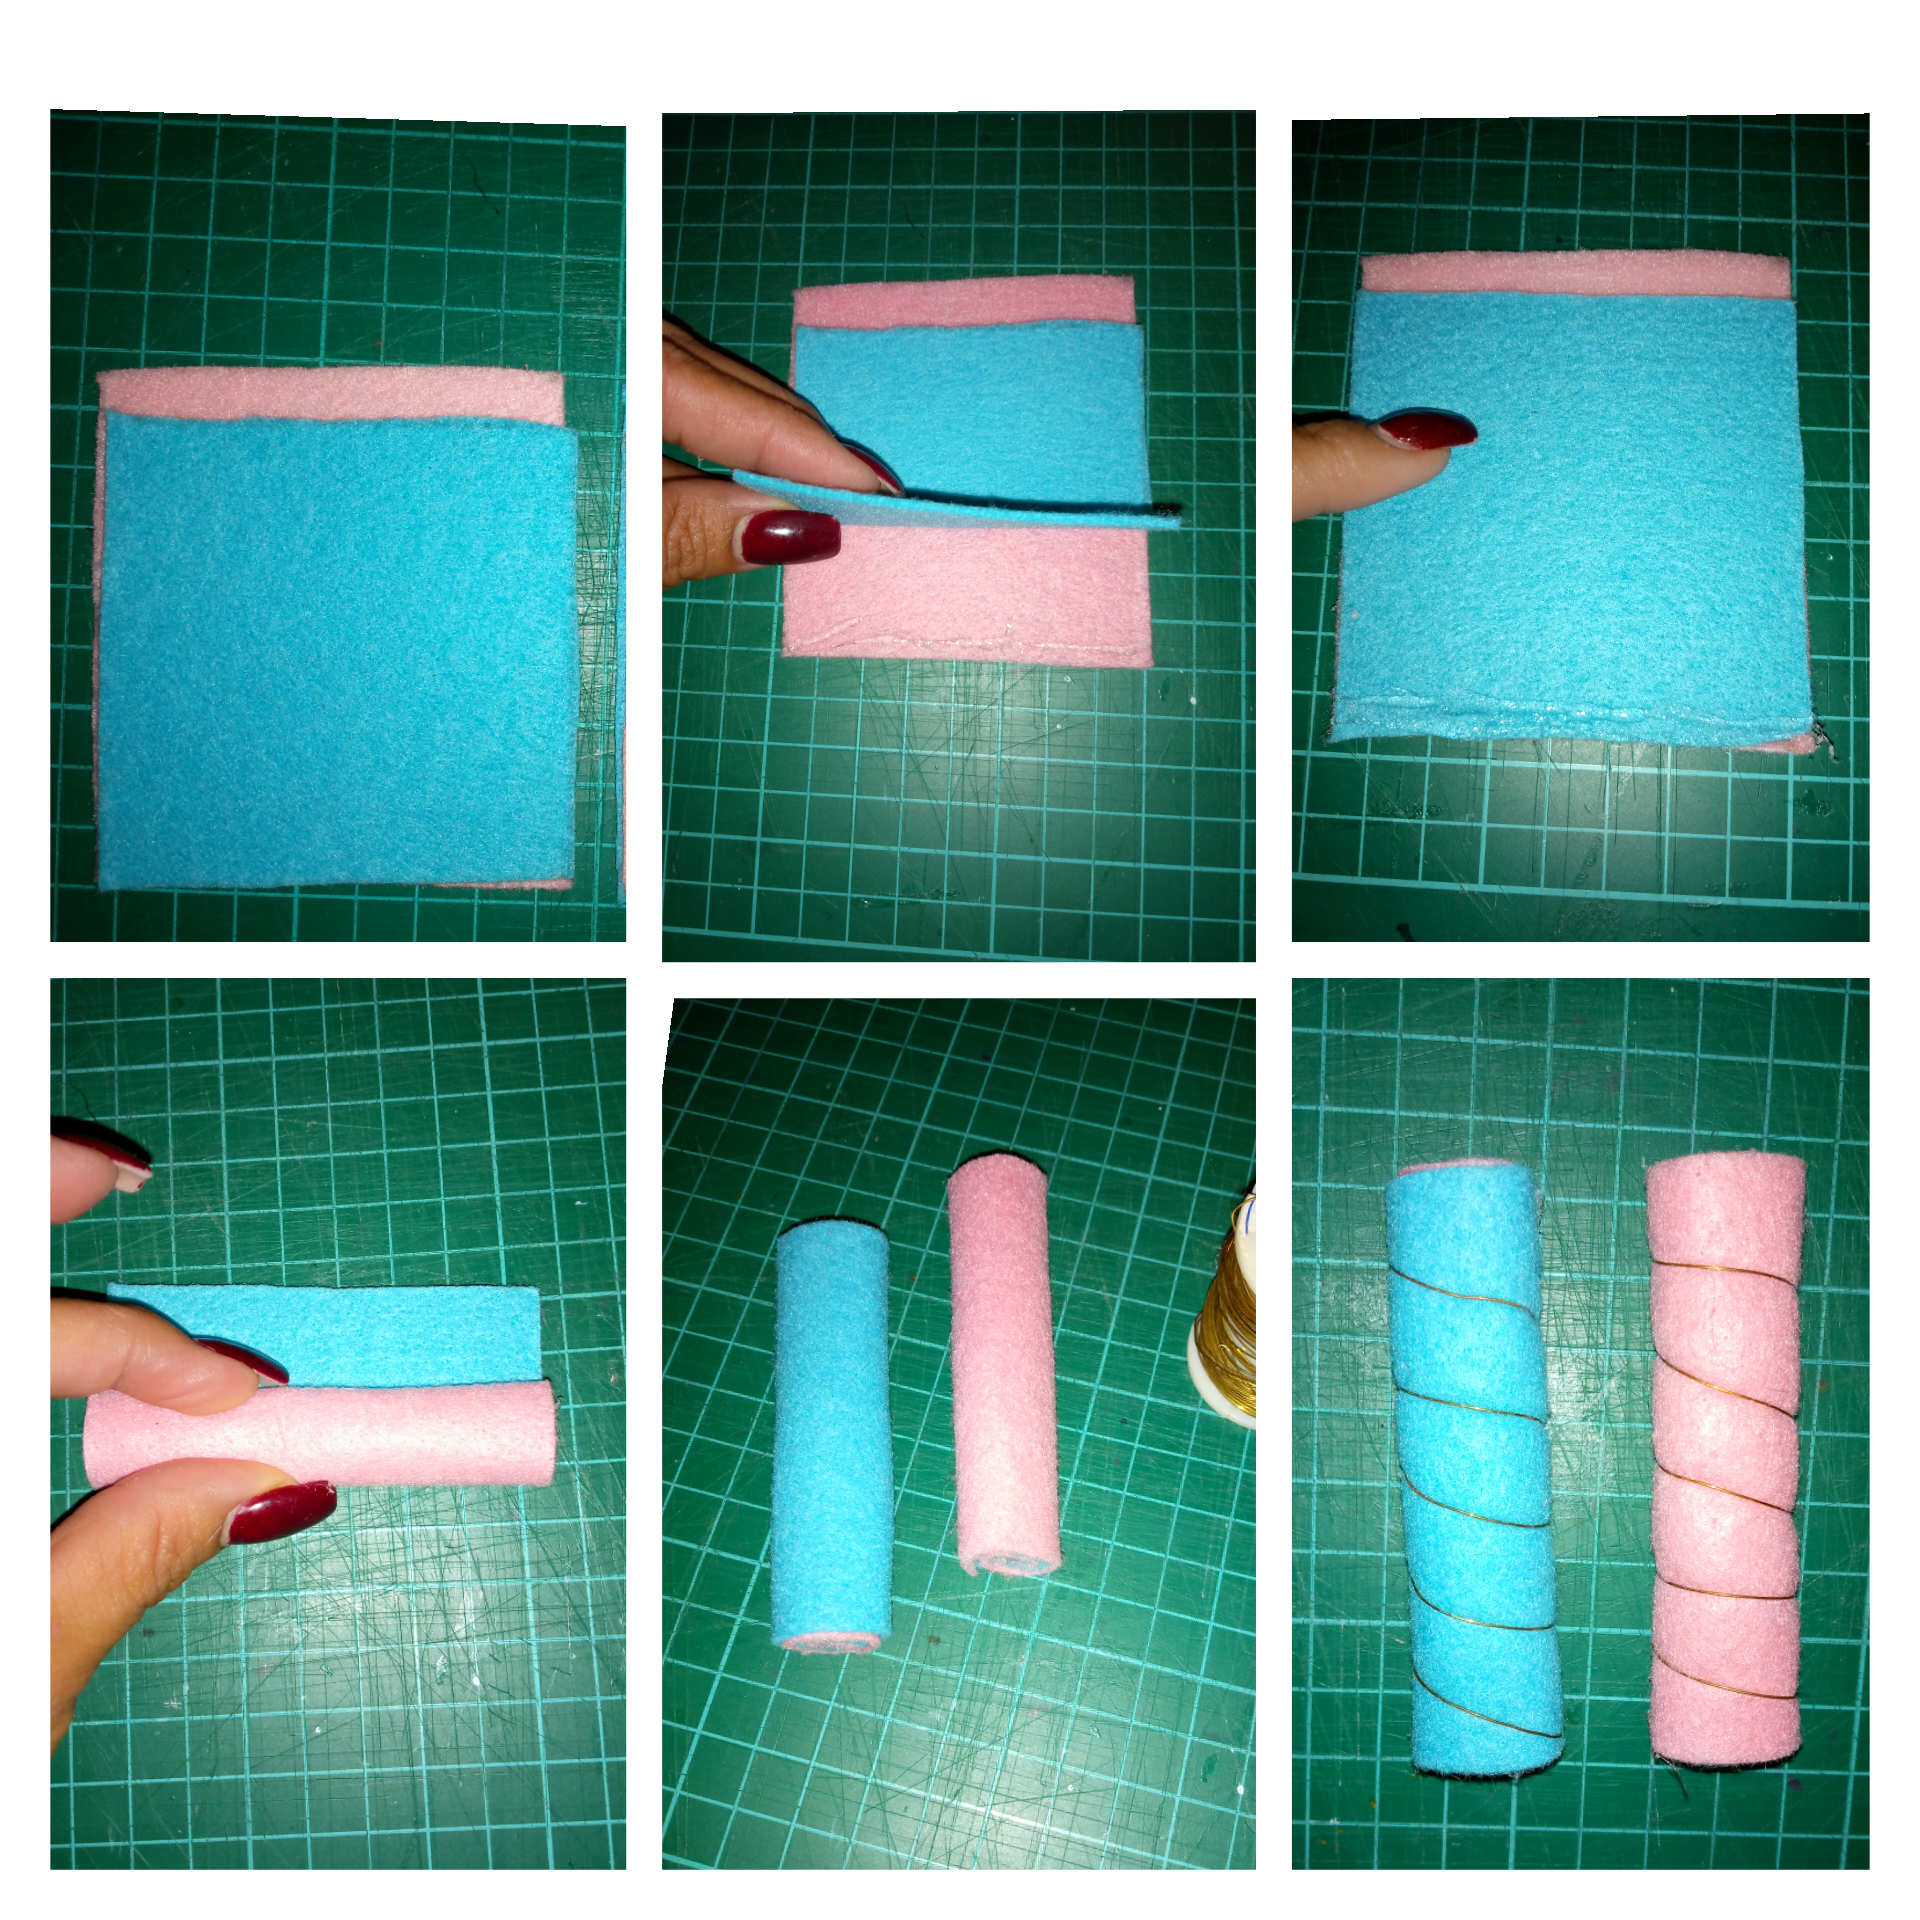
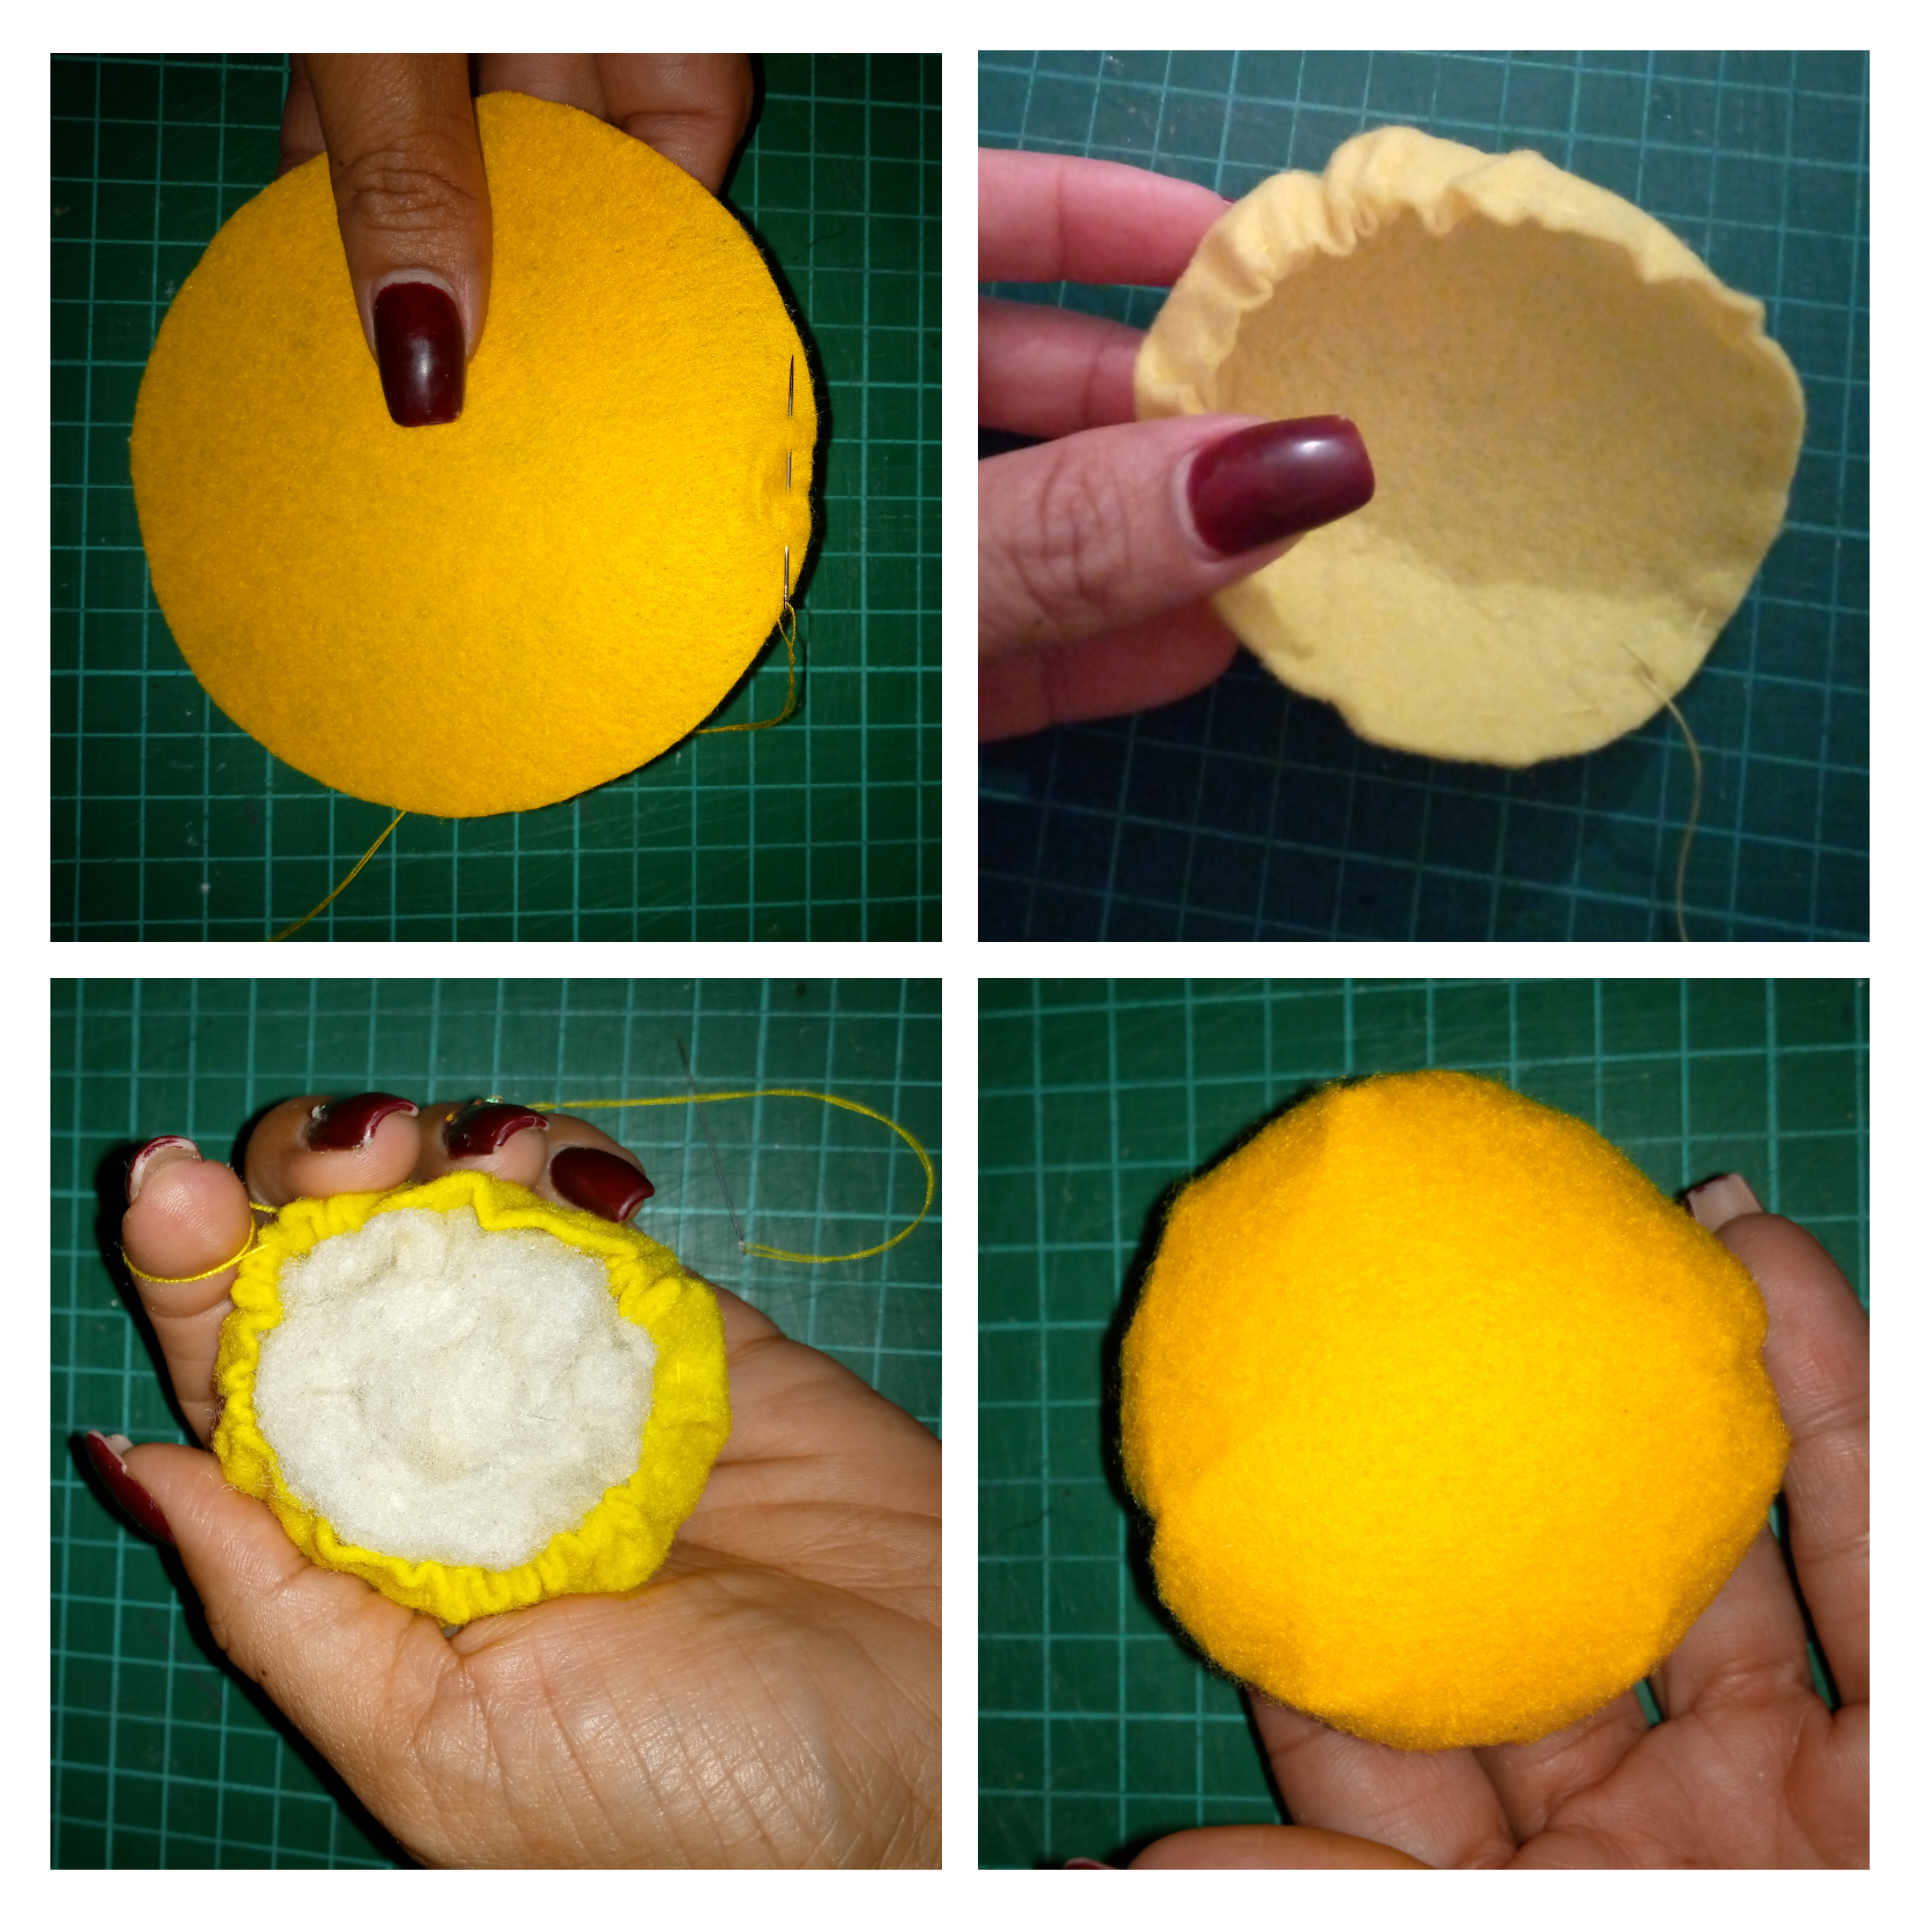
1- We copy and cut the mold of the circle on the felt, we will make 3 circles of 10 cm in diameter of each color, we draw and cut 2 rectangles of 7cmx8.5cm and 2 squares of 7cmx7cm.
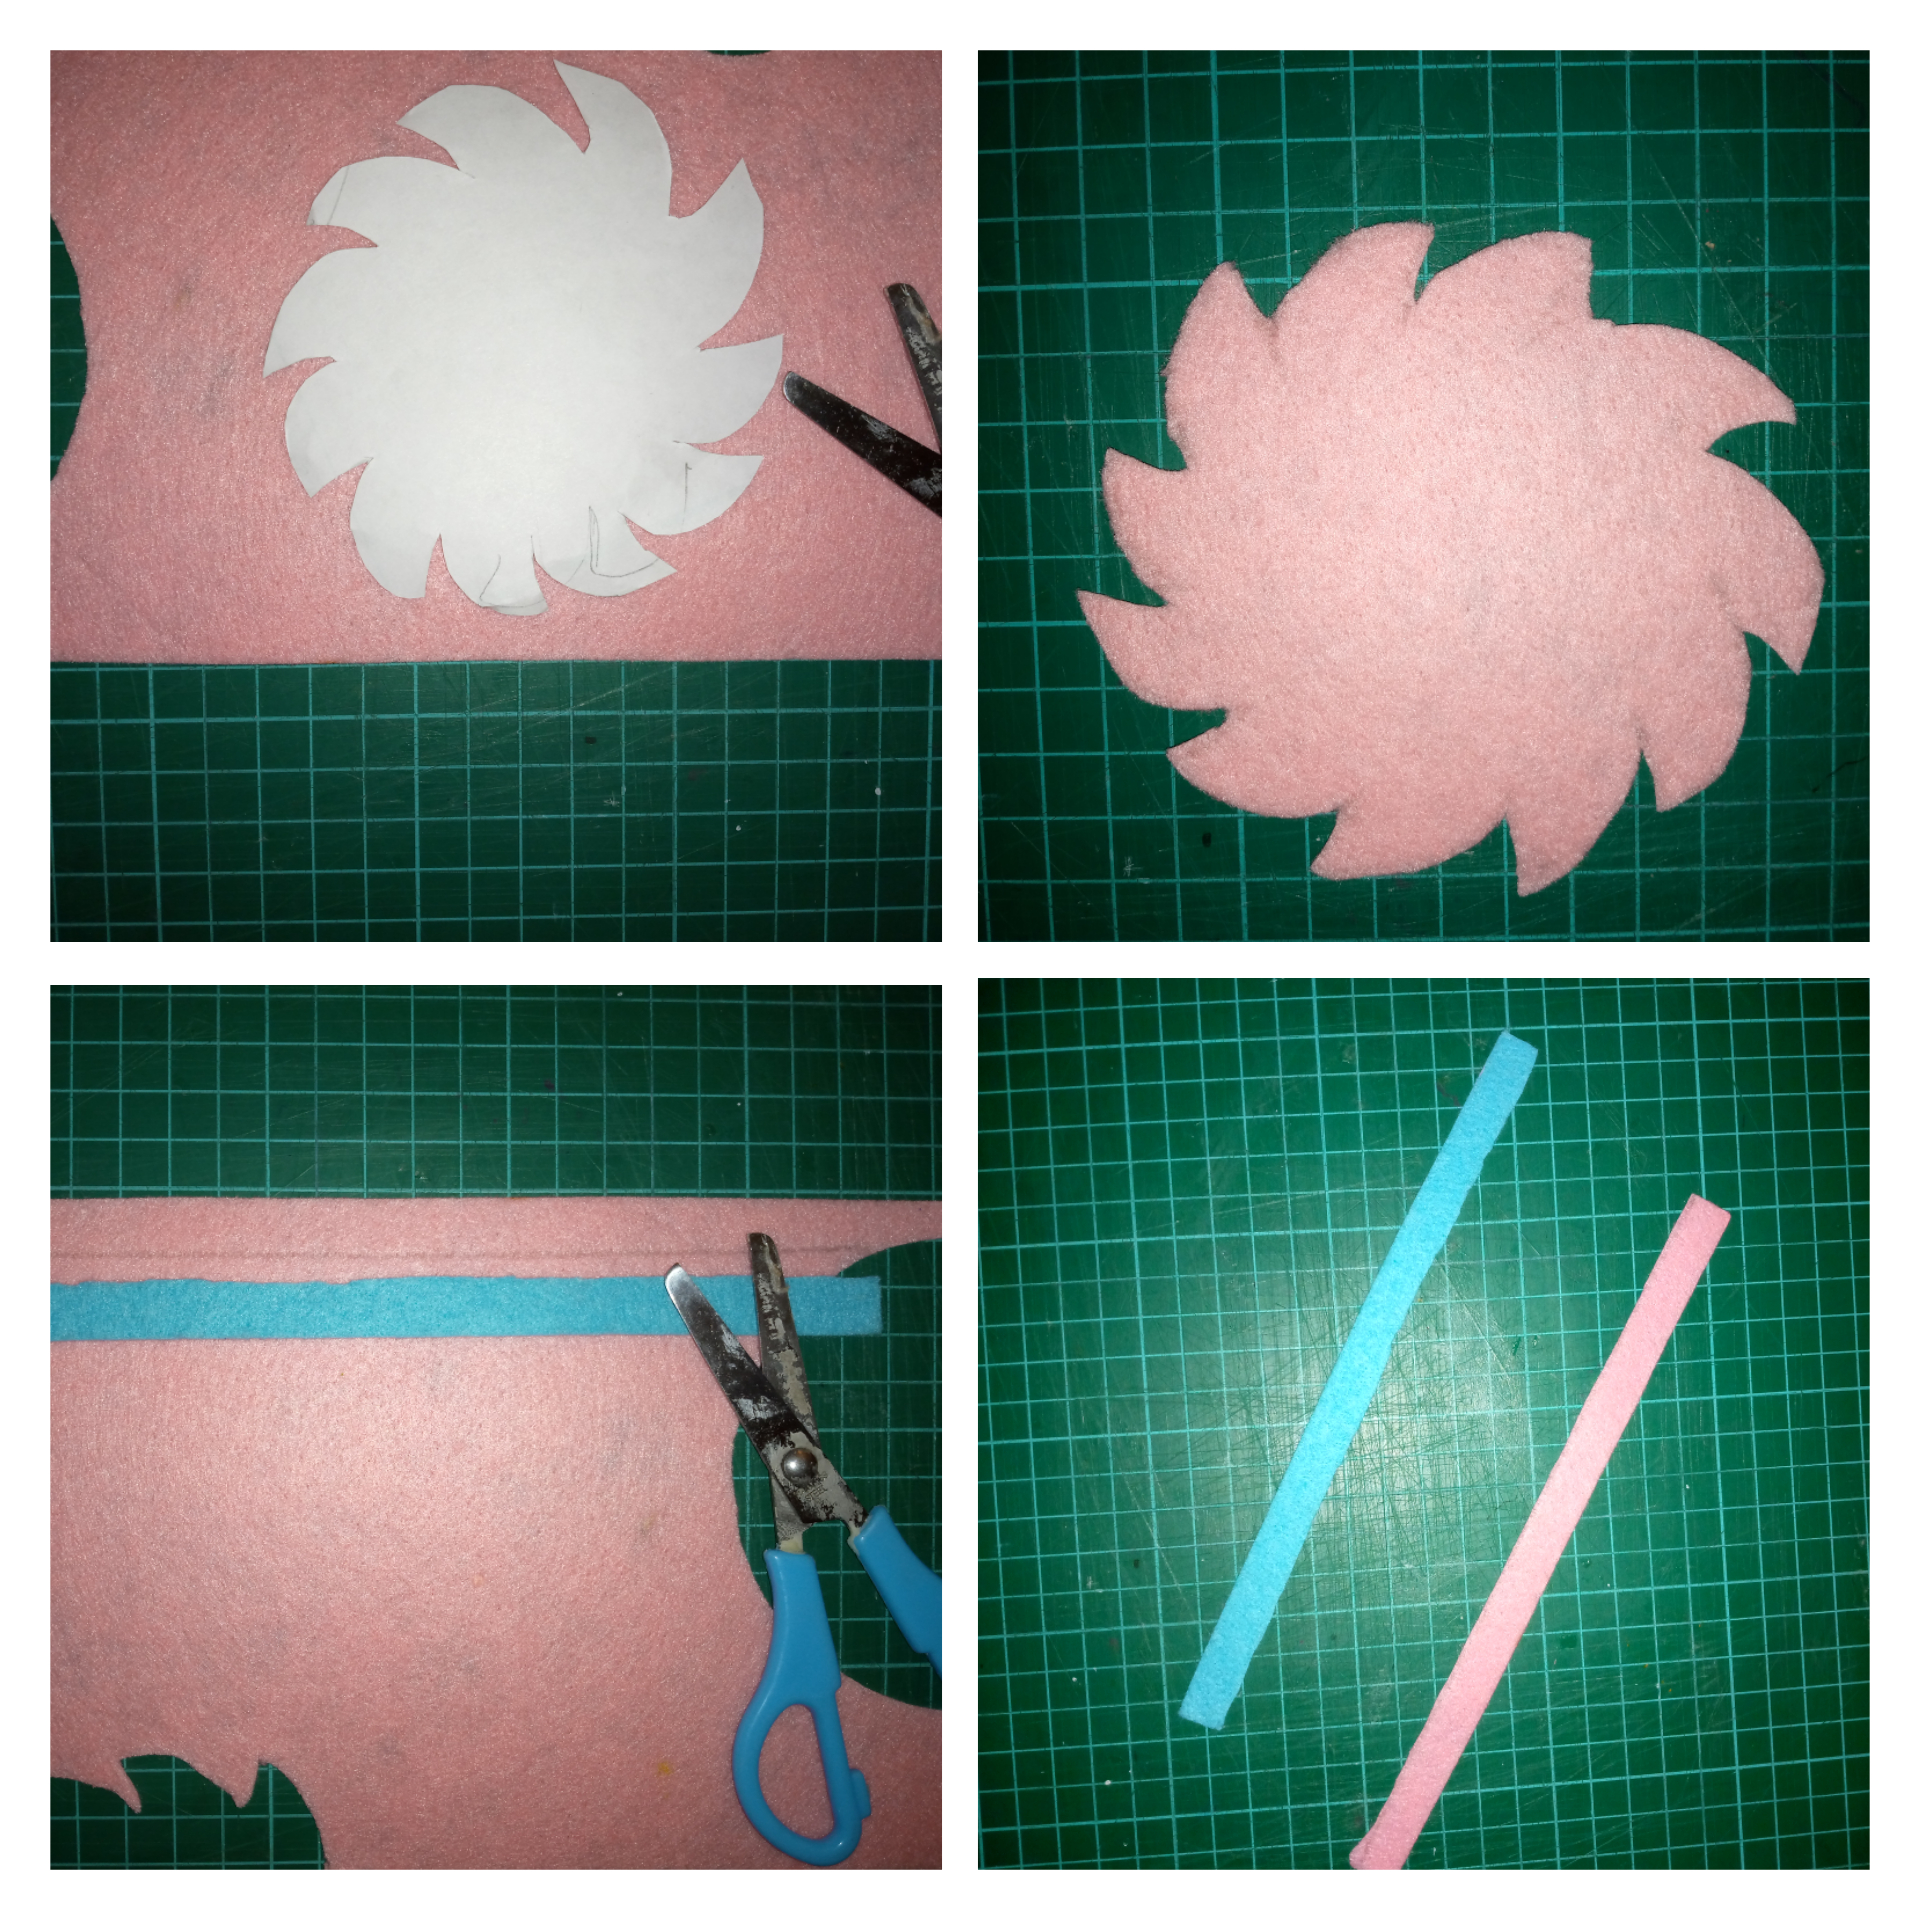
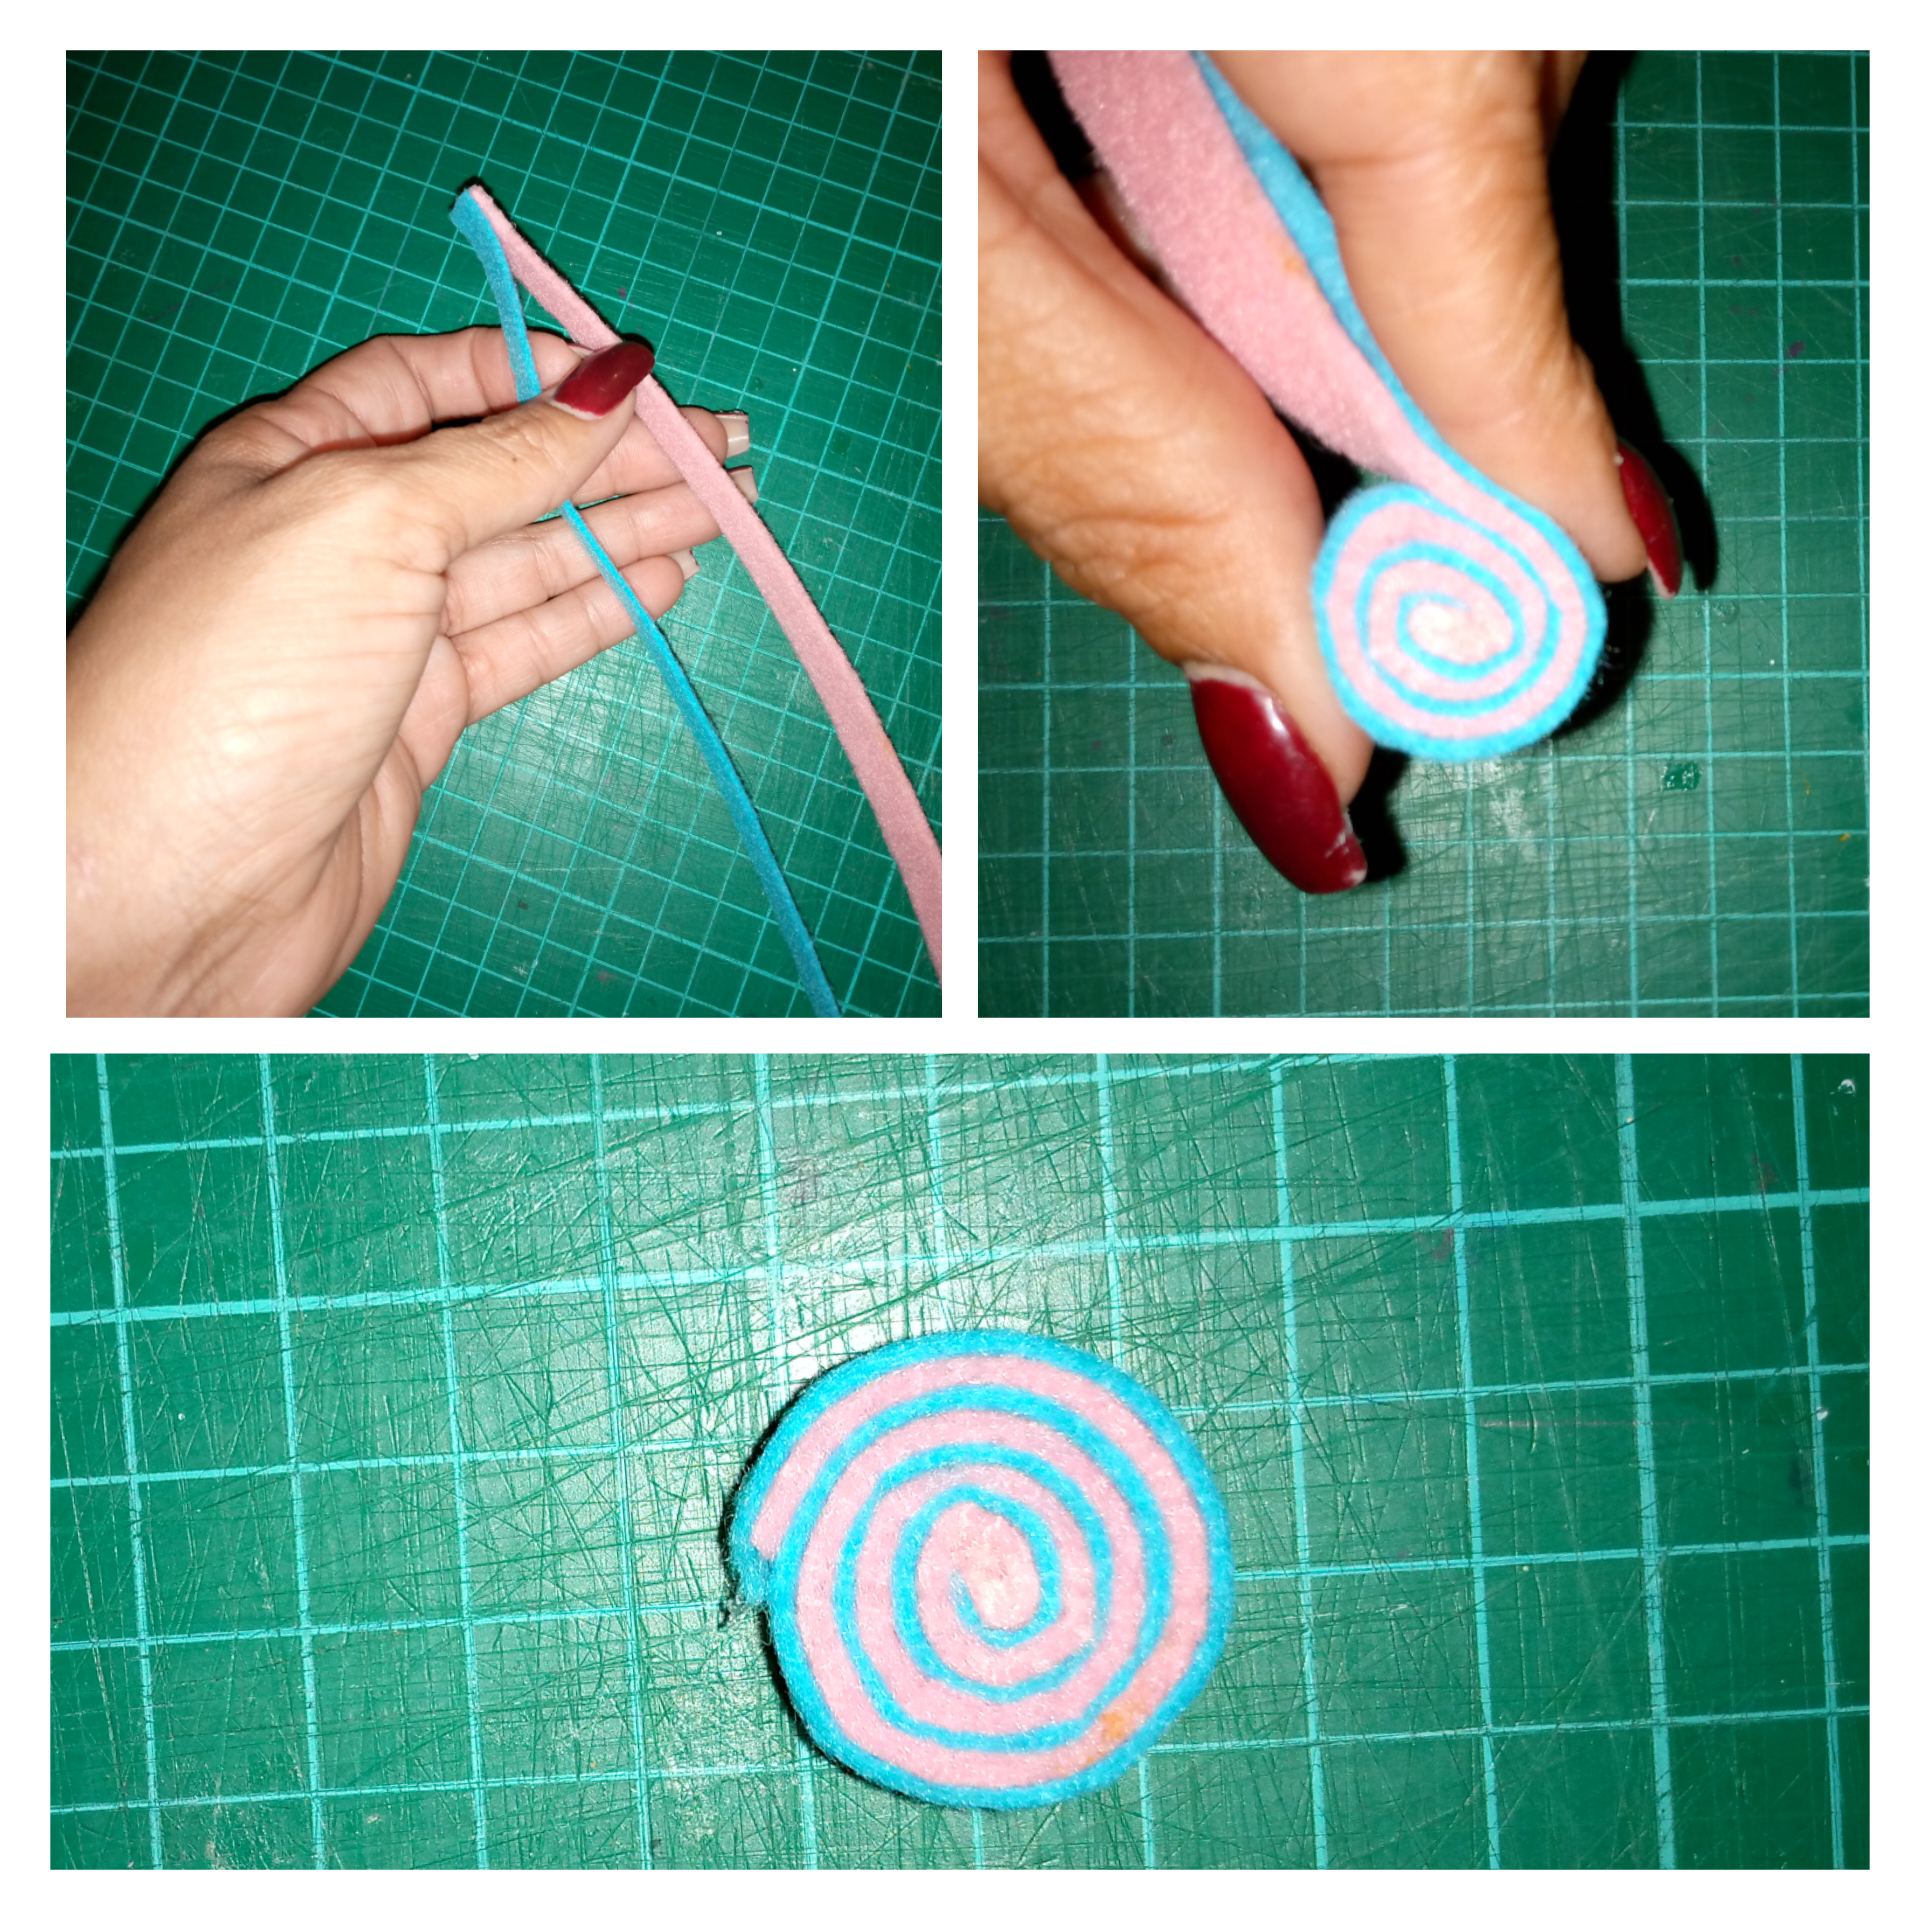
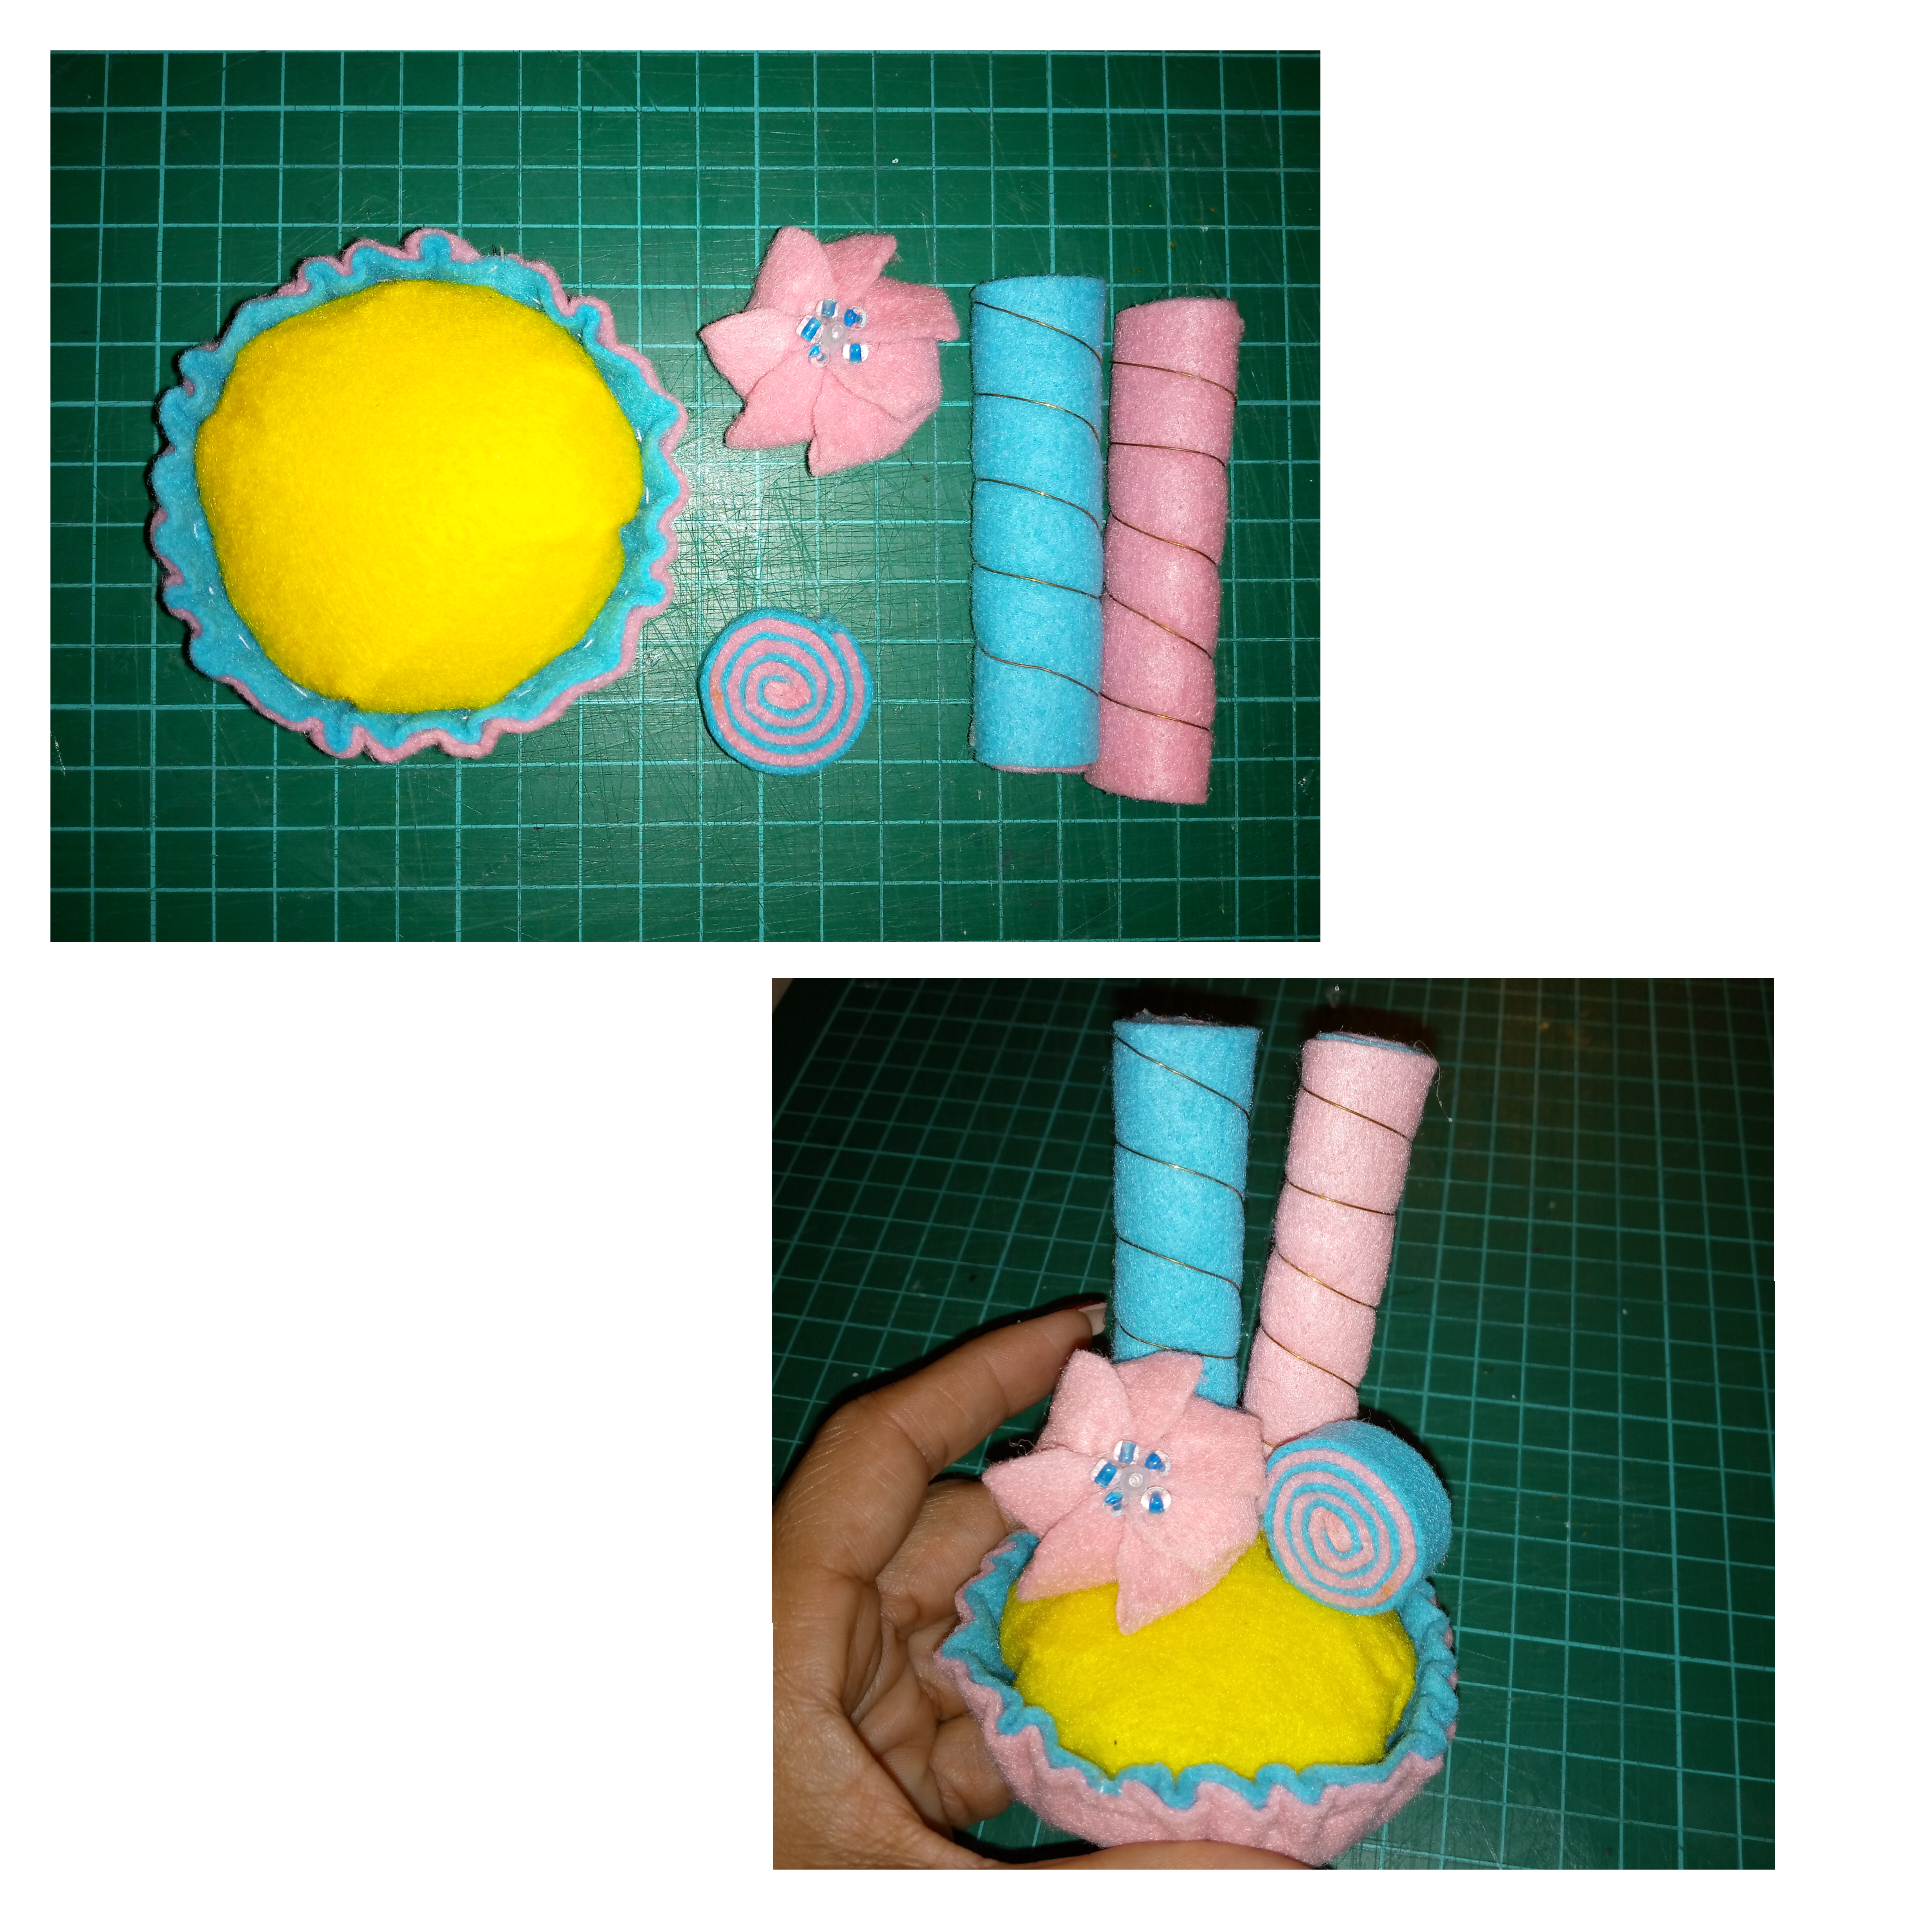
2- We copy the cookie mold on the pink felt and cut, we also cut two strips of 1cmx20cm.
1- Copiamos y recortamos el molde del círculo en el fieltro, haremos 3 círculos de 10 cm de diámetro de cada color, dibujamos y recortamos 2 rectángulos de 7cmx8,5cm y 2 cuadrados de 7cmx7cm.
2- Copiamos el molde de la galleta en el fieltro rosa y recortamos, también recortamos dos tiras de 1cmx20cm.
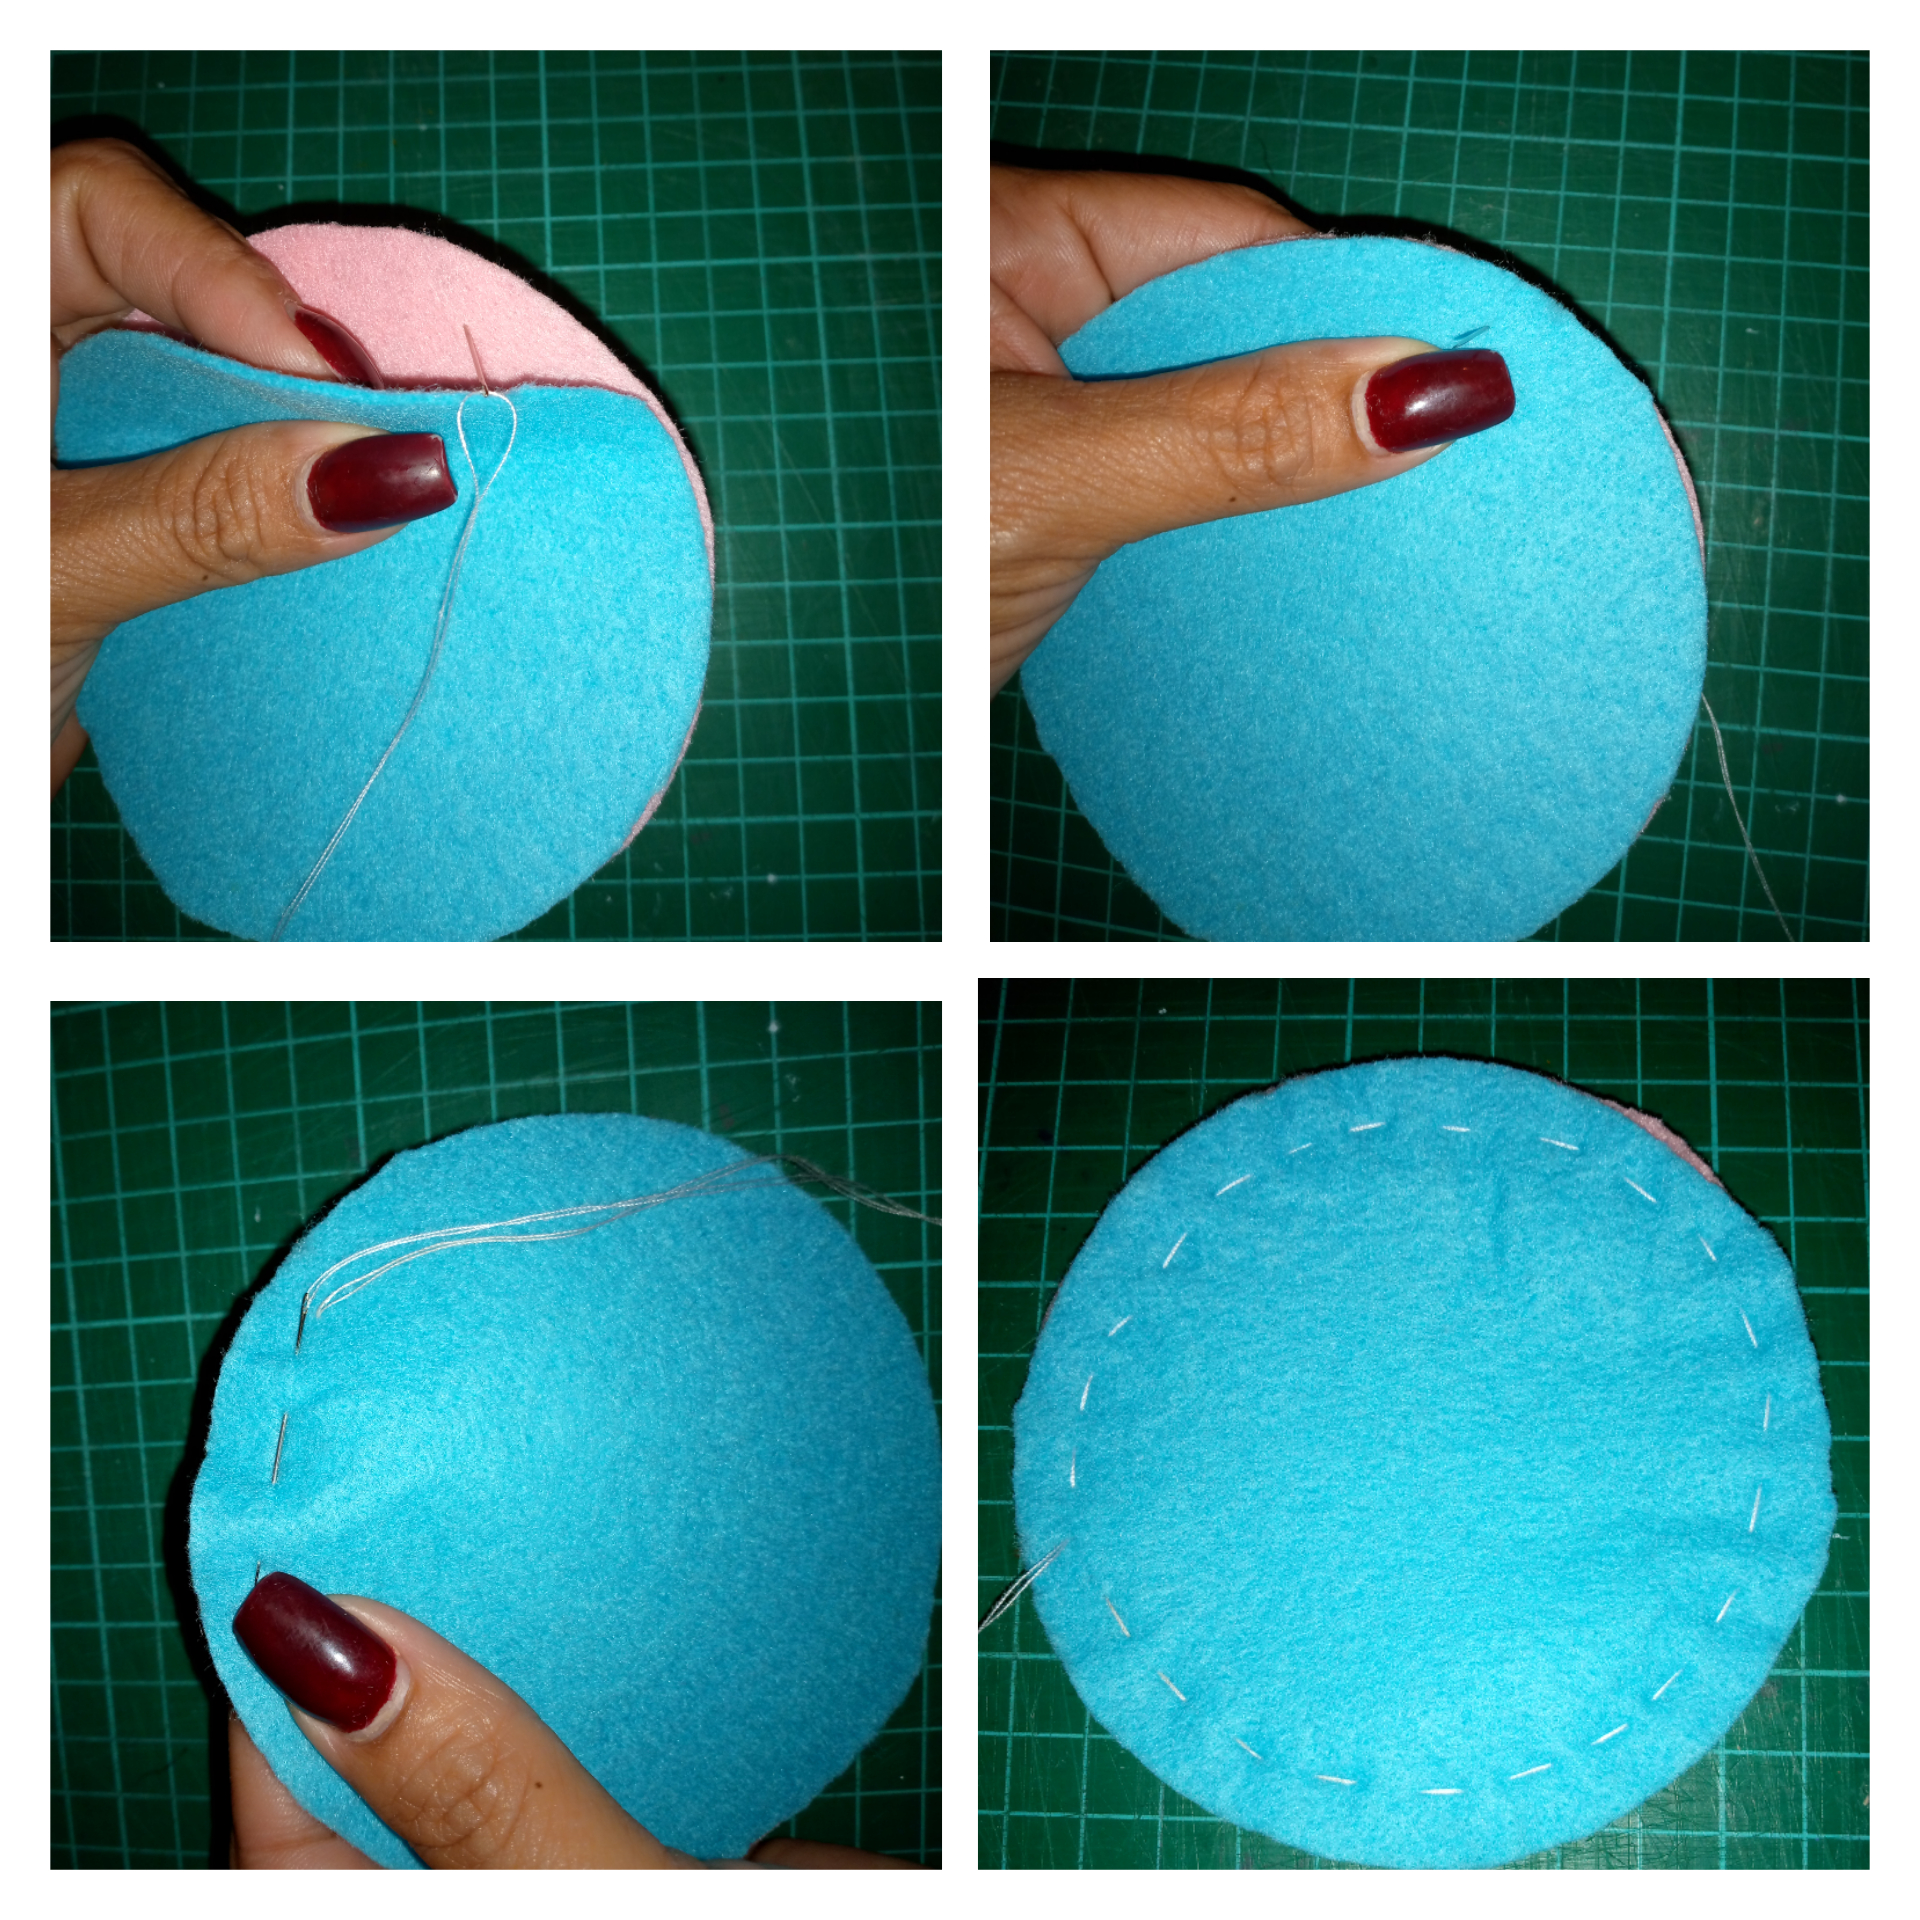
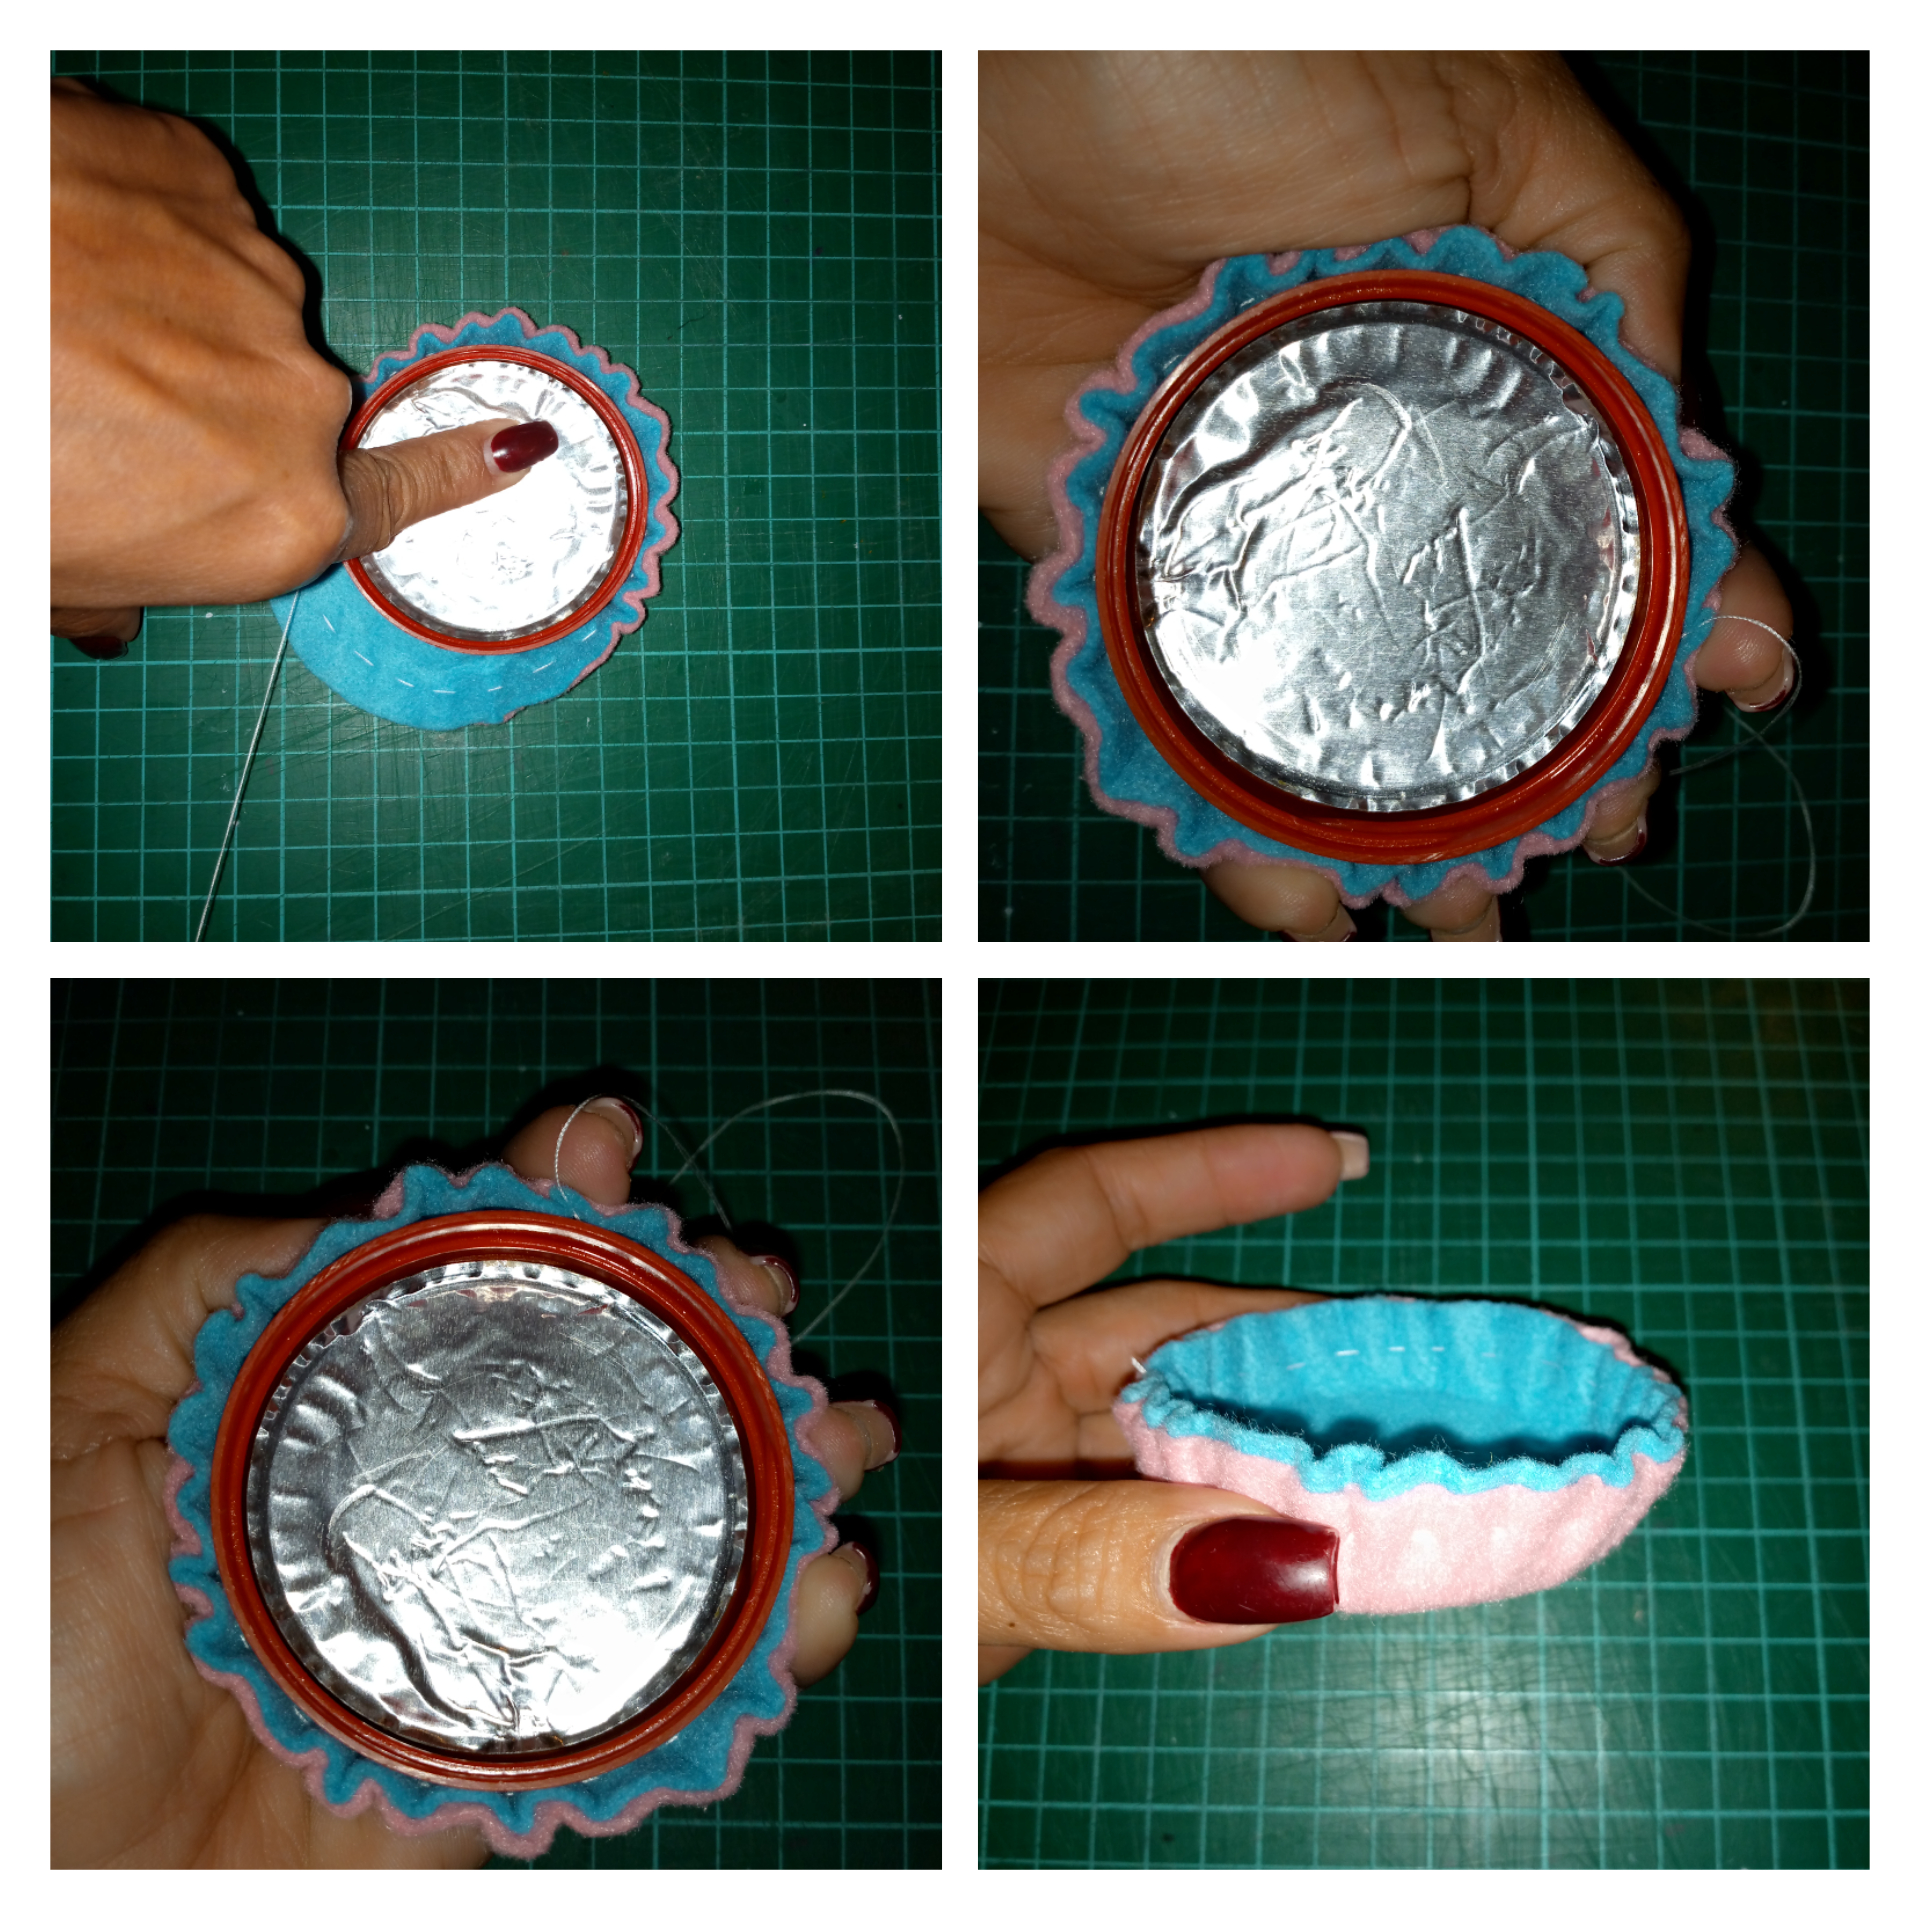
3- We continue sewing two circles, we make stitches leaving 5 millimeters of space from the edge, we sew all around.
4- We place the plastic lid in the center and carefully pull the thread forming what will be the basket, secure with a knot and remove the lid.
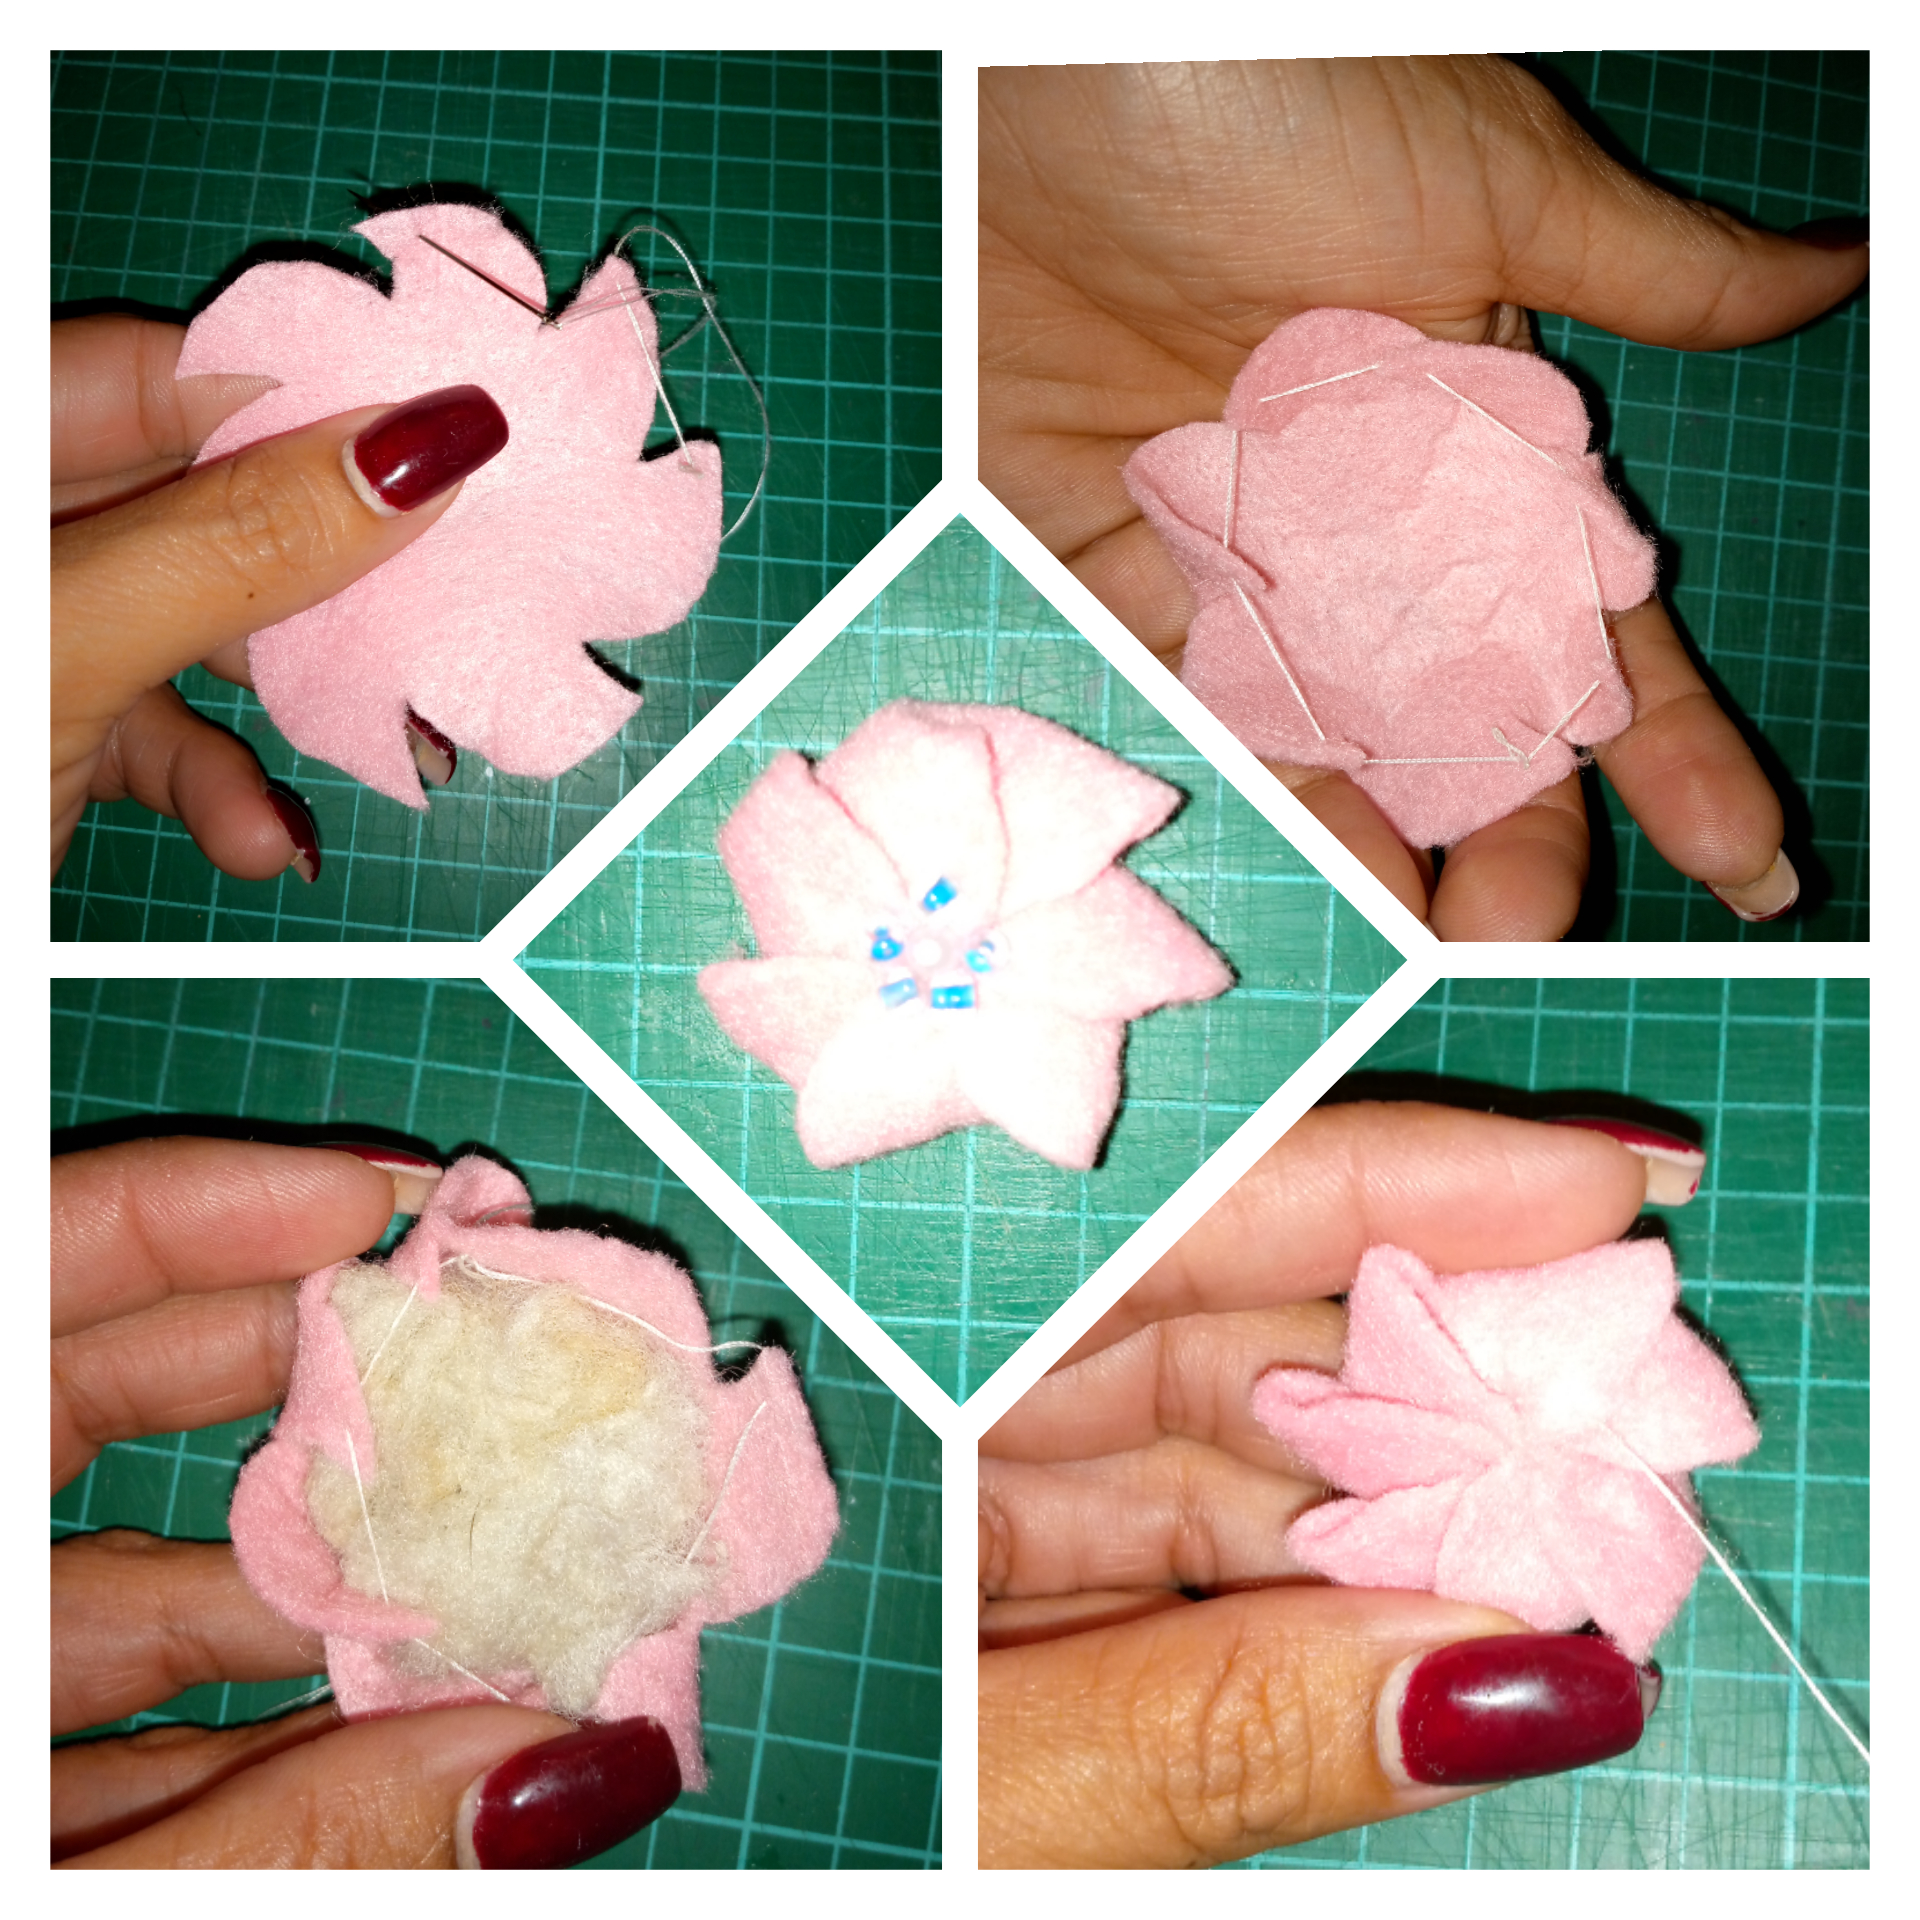
5- We will make our first cookie with the mold cut out of the pink felt, we insert the water in each of the tips, we pull a little, we put filling and we close pulling completely, then we decorate with some pearls.
3- Continuamos cosiendo dos círculos, hacemos puntadas dejando 5 milímetros de espacio desde el borde, cosemos por todo el alrededor.
4- Colocamos la tapa plástica en el centro y halamos el hilo con cuidado formando lo que será la cesta, aseguramos con un nudo y retiramos la tapa.
5- Haremos nuestra primera galleta con el molde recortado en el fieltro rosa, insertamos la aguja en cada una de las puntas, halamos un poco, colocamos relleno y cerramos halando completamente, luego decoramos con algunas perlitas.
6- We form our second cookies with the rectangles and squares previously cut out, a square is glued on a rectangle, then silicone is placed on the edge and rolled, then it is wrapped with golden thread in a diagonal way, gluing on each end .
7-Then we will make a third cookie with the two strips, glue the tip, roll and glue at the end.
8- Now we make the shape of the cupcake, we sew along the edge all the way around, we pull the thread a little, it is filled and closed a little, it is secured with a knot or we shape it with our hands.
6- Formamos nuestras segundas galletas con los rectángulos y cuadrados antes recortados, se pega un cuadrado sobre un rectángulo, luego se coloca silicón en el borde y se enrolla, después se envuelve con hilo dorado de forma diagonal pegando en cada punta.
7-Luego haremos una tercera galleta con la dos tiras, pegamos la punta, enrollamos y pegamos al finalizar.
8- Ahora elaboramos la forma del cupcake, cosemos junto al borde por todo el alrededor, halamos el hilo un poco, se rellena y se cierra un poco, se asegura con un nudo u le damos forma con las manos.
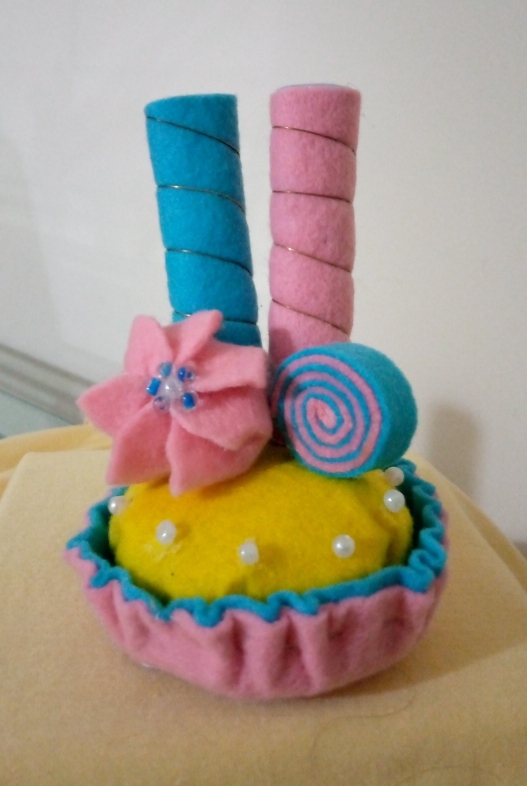
9- Having the pieces formed, we glue everything in place.
10- Finally we place the decorative pearls.
9- Teniendo las piezas formadas, pegamos todo en su lugar.
10- Por último colocamos las perlas decorativas.
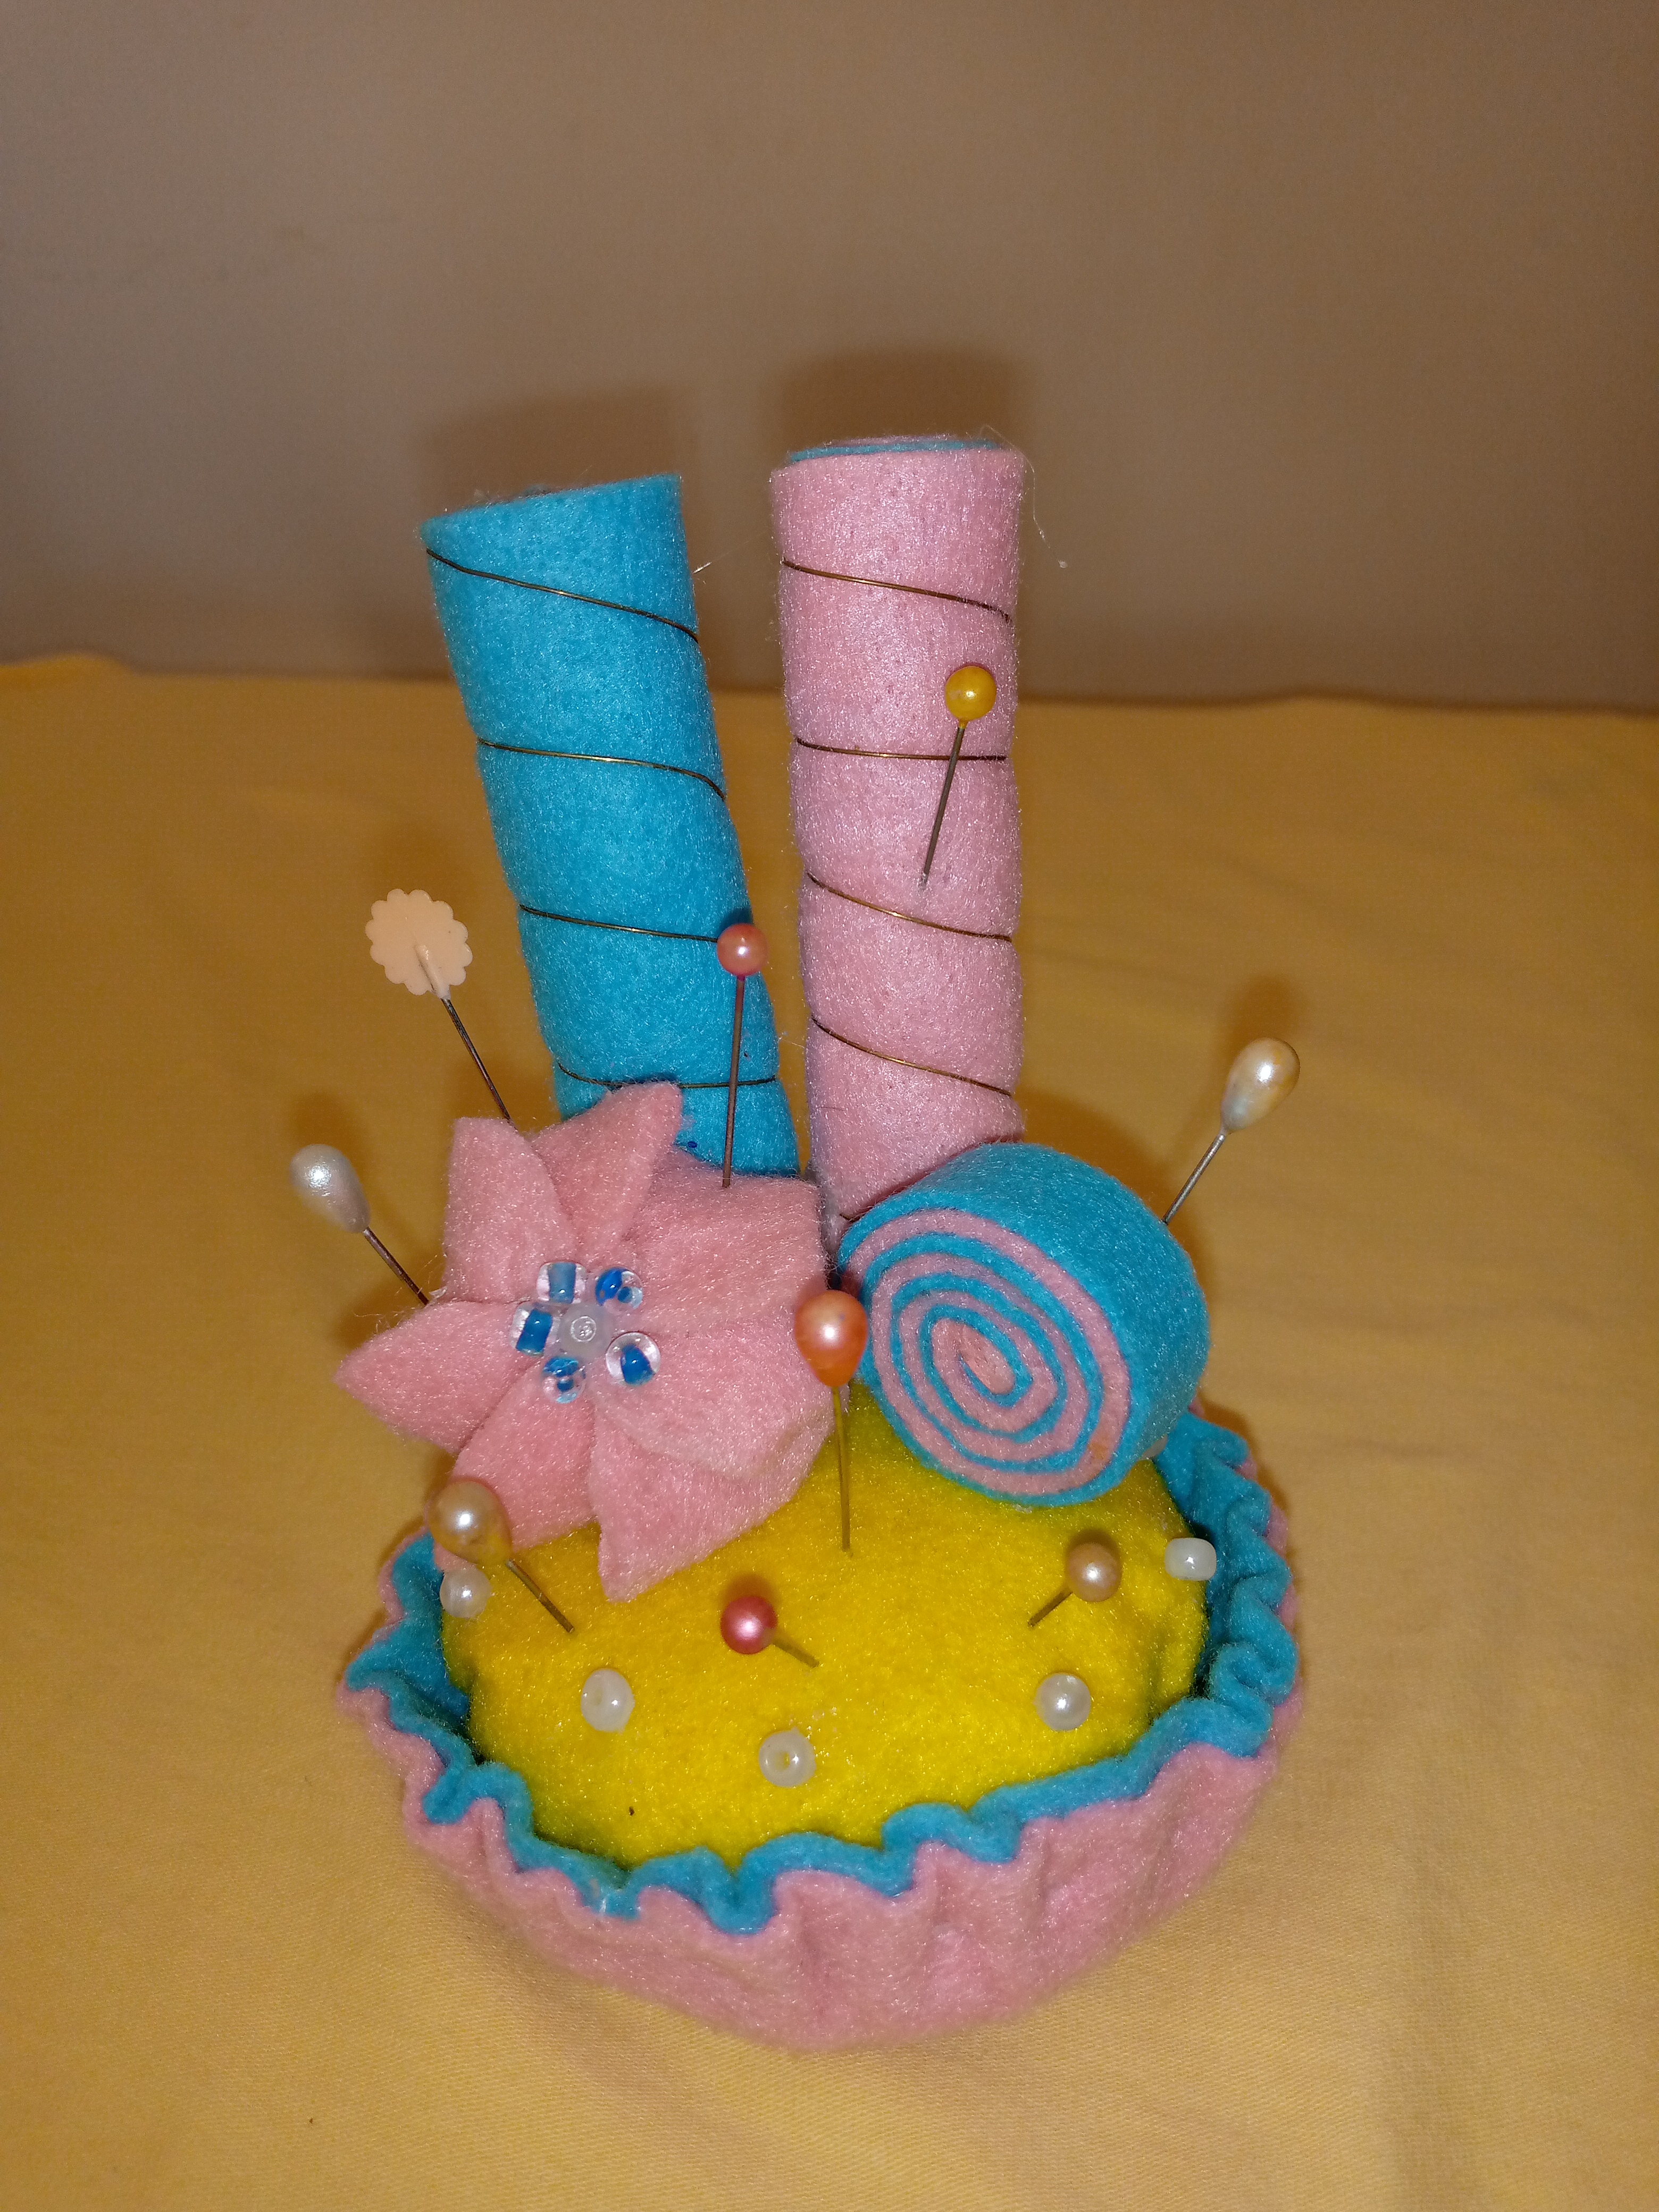
The end result, a beautiful cupcake-shaped pincushion, I hope you have liked friends and are encouraged to make it.
El resultado final, un hermoso alfiletero con forma de Cupcake, espero les haya gustado amigos y se animen a realizarlo.
I invite you to participate @ onixfemme27 here I leave the link
Invito a participar a @onixfemme27 acá dejo el enlace
Thank you very much for visiting my blog, see you soon!
@dayanaromer
Muchas gracias por visitar mi blog, nos vemos pronto!
@dayanaromer
Congratulations @dayanaromer! You have completed the following achievement on the Hive blockchain and have been rewarded with new badge(s) :
Your next target is to reach 300 replies.
You can view your badges on your board and compare yourself to others in the Ranking
If you no longer want to receive notifications, reply to this comment with the word
STOPCheck out the last post from @hivebuzz:
Que bello te quedo @dayanaromer muchas felicitaciones, suerte en el concurso
Gracias @nadeurdaneta, suerte para ti también, saludos
Está precioso, parece comestible. linda no olvides las bases del concurso :( te falto invitar a un amigo al concurso :( un abrazo.
Hola, muchas gracias @equipodelta, si lo invite, vuelva a revisar, saludos!!!