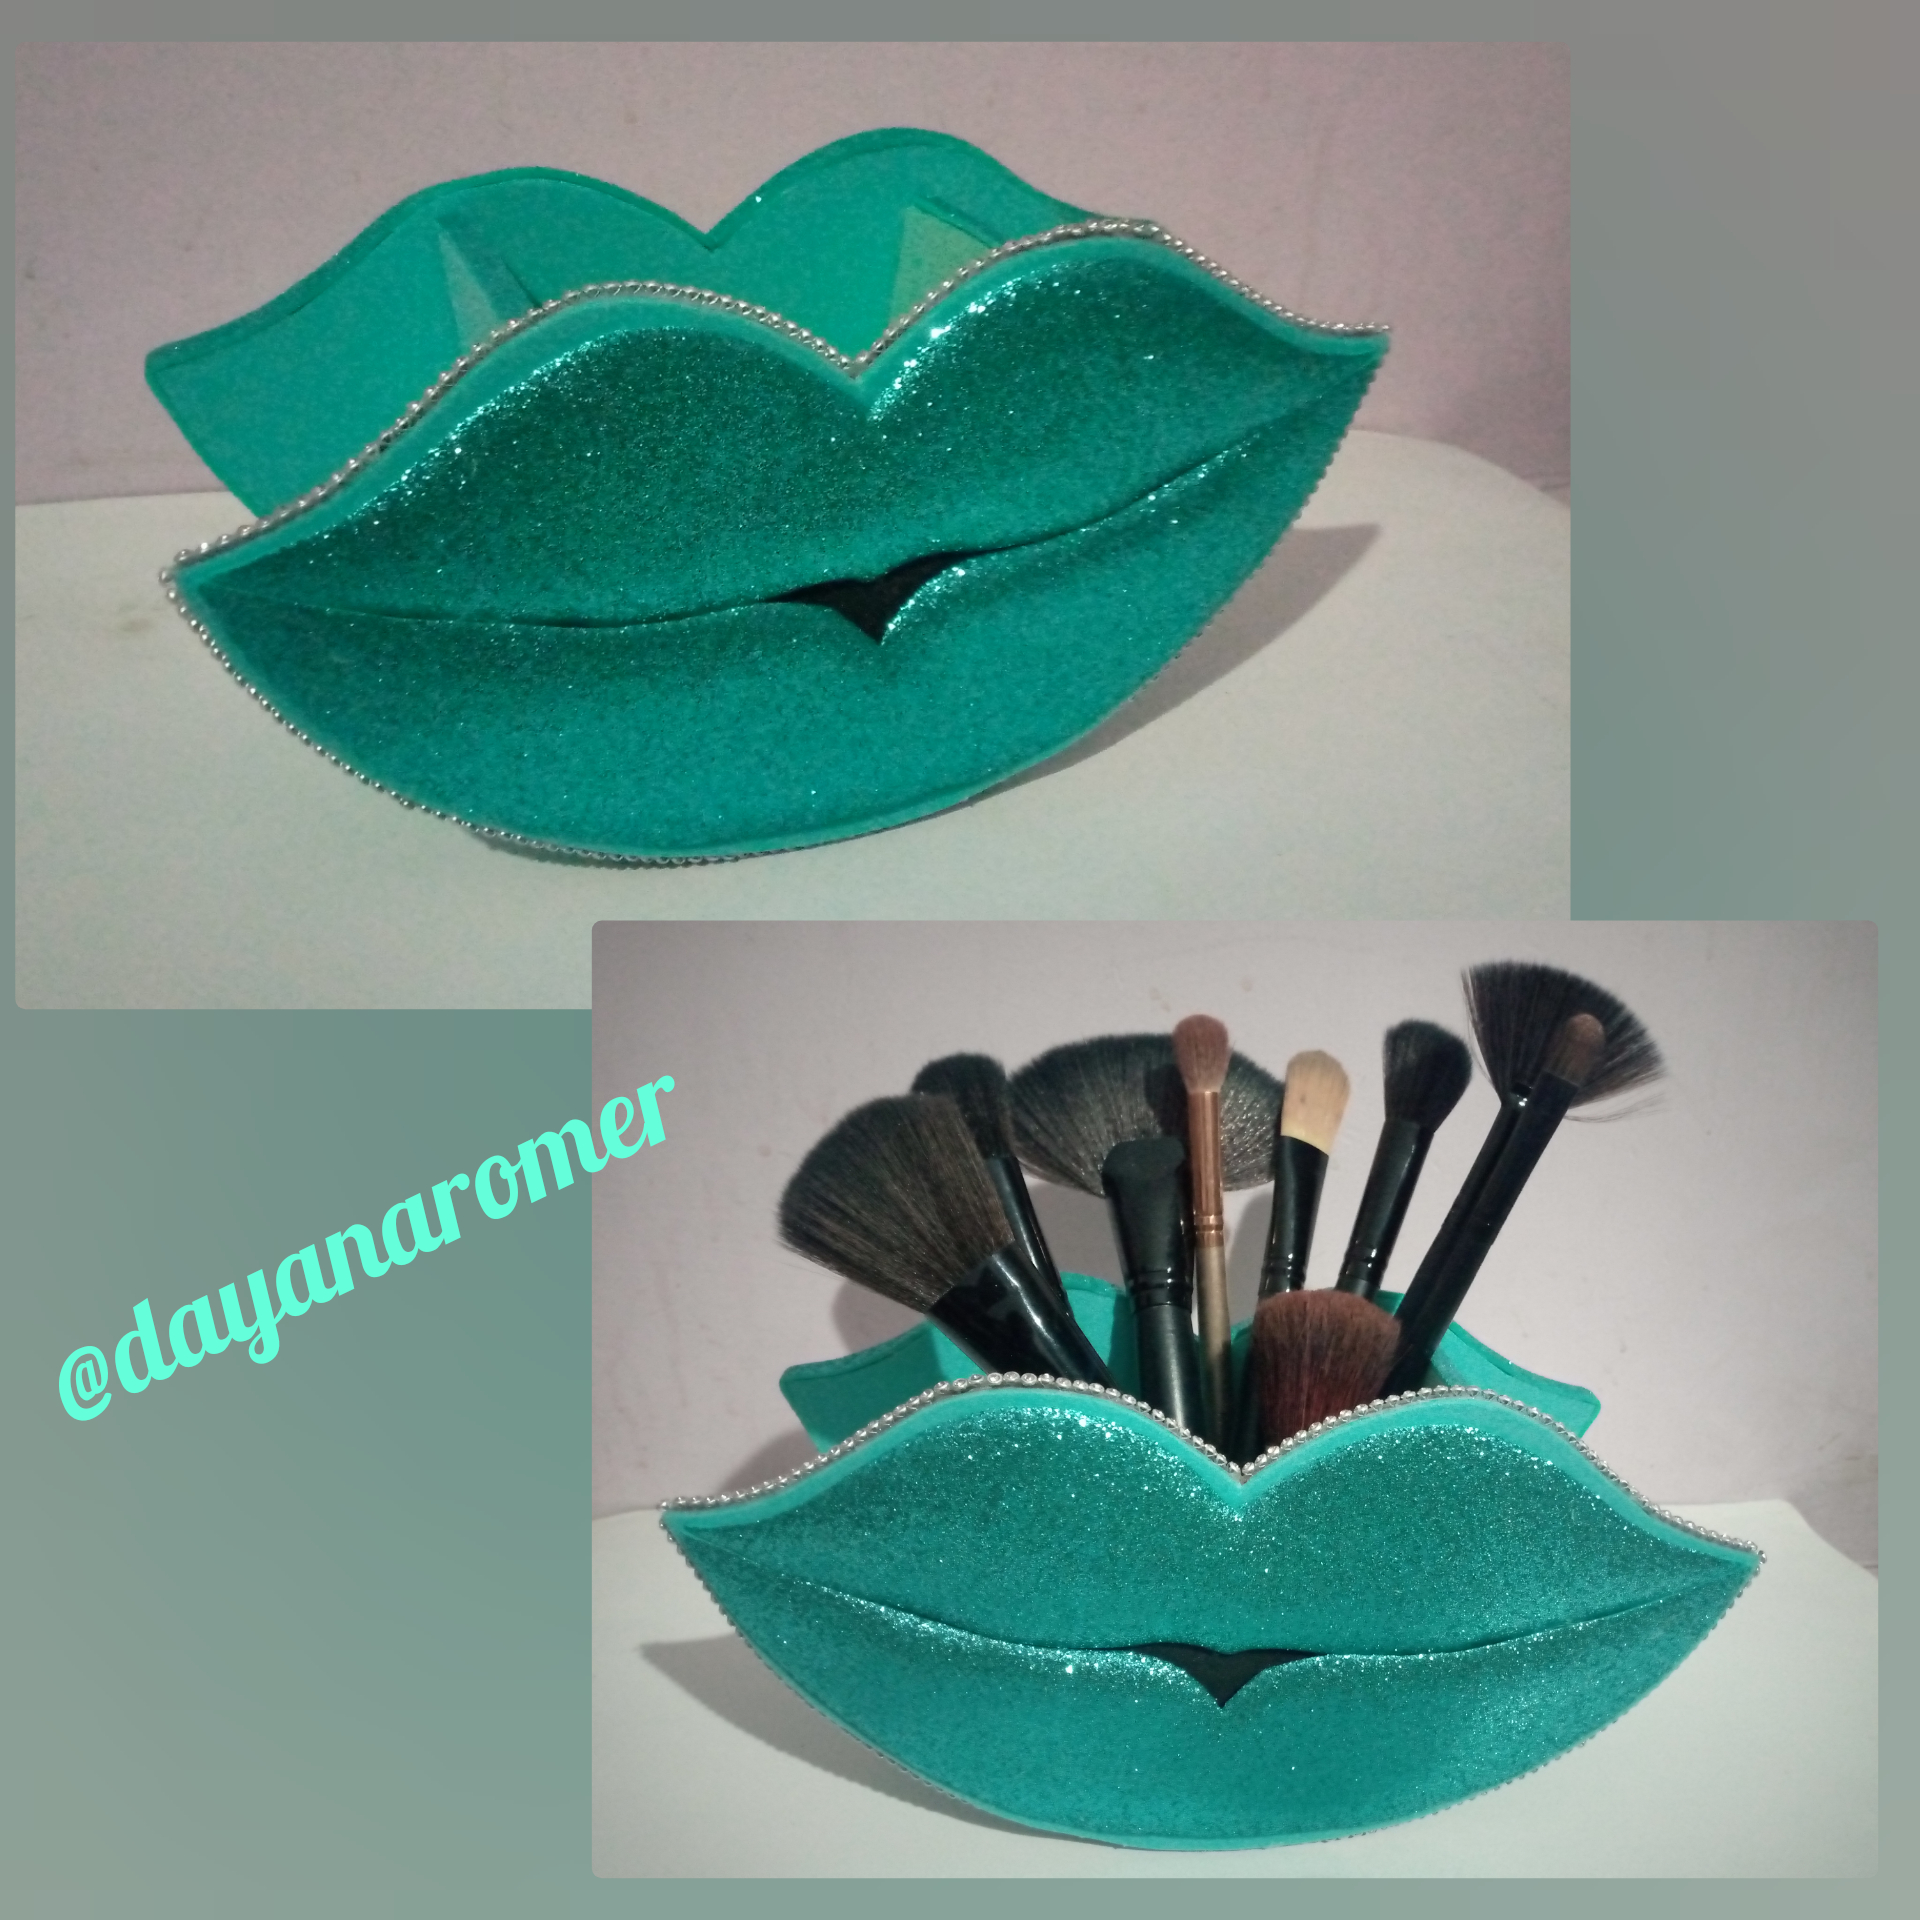
Buenas noches estimados amigos creativos, es un placer estar nuevamente compartiendo con ustedes mis trabajos en esta maravillosa comunidad #hivediy espero se encuentren muy bien y hayan pasando un grandioso día lleno de muchas bendiciones junto a sus familiares y amigos.
Good evening dear creative friends, it is a pleasure to be sharing with you again my work in this wonderful community #hivediy I hope you are very well and have spent a great day full of many blessings with your family and friends.
La manualidad que hoy les mostraré está inspirada en mi sobrina @mariaudhr, quién el pasado lunes arribó a sus 19 años y quise hacerle este lindo detalle, ya que le gusta mucho el arte del maquillaje y lo hace espectacularmente hermoso.
The craft I will show you today is inspired by my niece @mariaudhr, who last Monday turned 19 and I wanted to make her this nice detail, since she loves the art of makeup and makes it spectacularly beautiful.
Se trata de un lindo Porta brochas de maquillaje con figura de labios, hecho a partir de cartón y foami, es muy fácil de hacer, con pocos materiales y no lleva mucho tiempo, a continuación les muestro como elaborarlo.
This is a cute makeup brush holder with lips figure, made from cardboard and foami, it is very easy to make, with few materials and does not take much time, then I show you how to make it.
Materiales
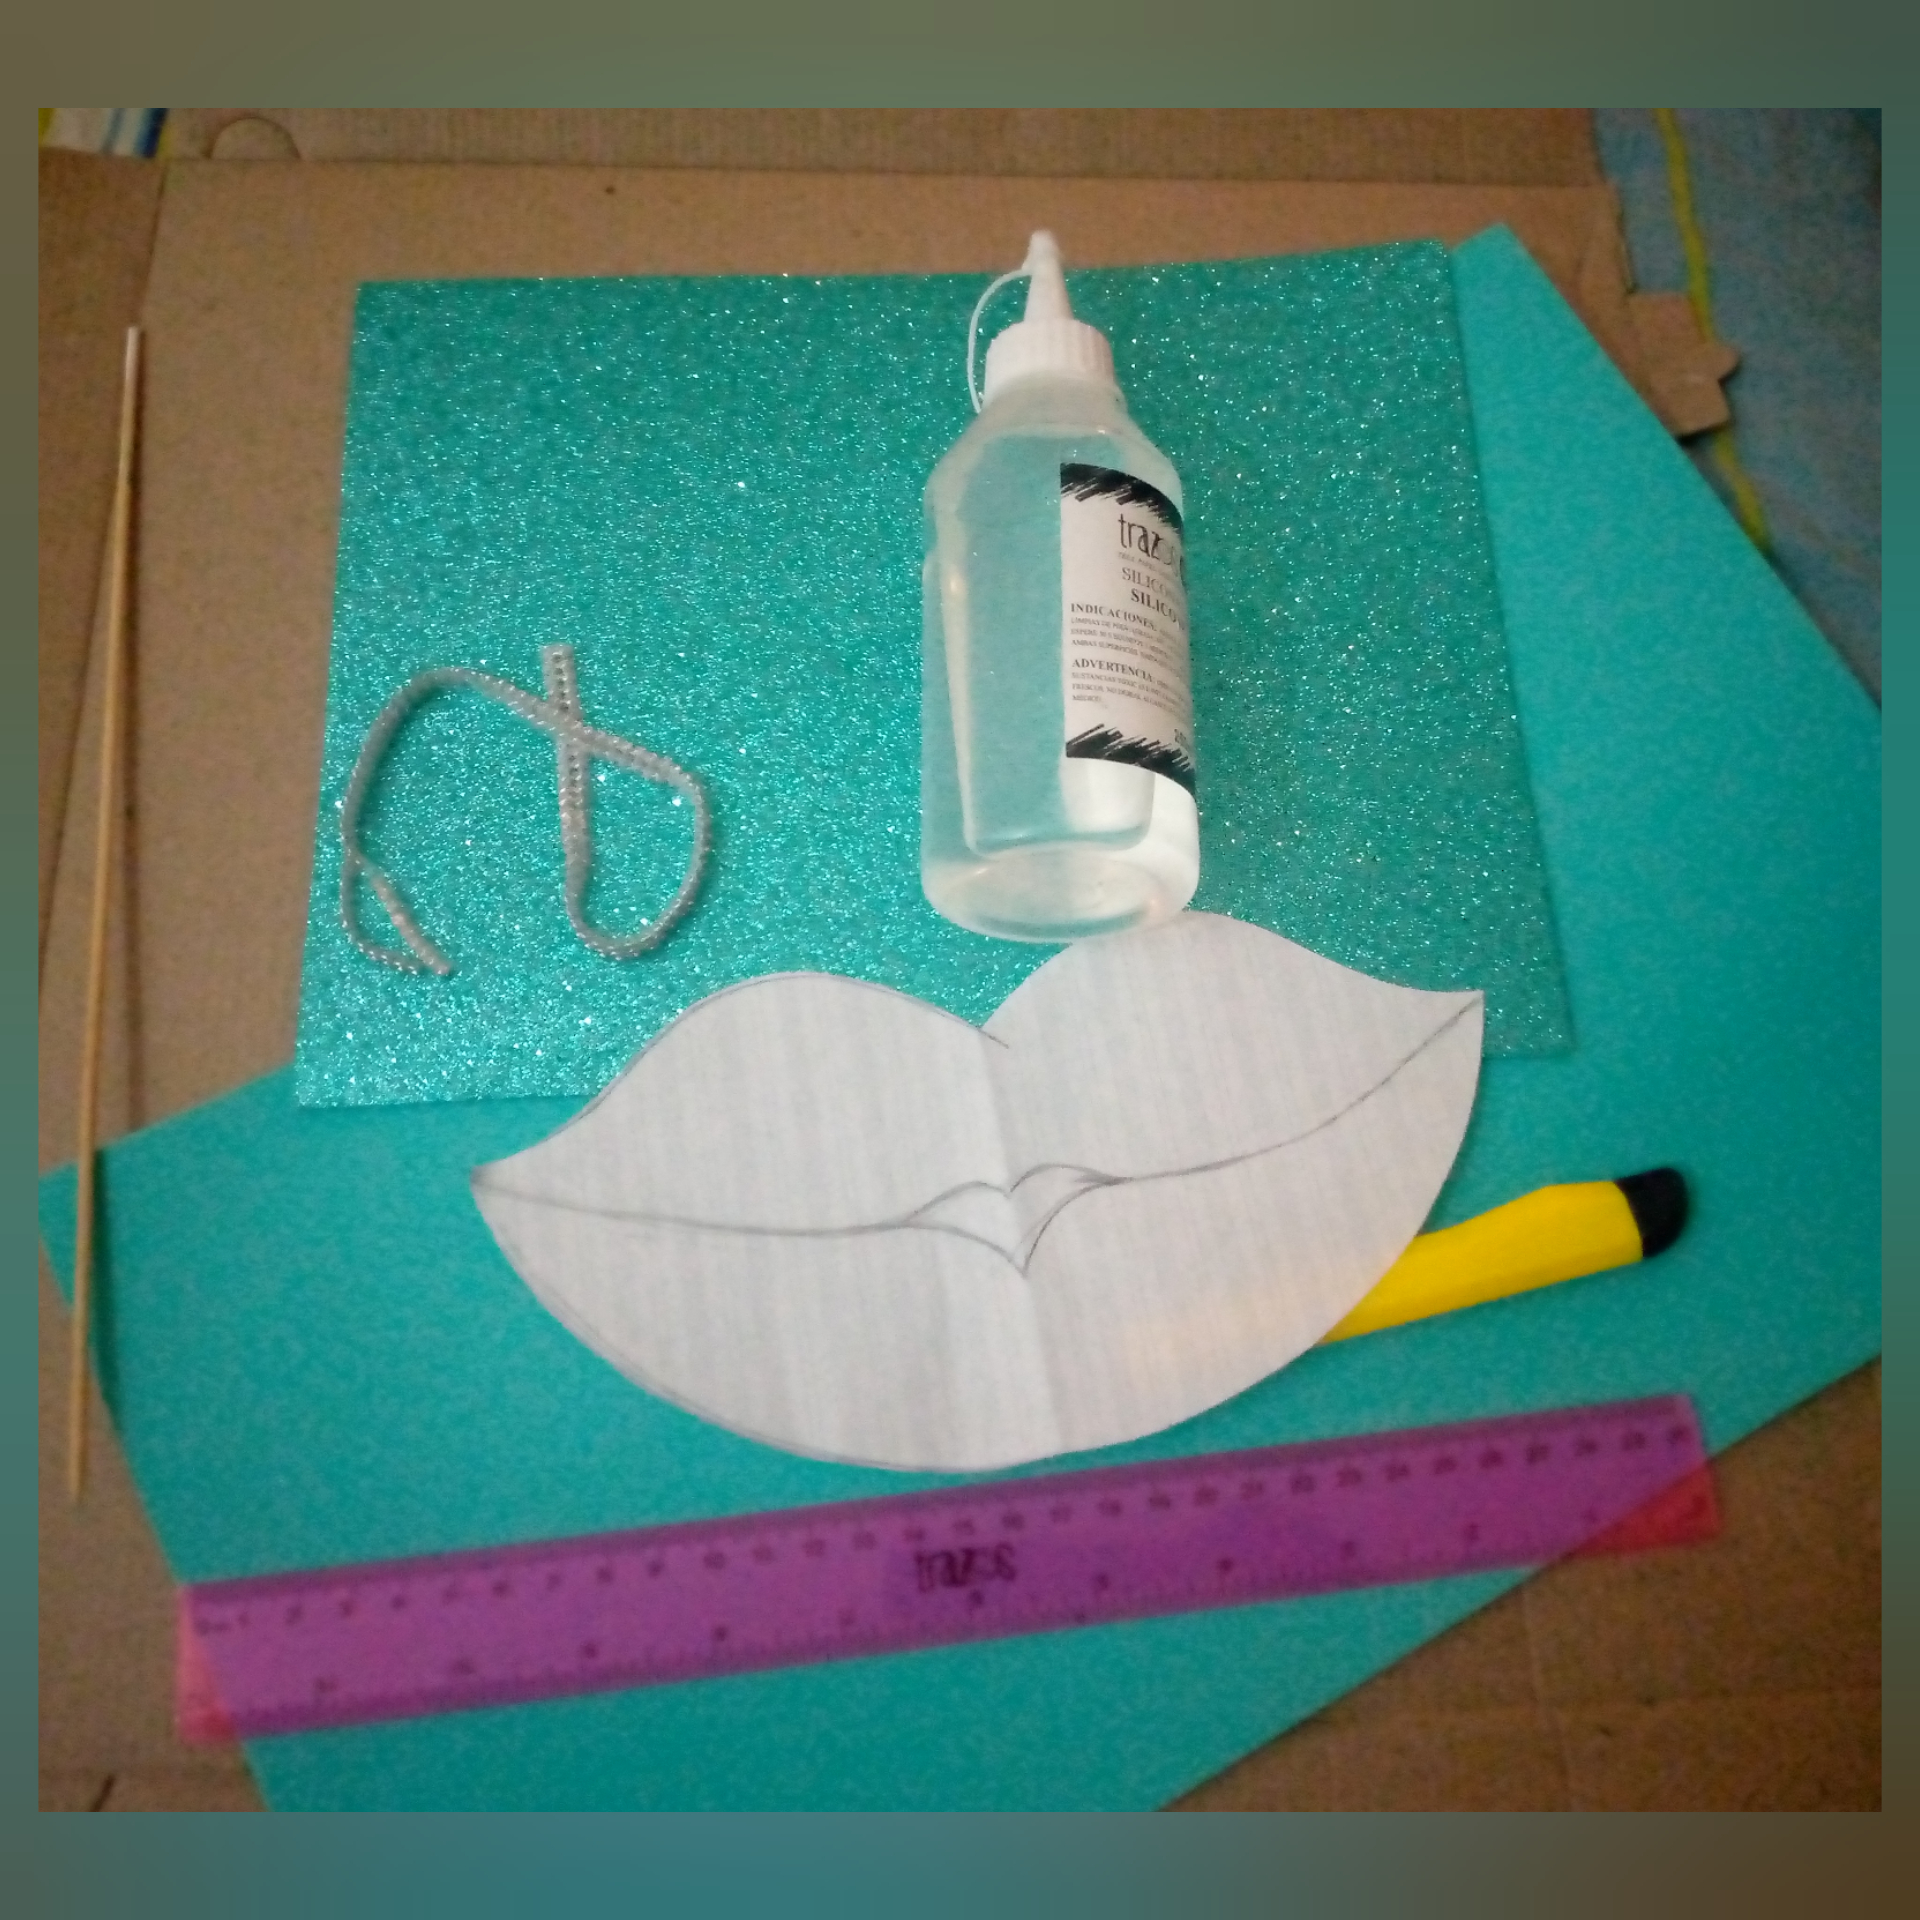
✓ Cartón grueso
✓ Foami diamantado de color turquesa
✓ Foami liso de color turquesa y verde claro
✓ Foami de color negro
✓ Silicón liquido
✓ Silicón caliente
✓Tijera
✓ Cutter
✓ Plancha para ropa
✓ Piedras decorativas
✓ Molde de labios
✓ Thick cardboard
✓ Turquoise colored diamond Foami
✓ Smooth turquoise and light green colored foami.
✓ Black colored foami
✓ Liquid silicone
✓ Hot silicone
✓ Scissors
✓ Cutter
✓ Clothes iron
✓ Decorative stones
✓ Lip mold
Paso a paso
Step by step
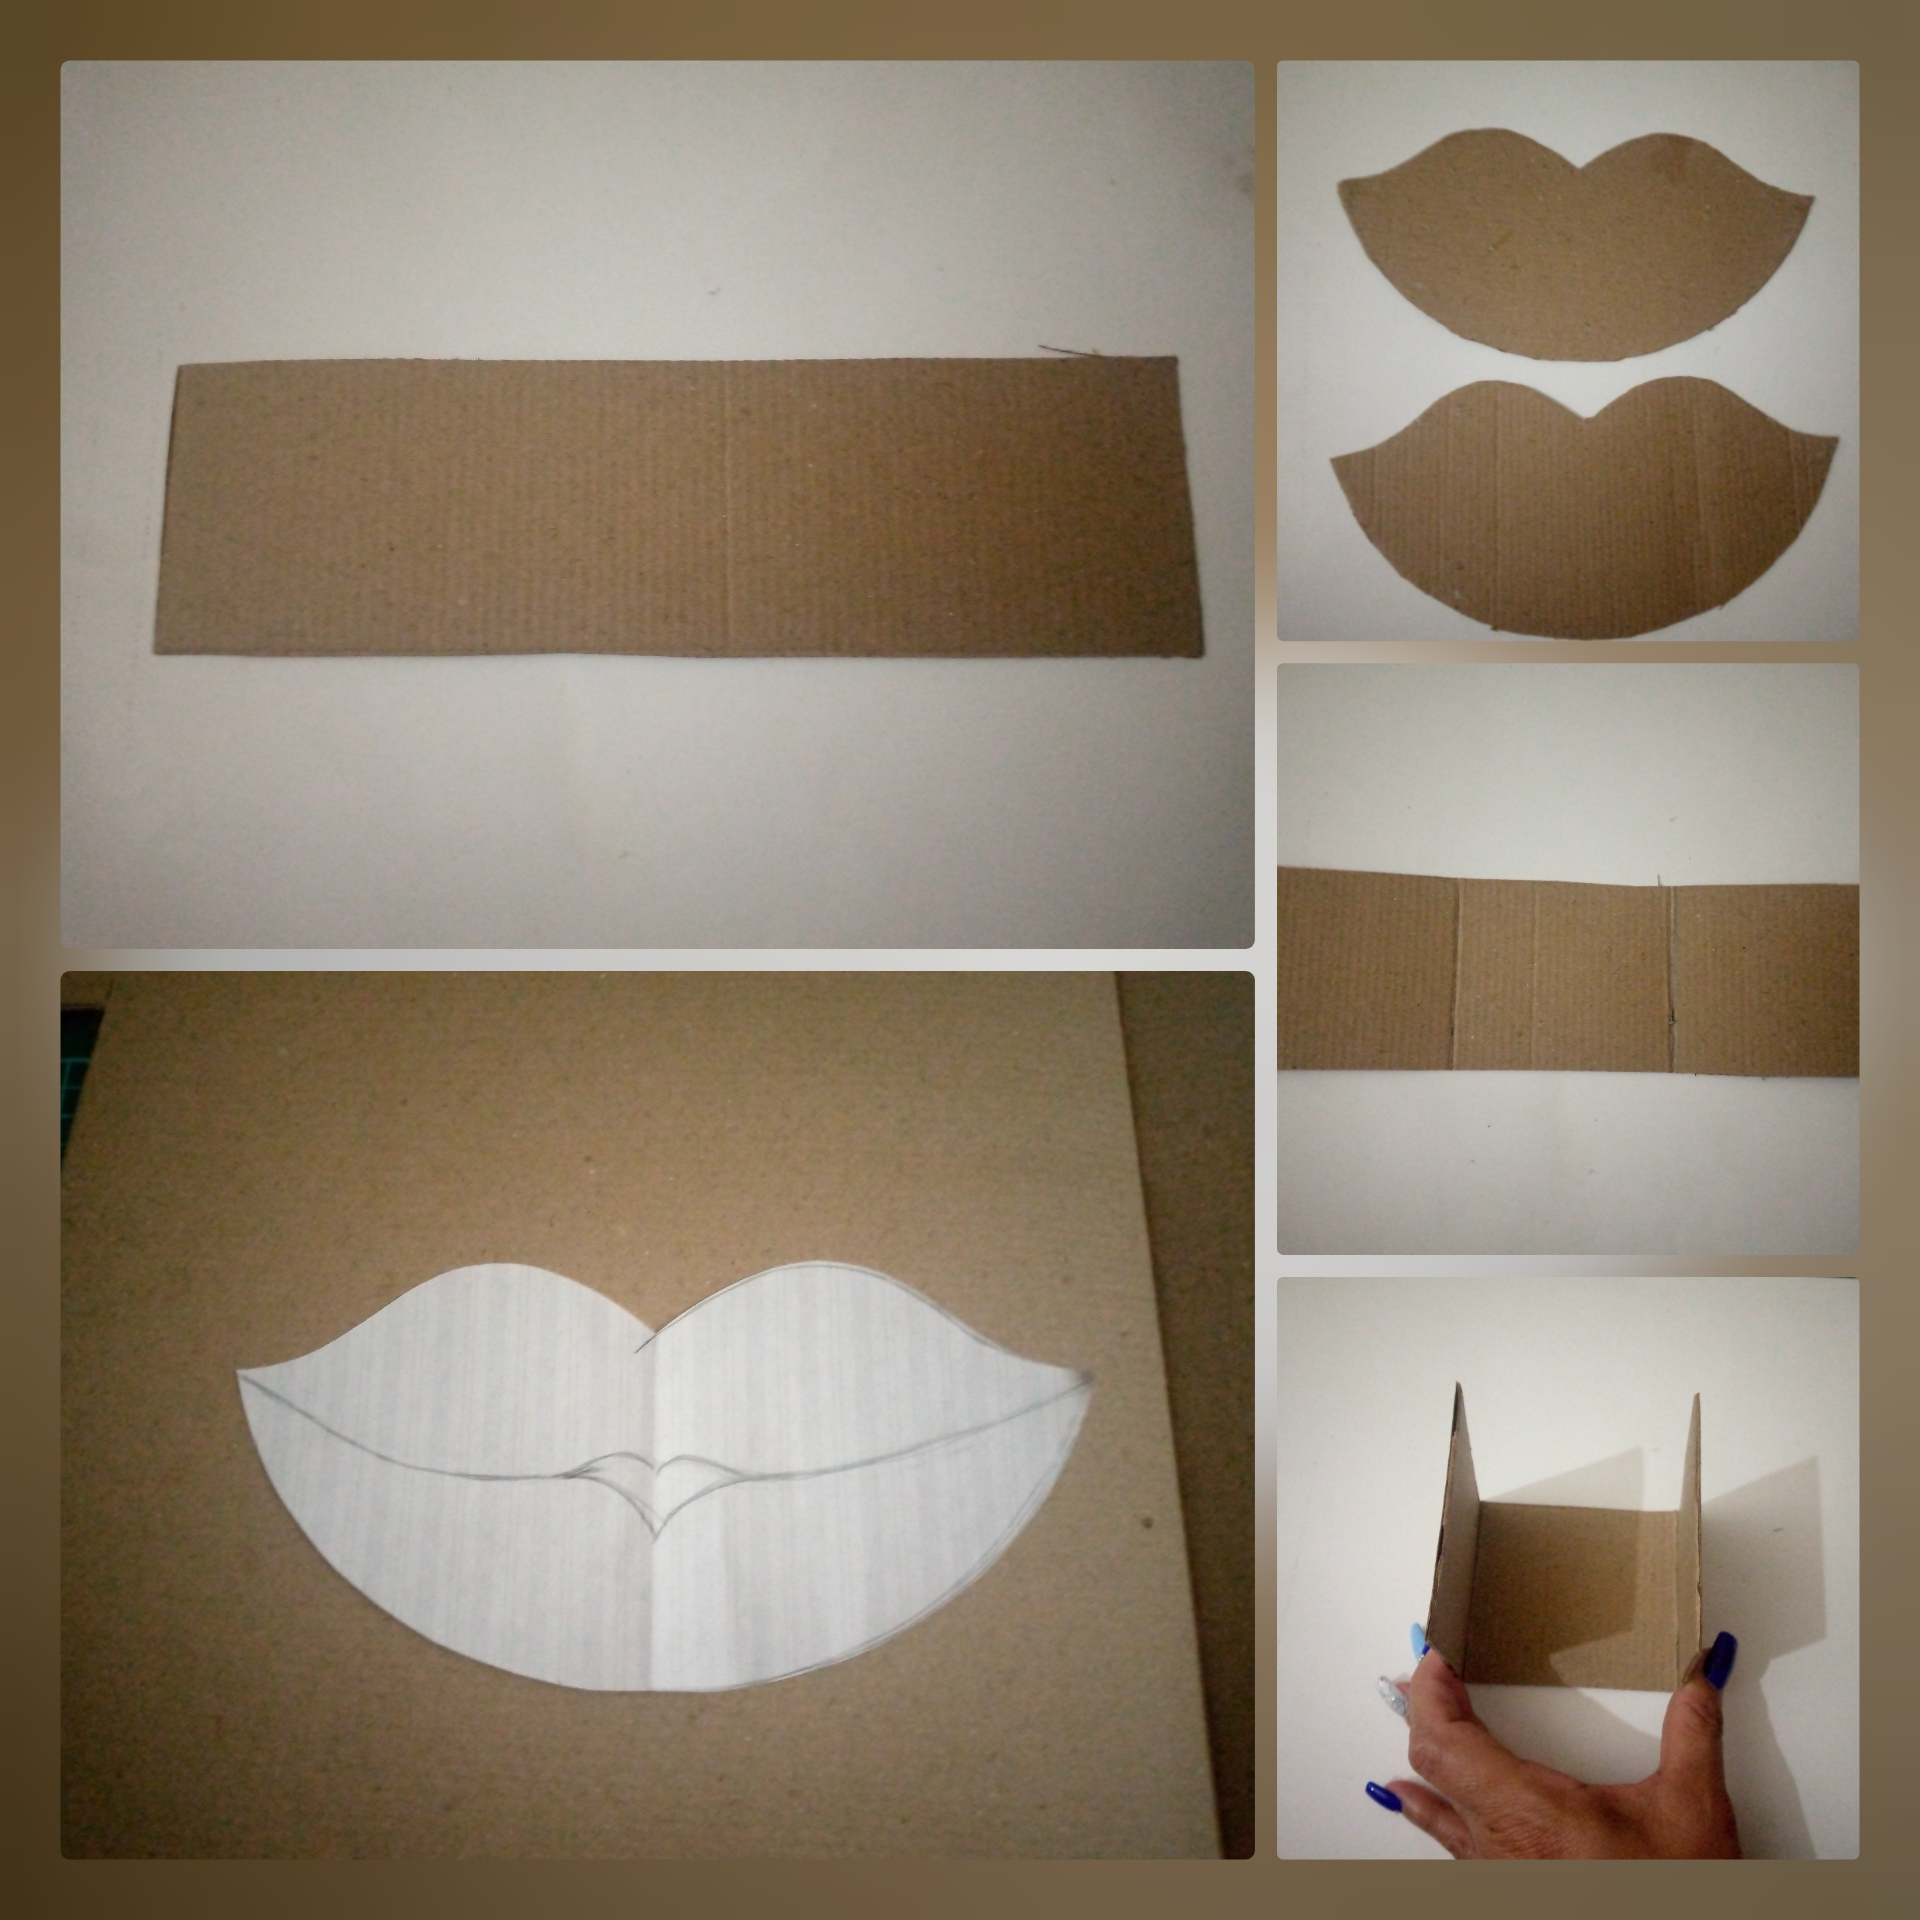
1- Recorta un rectángulo del cartón de 27x8cm, luego copia y recorta también sobre el cartón dos piezas del molde de los labios, posteriormente divide el rectángulo en tres partes iguales, corta en las divisiones ligeramente con el cutter sin profundizar y dobla hacía arriba.
1- Cut out a 27x8cm rectangle from the cardboard, then copy and cut out two pieces of the lip mold on the cardboard, then divide the rectangle into three equal parts, cut the divisions slightly with the cutter without going too deep and fold upwards.
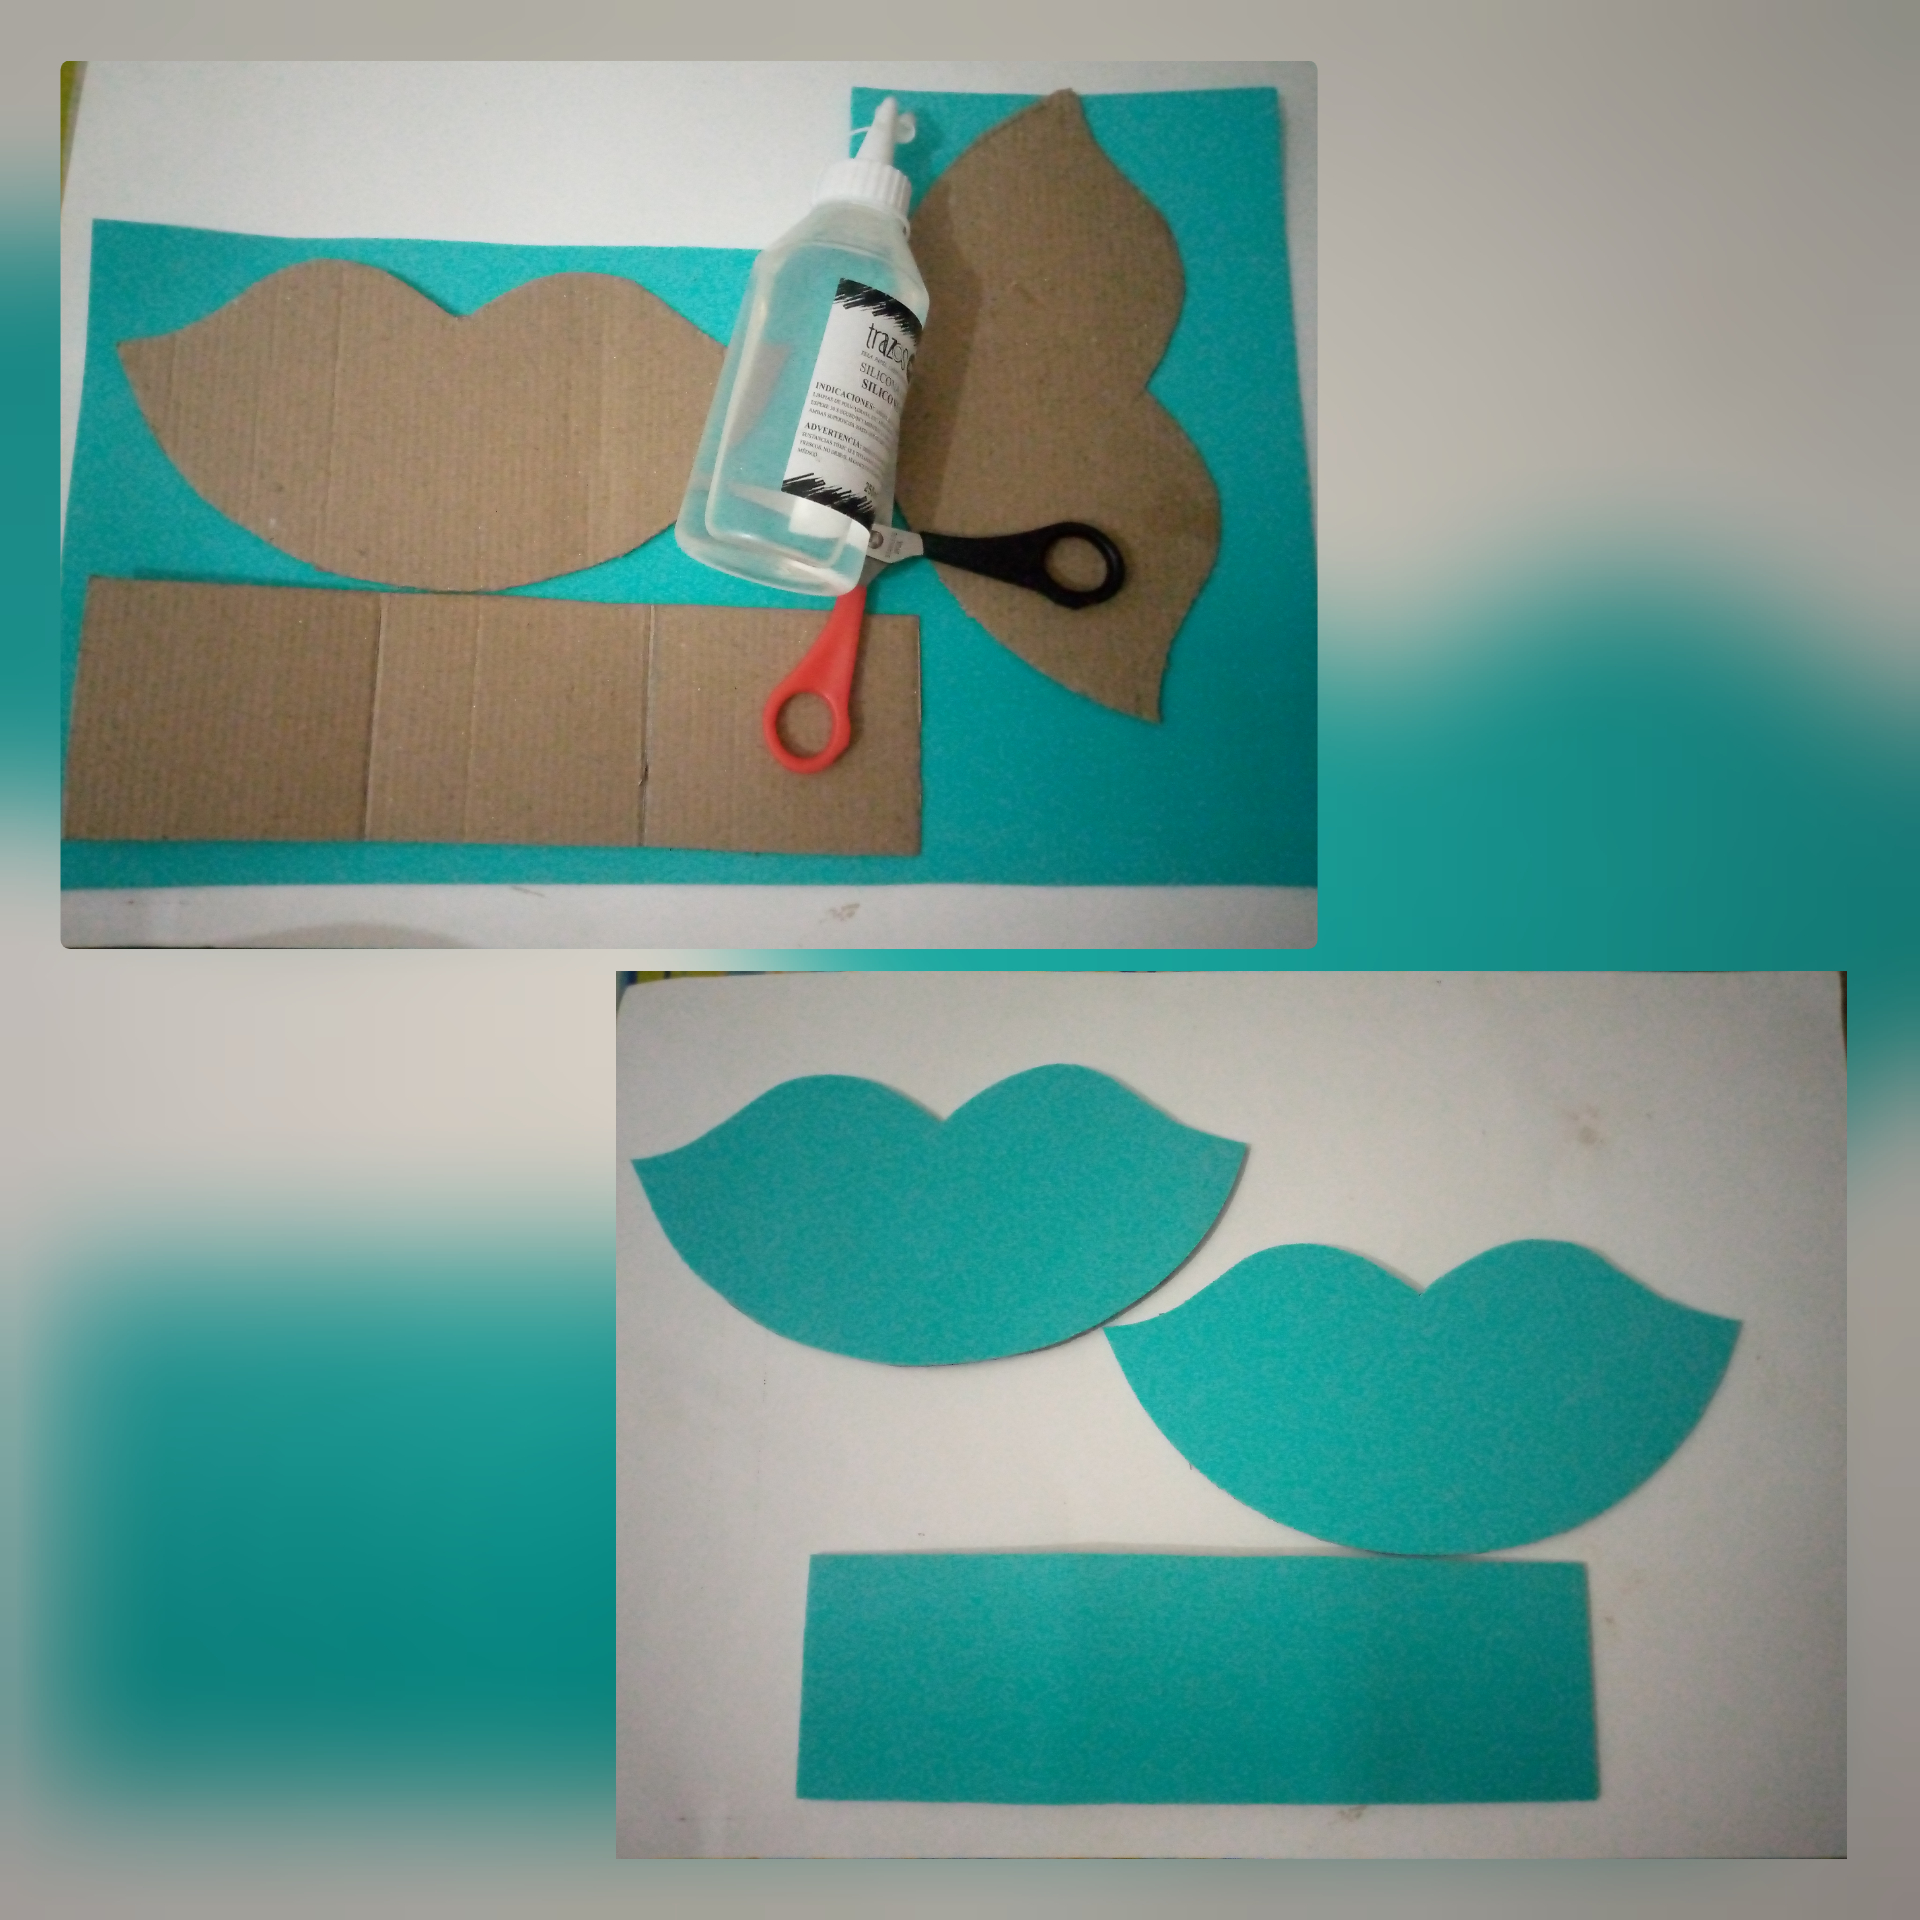
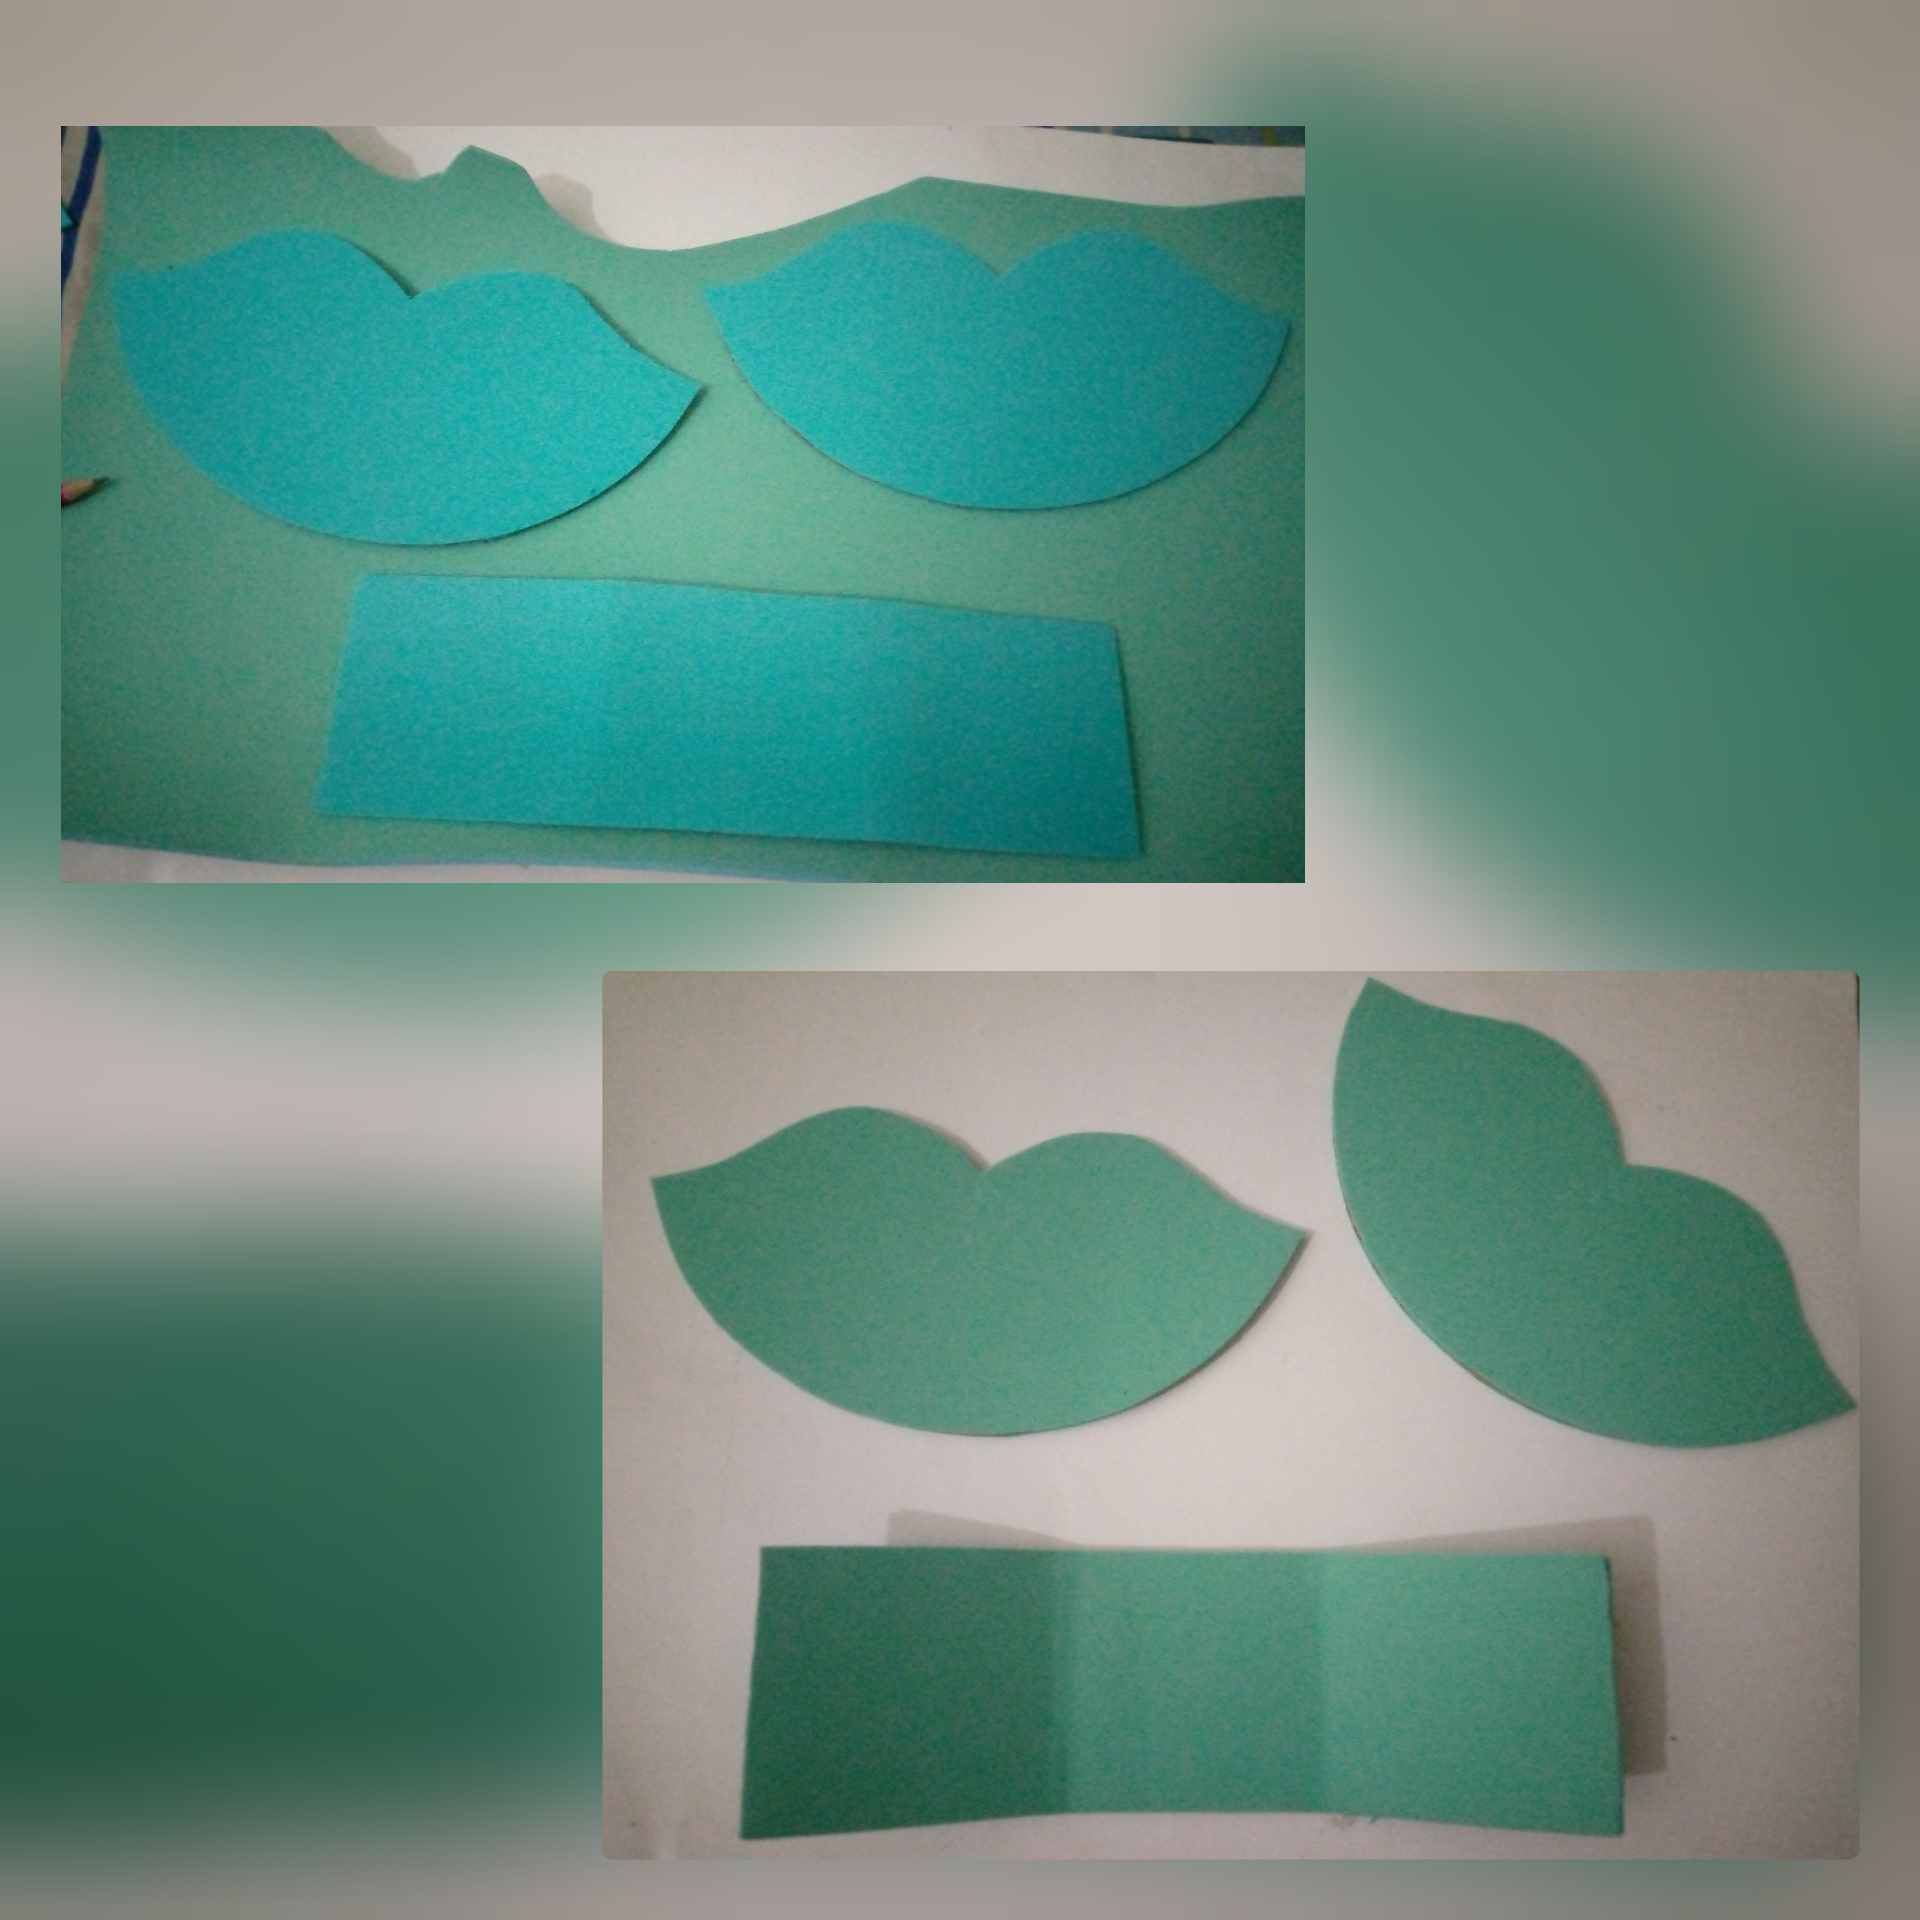
2- Pega y recorta las piezas de cartón sobre el foami liso de color turquesa por uno de sus lados, luego cubre el otro lado con el foami de color verde claro.
2- Glue and cut out the cardboard pieces on the smooth turquoise foami on one side, then cover the other side with the light green foami.
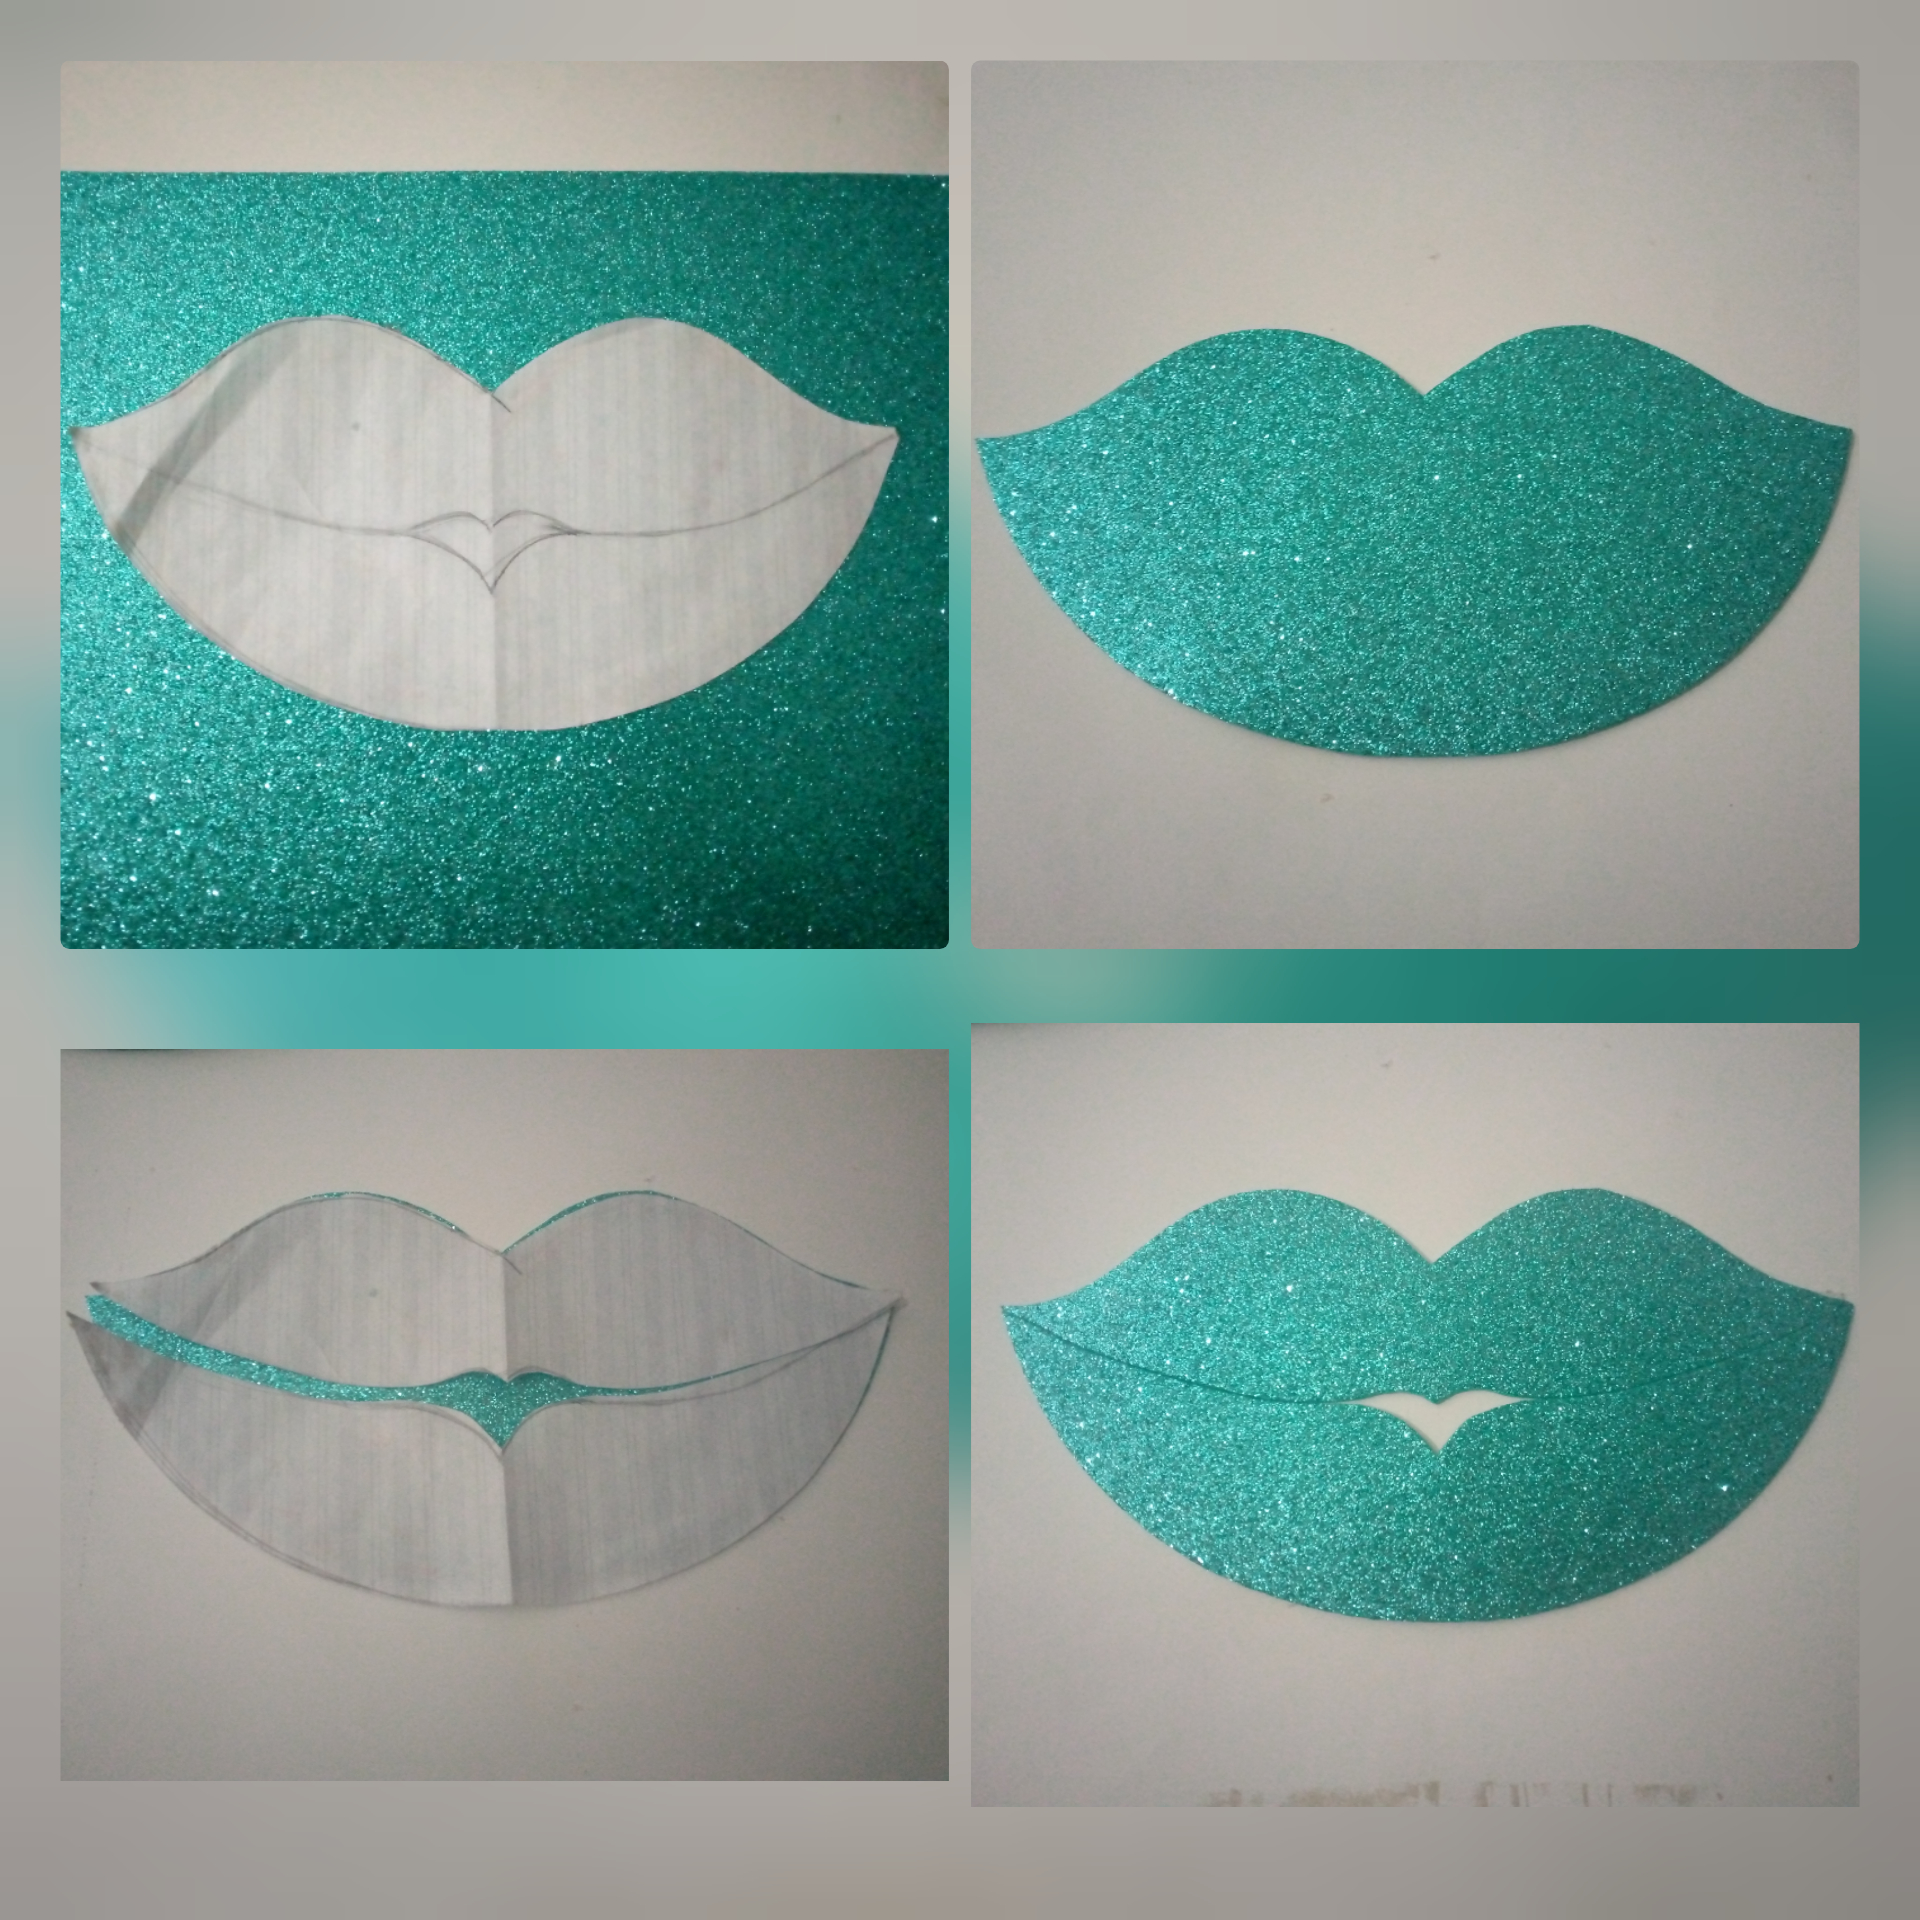
3- Copia y recorta el molde de los labios sobre el foami diamantado, ahora vamos a recortar el molde en las líneas que tiene trazadas obteniendo dos piezas, y de igual manera recortaremos el labio anterior.
3- Copy and cut out the mold of the lips on the diamond foami, now we are going to cut out the mold on the lines that it has drawn obtaining two pieces, and in the same way we will cut out the previous lip.
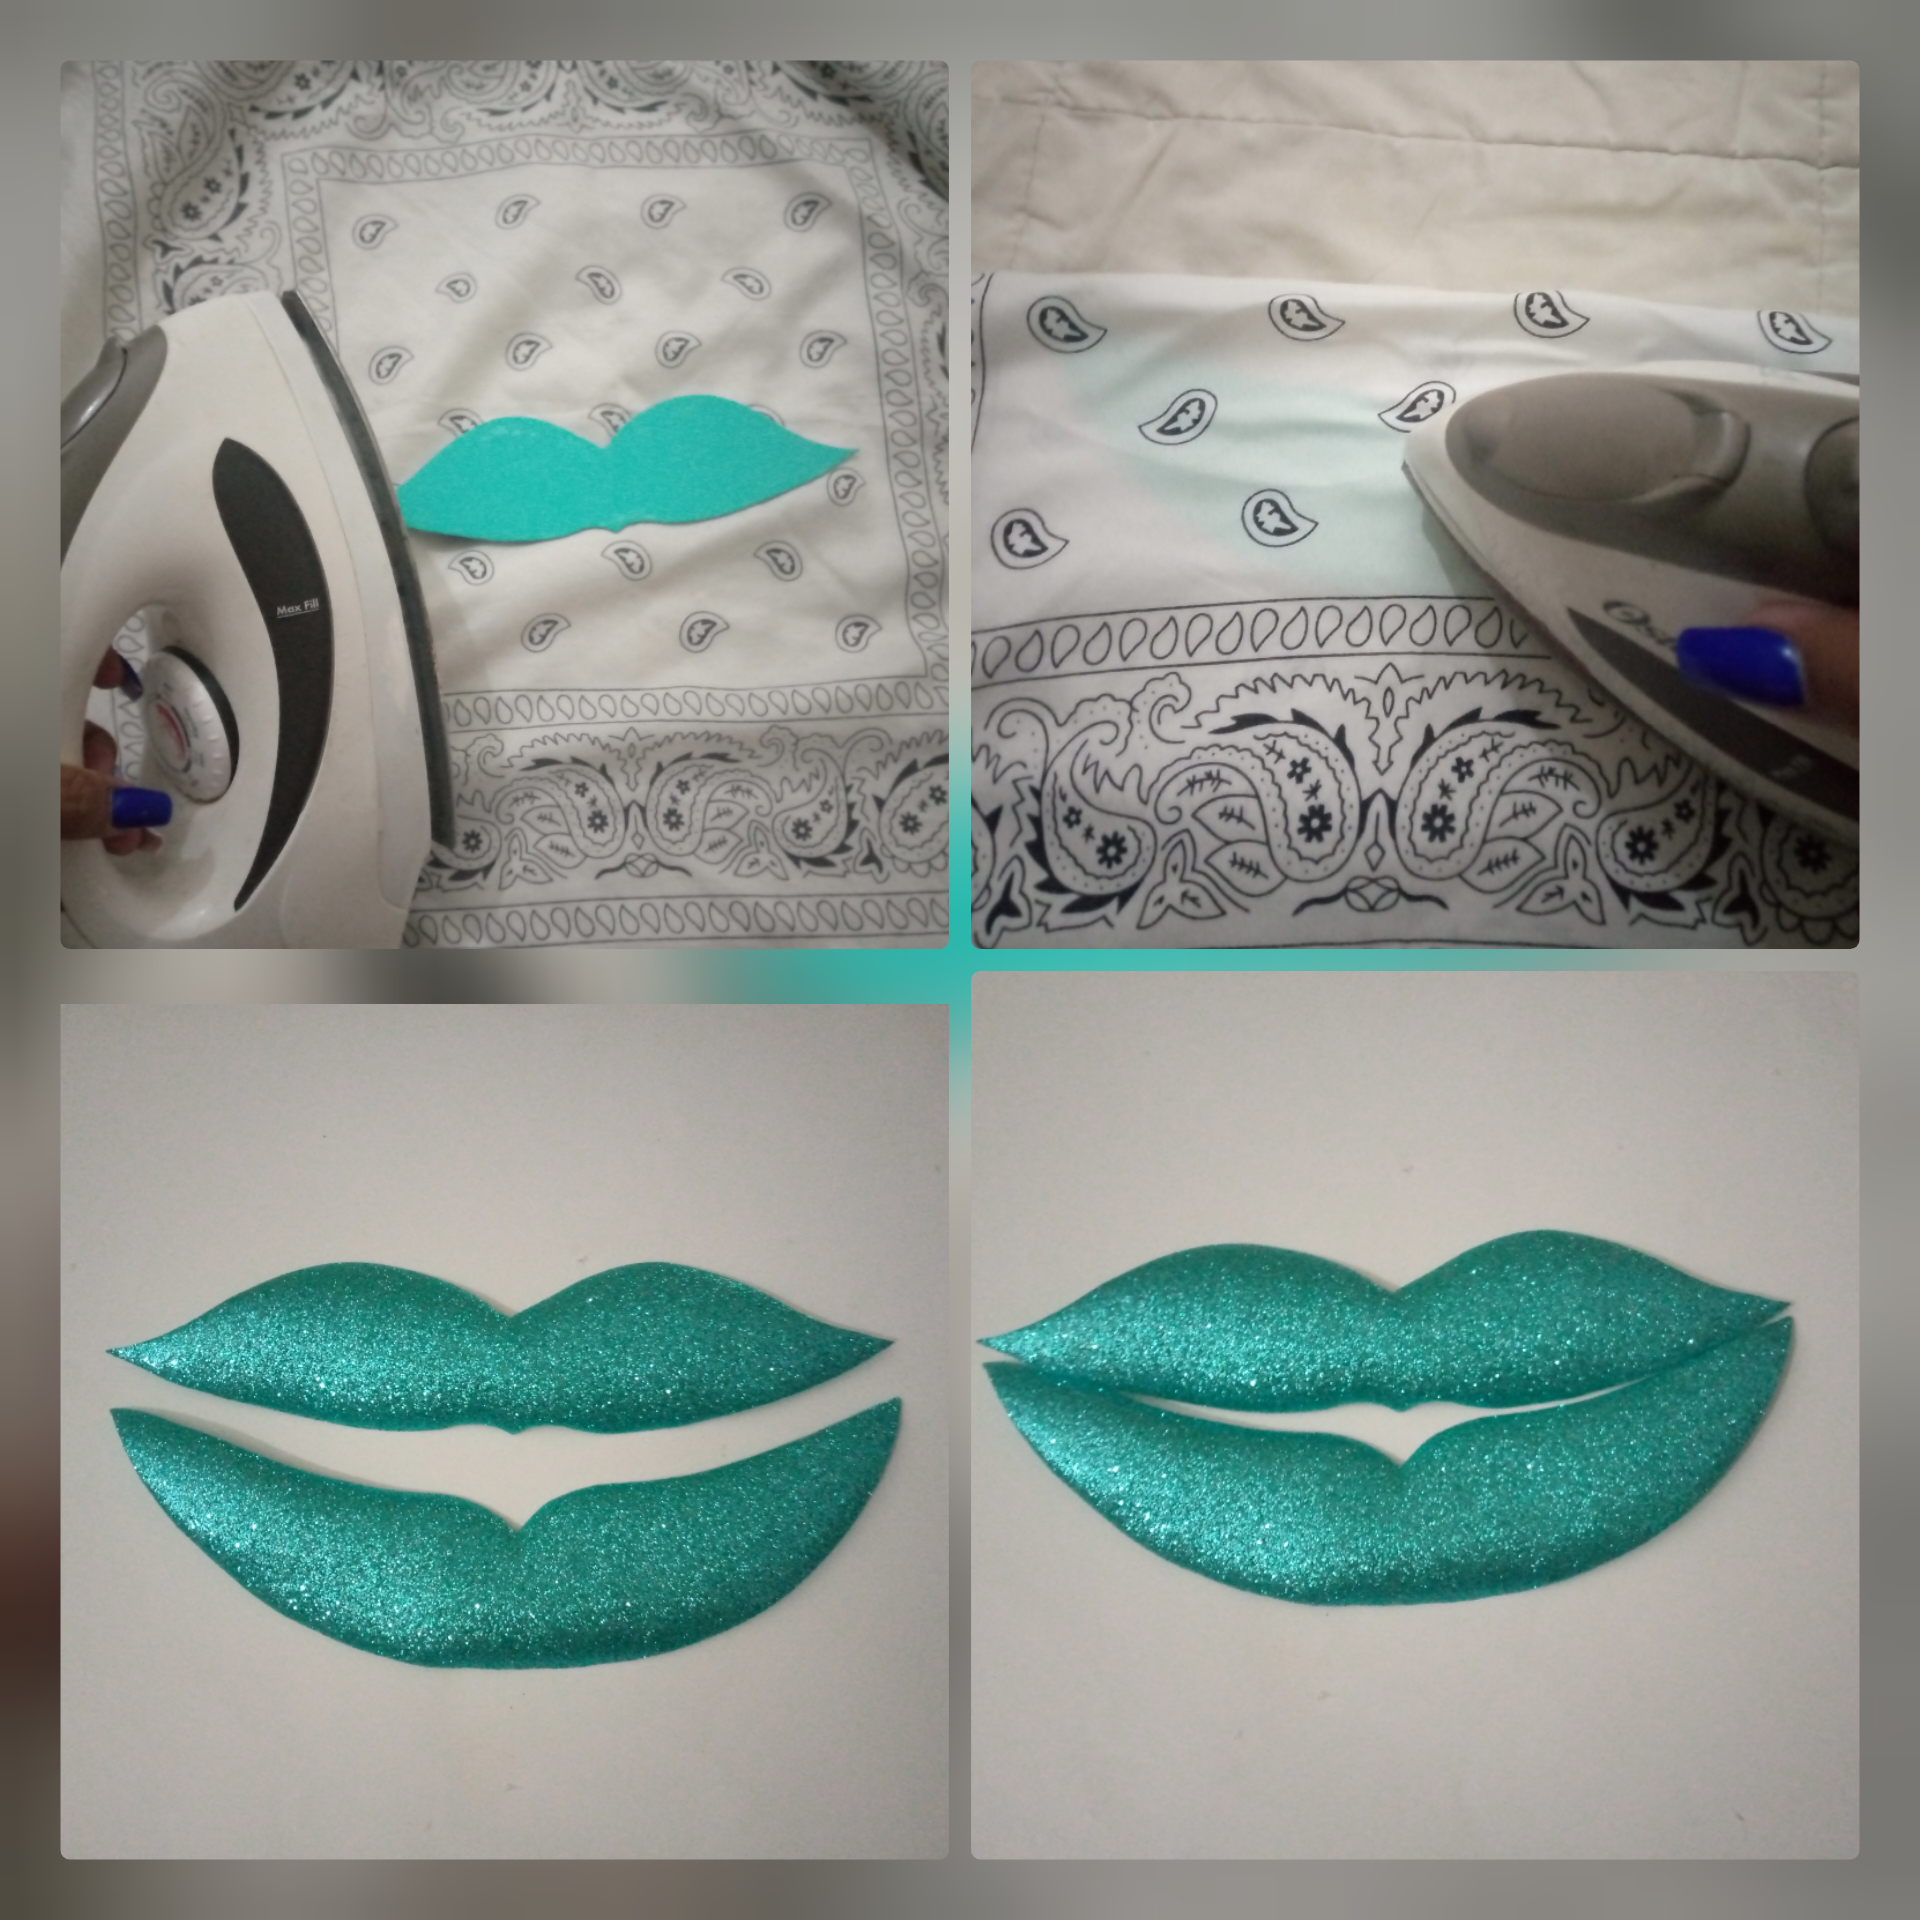
4- Aplicaremos la técnica del termoformado, coloca las piezas de los labios con foami diamantado ,(una por una) entre una tela, sabana, pañal, lo que tengas en casa y pasa sobre ellas la plancha para ropa caliente un par de veces, la tela ayudará a que las piezas no se doblen demasiado y puedas darle la forma deseada.
4- We will apply the thermoforming technique, place the pieces of the lips with diamond foami (one by one) between a cloth, sheet, diaper, whatever you have at home and pass over them the hot iron a couple of times, the fabric will help the pieces do not bend too much and you can give the desired shape.
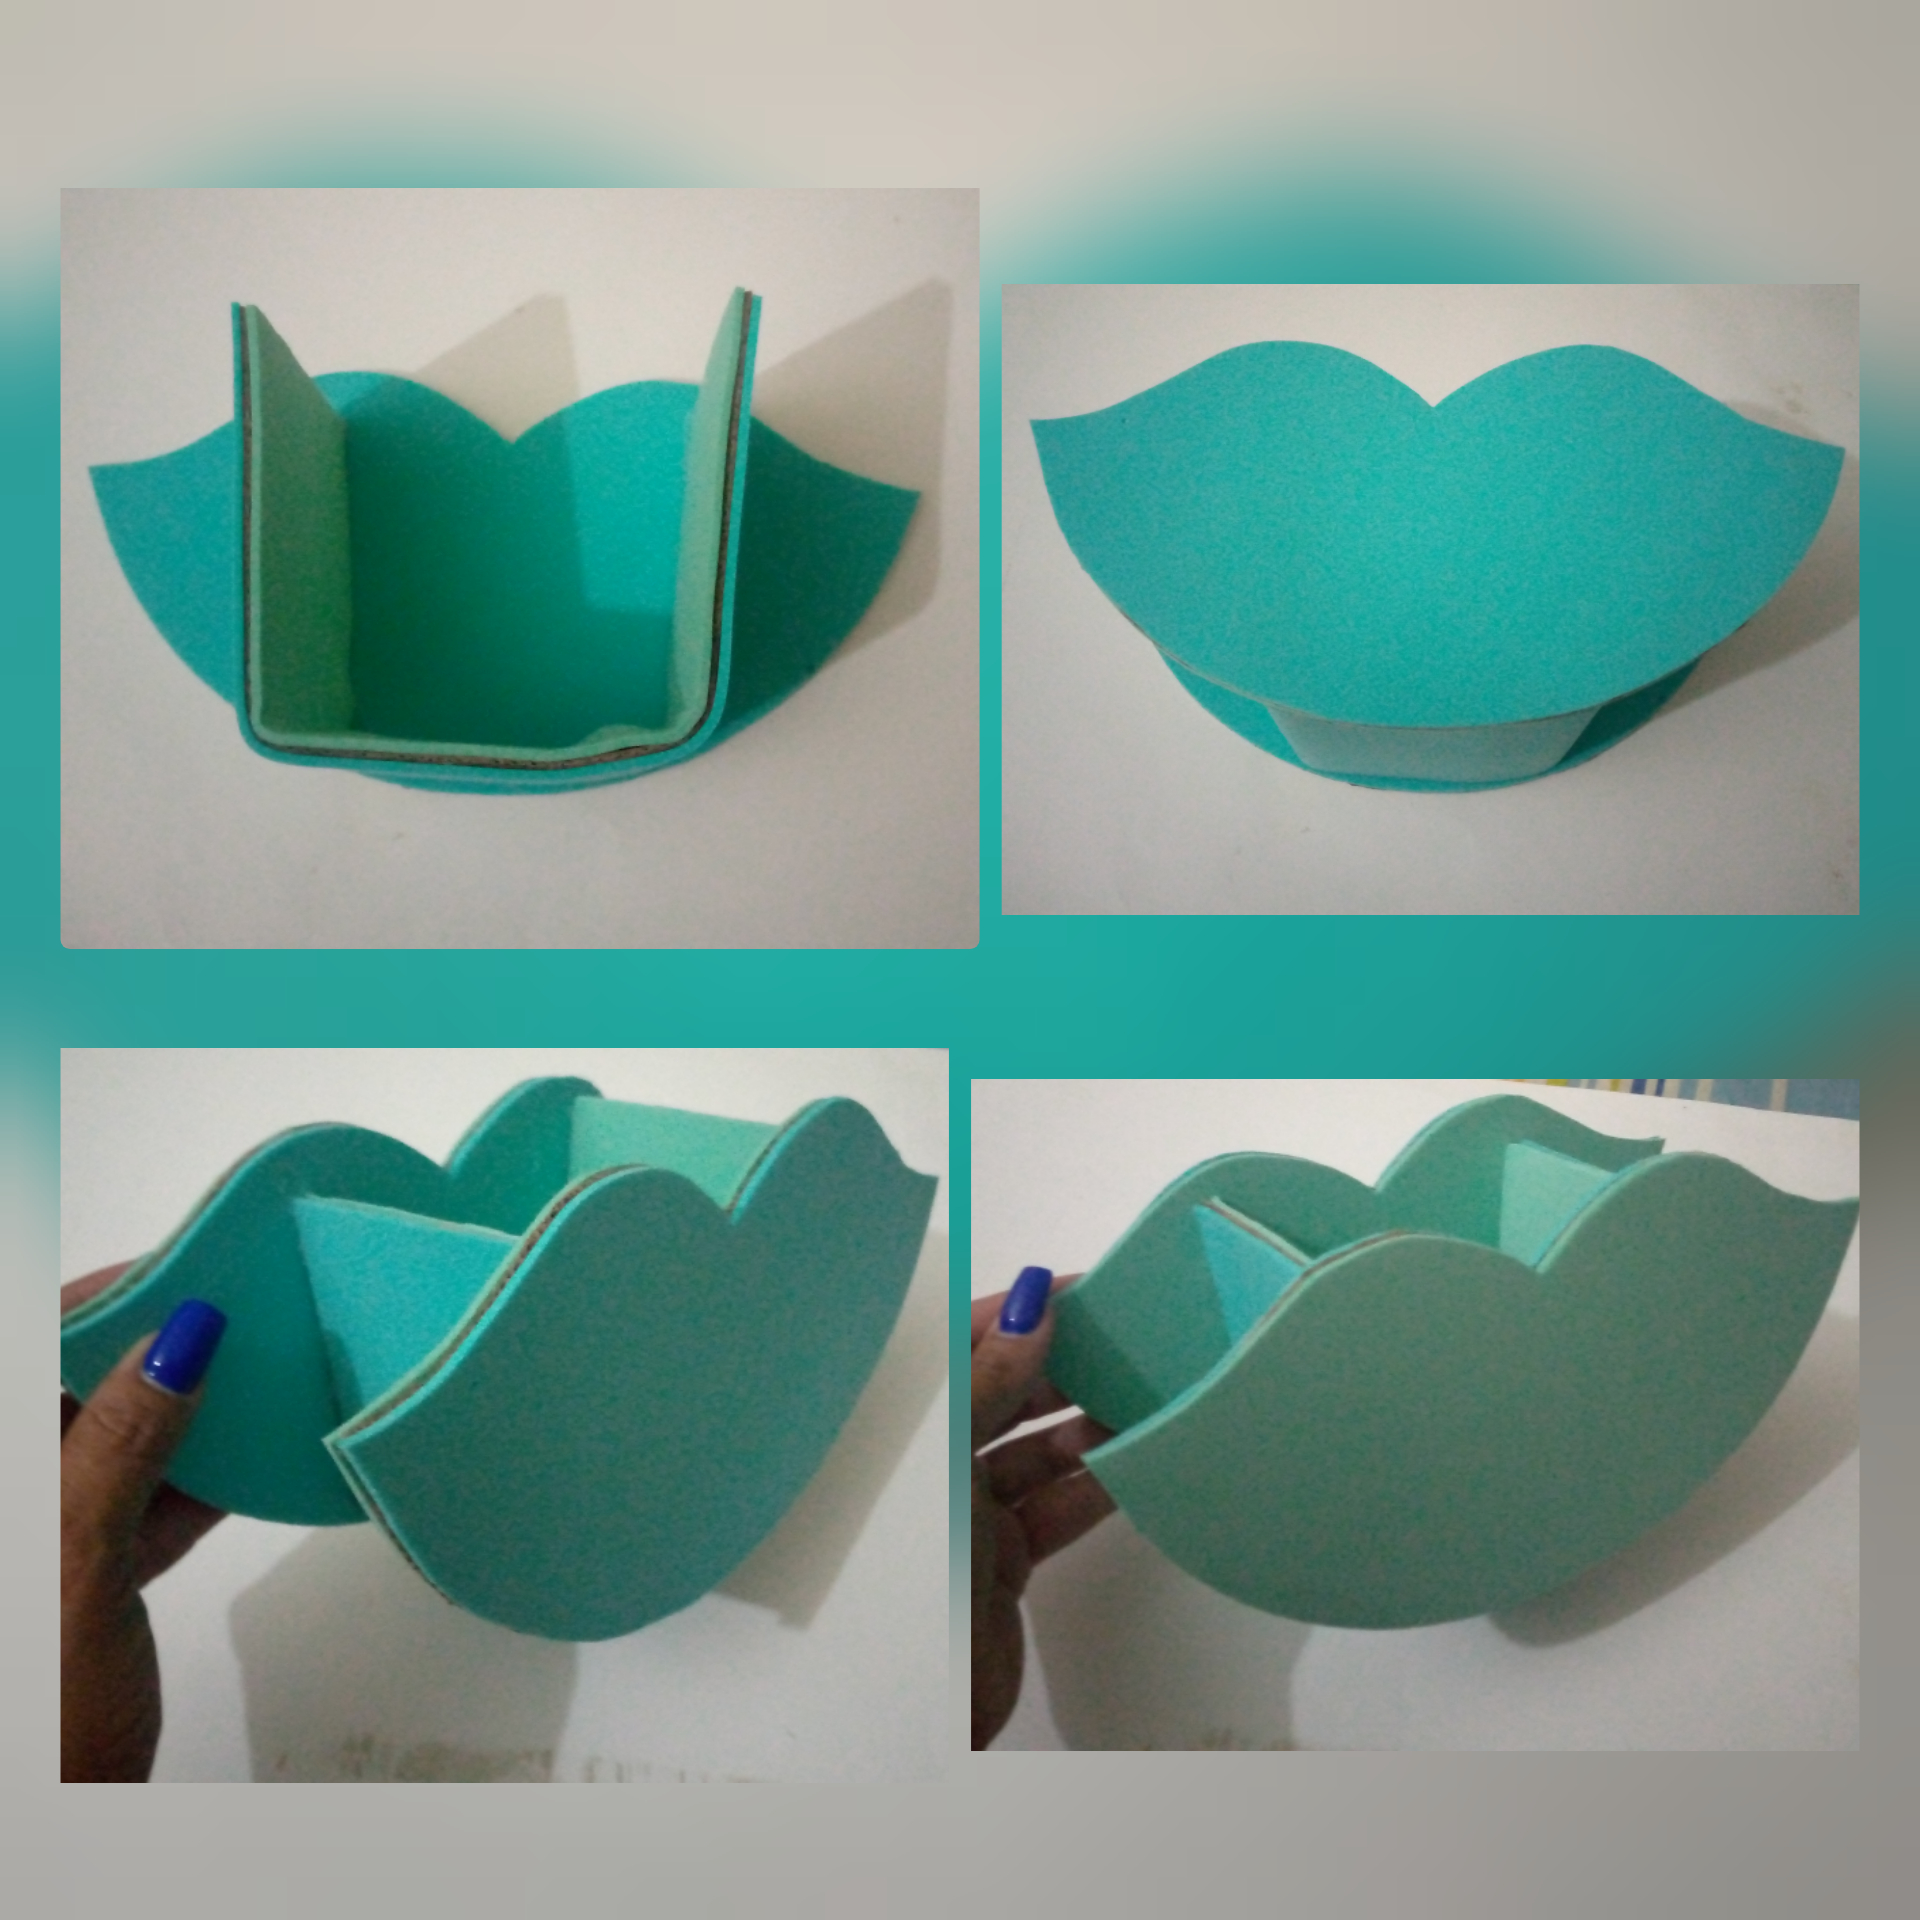
5- Con todas las piezas listas, procedemos a armar nuestro organizador, primero pega con silicón caliente el rectángulo con la forma que le dimos, sobre una de las piezas de los labios por el lado del color turquesa centrando muy bien, dejando el color verde claro del rectángulo en la parte interior, luego pega la otra pieza del labio dejando la parte del color turquesa también hacia arriba, destacará por el lado frontal el color turquesa y por la parte trasera el color verde claro.
5- With all the pieces ready, proceed to assemble our organizer, first glue with hot silicone the rectangle on one of the pieces of the lips on the side of the turquoise color centering very well, leaving the light green color of the rectangle on the inside, then glue the other piece of the lip leaving the turquoise color side also up, it will highlight the turquoise color on the front side and the light green color on the back side.
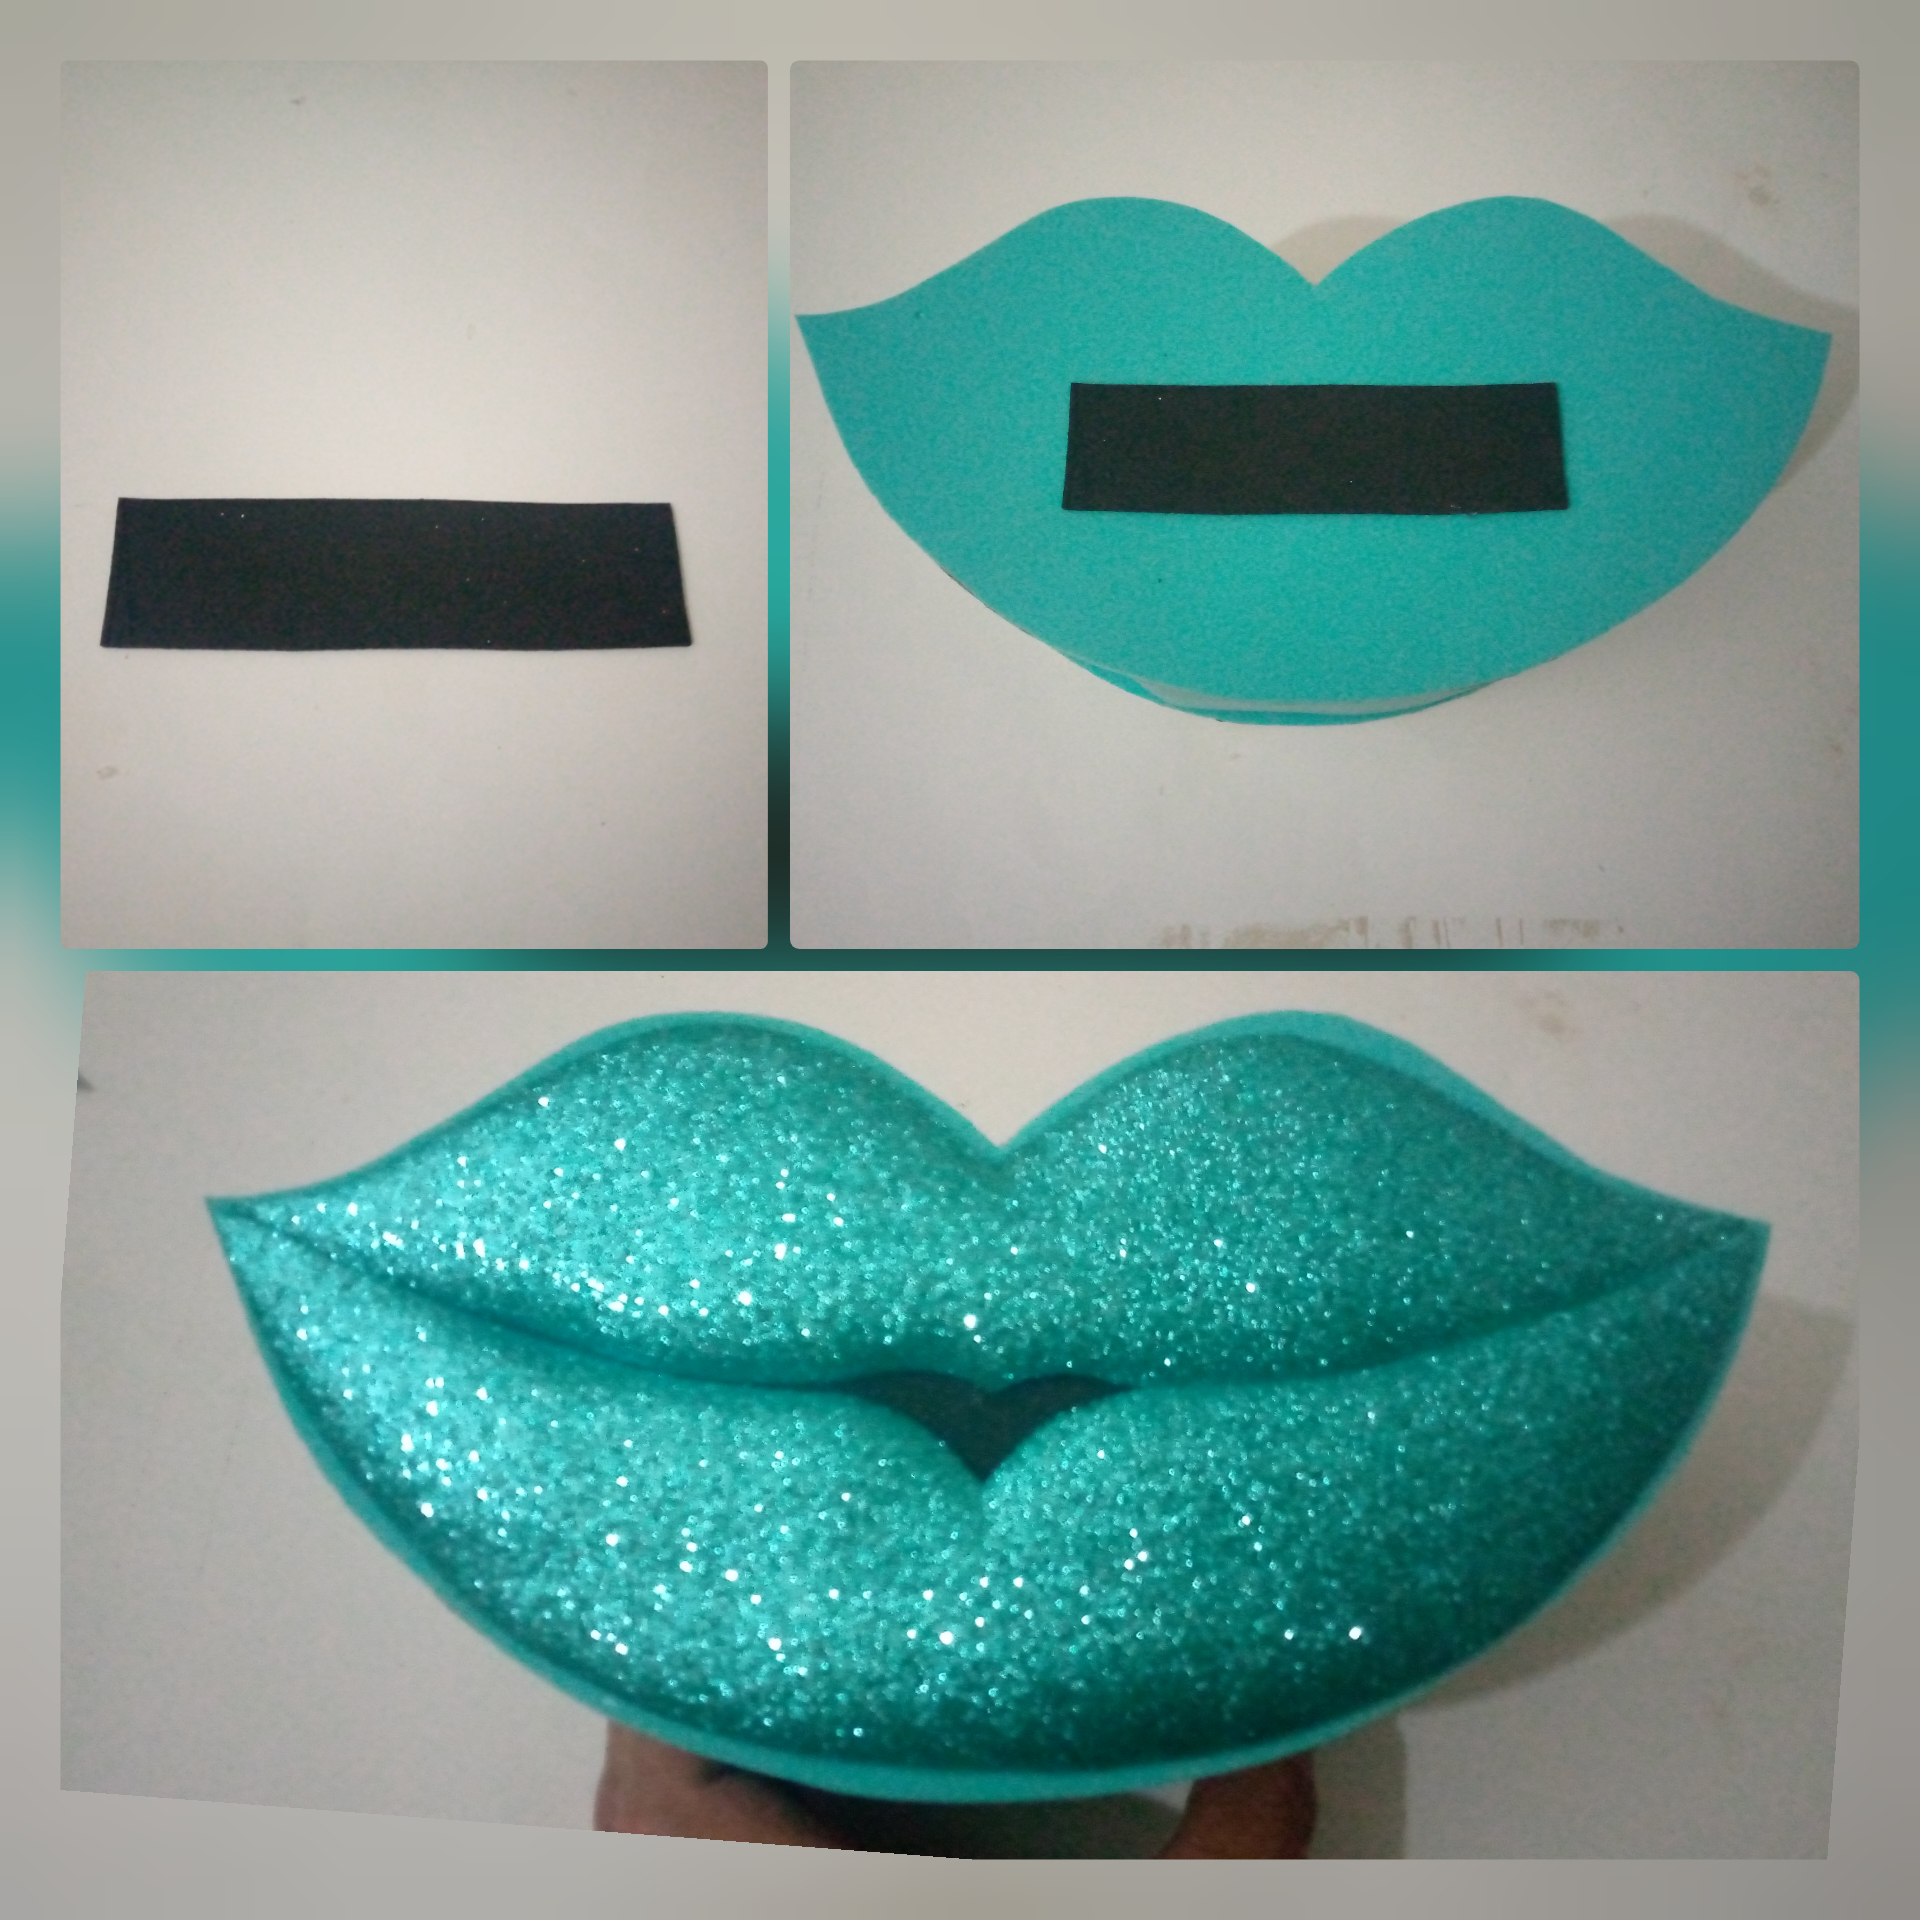
6- Corta un pequeño rectángulo del foami de color negro y pega en el centro de la parte frontal, seguidamente pega las piezas de los labios en foami diamantado ajustando muy bien, quedará un pequeño borde alrededor.
6- Cut a small rectangle of black foami and glue it in the center of the front side, then glue the lip pieces in diamond foami adjusting very well, there will be a small border around it.
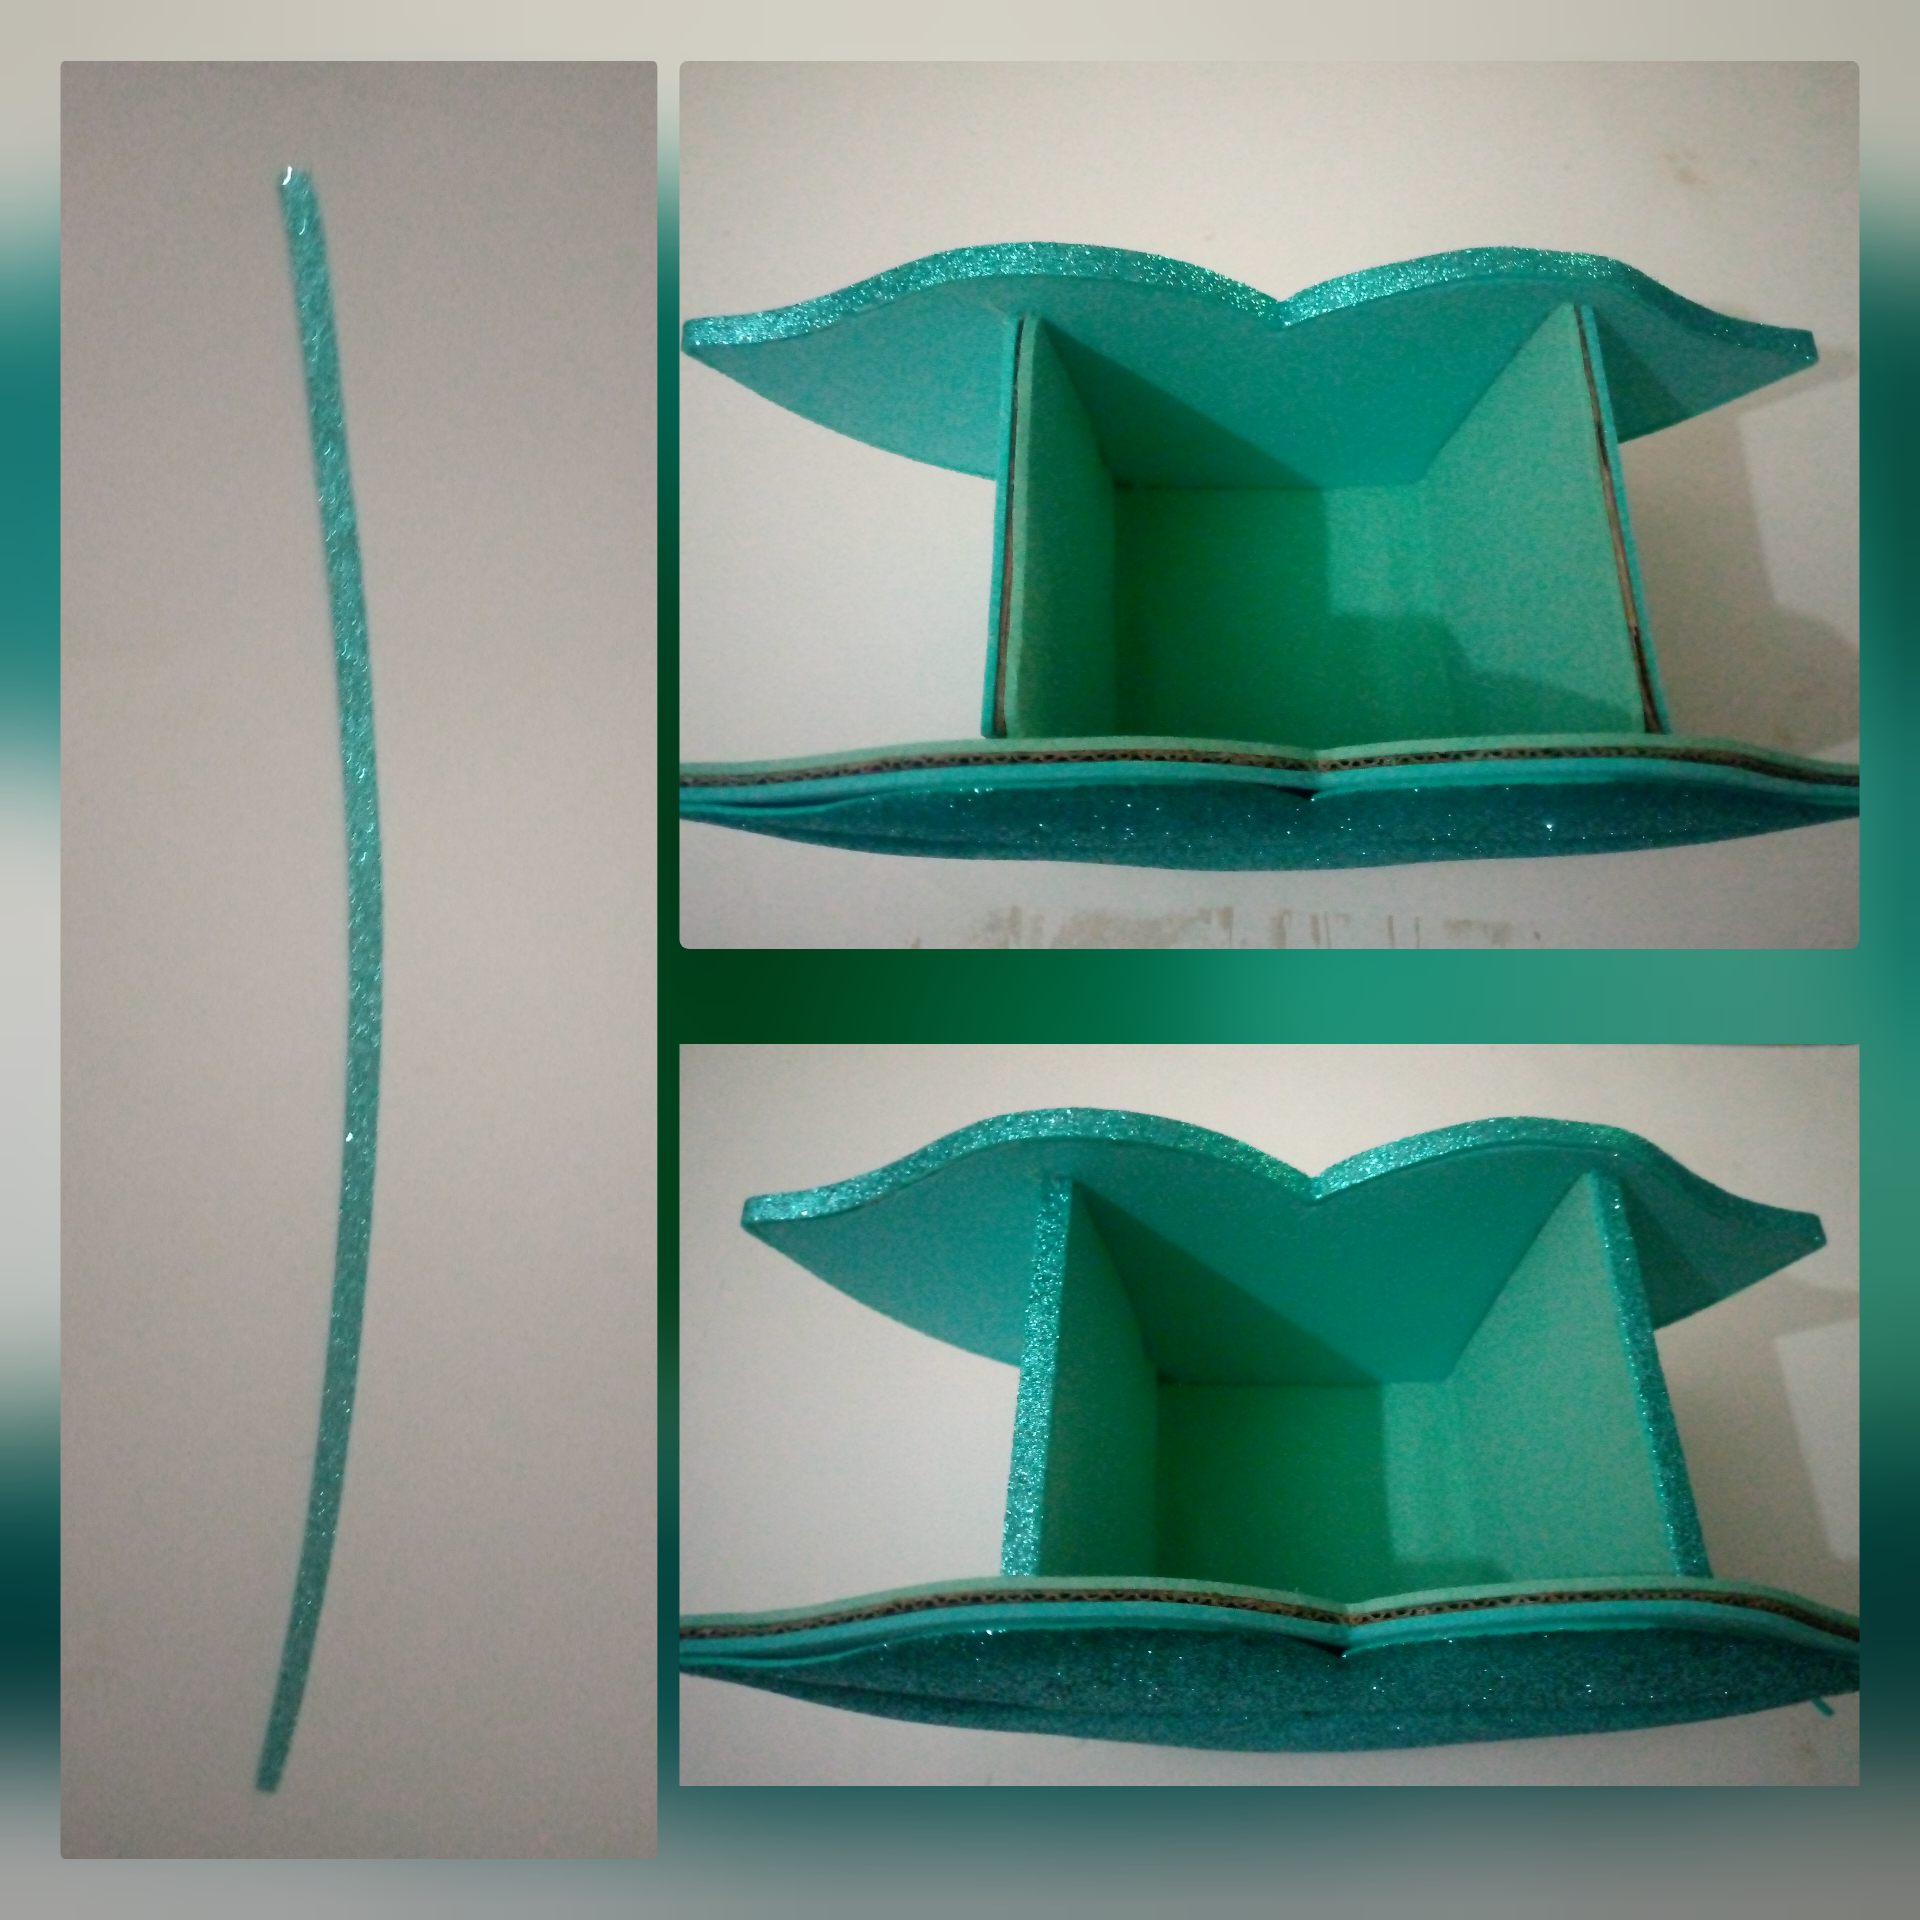
7- Corta una tira de foami diamantado de 1/2 cm de ancho y pega en todo el borde de la parte trasera para un mejor acabado, también en los laterales.
7- Cut a strip of diamond foami 1/2 cm wide and glue all around the edge of the back for a better finish, also on the sides.
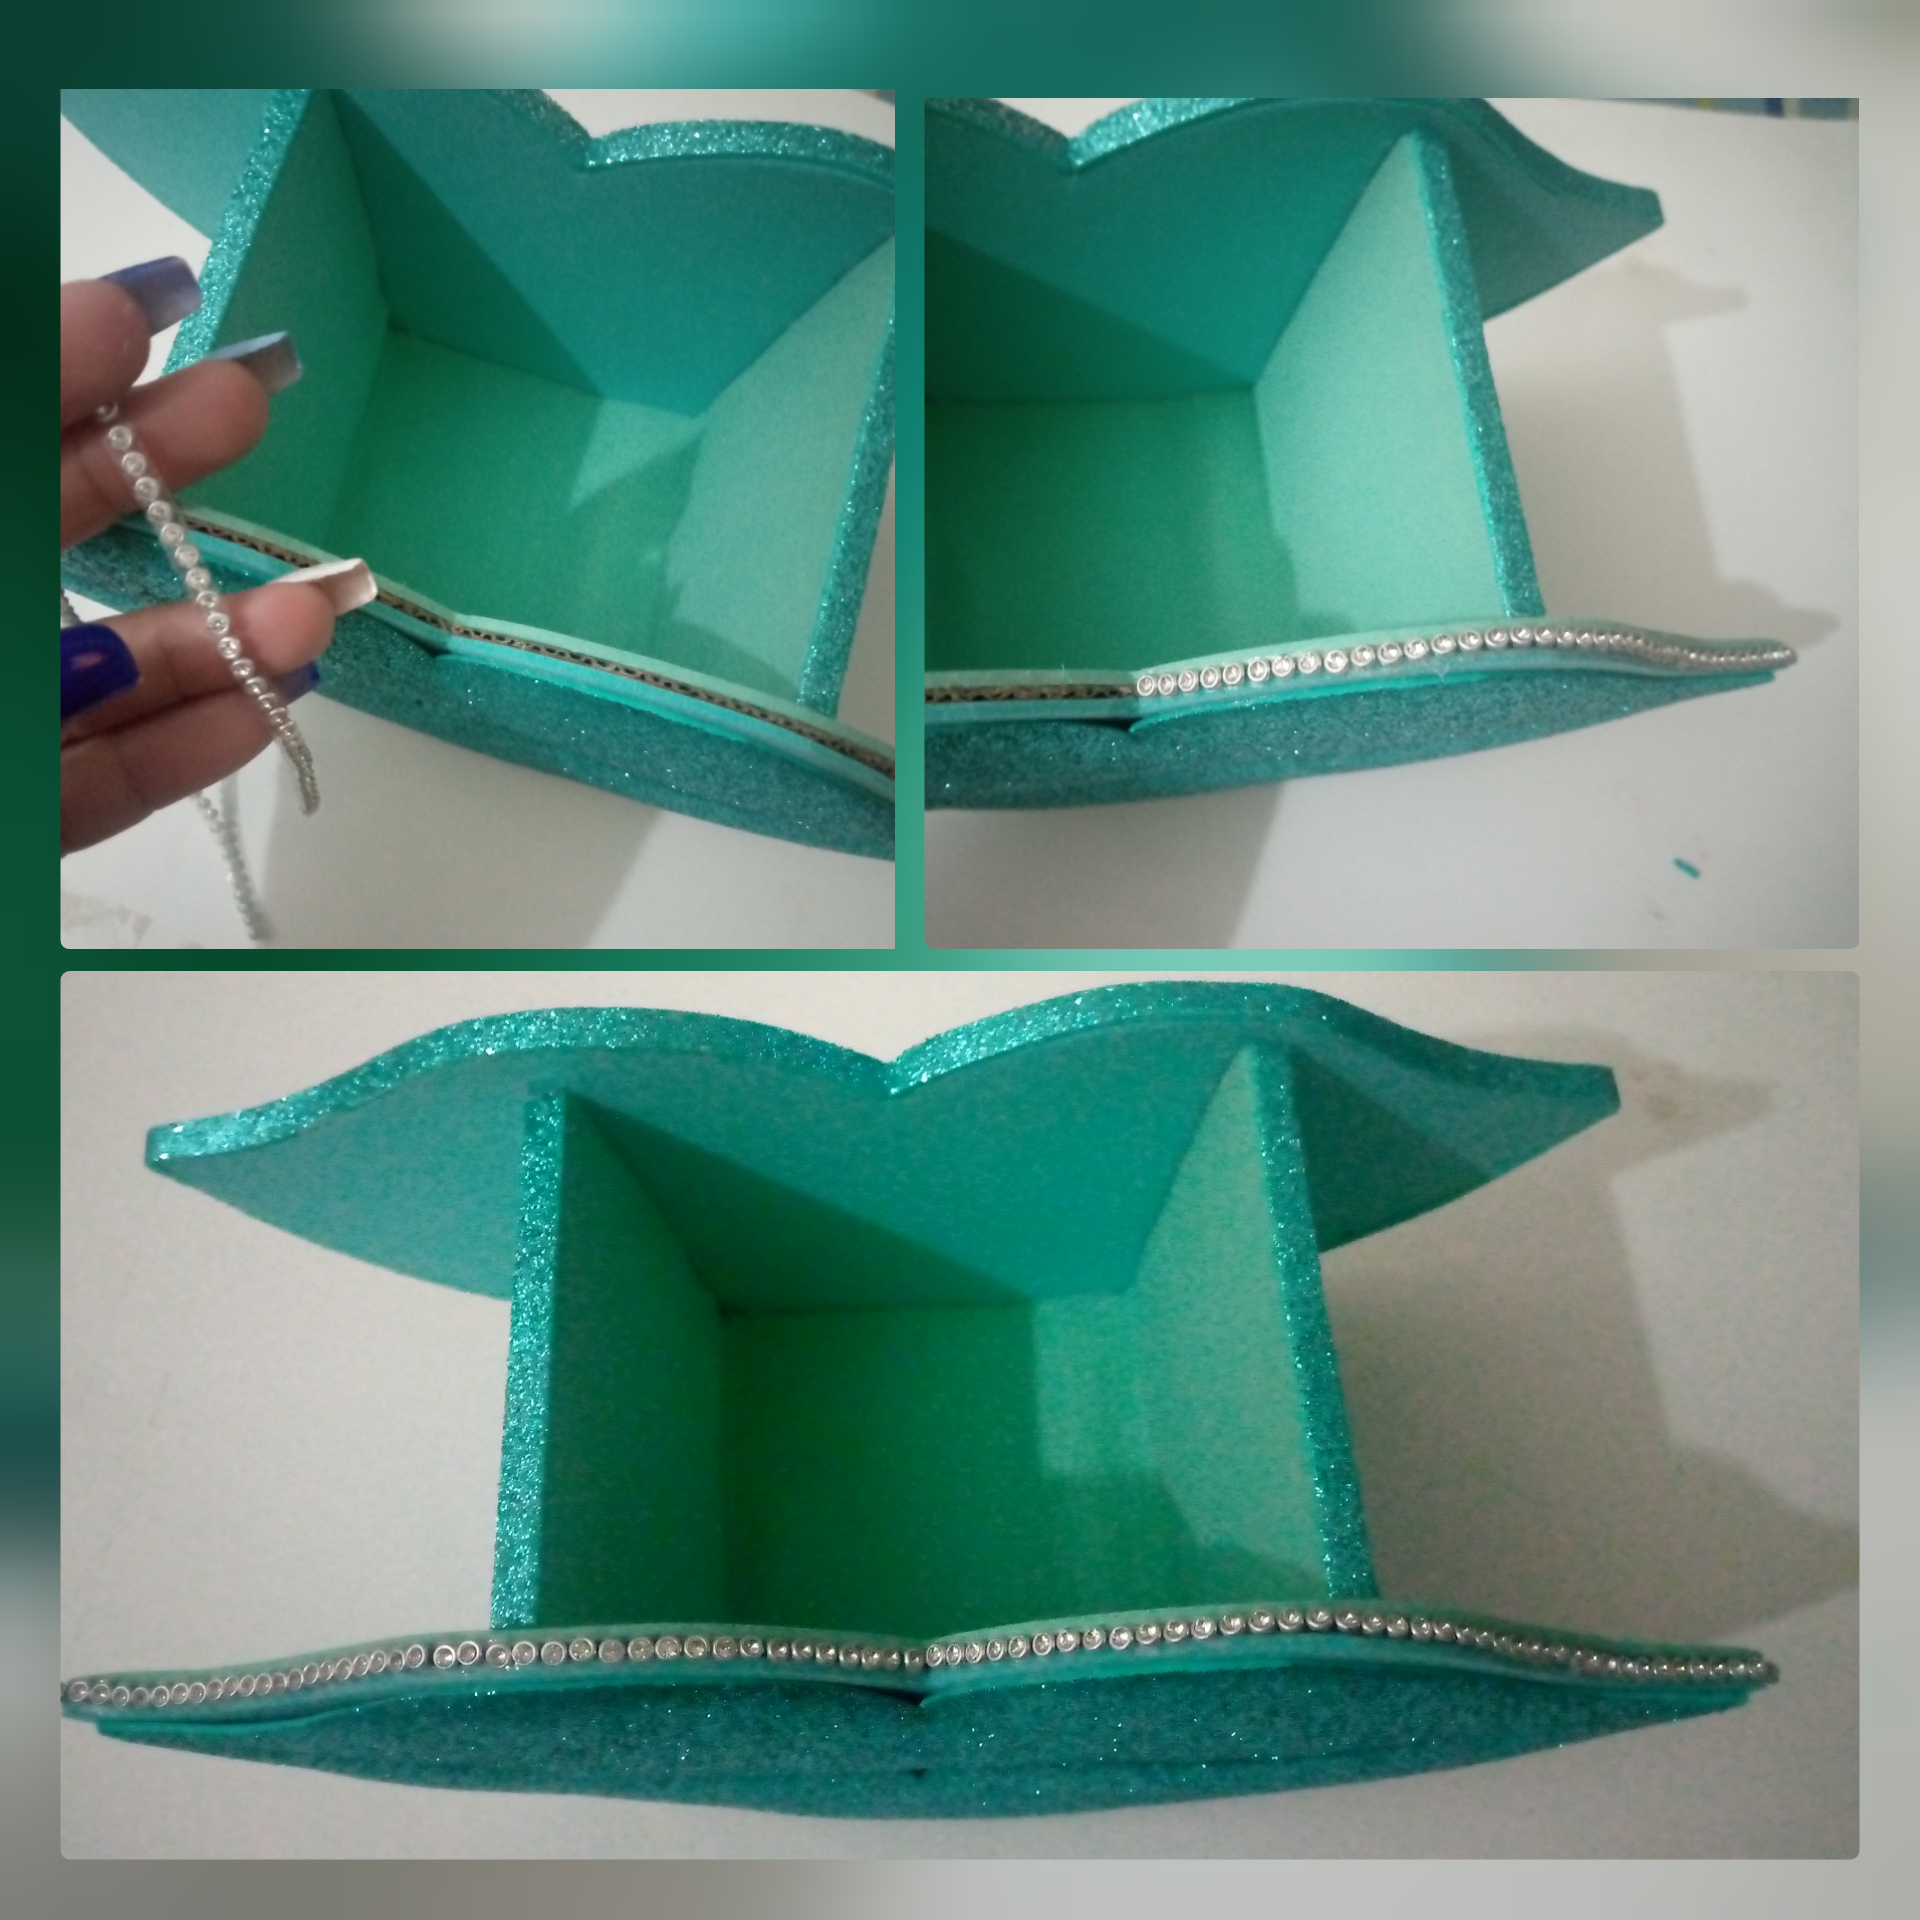
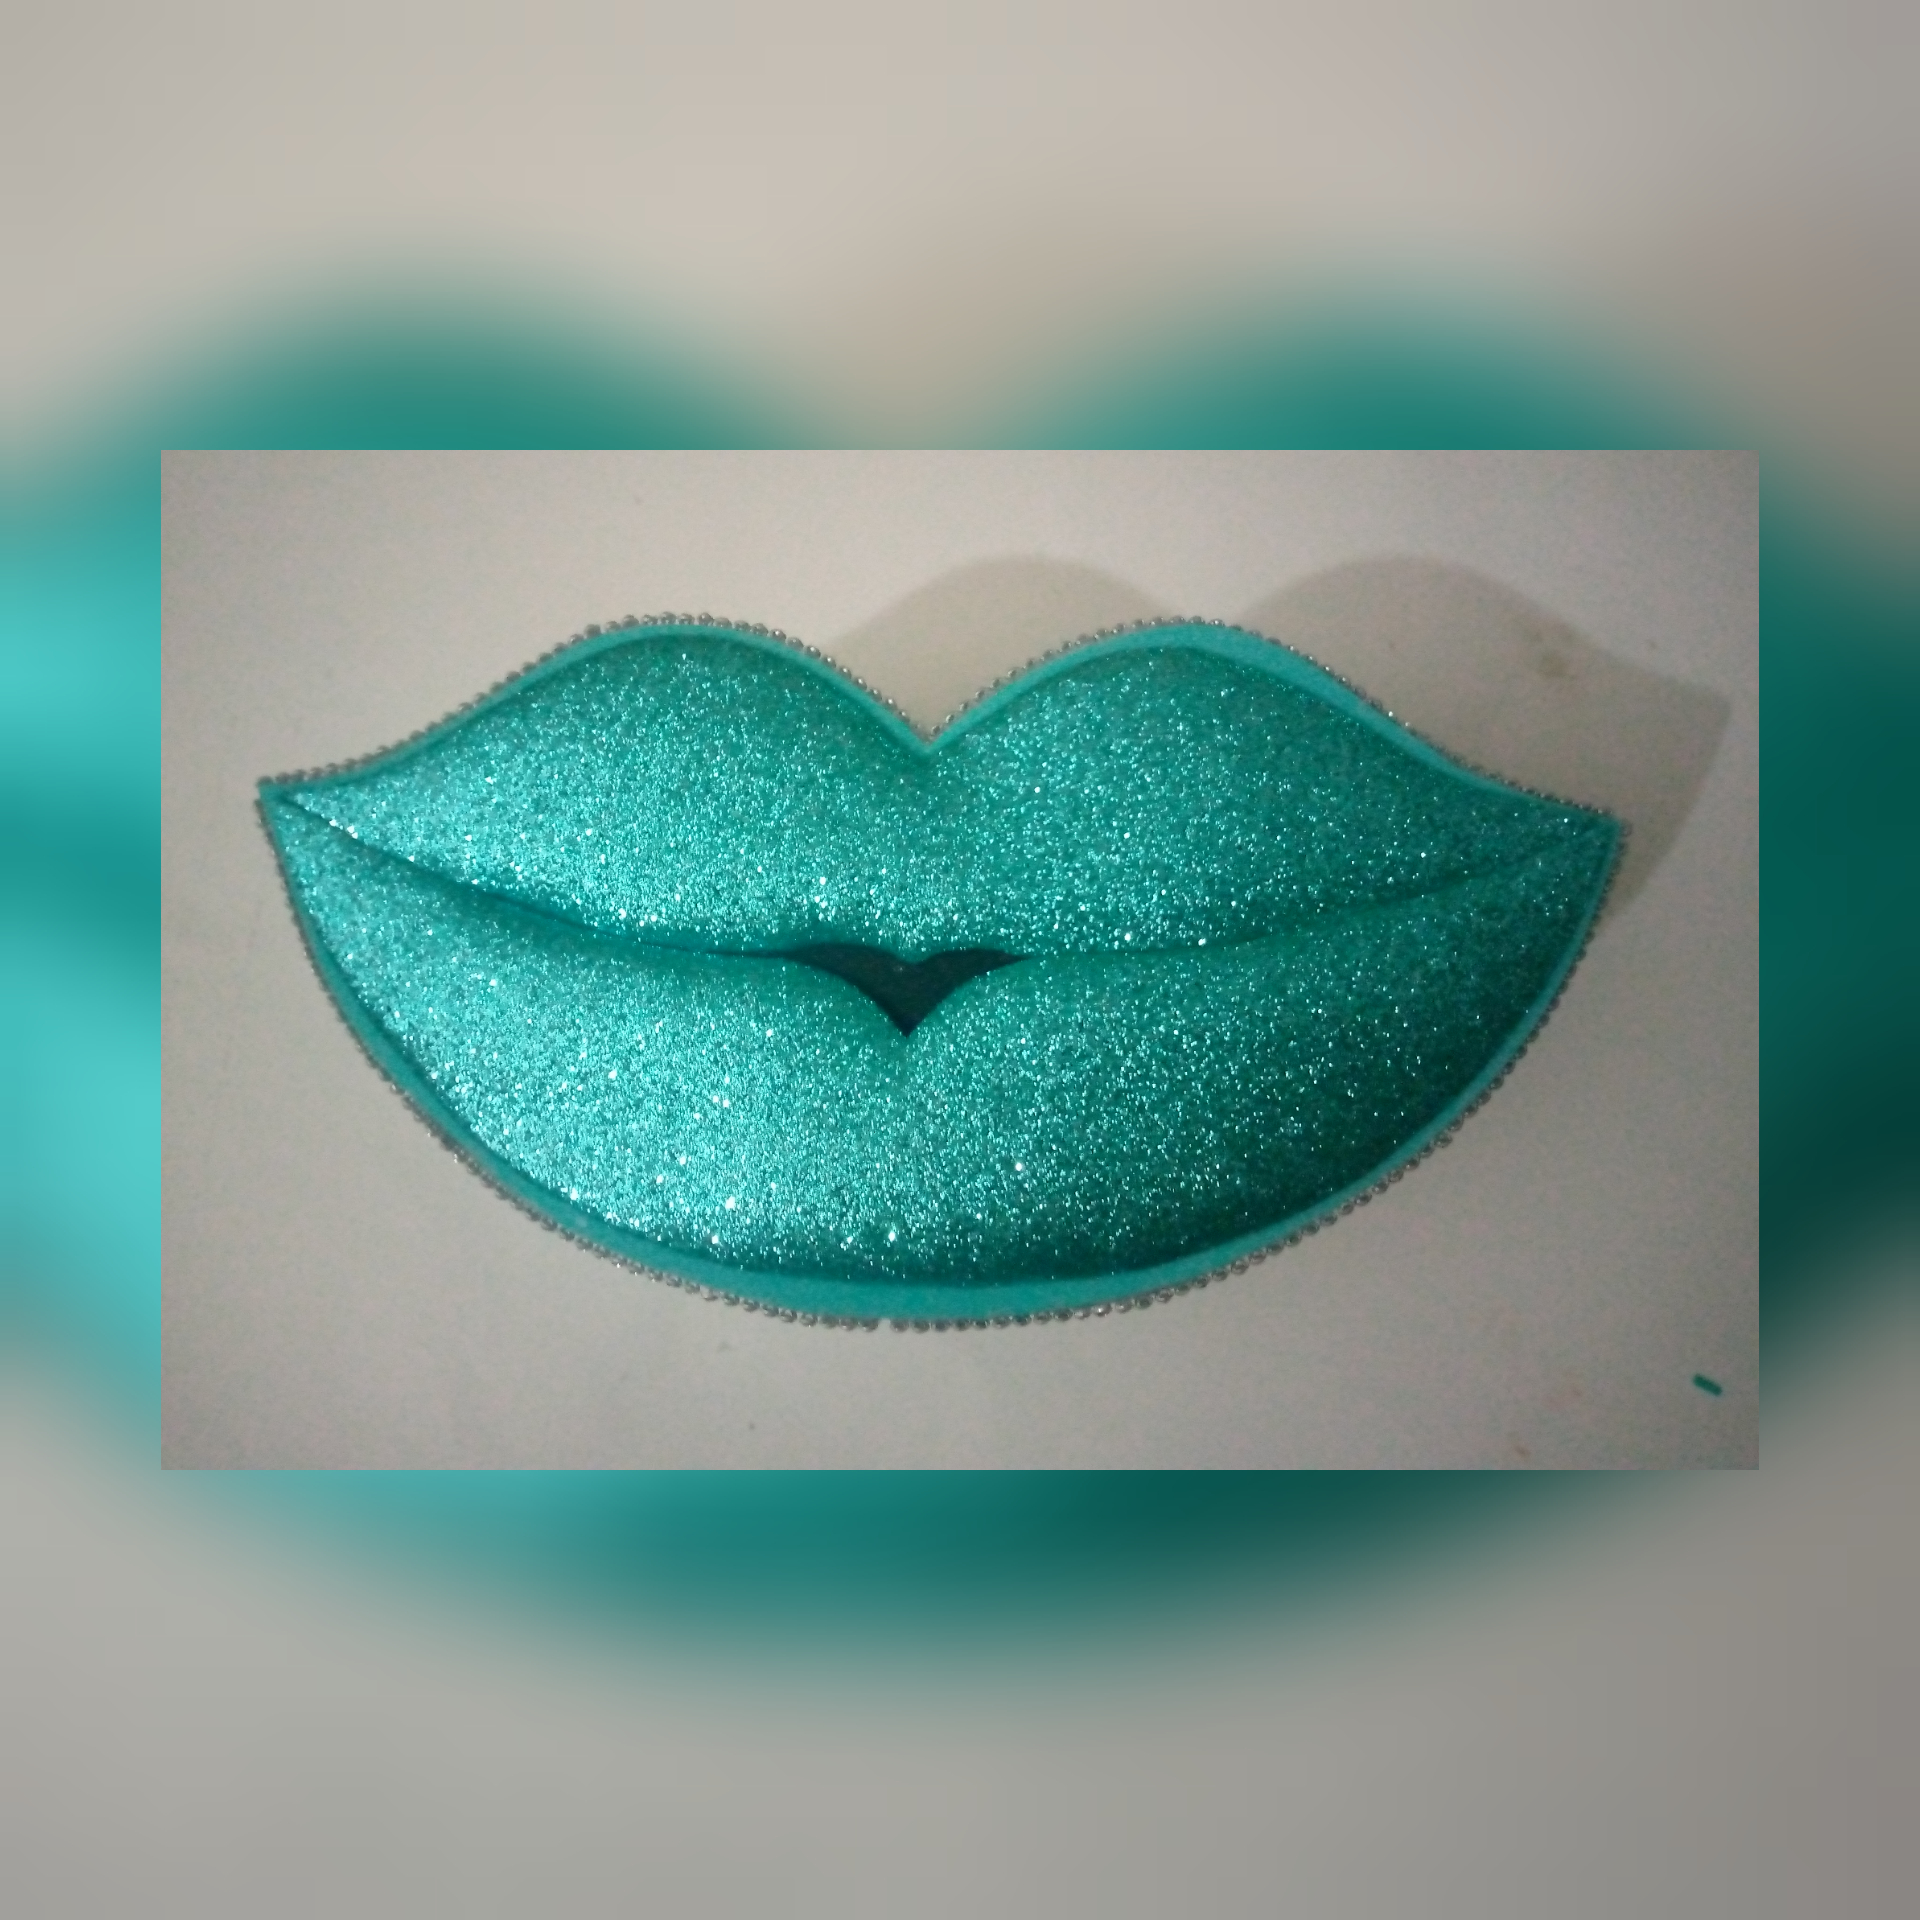
8- En la parte frontal pegamos las piedras decorativas también en todo su borde, y así hemos culminado este hermoso trabajo.
8- On the front we glue the decorative stones also all around the edge, and thus we have finished this beautiful work.
Resultado
Result
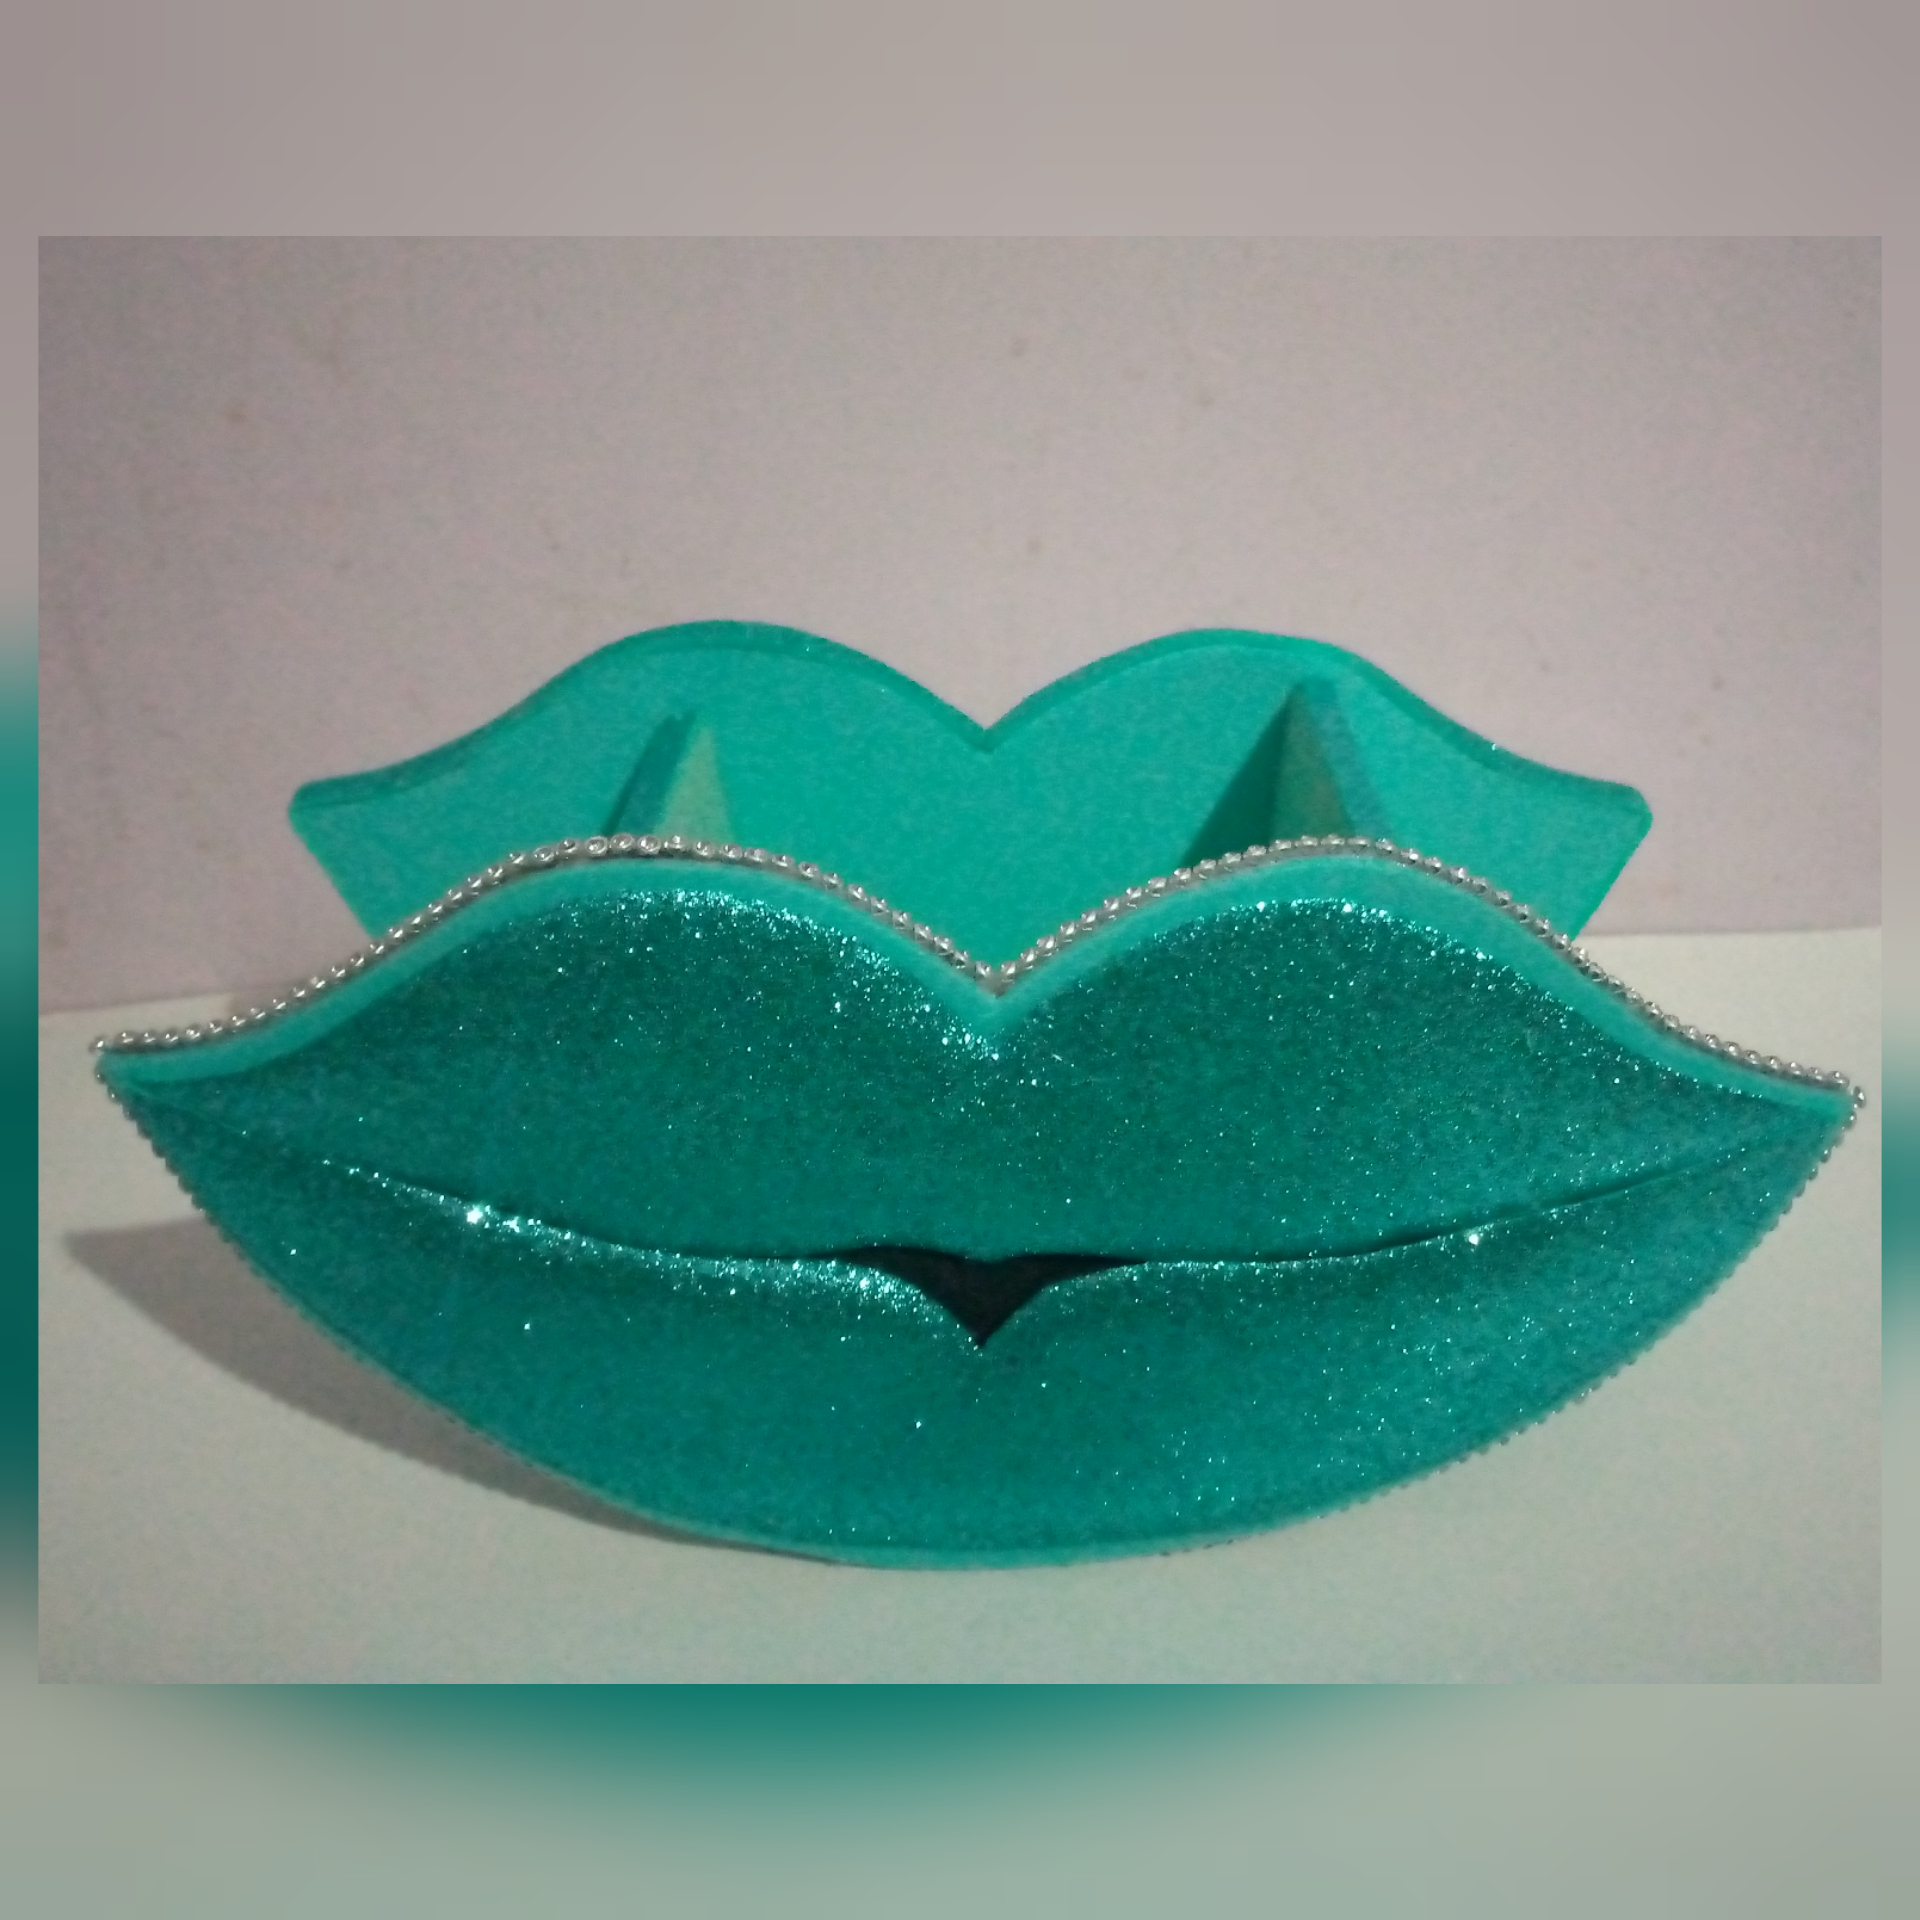
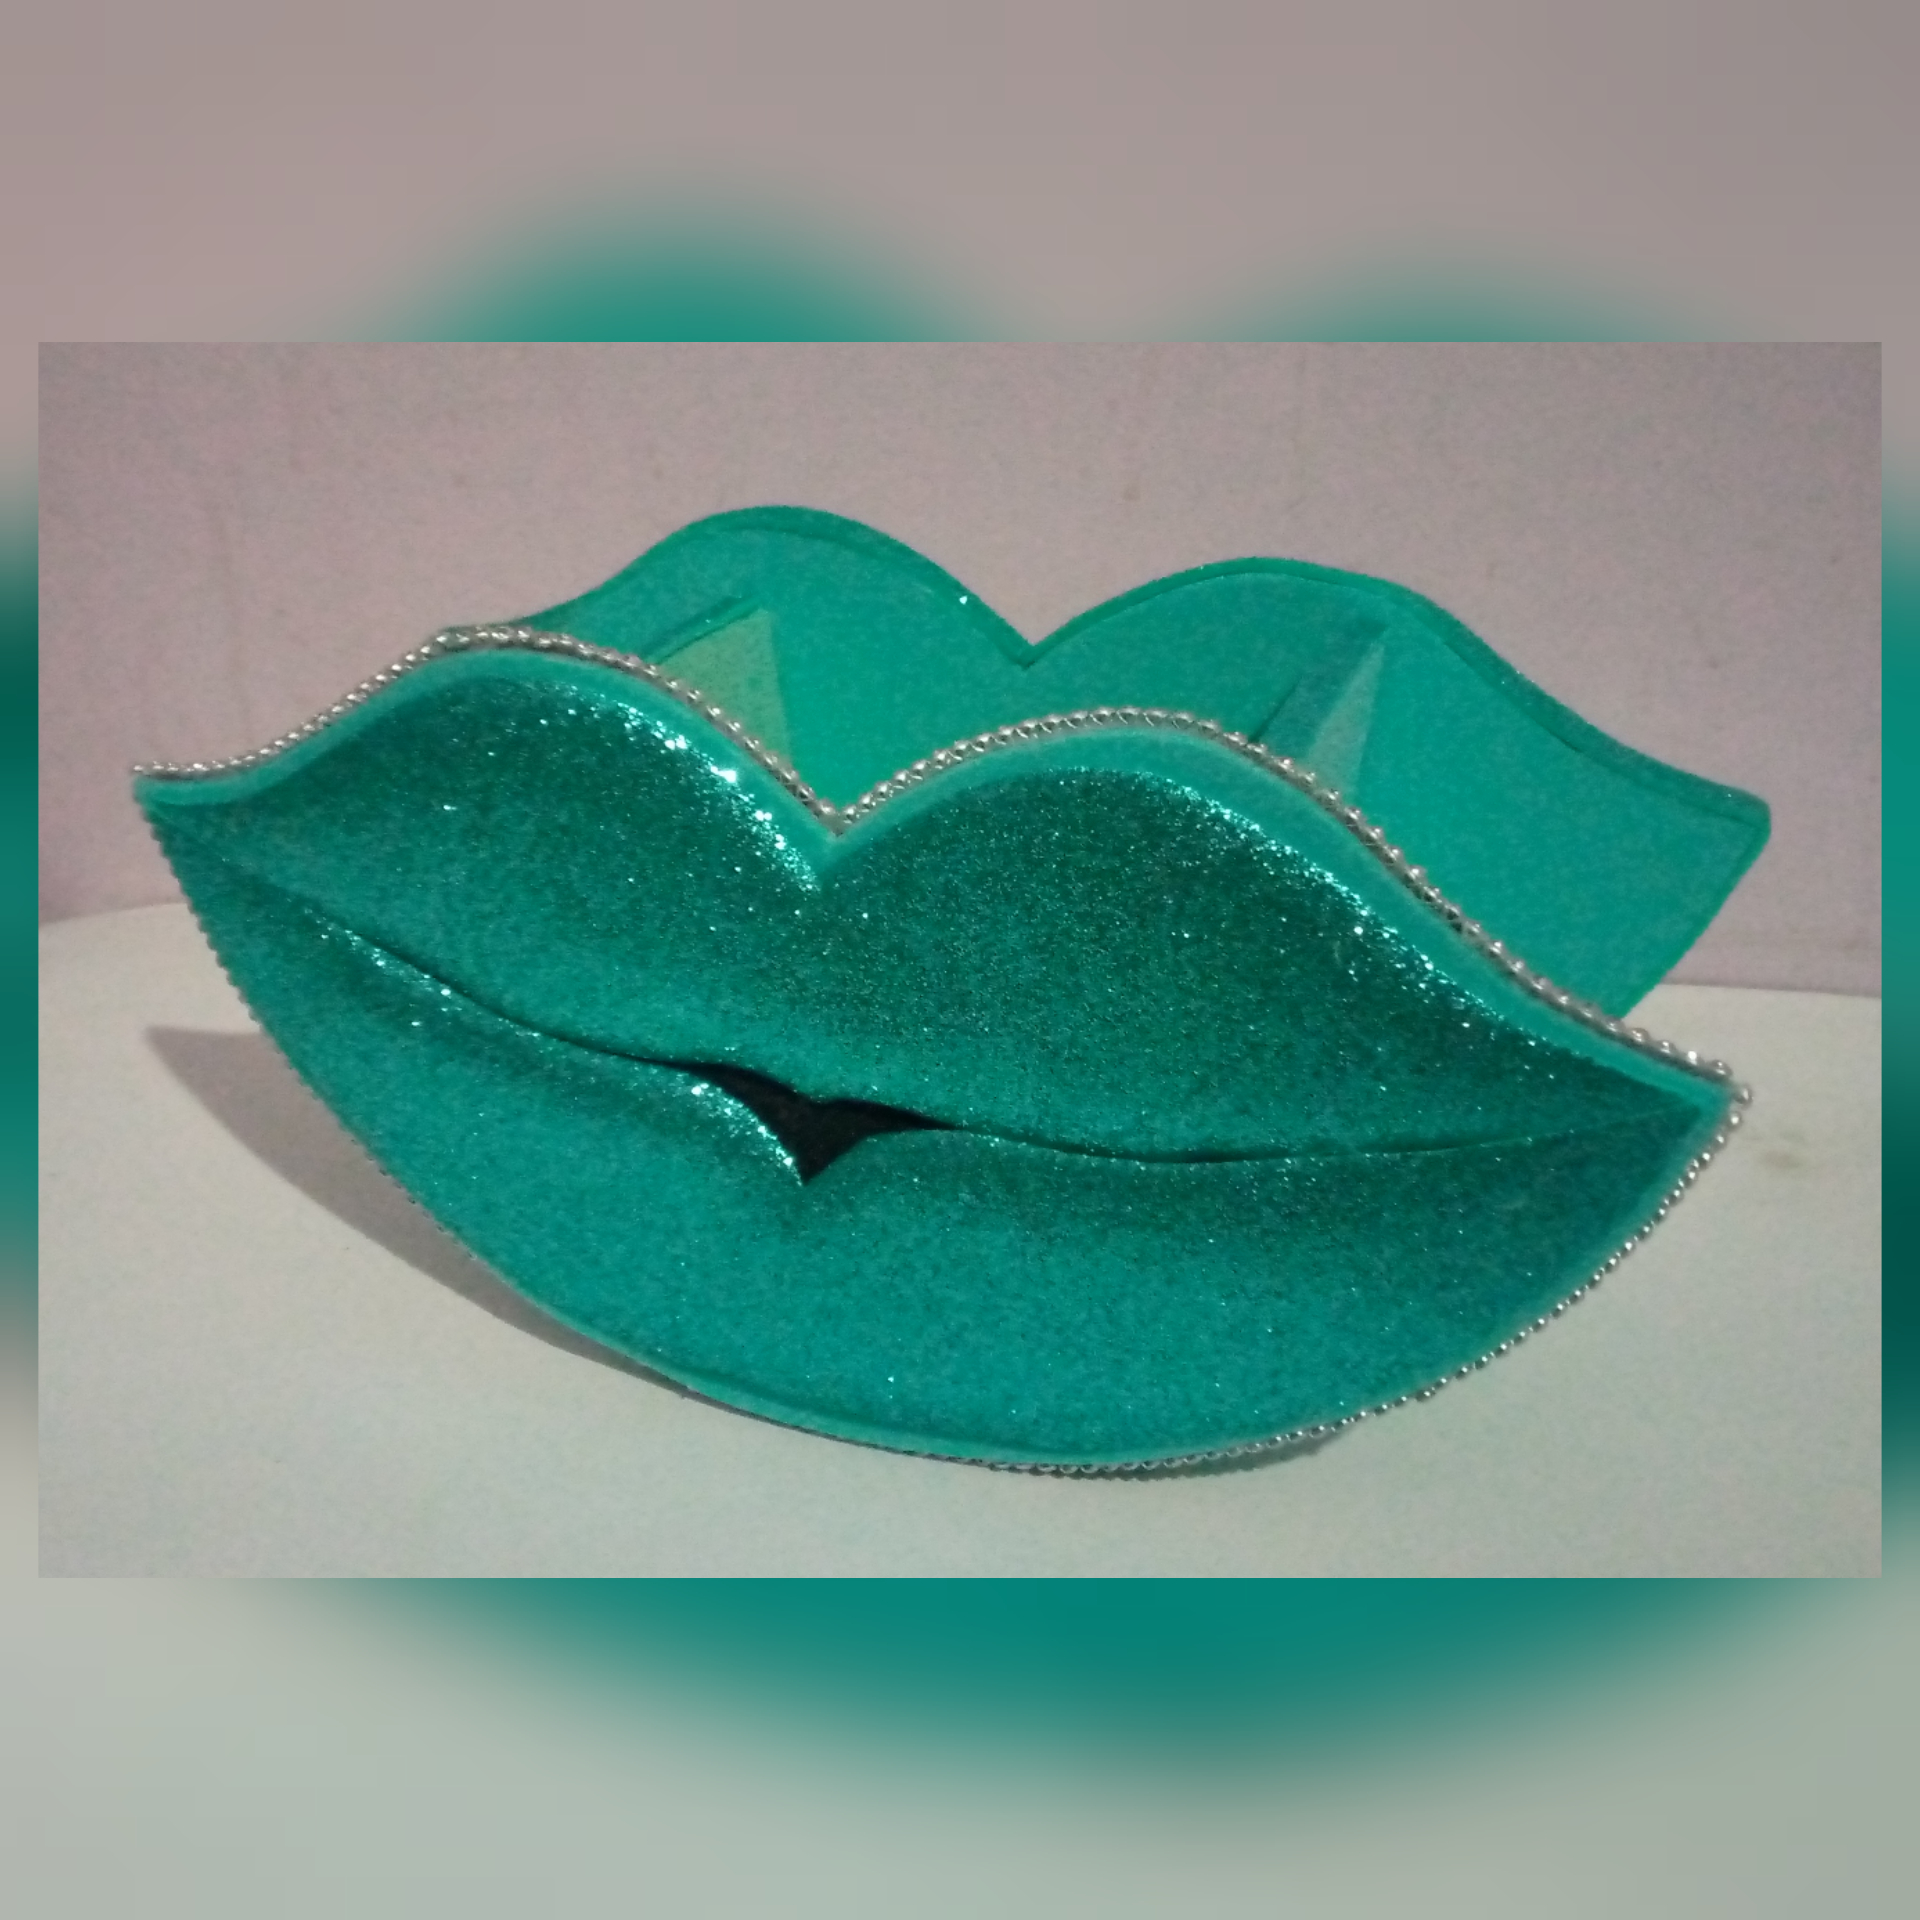
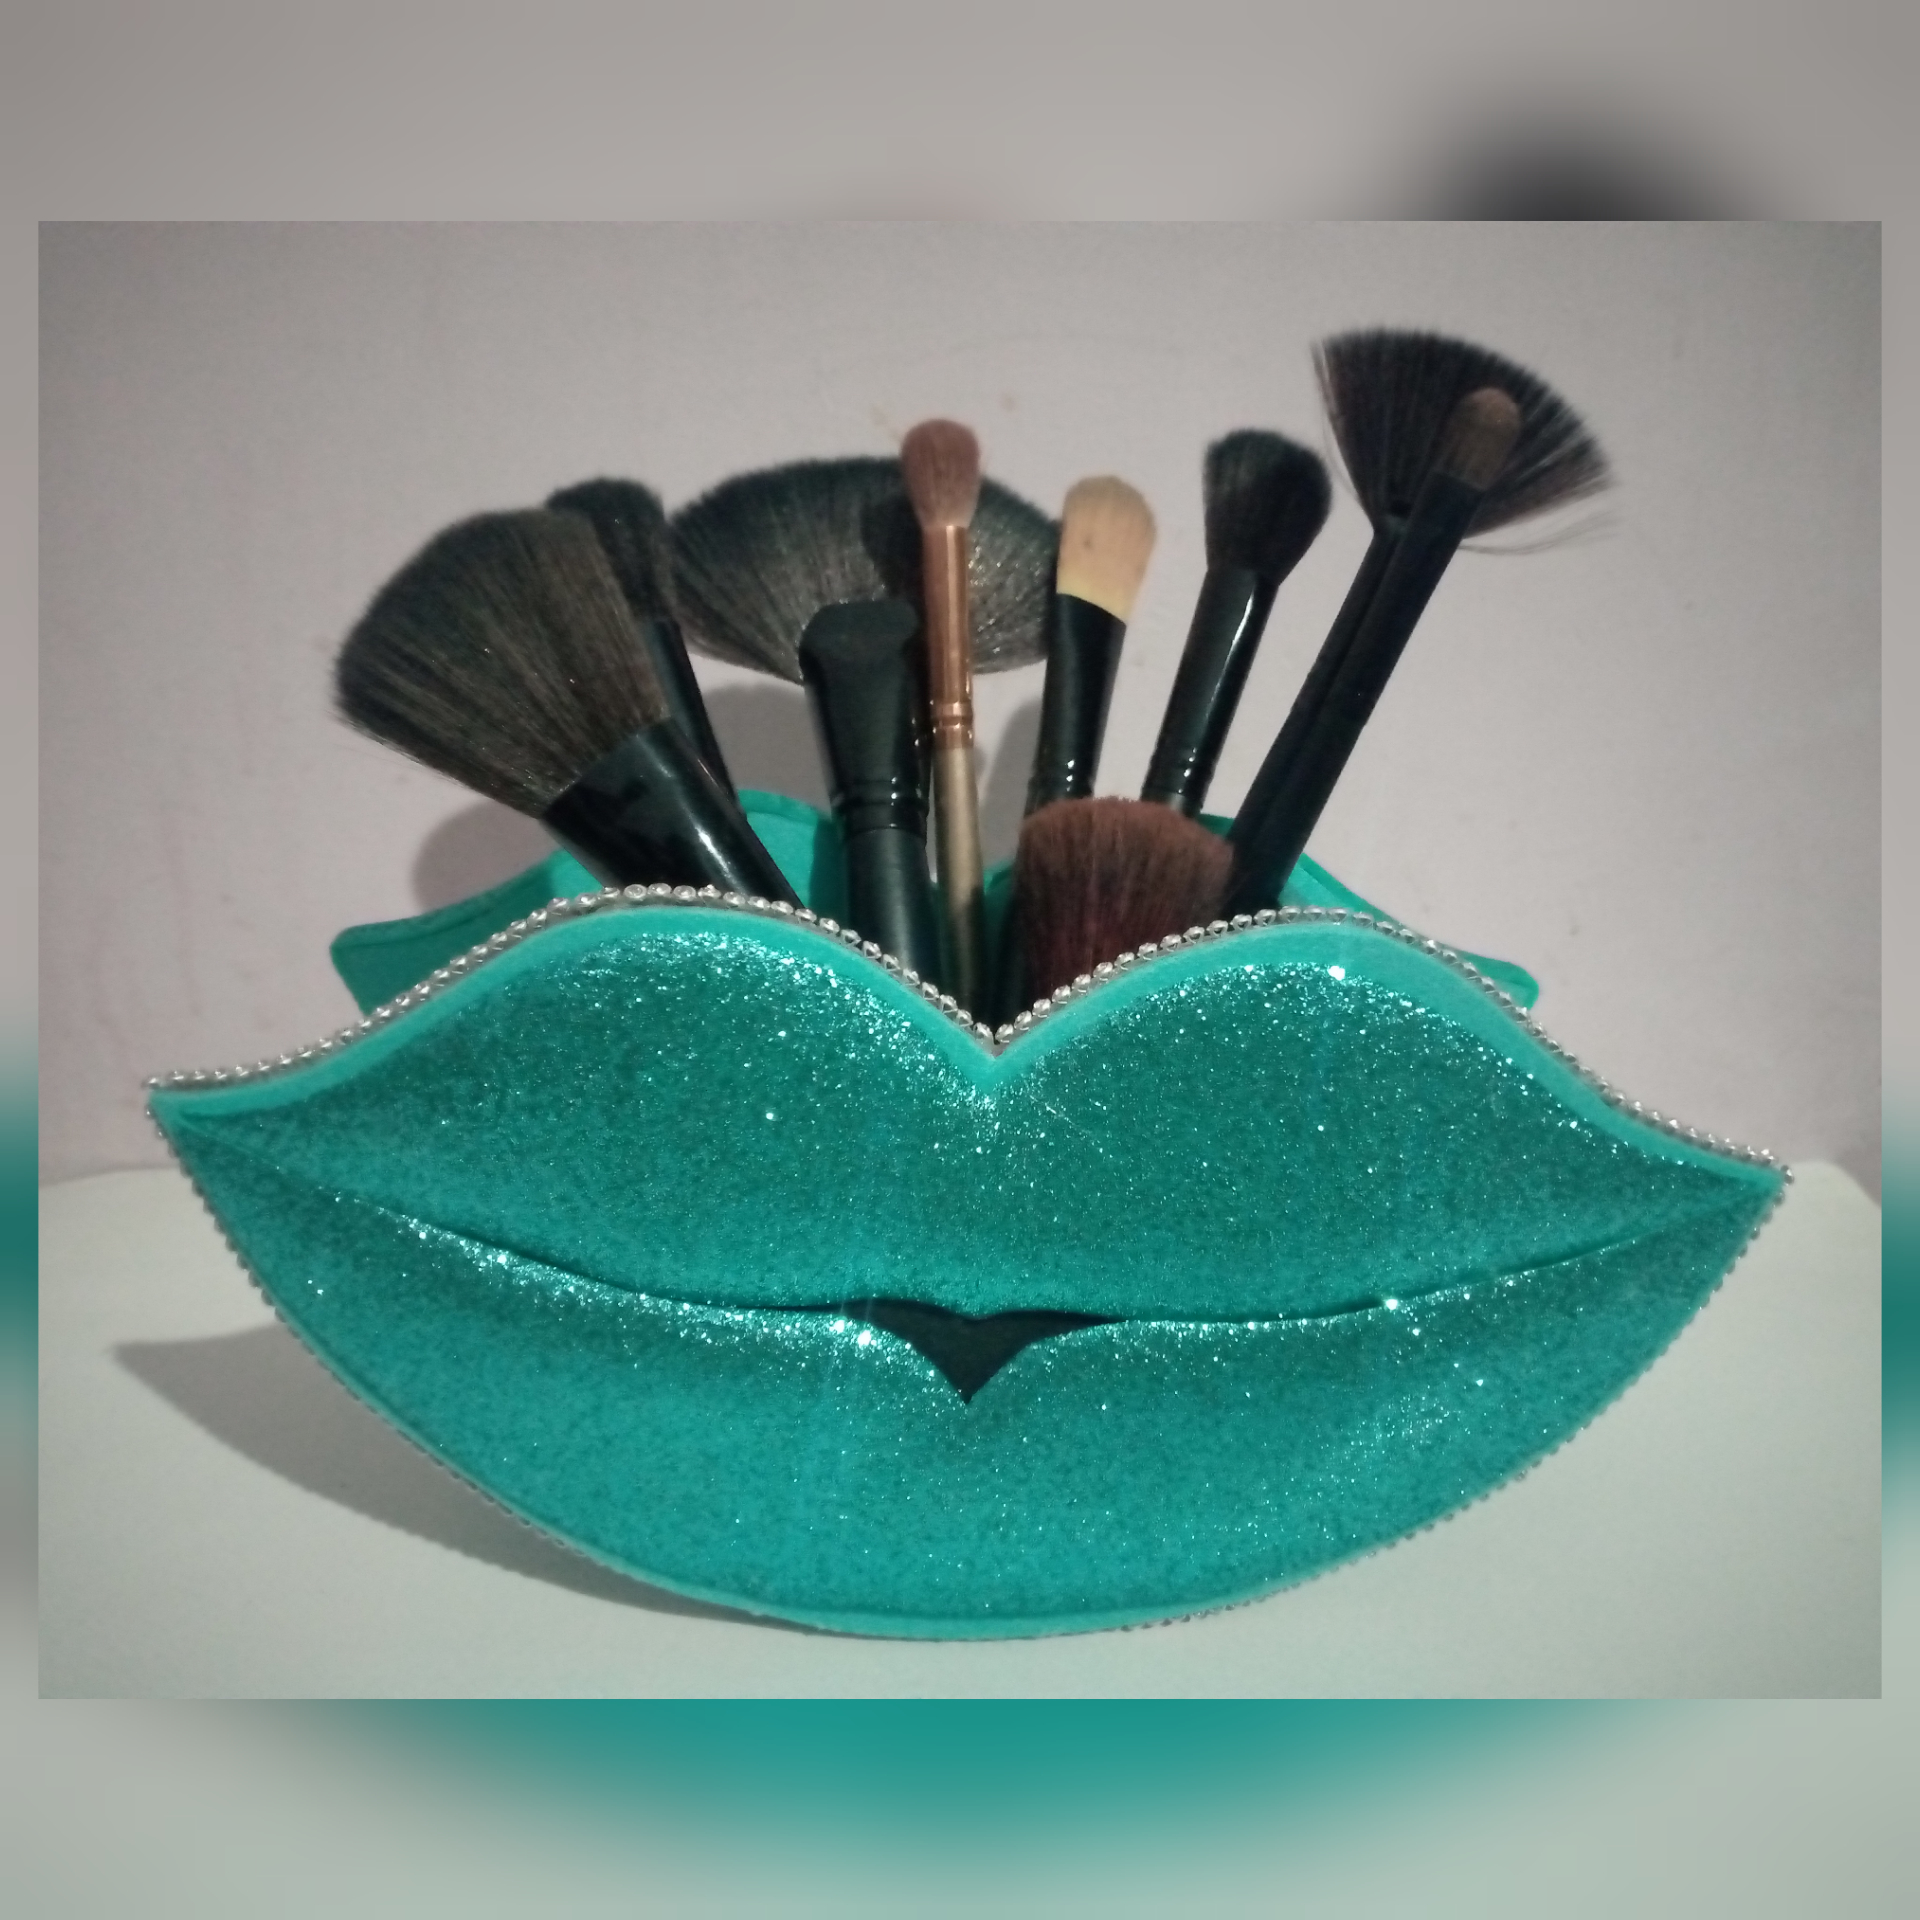
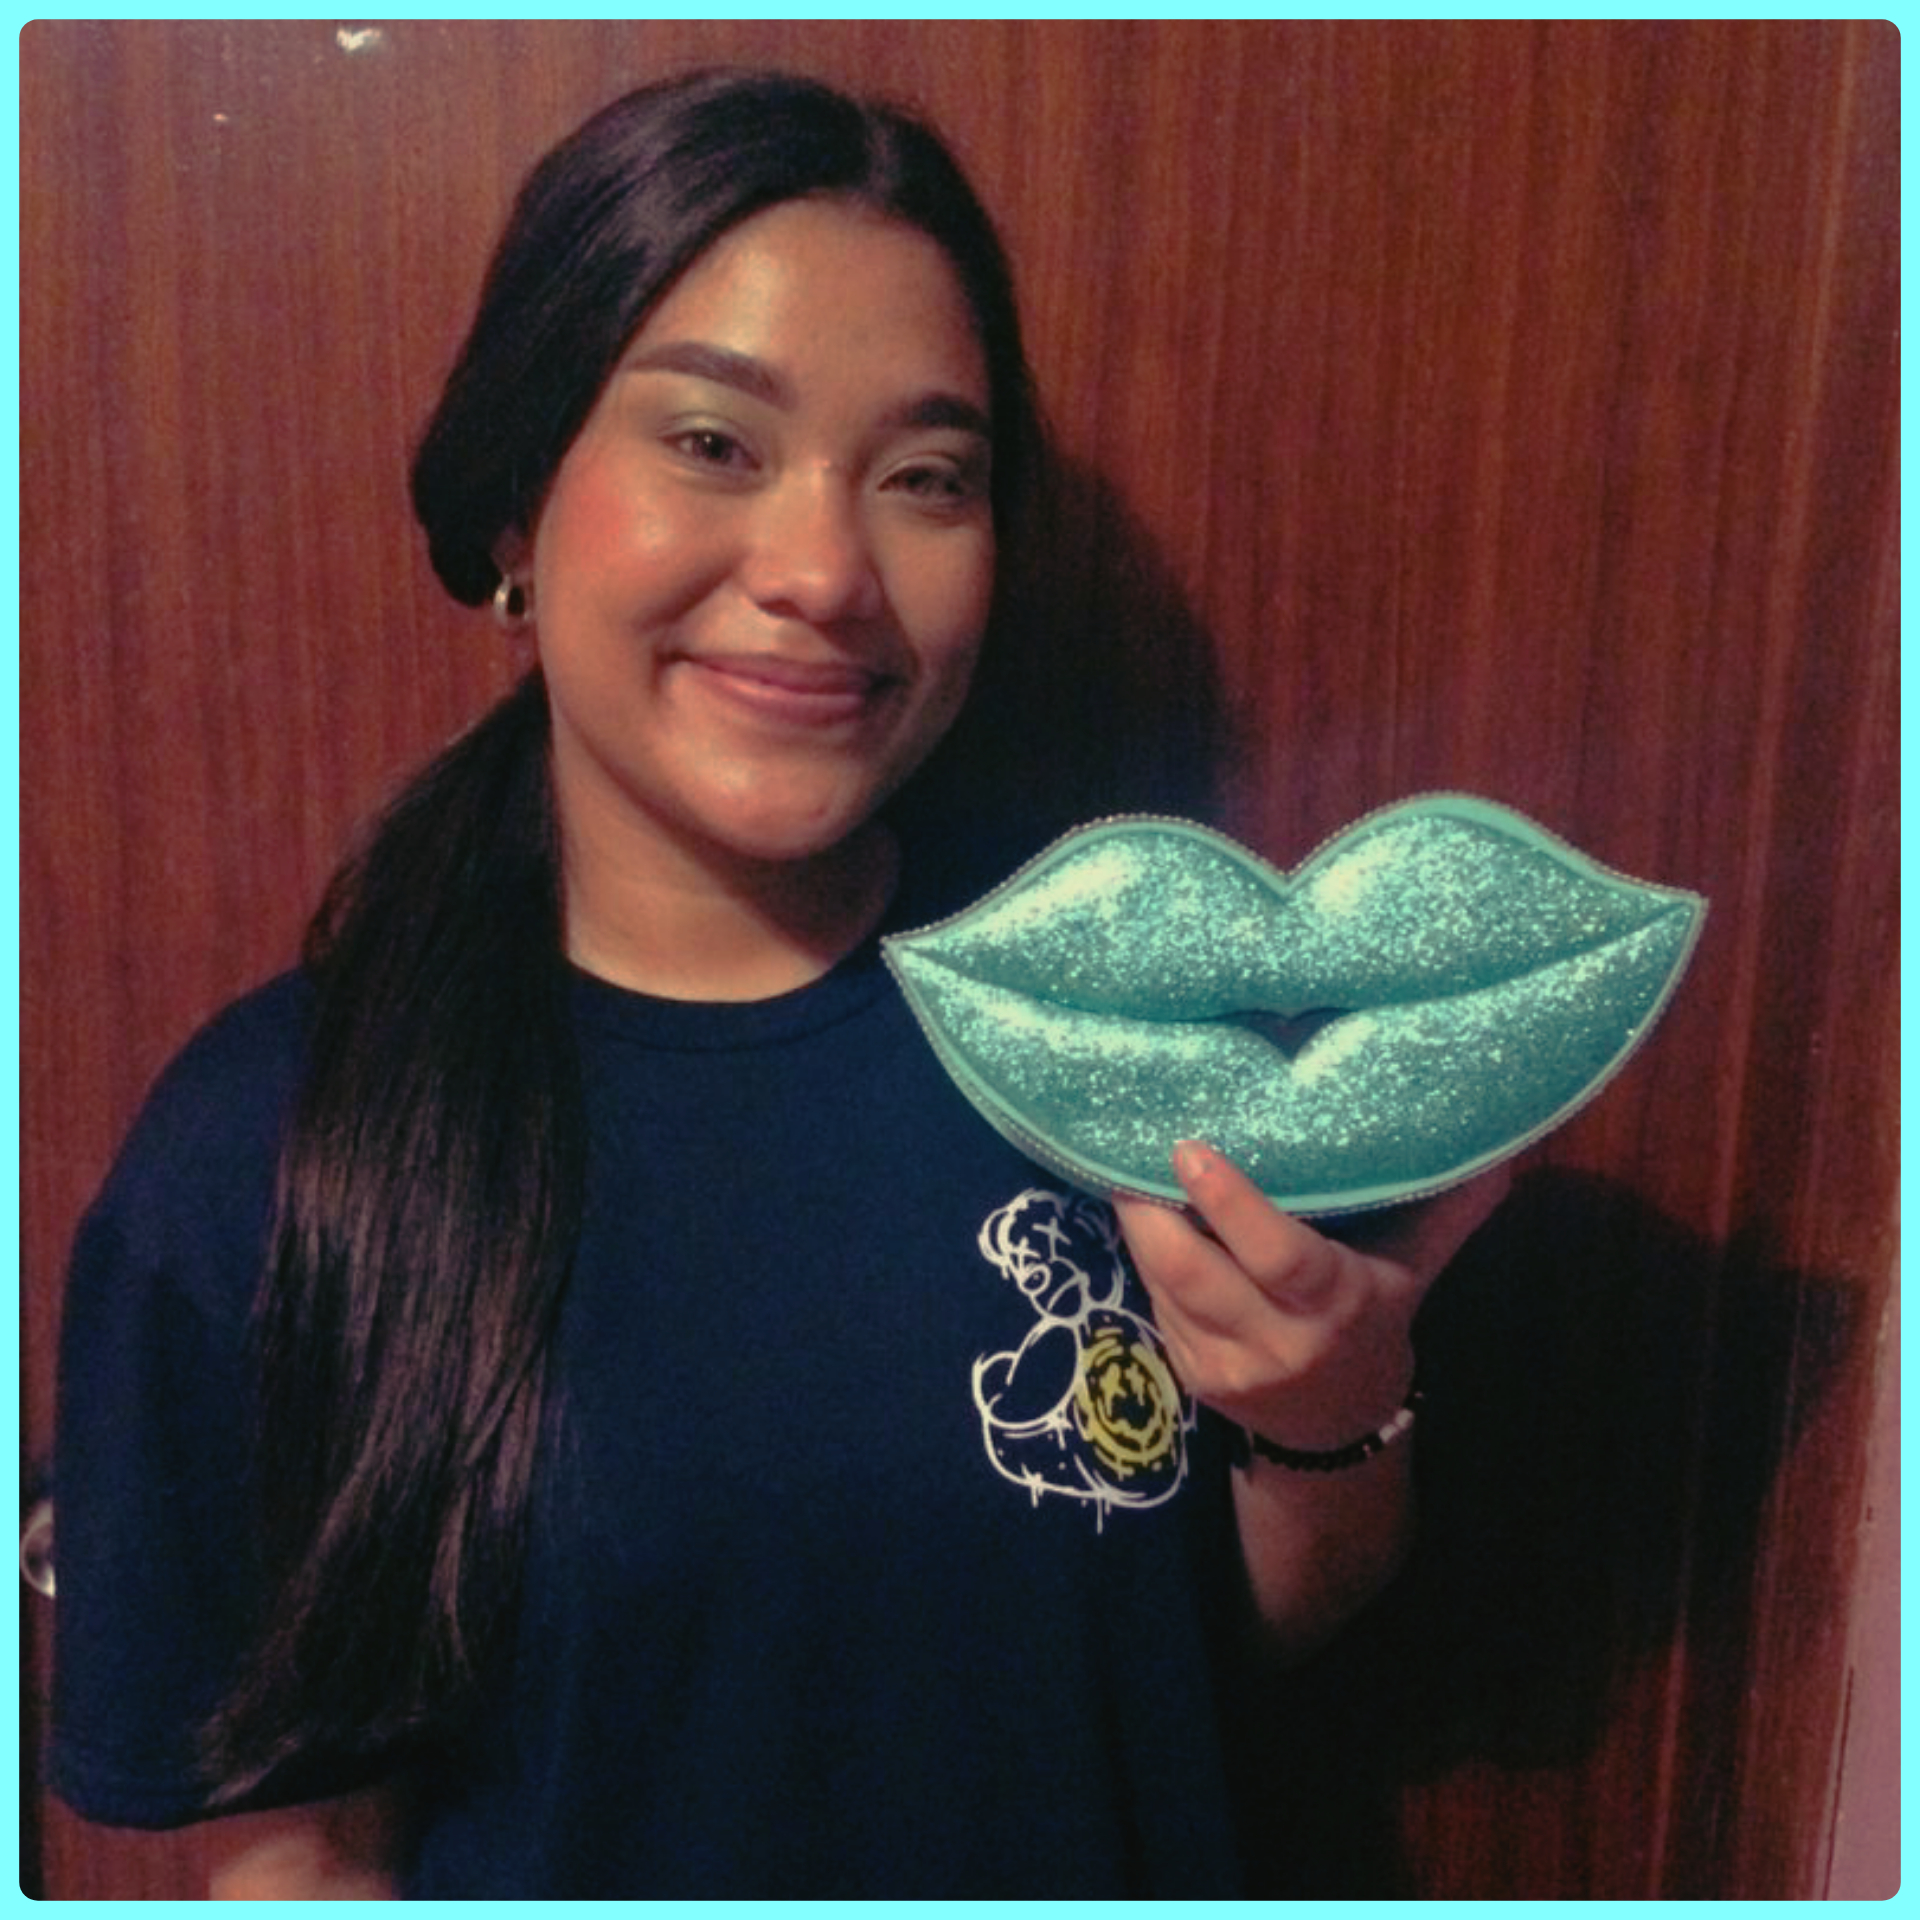
Una foto con la agasajada, a quien le gustó mucho su obsequio hecho con todo el cariño, y espero que a ustedes también les haya gustado, queda muy lindo en la variedad de colores que desees realizarlo.
A photo with the guest, who really liked her gift made with all the love, and I hope you also liked it, it looks very nice in the variety of colors you want to make it.
Muchas Gracias por visitar mi blog, espero verlos pronto, les deseo una feliz descanso y una bendecida noche.
Thank you very much for visiting my blog, I hope to see you soon, I wish you a happy rest and a blessed night.
Dios les Bendiga Inmensamente!
God Bless You Immensely!
@dayanaromer 💚
Todas las fotografías son de mi propiedad, captadas con mi léfono móvil Tecno Spark 6 go.
Editadas con inShop.
Traducido con Deepl traductor.
All photos are my own, taken with my Tecno Spark 6 go cell phone.
Edited with inShop.
Translated with Deepl translator.
Está demasiado lindo y coqueto 💋 sin duda lo usaría ✨💗
Gracias amiga ,saludos 😊
Thank you for sharing this amazing post on HIVE!
Your content got selected by our fellow curator tibfox & you just received a little thank you upvote from our non-profit curation initiative!
You will be featured in one of our recurring curation compilations which is aiming to offer you a stage to widen your audience within the DIY scene of Hive.
Make sure to always post / cross-post your creations within the DIYHub community on HIVE so we never miss your content. We also have a discord server where you can connect with us and other DIYers. If you want to support our goal to motivate other DIY/art/music/gardening/... creators just delegate to us and earn 100% of your curation rewards!
Stay creative & hive on!
Hola linda! 💕
Que hermoso te quedó , es una muy bonita idea , me encanta que utilizaste la técnica con la plancha, así los labios se ven más gorditos.
Muchas gracias por compartir amiga, Saludos ✨😊
Saludos amiga, me alegra que te haya gustado, muchas gracias por comentar, feliz día! 🤗
Wow me encantó! Te ha quedado hermoso, que buen regalo. Se ve bien elaborado 🎈 Saludos
Muchas gracias amiga, saludos 😊
Hermoso
Muchas gracias bella! 😊
Que precioso la verdad, sin duda lo usaría 👏🏼
Gracias amiga, Saludos 😊
Muy hermoso y útil este organizador de maquillaje . Me encantó
Gracias!! 🤗
Que idea tan maravillosa. Me parece súper fácil de hacer y el diseño es muy bonito, es algo que yo usaría para organizar mis brochas también. Creo que explicaste muy bien el proceso y me siento inspirada de aplicar la misma idea pero quizá con un diseño diferente🙌
Muchas gracias amiga, me alegra que te haya gustado y quieras realizar uno, de seguro te quedará genial 😊
Congratulations @dayanaromer! You have completed the following achievement on the Hive blockchain and have been rewarded with new badge(s):
Your next target is to reach 1000 replies.
You can view your badges on your board and compare yourself to others in the Ranking
If you no longer want to receive notifications, reply to this comment with the word
STOPCheck out the last post from @hivebuzz:
Support the HiveBuzz project. Vote for our proposal!
Que precioso, me encantó💕
Un tutorial bastante elaborado, y sin duda alguna un resultado increíble..
Siempre he dicho que no hay mejor regalo que aquel que hacemos nosotros mismos y obsequiamos con amor ¡Saludos! 💕✨
Me alegra que te haya gustado mucho, si! más que el detalle es el cariño con el que lo haces, gracias por comentar 💗
Hola Dayana, no queda otra palabra con la que definir tu proyecto más que perfección. está todo perfecto, me encantó el color, quisiera hacerme uno, cada detalle elaborado, es delicado, la perla corrida terminó de darle ese toque elegante, cuando vi la imagen pensé que era terciopelo. En la medita de peinar quedará super espectacular o para lucirlo en las tiendas de ventas.
Saludos amiga, me alegra mucho que te haya gustado, muchas gracias por tu lindo comentario, realmente quedé muy complacida con el resultado y me emociona la receptividad que ha tenido mi trabajo, feliz y bendecida noche 🤗
Qué buen trabajo. Práctico y fácil de hacer. Además es muy bonito. Saludos.
Muchas gracias 😊
Ha sido un gusto leer tu post, bien elaborado. Tu regalo para tu sobrina fue bastante creativo, se ve muy lindo, y es sencillo de hacer. Excelente.
Hola @dayanaromer, el color está fascinante. Te felicito muy buen trabajo. Está a la moda.