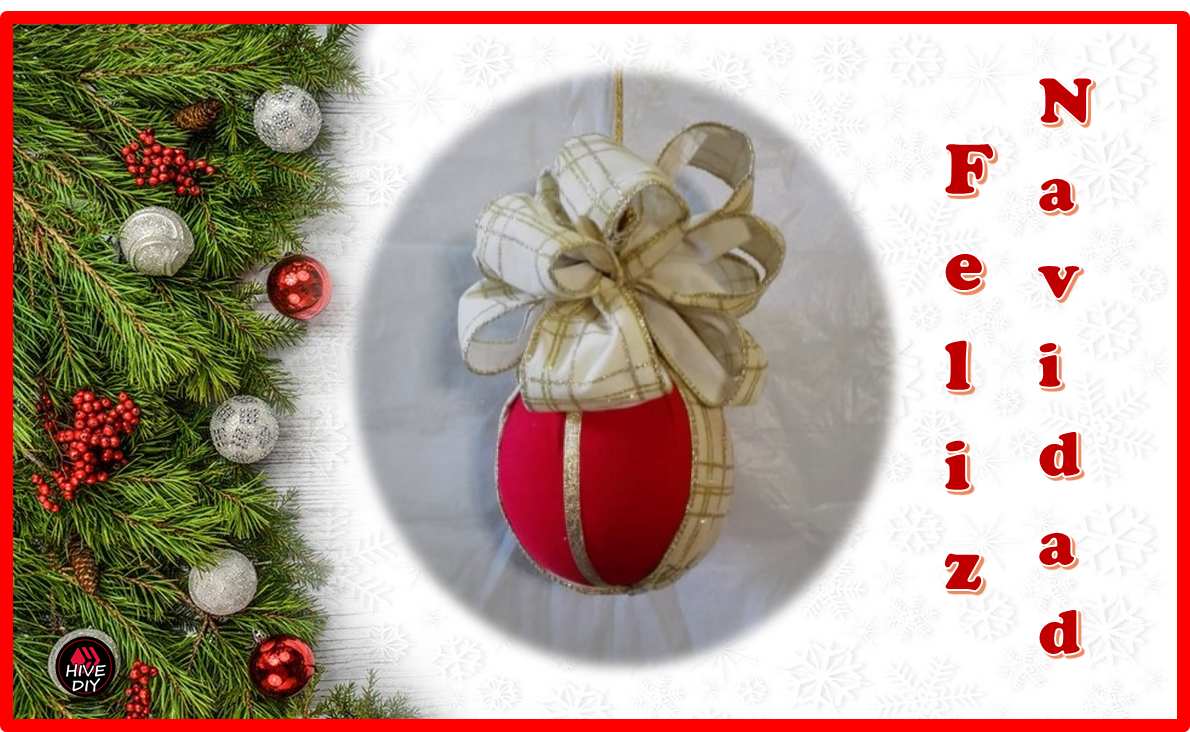
Hola amigos de la Comunidad Hive Diy, esta es mi participación en el concurso: Esferas decorativas con tela, gracias a @equipodelta por esta iniciativa. En esta ocasión aproveché que tenía una bola de anime durante mucho tiempo y la iba a usar para el último concurso, pero me fue imposible participar. Este concurso será todo un reto, porque aprovecharemos para decorar nuestros árboles o adornos navideños en casa, haciendo nuestras propias decoraciones. Las esferas nunca han pasado de moda, siempre hay un lugar para ellas.
Hello friends of the Hive Diy Community, this is my participation in the contest: Decorative spheres with fabric, thanks to @equipodelta for this initiative. This time I took advantage of the fact that I had an anime ball for a long time and I was going to use it for the last contest, but it was impossible for me to participate. This contest will be a challenge, because we will take the opportunity to decorate our trees or Christmas decorations at home, making our own decorations. Spheres have never gone out of style, there is always a place for them.
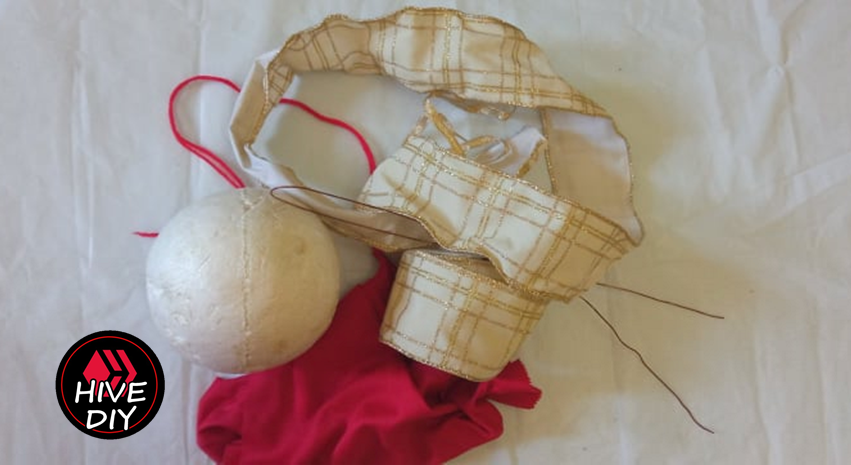
Materials:
- 1 sphere of 37cm in diameter.
- Red cloth
- 6 cm wide white wire ribbon with gold.
- 1 cm wide gold ribbon
- Wire to tie.
Materiales:
- 1 esfera de 37cm de diámetro.
- Paño rojo
- Cinta de alambre blanco con dorado de 6 cm de ancho.
- Cinta dorada de 1 cm de ancho
- Alambre para atar.
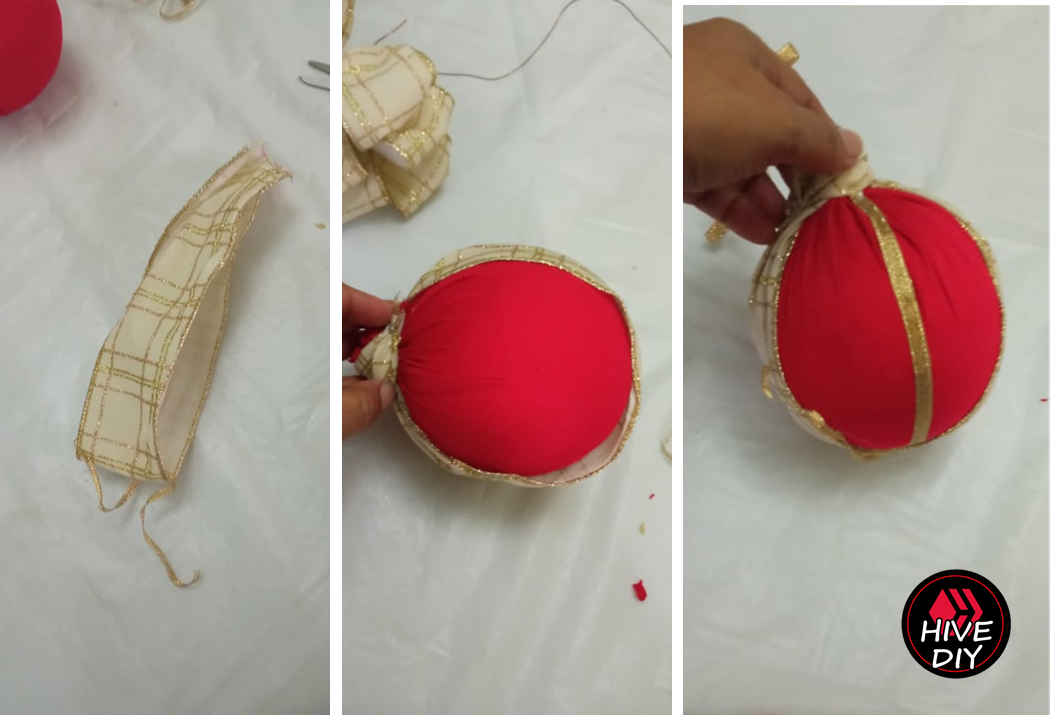
1. Paso
- Coloca la esfera sobre la tela y envuélvela estirando la tela completamente para que encaje bien, luego átala con hilo.
1. Step
- Place the sphere on the fabric and wrap it by stretching the fabric all the way to make it fit well, then tie it with thread
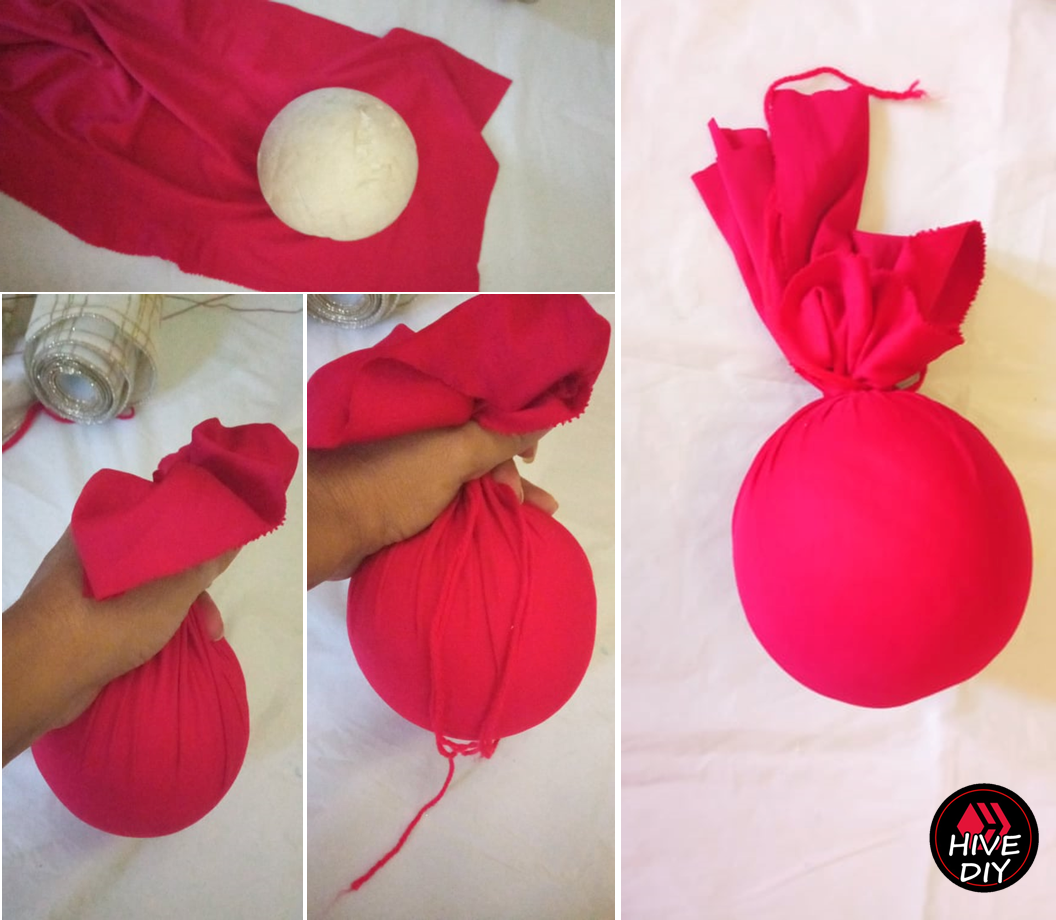
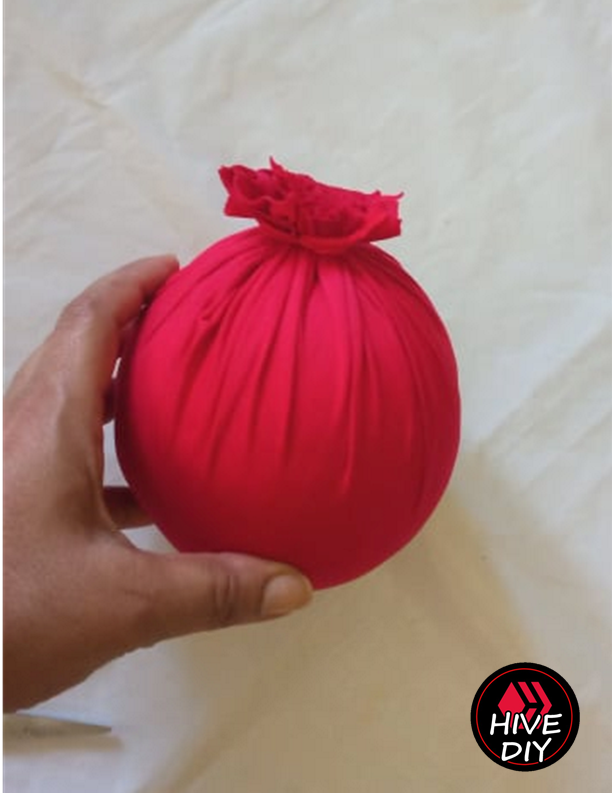
2. Paso
- Recorta el exceso de tela lo más corto posible.
Step 2.
- Trim the excess fabric as short as possible.
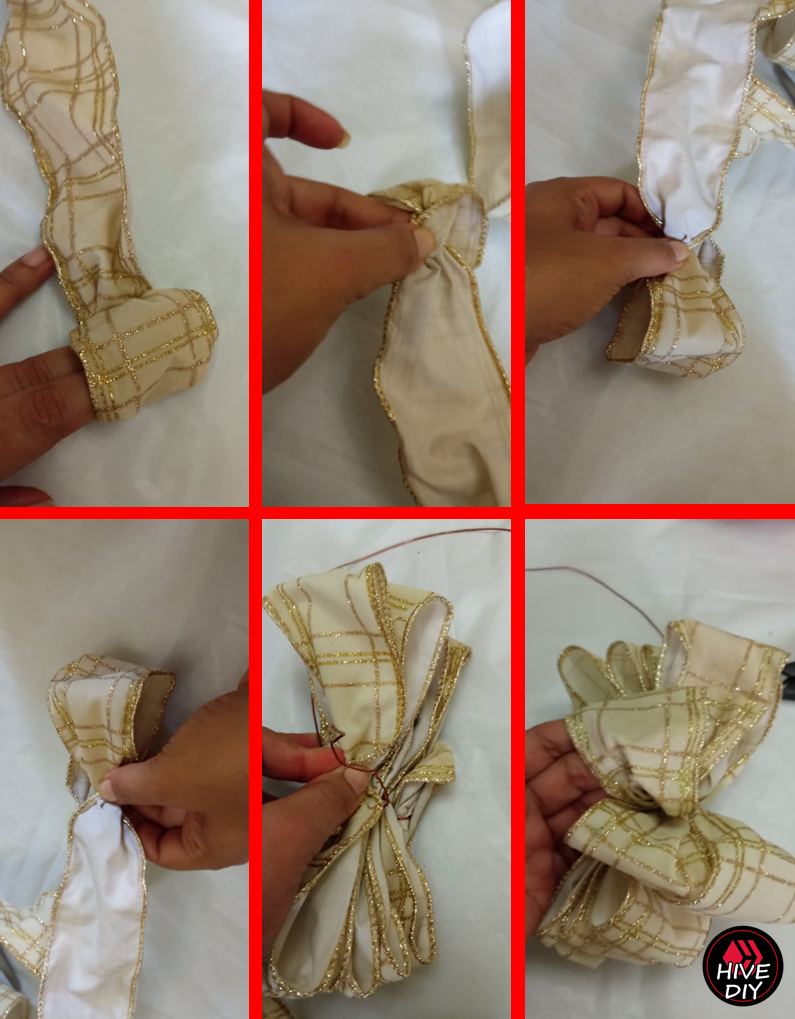
3. Paso
- Con la cinta de alambre de 6cm de ancho hacemos un pequeño anillo que se une en el centro, luego se da la vuelta a la cinta para hacer el otro bucle y siempre sujetamos el centro con fuerza hasta hacer un total de 5 bucles y al final debemos atar con alambre de floristería finalmente abrimos cada lazo dando forma al lazo.
3. Step
- With the 6cm wide wire tape we make a small ring that joins in the center, then the tape is turned over to make the other loop and we always hold the center tightly until we make a total of 5 loops and at the end we must tie with florist wire finally we open each loop shaping the loop.
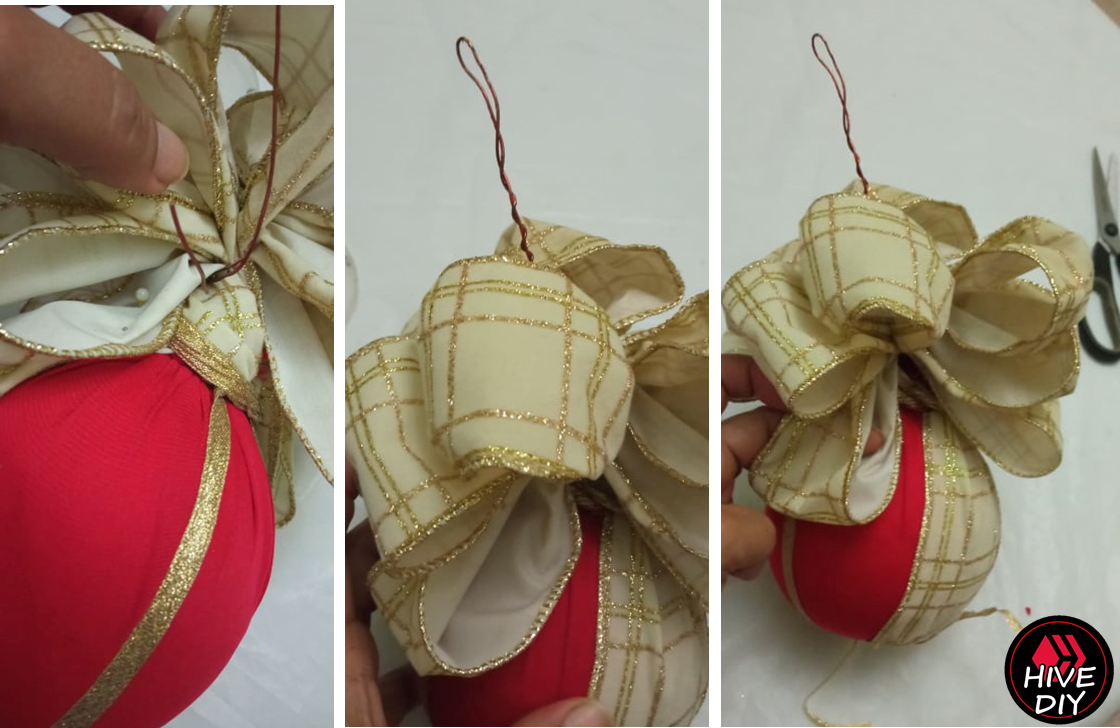
4. Paso
- Cortamos 40 cm. de la cinta con la que se hizo el lazo y 40 cm de la otra más fina. Decoramos la esfera como se indica en la imagen.
4. Step
- We cut 40 cm. of the ribbon with which the bow was made and 40 cm of the other thinner. We decorate the sphere as indicated in the image.
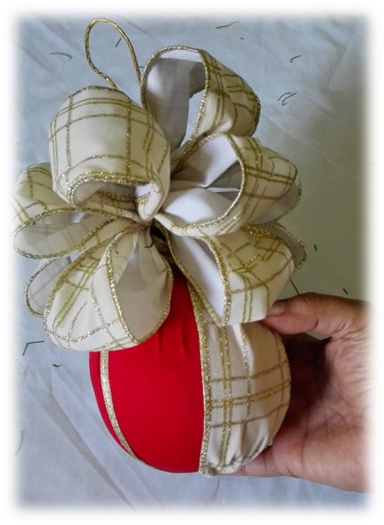
5. Paso
- Con la ayuda del cable, sujetamos el lazo de la esfera y arreglamos cada lazo.
5. Step
- With the help of the wire, we fasten the loop of the sphere and fix each loop.
ediciones de imagenes fueron realizadas con Powerpoint.
Image edits were made with Powerpoint.
I invite @annafenix y @kabirato, visit this community and enter the contests.
Invito a @annafenix y @kabirato, para que visite esta comunidad y participe en los concursos.

Join the Hive Diy community and create quality content.

Hermoso y delicado. Muchas gracias por compartir tu proyecto con nosotros. mucha suerte en el concurso.
Hola gracias a ti por promover este tipo de concursos, es genial ver una comunidad tan colorida y variada como los es Hive Diy. Para mi fue un honor participar, tanto así que me motive a poner navidad este año, porque ni pensaba hacerlo. Gracias una vez más por el apoyo.
¡Hola amiga! ¡¡Me encantó!! Realmente tu manualidad está hermosa y muy delicada.
La combinación del rojo con el dorado siempre ha sido una de las más delicadas y elegantes de la decoración navideña.
¡¡Muchas gracias por la invitación!!
Espero estar a la altura de tantas creaciones maravillosas.
¡¡Un abrazo!!
Hola amiga, gracias por tu comentario. Que bueno que por lo menos aceptaste visitarnos. Atrévete, hay muchas cosas que puedes hacer.
¡Feliz noche!
Wow que gran trabajo, gracias por compartir, te dejo mi voto y te sigo, saludos.
Gracias amigo por tu comentario y apoyo. Te debo una visita a tu blog.
Te estare esperando saludos.