Buenas noches queridos amigos.
Es un placer para mi, recibirte en mi espacio preferido.
Te digo, te encantará y ya verás lo fácil que es.
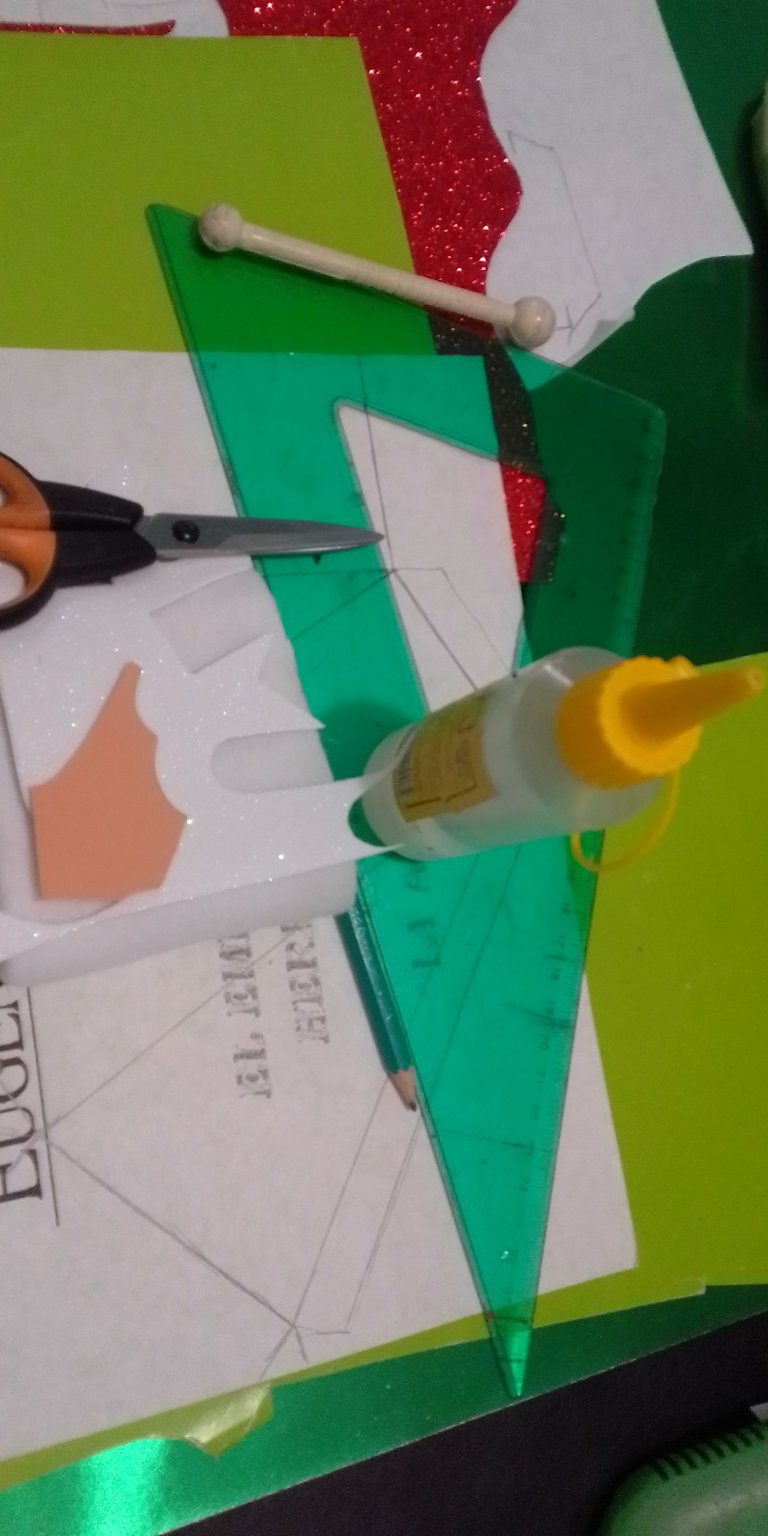
Así que ya te digo los materiales que usarás y... tu escoges los colores que desees.
| Cartulina doble fax | Retazo de tela blanca |
|---|---|
| Foami mate y escarchado | Lápiz |
| Tijera | Regla |
| Silicón | Acocador |
| Molde |
El Procedimiento es el siguiente:
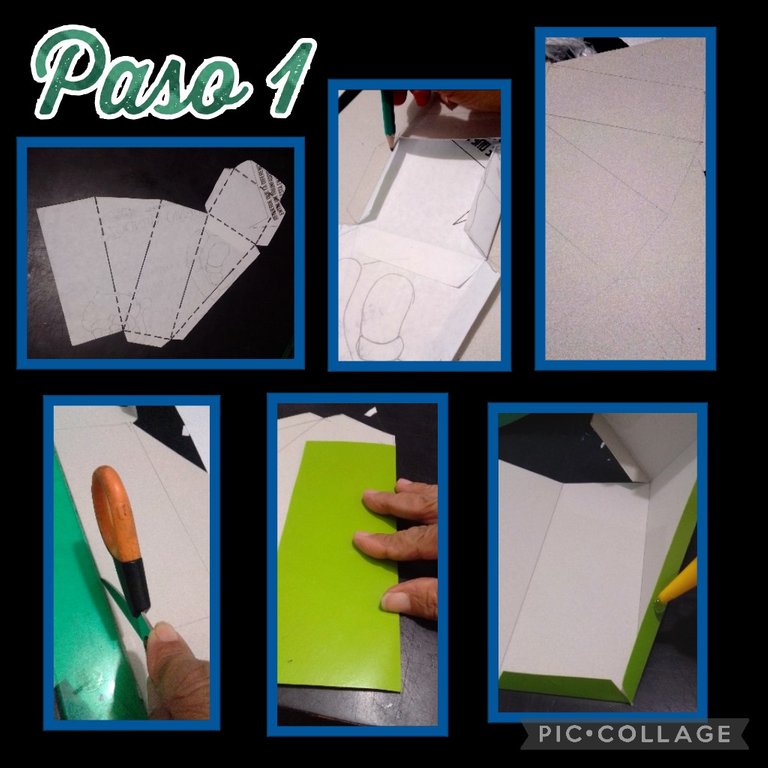
- Recorta el molde por toda la orilla, luego coloca sobre la cartulina y marca todo el borde.
- Con la punta de la tijera y la ayuda de la regla traza todas las líneas, sin presionar mucho para luego que los dobleces queden perfectos
- Aparte aplica silicón en la pestaña lateral y pega para armar la caja.

- Has un Dibujo de una barba en papel. (Si no sabes dibujar puedes calcar o imprimir), luego recorta en tela blanca, fieltro o peluche.
- Recorta 3 (tres) círculos en color carne y 2 (dos) en blanco escarchado, calienta la plancha a temperatura media y coloca para que tomen forma.
- Aparte recorta en foami un gorro, tomando la altura que quieras pero, teniendo de base el tamaño de la caja.
- Luego aplica silicón en la parte frontal de la caja y pega gorro, barba y nariz.
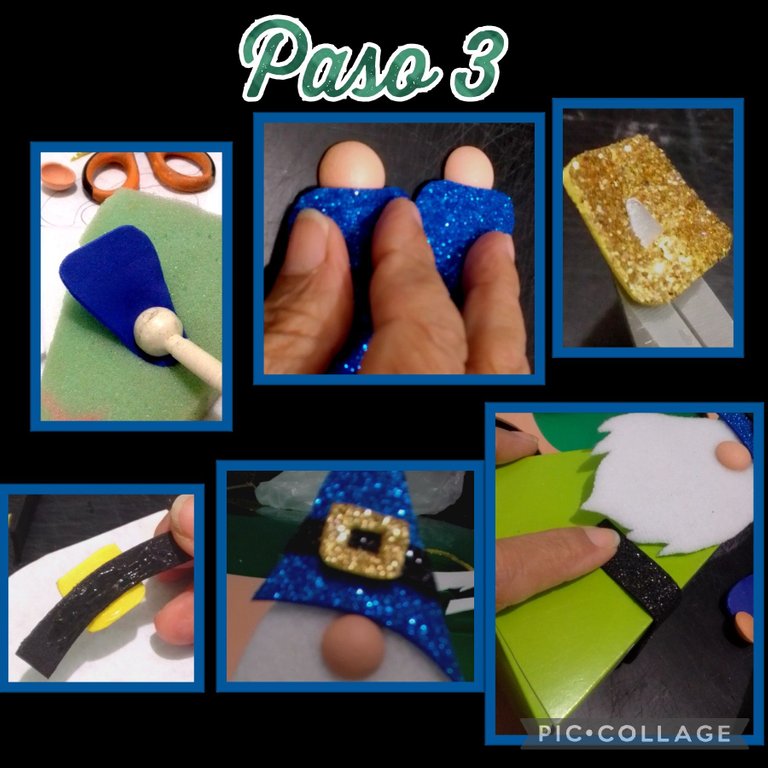
- Recorta dos (2) triángulos para los brazos y redondea las puntas, calienta nuevamente la plancha y termoforma con la ayuda de un acocador.
- Ahora aplica silicón en un extremo de los círculos (manos) y pega los brazos, aparte recorta dos cuadrados uno de 2cm y otro de 3cms y haz dos hebillas.
- También recorta dos tiras en foami negro de 1x5cms correa gorro y 2x 21cms(cinturón).
- Pega la correa al gorro y luego pega el cinturón comenzando por el frente, justo debajo de la barba.
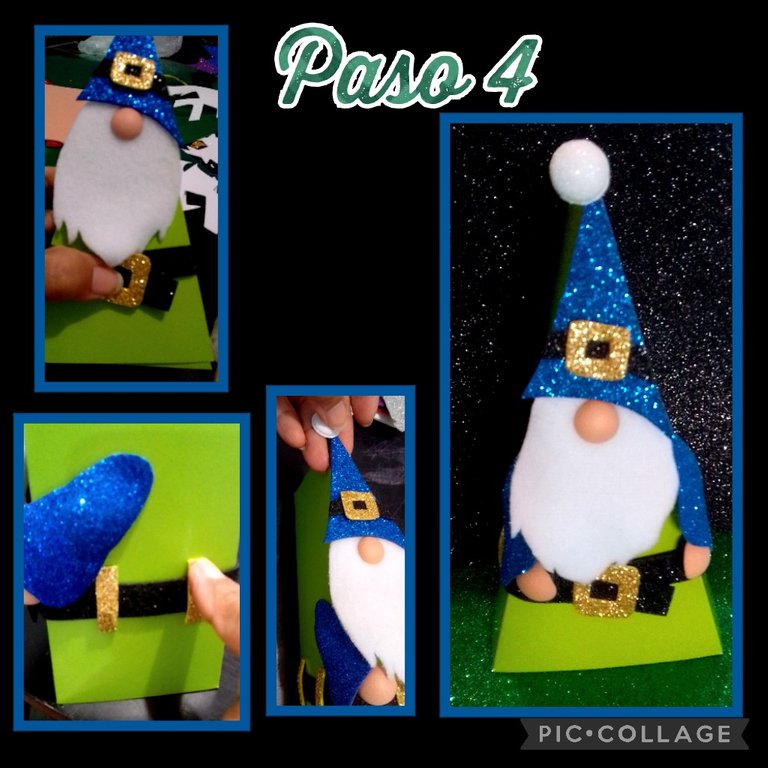
- En este paso al pegar el cinturón, aplica silicón a la hebilla y pega haciendo un poco de presión hasta que pegue bien.
- Luego pega los brazos a ambos lados.
-Aparte recorta una tira en foami dorado de 3mm de ancho y recorta pedacitos de 2cms y pega como trabillas alrededor del cinturón y por último pega la bolita blanca en la punta del gorro.
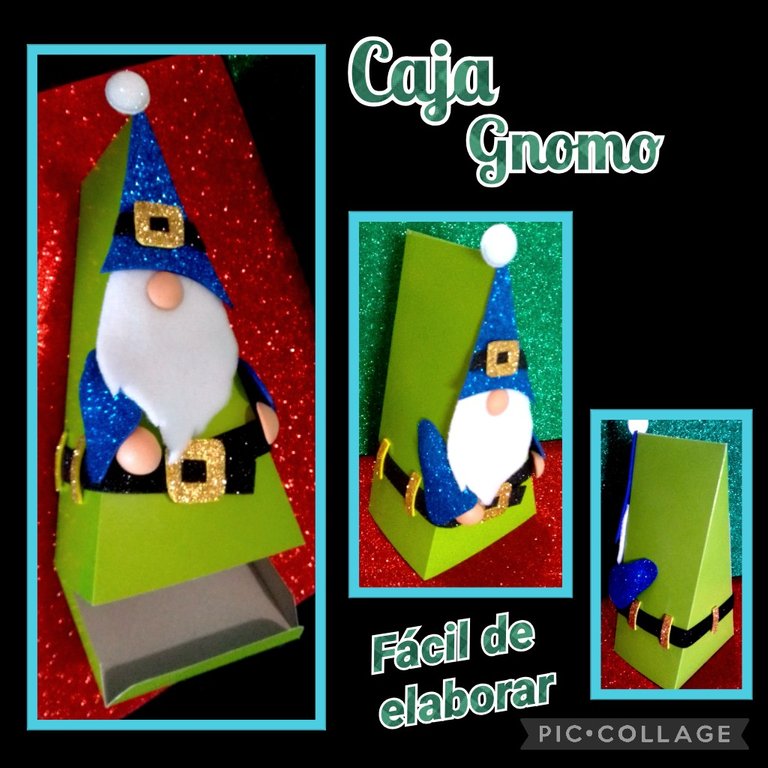
Así ya quedó lista esta Hermosa Caja Gnomo.

Espero te animes a realizar, como pudiste ver es muy sencillo.
Fuente:
https://www.pinterest.es/pin/343751384058194011/
Mi publicación está traducida por DeepL, editada con etiquetas HTML y las fotos capturadas por mi Blu G5, editadas con Pic Collage.
Ahora me despido agradeciendo tu visita, apoyo y comentario.
Como siempre mi tutorial está hecho con mucho cariño para ti, esperando aprendas y te sea útil.
Good evening dear friends.
It is a pleasure for me to welcome you in my favorite space.
It has two functions, as a box or ornament, you decide!
I tell you, you will love it and you will see how easy it is.
So I already tell you the materials you will use and..... you choose the colors that you want.
| Double fax cardboard | Piece of white fabric |
|---|---|
| Foami matte and frosted | Pencil |
| Scissors | Ruler |
| Silicone | Acocador |
| Mold |
The procedure is as follows:
- Cut out the mold along the entire edge, then place it on the cardboard and mark the entire edge.
- With the tip of the scissors and the help of the ruler draw all the lines, without pressing too much so that the folds are perfect.
- Then apply silicone on the side flap and glue to assemble the box.
- Make a drawing of a beard on paper. (If you don't know how to draw you can trace or print), then cut it out on white fabric, felt or plush.
- Cut out 3 (three) circles in flesh color and 2 (two) in frosted white, heat the iron at medium temperature and place them to take shape.
- Cut out a hat in foami, taking the height you want but having the size of the box as a base.
- Then apply silicone on the front of the box and glue the hat, beard and nose.
- Cut out two (2) triangles for the arms and round off the ends, heat the iron again and thermoform with the help of a heat press.
- Now apply silicone on one end of the circles (hands) and glue the arms, separately cut out two squares, one of 2cm and the other of 3cms and make two buckles.
- Also cut two black foami strips of 1x5cms (1x5cms) for the hat strap and 2x 21cms (belt).
- Glue the strap to the hat and then glue the belt starting from the front, just below the beard.
- In this step when gluing the belt, apply silicone to the buckle and glue with a little pressure until it sticks well.
- Then glue the arms on both sides.
-Cut out a 3mm wide strip of gold foami and cut out 2cm pieces and glue them as loops around the belt and finally glue the little white ball on the tip of the hat.
This is how this beautiful gnome box is ready.
I hope you are encouraged to make it, as you could see it is very simple.
Source:
https://www.pinterest.es/pin/343751384058194011/
My publication is translated by DeepL, edited with HTML tags and the photos captured by my Blu G5, edited with Pic Collage.
Now I say goodbye thanking you for your visit, support and comments.
As always my tutorial is made with love for you, hoping you learn and you find it useful.
Greetings and blessings
¡Quedó hermoso!, sin duda alguna transmite el espirítu navideño, gracias por compartir el paso a paso. Saludos @elmundodebetty
Muchas gracias @freidimar18 por tu comentario.
Es un placer para mi compartirlo con ustedes.
Saludos y bendiciones.