Hello friends...
☺☺☺
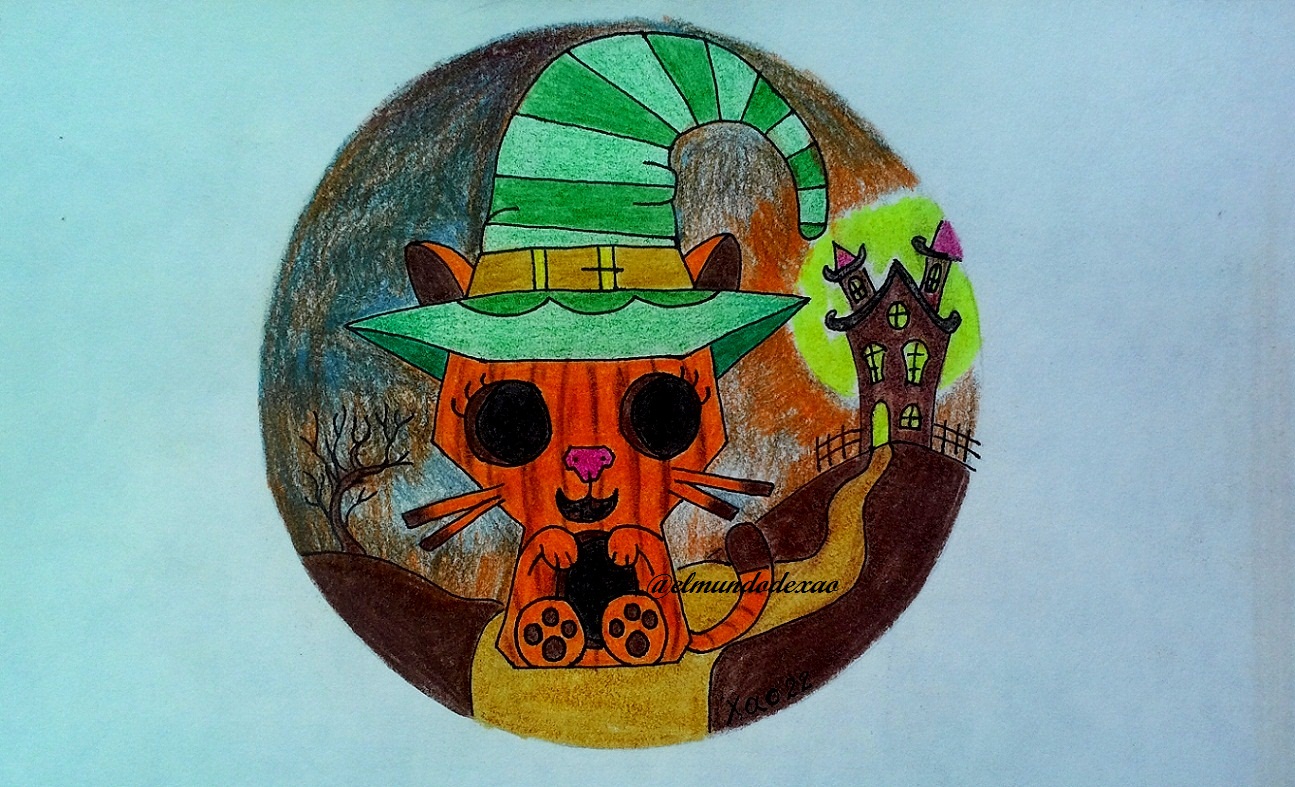
Welcome to my blog; I wish you a happy Halloween celebration. For this day I wanted to do something of my own initiative so this drawing began with an image I got on the Internet of a kitten wearing a witch hat and accompanied by a pumpkin so I made a sketch and began to work applying my own creativity. After several days I came up with the idea of making what I call a pumpkin cat; well let's start and see.
Here are the materials used: white paper, graphite pencil 2, 0.5 marker, eraser and colors (Variety of brands).
Before continuing I remind you that at the end I will leave you the link I used on this occasion.
I start with the step by step of the drawing:
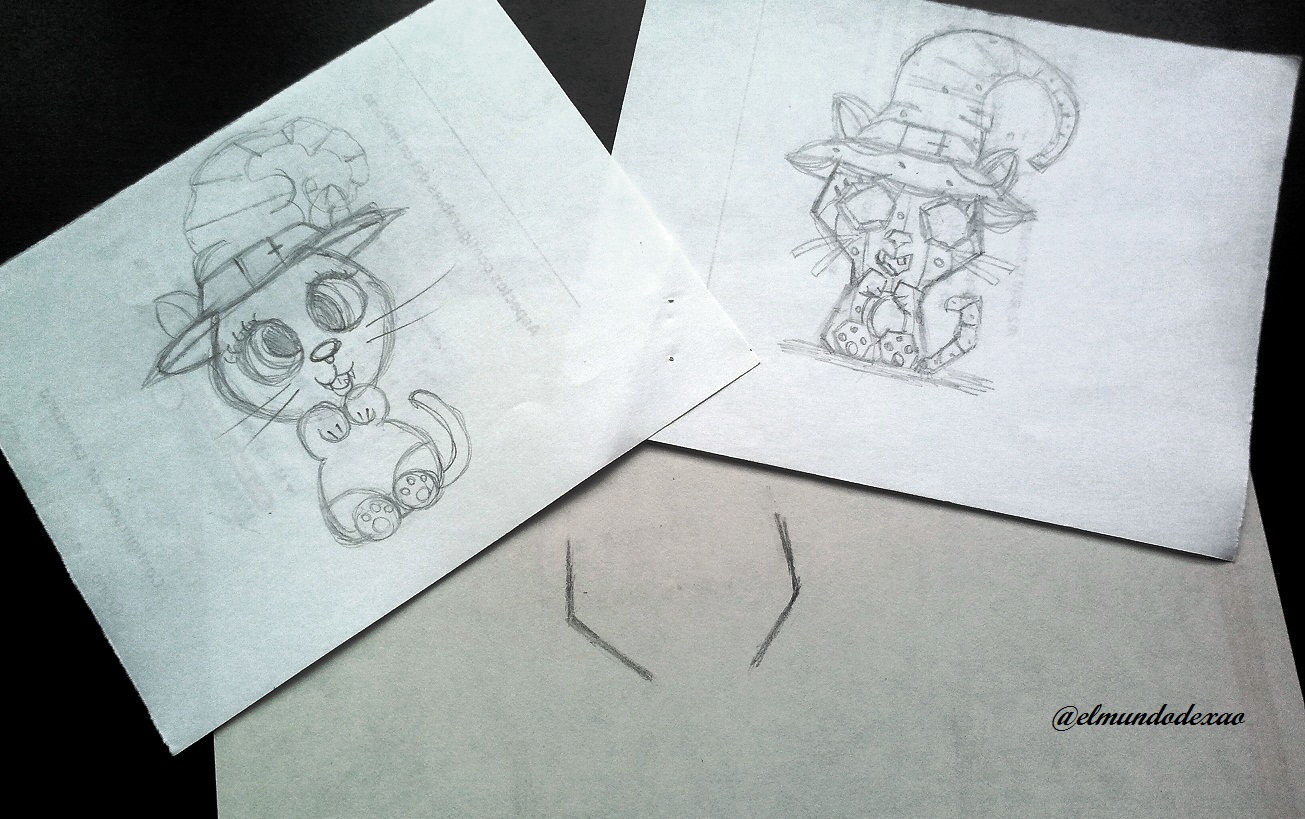
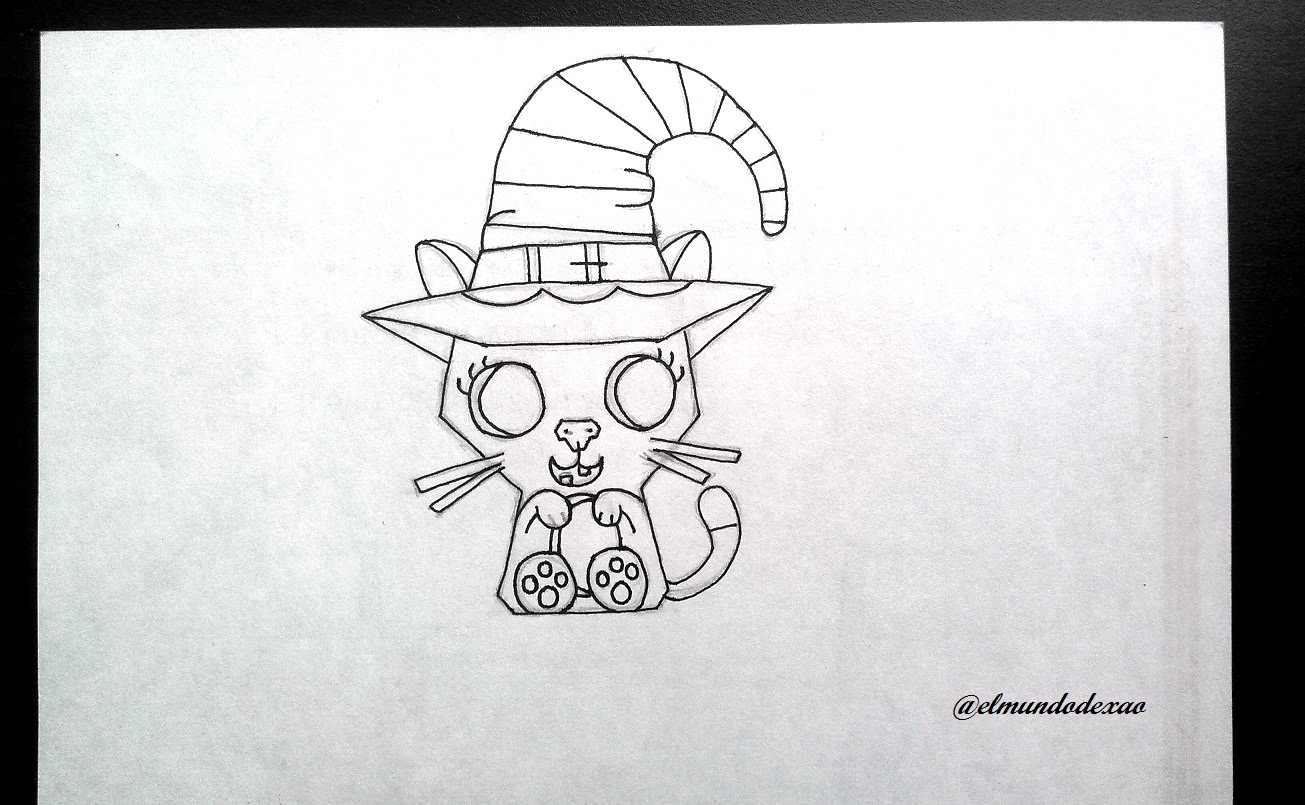
Step # 01: The first thing was to recreate the sketch of the cat I was going to work with (on the left) and then I started to define the same cat but made in pumpkin (on the right); this occurred to me because I was practicing combining or joining two or more drawings to develop figures of my own.
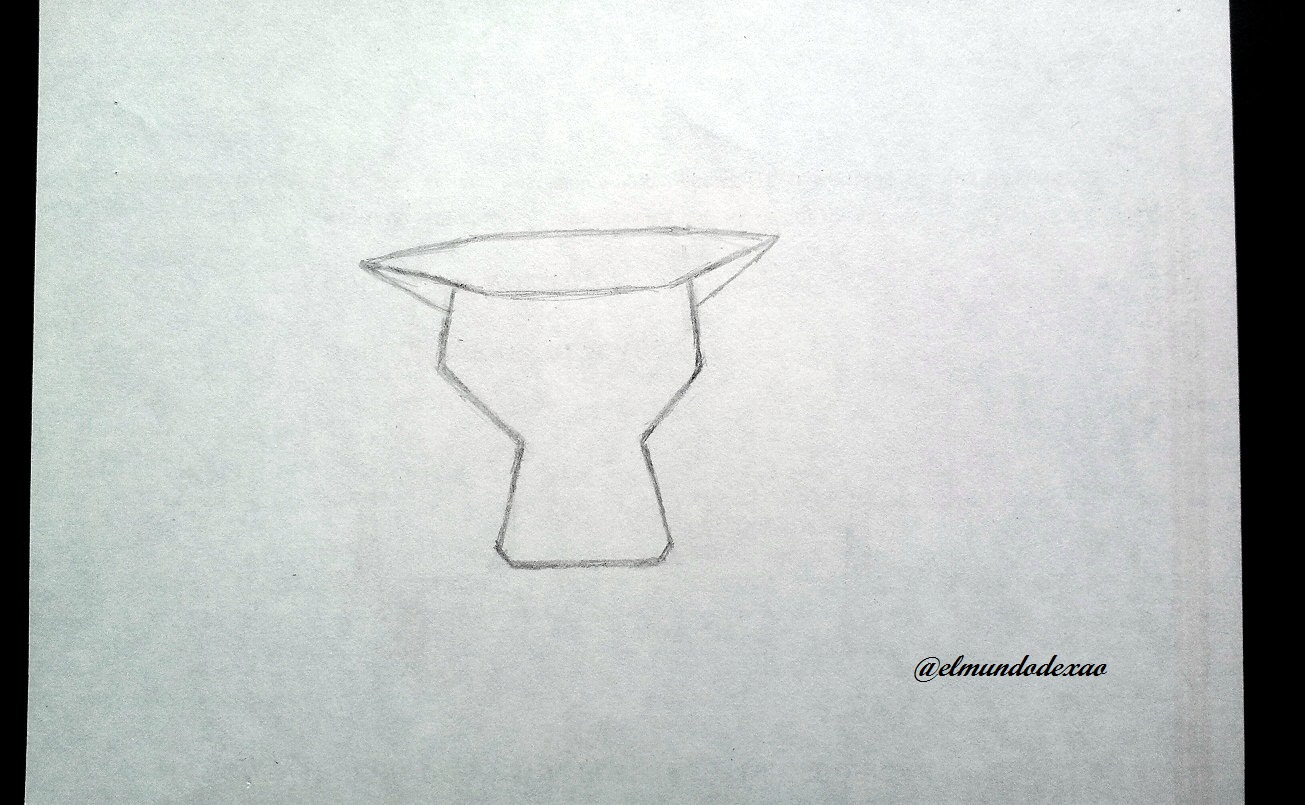
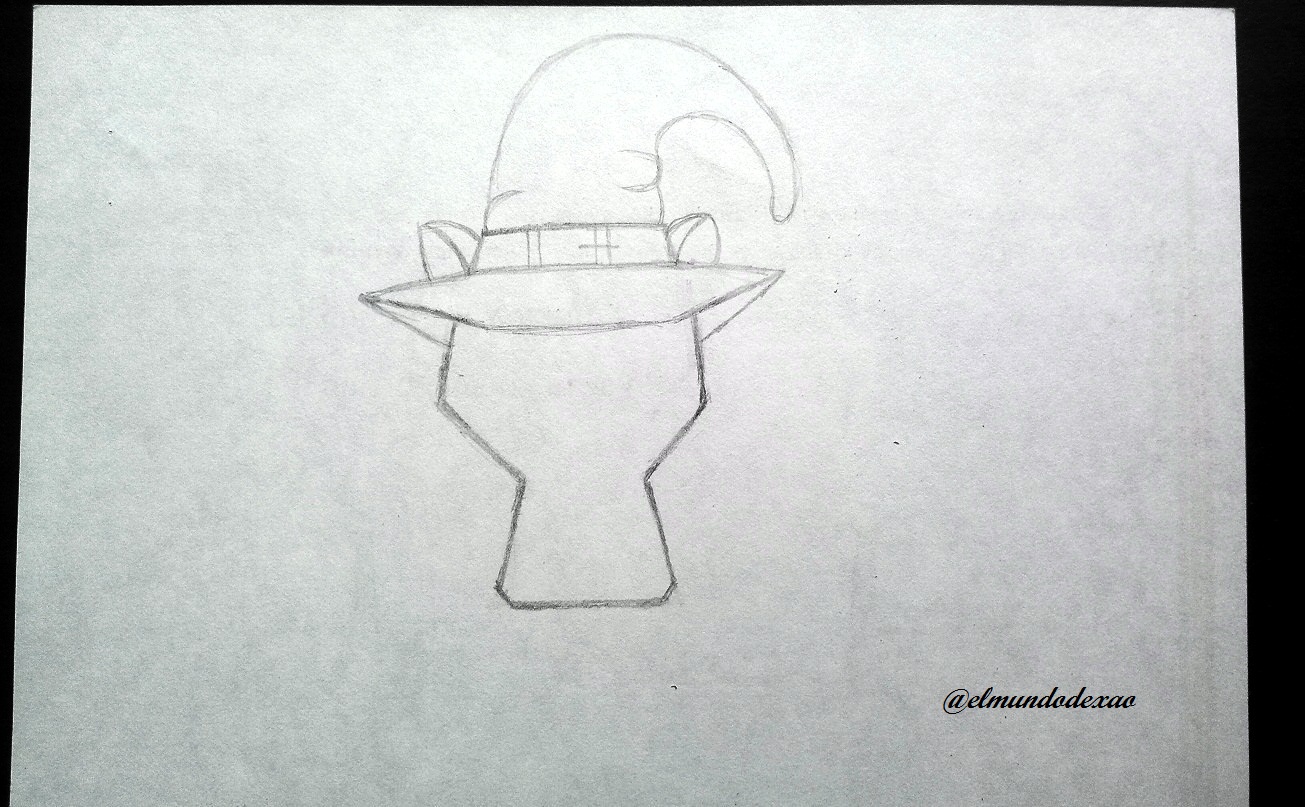
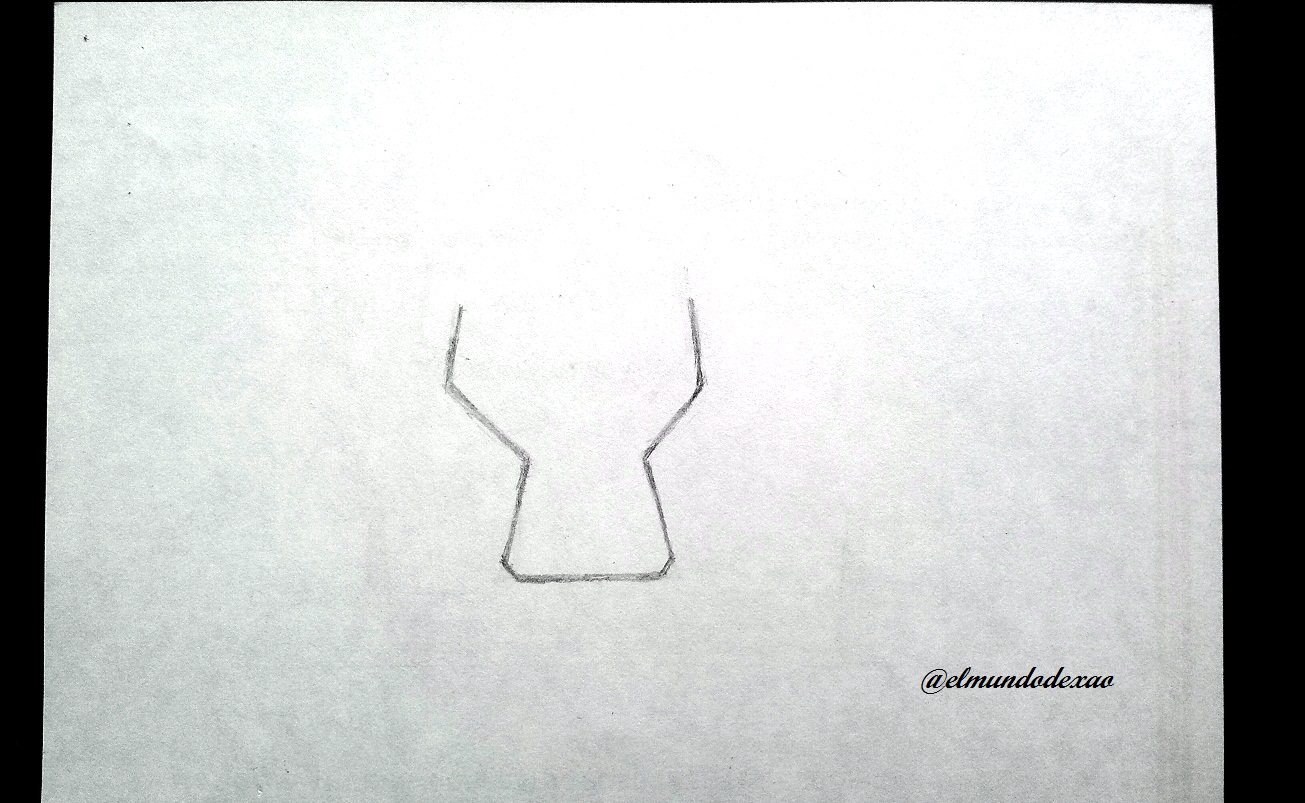 Step # 02: I started by making a gridded figure for which I first defined the head and the body; then I drew the hat and the ears that went on top of it.
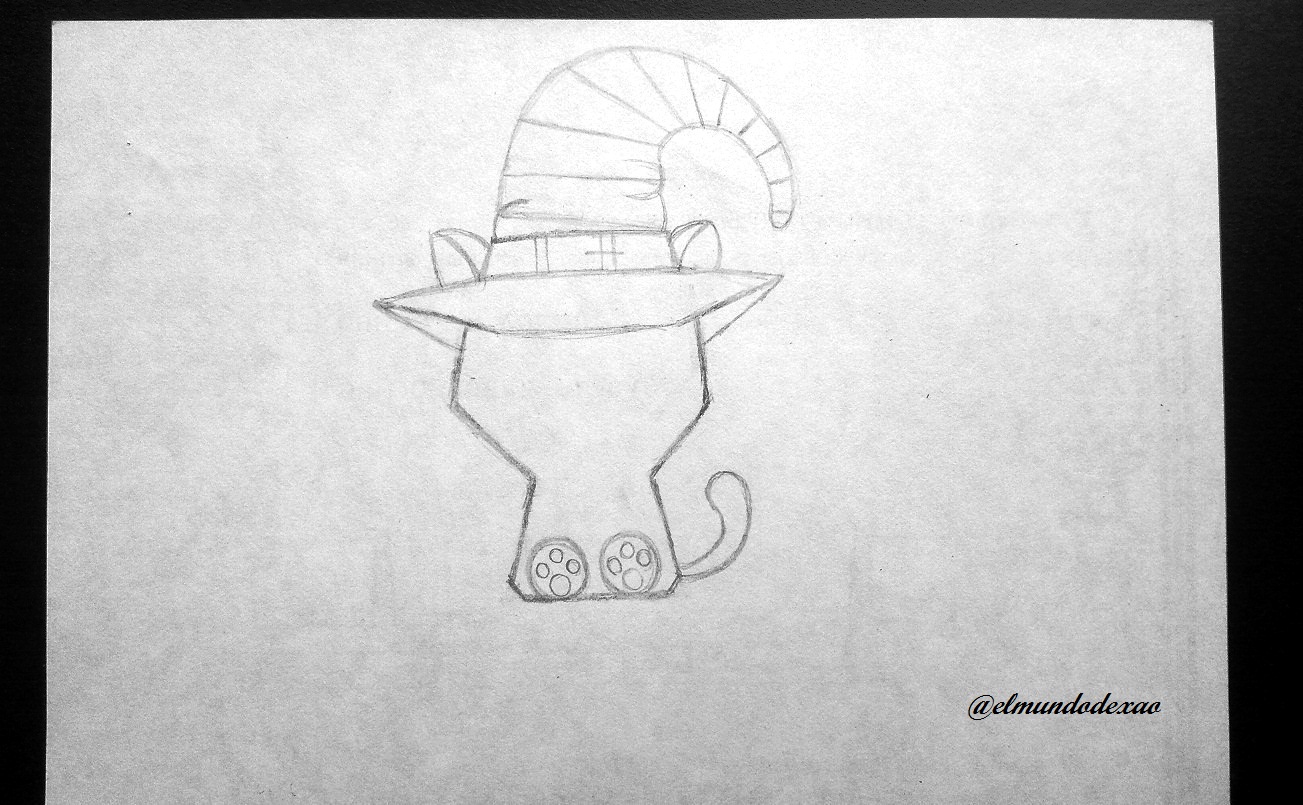
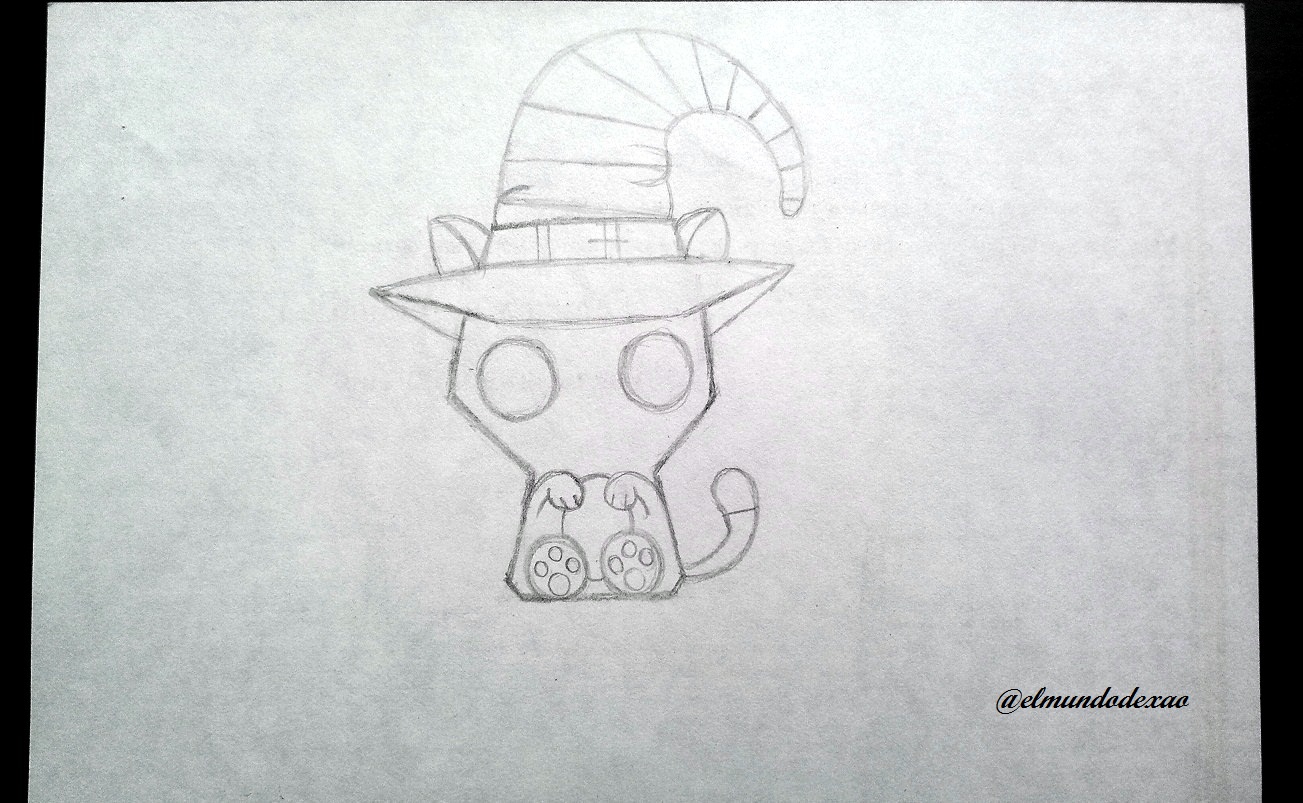
 Step # 03: I place two circles for the back legs and inside these four more circles; at once I make the tail which will be like an elongated drop of water. Then I define the front legs and the eye sockets.
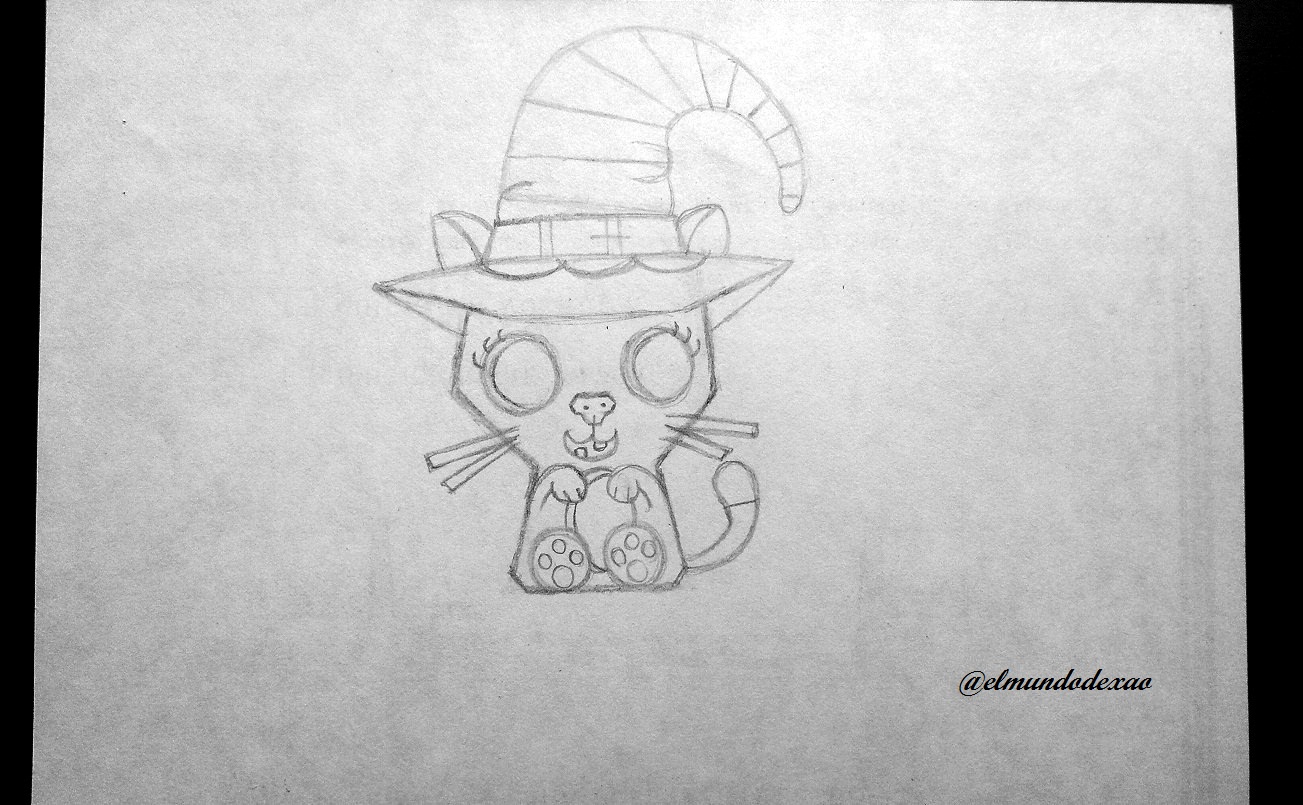
 Step # 04: Now I add the eyelashes and the mustache; the muzzle and a couple of teeth; this way I finish the sketch and then I can highlight it with the marker and add any missing details.
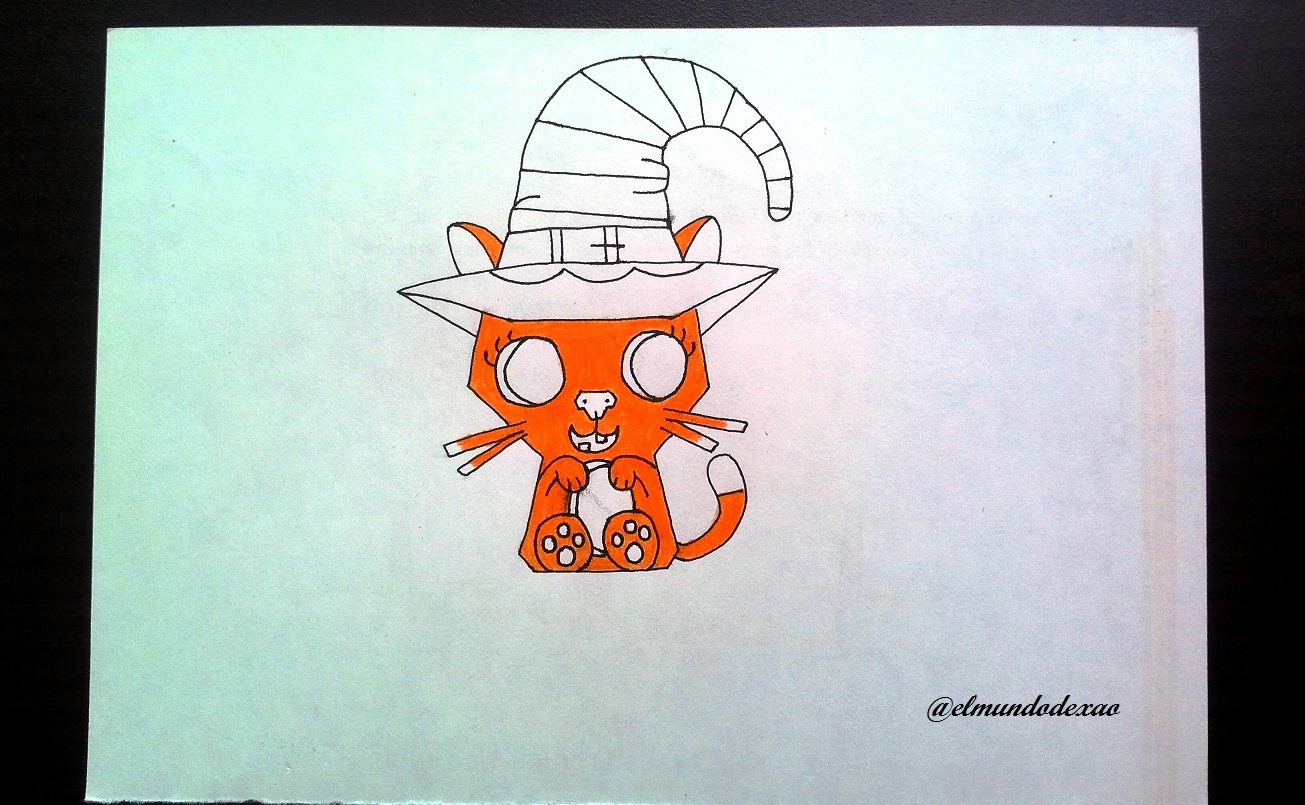
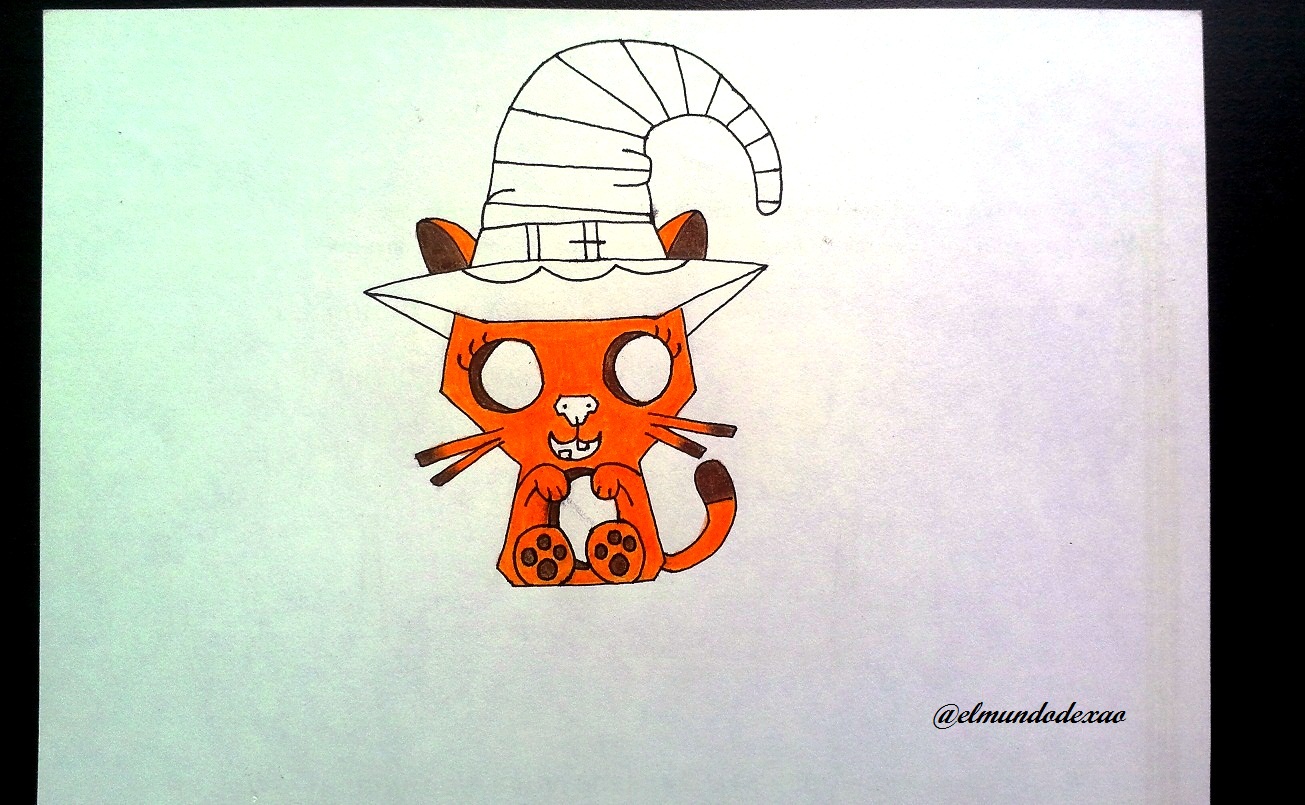
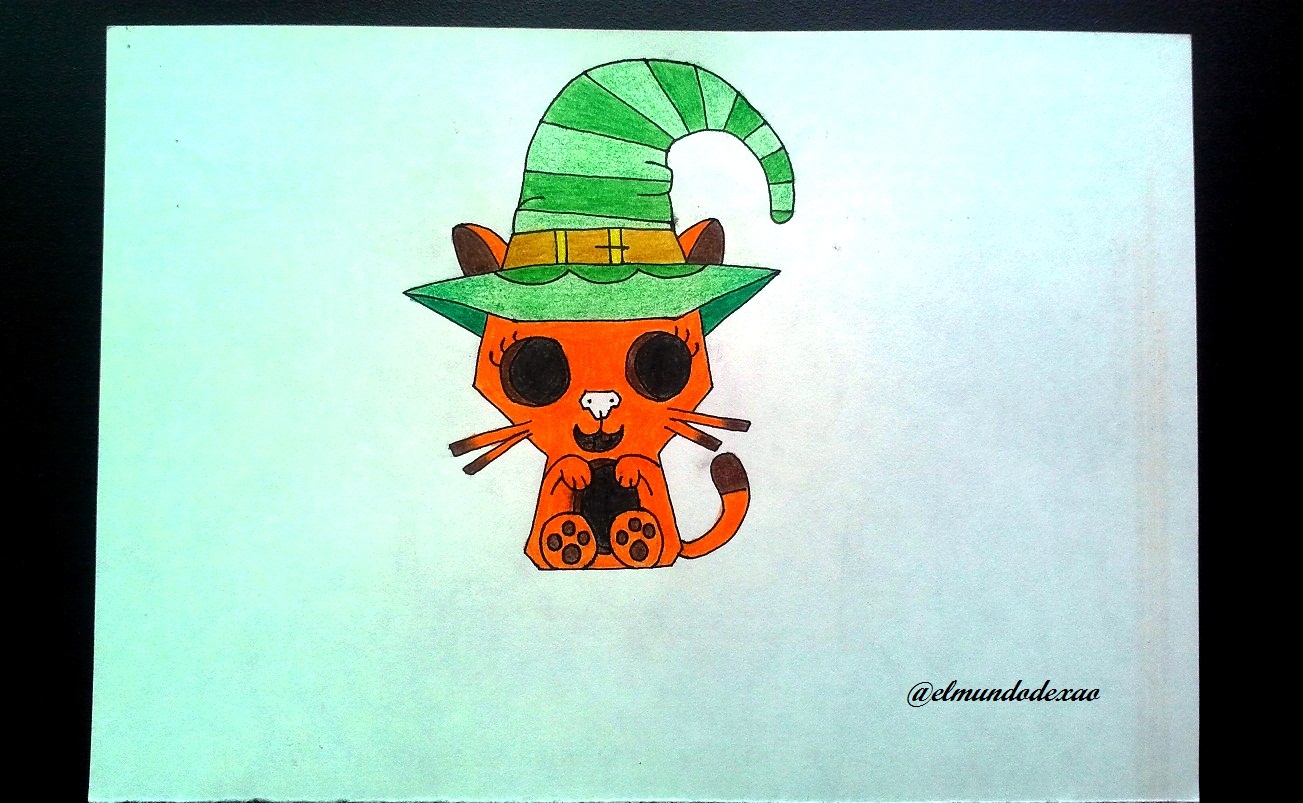
 Step # 05: I start coloring with an orange tone for almost the whole drawing and brown only in some parts.
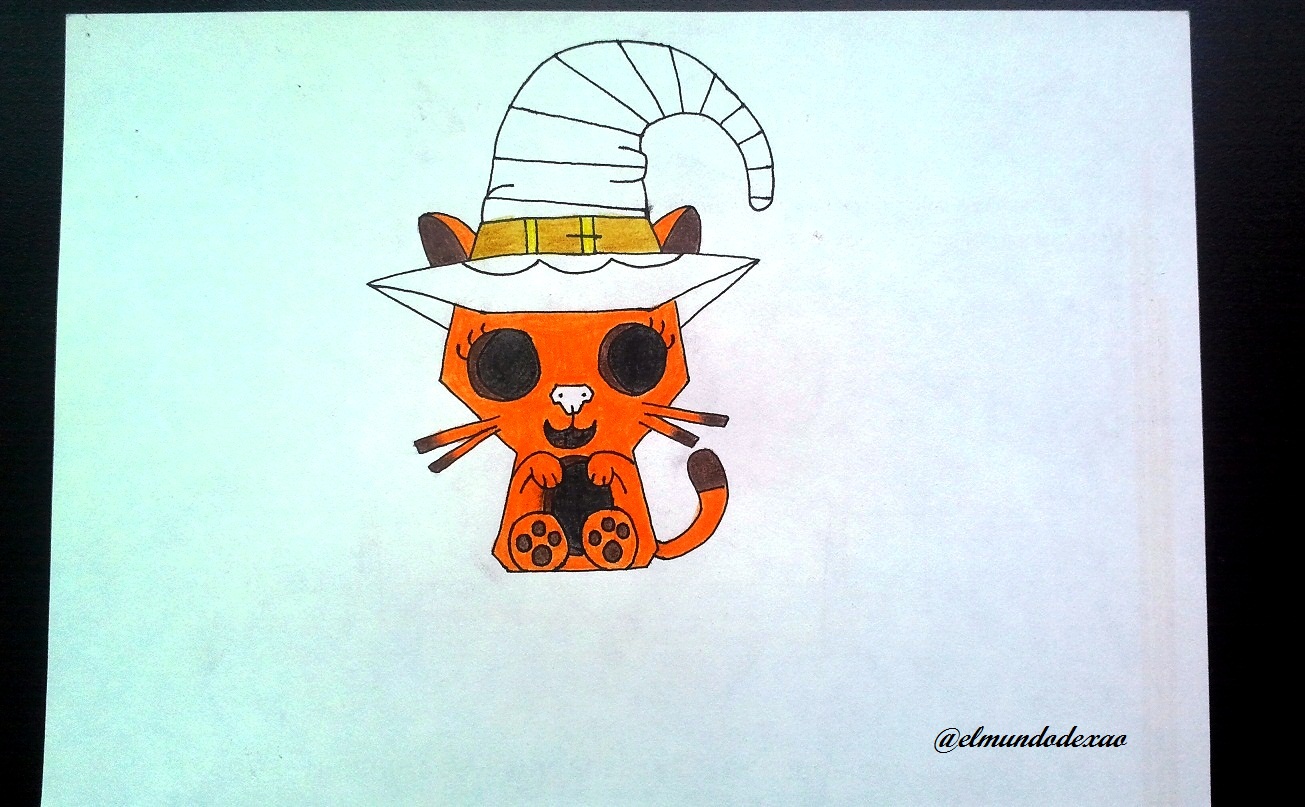
 Step # 06: For the darker parts I use black for the eyes and the belly; for the hat I will use two shades of green and brown with yellow for the strap it carries.
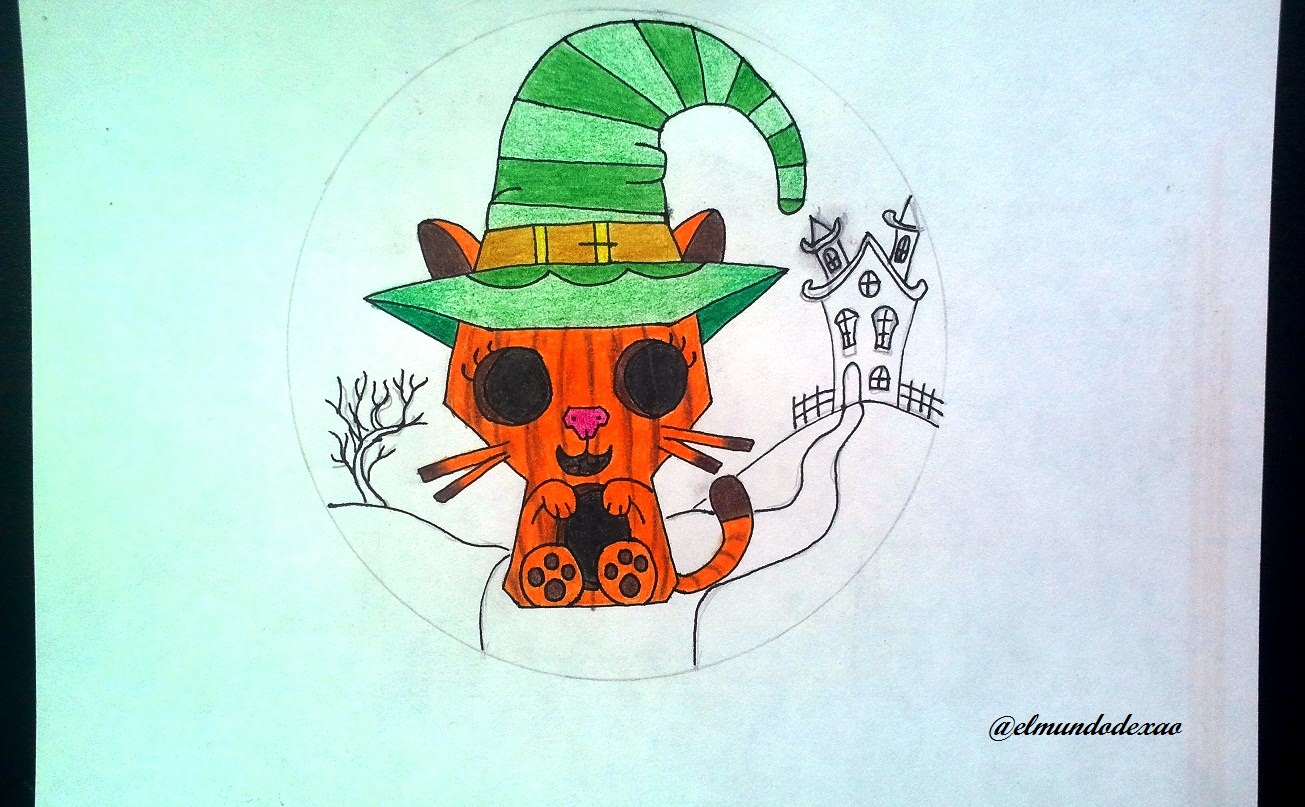
 Step # 07: For the environment there is no need to dig too much since the best is dry trees and gloomy houses; so I drew the house in the distance on a hill as well as a dry tree and up to this point everything goes as I had imagined it. I give an ochre color to the road that leads to the house and the rest of the hills will have a brown tone.
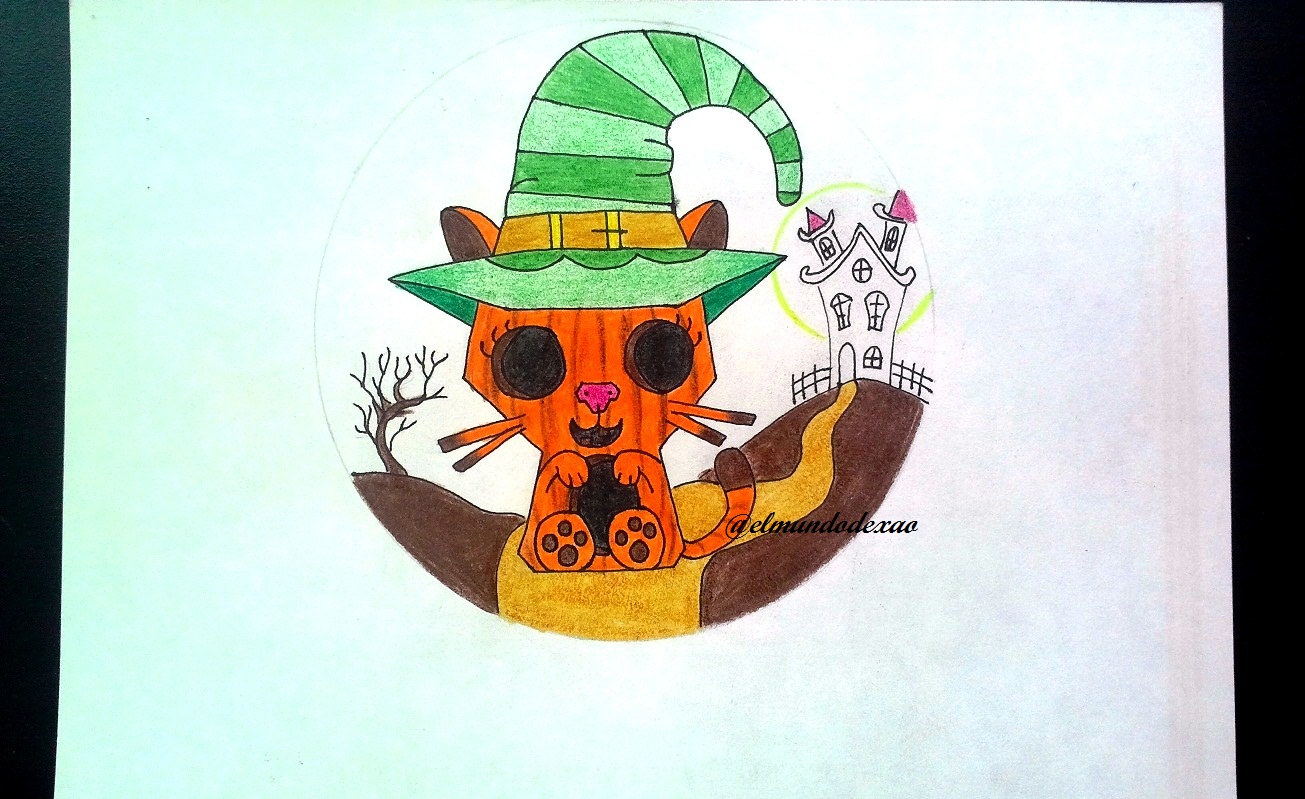 Step # 08: Behind the house I place the moon and I give it a yellow background; the sky was complicated for me because it must have a dark aspect so I place a blue-gray background then on top of this I apply an orange tone accentuating it in some parts more than in others; I also add a little brown and ready I have finished my art with which I express my wish that you have a great time.
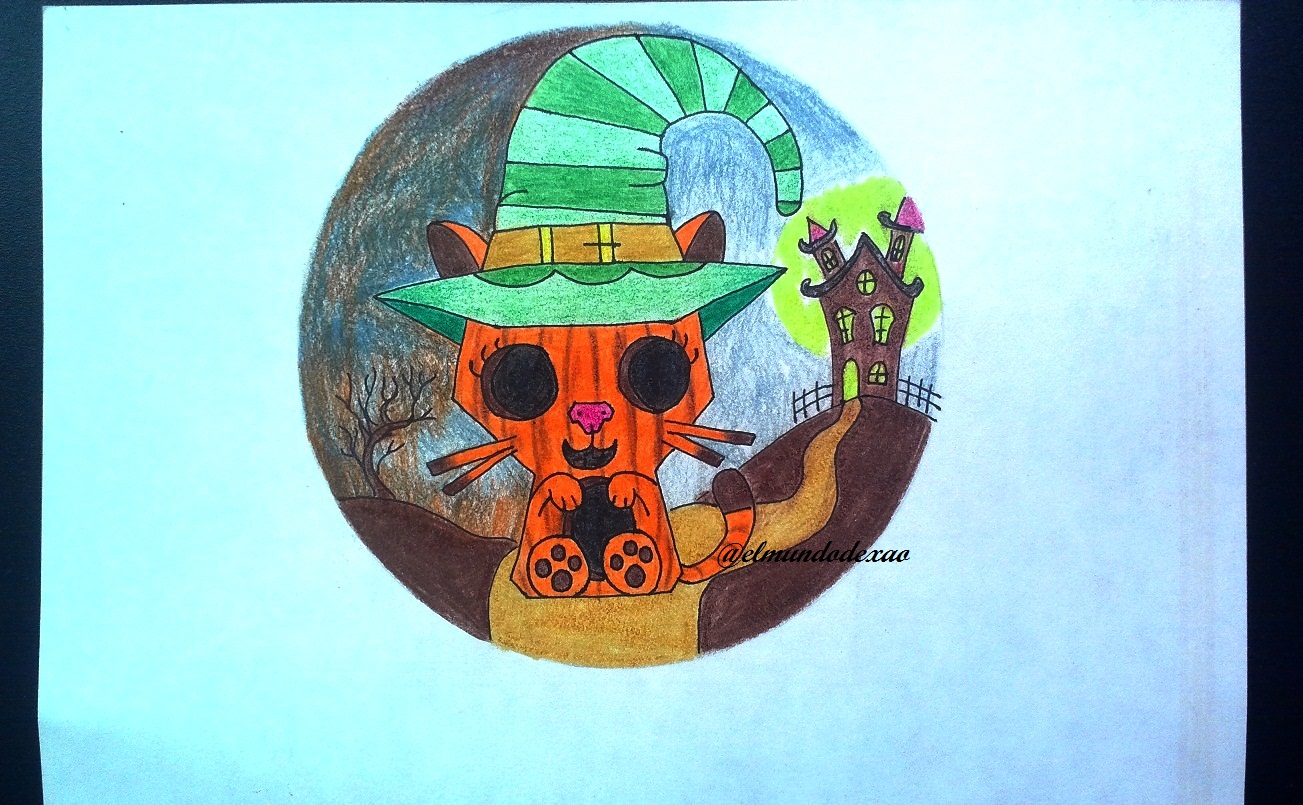
Photo Source: Own photos captured with a Síragon camera.
Modified size: With the Paint Program.
Thanks for visiting my Blog… AH! Don't forget to vote, reblogear, and comment.
Translated with:

www.DeepL.com/Translator (free version)

Arte Kawaii “Mi Gata Calabaza”. Feliz Halloween 2022.
Hola amigos…
☺☺☺
Bienvenidos a mi blog; les deseo que tengan una feliz celebración de Halloween. Para este día quise hacer algo de mi propia iniciativa por lo que este dibujo comenzó por una imagen que conseguí en Internet de una gatita con sombrero de bruja y acompañada de una calabaza así que hice un boceto y comencé a trabajar aplicando mi propia creatividad. Después de varios días se me ocurrió hacer lo que denomine una gata calabaza; bueno comencemos y verán.
A continuación menciono los materiales utilizados: Papel blanco, lápiz de grafito 2, rotulador de 0.5, borrador y colores (Variedad de marcas).
Antes de continuar les recuerdo que al final les dejare el enlace que use en esta ocasión.
Comienzo con el paso a paso del dibujo:
Paso # 01: Lo primero fue recrear el boceto de la gata con la que iba a trabajar (a la izquierda) y luego comencé a definir la misma gata pero hecha en calabaza (a la derecha); esto se me ocurrió debido a que estaba practicando la combinación o unión de dos o más dibujos para desarrollar figuras propias.
Paso # 02: Comencé haciendo una figura cuadriculada para la cual definí primeramente la cabeza y el cuerpo; luego dibuje el sombrero y las orejas que iban por encima de este.
Paso # 03: Ubico dos círculos para las patas traseras y dentro de estos cuatro círculos más; de una vez hago la cola que será como una gota de agua alargada. Luego defino las patas delanteras y las cuencas de los ojos.
Paso # 04: Ahora le agrego las pestañas y el bigote; el hocico y un par de dientes; así termino el boceto para luego remarcar con el rotulador y agregar cualquier detalle que falte.
Paso # 05: Comienzo a colorear con un tono naranja para casi todo el dibujo y marrón solo en algunas partes.
Paso # 06: Para las partes más oscuras utilizo el color negro como en los ojos y la panza; para el sombrero le colocare dos tonos de verde y marrón con amarillo para la correa que este porta.
Paso # 07: Para el entorno no hay que indagar mucho ya que lo mejor es árboles secos y casas tenebrosas; así que la casa la dibuje a lo lejos en una colina al igual que un árbol seco y hasta este punto todo va como me lo había imaginado. Le doy un color ocre a el camino que lleva a la casa y el resto de las colinas llevaran un tono marrón.
Paso # 08: Detrás de la casa ubico la luna y le doy un fondo amarillo; el cielo sí que se me puso complicado ya que debe tener un aspecto tenebroso por lo que coloque un fondo azul grisáceo luego encima de este aplique un tono naranja acentuándolo en unas partes más que en otras; también agregue un poco de marrón y listo he terminado mi arte con el cual les expreso mi deseo de que la pasen muy bien.
Fuente de Fotos: Propias capturadas con una cámara Síragon.
Modificado el tamaño: Con el Programa Paint.
Gracias por visitar mi Blog… ¡AH! No se olvide de votar, rebloguear y comentar.
Hola mi reina, qué lindo dibujo has hecho <3 me encantó la textura y mezcla de colores lograda.
Hola amiga de @equipodelta; me alegra que te gustara, lo que más me gusto fue como quedo la noche ya que lo he tratado muchas veces y hasta ahora es que comienzo a notar las mejoras. Gracias por comentar y apoyarme. Feliz tarde.

Thank you for sharing this post on HIVE!
Your content got selected by our fellow curator semarekha & you received a little thank you upvote from our non-profit curation initiative. Your post will be featured in one of our recurring curation compilations which is aiming to offer you a stage to widen your audience within the DIY scene of Hive.
Next time make sure to post / cross-post your creation within the DIYHub community on HIVE and you will receive a higher upvote!
Stay creative & hive on!
Hi @diyhub; I appreciate the support for my publication and the selfie initiative of colleague @semarekha ; I wish you a nice evening.

You're welcome! Have a nice week too :)