Saludos mis queridos y apreciados amigos miembros de esta creativa comunidad, es un placer para mí poder compartir en esta oportunidad con todos ustedes, siempre me he considerado una persona creativa aunque como a todos muchas veces las cosas no me salen como espero, hace un par de días estuve recordando mi niñez cuando realizaba hermosas pulseras, collares y zarcillos con mostacilla, canutillo y esas piedritas hermosas que mamá nos compraba para que realizabamos nuestras propios acsesorios. Recuerdo que las elaborabamos de muchas formas y colores, y pues yo sabía que por hay en mi memoria debía estar esos procedimientos guardados.
Greetings my dear and appreciated friends, members of this creative community, it is a pleasure for me to be able to share this opportunity with all of you, I have always considered myself a creative person although, like everyone else, many times things do not turn out as I expect, A couple of days ago I was remembering my childhood when I made beautiful bracelets, necklaces and earrings with beads, beads and those beautiful little stones that mom bought us so that we could make our own accessories.
I remember that we made them in many shapes and colors, and well, I knew that because of that, those procedures must have been saved in my memory.
Así quee puse a practicar y poco a poco he ido recordando esos diseños espectaculares, que se que aún no pasan de moda, el día de hoy les comparto una muy sencilla pulcera elaborada con canutillo, con pequeñas formas cuadradas.
Para ustedes he elaborado un sencillo tutorial que a continuación les comparto.
So I began to practice and little by little I have been remembering those spectacular designs, which I know have not yet gone out of style, today I share with you a very simple bracelet made with beading, with small square shapes.
For you I have prepared a simple tutorial that I share below.
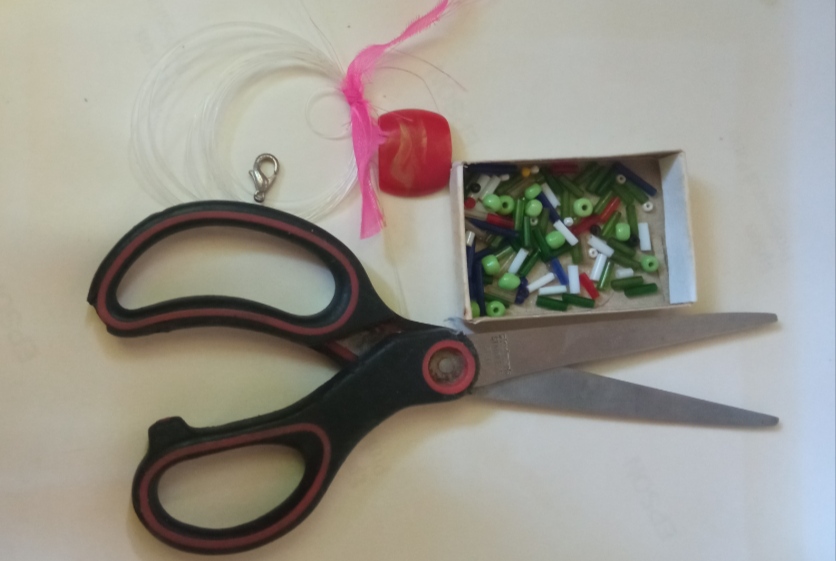
✴️ Materiales:
- Canutillo verde y blanco.
- 2 Mostacilla.
- Tijera.
- nylon delgado.
- Pedrería grande.
- Terminar de cadena
✴️ Materials:
- Green and white tube.
- 2 Mostacilla.
- Scissors.
- thin nylon.
- Large rhinestones.
- End of chain
😊 paso a paso
😊 Step by step
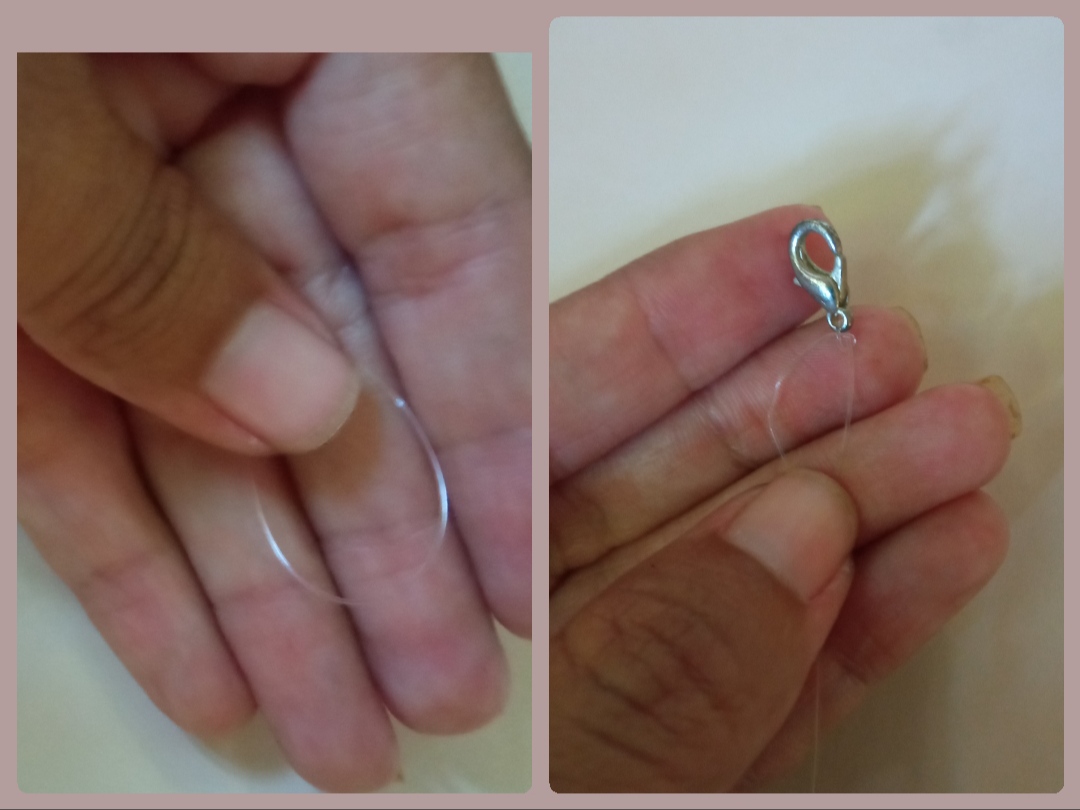
⭐ Paso 1: Primeramente al tener a nuestro alcance los materiales necesarios tomamos el nylon que debemos usar el más delgado que encontremos y cortamos un pedazo, suficientemente largo para la pulsera, tomando en cuenta que al ir tejiendo el nylon la largura irá disminuyendo, yo siempre procuro cortar que me sobre.
Corte un pedazo de 30 cm, el cual doblaremos en dos, quedándonos un tamaño de 15 cm, para iniciar introducimos una de las partes del terminar de cadena por el nylon y lo llevamos hasta la mitad y allí realizaremos un pequeño amarre.
⭐ Step 1: First, when we have the necessary materials within our reach, we take the nylon that we must use the thinnest we can find and cut a piece, long enough for the bracelet, taking into account that as we weave the nylon the length will decrease, I I always try to cut off what is left over.
Cut a 30 cm piece, which we will fold in two, leaving a size of 15 cm, to start we introduce one of the parts of the chain ending through the nylon and we take it to the middle and there we will make a small tie.
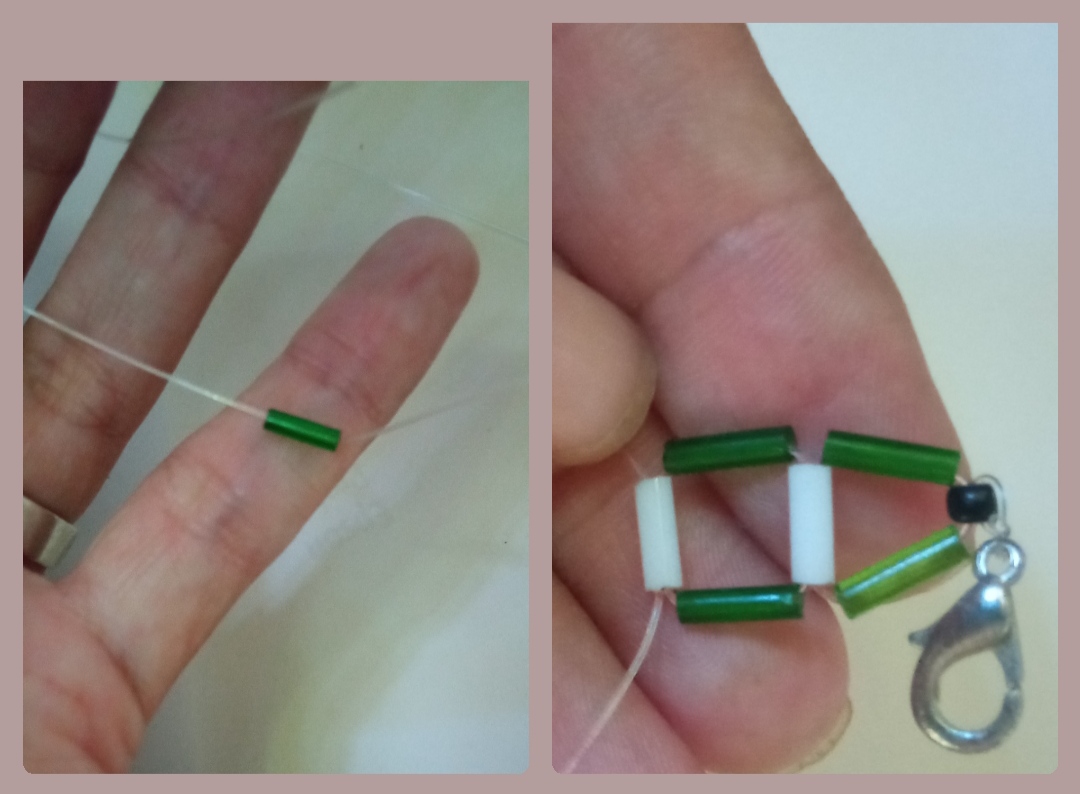
⭐ Paso 2: Seguidamente introducimos una pequeña mostacilla color negro por un extremo del nylon y luego a la mísma mostacilla introducimos el otro extremo del nylon hacia el lado contrario, quedando intercalada en ambos nylon, luego hablamos las puntas del nylon y llevamos la mostacilla al inicio de la pulsera.
Para continuar introducimos un canutillo verde por cada punta del nilón y Seguidamente introducimos por una punta un canutillo blanco al cual luego también introduciremos el otro extremo de nylon en forma cruzada y al jalar ambas puntas formaremos un pequeño triángulo.
⭐ Step 2: Next, we introduce a small black colored bead through one end of the nylon and then we introduce the other end of the nylon to the other end of the nylon to the opposite side, being interspersed in both nylons, then we speak the ends of the nylon and take the mustacilla to the beginning of the bracelet
To continue, we introduce a green bead for each end of the nylon and then we introduce a white bead through one end, to which we will also introduce the other end of nylon crosswise and by pulling both ends we will form a small triangle.
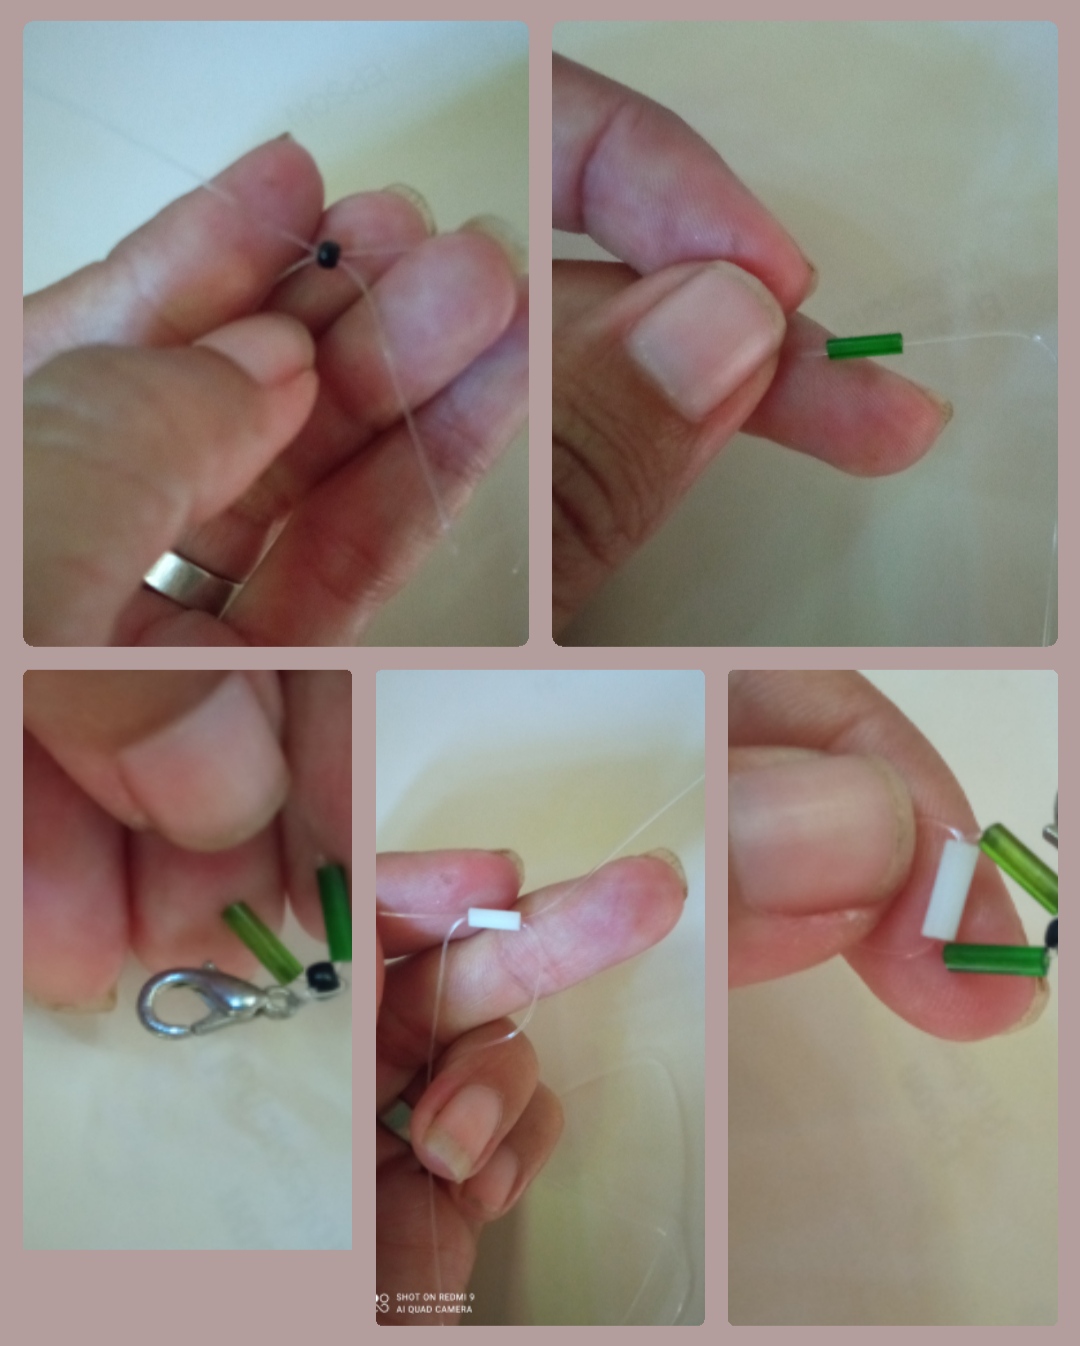
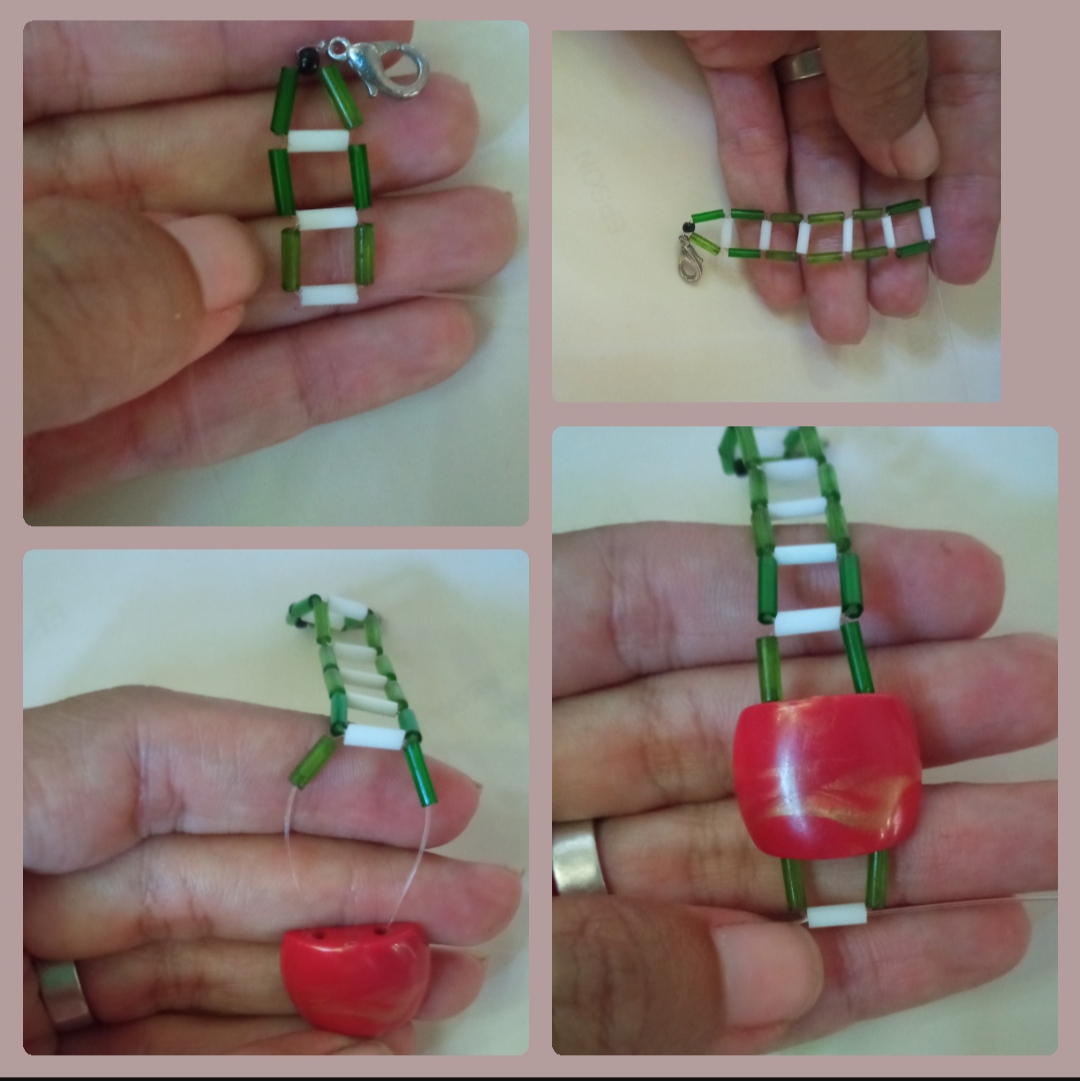
⭐ Paso 3: Luego procedemos a introducir un canutillo verde por cada lado del nylon y cerramos la forma introduciendo un canutillo intercalado por ambos nylon que al jalar las puntas formará un pequeño cuadrado.
Este procedimiento lo repetimos varias veces hasta lograr la mitad del tamaño deseado, para ello podemos medir la pulsera en nuestra muñeca.
⭐ Step 3: Then we proceed to introduce a green bead on each side of the nylon and close the shape by introducing a bead interspersed by both nylons that when pulling the ends will form a small square.
We repeat this procedure several times until we achieve half the desired size, for this we can measure the bracelet on our wrist.
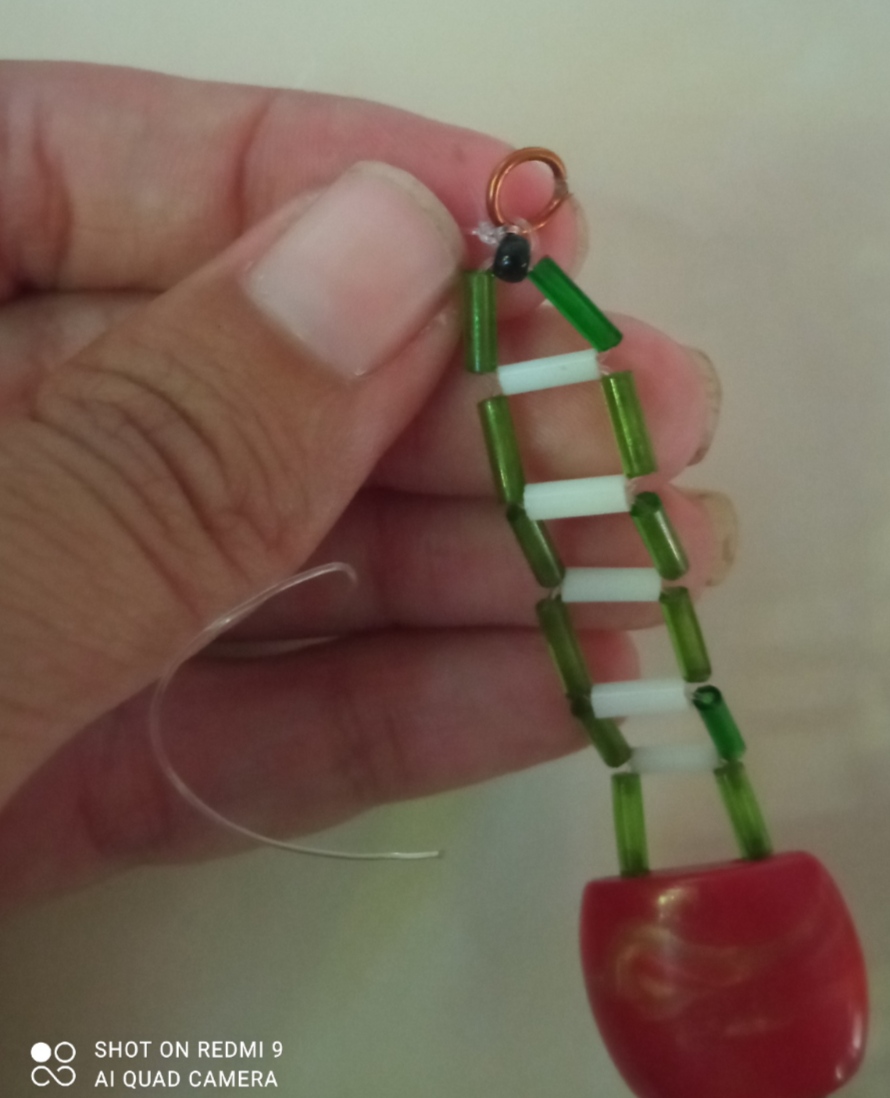
⭐ Paso 4: al llegar a la mitad de la pulsera introducimos un canutillo verde por cada lado y cerramos la forma con la pedrería grande que hemos seleccionado, está que yo seleccione posee dos agujeros uno encima de la otra, lo cual fue perfecta para continuar mi procedimiento, el cual continuaremos introduciendo luego de la piedra central un canutillo por cada lado y cerrándolo con un canutillo blanco intercalado.
⭐ Step 4: when we reach the middle of the bracelet we insert a green bead on each side and close the shape with the large rhinestones that we have selected, the one I selected has two holes one above the other, which was perfect to continue my procedure, which we will continue introducing after the central stone a bead on each side and closing it with an interspersed white bead.
⭐ Paso 5: seguimos realizando los mismos procedimientos para dar ma misma forma que llevamos, al lograr completar el tamaño del lado contrario cerramos con una forma triangular exactamente como con la que iniciamos, cerrando con dos canutillos verdes e intercalando una mostacilla negra.
⭐ Step 5: we continue to carry out the same procedures to give the same shape that we have, when we manage to complete the size of the opposite side, we close with a triangular shape exactly like the one with which we started, closing with two green beads and interspersing a black mustacilla.

⭐ Paso 6: para culminar introducimos la segunda parte del terminal de cadena y realizamos un amarre, luego cortamos el exceso de nylon y listo.
⭐ Step 6: to finish we introduce the second part of the chain terminal and we make a tie, then we cut the excess nylon and that's it.
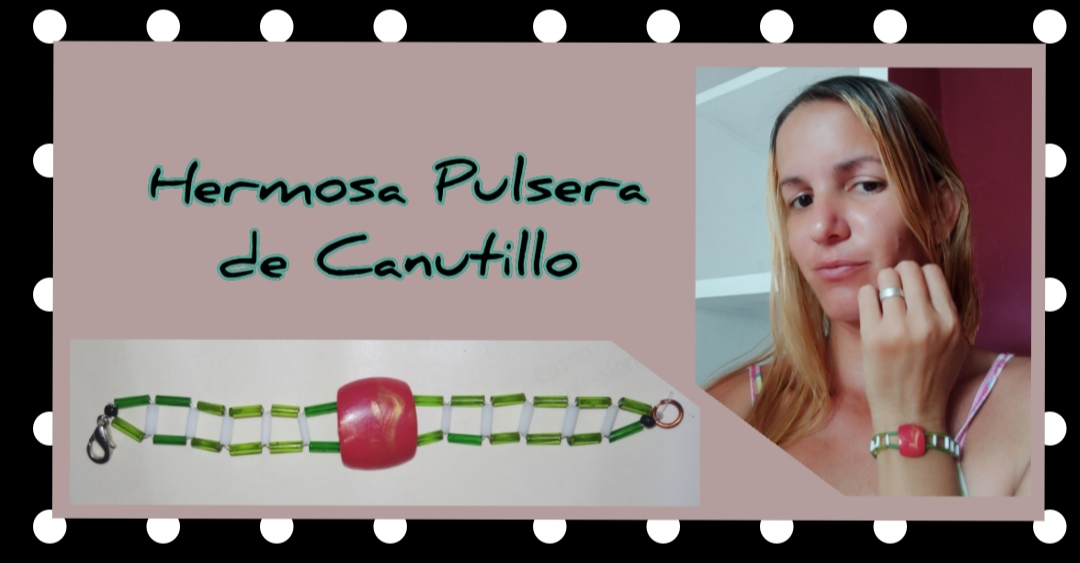
⭐ Hermosa Pulsera de Canutillo⭐
⭐ Beautiful Bead Bracelet⭐
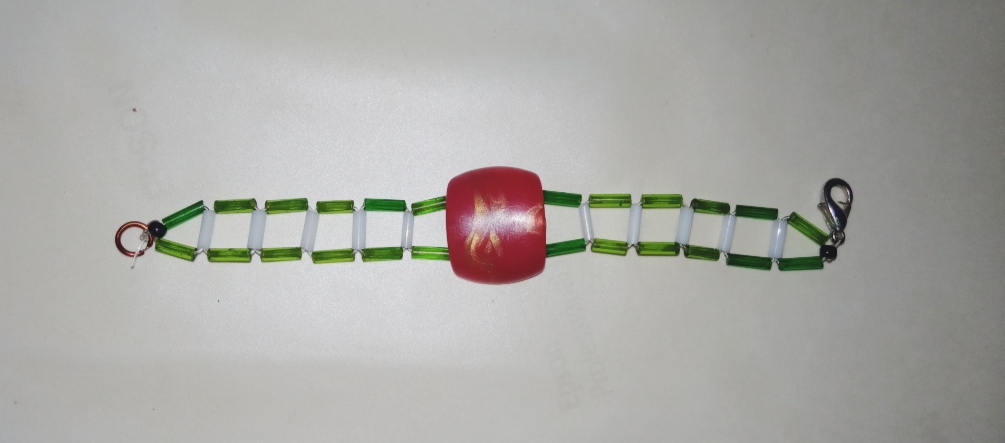
Y así mis queridos amigos fácil, sencillo u rápido tendremos nuestro nuevo acsesorio, una hermosa y llamativa pulsera de canutillo, ideal para lucir en nuestro día a día, pues podemos mojarla con confianza sin miedo a dañarla.
And so my dear friends easy, simple and fast we will have our new accessory, a beautiful and striking beaded bracelet, ideal to wear in our day to day, because we can wet it with confidence without fear of damaging it.
Mis queridos amigos está a Sido mi sencilla y humilde creación para todos ustedes, espero que está creativa idea les sea de su agrado y mi sencillo tutorial les sea de utilidad.
Les agradezco por llegar hasta acá y acompañarme en esta nueva creación, me despido esperando sus comentarios y sugerencias.
Saludos y bendiciones.
My dear friends, this has been my simple and humble creation for all of you, I hope that you like this creative idea and that my simple tutorial will be useful to you.
I thank you for coming here and joining me in this new creation, I say goodbye waiting for your comments and suggestions.
Greetings and blessings.
las fotos fueron tomadas con mi teléfono Redmi 9, contenido exclusivo para Hive. Y la traducción fue realizada a través de Google.
photos were taken with my Redmi 9 phone, exclusive content for Hive. And the translation was done through Google.
Me gusta el diseño que elegiste, el color combina muy bien. Está muy bonita, para usarla con un vestido.
Me alegra que sea de su agrado, gracias por su comentario.