
¡Hola Chicos!
Muchas veces cuando vemos un proyecto por internet decimos internamente "eso yo lo hago rápido y me va a quedar mejor", pero a la hora de la ejecución no nos va tan bien.
Eso fue lo que me pasó a mí en este proyecto, aunque tuvo un final feliz porque encontré la solución al problema.
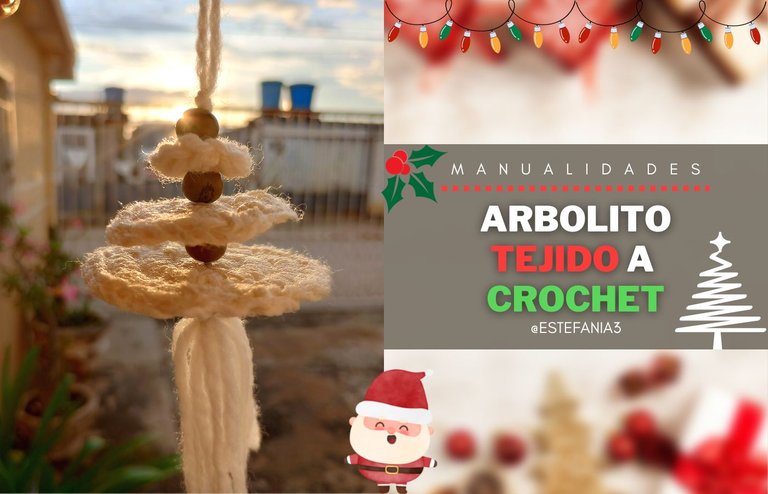
Es un arbolito creado con bases circulares tejidas a crochet, que va de un tamaño pequeño hasta un tamaño un poco más grande.
Cuando lo tejí y armé mi arbolito no tenía forma, había quedado como el cuadro de los relojes de Salvador Dalí, todo chorreado 😂. La razón de esto es que el hilo que utilicé, aunque era esponjoso y de varias fibras, era muy ligero y cuando armé el arbolito, este perdió forma.
Por un momento me desanimé, pero luego se me ocurrió la solución: "¡voy a endurecer el tejido!", dije.
Y ya luego de hacerlo y esperar algunas horas a que secara por completo, lo armé y quedó tal y como esperaba.
Hoy te traigo, no solo el tutorial para que puedas hacer el arbolito, sino también la guía para que puedas endurecer tus tejidos.
Así que ahora sí, vayamos con el paso a paso. ♥
Hello Guys!
Many times when we see a project on the internet we internally say 'I'll do that quickly and it will turn out better', but when it comes to execution it doesn't go so well.
That's what happened to me in this project, although it had a happy ending because I found the solution to the problem.
It is a little tree created with circular crocheted bases, ranging from a small size to a slightly larger size.
When I knitted it and put together my little tree, it had no shape, it had turned out like Salvador Dalí's clock painting, all dripped 😂. The reason for this is that the thread that I used, although it was fluffy and made of various fibers, was very light and when I assembled the tree, it lost its shape.
For a moment I was discouraged, but then the solution occurred to me: 'I'm going to stiffen the fabric!' I said.
And after doing it and waiting a few hours for it to dry completely, I put it together and it was just as I expected.
Today I bring you not only the tutorial so you can make the tree, but also the guide so you can harden your fabrics.
So now yes, let's go step by step. ♥
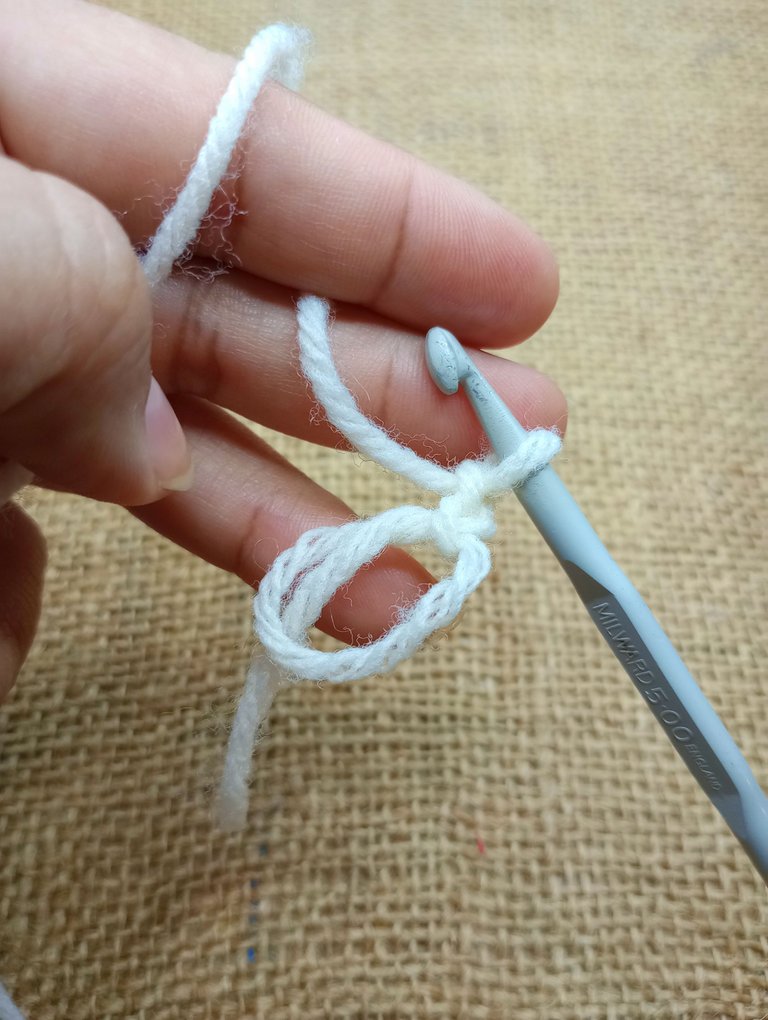
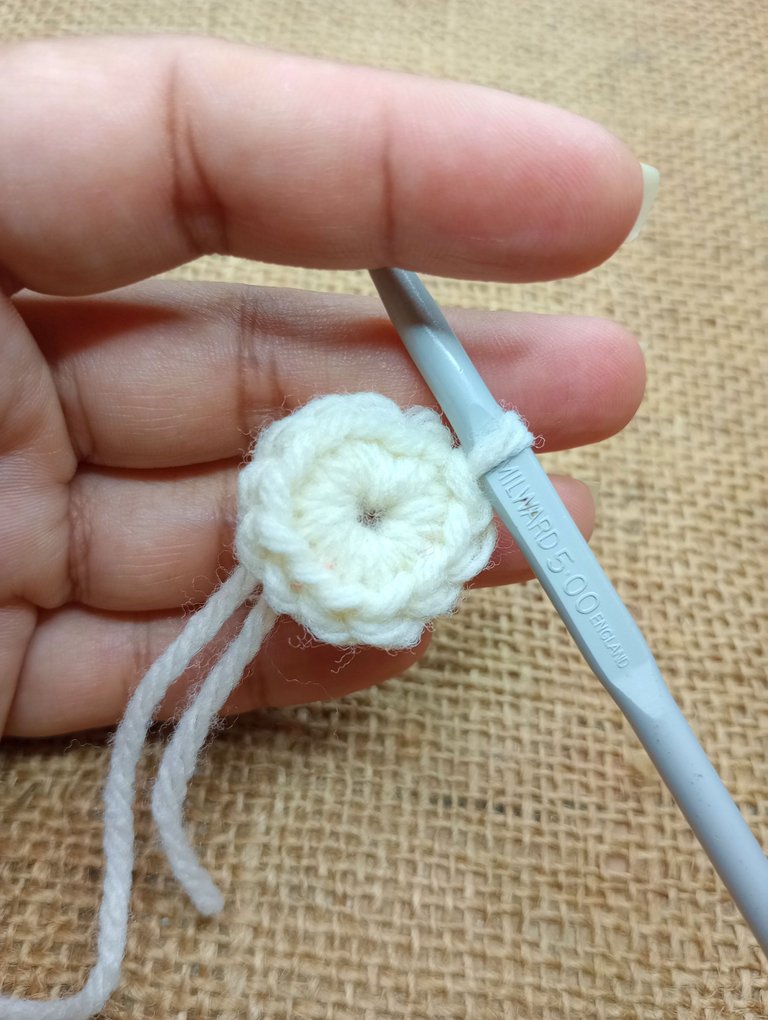
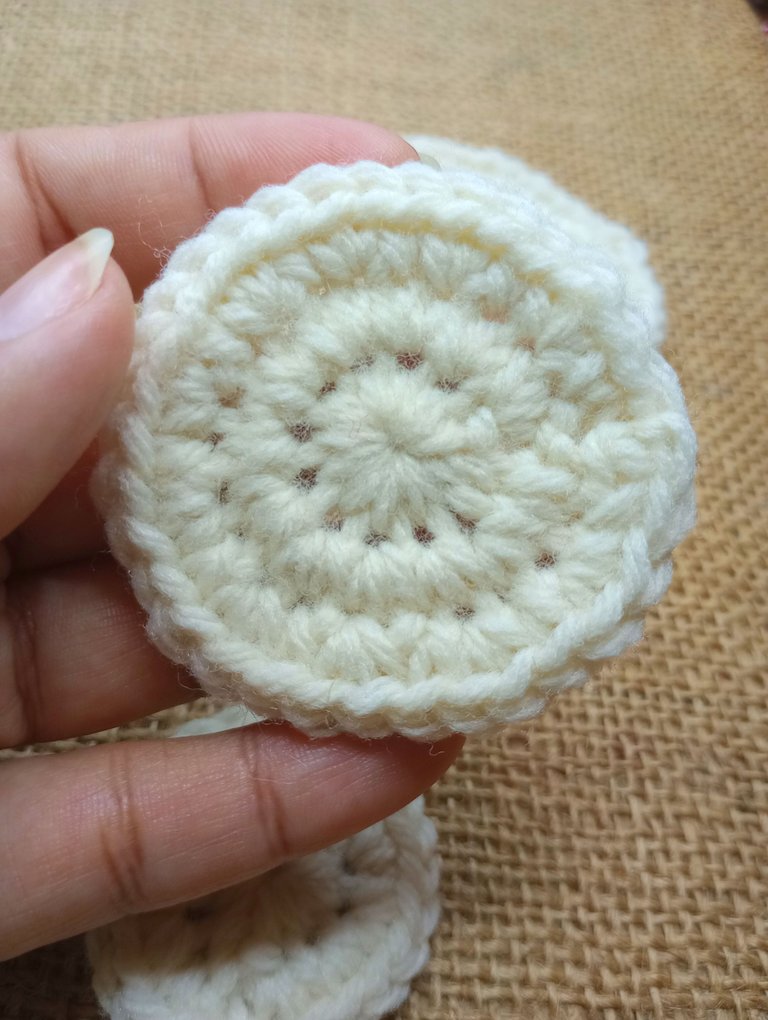
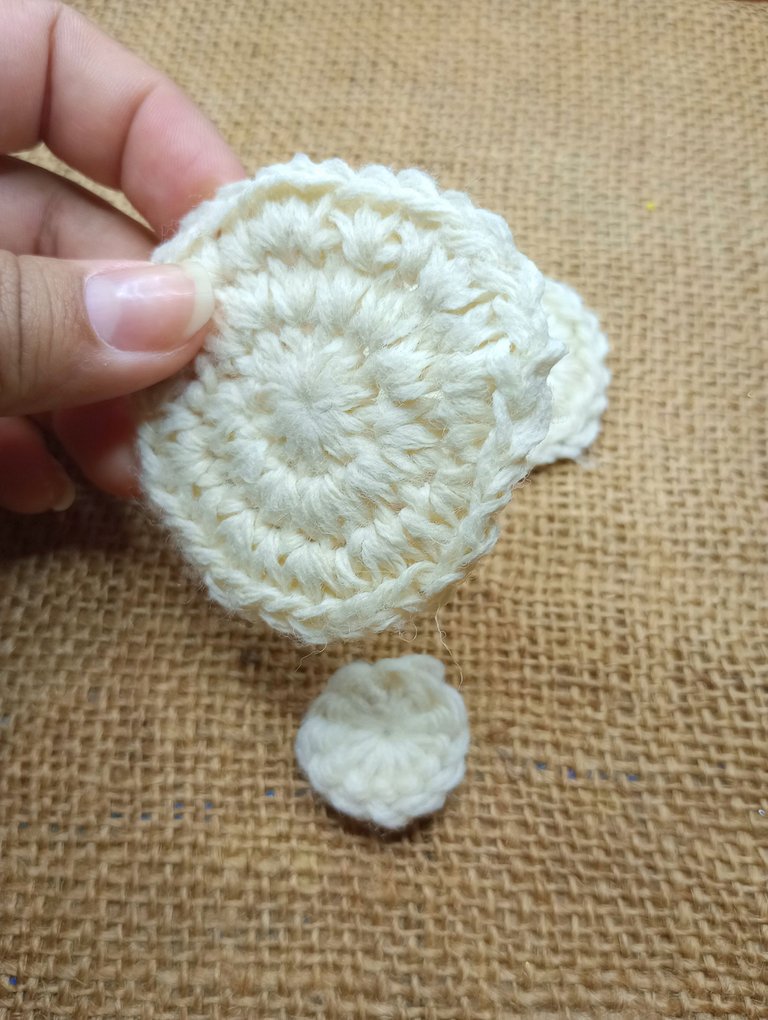
El arbolito está hecho a base de círculos, para tejerlos debemos iniciar con un anillo mágico y sobre él tejeremos dos cadenas + 11 puntos. Finalizamos esta primera vuelta con un punto deslizado.
Ya acá tendremos listo nuestro primer círculo, cortamos el hilo y hacemos un nudo para asegurar el tejido.
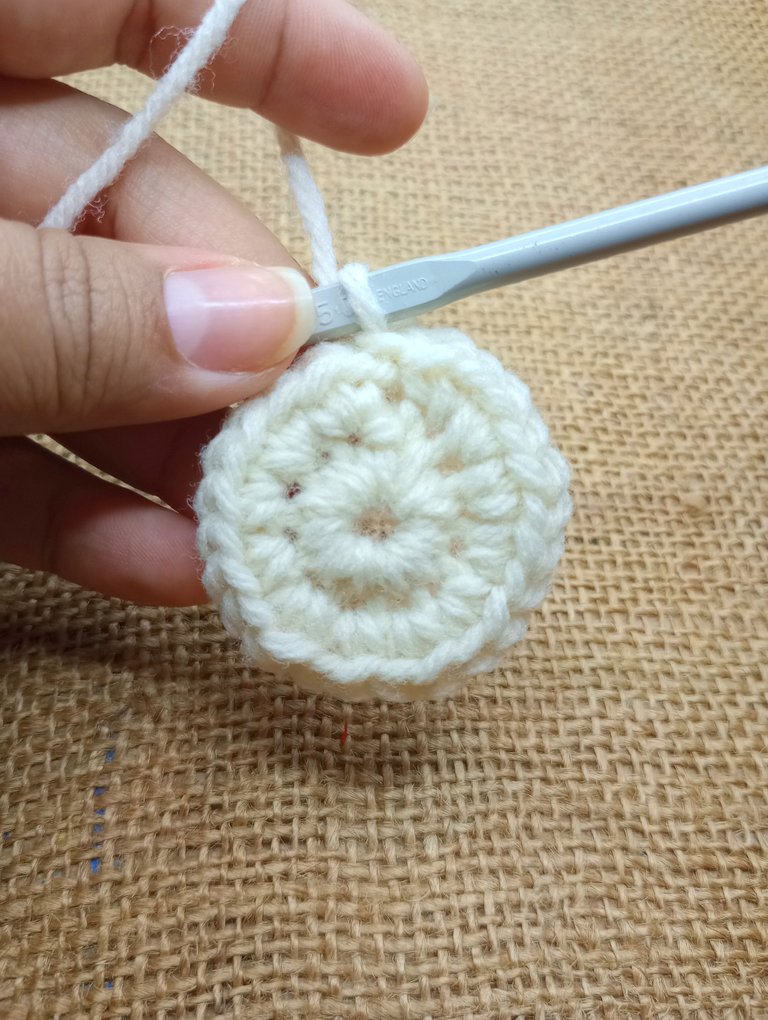
Para el segundo círculo repetimos este proceso, pero haremos una segunda vuelta, tejiendo un aumento por cada punto. Así lograremos 24 puntos bajos. Cortamos el hilo y aseguramos.
El tercer círculo va a ser un poco más grande. Repetimos las vueltas uno y dos y haremos una tercera, tejiendo un aumento + un punto bajo, así hasta completar un total de 36 puntos bajos.
Ya tendremos listos nuestros 3 círculos. Tú puedes continuar haciendo tantos círculos como gustes, y en cada vuelta que agregues ir haciendo sus respectivos aumentos.
The little tree is made of circles, to knit them we must start with a magic ring and on it we will knit two chains + 11 stitches. We finish this first round with a slip stitch.
Here we will have our first circle ready, cut the thread and tie a knot to secure the fabric.
For the second circle we repeat this process, but we will do a second round, knitting an increase for each stitch. Thus we will achieve 24 low points. We cut the thread and secure.
The third circle is going to be a little bigger. We repeat rounds one and two and we will do a third, knitting an increase + a single crochet, like this until completing a total of 36 single crochets.
We will have our 3 circles ready. You can continue making as many circles as you like, and with each turn you add, make their respective increases.
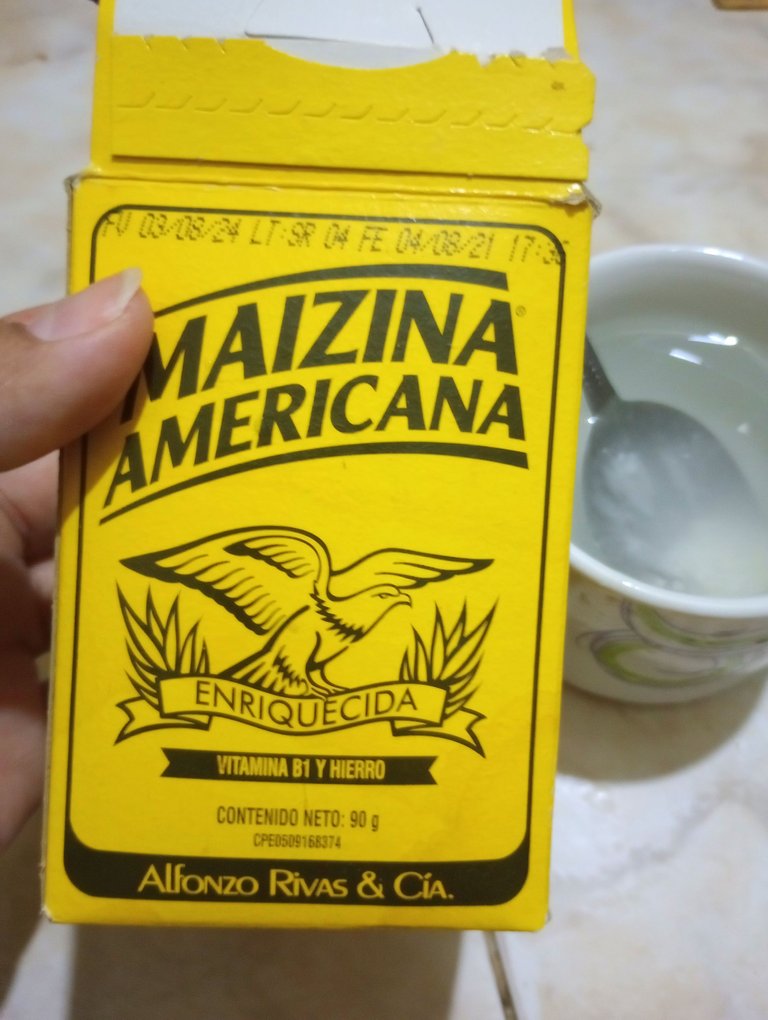
Ahora toca endurecer el tejido. Una de las maneras de hacerlo es utilizando Maizina Americana o almidón de maíz. Vamos a colocar en una taza de agua una cucharada de Maizina y mezclaremos muy bien hasta disolver.

Now it's time to harden the fabric. One of the ways to do it is by using American Maizina or corn starch. We are going to place a tablespoon of Maizina in a cup of water and mix very well until dissolved.
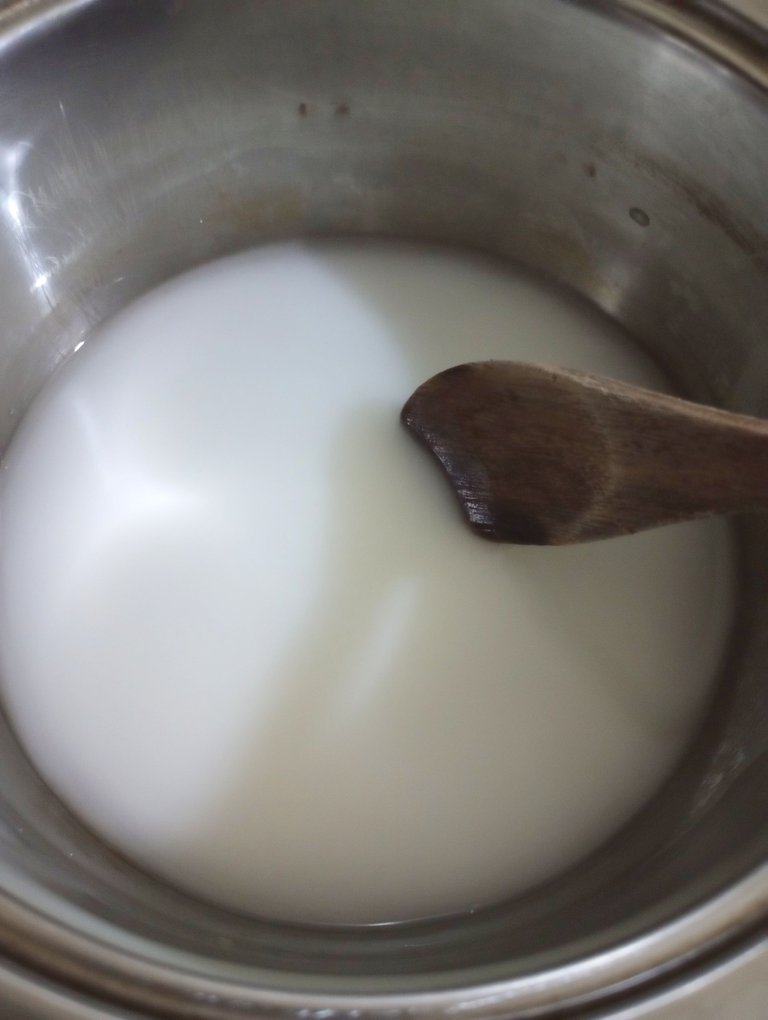
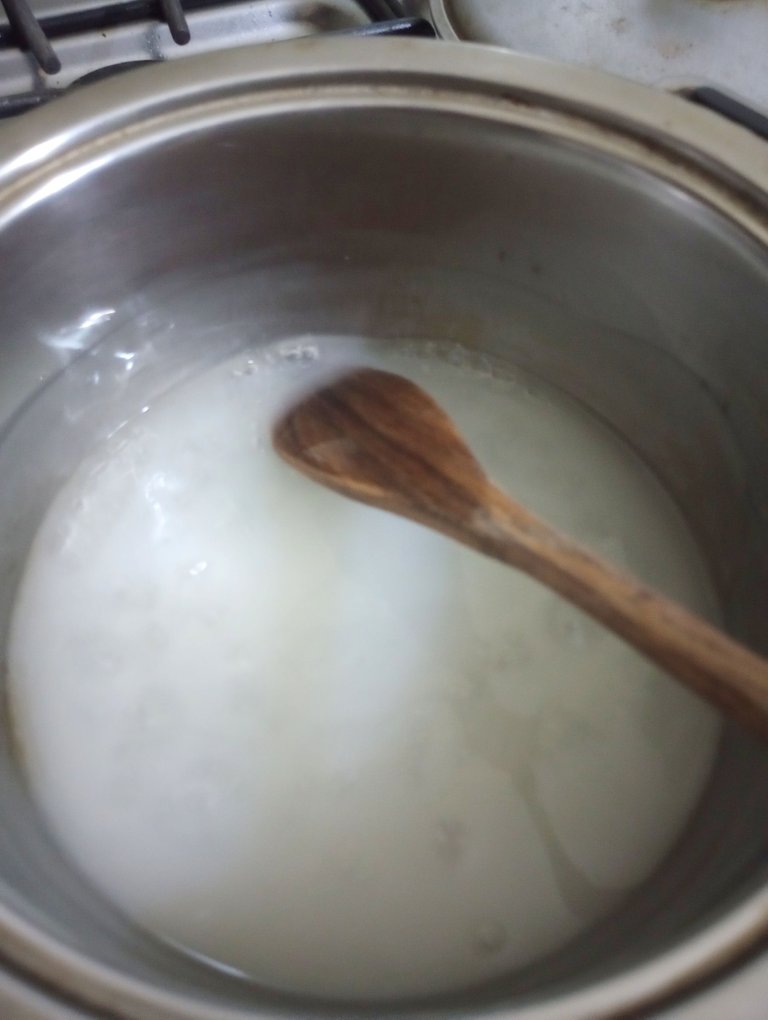
Colocamos la mezcla en una olla y cocinamos a fuego medio, revolviendo constantemente.
Al hervir apagamos el fuego.
Place the mixture in a pot and cook over medium heat, stirring constantly.
When boiling we put out the fire.
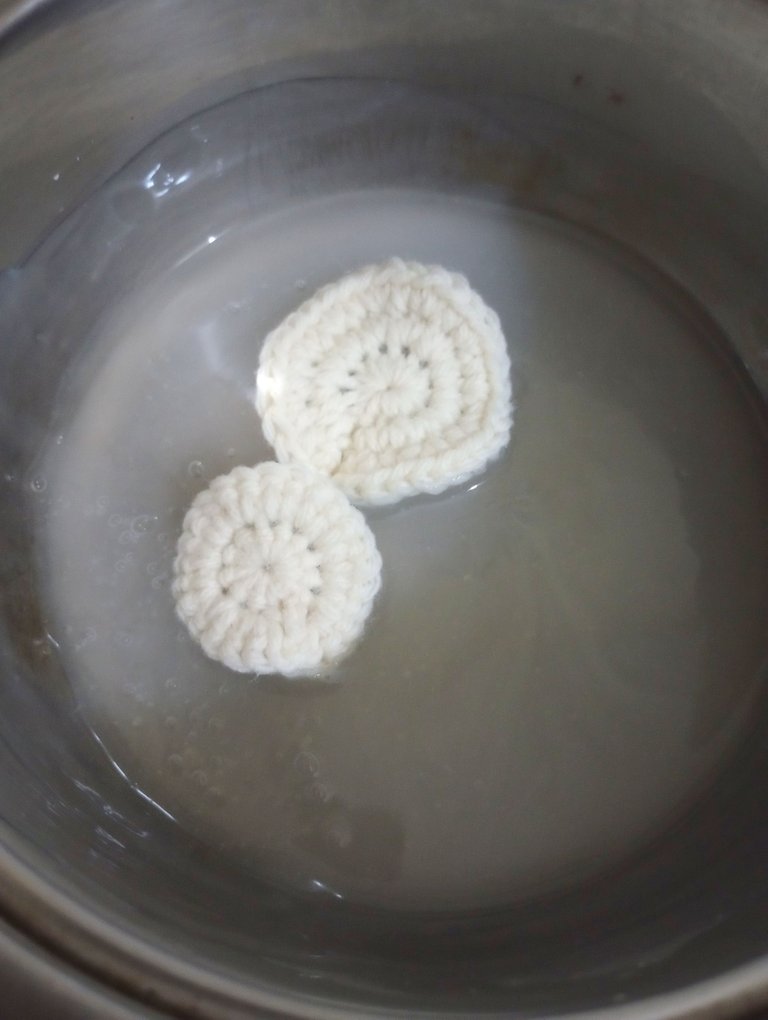
Se deja reposar la mezcla por unos 5 minutos y luego se baña el tejido con esta. Se retira el excedente y se coloca estirada sobre una base plana.
Se coloca al sol o en un lugar seco hasta que sequen por completo.
The mixture is allowed to rest for about 5 minutes and then the fabric is bathed with it. The excess is removed and placed stretched on a flat base.
It is placed in the sun or in a dry place until completely dry.
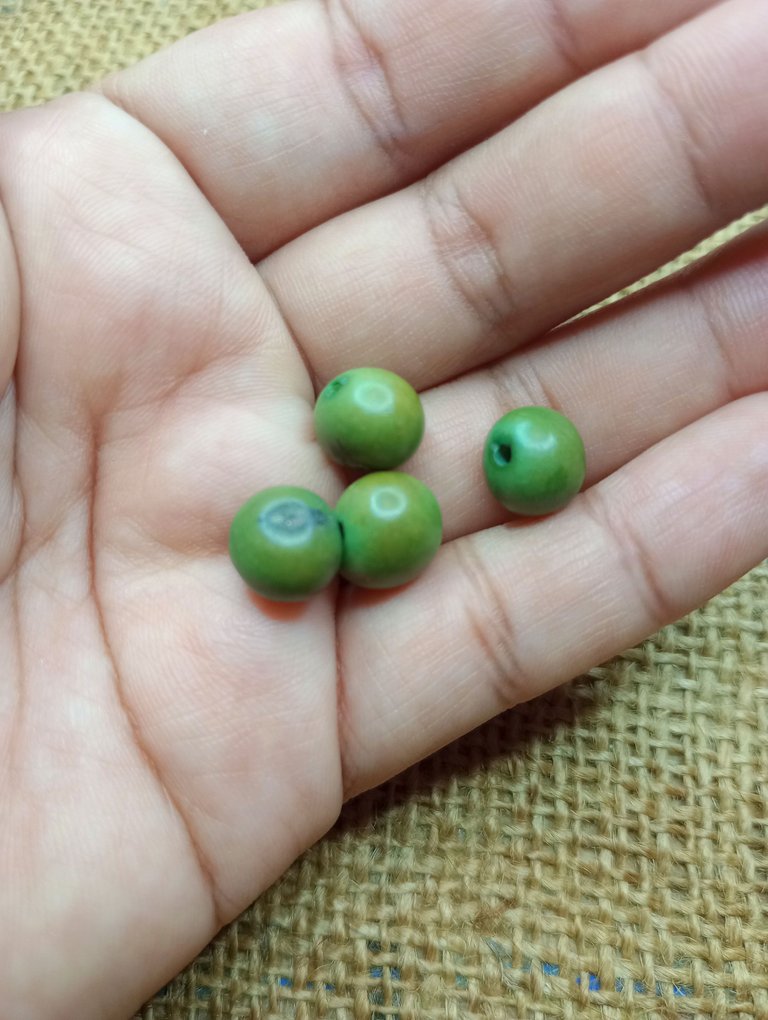
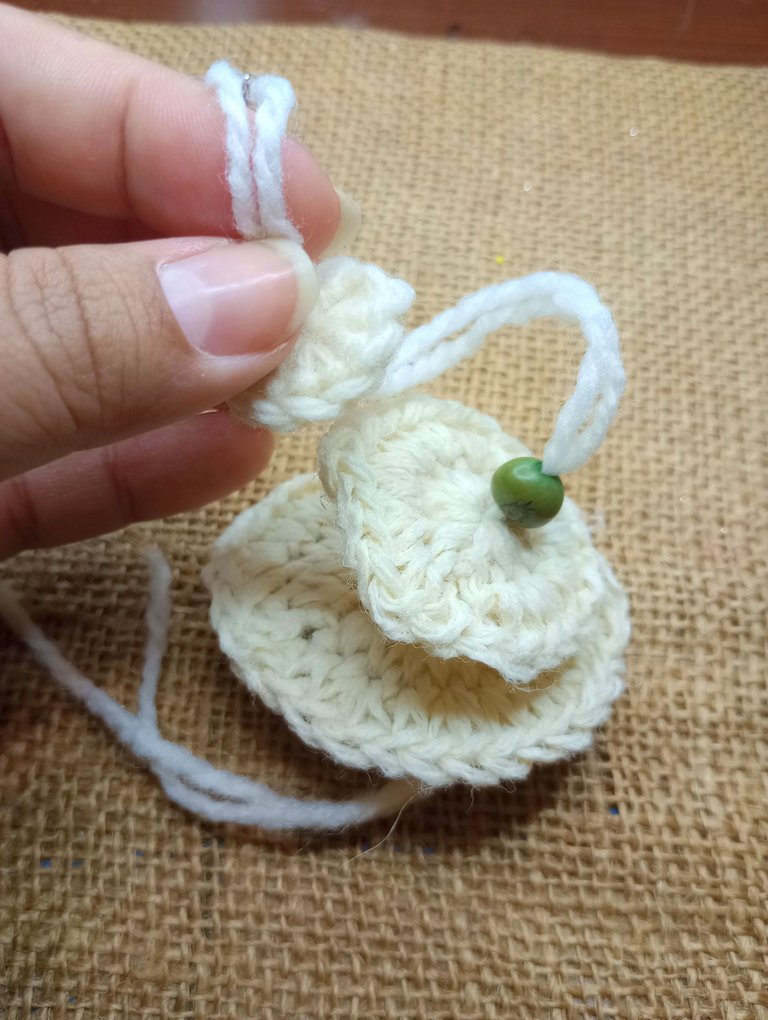
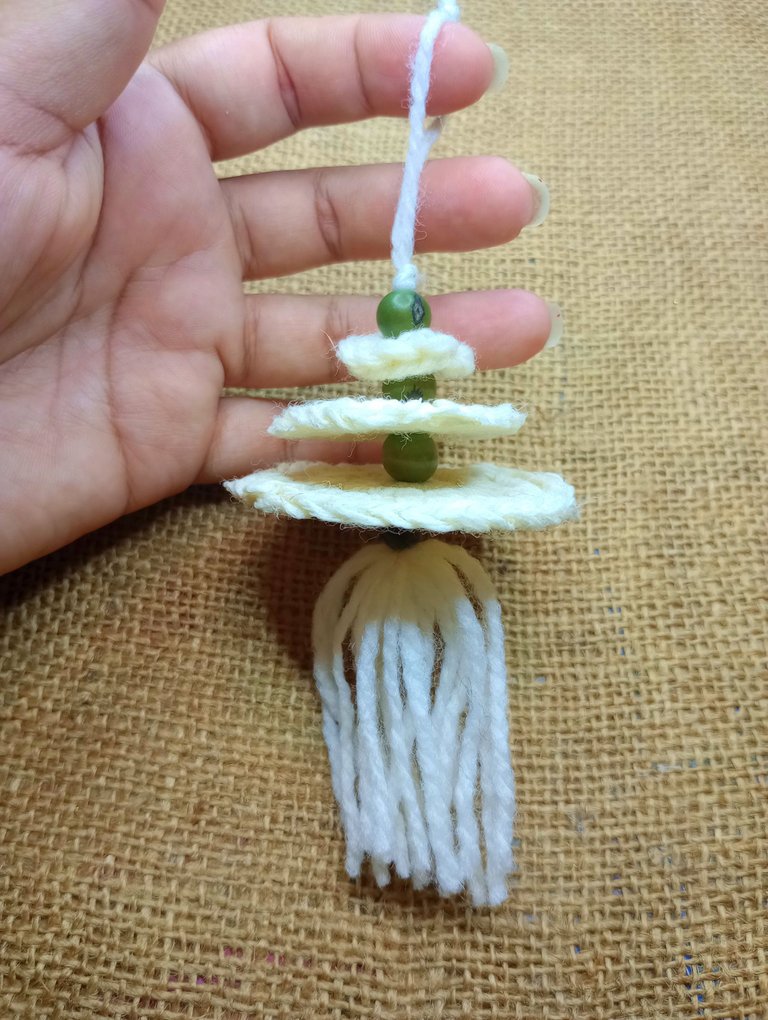
Para separar cada circulo utilicé unas esferas de madera en color verde.
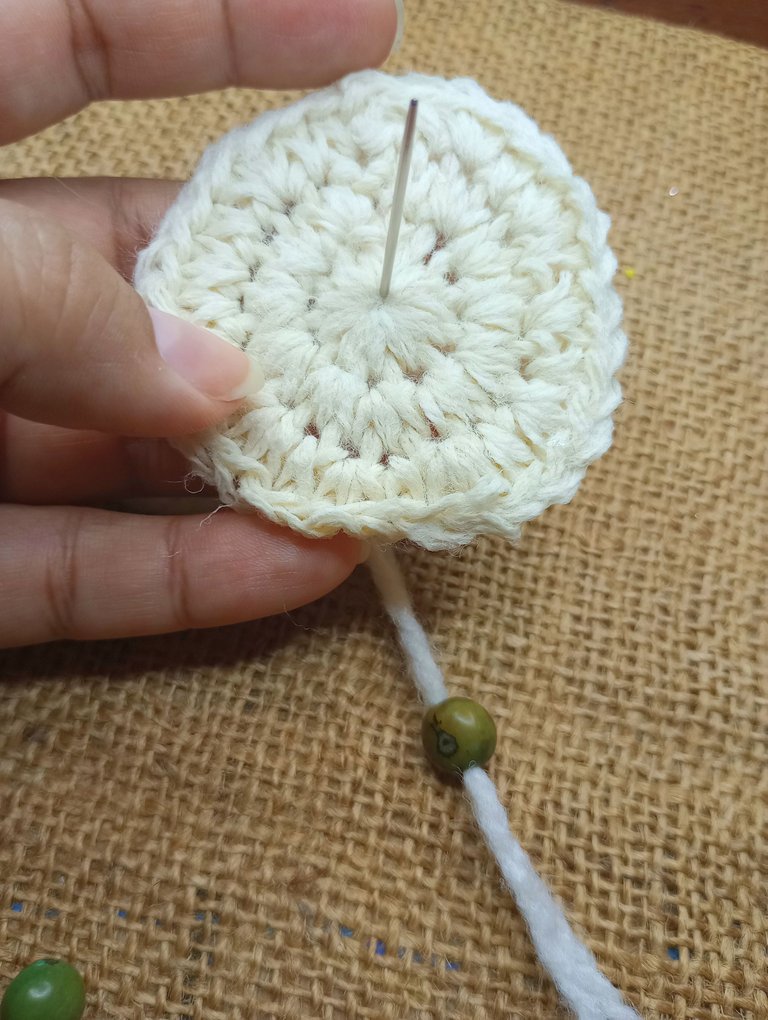
Introduje un trozo del mismo hilo con el que tejí los círculos en una aguja punta roma. Dentro de él coloqué una de esas esferas verdes, luego el círculo más grande y así fui intercalando esferas y círculos hasta colocar una ultima esfera verde.

To separate each circle I used some green wooden spheres.
I introduced a piece of the same thread with which I knitted the circles in a blunt point needle. Inside it I placed one of those green spheres, then the largest circle and thus I interspersed spheres and circles until I placed one last green sphere.
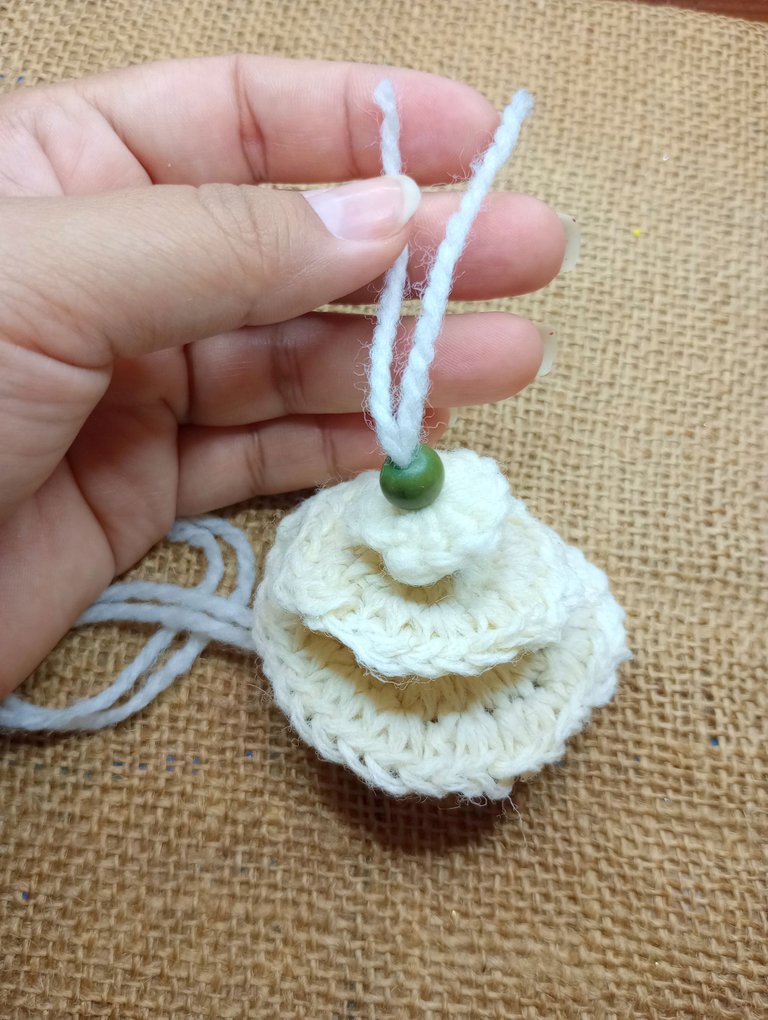
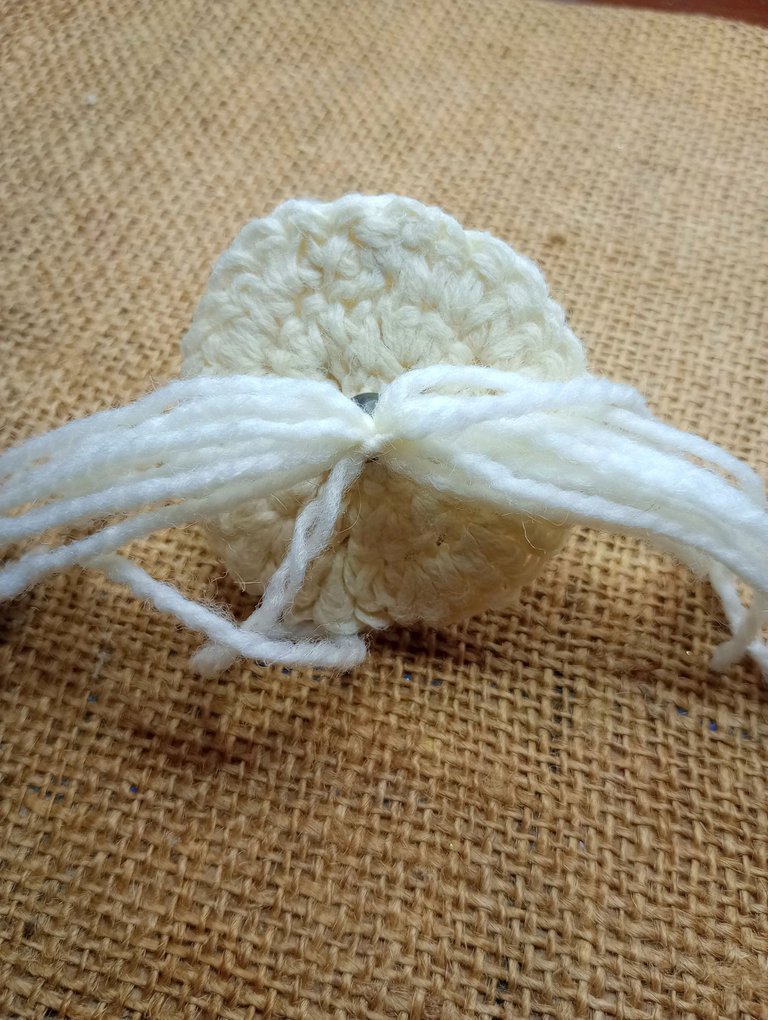
Cortamos el hilo en la parte superior para retirar la aguja y hacemos un nudo.
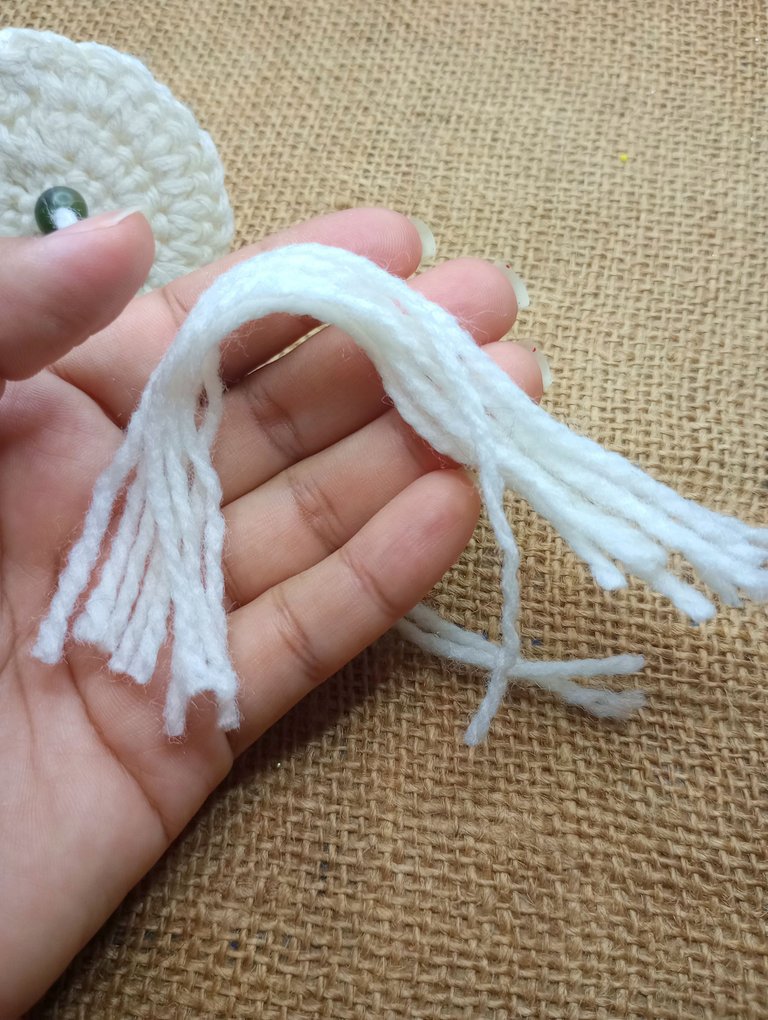
En la parte inferior del arbolito vamos a colocar unos flecos. Cortamos varios hilos de unos 10 centímetros de largo.
Amarramos por la mitad con los dos hilos sobrantes en la parte inferior y con una tijera cortamos para emparejarlos.
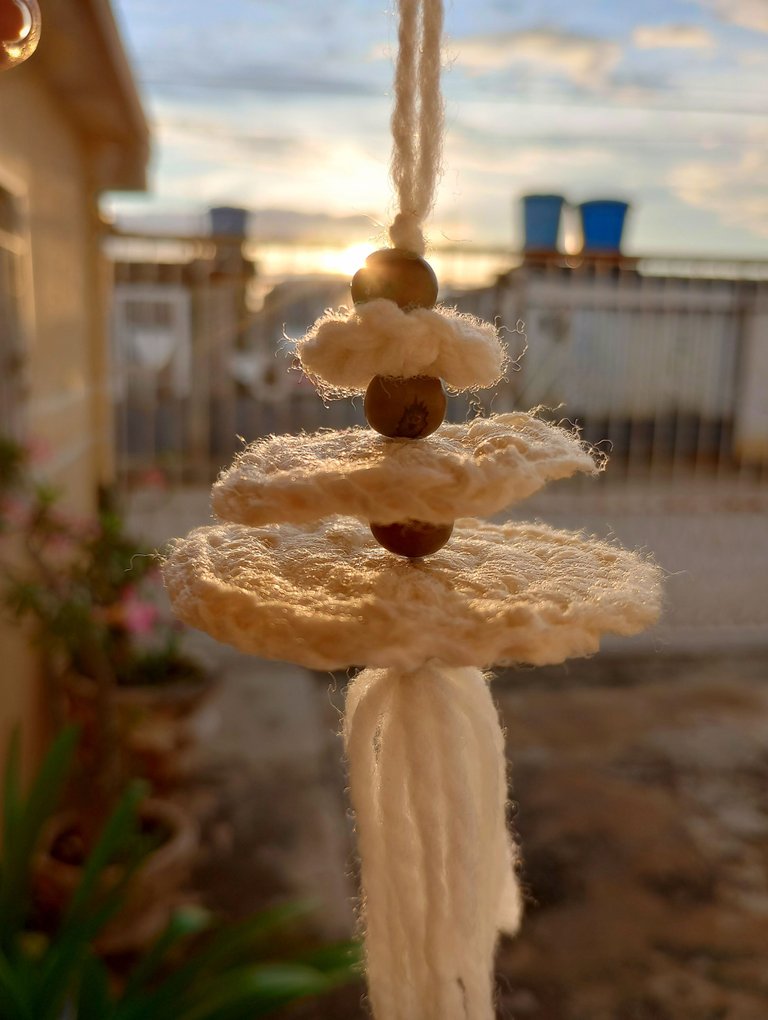
Así es entonces como queda listo este arbolito tejido. Espero les haya gustado la propuesta y que les sirvan estos tips para mejorar sus tejidos. ♥
We cut the thread at the top to remove the needle and tie a knot.
At the bottom of the tree we are going to place some fringes. We cut several threads about 10 centimeters long.
We tie in half with the two remaining threads at the bottom and with scissors we cut to match them.
This is how this little woven tree is ready. I hope you liked the proposal and that these tips will help you improve your fabrics. ♥

Espero haya sido de tu agrado y provecho.
Un gran abrazo a todos, y nos leemos en un próximo post
• Lakrearte en Hive •
Att: Estefania Garcia ♥

Imágenes y separadores de mi autoría
Portada editada en Canva
Fotografías tomadas con un Moto G31
Texto traducido en Google ImTranslate v.14.27
Congratulations @estefania3! You have completed the following achievement on the Hive blockchain and have been rewarded with new badge(s):
Your next target is to reach 80000 upvotes.
You can view your badges on your board and compare yourself to others in the Ranking
If you no longer want to receive notifications, reply to this comment with the word
STOPCheck out the last post from @hivebuzz:
Support the HiveBuzz project. Vote for our proposal!
Yay! 🤗
Your content has been boosted with Ecency Points, by @hive-130560.
Use Ecency daily to boost your growth on platform!
Support Ecency
Vote for new Proposal
Delegate HP and earn more
Thank you for sharing this post on HIVE!
Your content got selected by our fellow curator stevenson7 & you just received a little thank you upvote from us for your great work! Your post will be featured in one of our recurring compilations which are aiming to offer you a stage to widen your audience within the DIY scene of Hive. Next time make sure to post / cross-post your creation within the DIYHub community on HIVE and you will receive a higher upvote ;) Stay creative & HIVE ON!
Please vote for our hive witness <3
Thanks for your support ❤️
You're welcome. Keep up the good work.
Hola @estefania3. Te felicito hiciste un gran trabajo, te quedó muy bonito. ¡Saludos!
Muchas gracias! Perdón por responder tan tarde. Se perdió tu comentario entre tantas notificaciones. Un abrazo y gracias por pasarte a mi blog 🤗✨❤️
Muy lindo