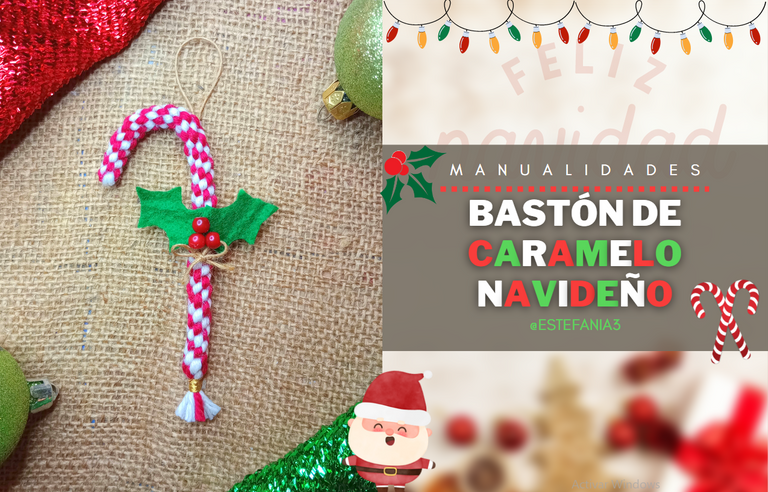

¡Hola Chicos!
Continuamos con las decoraciones navideñas para llenar de color y espíritu festivo todo nuestro hogar. Hoy quiero compartir con ustedes una propuesta bastante linda y que me gustó mucho crear para ustedes y para agregarlo a mi catálogo de decoraciones navideñas.
Esta idea la encontré navegando en internet en la búsqueda de inspiración (acá les dejo el video de donde me inspiré para esta manualidad) y por supuesto le agregué mi toqué personal, pues me parecía que aunque era linda la base, le hacían falta un poquito más de decoraciones.
Me resultó fácil hacerla, pues yo trabajo con artesanías y bisutería y estos nudos son bien sencillos de hacer, ya que los he practicado bastante.
Hoy te daré una visión general de la manualidad, pero pronto espero estarles trayendo un tutorial más detallado para que aprendas a tejer estos nudos, de igual forma en el video que te estoy compartiendo puedes ver la explicación de cómo tejer este nudo cuadrado o cruzado.
Así que mejor vayamos con el paso a paso para elaborar esta linda decoración de caramelo navideño. ♥
Hey guys!
We continue with the Christmas decorations to fill our entire home with color and festive spirit. Today I want to share with you a very nice proposal that I really liked creating for you and adding it to my catalog of Christmas decorations.
I found this idea surfing the internet in search of inspiration (here I leave the video from where I was inspired for this craft) and of course I added my personal touch, because I it seemed that although the base was nice, it needed a little more decorations.
It was easy for me to do it, because I work with crafts and jewelry and these knots are very easy to do, since I have practiced them a lot.
Today I will give you an overview of the craft, but soon I hope to be bringing you a more detailed tutorial so you can learn how to weave these knots. In the same way, in the video that I am sharing with you, you can see the explanation of how to weave this square or crossed knot.
So let's go step by step to make this cute Christmas candy decoration. ♥
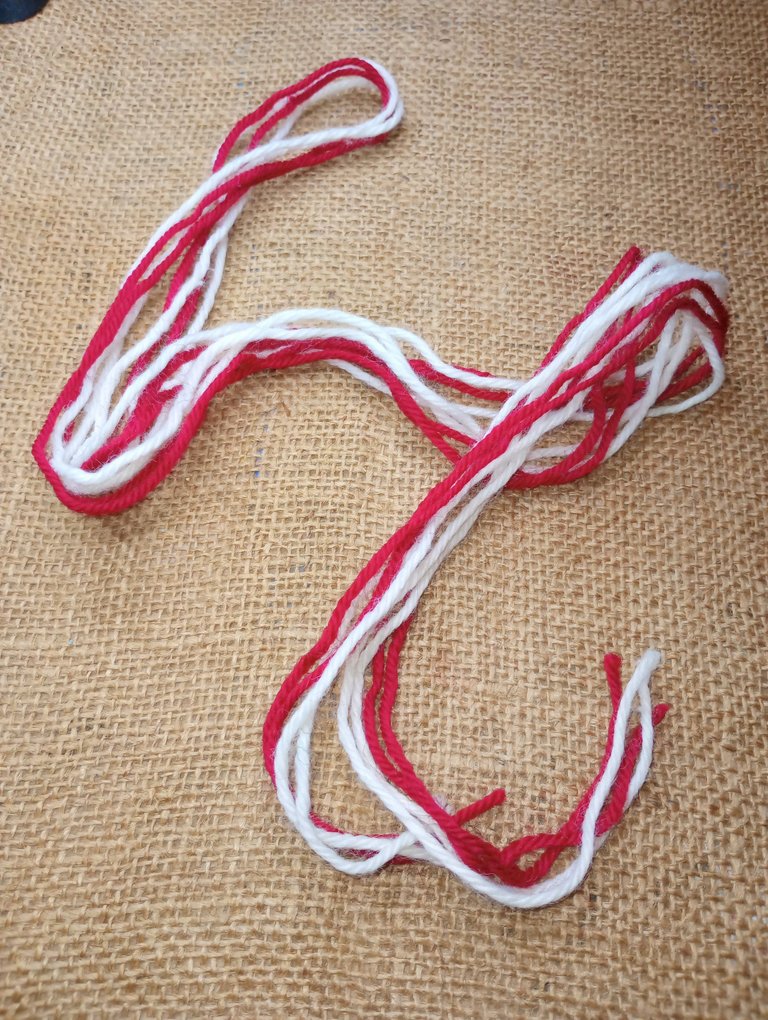
El hilo que utilicé fue una lana gruesa de color blanco y rojo, típicos de estos bastones de caramelo. Mientras mayor sea el grosor del hilo, mayor será el tamaño del caramelo.
Yo corté dos tiras de cada color para que quedara de un tamaño mediano. Todas miden 140 centímetros de largo.
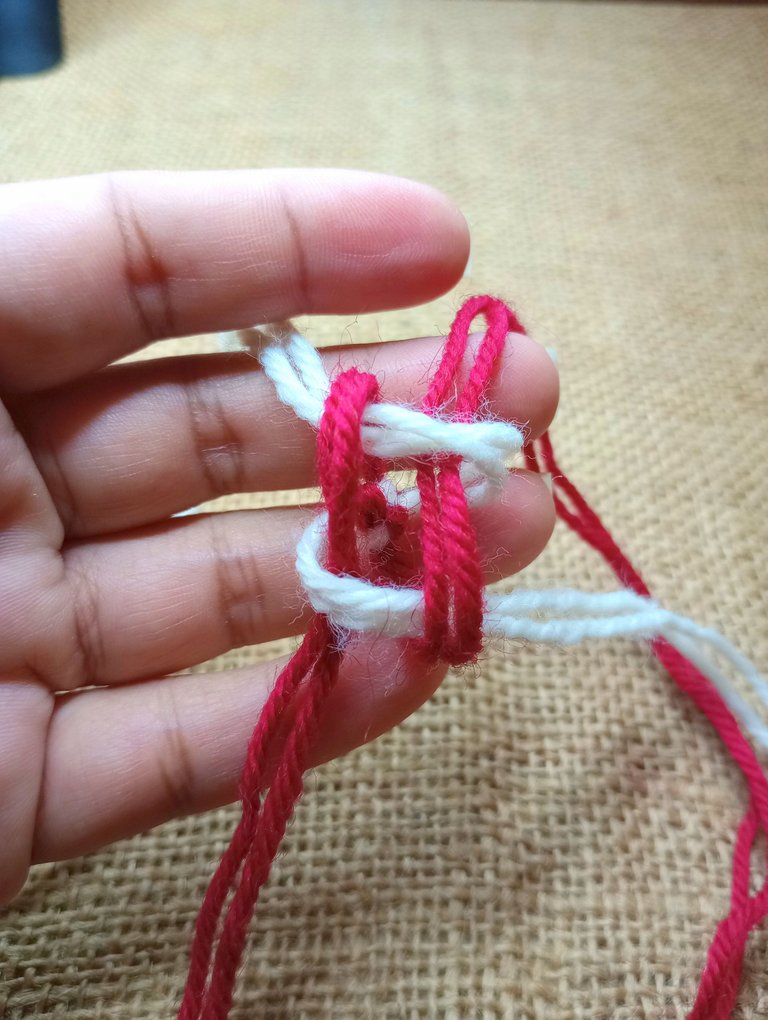
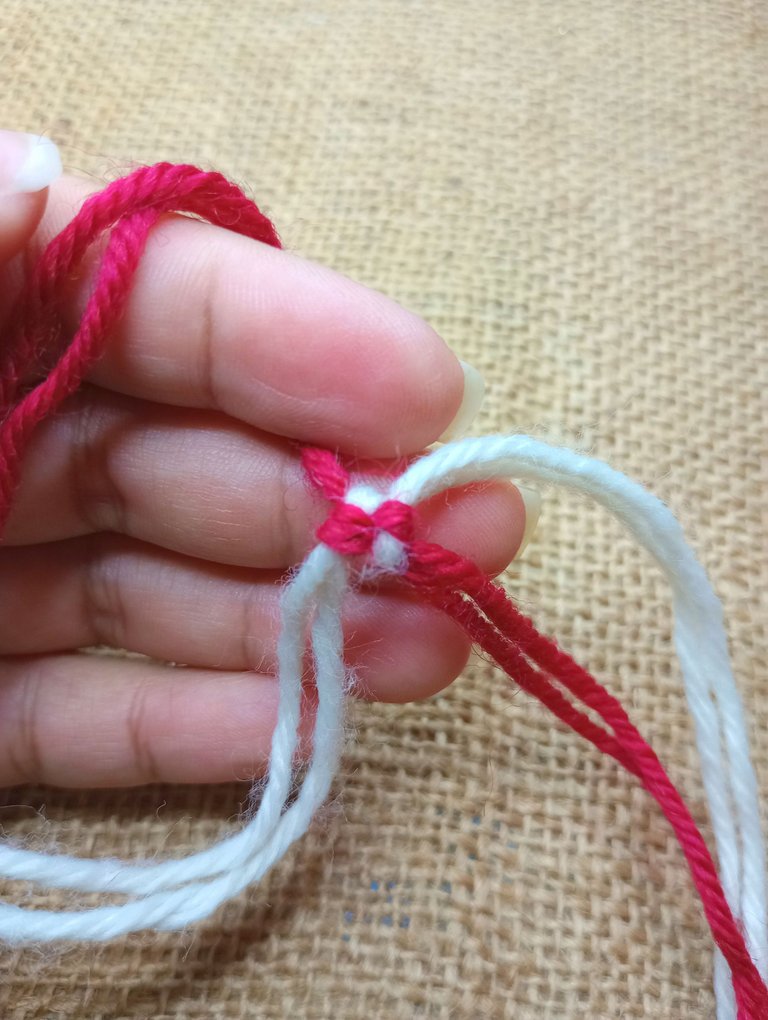
Comencé armando el primer nudo, doblando los hilos a la mitad para así lograr 4 tiras.
Este nudo cuadrado o cruzado, consta de ir intercalando cada hilo sobre el que se encuentra hacia la derecha, que al ajustarse forman todos un cuadrado, de ahí su nombre.
Se va tejiendo poco a poco y el caramelo irá tomando forma. Dependiendo de la habilidad al tejer, esto nos tomará unos 20-30 minutos completarlo.
The thread I used was a thick white and red yarn, typical of these candy canes. The thicker the string, the larger the size of the candy.
I cut two strips of each color so that it was a medium size. They all measure 140 centimeters long.
I started by making the first knot, folding the threads in half to achieve 4 strips.
This square or crossed knot consists of inserting each thread over the one to the right, which when adjusted all form a square, hence its name.
It is weaving little by little and the caramel will take shape. Depending on your knitting skill, this will take about 20-30 minutes to complete.
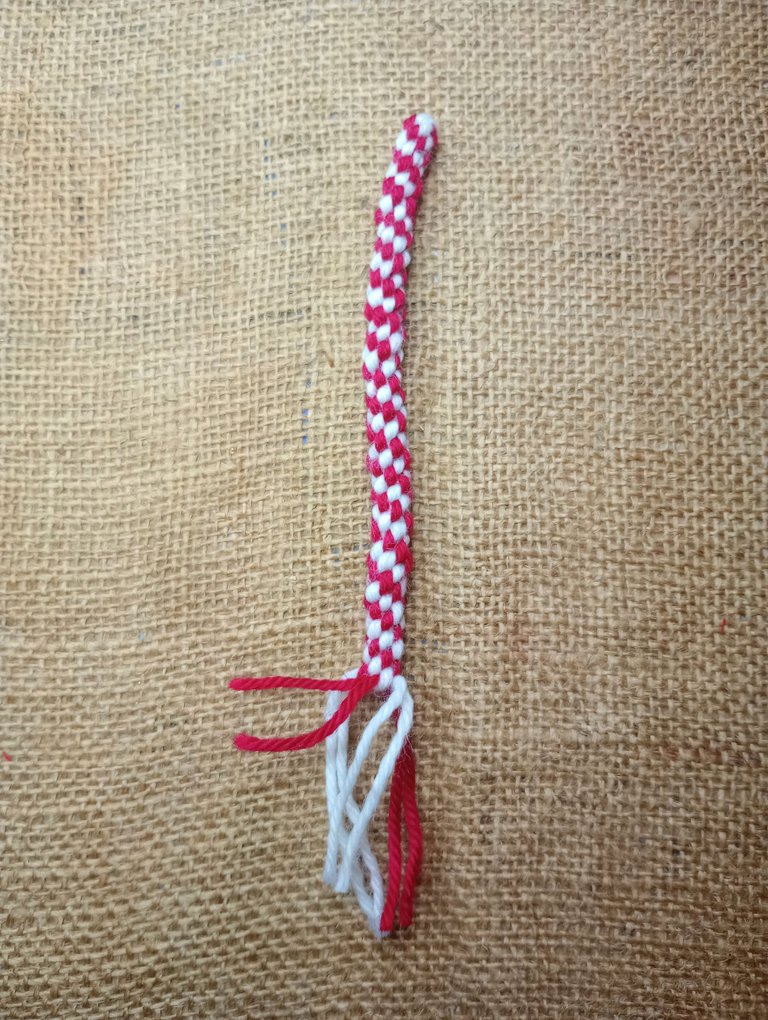
Tejemos hasta que anudar todos los hilos, dejando un excedente de 7 centímetros.
En el interior de este cilindro tejido vamos a colocar un trozo de alambre de cobre o un alambre fácil de moldear. Que nos permitirá darle forma al caramelo y no se deforme.
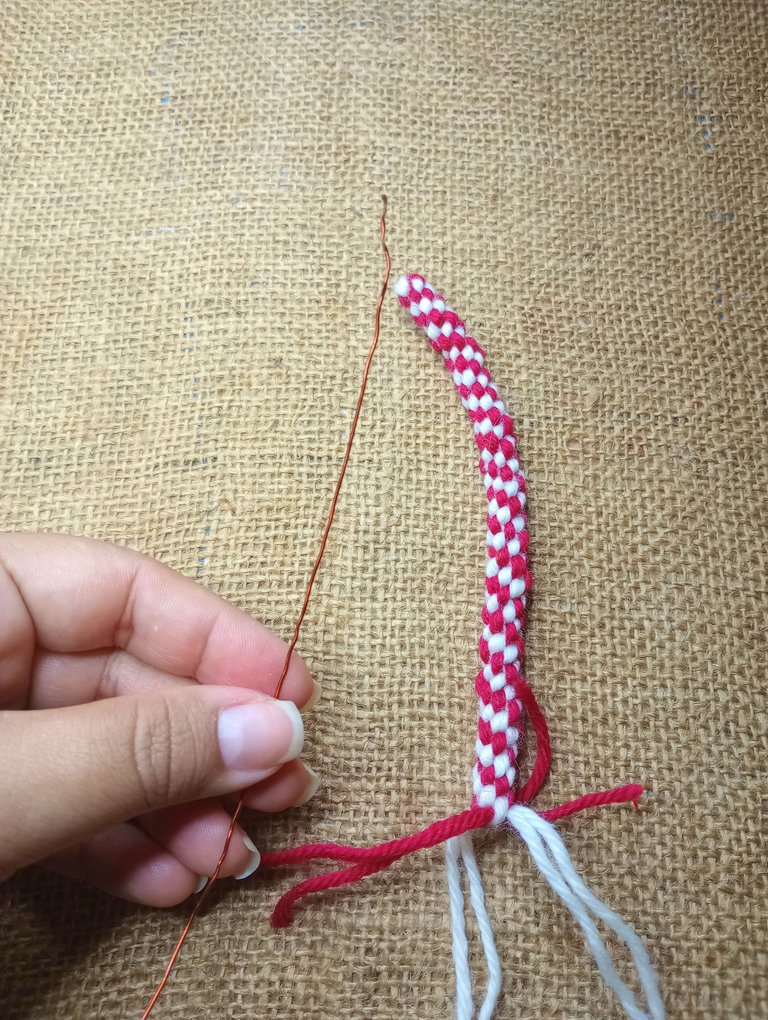
We weave until all the threads are knotted, leaving a surplus of 7 centimeters.
Inside this woven cylinder we are going to place a piece of copper wire or an easy-to-shape wire. That will allow us to shape the caramel and not deform it.
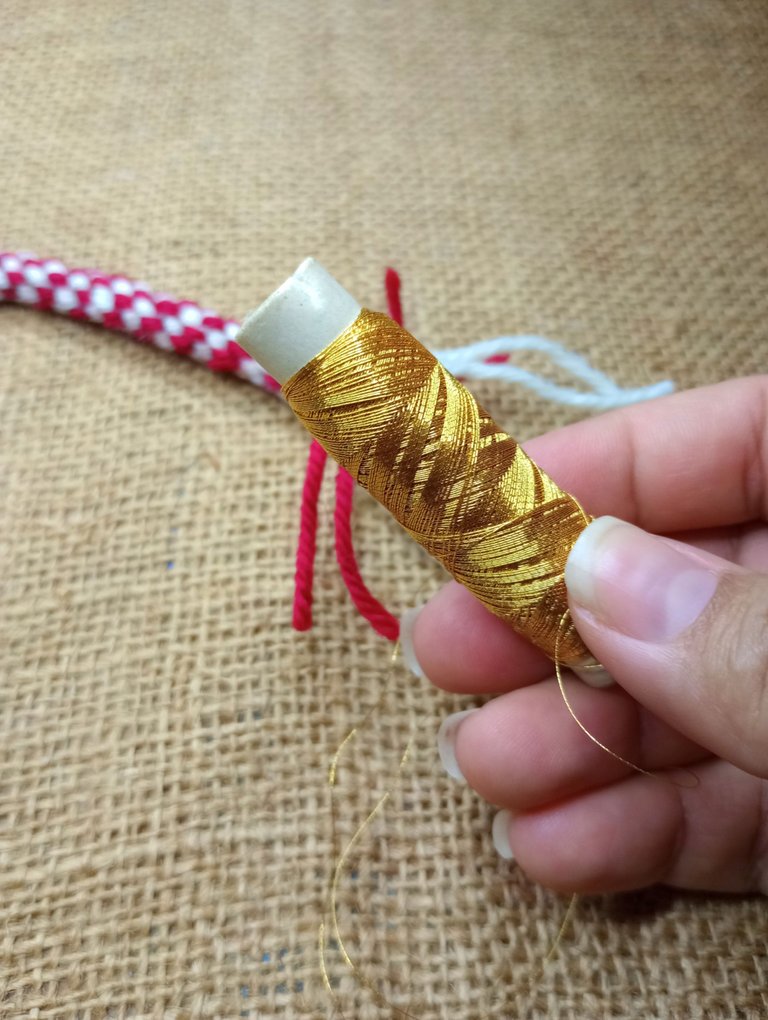
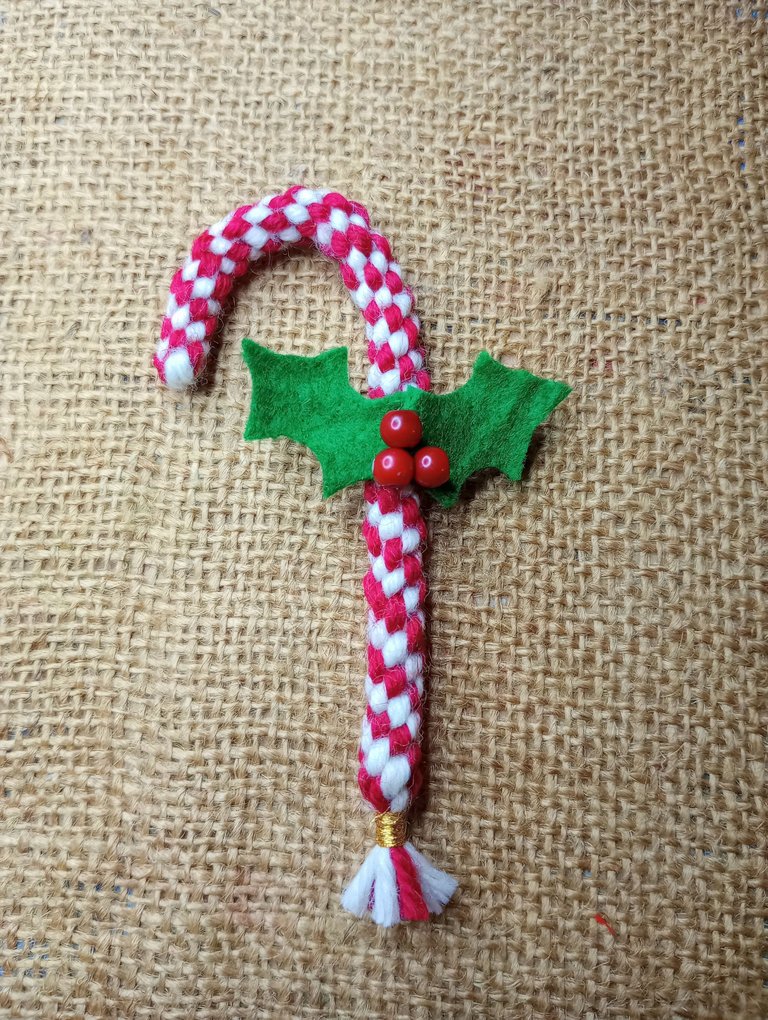
Ahora con un hilo dorado o el de tu elección, vamos a atar la parte inferior del caramelo para asegurar los nudos.
Cortamos el excedente de hilos.
Now with a golden thread or the one of your choice, we are going to tie the bottom part of the candy to secure the knots.
We cut off the excess threads.
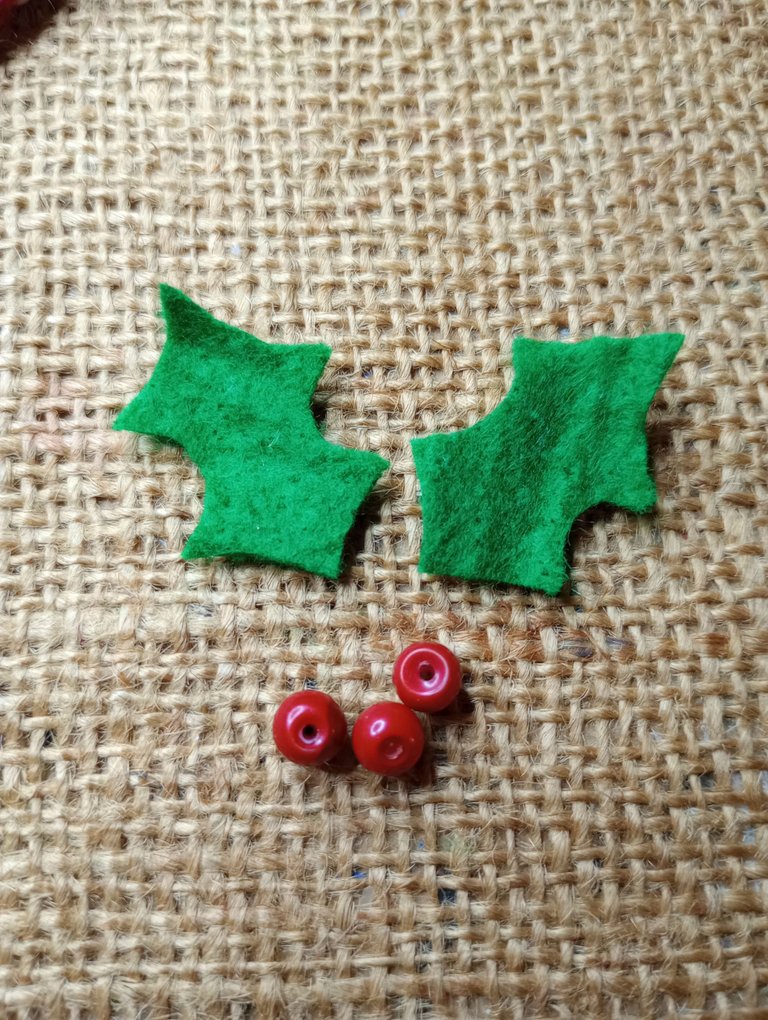
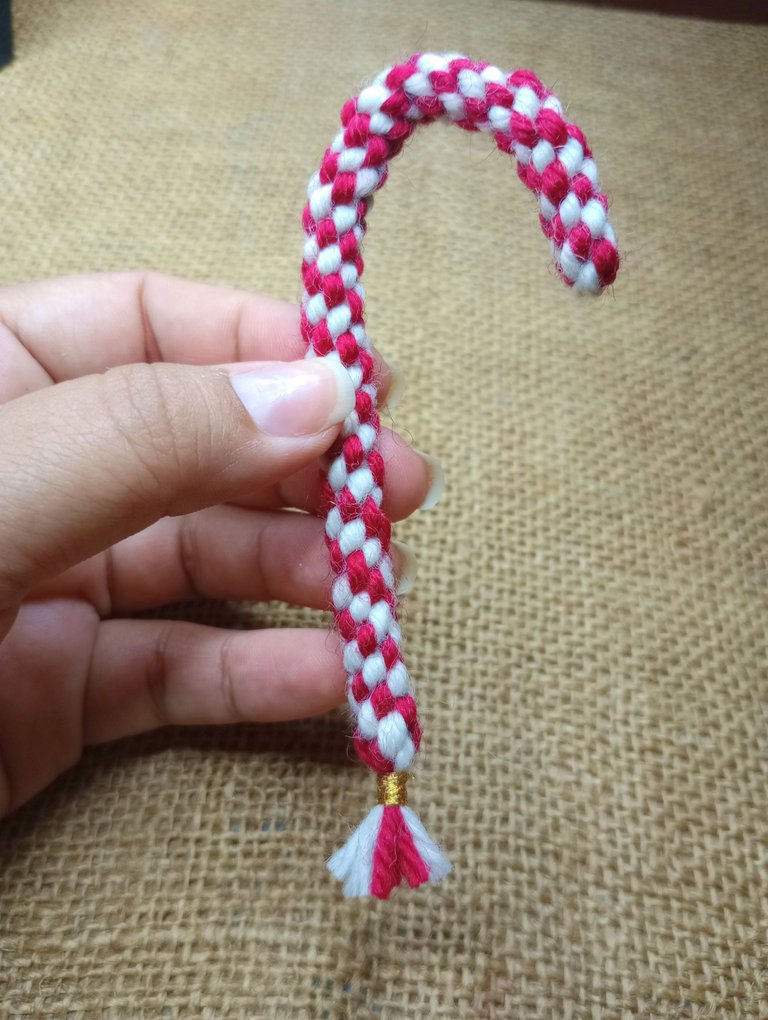
Para decorar el bastón hice unas hojitas en fieltro de color verde, y también agregué unas cuentas de color rojo para simular las fruticas.
Todo esto lo uní con silicón y luego pegué al bastón de caramelo.
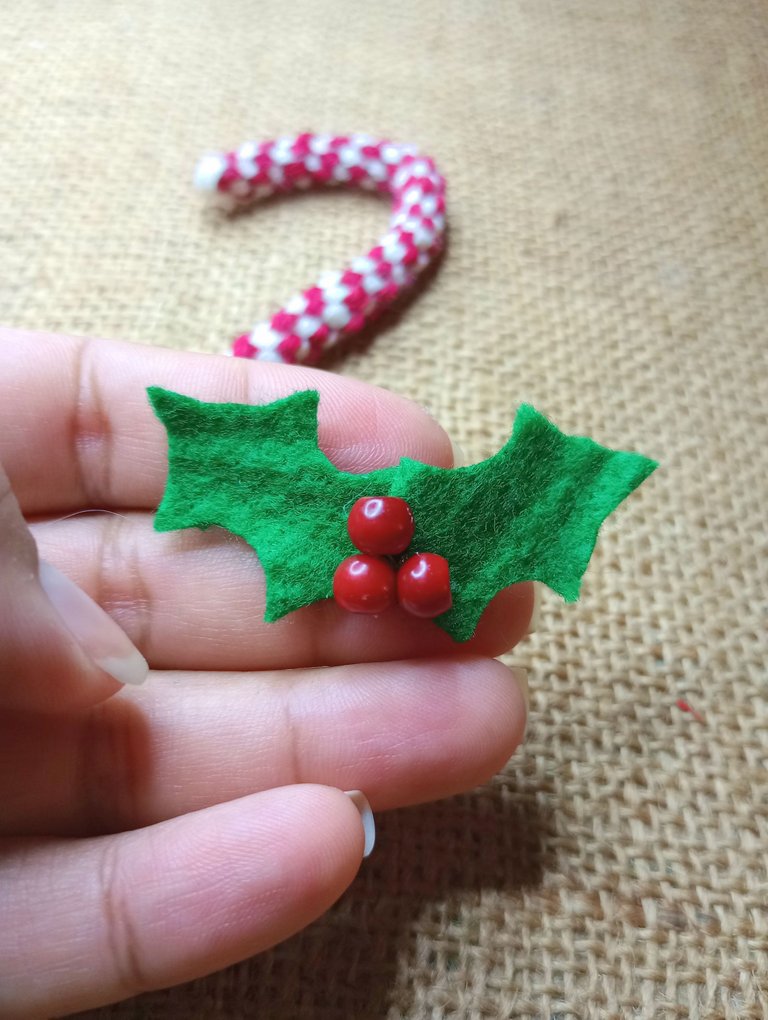
To decorate the cane I made some green felt sheets, and I also added some red beads to simulate the fruits.
All this I joined with silicone and then glued to the candy cane.
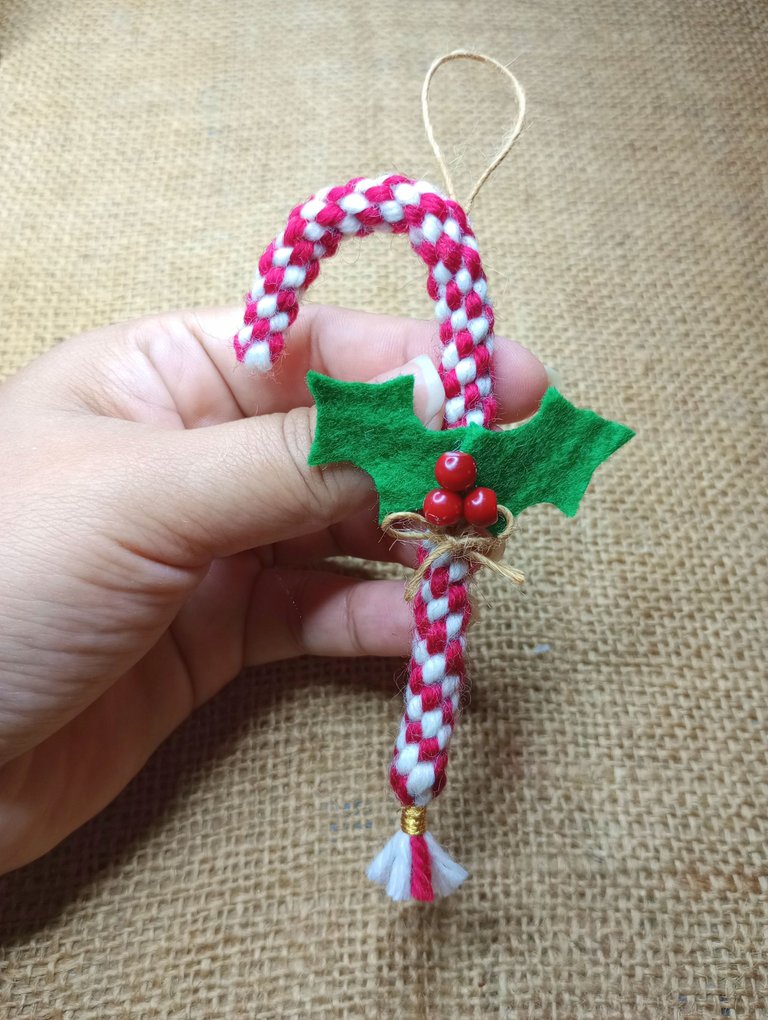
Para finalizar, hice un pequeño lazo con hilo de yute y también coloqué un trozo en la parte superior para tener donde colgarlo.
Ahora sí esta listo este lindo bastón de caramelo.
Como les comenté, pueden colocar estos lindos caramelos en cualquier rincón de tu hogar, y lo genial es que se hacen super rápido.
También puede ser un lindo detalle para regalar a tu seres queridos.
Espero les haya gustado la idea y hagan muchos para decorar su hogar. ♥
To finish, I made a small bow with jute thread and I also placed a piece at the top to have a place to hang it.
Now this cute candy cane is ready.
As I told you, you can place these cute candies in any corner of your home, and the great thing is that they are made super fast.
It can also be a nice detail to give to your loved ones.
I hope you liked the idea and make many to decorate your home. ♥

Espero haya sido de tu agrado y provecho.
Un gran abrazo a todos, y nos leemos en un próximo post
• Lakrearte en Hive •
Att: Estefania Garcia ♥

Imágenes y separadores de mi autoría
Portada editada en Canva
Fotografías tomadas con un Moto G31
Texto traducido en Google ImTranslate v.14.27
~~~ embed:1590476776328769536 twitter metadata:OTg3NDk2MDB8fGh0dHBzOi8vdHdpdHRlci5jb20vOTg3NDk2MDAvc3RhdHVzLzE1OTA0NzY3NzYzMjg3Njk1MzZ8 ~~~
The rewards earned on this comment will go directly to the people( @vaneenieves ) sharing the post on Twitter as long as they are registered with @poshtoken. Sign up at https://hiveposh.com.
Te quedo muy lindo amiga, se ve que es fácil de realizarlo pero uno nunca sabe jajajajaj uno siempre intenta seguir los tutoriales y casi siempre sale algo mal, pero de verdad que esas decoraciones son muy prácticas para la casa.
Me ha pasado creeme. Jajaja 😂 uno confiado pensando "ahhh eso lo hago yo rapidito" y termina botando uno todo eso mal echo bien frustrado. No siempre se logra pero lo importante es seguir intentando hasta quedar contento. La cosa es proponérselo. 😊
Muchas gracias por tu comentario 🤗✨❤️
Realmente mereces unas FELICITACIONES, así grandotas. Tienes un don y una paciencia que a mi me faltan nena!
Jajaja eso es algo que se trabaja. Yo tampoco tengo paciencia por eso me gustan los proyectos pequeños. Así se sale rápido y de pasa al siguiente. 😂😊 Muchas gracias!
Congratulations @estefania3! You have completed the following achievement on the Hive blockchain and have been rewarded with new badge(s):
Your next target is to reach 2500 replies.
You can view your badges on your board and compare yourself to others in the Ranking
If you no longer want to receive notifications, reply to this comment with the word
STOPCheck out the last post from @hivebuzz:
Support the HiveBuzz project. Vote for our proposal!
Que lindo amiga, bastante sencillo y muy decorativo, gracias por compartir.
Muchas gracias ☺️ me alegra que te haya gustado la propuesta ✨🤗
Quedó hermoso ese bastón, el tejido se ve muy elaborado. Este adorno me parece ideal para el arbolito. Gracias por compartir tu toque personal. Fue un gusto ver tu talento. Saludos.
Muchas gracias! Me alegra que te haya gustado la propuesta ✨🤗❤️
A simple vista se ve de otro material, jamás hubiera imaginado que lo habías hecho con hilos.. Genial!
Si? que loco. Bueno yo por más que lo vea sigo viendo los nudos jajaja debe ser porque trabajo con eso. Que fino que te gusto 😊 saludos amigo @fixie