
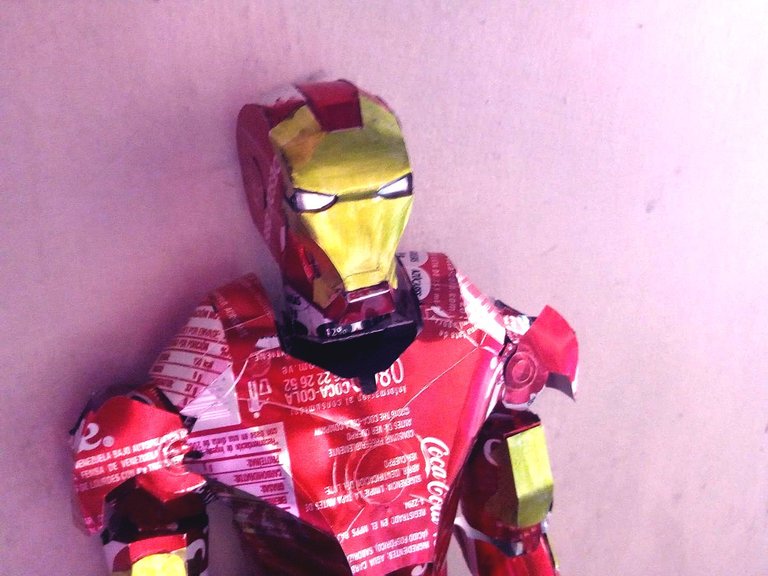
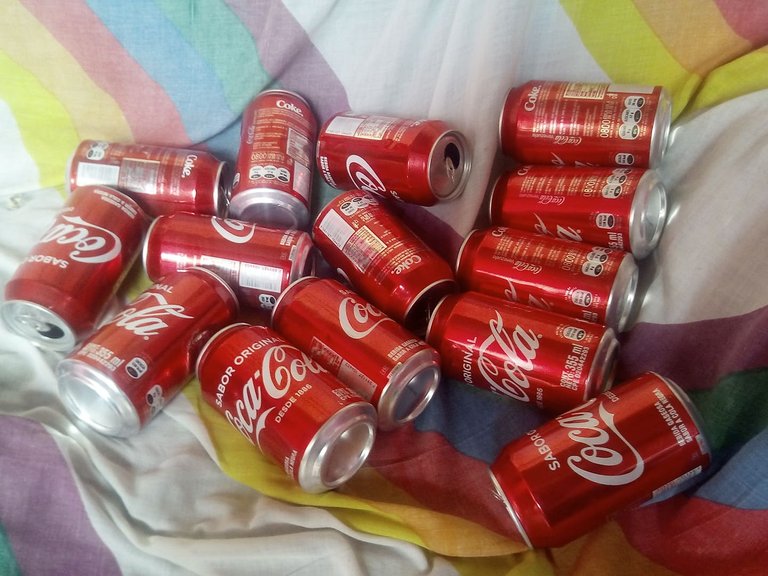
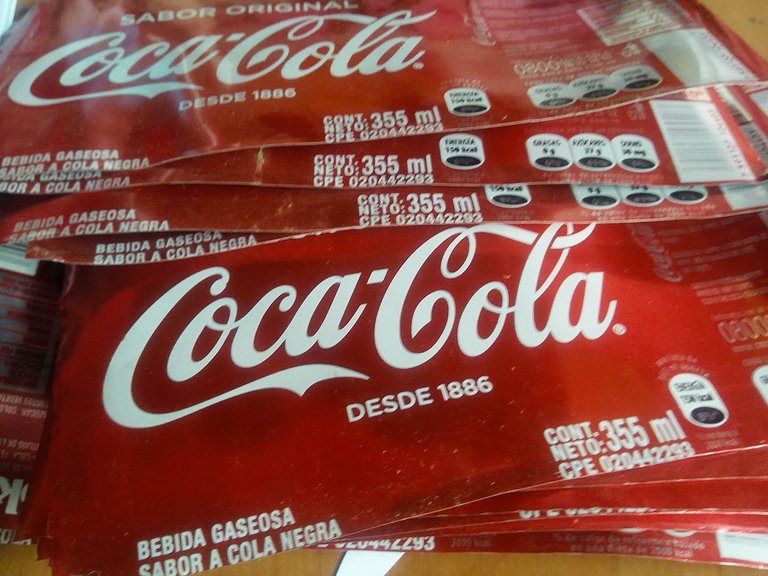
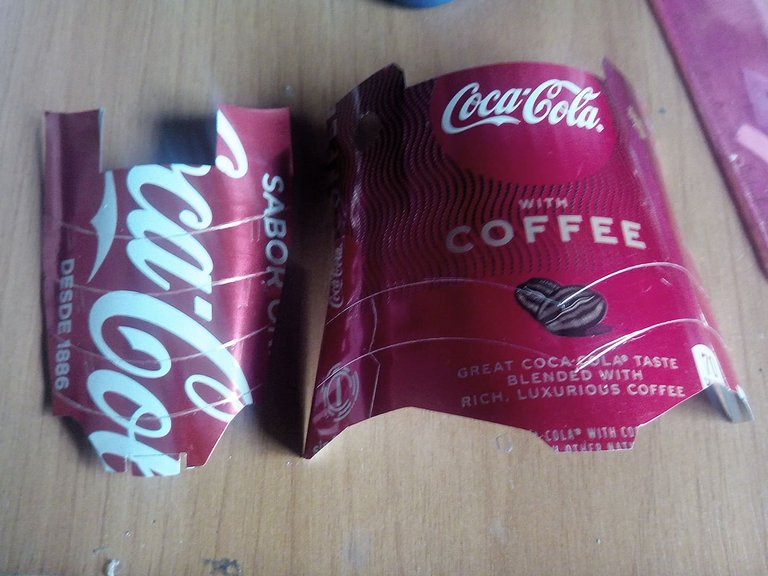
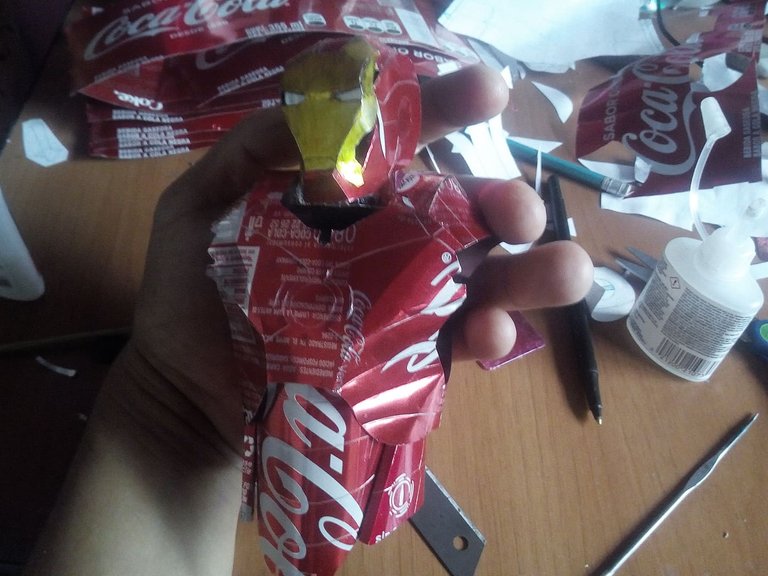
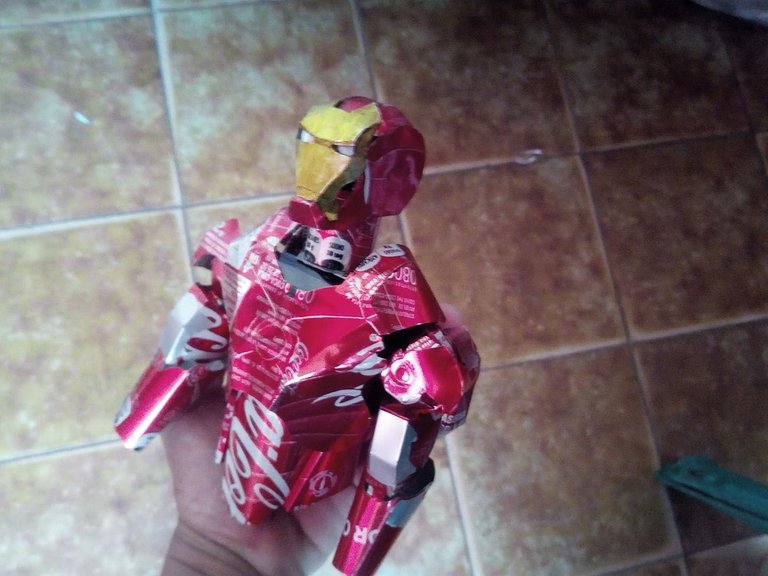
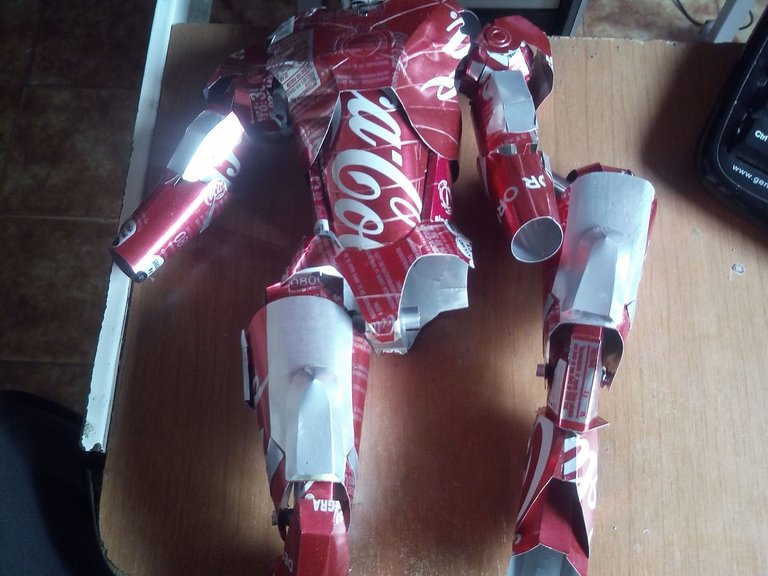
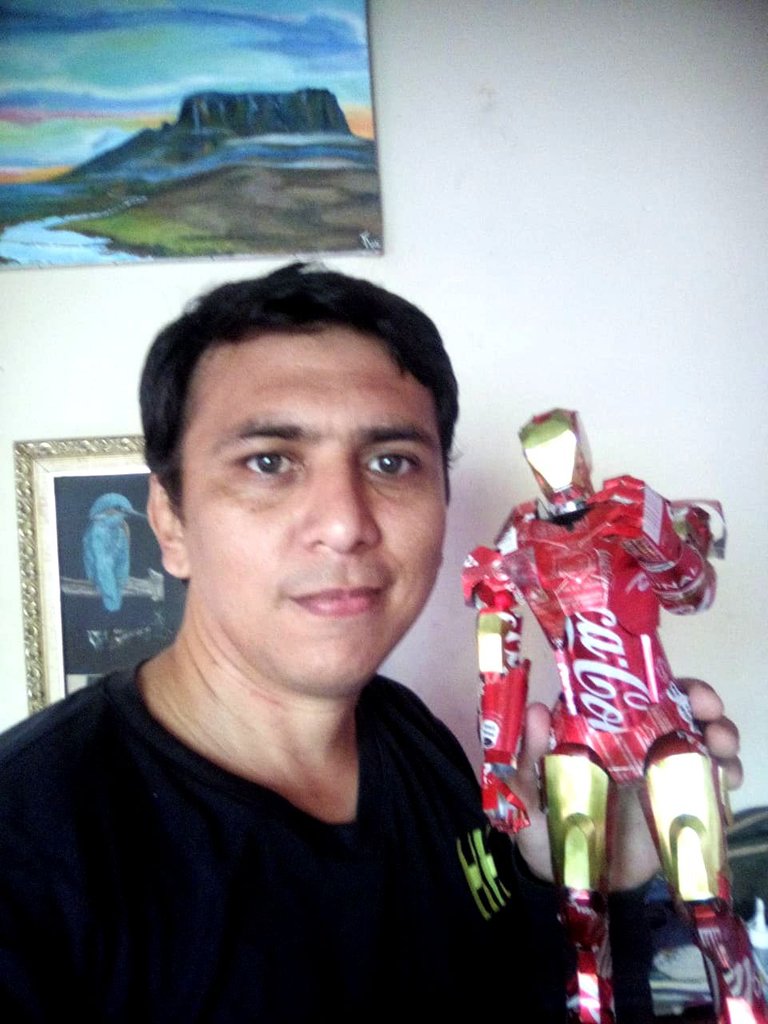
Hello friends, here I am again participating in the CREATIVE RECYCLING CHALLENGE # 14 made by our friend @jennyzer. This time I have made Tony Stark's armor, the MArk 3 that appears in Iron Man 1, the beginning of the MCU, the armor is made from coca cola cans. I used 16 cans in total and almost a week to do it. I had made the helmet a long time ago, and it was the beginning but I abandoned the project because it took me a long time to do it back then. Aluminum is one of the most widely used components such as copper and iron, aluminum cans, as they come in many colors, give us many opportunities to do things, like these coca cola used to make the armor, also to be malleable and become in a sheet it allows you to build with it everything you can think of. It is something that is always on the street because people pollute, I look for them and select them to put them to good use. Hope you like. I will try to summarize the work because it is quite long to explain.
Hola amigos, aqui estoy de nuevo participando en el CREATIVE RECYCLING CHALLENGE # 14 realizado por nuestra amiga @jennyzer. Esta vez he hecho la armadura de Tony Stark la MArk 3 que sale en Iron Man 1, el inició del MCU, la armadura esta hecha a base de latas de coca cola. Utilicé 16 latas en total y casi una semana realizarlo. El casco lo había hecho hace mucho tiempo, y era el principio pero abandoné el proyecto porque en aquel entonces me llevaba mucho tiempo hacerlo. El aluminio es uno d elos componentes mas utilizados como el cobre y el hierro, las latas de aluminio al venir de muchos colores nos brindan muchas oportunidades para hace cosas, como estas de coca cola sirvieron para hacer la armadura, tambien al ser maleable y convertirse en una lámina te permite construir con ella todo lo que se te ocurra. Es algo que siempre esta en la calle porque las personas contaminan, yo las busco y las selecciono para darles un buen uso. Espero que les guste. Trataré de resumir el trabajo porque es bastante largo de explicar.

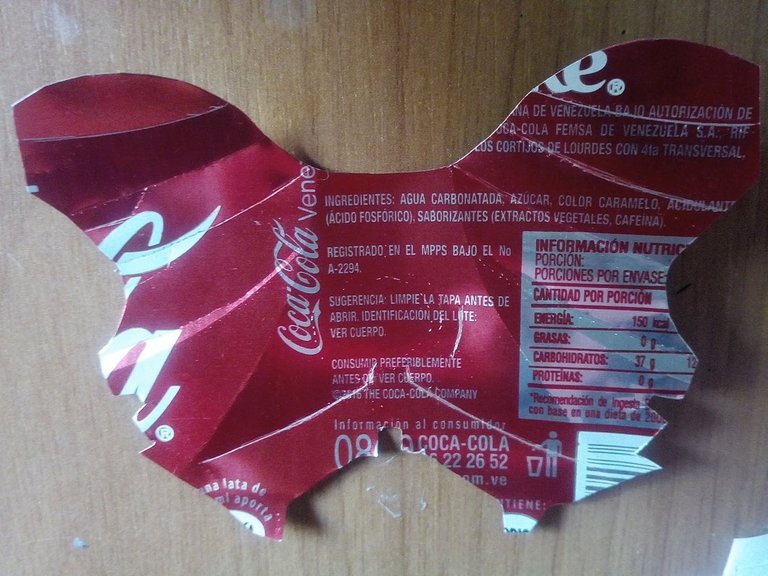
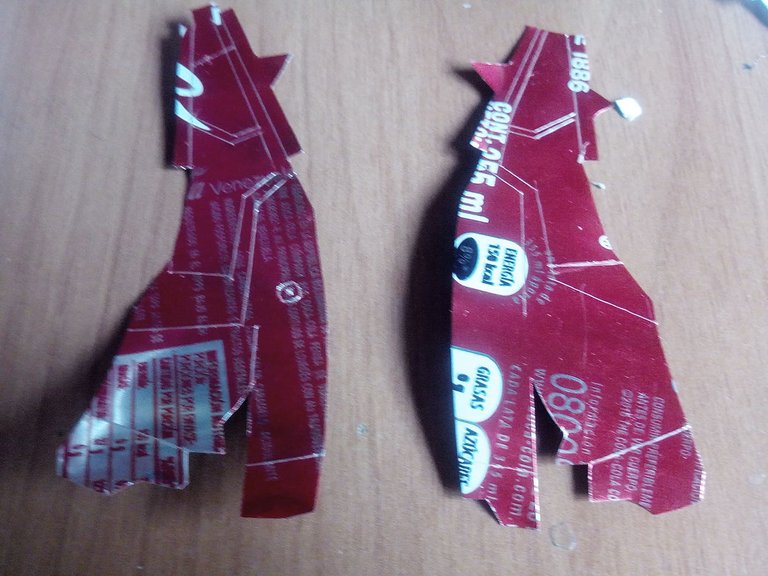
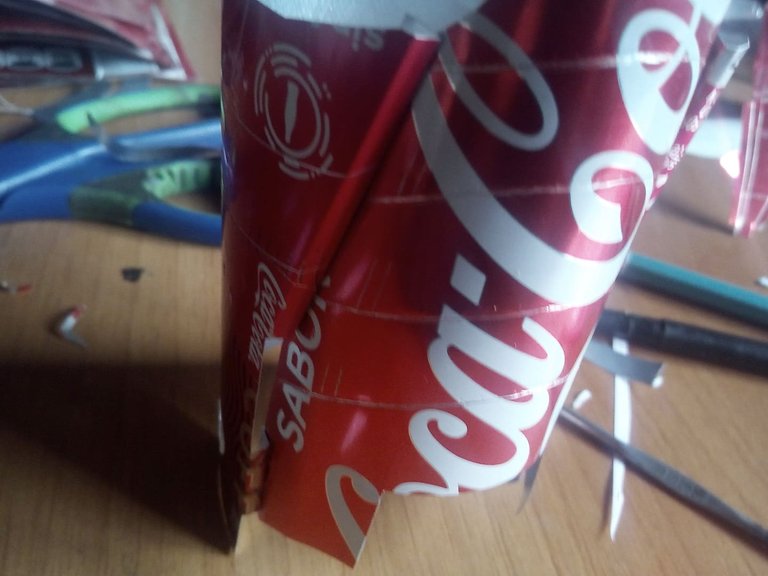
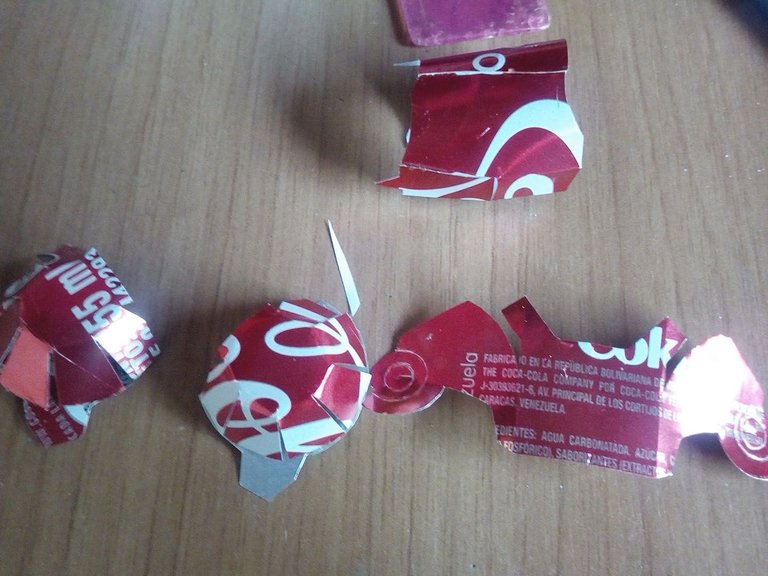
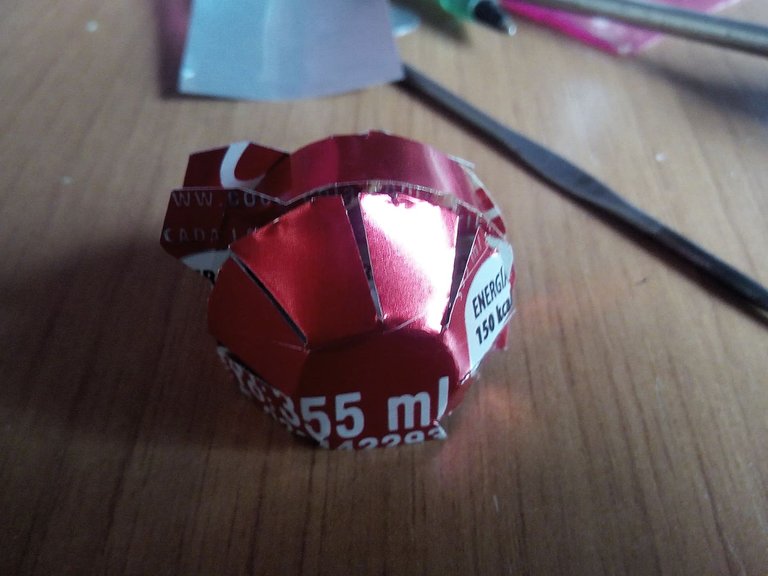
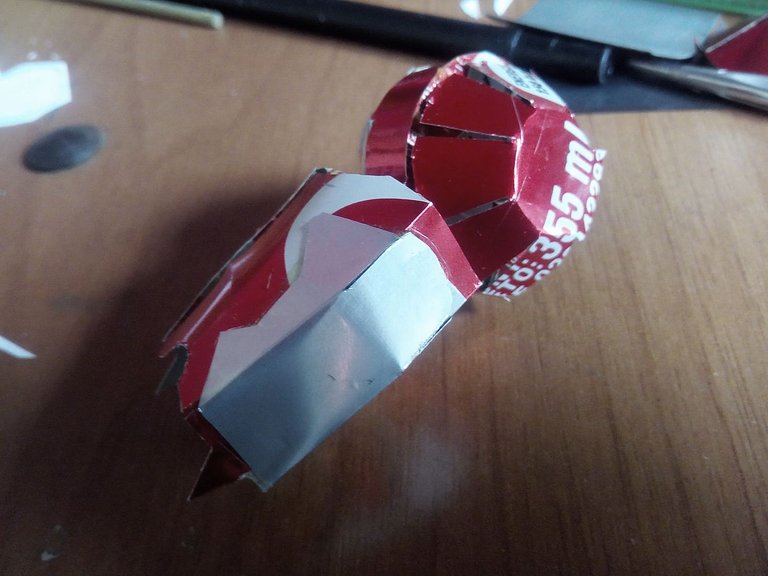
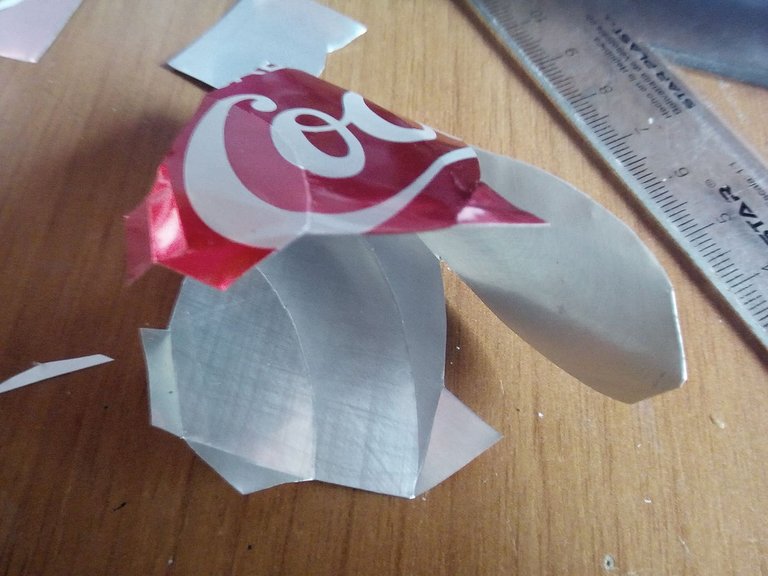
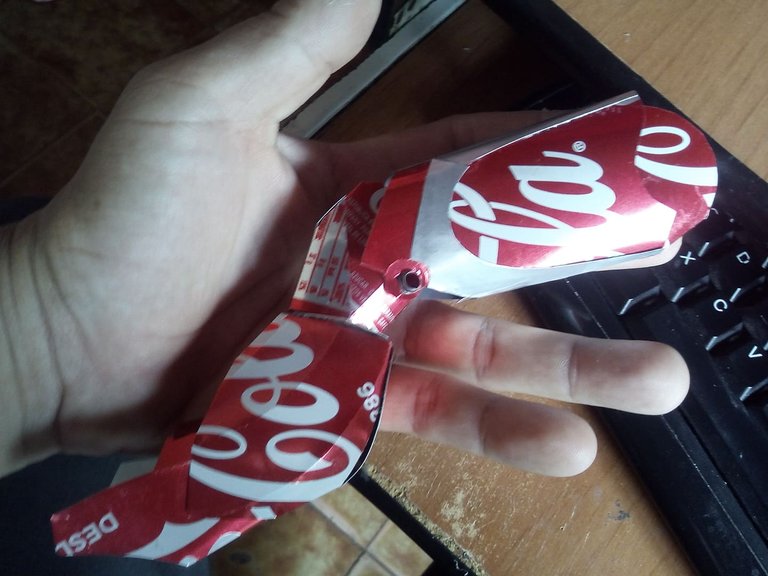
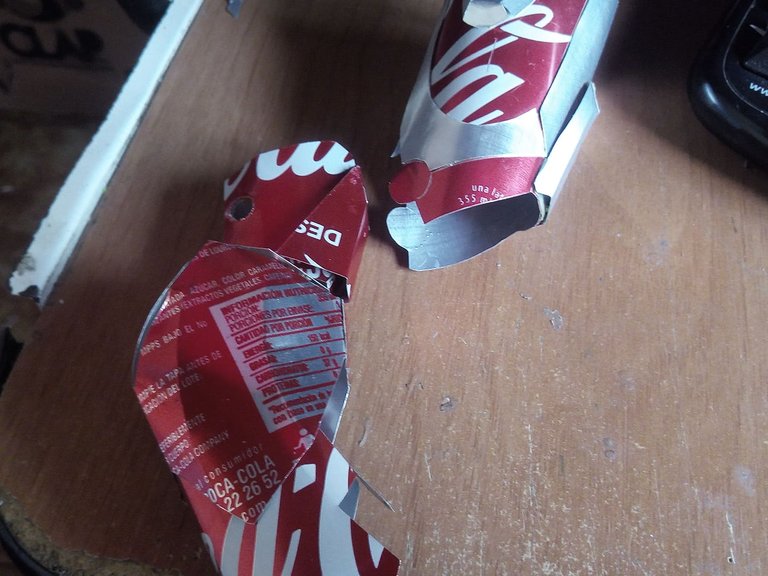
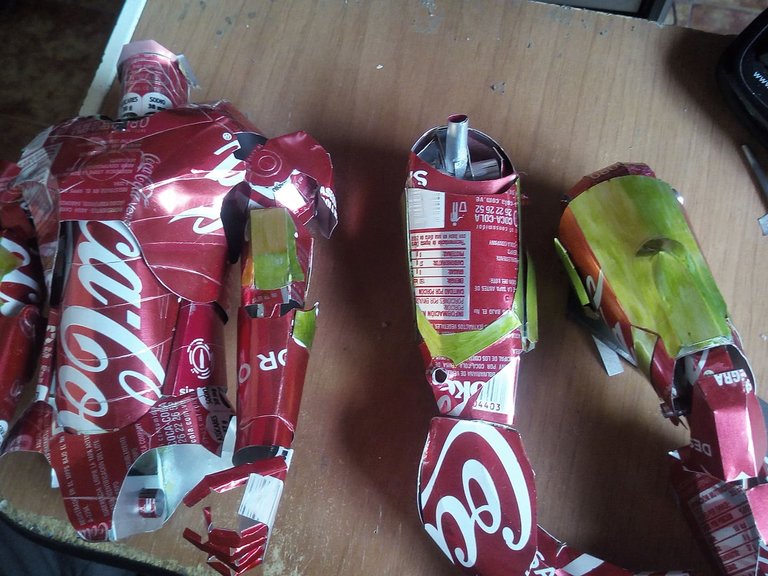
The first part I start to do is the chest and shoulders, in this work I was going on the fly so I did not make templates or anything. I only used the PEPAKURA design program and through it I got a well-drawn Iron Man armor. So I would just look at the parts and draw lines on the cans and then cut. Here I have taken out the chest and shoulders and one at the end of each one with super glue.
La primera parte que comienzo a hacer es el pecho y los hombros, en este trabajo iba sobre la marcha así que no hice plantillas ni nada. Solo utilicé el programa de diseño PEPAKURA y a través de el conseguí una armadura de Iron Man bien dibujada. Así que solo miraba las partes y las dibujaba sobre las latas y después cortaba. Aquí he sacado el pecho y los hombros y los uno por el extremo de cada uno con super pegamento.
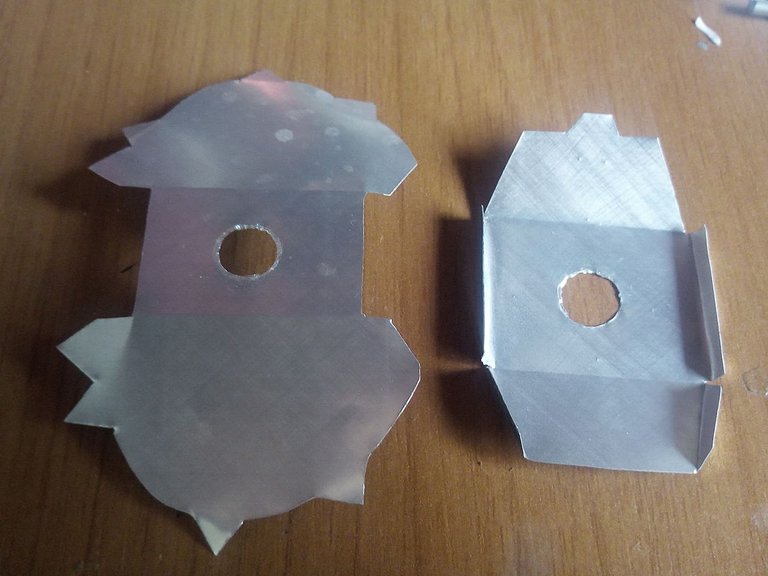

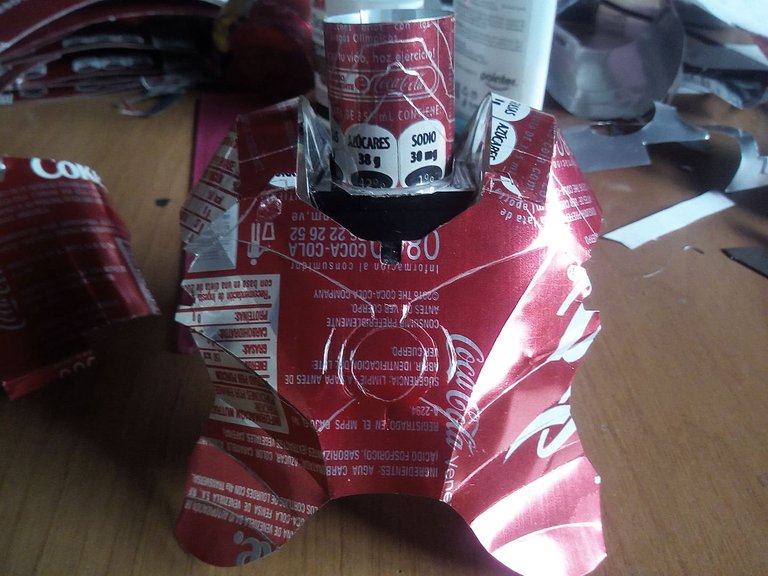
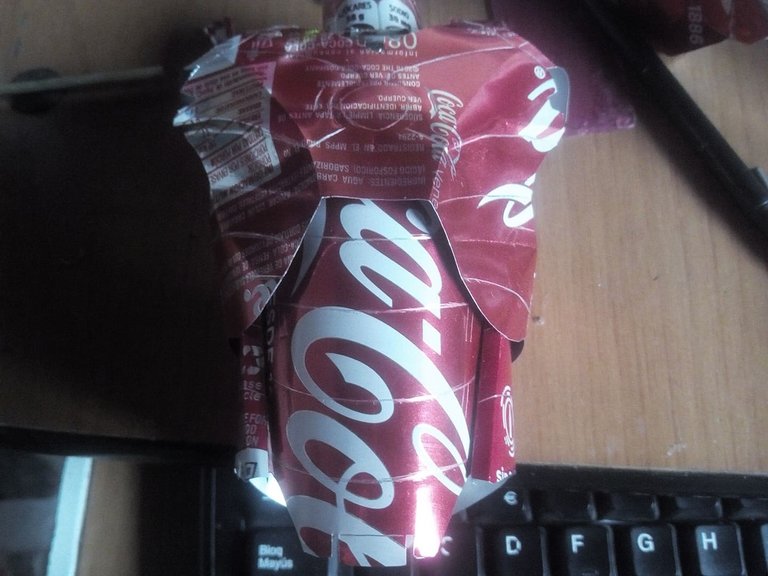
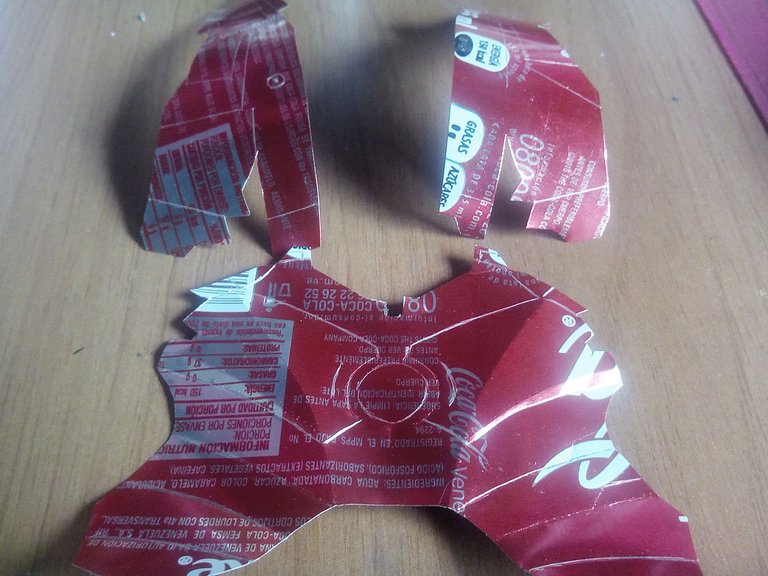
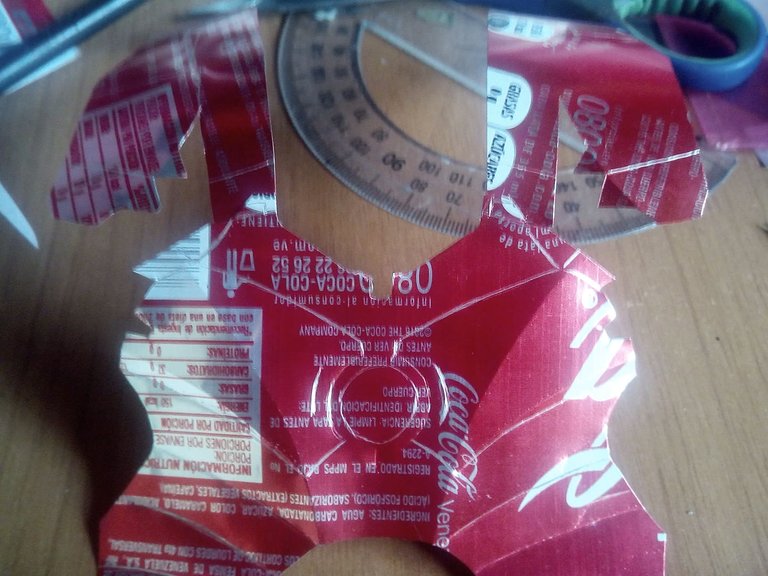
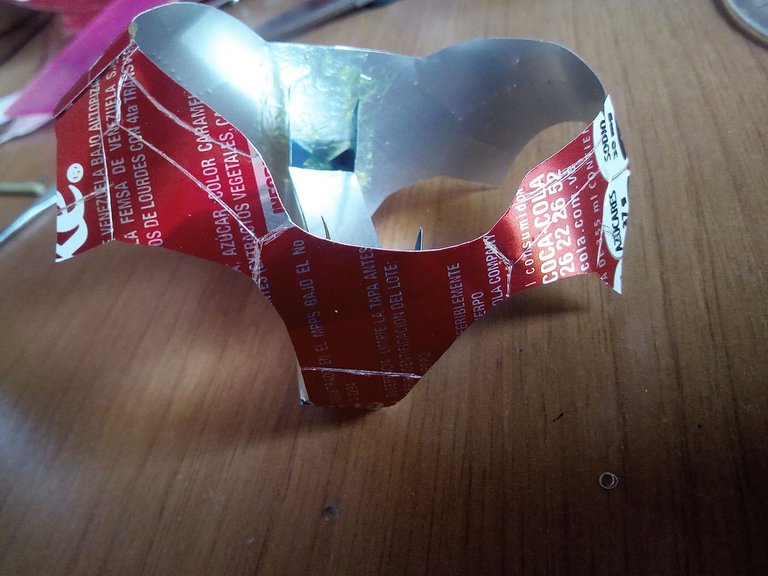
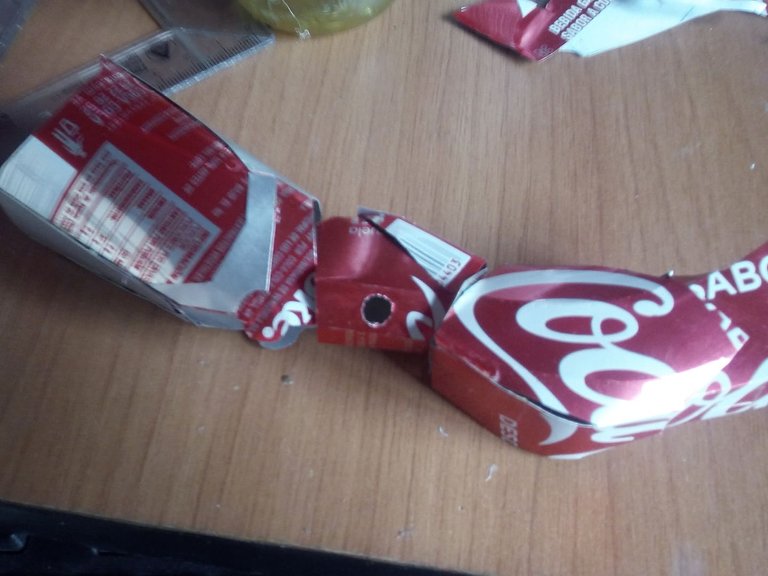
Then we finish the part of the body that covers the chest, the back and part of the waist. To first we do the neck part, here I had to improvise because in the Pepakura model it was different, so I did something simpler and it worked for me. After I made the parts that cover the stomach, the back and the waist, I joined them and in turn I joined them with the parts of the shoulder and chest. Here you can see how it turned out. I just need to do arms and legs.
Luego finalizamos la parte del cuerpo que cubre los hombres el pecho la espalda y parte de la cintura. Para primero hacemos la parte del cuello, aquí me toco improvisar porque en el modelo de Pepakura era diferente, así que hice algo más sencillo y me resulto. Después hice las partes que cubre el estomago la espalda y la cintura, las un{i y a su vez las uní con las partes del hombro y el pecho. Aquí pueden ver como quedo. Solo me falta hacer brazos y piernas.
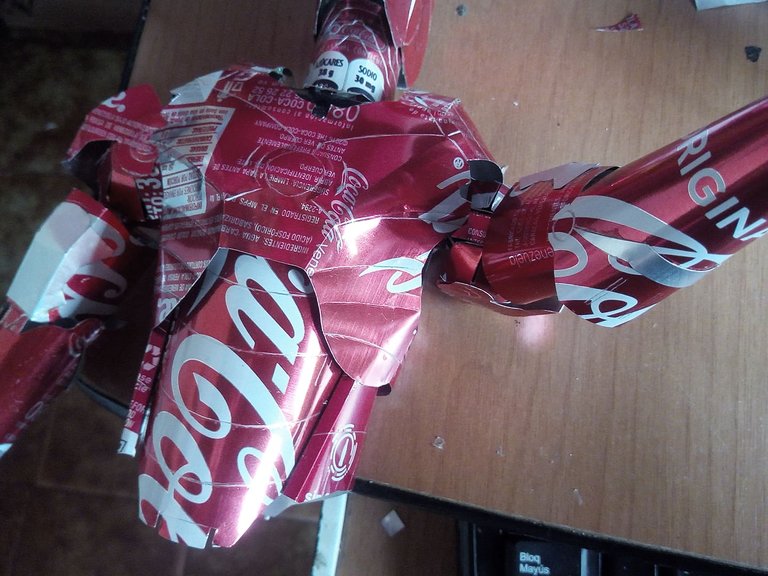
The order to make the arms is starting with the shoulders, here I do the part that connects the arm with the torso, and I place some openings that allow me to make the arms move, then with the rest of the arm, to finish I do the other left arm and place them in the openings I made. There I can freely move the arms of Iron man.
El orden para hacer los brazos es comenzando por los hombros, aqui hago la parte que conecta el brazo con el torso, y coloco unas aberturas que me permitan hacer que los brazos se muevan, luego con el resto del brazo, para finalizar hago el otro brazo izquierdo y los coloco en las aberturas que hice. Ahí puedo mover libremente los brazos de Iron man.


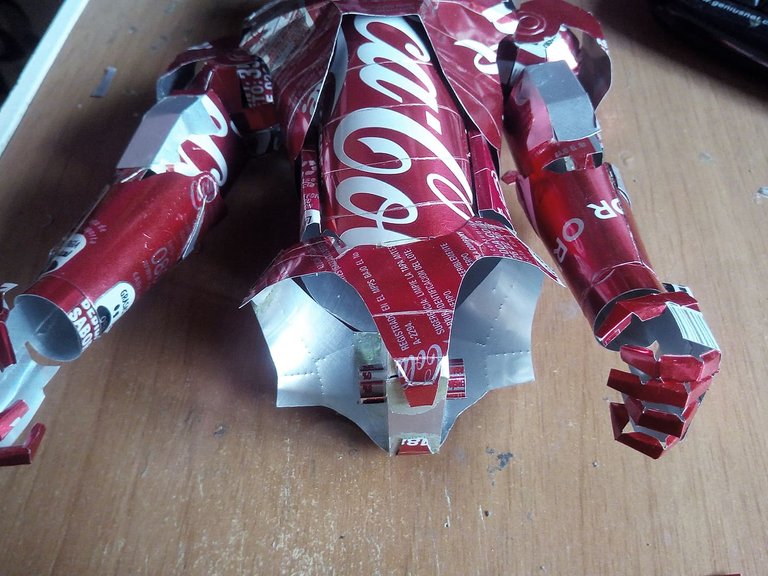
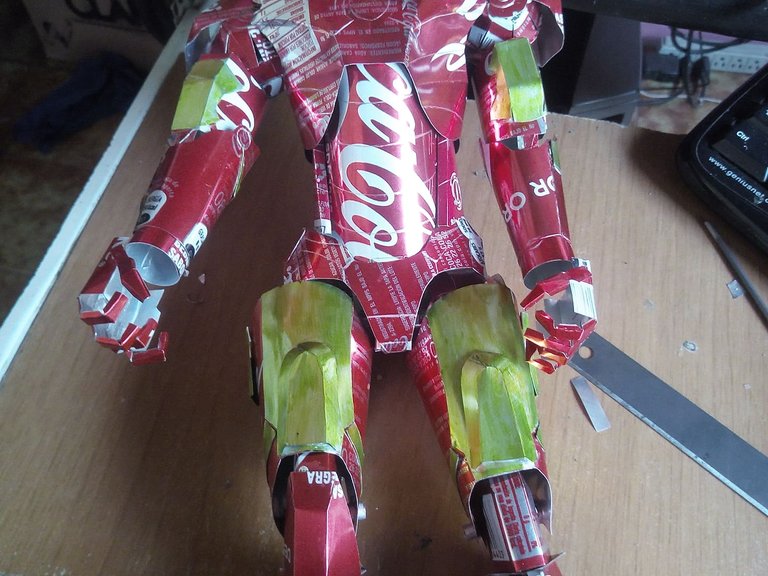
To make the legs, first we do the part that completely covers the waist and that serves as a bridge between the rest of the body and the legs. It is important to make a hole in the middle so that the legs can also have movement. We make the upper part of the leg first. Here we can look at the images of Iron's armor to see how they go. Then the lower part and we join them both through a hole and through them we pass a small aluminum tube that serves as a gear and allows the leg to have movement.
Para hacer las piernas primero hacemos la parte que cubre completamente la cintura y que sirve de puente entre el resto del cuerpo y las piernas. Es importante hacer un hoyo en medio para que las piernas también puedan tener movimiento. Hacemos primero la parte superior de la pierna. Aquí nos podemos fijar en las imágenes de la armadura de Iron Man para saber como van. Luego la parte inferior y las unimos a ambas por un agujero y a través de ellas pasamos un pequeño tubo de aluminio que sirva como engranaje y permita que la pierna tenga movimiento.
Here I place the legs and arms each in position and do a little test to see how they move. I stretch my arms and they move great, then each leg. it opens to the sides and also flexes the knees.
Aquí coloco las piernas y los brazos cada uno en su posición y hago una pequeña prueba para ver como se mueven. Estiro los brazos y se mueven genial, luego cada pierna. se abre para los lados y tambien flexiona las rodillas.
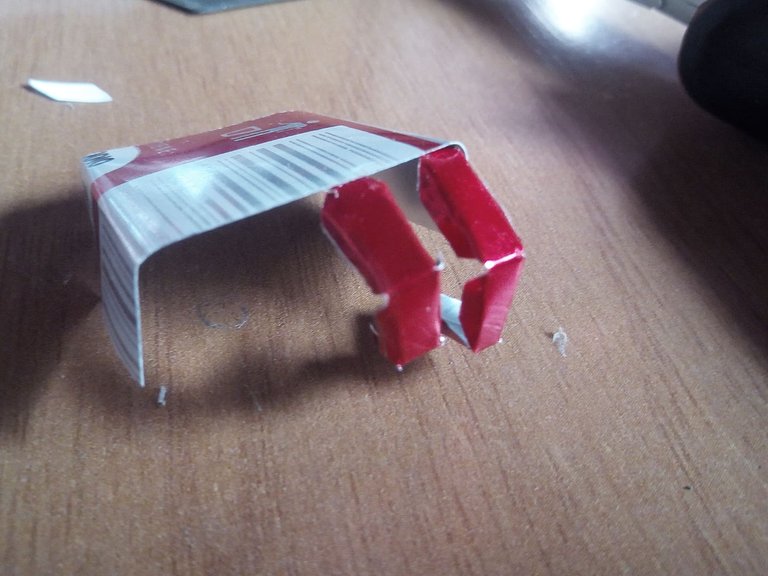
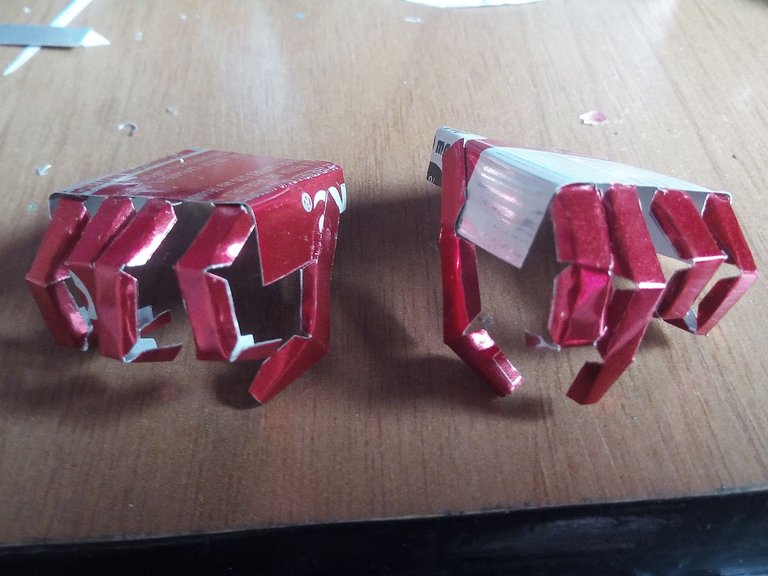

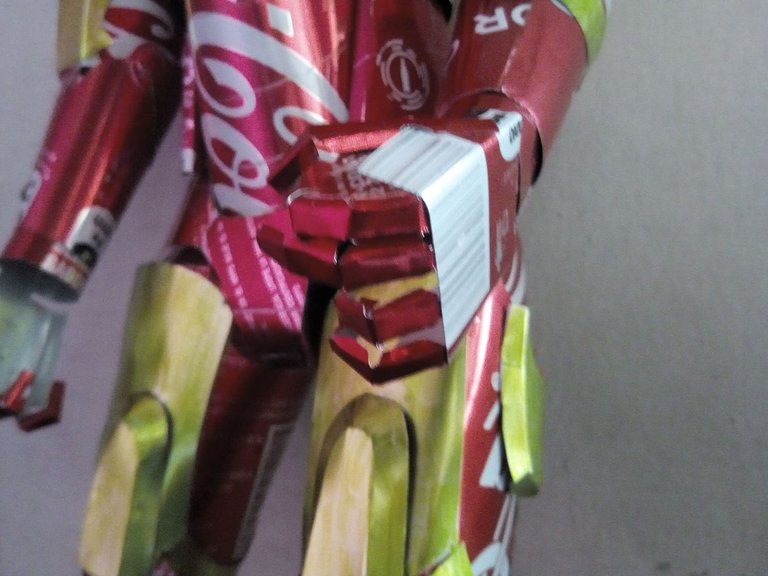
We make the hands by cutting out a small square that would be the palms, then each finger of the hand we would do it with a small strip of tin and on each side we would cut a little with scissors, then we fold to obtain the fingers of the hands and glue each one in The squares that we cut before, we finish by adding them to the arms, and this is how each hand looks.
Las manos las hacemos recortando un cuadro pequeño que serían las palmas, luego cada dedo de la mano lo hariamos con una pequeña tira de lata y por cada lado cortariamos un poco con tijera, luego doblamos para obtener los dedos las manos y pegamos cada uno en los cuadros que cortamos antes, finalizamos añadiendolos a los brazos, y así es como se ve cada mano.
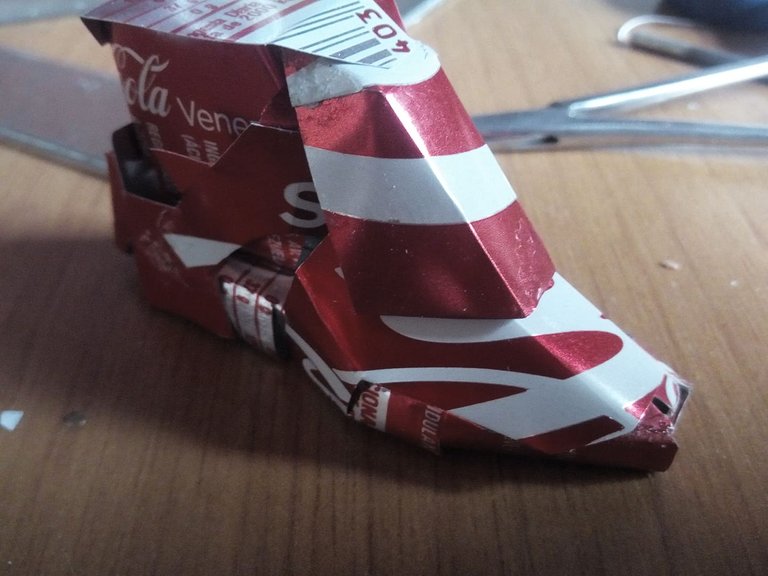
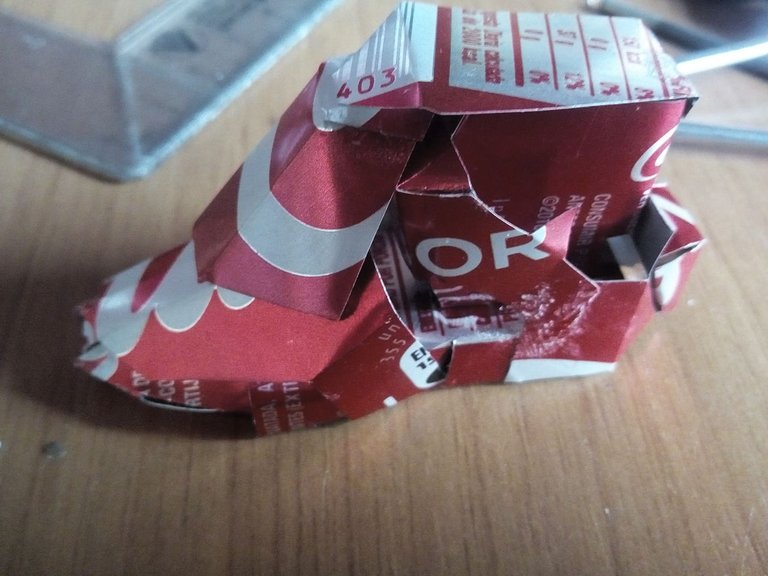
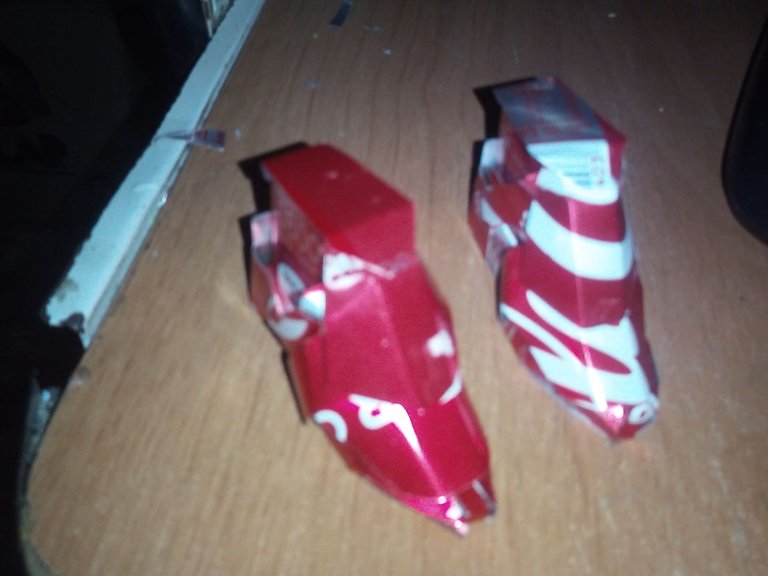
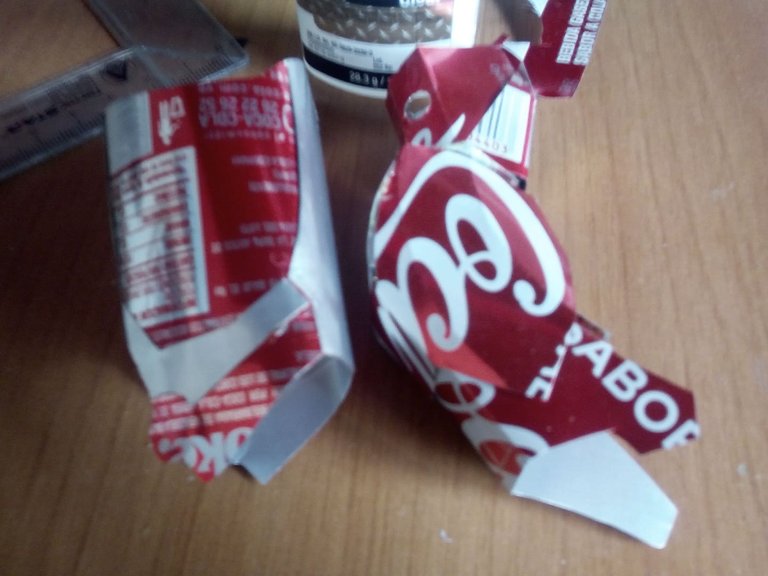
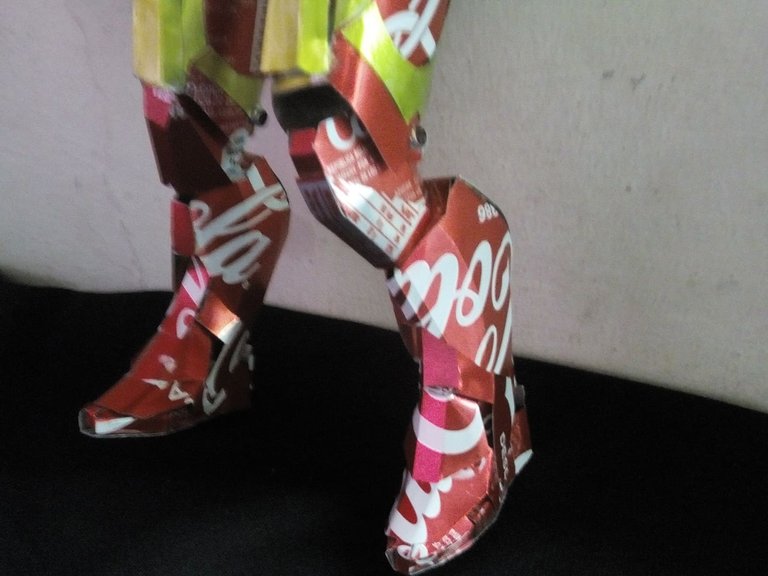
The last part of completing the armor is making the parts that protect the feet, I was based on the original design, so I watched the video several times when Tony Stark is building his armor to see the best way he could do it, so take Note on top of the can with pencil and ruler and I was taking out each part. I did both feet really fast after finding the perfect model!
La ultima parte para completar la armadura es hacer las partes que protege los pies, me basé en el diseño original, así que vi varias veces el video cuando Tony Stark está construyendo su armadura para ver la mejor forma en que podría hacerla, así que tome nota encima de la lata con lapiz y regla y fui sacando cada parte. Hice ambos pies muy rápido luego de encontrar el modelo perfecto!
<center<Assembly
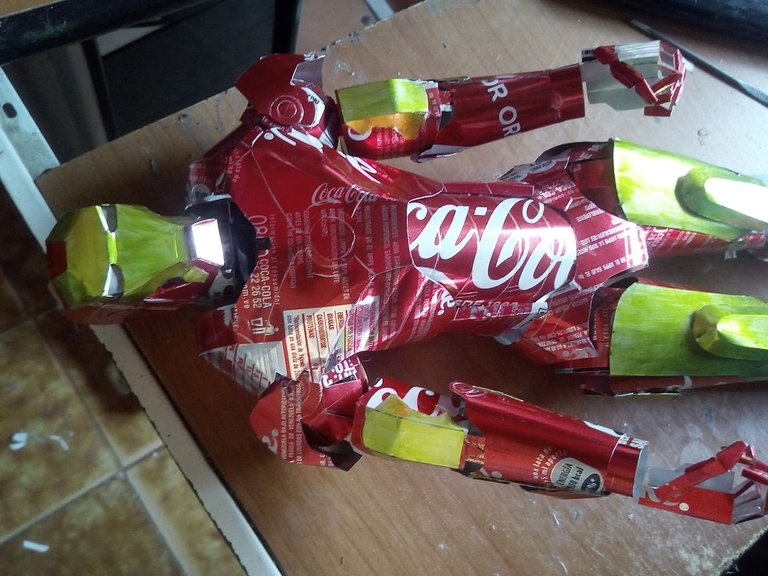
To finish with a gold-colored marker, which was very very difficult for me to get, we painted the parts of the armor in gold to give it more realism, I would have liked to cover the coca cola letters but it was impossible for me so I left them the same. Although with the letters the work is better and that I used the cans to make the armor. Then we assemble the armor by placing each of its extremities in place.
Para finalizar con un marcador de color dorado, que me fue muy muy dificil conseguir pintamos las partes que la armadura tiene de color dorado para darle mas realismo, me hubiera gustado tapar las letras de coca cola pero me fue imposible así que las deje igual. Aunque con las letras se ve mejor el trabajo y de que usé las latas para hacer la armadura. Lueo ensamblamos la armadura colocando cada una de sus extremidades en su sitio.
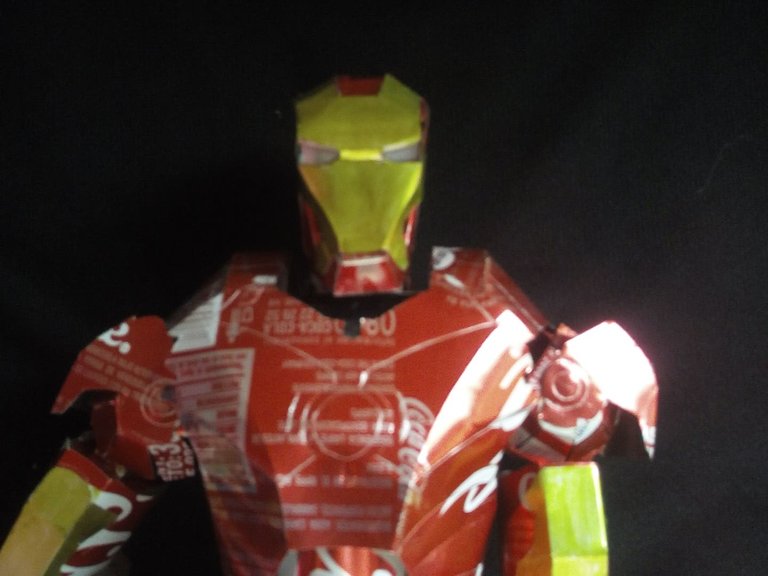
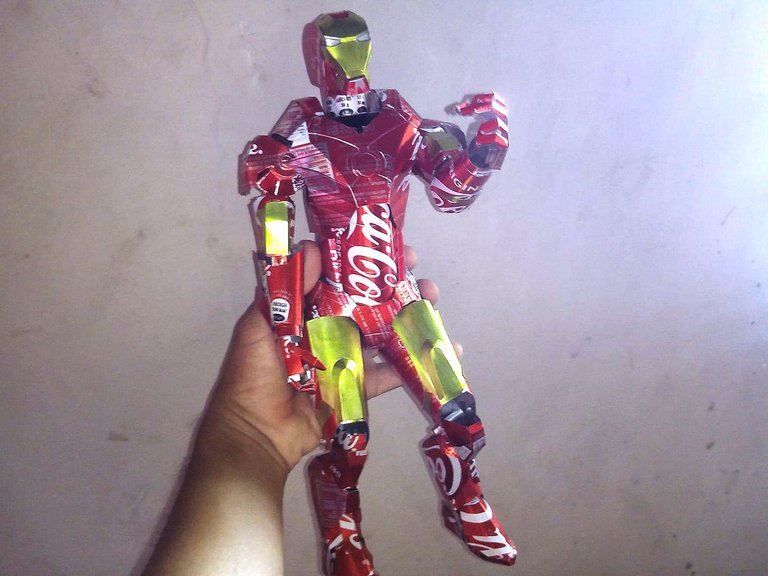
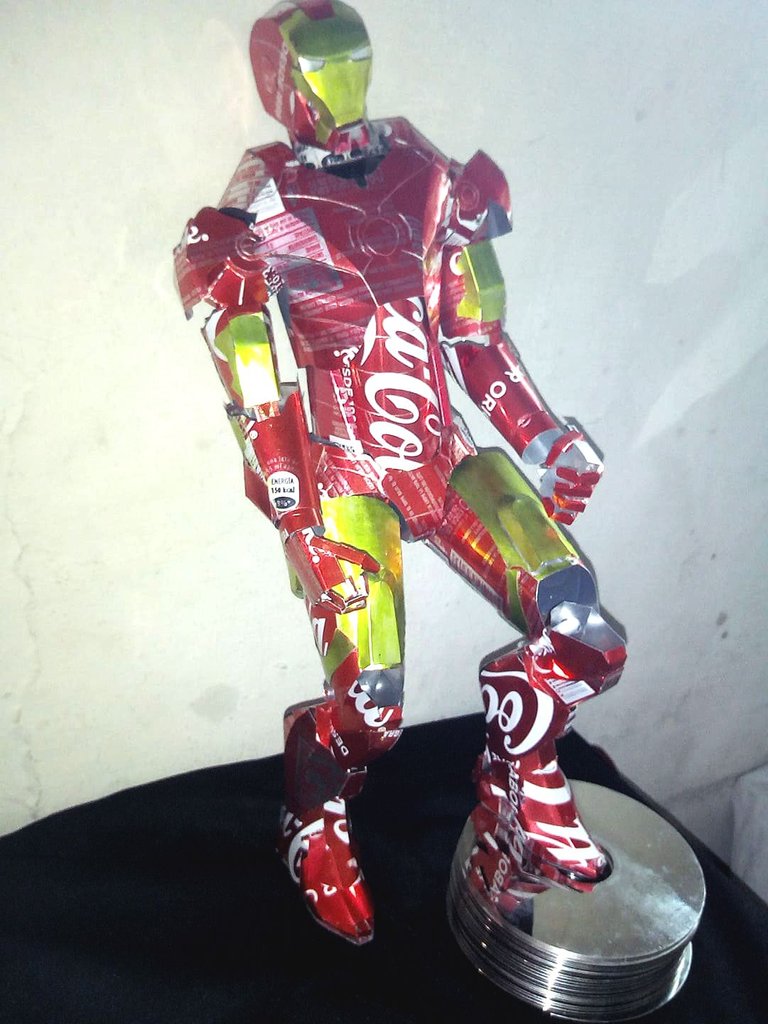
This is how the final design of Iron Man's armor has been, the Mark 3. It took almost a week to make it even though the helmet had already been made for a long time, it took several days to complete. I had some accidents like cut hands, but nothing serious. I had a lot of fun and while making this armor I was envisioning other things to do in the future. I just hope I can continue collecting cans of soda, it is difficult to find but some people always help me, they remember that I work with them and they keep them for me. I take this opportunity to tell you about Hive and recycling, and how it is a door of opportunity to make recycling something artistic and unique. Aluminum is not like plastic, which is more difficult to destroy, because being a synthetic product, nature does not have the mechanism to eliminate it, but not aluminum and metals that are part of the earth itself through the process of oxidation. I like to share my work here and always support this great initiative that allows us to see great works by other great creators that we are fortunate to see, I congratulate you all and keep going. I say goodbye to you soon!
Así ha quedado el diseño final de la armadura de Iron Man, la Mark 3. Tarde casi una semana en hacerla aún cuando el casco ya lo tenía hecho desde hace tiempo, se llevó bastantes días completarlo. Tuve algunos accidentes como cortes de manos, pero nada grave. Me divertí mucho y mientras hacía esta armadura imaginaba otras cosas por hacer en el futuro. Solo espero poder seguir coleccionando latas de soda, es difícil encontrar pero algunas personas siempre me ayudan, se acuerdan de que yo trabajo con ellas y me las guardan. Aprovecho para comentarles sobre Hive y el reciclaje, y como es una puerta de oportunidad para hacer del reciclaje algo artístico y único. El aluminio no es como el plástico, que es más difícil de destruir, pues al ser un producto sintético la naturaleza no cuenta con el mecanismo para eliminarlo, no así el aluminio y los metales que forman parte de la misma tierra a través del proceso de oxidación. Me gusta compartir mi trabajo aquí y apoyar siempre esta gran iniciativa que nos permite ver grandes obras de otros grandes creadores que tenemos la fortuna de ver, los felicito a todos y sigan adelante. Me despido hasta pronto!.
Gran trabajo bro como siempre, el reciclaje se te da tremendamente bien y seguro se lleva bastante tiempo para conseguir este tipo de obras, me ha animado a intentarlo en el futuro, sigue así bro, saludos.
Congratulations, your post has been upvoted by @dsc-r2cornell, which is the curating account for @R2cornell's Discord Community.
Enhorabuena, su "post" ha sido "up-voted" por @dsc-r2cornell, que es la "cuenta curating" de la Comunidad de la Discordia de @R2cornell.
The rewards earned on this comment will go directly to the person sharing the post on Twitter as long as they are registered with @poshtoken. Sign up at https://hiveposh.com.
Un trabajo excepcional, sin duda uno de los mejores que te he visto hacer. Me quito el sombrero, mis felicitaciones.
Gracias hermano, y fue un trabajo arduo en el que cometí muchos errores, así que tenía que hacer pausas mientras salia a la calle a buscar latas de refresco. Pero valio la pena, me contenta que te haya gustado!
Sin palabras..excelente trabajo realizaste aqui.bendiciones para ti
Muchas gracias por tomarte el tiempo de leer y observar el proceso. Me alegra que te haya gustado.
Hola.! te ha quedado hermoso.
Muchas gracias :)
¡wuao @fixie! no dejas de sorprenderme, esta creación esta brutal, genial... la adoré.
Si a piezas como estas le aplicarás espray de colores metalizados y neón sería un producto con calidad de exportación. Debemos coordinar en serio para que me hagas uno, escríbeme por discord me gustaría una pieza para mi esposo.
Creo mereces el premio, no solo porque son latas recicladas sino que pones tanto detalle y amor en la creación. Mucha suerte amigo.
Saludos, bendiciones y éxitos.
Si justamente estuve pensando lo mismo, aplicarle pintura metalizada para lograr un mejor acabado. La próxima oportunidad haré a Punisher War Machine que es otra armadura hermosa y de diseño brutal. Por supuesto, estoy a la orden para hacer lo que desees. ME alegra mucho que te hayas gustado..!
This is incredible 🤯
Thank you bro! :)
Que gran trabajo!
@fixie, te felicito es una pieza muy bien elaborada!
Me imagino que llevó tiempo en elaborar y armar tantas piezas para tener tan buen resultado.
Sencillamente espectacular!
así es, tarde casi toda una semana. Fue un proyecto que retomé del año pasado. HAstra que decidi hacerlo. contabilicé casi 200 piezas. ME alegra que te haya gustado. Saludos.
Me lo imaginé, es una figura que tiene muchas piezas y cada una tiene su grado de complejidad......pero valió la pena. Felicitaciones!
Saludos.
Muy buen trabajo bro, todos los detalles del traje del personaje quedaron geniales, y el diseño final ni se diga, de aplaudir 👏👏, saludos hermano!
Gracias hermano.. Estoy buscando mas material para ver si me animo hacer a war machine y el iron patriot. Gracias por pasar.!
Dude! Your work is always so amazing!! You have real skill.
Cuanto derroche de talento, es una fortuna que lo uses para crear arte reciclado, has puesto mucho empeño en conseguir una obra única, en cada nueva edición te superas como siempre sorprendiendo a aquellos que seguimos tu trabajo, gracias por formar parte de creative recycling challenge.
el sentimiento más reconfortante es la diversión de la concentración.. entregar cada minuto a cada pieza es muy satisfactorio.. Me diverti muchisimo!! GRacias por invitarme.
Woow te quedo espectacular me gusto mucho tu iron man con latas de cocacola sin duda una gran manera para reciclar latas 😎
Saludos 😎
¡Que hemoso trabajo! Te felicito, un trabajo tan delicado lleva bastante tiempo y concentración. Te ganaste una seguidora, abrazo virtual 🙌🏻😊