Bienvenidos Queridos Amantes de la Artes Manuales
Welcome Dear Manual Arts Lovers
Mis queridos lectores, les deseo una maravillosa semana repleta de bendiciones, que bueno es estar de nuevo con ustedes, como saben, ya estamos a pocas semanas de la mejor época del año, la navidad y bueno llego el momento de iniciar con los preparativos. Por ello aproveche una petición le hicieron en el colegio a mi pequeña hija para compartir también con ustedes este divertido y sencillo proyecto.
My dear readers, I wish you a wonderful week full of blessings, it is so good to be with you again, as you know, we are just a few weeks away from the best time of the year, Christmas and it is time to start with the preparations. So I took advantage of a request made at school to my little daughter to also share with you this fun and simple project.

Les cuento, resulta que todos los años en el patio central del colegio de mis niñas construyen un gran árbol de navidad y todos colaboramos en su elaboración, siempre es diseño distinto y nada tradicional. Y su esencia se centra en el reciclaje y reutilización de recursos, hace dos años se elaboró un muy original árbol con botellas de refresco de color verde y el año pasado, ya estábamos en cuarentena y eso fue su inspiración nos pidieron que elaboráramos con cualquier material de provecho tapabocas de color verde, salió un árbol navideño muy curioso y eclético.
I tell you, it turns out that every year in the central courtyard of my girls' school they build a big Christmas tree and we all collaborate in its elaboration, it is always a different design and not traditional at all. And its essence is focused on recycling and reuse of resources, two years ago a very original tree was made with green soda bottles and last year, we were already in quarantine and that was their inspiration, they asked us to elaborate a very curious and eclectic Christmas tree with any useful material.
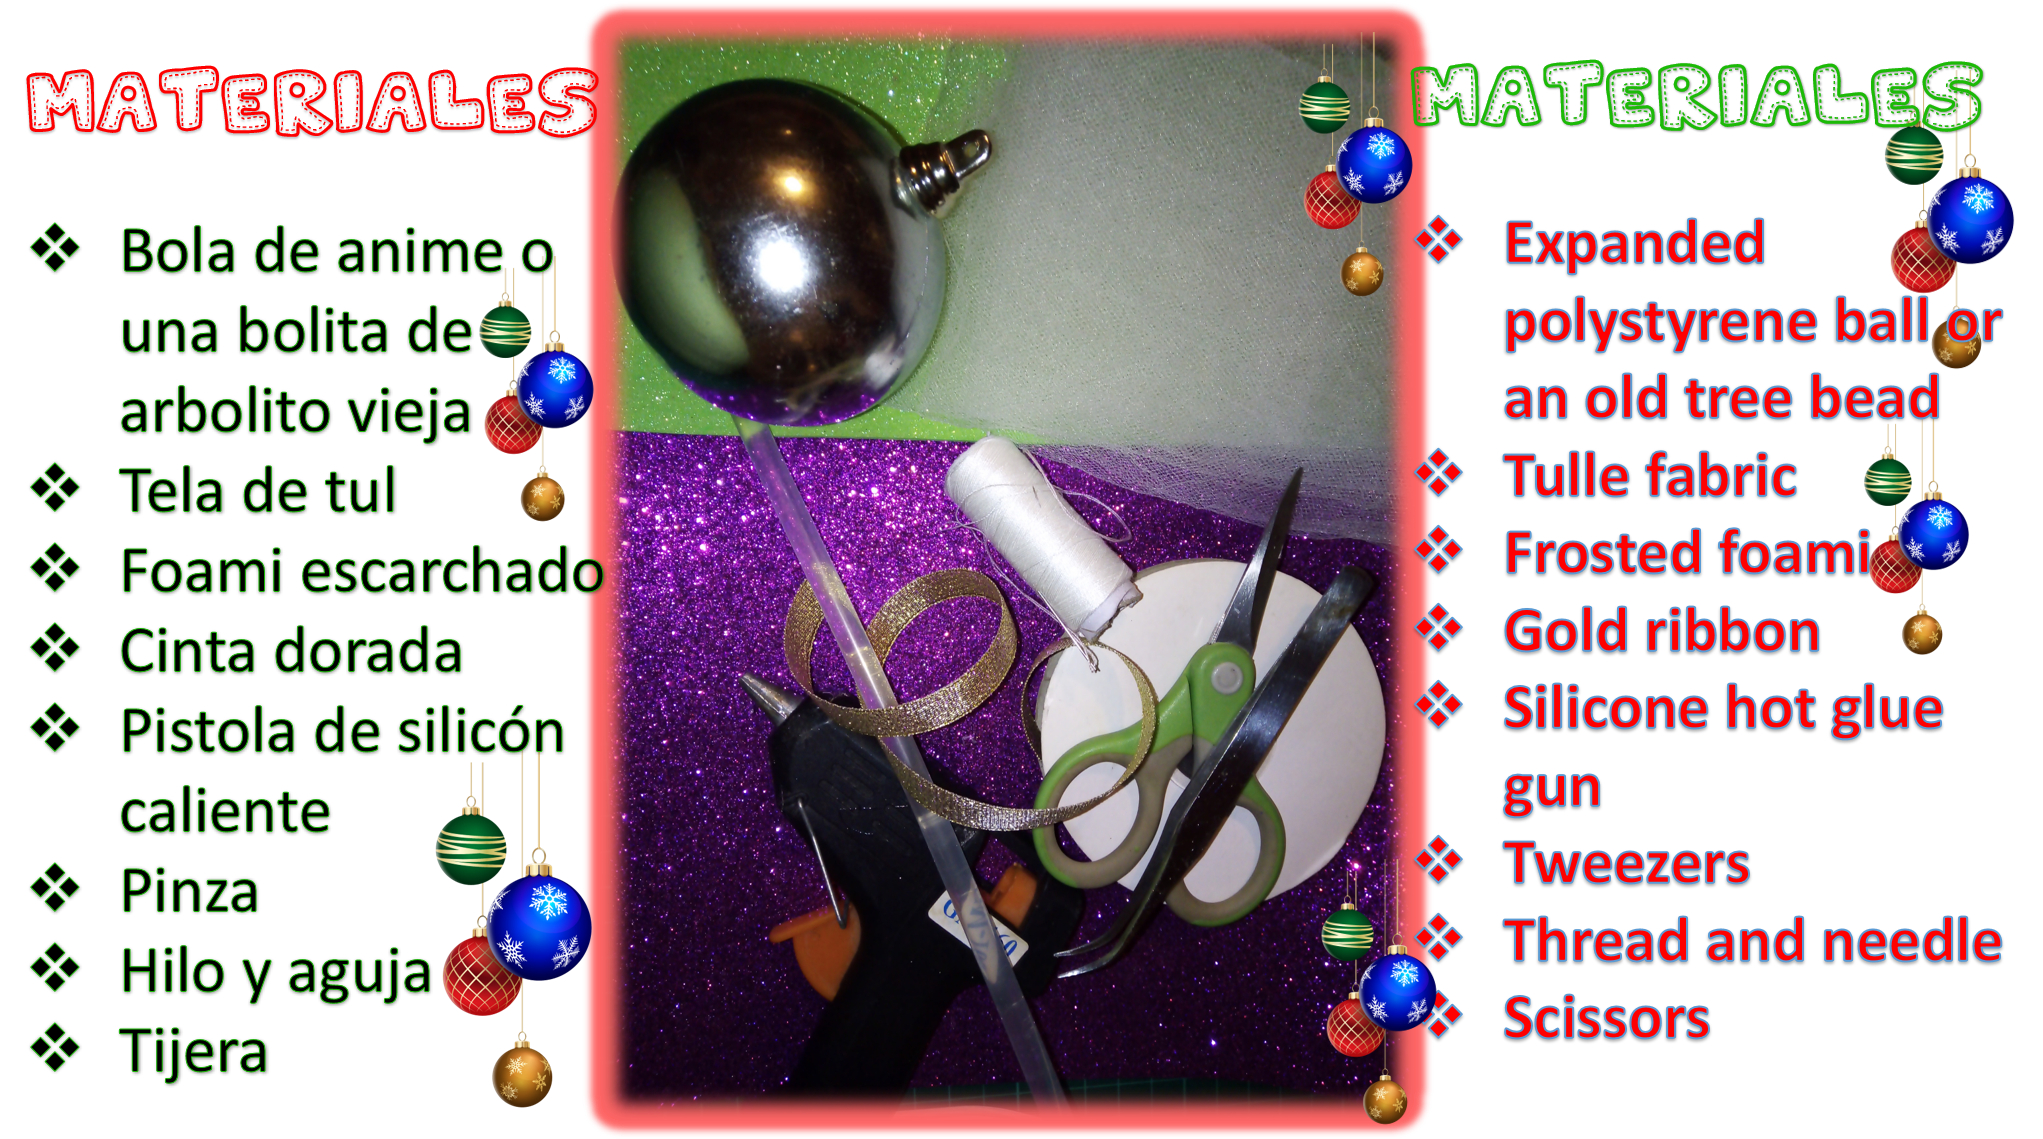
El aspecto del arbolito, de alguna manera, siempre es una sorpresa tanto para representantes como para los alumnos, porque es el personal de colegio el que se encarga de armarlo, por ello, no tengo ni idea de como será este año. Lo único que sabemos es que lo adornaran con bolitas de navidad, pidieron que cada niño decorara a su gusto una esfera, y le colocaran algo con que colgarla. El día de hoy les mostraré como elaboré la bolita que llevará mi hija, me inspiré, en una idea que encontré en internet, espero que les guste, los materiales los encontrarán en la imagen anterior.
The appearance of the tree, in a way, is always a surprise for both representatives and students, because it is the school staff who is in charge of putting it together, so I have no idea what it will look like this year. The only thing we know is that they will decorate it with Christmas balls, they asked each child to decorate a ball of their choice, and put something to hang it with. Today I will show you how I made the ball that my daughter will wear, I was inspired by an idea I found on the internet, I hope you like it, you will find the materials in the image above.
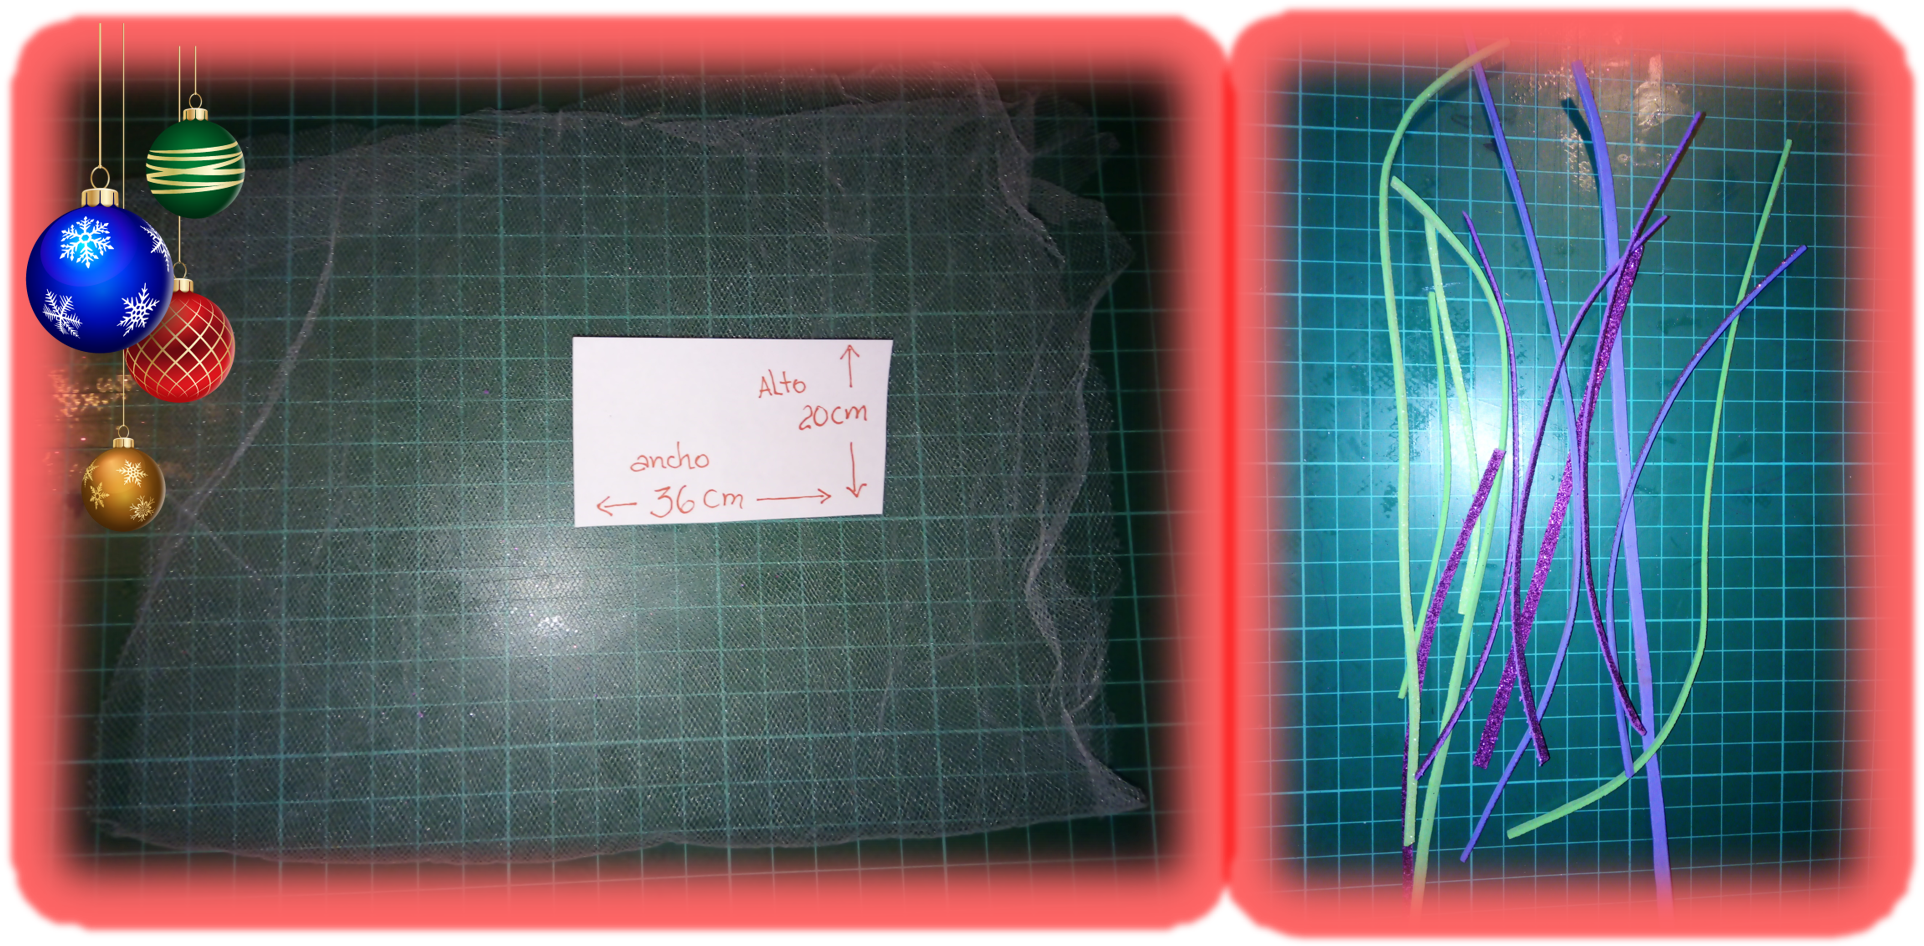
Paso 1:
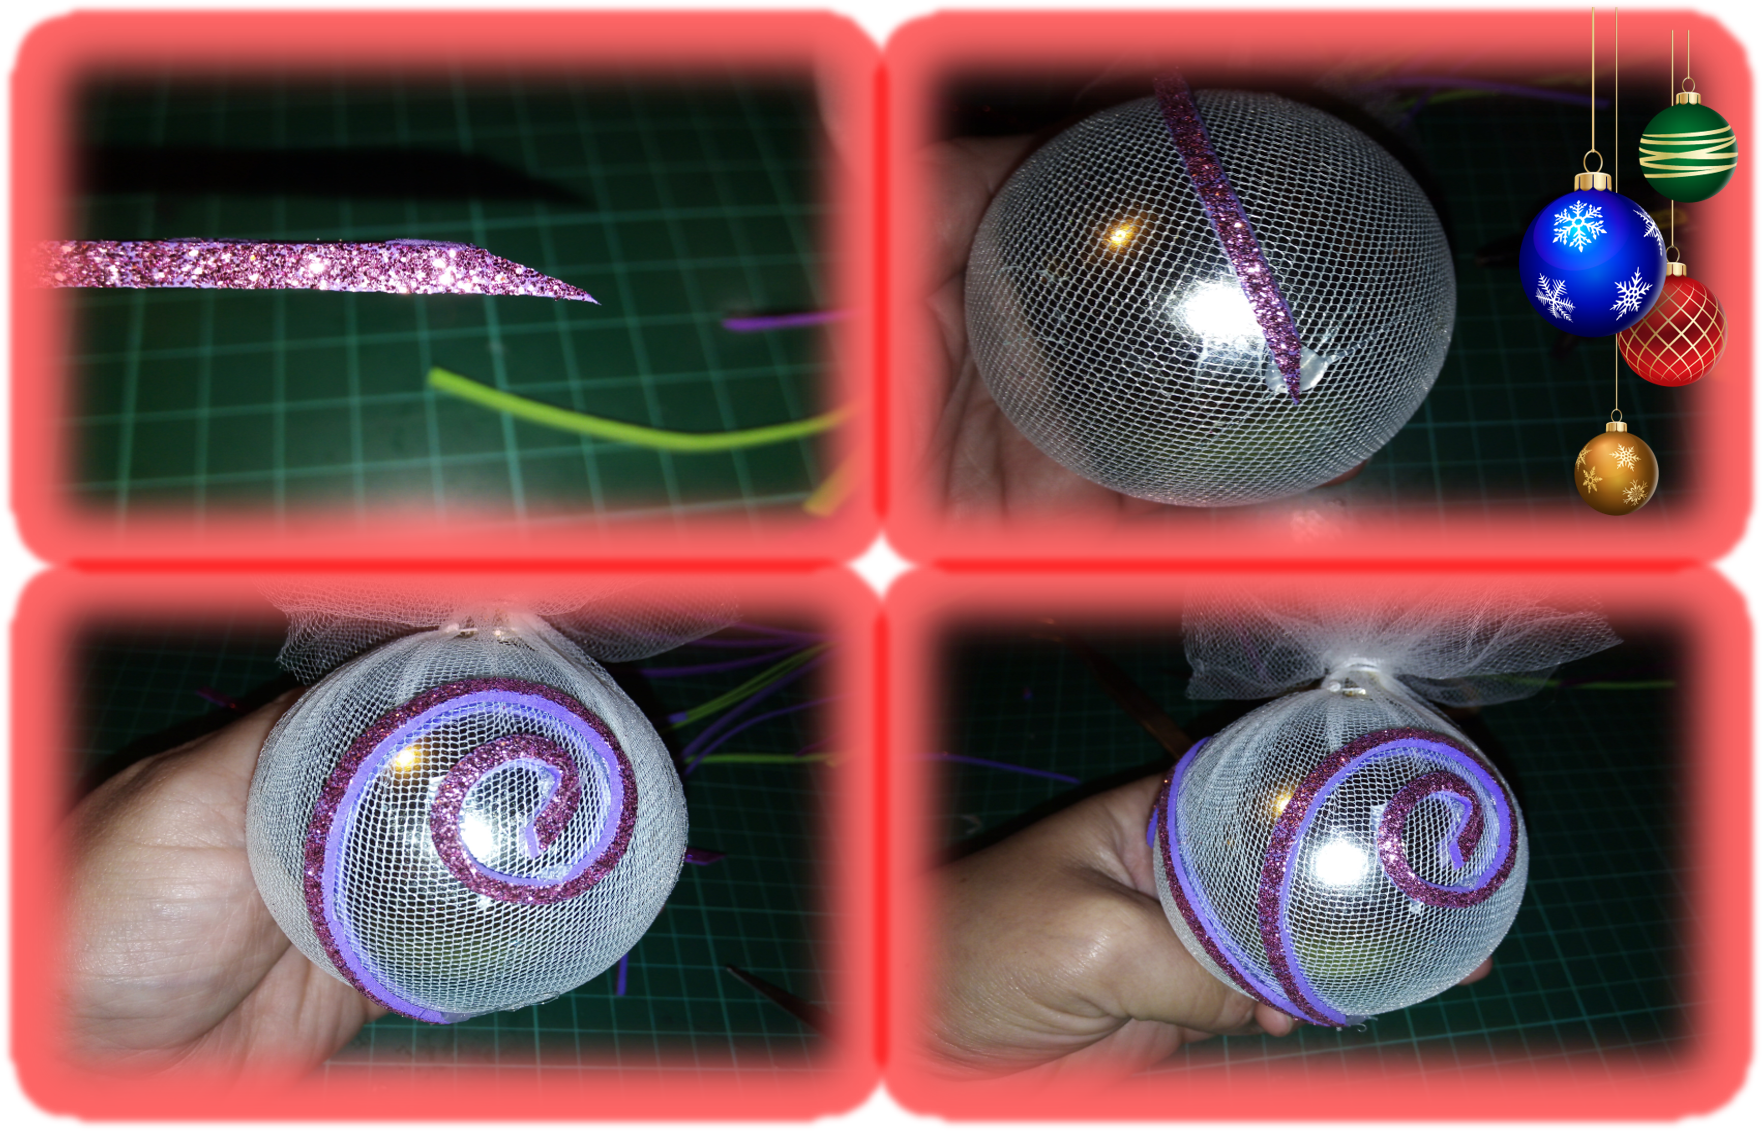
Lo primero que hice fue cortar un rectángulo en tela de tul, en mi caso, para recubrir la esfera que utilice fue necesario uno de tamaño 36 X 20 cm, antes de seguir, debo aclarar, que en el tutorial que vi, utilizaron una bola de poliestireno. Sin embargo, como yo no tenía, utilice una de las bolitas que uso para decorar nuestro arbolito, esta vieja y decolorada, por lo que, la uso, solo de relleno, siempre la escondo entre las ramas, donde no se vea mucho. Así que, con este proyecto le estoy dando una nueva vida, a este viejo adorno, ya bastante gastado por el tiempo. Luego, corté lo más delgada que pude, varias tiras de foami, tratando además que entre ellas fueran de similar grosor.
Step 1:
The first thing I did was to cut a rectangle in tulle fabric, in my case, to cover the sphere I used was necessary one of size 36 X 20 cm, before I continue, I must clarify, that in the tutorial I saw, they used a polystyrene ball. However, as I didn't have one, I used one of the little balls that I use to decorate our tree, it is old and discolored, so I use it only as a filler, I always hide it between the branches, where it is not very visible. So, with this project I'm giving a new life to this old ornament, already worn out by time. Then, I cut as thin as I could, several strips of foami, trying to make them of similar thickness.
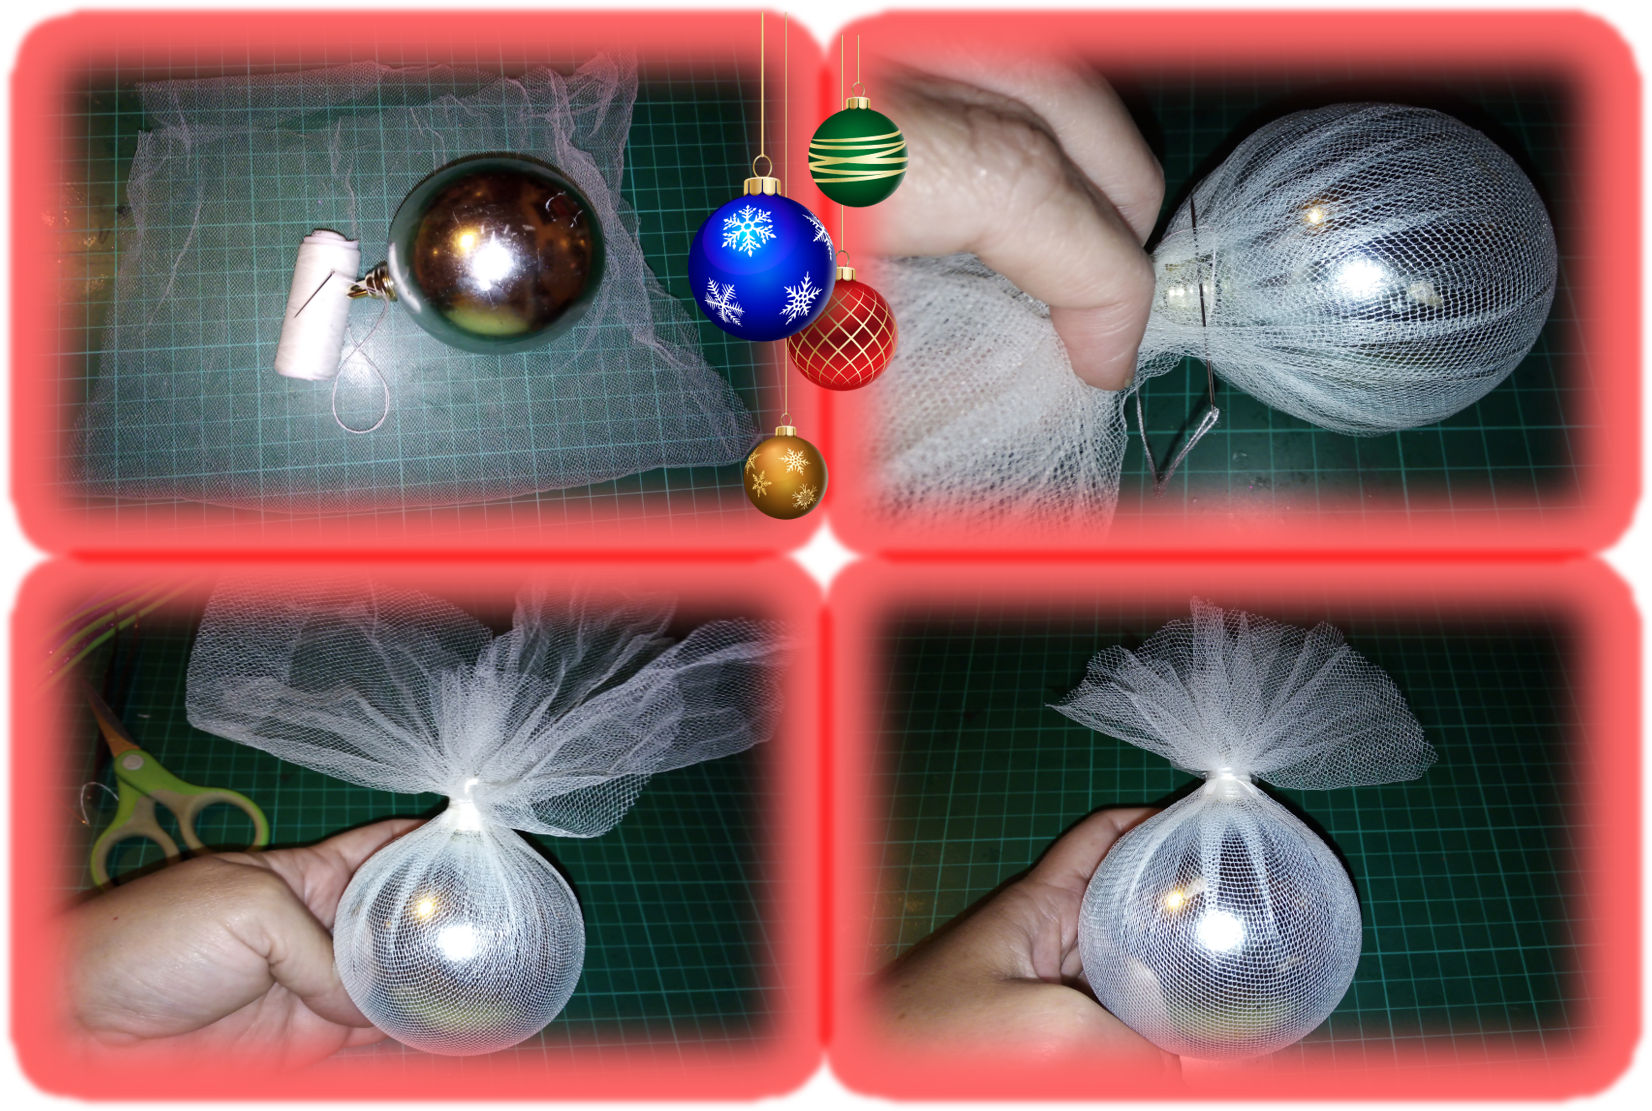
Paso 2:
Paso seguido, forre la esfera con el trozo de tul que había cortado, la envolví y en lo que correspondería a la parte de arriba, realice una especie de moño que aseguré muy bien con aguja e hilo. Finalmente, recorte la tela sobrante para que así quedada pareja y más prolija.
Step 2:
Next, I lined the sphere with the piece of tulle that I had cut, wrapped it and on what would correspond to the top, I made a kind of bow that I secured very well with needle and thread. Finally, I trimmed the excess fabric so that it would be even and neater.
Paso 3:
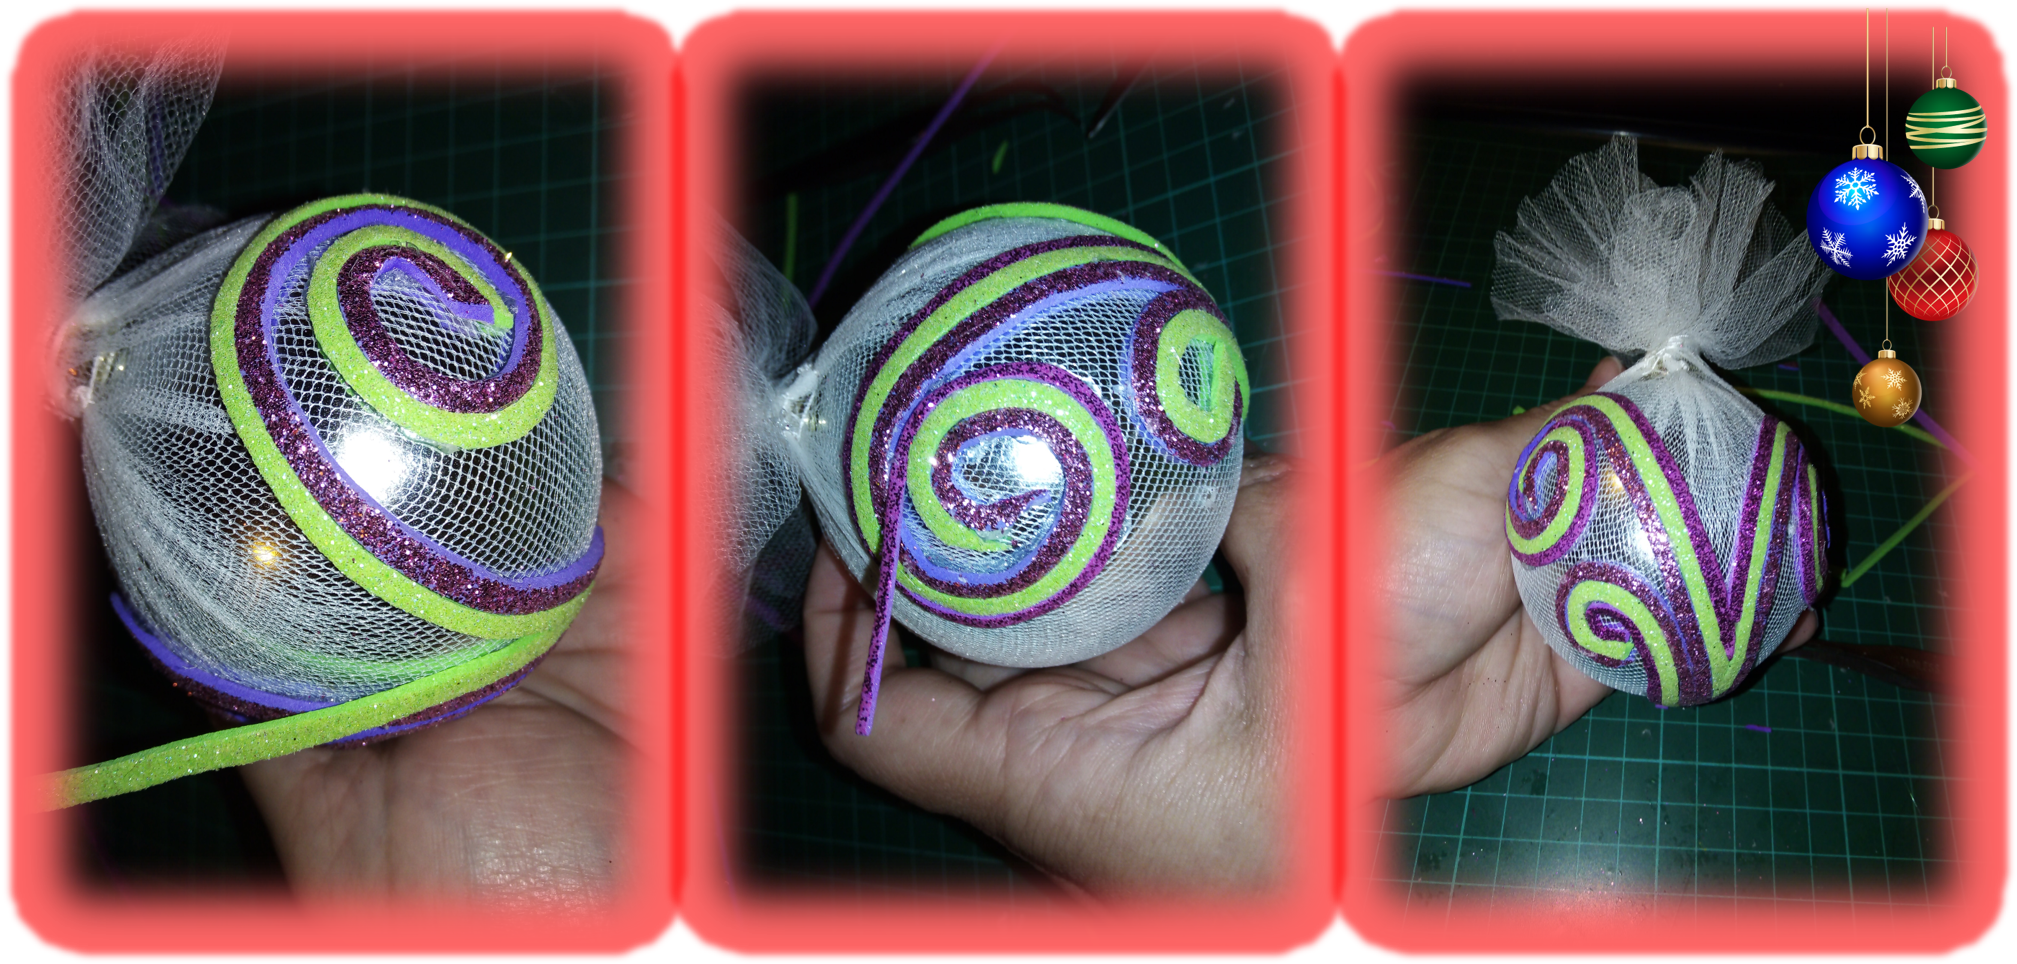
Llego el momento de empezar a decolar la pelotica, para ello utilice las tiras de foami que corte, y la pistola de silicón caliente. No tenía un diseño preestablecido, simplemente mi idea era formar especies de arabescos, este plan me preocupaba un poco, porque no sabía cómo quedarían las áreas curvas, pero, resulto muy fácil ya que al calentarse el foami con el pegamento, se puso muy maleable y tomaba la forma que le daba. Fue realmente genial, poco a poco fueron emergiendo las formas, nada completas, una vez que colocaba una tira, luego colocaba otra de otro color y así fui combinando los colores. Pero, realmente ustedes pueden decorarlas como ustedes prefieran.
Step 3:
It's time to start to glue the ball, for this I used the foami strips that I cut, and the hot silicone gun. I didn't have a pre-established design, my idea was simply to form arabesque shapes, this plan worried me a little, because I didn't know how the curved areas would look like, but, it turned out to be very easy because when the foami heated up with the glue, it became very malleable and took the shape I gave it. It was really great, little by little the shapes emerged, nothing complete, once I placed a strip, then I placed another strip of another color and so I was combining the colors. But, really, you can decorate them as you prefer.
Paso 4:
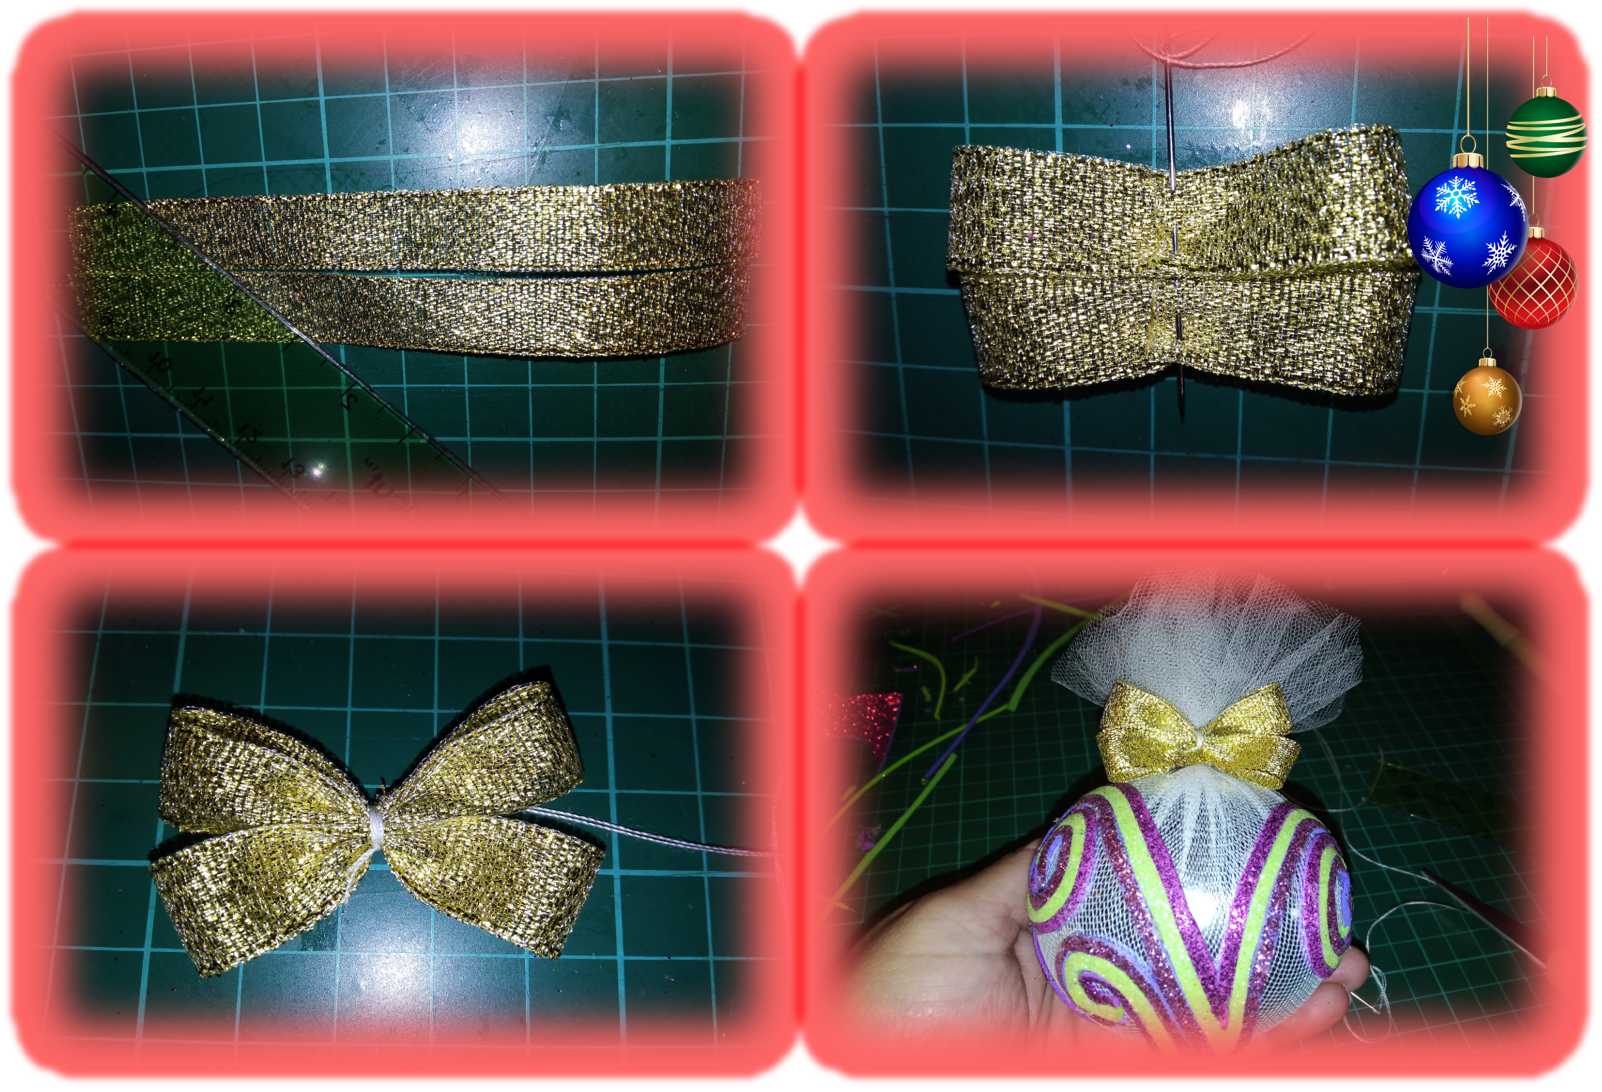
Este consistió simplemente en la elaboración de un lazo para decorar la zona donde realice el moño, para ello utilice una cinta dorada. Corte dos trozos de cinta, cada uno los doble y luego hilvané por el centro uniendo las 2 piezas, arruche y aseguré, para luego fijarla en su sitio.
Step 4:
This one consisted simply of making a bow to decorate the area where I made the bow, for this I used a gold ribbon. I cut two pieces of ribbon, folded each one and then I basted through the center joining the 2 pieces, I folded and secured, and then I fixed it in place.
Paso 5:
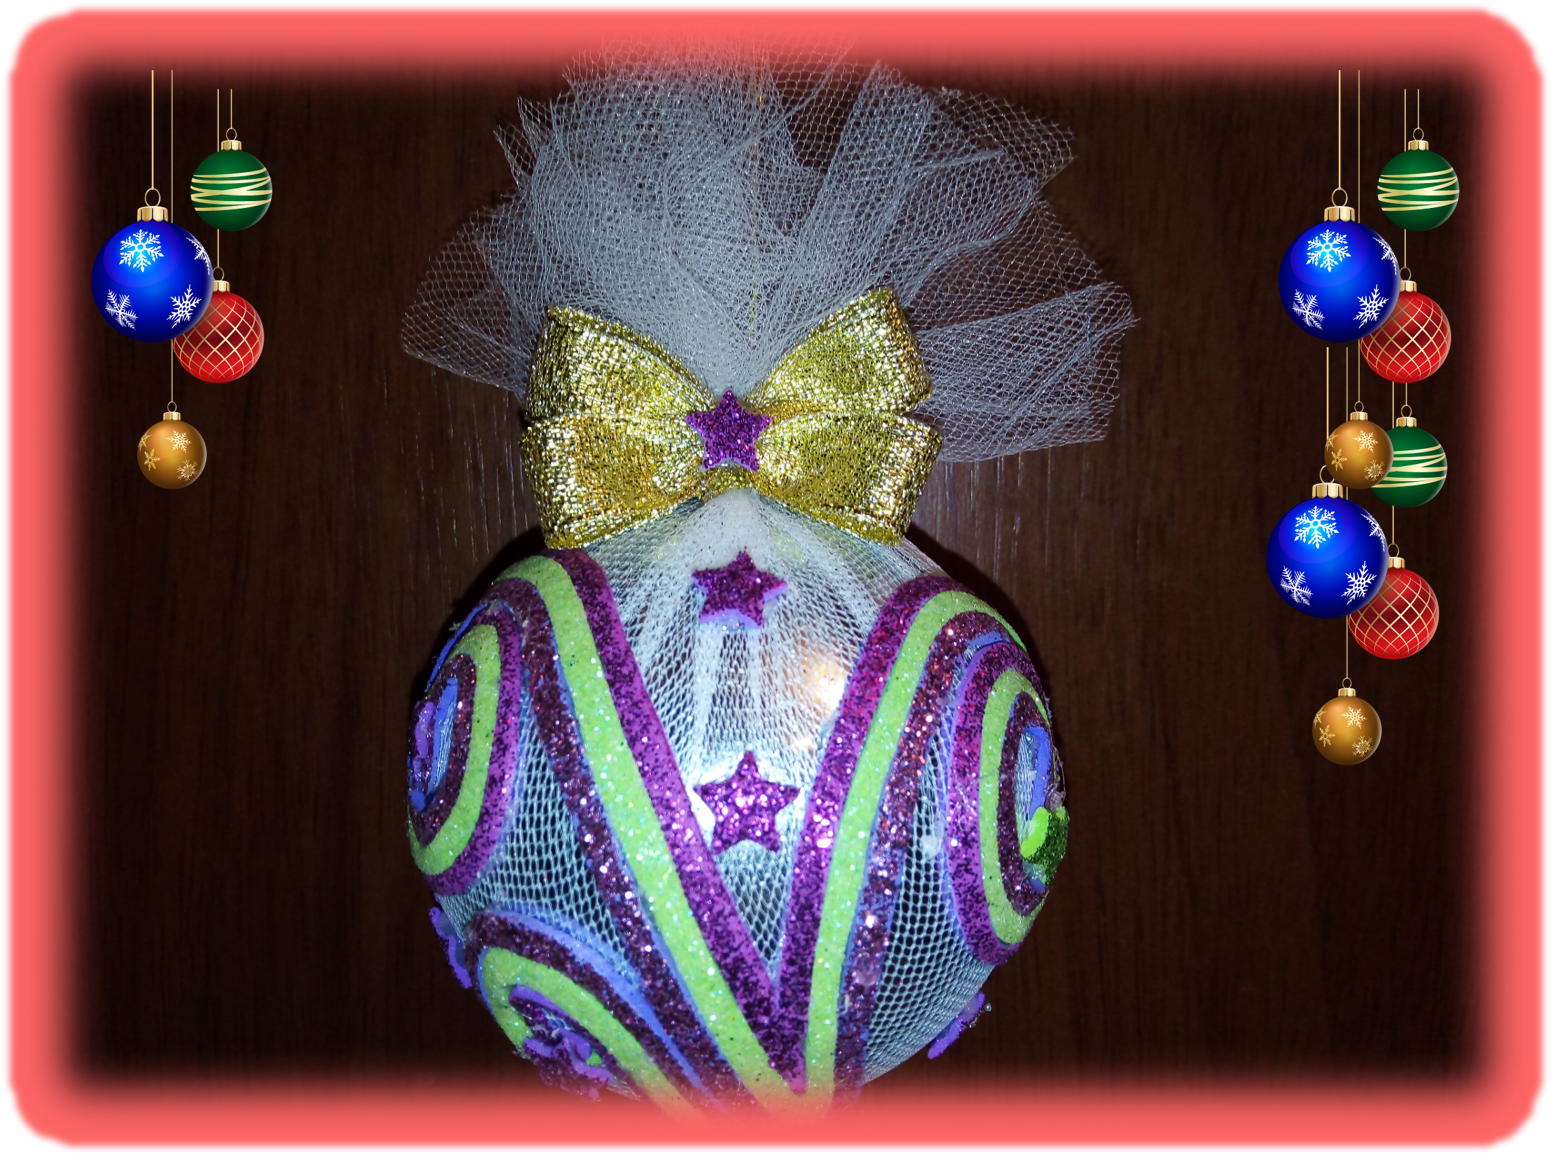
Llego el momento de colocar el cordón para poder colgar la bolita, para ello utilice un trozo de hilo dorado, lo ubique en la parte central del moño, de manera que quedara emergiendo de él. Después, con un cortador en forma de estrella, corte pequeñas estrellitas que distribuí estratégicamente por toda la esfera, también me sirvió para poner en el centro del lazo y así poder tapar el hilo que usé para armarlo.
Step 5:
It was time to place the cord to hang the ball, for this I used a piece of gold thread, I placed it in the central part of the bow, so that it would be emerging from it. Then, with a star-shaped cutter, I cut small stars that I distributed strategically throughout the sphere, also served me to put in the center of the bow and thus be able to cover the thread I used to assemble it.

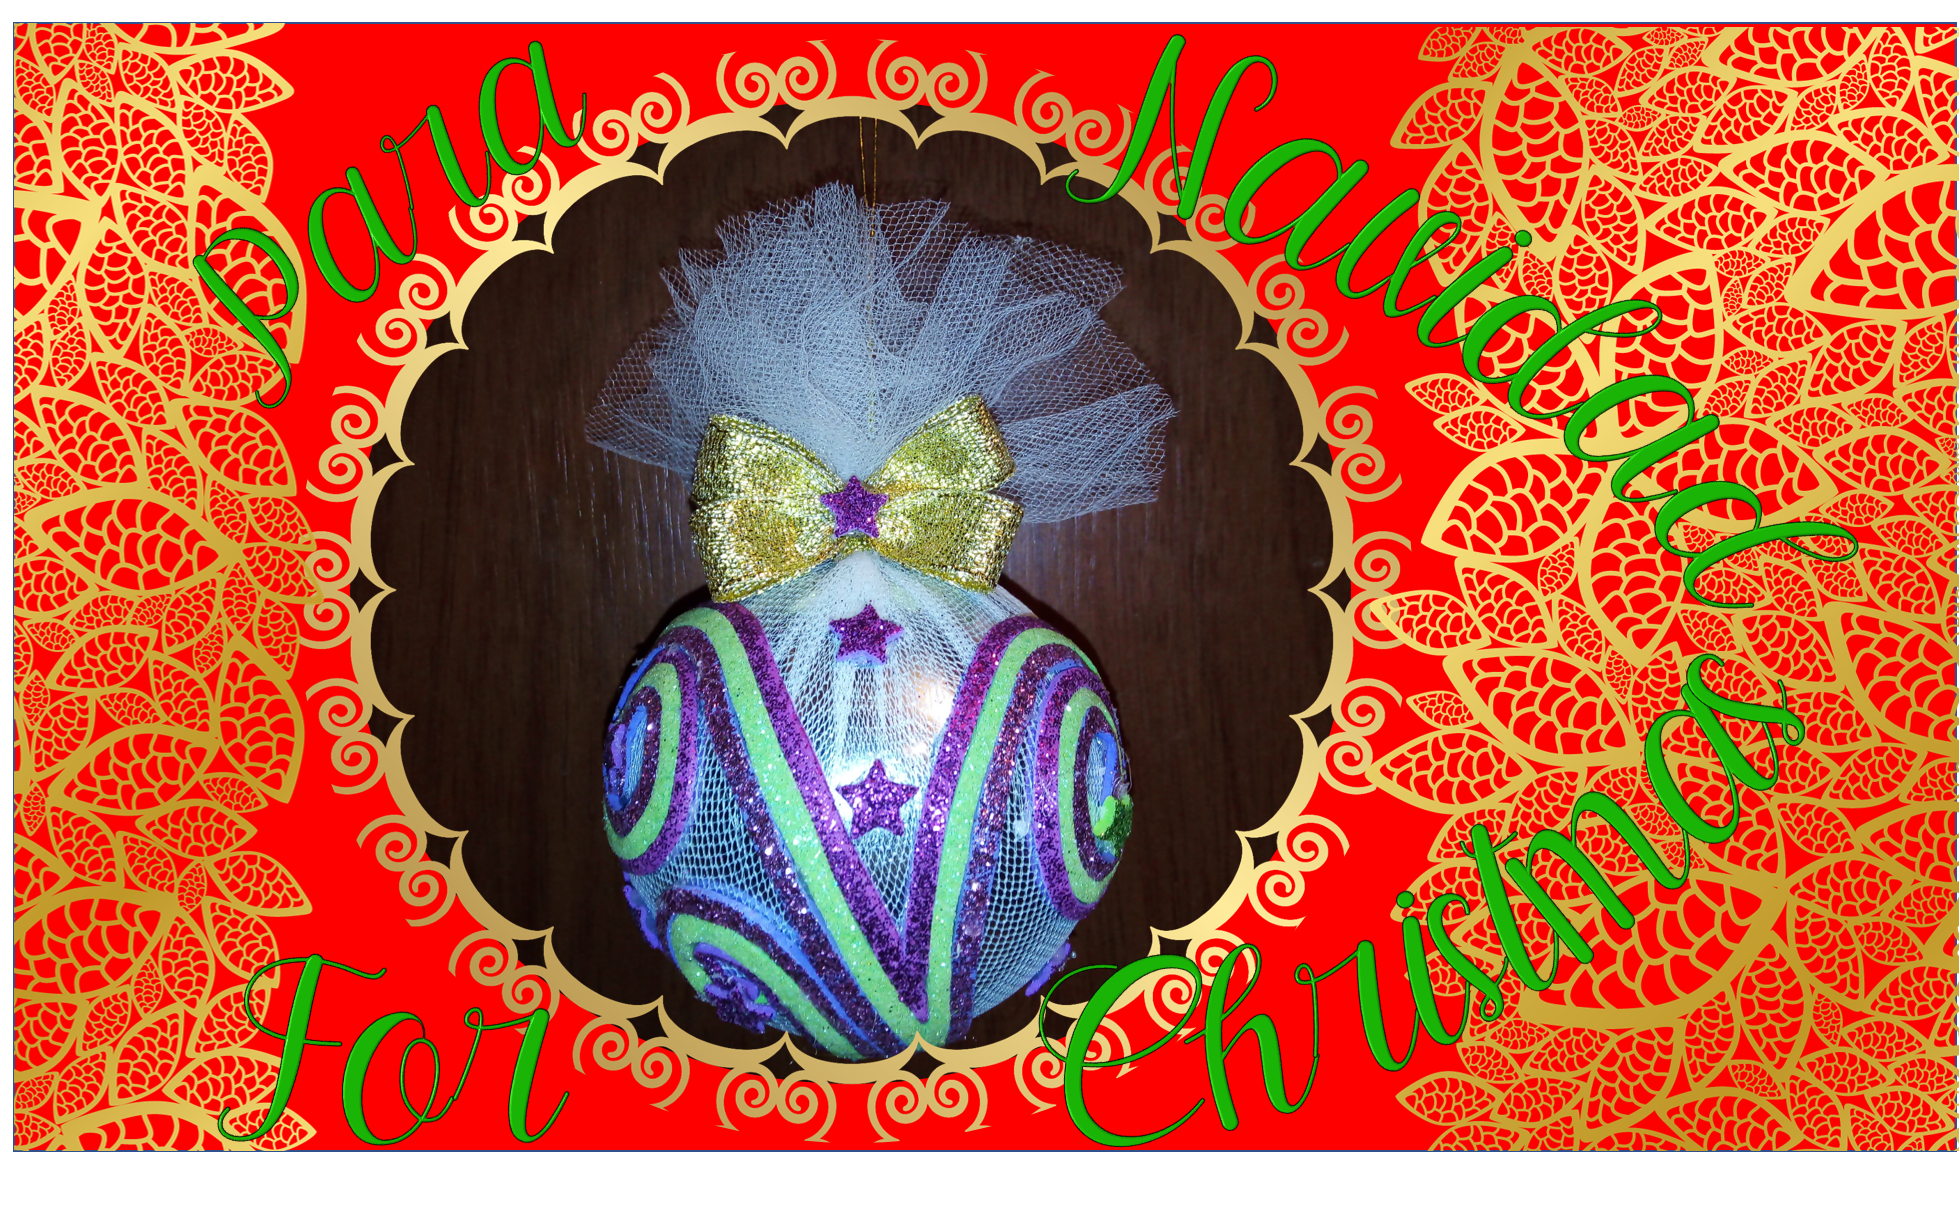
Bueno, llegamos al final de nuestro proyecto, espero que les gustara el resultado, por lo menos a mí me encantó y pienso con esto, darles una segunda vida a muchas de esas bolitas que ya no se ven tan bonitas en mi arbolito y que normalmente escondo entre las ramas. También, se me ocurre que podría ser un lindo detalle que regalar, a esas personas especiales de nuestro entorno, ahora en navidad, para que lo coloquen en el arbolito de sus casas, en fin, es solo cuestión de darle rienda suelta a su creatividad.
Well, we reached the end of our project, I hope you liked the result, at least I loved it and I think with this, give a second life to many of those little balls that no longer look so nice in my tree and usually hide among the branches. Also, it occurs to me that it could be a nice gift to give to those special people around us, now at Christmas time, so that they can put it on their tree at home, well, it's just a matter of giving free rein to your creativity.
Llego el momento de despedirme, espero que esta nueva semana sea de múltiples bendiciones, para todos ustedes y sus seres queridos, les envío un gran abrazo desde la distancia y recuerden, siempre cuidarse y cuidar a los suyos, cumpliendo con las medidas de bioseguridad.
It is time to say goodbye, I hope this new week will be of multiple blessings for all of you and your loved ones, I send you a big hug from a distance and remember, always take care of yourself and your loved ones, complying with biosecurity measures.
Contenido y fotografías de mi propiedad intelectual
Información Técnica
| Cámara | Pentax * istDL |
|---|---|
| Lente | * Pentax 18-55 |
| Iluminación | Luz Natural |
| Locación | Barcelona, Estado Anzoátegui, Venezuela |
Content and photographs of my intellectual property
Technical information
| Camera | Pentax * istDL |
|---|---|
| Lens | * Pentax 18-55 |
| Lighting | Natural Light |
| Location | Barcelona, Anzoátegui State, Venezuela |


The rewards earned on this comment will go directly to the person sharing the post on Twitter as long as they are registered with @poshtoken. Sign up at https://hiveposh.com.
Gracias por su apoyo