Bienvenidos Queridos Amantes de la Artes Manuales
Welcome Dear Manual Arts Lovers
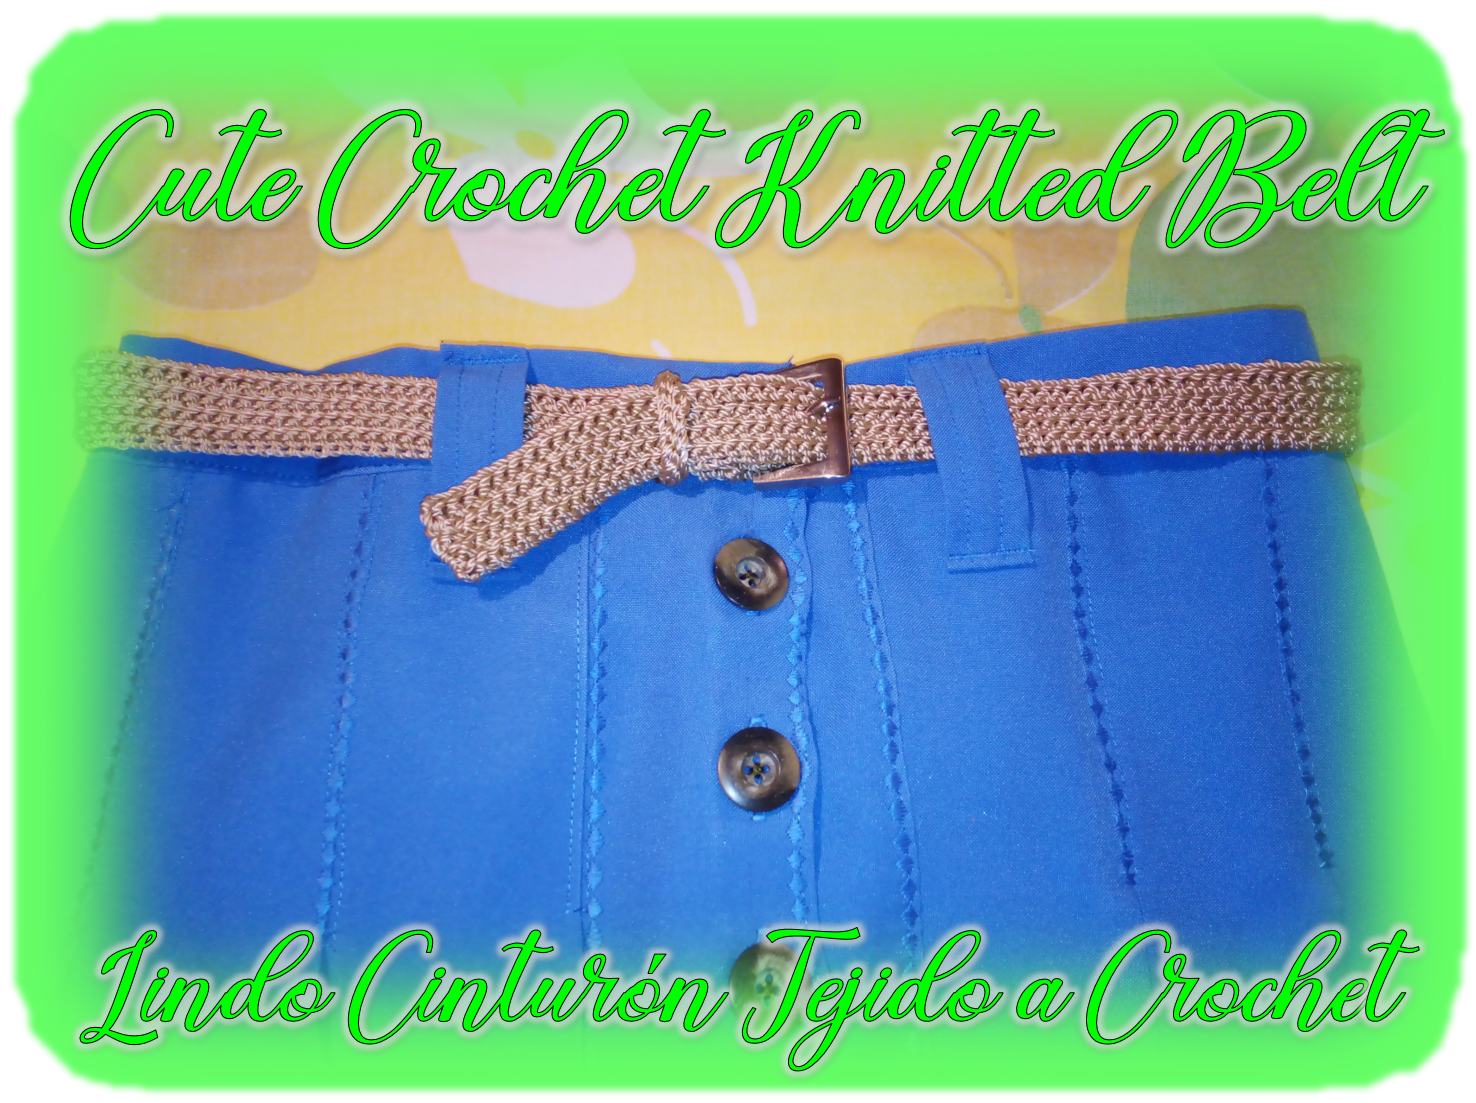
Dear readers, as I always say, it is a great pleasure to be back with you to share with you another of my crafts. Perhaps this is the simplest project I have shared with you so far, it is a belt or strap that I made for my eldest daughter, to combine it with some booties in the same tone.

Unos días atrás, recordé que tenía guardado un poco de cordel o hilo de nailon, que me sobro de un pequeño bolso que tejí, hace unos cuantos años atrás. El hilo vino a mi mente, después de ver un video en internet donde realizaban un cinturón tejido. Me pareció buena intentar realizar uno, aprovechando que mi hija tiene unos botines en la misma tonalidad y no tenía correa para combinar.
A few days ago, I remembered that I had some string or nylon thread left over from a small bag I knitted a few years ago. The yarn came to my mind after watching a video on the internet where they made a knitted belt. I thought it would be a good idea to try to make one, taking advantage of the fact that my daughter has some booties in the same color and I didn't have a belt to match.
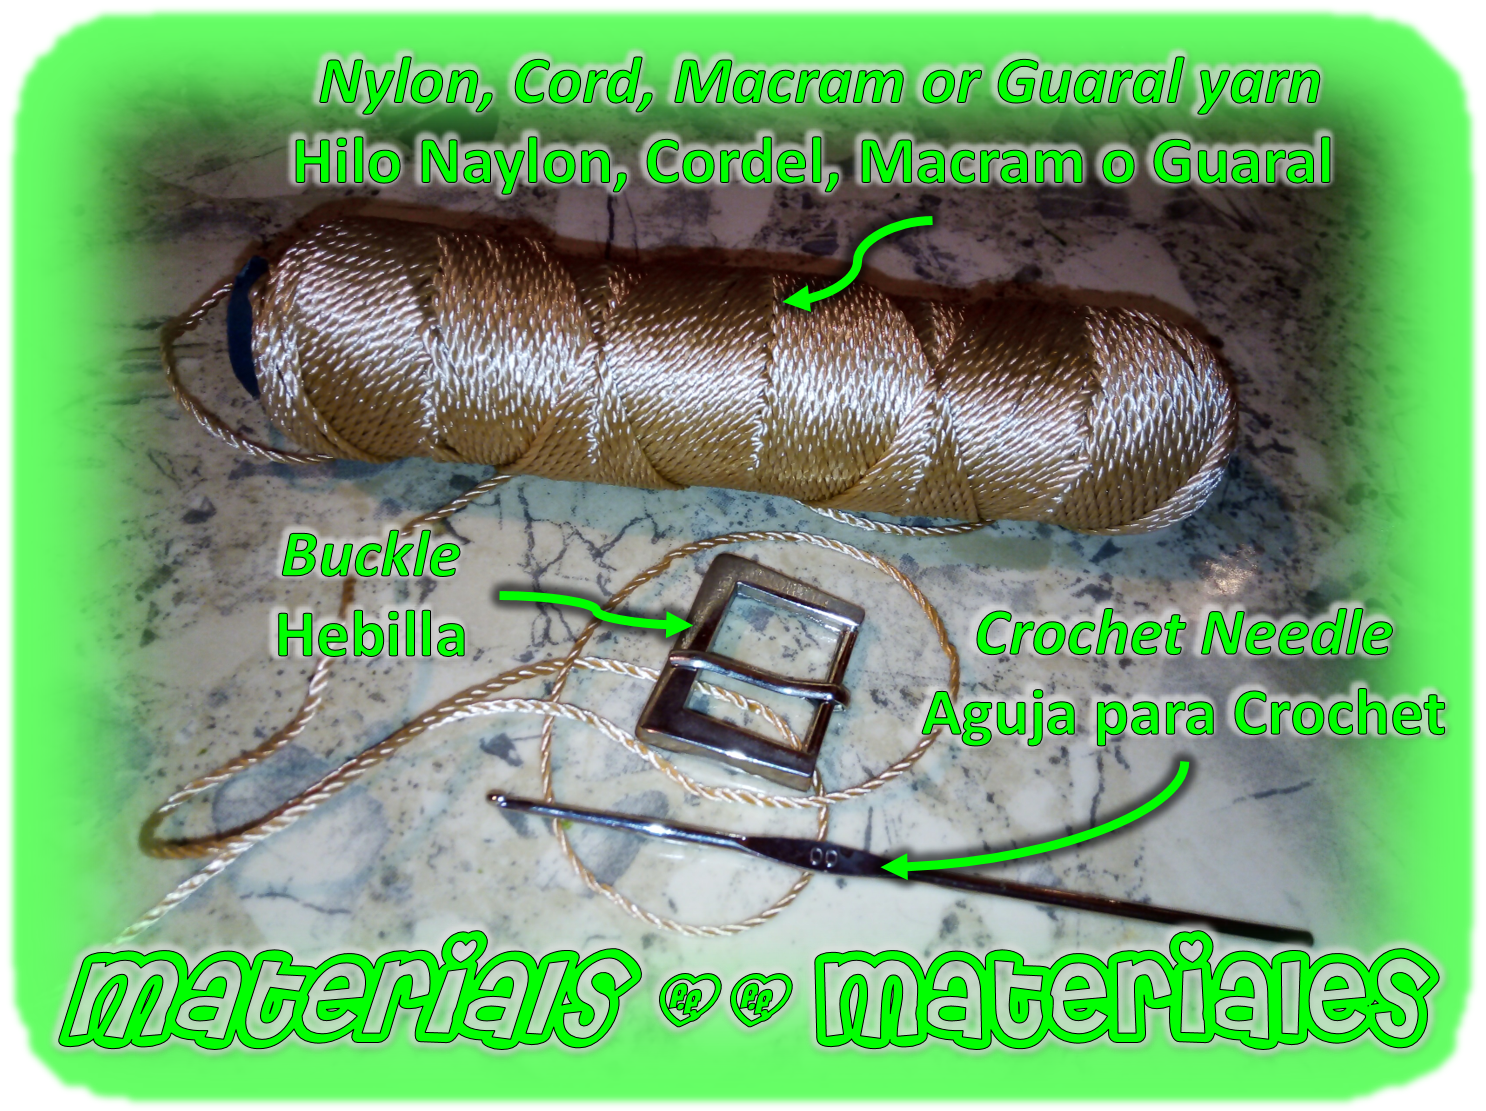
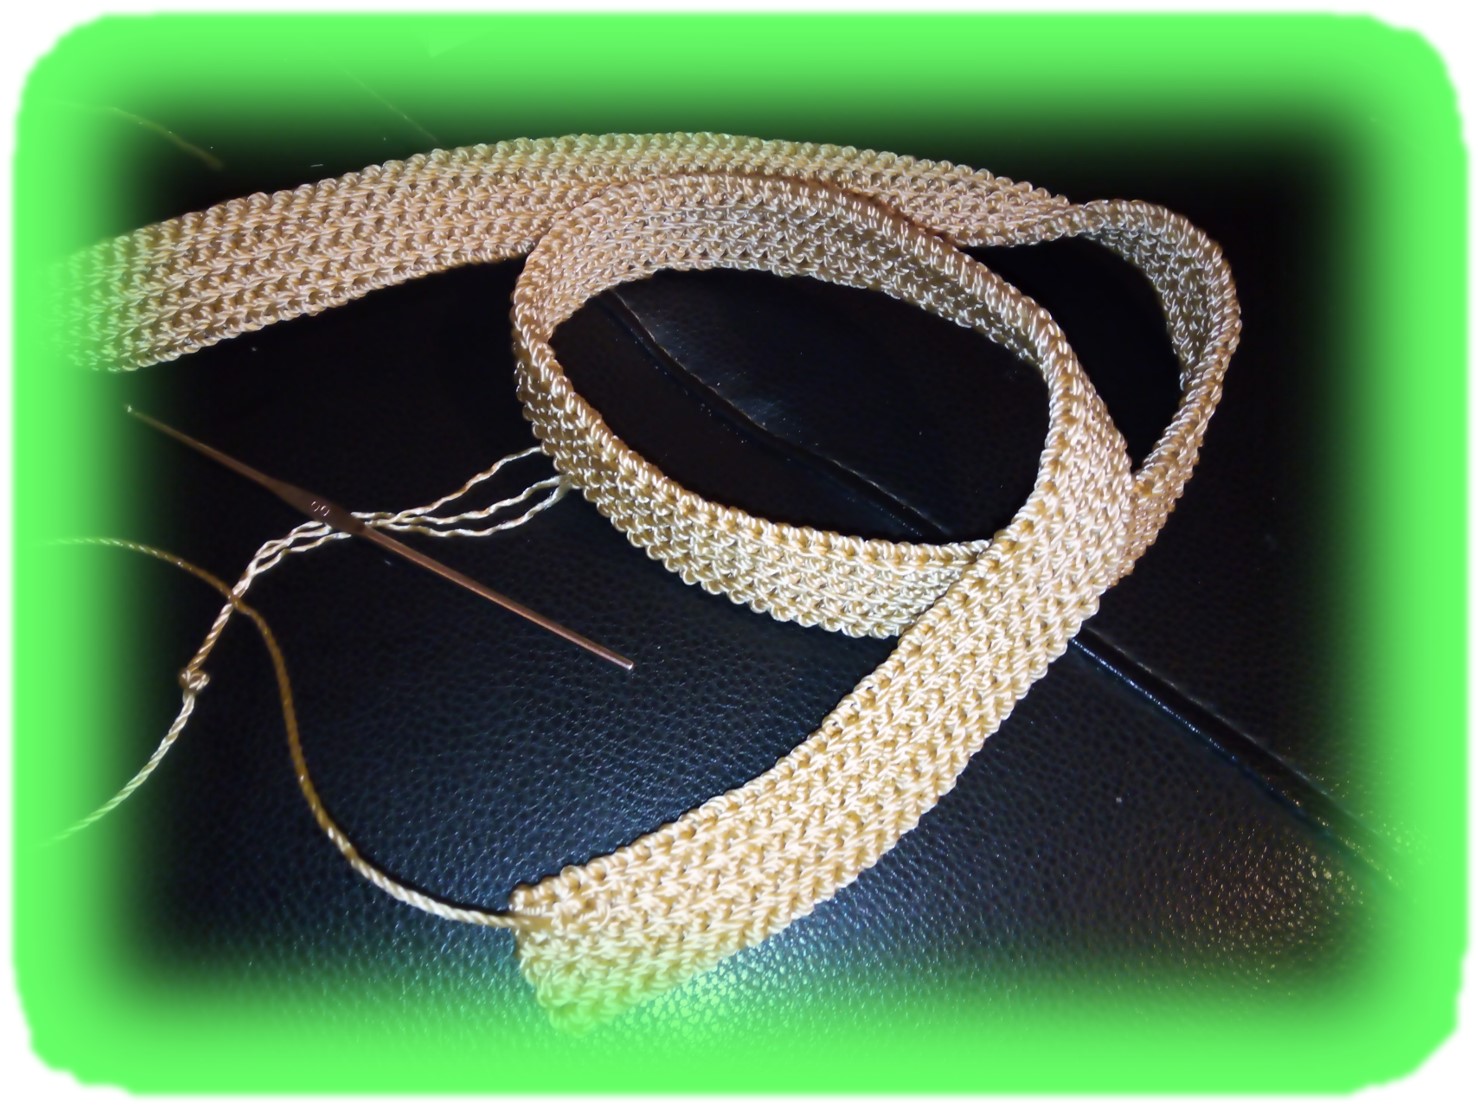
Como pueden apreciar en la imagen, los materiales que utilice, fueron simplemente hilo de nailon o cordel, una aguja para crochet y una hebilla para cinturones que había reciclado de una cartera vieja. Antes de seguir, quería comentarles que el hilo de nailon o cordón, que utilicé, es un material bastante tradicional en Carúpano la ciudad donde nací, ya que, se usa para tejer chinchorros y redes de pescar. Claro, no se usa aguja de crochet, usan una aguja especial, que elaboran los artesanos con madera, y el tipo de tejido, también es distinto, yo diría que, se asemeja un poco al estilo del macramé, pero no es exactamente igual. Tuve la oportunidad de que un gran amigo de la infancia, que su familia es de pescadores, me enseñara a realizar ese tipo de tejido, ya que, su familia realizaba sus propias redes de pescar, solo que yo lo usé, para armar un chinchorro.
As you can see in the picture, the materials I used were simply nylon thread or cord, a crochet needle and a belt buckle that I had recycled from an old purse. Before going on, I wanted to tell you that the nylon thread or cord I used is a very traditional material in Carúpano, the city where I was born, since it is used to weave “chinchorros” and fishing nets. Of course, they don't use a crochet needle, they use a special needle that the artisans make with wood, and the type of weaving is also different, I would say that it is a bit similar to the macramé style, but it is not exactly the same. I had the opportunity that a great childhood friend of mine, whose family is fishermen, taught me how to make this type of weaving, since his family made their own fishing nets, but I used it to make a "chinchorro".
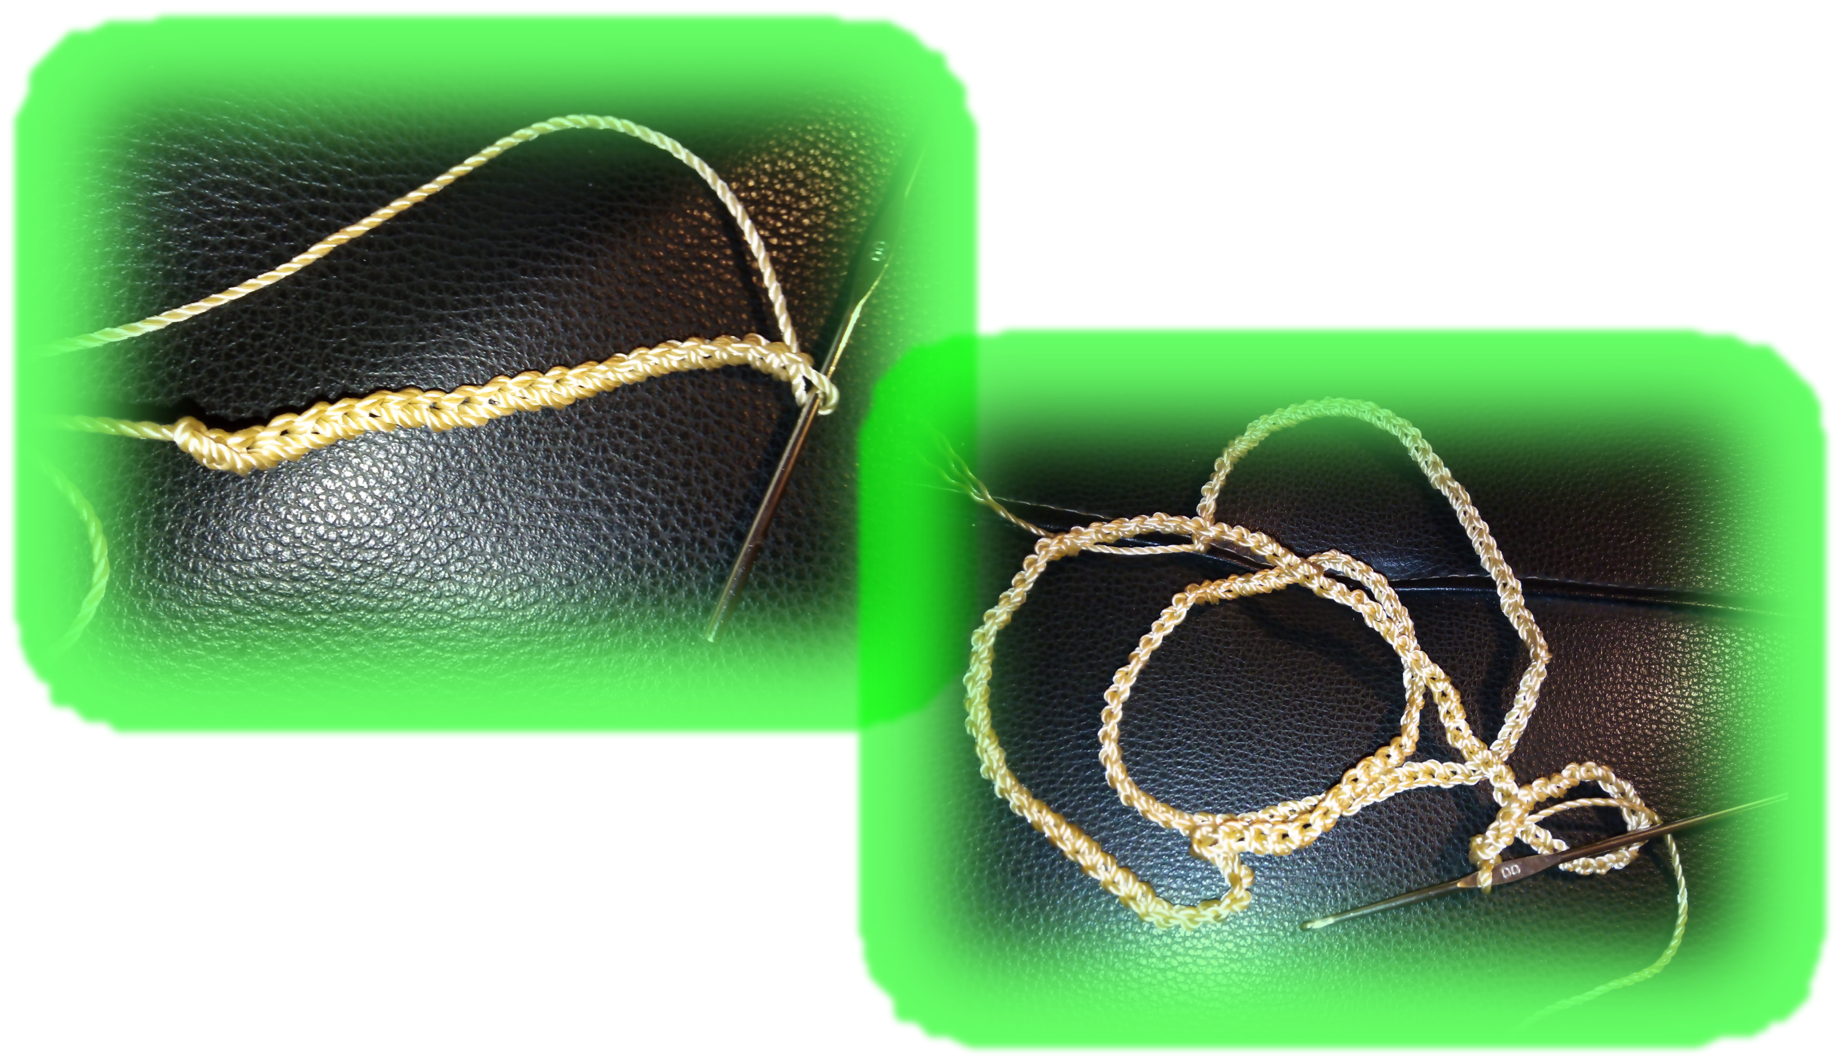
Pero bueno, volvamos a lo que venia a mostrarle, el cinturón o correa, para realizarla, no use ningún punto complicado, todo el cinturón lo tejí en punto de cadeneta. Empecé realizando 190 puntos de cadeneta, con ello obtuve el largo que necesitaba para la correa, en su caso, por supuesto, podía variar porque depende del ancho de la cintura.
But well, let's go back to what I came to show you, the belt or strap, to make it, I didn't use any complicated stitch, I knitted the whole belt in chain stitch. I started by making 190 chain stitches, with this I obtained the length I needed for the belt, in your case, of course, it could vary because it depends on the width of the waist.
Una vez que completé el largo que necesitaba, que como les dije, fueron 190 punto de cadenetas, tejí un punto adicional y comencé a regresarme tejiendo un punto de cadeneta, sobre cada uno de los puntos de cadenetas que ya había realizado, hasta regresar al principio nuevamente.
Once I completed the length I needed, which as I told you, was 190 chain stitches, I knitted an additional stitch and started to go back to the beginning by knitting a chain stitch over each of the chain stitches I had already knitted, until I was back to the beginning again.
Continúe realizando lo mismo, ida y vuelta, tejiendo siempre un punto de cadeneta sobre cada uno de los puntos de la base, así hasta completar 10 vueltas. Con esto, logre el grosor de la tira que coincidía con el tamaño de la hebilla que tenía para usar.
Continue doing the same, round and round, always knitting a chain stitch over each of the base stitches, until you have completed 10 rounds. With this, I achieved the thickness of the strip that coincided with the size of the buckle I had to use.
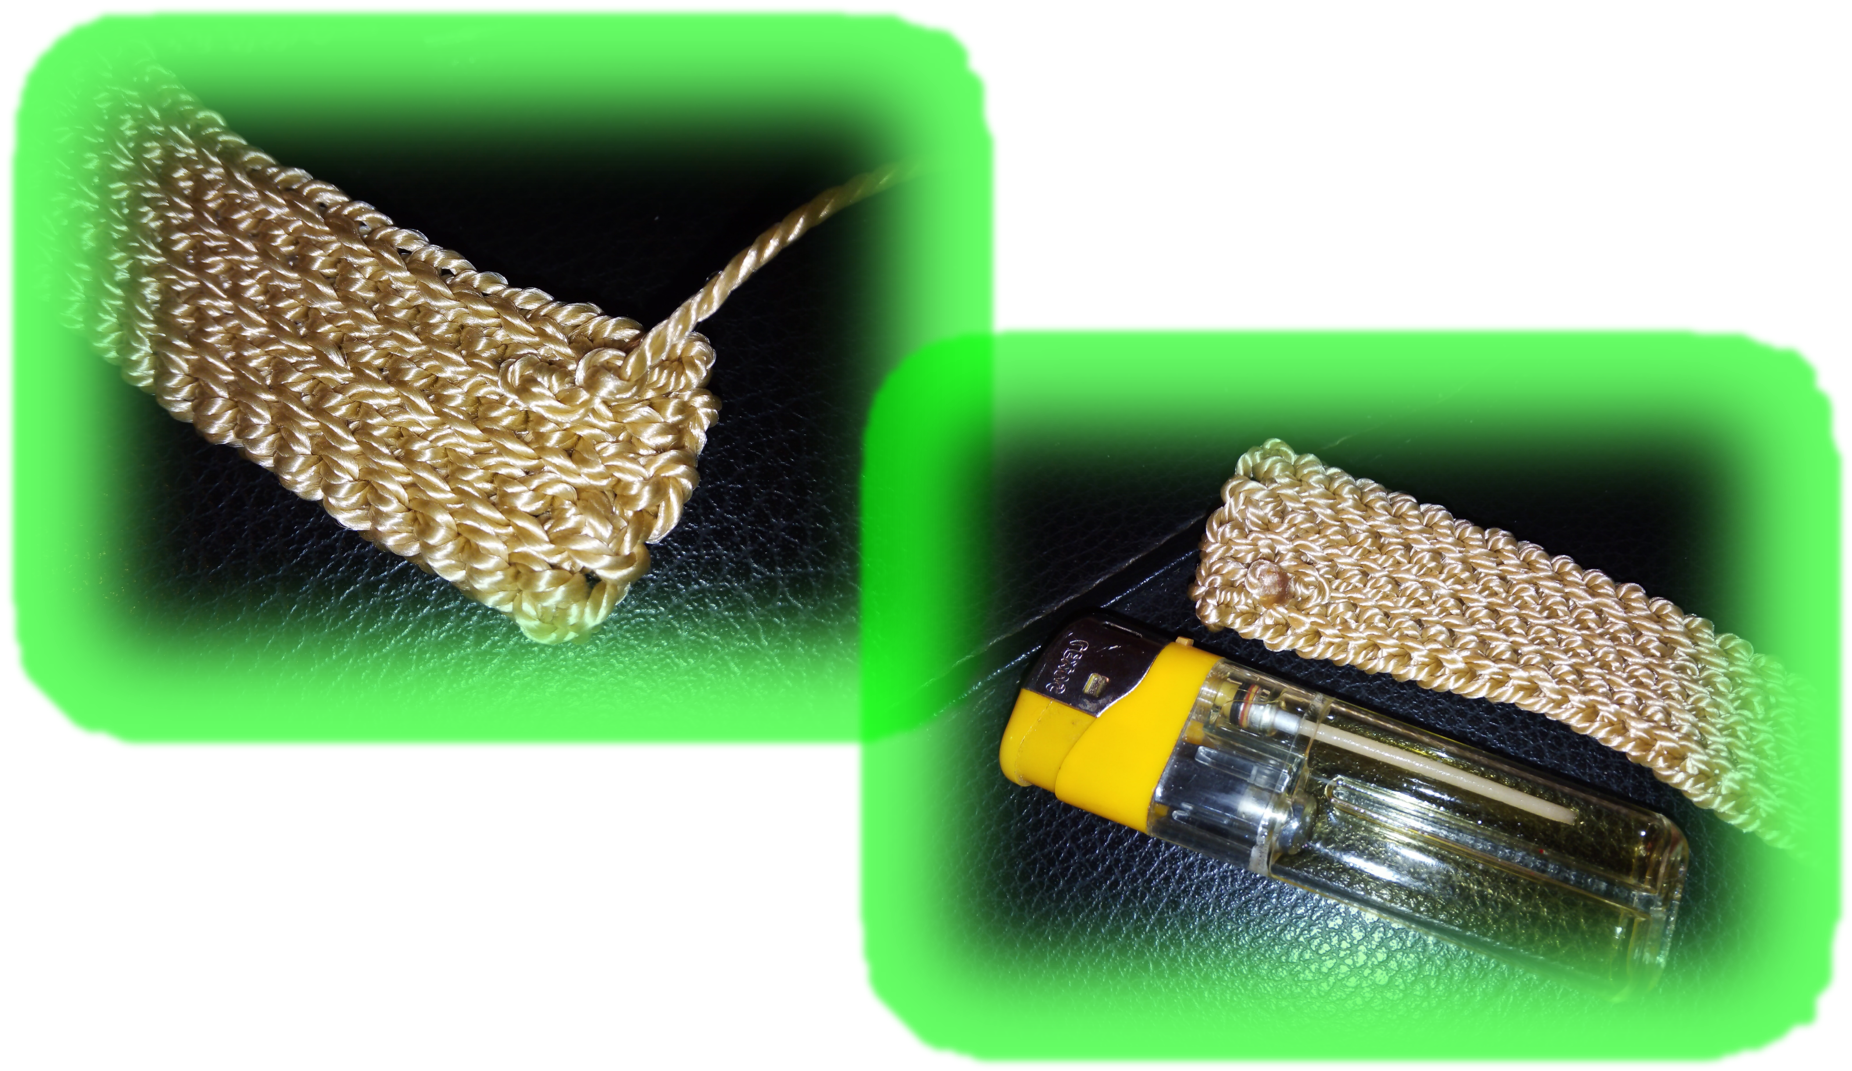
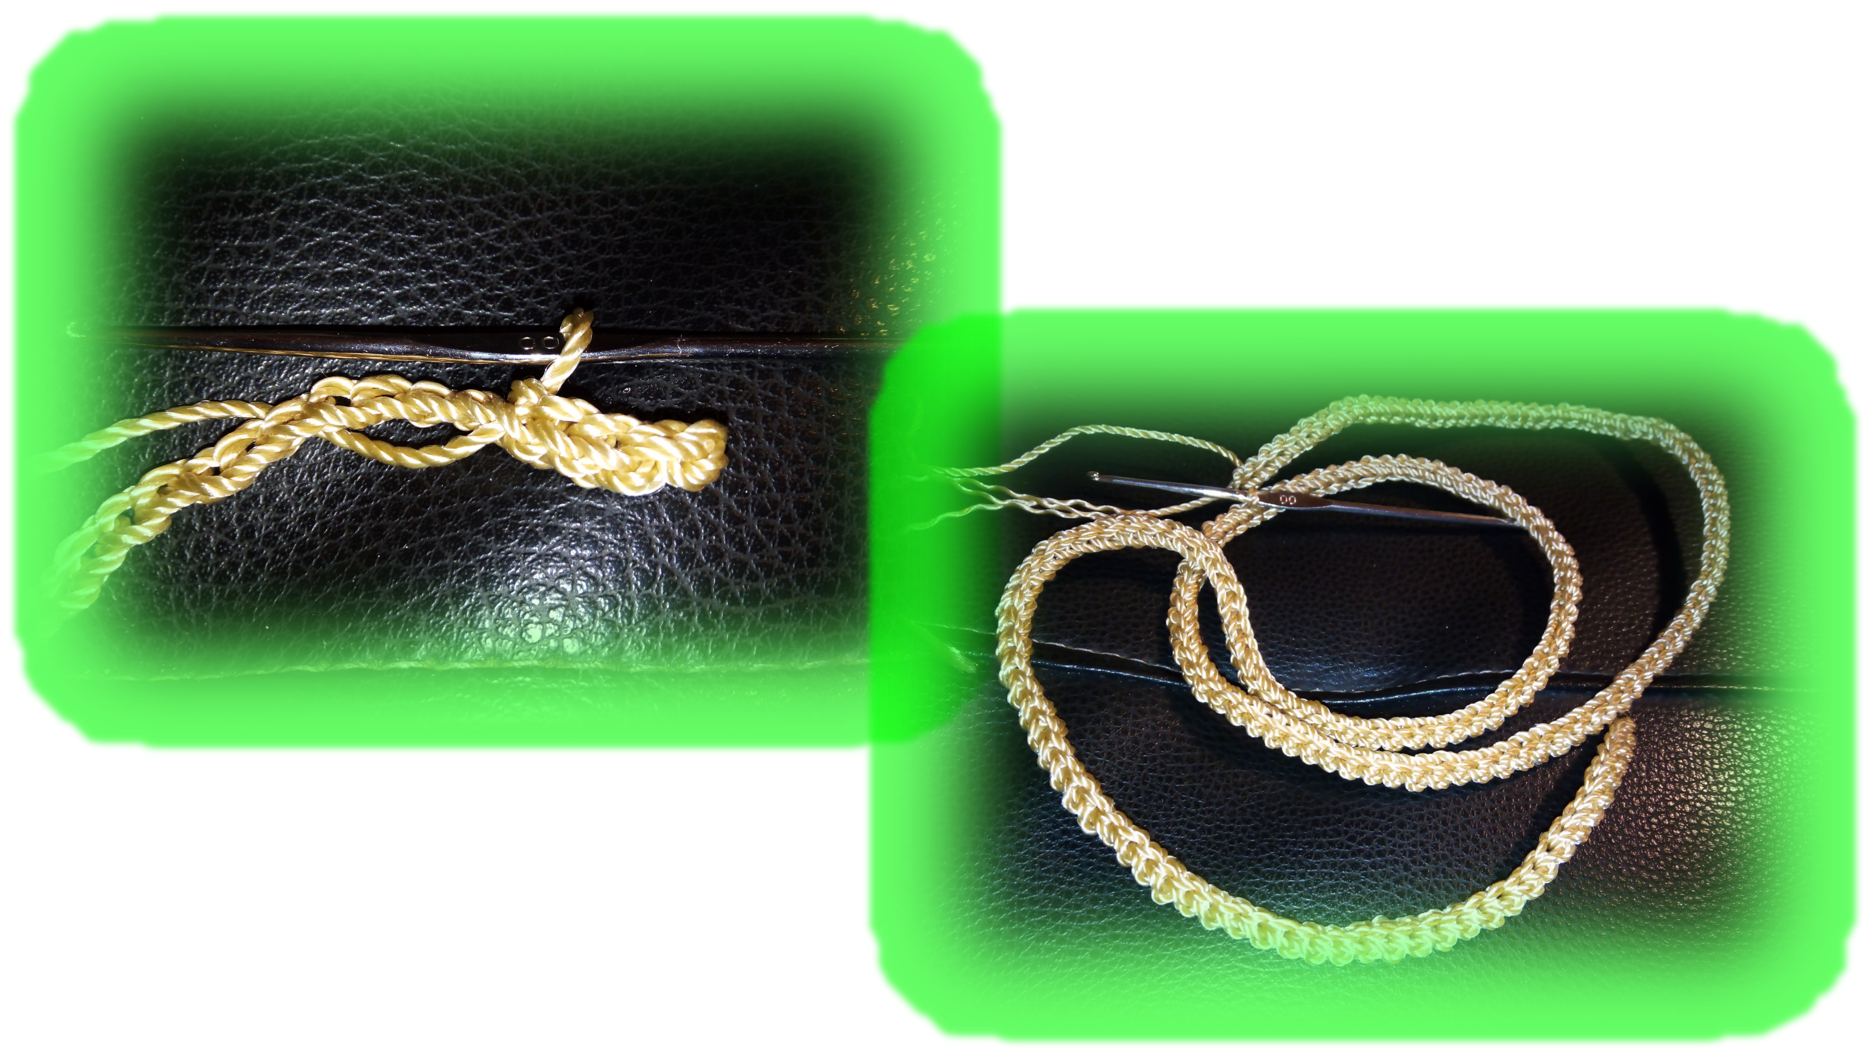
Una vez que ya tenia el grosor necesario, llego el momento de realizar los remates, en este caso, a diferencia de los hilos que usualmente utilizamos para tejer a crochet, para este tipo de hilo, no basta con realizar un nudo, porque tiende a desarmarse. Es necesario, luego de realizar el remate con nudos, se debe quema la punta del hilo con un yesquero para que no se desarme el tejido.
Once it already had the necessary thickness, it was time to make the ends, in this case, unlike the yarns that we usually use to crochet, for this type of yarn, it is not enough to make a knot, because it tends to fall apart. It is necessary, after knotting, to burn the end of the yarn with a tinder so that the fabric does not fall apart.
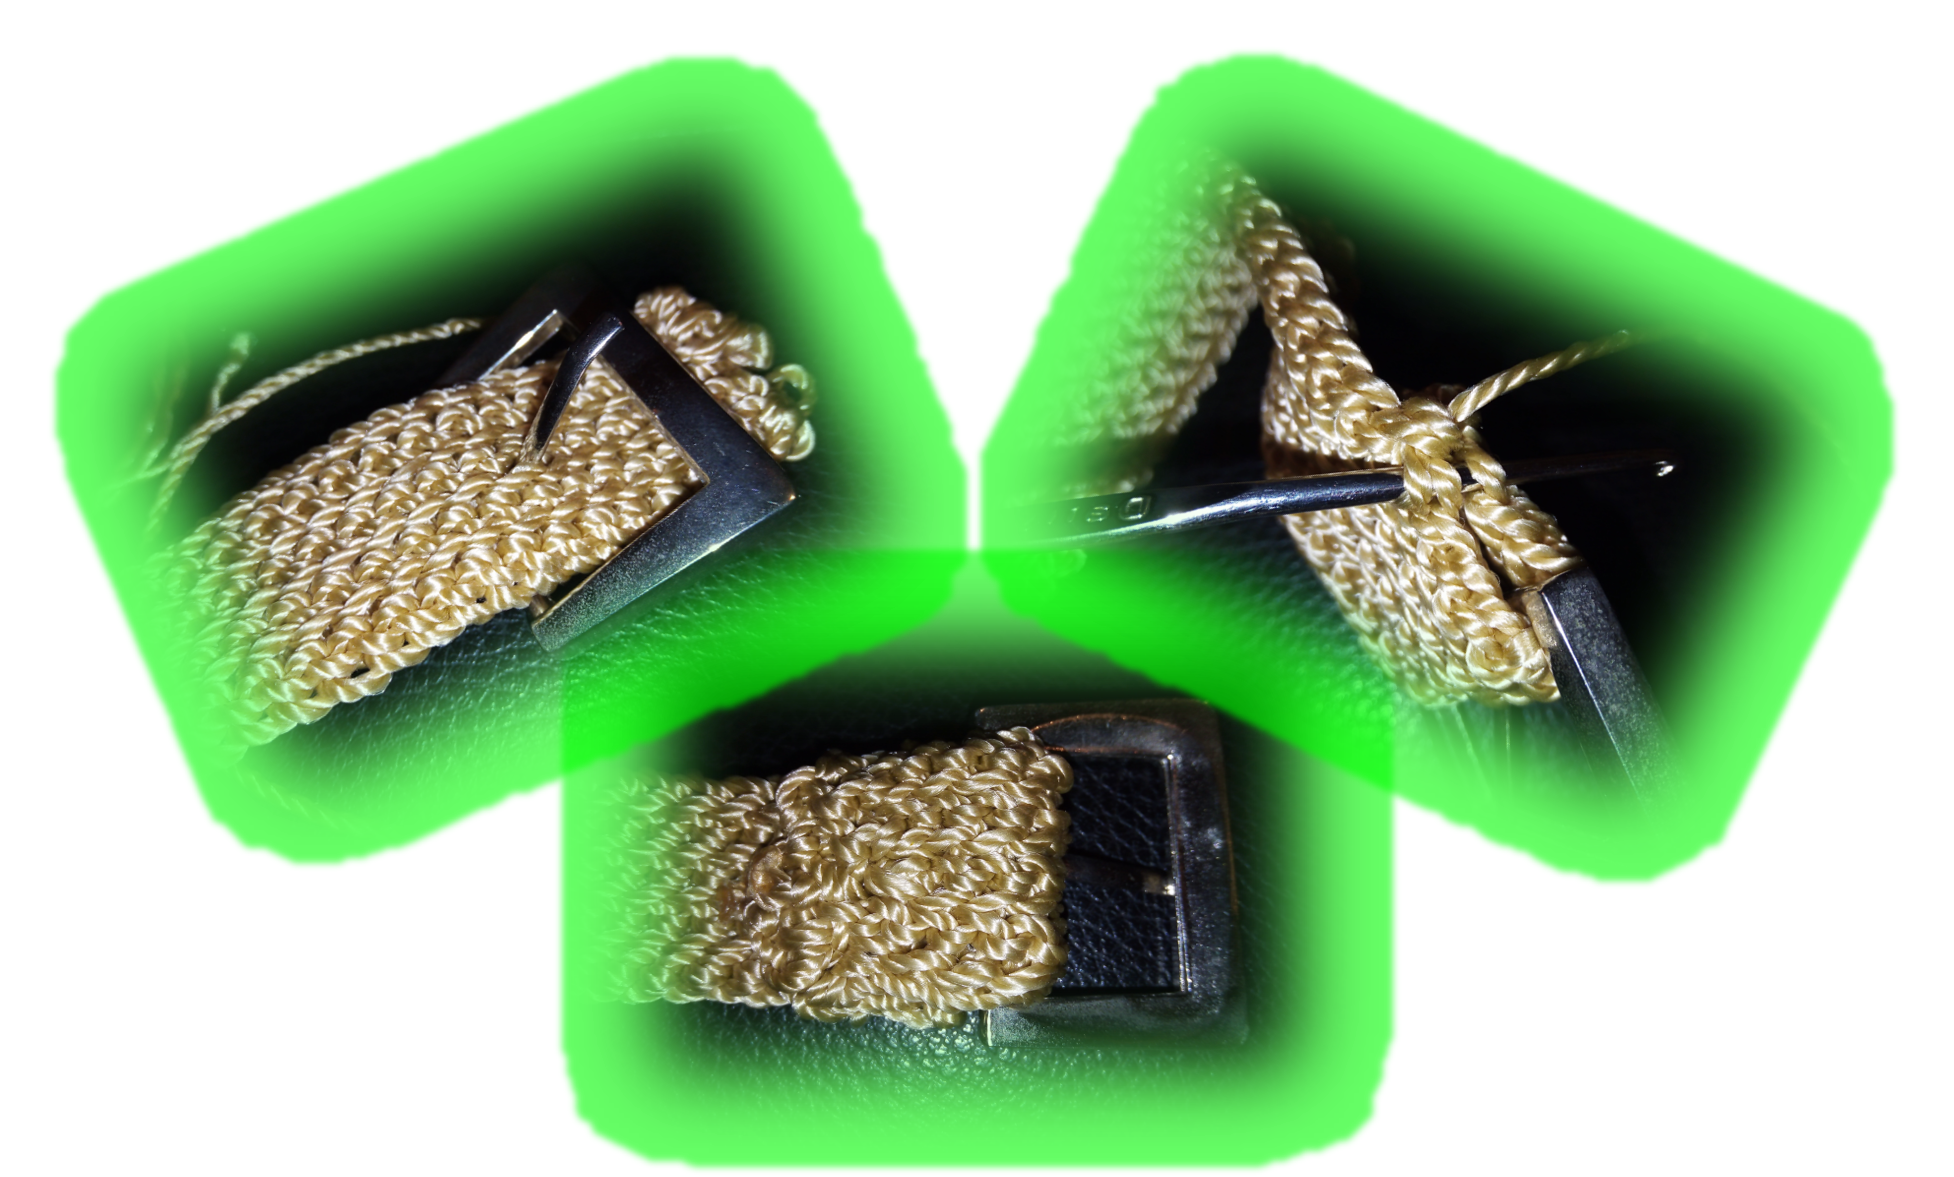
Ahora, llego el momento de colocar la hebilla, el proceso fue sencillo como pueden ver en la imagen, solo en una de las puntas del tejido atravesé el palito de la hebilla, dejando un espacio suficiente para poder realizar un doblez y así, poder sujetar la hebilla. Luego, simplemente realice el respectivo remate para finalmente sellar con el uso del yesquero.
Now, it was time to place the buckle, the process was simple as you can see in the image, only in one of the ends of the fabric I went through the buckle stick, leaving enough space to make a fold and thus, to hold the buckle. Then, I simply made the respective finishing touch to finally seal it with the use of the tinder.
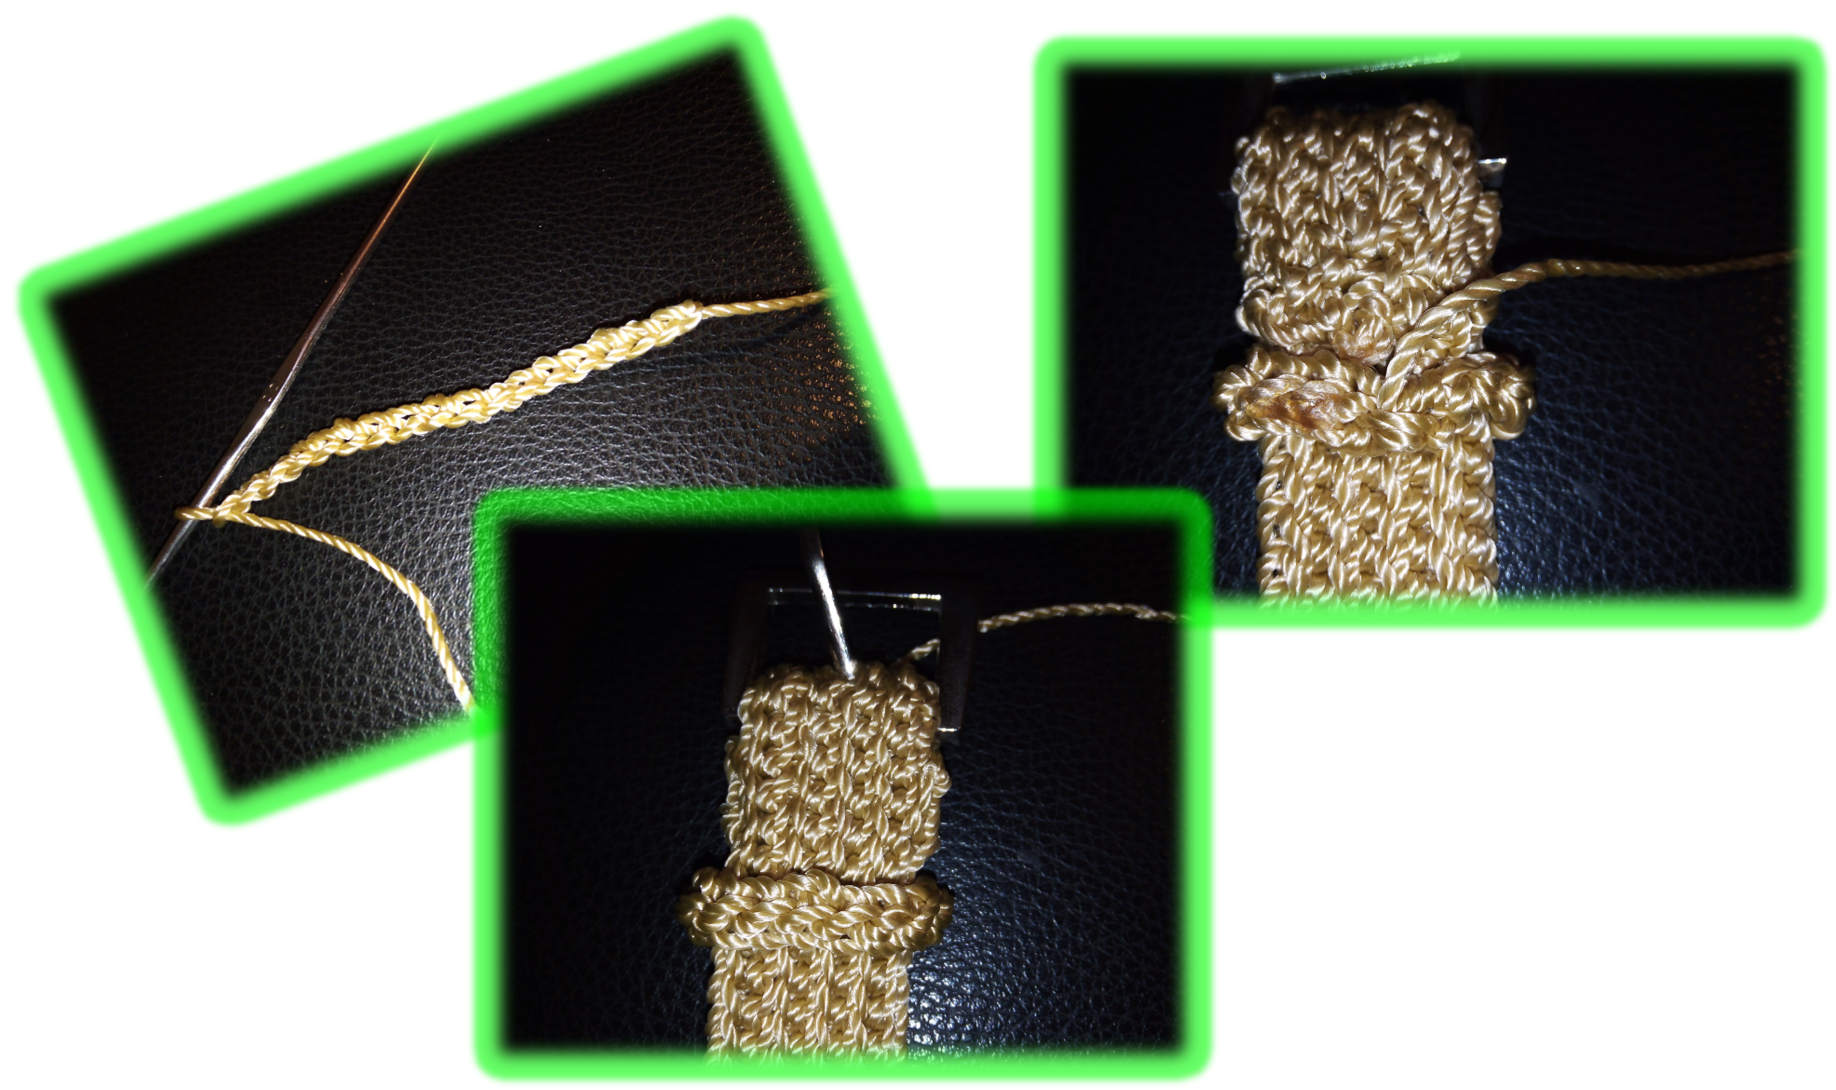
Para finalizar, realice una cadeneta de 20 puntos, y repetí en mismo proceso que para la correa, me regrese, tejiendo, un punto de cadeneta sobre cada uno de los puntos de la base, solo que, en este caso, únicamente realicé 2 vueltas. Este pequeño tejido, me sirvió para colocar la trabilla que tienen todas las correas, y que usamos para sujetar el tramo de correa que siempre nos sobra, cuando nos la ajustamos.
To finish, I made a chain stitch of 20 stitches, and repeated the same process as for the strap, I went back, knitting a chain stitch over each of the stitches of the base, only that, in this case, I only knitted 2 rows. This small knitting, I used to place the loop that all the straps have, and that we use to hold the leftover strap that we always have when we adjust it.
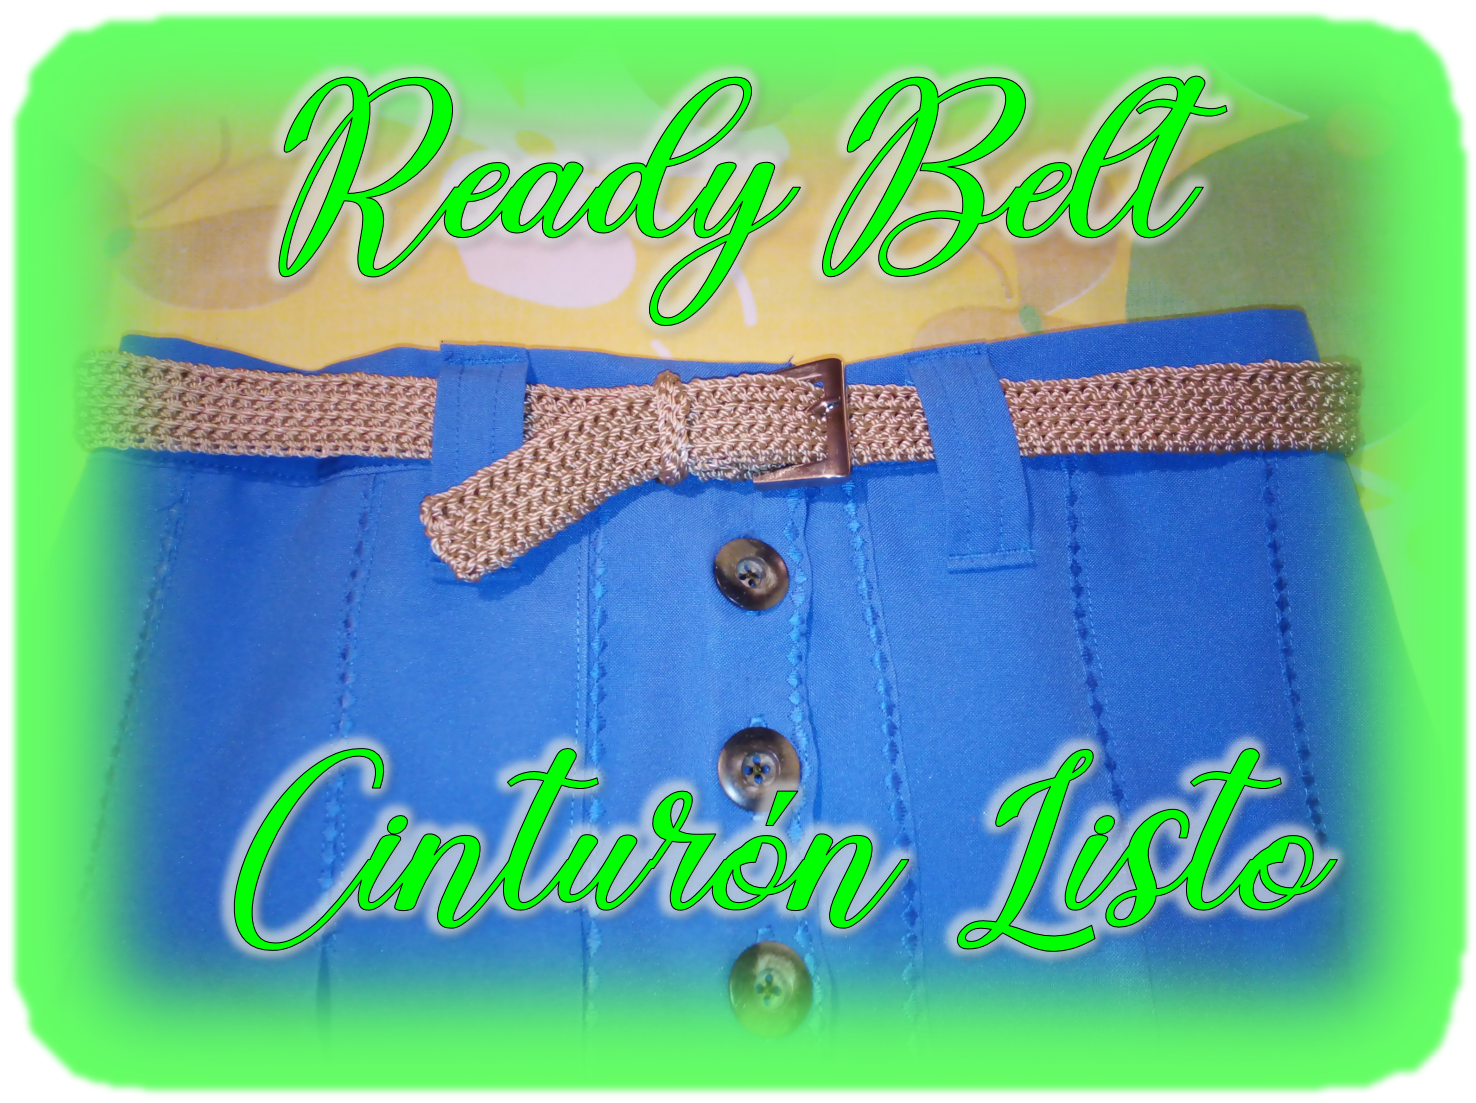
Bueno, llegamos al final del proyecto, como pueden ver en la imagen, ya la correa quedo terminada, fue un proyecto realmente sencillo, y aunque, es un tipo de punto bastante simple, me pareció que quedo muy linda. Tengo varias hebillas que he reciclado de carteras, y también tengo hilo de nailon en otros colores, así que, tengan por seguro que realizaré otras correas, pero, probaré con esquemas de tejidos más elaborados. No me queda más que despedirme de ustedes, esperando que disfrutaran del proceso de elaboración de este sencillo proyecto y por supuesto, sería genial que se animaran a realizarlo. Hasta la próxima, cuídense mucho y cuiden a los suyos.
Well, we got to the end of the project, as you can see in the picture, the strap is finished, it was a really simple project, and although, it is a quite simple type of stitch, I thought it was very nice. I have several buckles that I have recycled from wallets, and I also have nylon thread in other colors, so, rest assured that I will make other straps, but I will try with more elaborate knitting schemes. I just have to say goodbye to you, hoping you enjoyed the process of making this simple project and of course, it would be great if you would be encouraged to do it. Until next time, take care of yourselves and your loved ones.
Contenido y fotografías de mi propiedad intelectual
Información Técnica
| Cámara | Pentax * istDL |
|---|---|
| Lente | * Pentax 18-55 |
| Iluminación | Luz Natural |
| Locación | Barcelona, Estado Anzoátegui, Venezuela |
Content and photographs of my intellectual property
Technical information
| Camera | Pentax * istDL |
|---|---|
| Lens | * Pentax 18-55 |
| Lighting | Natural Light |
| Location | Barcelona, Anzoátegui State, Venezuela |

The rewards earned on this comment will go directly to the people( @francyrios75 ) sharing the post on Twitter as long as they are registered with @poshtoken. Sign up at https://hiveposh.com.
Siempre agradecida de recibir su apoyo. Salud y bendiciones para todo el equipo.
Qué lindo proyecto. Recuerdo que mi madre me hizo una y se estiró 😂 Viendo tu publicación, pues claro, ella lo hizo con lo que tenía, hilo de crochet 😂 al final terminé haciéndole un nudo. Gracias por enseñarnos cómo se hace y los materiales apropiados para ello.
Hola, gracias por la visita y apoyo.
Respecto a tu comentario, leí algo al respecto, en caso de tejer cinturones con hilo para crochet, decía, que se debía tejer con una aguja de menor número al adecuado para el grosor del hilo, precisamente por lo que comentas, tiende a estirarse.
Me alegra que mi trabajo te ayudara, si te animas a realizar una, que por cierto, te aseguro no se estirara, jajaja, me comentas como te fue.
Te envío muchas bendiciones.