Greetings to all. Since I saw the "Electronic World" contest I knew I had to participate. For days I had been preparing my post, but for various reasons (lack of time more than anything else) I had not left my participation. In fact, at this point I'm finishing so without further ado I present my creation. For your enjoyment, Mechagodzilla.

The tools I used to make this figure are as follows:

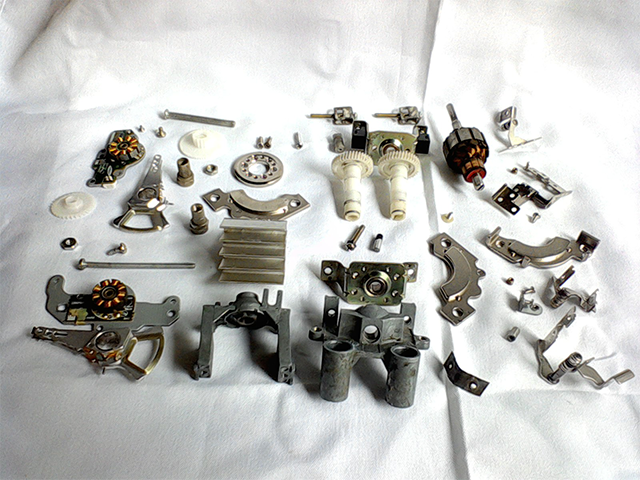
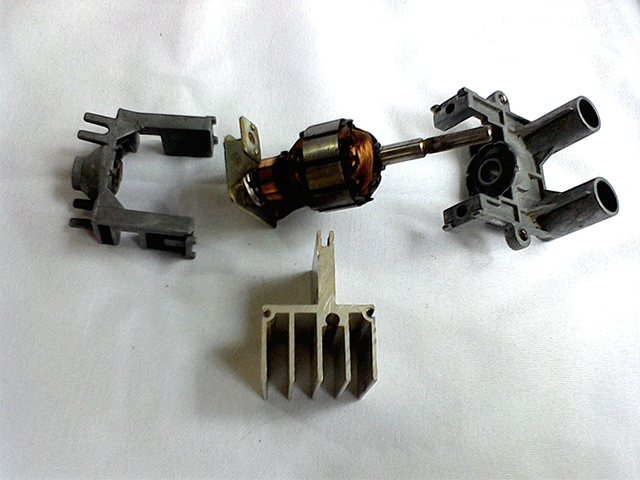
As for the parts I used to build the mechanical monster, well, those were more varied. At home I had a lot of pieces of electrical appliances, since I am dedicated to repair them, among some of the parts I used (because I selected others as I was building the figure), are the following:


This is a piece of a transformer that I disassembled from an old UPS:

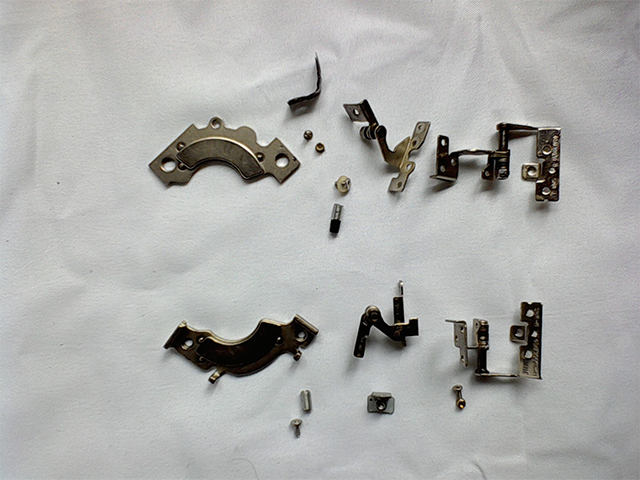
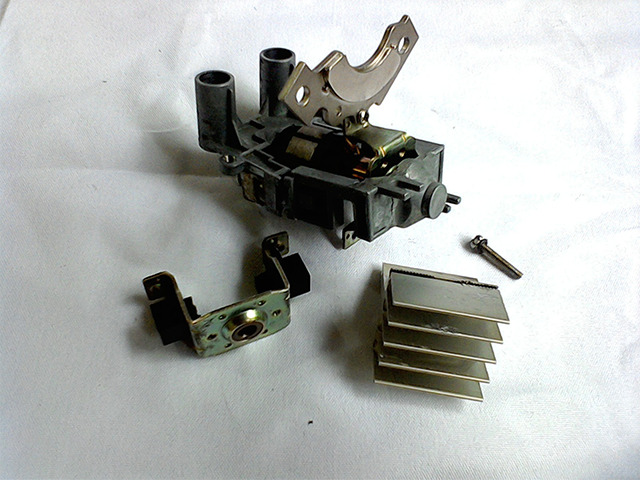
The following are some artifacts from which I extracted other parts that I used for the figure; two hard drives, two dvd drives, two old blenders:

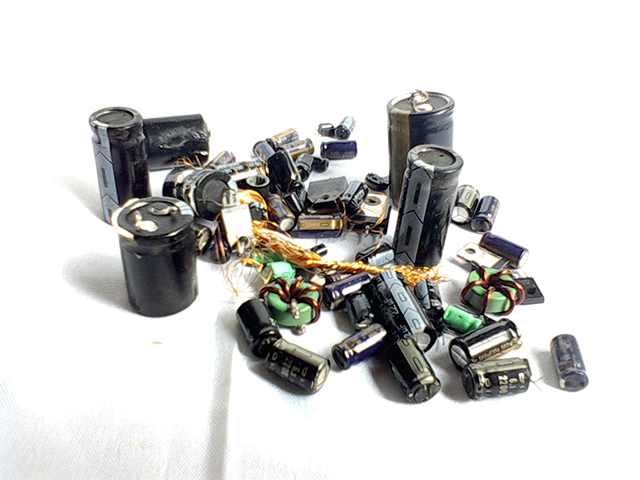
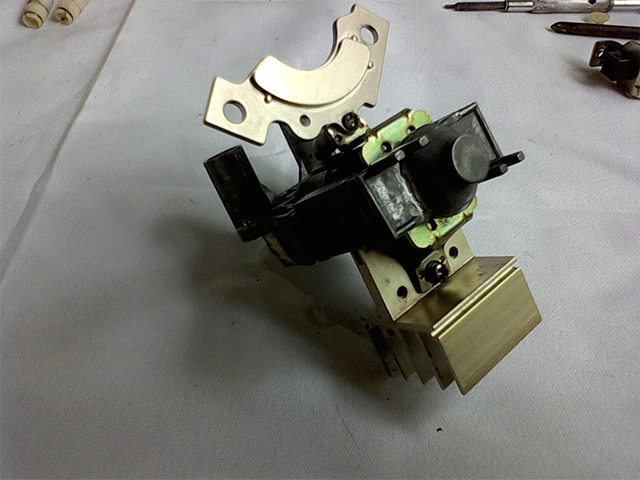
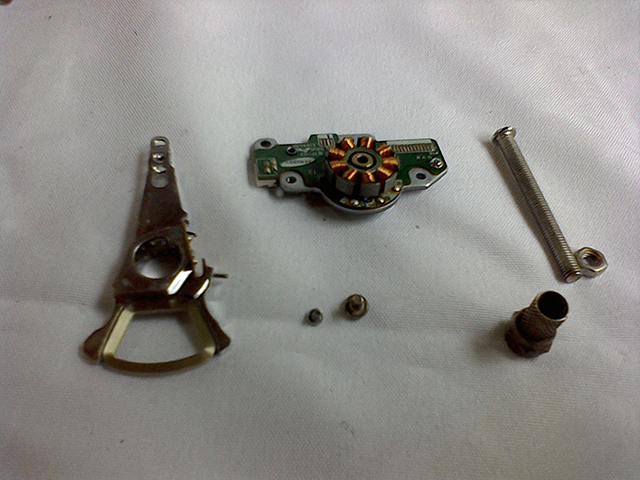
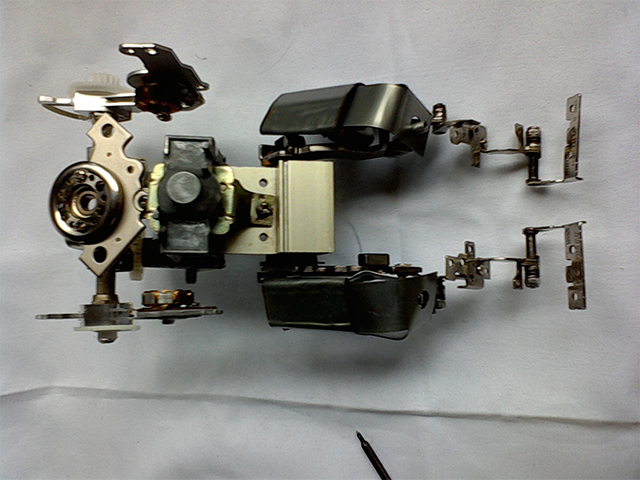
I selected a lot of pieces, making trial and error until I got an idea of how I wanted my figures to look. These were all the pieces I used:
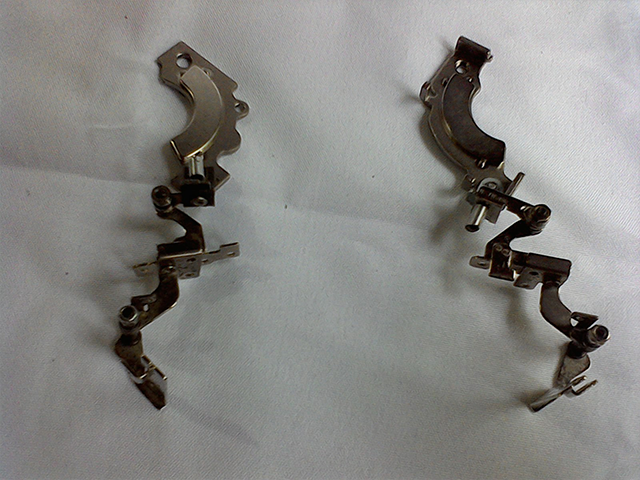
The first thing I did was to assemble the legs, which I assembled with some pieces that connect the screen of a laptop and with some pieces of discoduros:
I assembled the waist with different pieces of the beaters and some computer heatsinks.

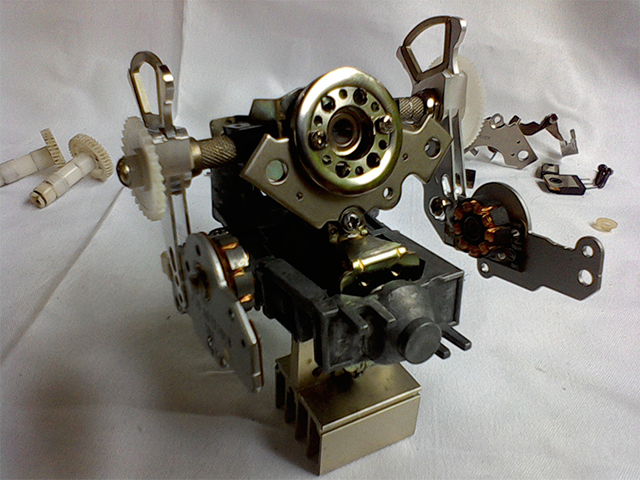
Then came the chest and arms:


This left the waist together with the chest and arms of the figure:
Time to attach the legs. After making a few grimaces with a screw at the base of the computer heatsink, I screwed each leg on one end.

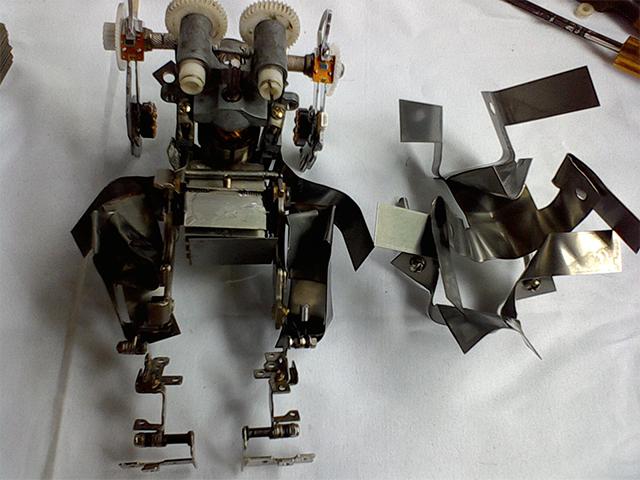
This is how the figure looked with its legs. It still doesn't look like godzilla, but wait.

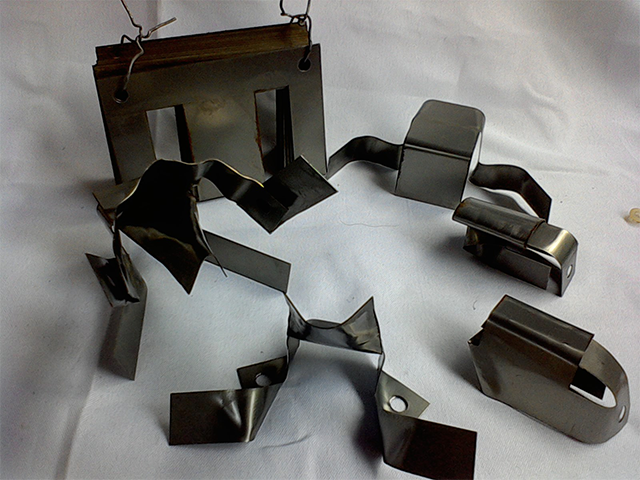
To give shape to what would be the thick part of the figure I used the sheets that I extracted from the transformer and molded them in the desired way. These are the sheets I used for the figure:
Thanks to the magnets that came with the disc parts, I simply left the sheets on the discs and they adhered as if I were using glue:
Then I placed the back sheets:
I made the tail with another piece of a mixer motor, copper wire from a transformer and capacitors of different sizes:

It looked like this once it was fixed in the figure:

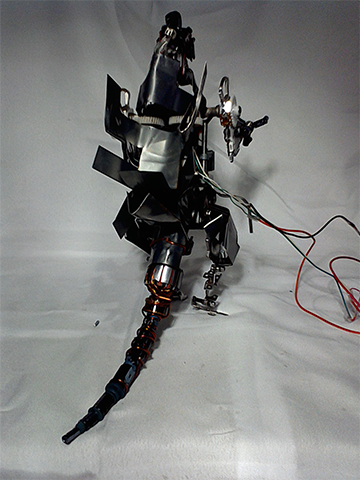
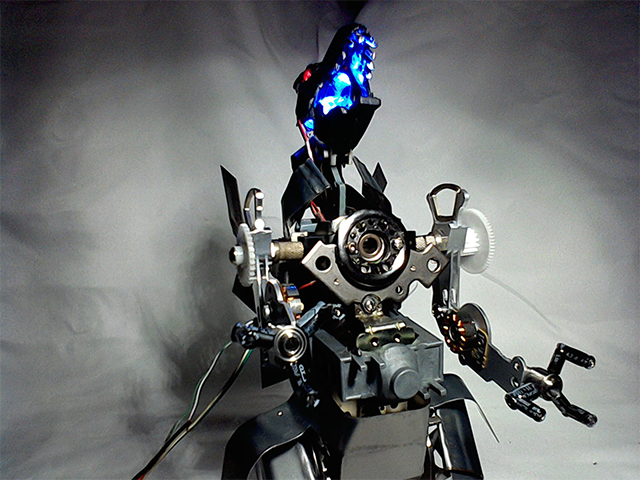
And this is how the back was left with the sheets simulating thorns:

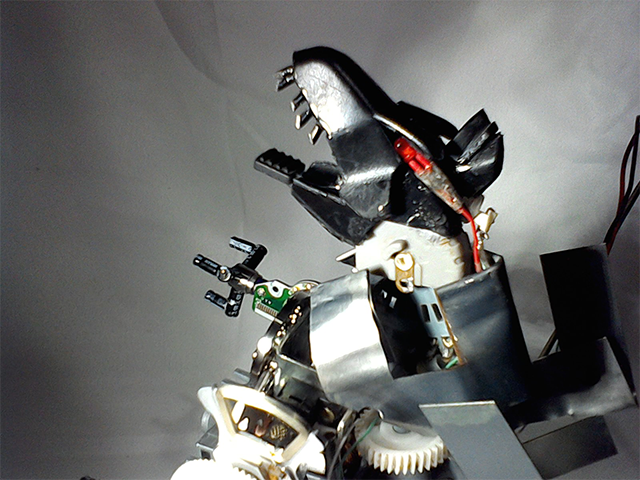
Due to time constraints, in order to publish the post on time, I could not take pictures of the step by step of the head. But I made it with parts from a computer mouse, another moving part from the blender, LED lights and wires, lots of wires. Also, I used capacitors and rollers from hard drives to make the hands of the mechagodzilla.
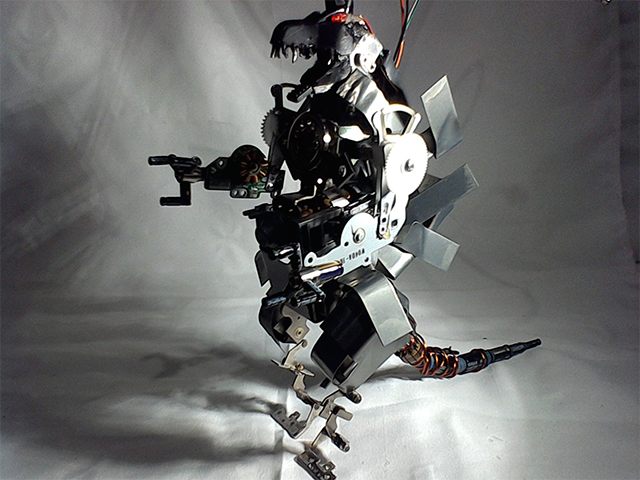
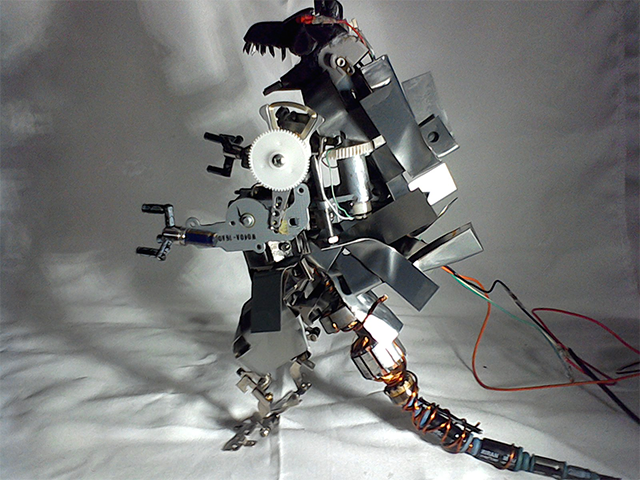
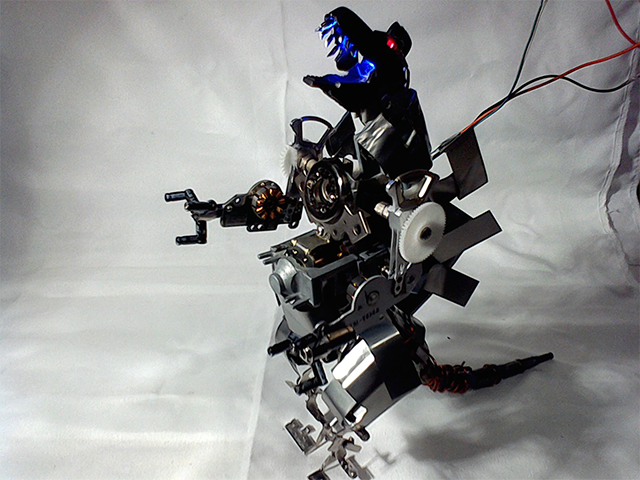
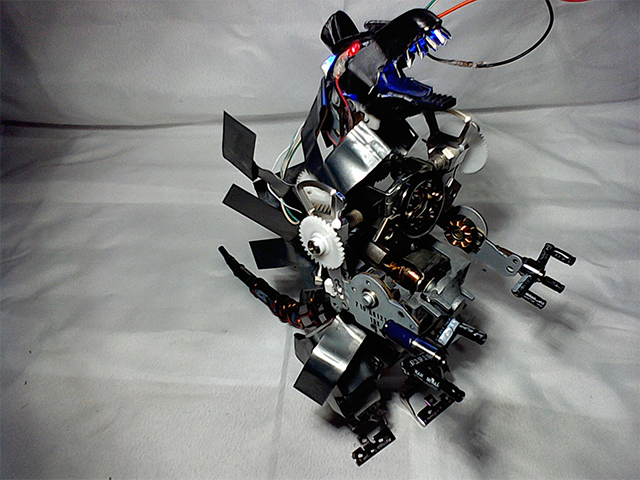
And this is how our figure turned out, I present to you Mechagodzilla:
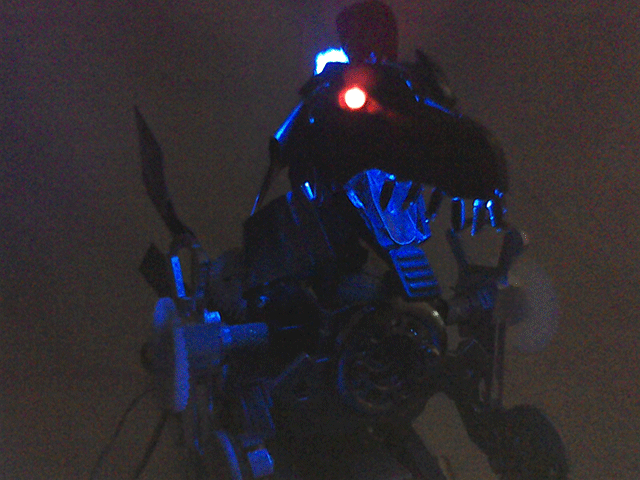
Which also has lights...

Well, that's all for now. It doesn't count much now, but I invite @josueprime to participate in this and the next HiveDIY contests. I hope you liked the publication as much as I liked making it, I'll say goodbye then....
See you next time!
*****Versión en español*****
Saludos a todos. Desde que vi el concurso "Electronic World" sabía que debía participar. Desde hace días había estado preparando mi post, pero por distintas razones (falta de tiempo más que otra cosa) no había dejado mi participación. De hecho, a estas alturas estoy terminando así que sin más dilación les presento mi creación. Para su disfrute, Mechagodzilla.
Las herramientas que usé para hacer esta figura son las siguientes:
En lo que respecta a las partes que usé para construir al monstruo mecánico, bueno, esas fueron más variadas. En casa tenía un montón de piezas de artefactos eléctricos, ya que me dedico a repararlos, entre algunas de las piezas que usé (porque seleccioné otras a medida que construía la figura), se encuentran las siguientes:
Esto es una pieza de un transformador que desarmé de un UPS viejo:
Lo siguiente son algunos artefactos de los que extraje otras piezas que usé para la figura; dos discos duros, dos unidades de dvd, dos viejas batidoras:
Seleccioné una gran cantidad de piezas, haciendo ensayo y error hasta lograr una idea de cómo quería que quedase mi figuras. Estas fueron todas las piezas que usé:
Lo primero que hice fue armar las piernas, las cuales armé con unas piezas que conectan la pantalla de una laptop y con unas piezas de discoduros:
La cintura la armé con distintas piezas de las batidoras y algunos disipadores de computador.
Luego vino el pecho y los brazos:
De esta manera quedó la cintura junto con el pecho y los brazos de la figura:
Hora de fijar las piernas. Tras hacer unas muecas con un tornillo en la base del disipador de computador, atornillé cada pierna en un extremo.
Así quedó la figura con sus piernas. Aún no se parece a godzilla, pero esperen.
Para darle forma a lo que sería la parte gruesa de la figura usé las láminas que extraje del transformador y las moldeé de la manera deseada. Estas son las láminas que usé para la figura:
Gracias a los imanes que traían las piezas de los discos, simplemente dejé las láminas sobre estos y se adhirieron como si estuviese usando pegamento:
Luego coloqué las láminas de la espalda:
La cola la hice con otra pieza de un motor de batidora, con alambre de cobre de un transformador y condensadores de distintos tamaños:
Quedó de esta manera una vez fijada en la figura:
Y así quedó la espalda con las láminas simulando espinas:
Por cuestión de tiempo, para lograr publicar el post a tiempo, no pude tomar fotos del paso a paso de la cabeza. Pero la hice con piezas de un ratón de computadora, de otra pieza móvil de la batidora, luces LED y cables, muchos cables. Además, usé condensadores y rolineras de los discos duros para hacer las manos del mechagodzilla.
Y así quedó nuestra figura, les presento a Mechagodzilla:
El cual también tiene luces...
Bien, esto ha sido todo por ahora. No cuenta mucho ahora, pero invito a @josueprime a participar en este y los próximos concursos de HiveDIY. Espero que la publicación les haya gustado tanto como a mi me gustó hacerla, me despido entonces...
¡Hasta la próxima!

Imagenes editadas con Photoshop
Fotos tomadas con tablet HP stream 7
Traducido con DeepL
Photos edited with Photoshop
Photos taken with HP stream 7 tablet
Translated with DeepL
Últimos tres post/Last three posts:
Sculpture #4: Travel companion / Escultura #4: Compañero de viaje
Weekend in my vegetable garden, one month later!
Entrada al Concurso de microrrelatos fantásticos de Literatos | Canicas
Oh man! This stuff is next level! 👀
I love it! Great stuff Gabo, you got skills, I like your sculptures and your style but I wasn't expecting that! SUPER! 😎
And the glow in the dark effect, really cool!
Good luck for the contest! I'm sure you're going to score big with this one!
Take care! 😁
HAHAHA I'm glad you liked it! I did the best I could! Truth be told I took quite a while on this and even stayed up late haha so I really appreciate your comment. Blessings my friend! Best regards!
te botaste, pero lo postulaste tarde coñio!!!! esta genial vale! te vamos a enviar unos regalitos con tip!
Esto quedo extraordinario, esto es de genios realmente tu creatividad vuela. Te felicito gracias por participar.
Top!! You did a great work!!
!discovery 30
Hey! thanks for stopping by to read the post! I'm glad you commented! I really appreciate it, because it encourages you to keep posting good content.
Best regards!
This post was shared and voted inside the discord by the curators team of discovery-it
Join our community! hive-193212
Discovery-it is also a Witness, vote for us here
Delegate to us for passive income. Check our 80% fee-back Program
Hola amigo @gaboamc2393 naguara Wow 😲 te admiro , tienes una imaginación envidiable para muchas cosas quede así cuando vi tu post de verdad 😲, de pana como lo hiciste , te quedo demasiado genial.
Sigue así amigo tiene mucho talento. Bendiciones🤗.
jajaja me alegro mucho que te haya gustado, es algo en lo que estuve trabajando todo el fin de semana practicamente, es algo que lleva bastante trabajo pero el resultado es bastante satisfactorio... acá entre nos, yo mismo no sé cómo lo hice, simplemente quería hacer algo bonito y bueno, creo que quedó bien.
Gracias por comentar, muchos éxitos amiga @ross92 !
Congratulations @gaboamc2393! You have completed the following achievement on the Hive blockchain and have been rewarded with new badge(s) :
Your next target is to reach 8000 upvotes.
You can view your badges on your board and compare yourself to others in the Ranking
If you no longer want to receive notifications, reply to this comment with the word
STOPTe quedo espectacular, te felicito.
amiga @elemarg25 muchas gracias por comentar, lo agradezco mucho.
Excelente trabajo. Te quedó espectacular👏
Que bueno que piense eso, me alegra mucho que le haya gustado. Gracias por tomarse el tiempo para leer la publicación. Saludos cordiales!
Chamo que visión tienes para lograr ese godzilla muy buena tu publicación, después con mas tiempo haces una versión mejorada con algo de movimiento jejeje.
Saludos y bendiciones.
amigo te quedo genial, y me gusta mucho como explicas el procedimiento a través de las fotos, felicitaciones, saludos y bendiciones.