English
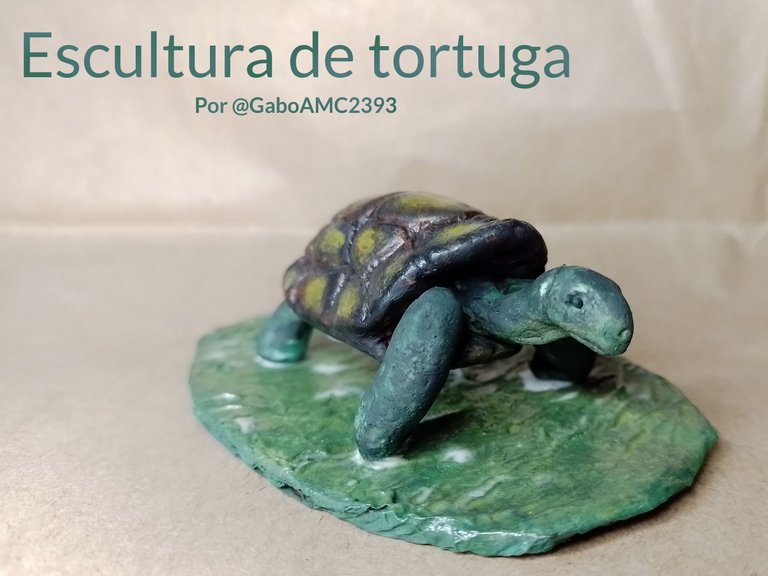
Sculptures are something characteristic of my blog; however, I had a long time without bringing you any, so today I bring you a sculpture I made to give it to a neighbor who will go far away and loves turtles.
It is a rustic sculpture, rough, it does not cause tenderness or anything like it. But come on, it's a turtle, so that's what it should look like, like a turtle. Next, I will share with you the step by step of the figurine and some tricks so you can see how I managed to make it. I sincerely hope you like it.

As always, let's detail the materials. This is not the typical sculpture that is made on a complete frame. It is made entirely of plasticine and only has a couple of supports along the body, for the legs and the head.
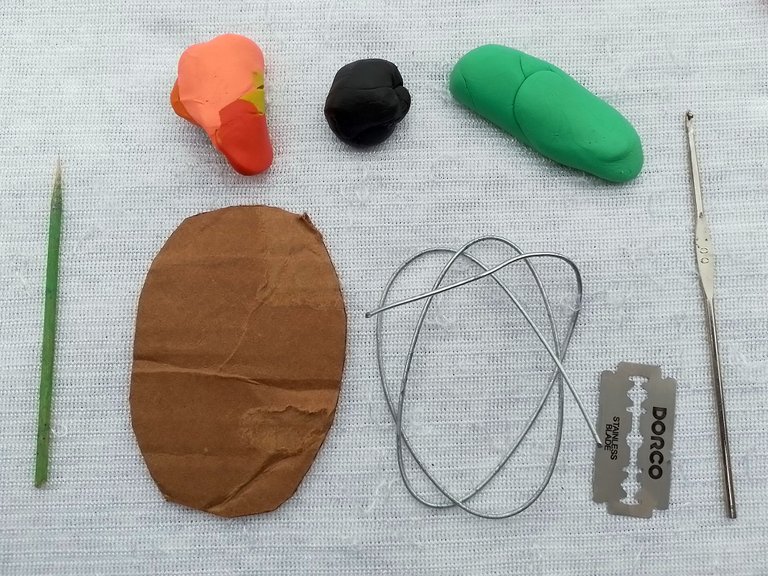
Among the materials I used are plasticine (the base material), wire, cardboard and paints of different colors. As tools I used a wooden stick, a blade and a knitting needle.
Well, to begin with I made a mixture of orange with yellow, red and a bit of black, to create this clay-like color, which would serve as the base color for the creation of the turtle's shell.
I must emphasize that it is not a sea turtle, nor a small land turtle, no. This turtle is similar in appearance to a sea turtle. This turtle is similar in appearance to the giant turtles seen in documentaries, for example, as the turtle of Kung Fu Panda, the master Oogway.
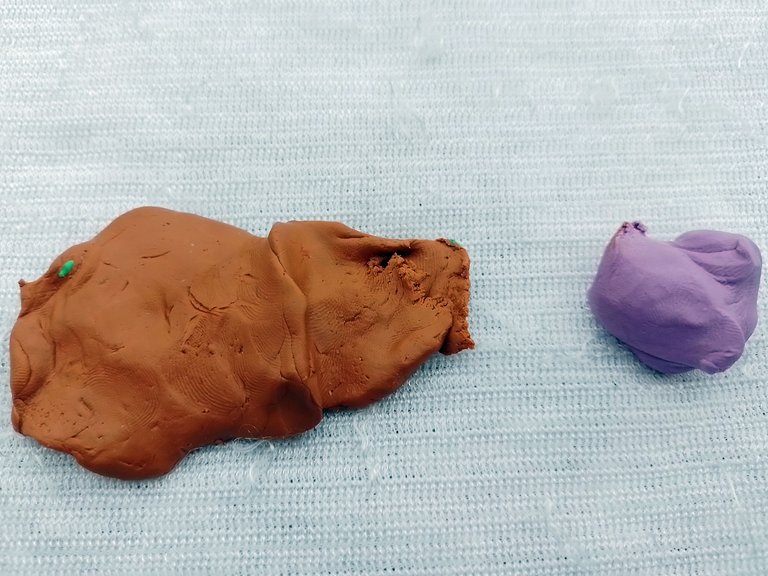
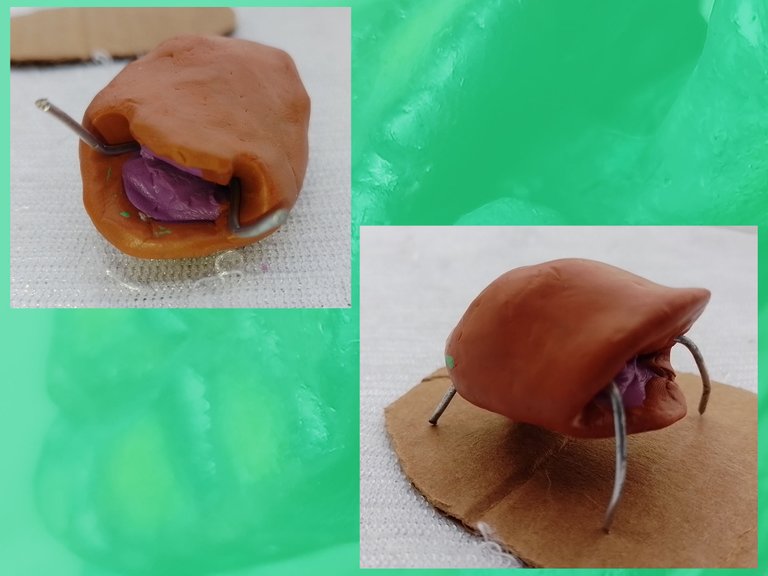
Once I had the base color, I took a piece of purple plasticine and covered it with the clay-colored plasticine to start molding the shell. Little by little I continued molding until I achieved the desired shape.
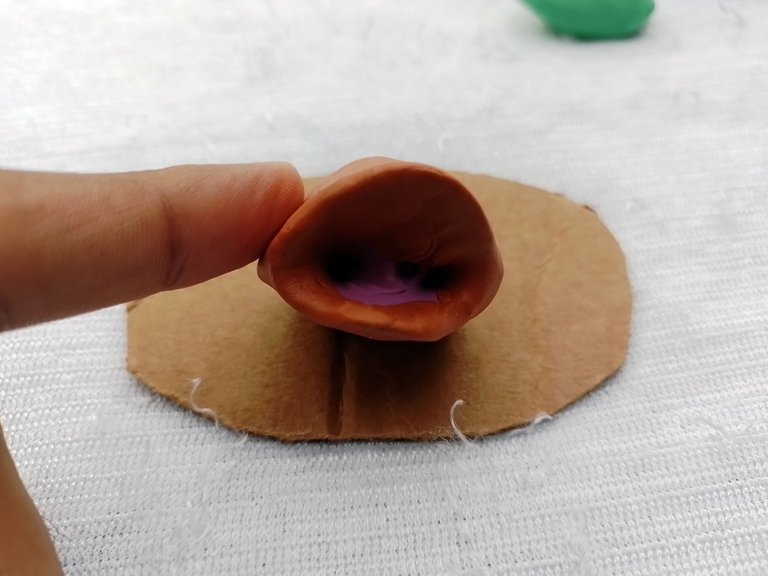
Below you can see a part of the before and after. As you can see, I left the opening in the front for the legs and feet. Obviously, I also left an opening for the hind legs and tail.

As I mentioned before, this figure does not have an inner shell, it is quite sturdy as it is only made of plasticine; however, it would need support for the legs and head, so I made three holes in each opening of the shell.
Below you can clearly see the three holes I made in the front for the wires for the head and legs.
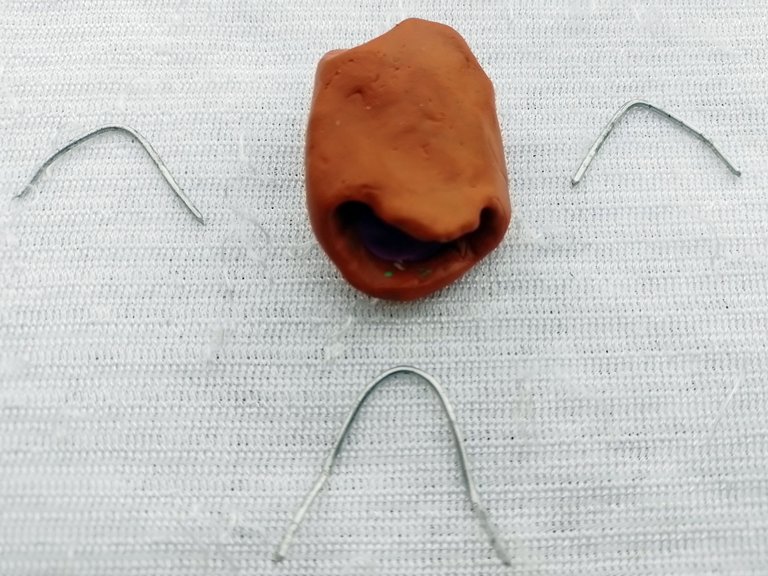
The supports are made of wire, each one I made in the final shape that the legs would have, except the hind leg support, which is a V-shaped wire, which I bent down at the ends.
Here is a photo of the wire supports next to the shell.
Once I cut each wire support, I placed them in each place and did a test to see if these wires would make it stand up. Indeed, they were strong enough to support the turtle, as you can see in the image below:
Once I had an idea of how and where each wire support would be, I used the plasticine and covered the wire and then put it back in place.
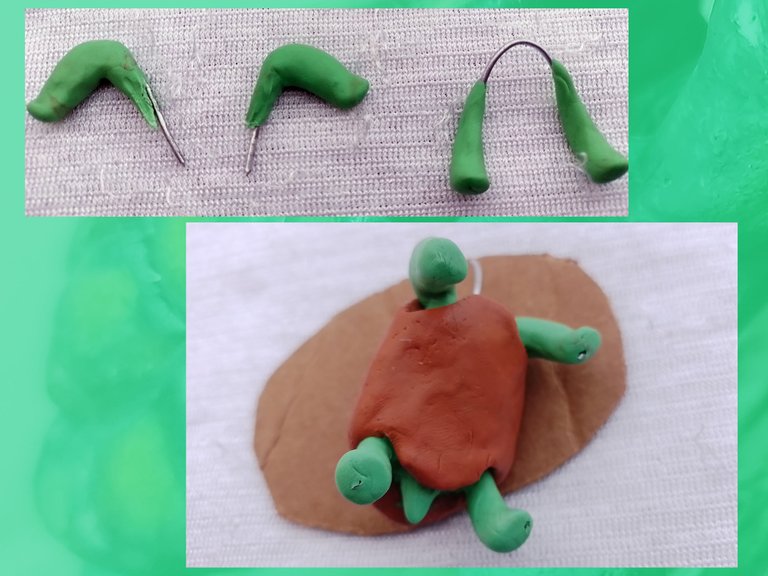
I also did the same with the head, I cut a piece of wire, covered it with plasticine and placed it in the place where the turtle's head would go. As you can see it is a turtle with a long neck, so I made it that way.
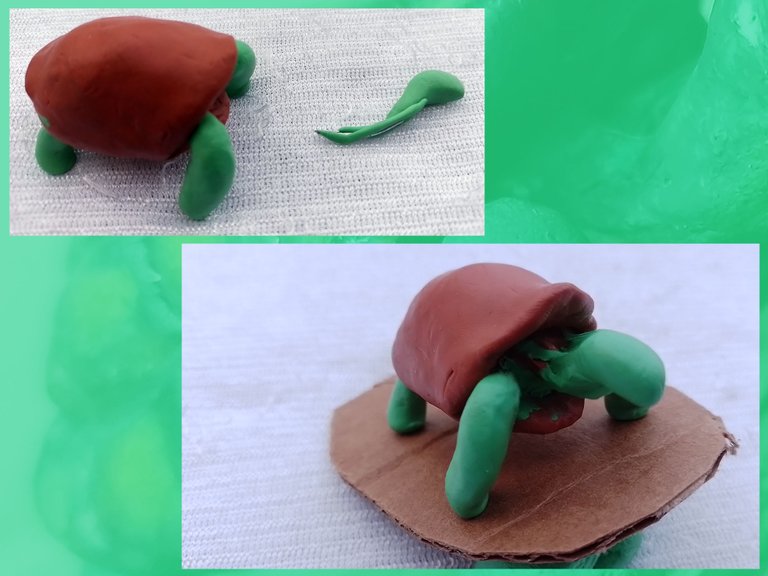
As soon as I finished the base shape, it was time to do the details, which take the most time.
First I started to make the dividing lines on the shell. Some turtles, which have been living for years, have very pronounced carapace dividing lines, so I made them quite pronounced so that they could be clearly seen.
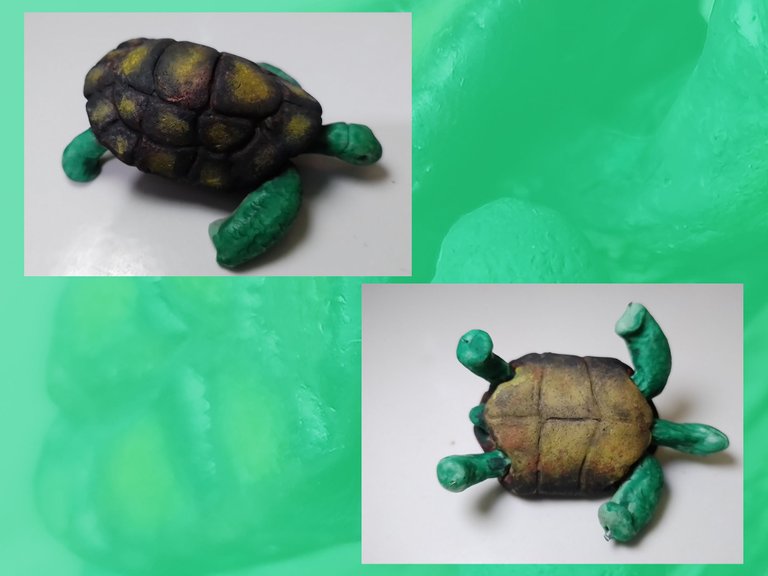
Then I began to paint them with black, yellow and green, to darken the clay color of the clay.
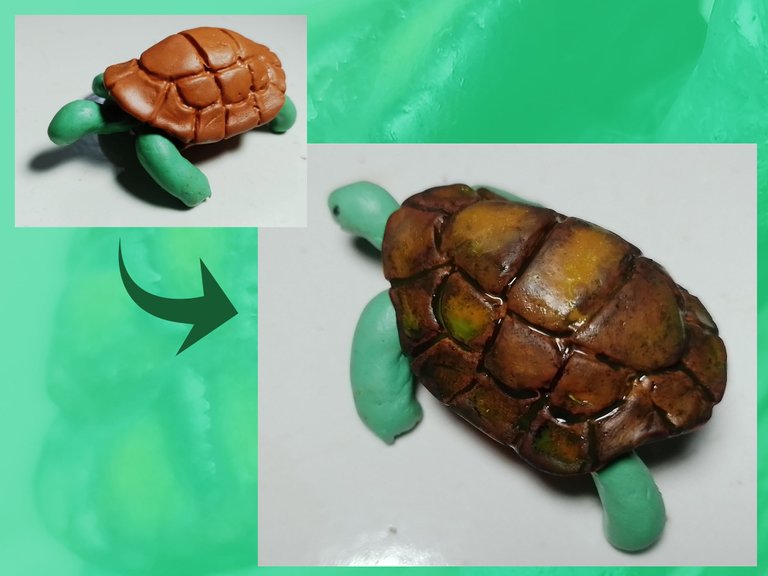
Once the paint was dry, I also used forest green to darken a bit the legs and head of the turtle. I also used yellow to create those yellow dots on the turtle's shell.
It should be noted that although the bottom of the turtle will not be seen at the end, because it will be on a cardboard base, I made the lines and painted it, as you can see in the image below:
After finishing the last details, I applied glue on the cardboard base, painted it and placed the turtle. I also applied glue on the turtle, but only on the shell. On the extremities and head I did not apply glue.
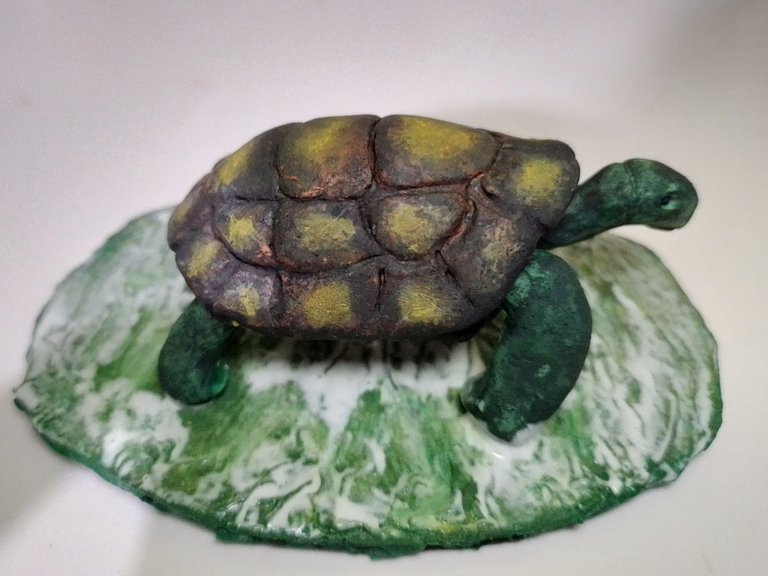
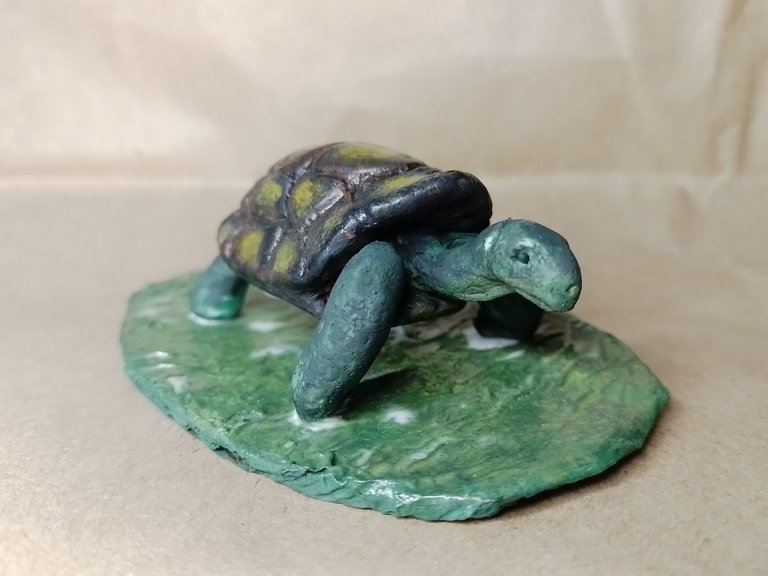
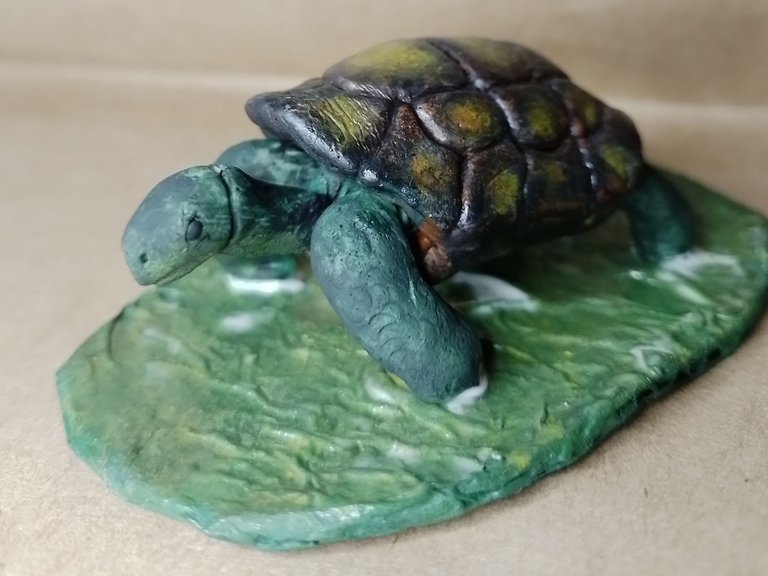
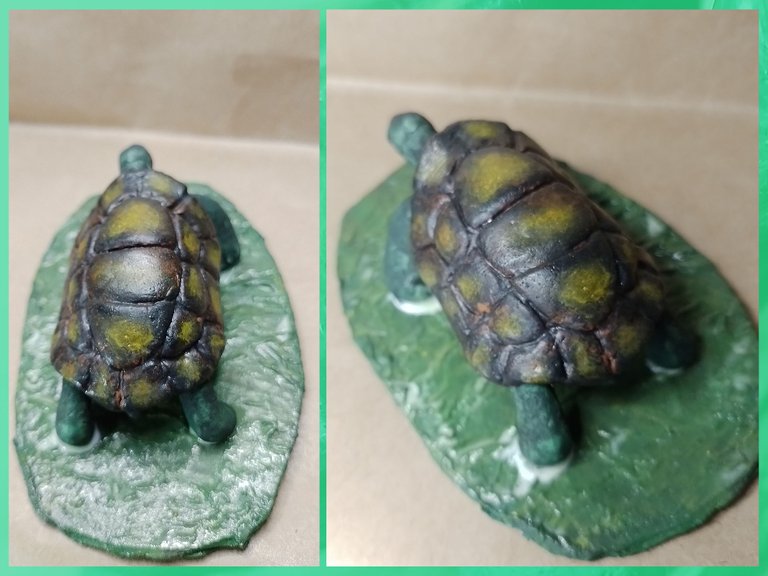
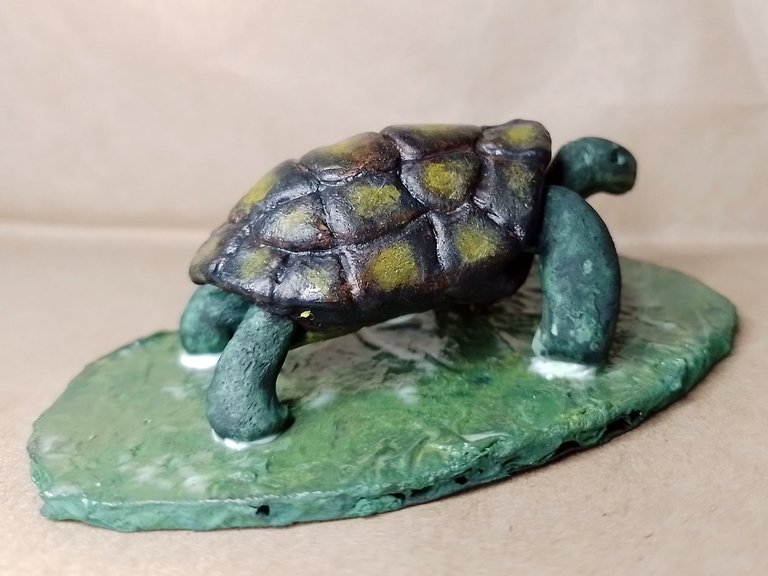
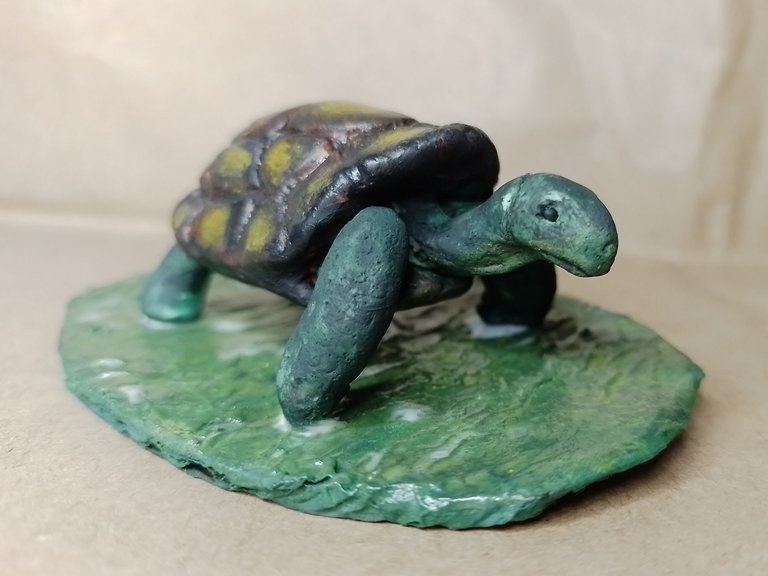
This way the figure was finished, a turtle a little old, with an evident rustic aspect that these turtles usually have and with details in the eyes, the nose, the mouth, the neck and the shell, which is what stands out most to the eye.
Here are a series of photographs of the final result:
Well friends, that's all for now. At this point I gave the turtle to its owner, so she was very happy with her little sculpture, which she kept in a little box with paper to protect it.
On my part, thank you very much for reading the publication, I hope you liked it. I invite you to leave your opinions below in the comments, as always I will be happy to read them. Without further ado, I will say goodbye then...
See you next time!
Español
Las esculturas son algo característico de mi blog; sin embargo, tenía bastante tiempo sin traerles alguna, así que hoy les traigo una escultura que hice para regalarla a una vecina que se irá lejos y le encantan las tortugas.
Es una escultura rústica, áspera, no causa ternura ni nada que se le parezca. Pero vamos, es una tortuga, así que así debería lucir, como una tortuga. A continuación, les compartiré el paso a paso de la figurita y algunos trucos para que vean cómo logré hacerla. Espero de corazón que les guste.
Como siempre, vamos a detallar los materiales. Esta no es la típica escultura que se hace sobre un armazón completo. Está hecha completamente de plastilina y solo tiene un par de soportes a lo largo del cuerpo, para las piernas y la cabeza.
Entre los materiales que utilicé está la plastilina (el material base), el alambre, el cartón y pinturas de diversos colores. Como herramientas utilicé un palillo de madera, una hojilla y una aguja de tejer.
Bien, para comenzar hice una mezcla de naranja con amarillo, rojo y un poco de negro, para crear este color parecido a la arcilla, el cual serviría de color base para la creación del caparazón de la tortuga.
Debo destacar que no es una tortuga marina, ni una tortuga terrestre de las pequeñas, no. Esta tortuga es de apariencia similar a las tortugas gigantes que se ven en los documentales, por ejemplo, como la tortuga de Kung Fu Panda, el maestro Oogway.
Una vez que tuve el color base, tomé un trozo de plastilina morada y la cubrí con la plastilina de color arcilla, para comenzar a moldear el caparazón. Poco a poco continué moldeando hasta que logré la forma deseada.
Abajo pueden ver una parte del antes y el después. Como pueden observar, dejé la apertura en la parte delantera para las piernas y las patas. Obviamente, también dejé una apartura para las patas traseras y la cola.
Como les mencioné antes, esta figura no tiene un armazón interior, es bastante robusta al ser solamente de plastilina; sin embargo, sí necesitaría soporte para las patas y cabeza, así que le hice tres agujeros en cada apertura del caparazón.
A continuación se ve claramente los tres agujeros que hice en la parte delantera para los alambres de la cabeza y las patas.
Los soportes estan hecho de alambre, cada uno lo hice con la forma final que tendrían las patas, excepto el soporte de las patas traseras, que es un alambre con forma de V, el cual doblé hacia abajo en los extremos.
Aquí está una foto de los soportes de alambre junto al caparazón.
Una vez que corté cada soporte de alambre, los coloqué en cada lugar e hice una prueba para ver si con estos alambres lograba ponerse de pie. En efecto, eran lo suficientemente fuerte para sostener a la tortuga, como pueden evidenciar en la imagen de abajo:
Una vez que ya tenía una idea de cómo y donde quedaría cada soporte de alambre, usé la plastilina y cubrí el alambre para luego volver a colocarlo en su lugar.
También hice lo mismo con la cabeza, corté un trozo de alambre, lo cubrí con plastilina y lo coloqué en el lugar donde iría la cabeza de la tortuga. Como pueden ver es una tortuga con el cuello largo, así que la hice de esa manera.
Tan pronto terminé la forma base, era tiempo de hacer los detalles, los cuales son los que quitan más tiempo.
Primero comencé a hacer las líneas divisorias en el caparazón. Algunas tortugas, que tienen años viviendo, tienen muy marcadas estas líneas divisorias del caparazón, así que estas las hice bastante pronunciadas para que se vieran claramente.
Posteriormente comencé a pintarlas con color negro, amarillo y verde, para oscurecer el color arcilloso de la plastilina.
Una vez que la pintura se secó, también usé color verde bosque para oscurecer un poco las piernas y la cabeza de la tortuga. De igual manera usé el color amarillo para crear esos puntor amarillos que tiene la tortuga en su caparazón.
Cabe destacar, que a pesar de que la parte de abajo de la tortuga no se verá al final, pues va a estar sobre una base de cartón, yo le hice las líneas y la pinté, como pueden ver en la imagen de abajo:
Tras afinar los últimos detalles, apliqué pegamento sobre la base de cartón, la pinté y coloqué a la tortuga. Sobre esta también apliqué pegamento, pero solo sobre el caparazón. Sobre las extremidades y la cabeza no apliqué pegamento.
De esta manera quedó terminada la figura, una tortuga un poco vieja, con evidente aspecto rústico que suelen tener estas tortugas y con detalles en los ojos, la nariz, la boca, el cuello y el caparazón, que es lo que más destaca a la vista.
A continuación les dejo una serie de fotografías del resultado final:
Bien amigos, esto ha sido todo por ahora. Ya a estas alturas la tortuga la regalé a su dueña así que se fue muy contenta con su pequeña escultura, la cual guardó en una cajita de manera con papel, para protegerla.
De mi parte, muchas gracias por leer la publicación, espero que les haya gustado. Los invito a dejar sus opiniones abajo en los comentarios, como siempre estaré encantado de leerlos. Sin más que agregar, me despido entonces...
¡Hasta la próxima!

Traducido con DeepL
First Year At Hive
Visitando Amigos #HiveSWCBqto
Unboxing: New Router
~~~ embed:1573087255819915267 twitter metadata:Ym9ieV9Xc2l4fHxodHRwczovL3R3aXR0ZXIuY29tL2JvYnlfV3NpeC9zdGF0dXMvMTU3MzA4NzI1NTgxOTkxNTI2N3w= ~~~
The rewards earned on this comment will go directly to the people( @gaboamc2393, @fixie, @leidimarc ) sharing the post on Twitter as long as they are registered with @poshtoken. Sign up at https://hiveposh.com.
Interesante esa base dentro del caparazón, es entendible para poder hacer la forma y le de fuerza al caparazón.
Muy bonita la morrocoya
Hola Ana siii vale la idea era darle un poquito de fuerza para que mantuviera estable la figurita. Quedo beia jejeje gracias por pasarte por mi post.
Me encanta, si me quito los lentes casi que parecie real, pero como no me los quito sí sé que es una escultura, quedó muy bonita, espero que tu vecina la sepa valorar y la cuide mucho.
Bueno la idea era darle ese toque realista pero sin que dejase de ser una escultura jeje
Ojala le dure bastante a la vecina, es una figurita que hice con cariño y pss un detallito para que se acuerde de uno.
Esto simplemente es una belleza 😍 Parece real. Grandioso trabajo. No tengo mas que agregar que felicidades amigo @gaboamc2393 💕
!LADY
View or trade
LOHtokens.@dayadam, you successfully shared 0.1000 LOH with @gaboamc2393 and you earned 0.1000 LOH as tips. (1/1 calls)
Use !LADY command to share LOH! More details available in this post.
Ay Daya tu siempre atenta a mis post dejando bonitos comentarios. Mira, te regalo un pedacito de pizza.
!PIZZA
Ainsssss. Gracias por la pizza 🍕🍕🍕 Para eso estamos amigo @gaboamc2393. Para apoyarnos. Exitosssss... 💕
Es imposible que yo vea a una tortuga, yo veo a Squirtle jajaja.. No en serio, quedó genial hermano.. Especialmente el caparazon!
Jajajaja sabes qué estaba pensando? En hacer al maestro Oogway el de Kung fu Panda. Después que hice esta figurita pensé en hacerlo... tal vez un día de estos.
Your content has been voted as a part of Encouragement program. Keep up the good work!
Use Ecency daily to boost your growth on platform!
Support Ecency
Vote for new Proposal
Delegate HP and earn more
Bueno amigo a mi me ha encantado esta escultura, esta fenomenal.
Tengo años viendo las tortugas de que mi suegra y se le parecen bastante, porque ya están con unos cuantos años encima.
Me llama la atención qu con un material como la plastilina haya hecho algo tan profesional.
La idea de hacer soportes con esos alambres y el toque del cartón como soporte le dan mayor soporte y durabilidad.
Me imagino lo contenta que se puso la dueña con tan hermoso regalo.
Hola hola Leidi gracias por pasarte por mi post. Que bueno que la tortuguita que hice te recordara a las de tu suegra. Si es mas o menos como una tortuga viejita, no es pequeña por eso quizás se parecen.
Sabes que la plastilina es un material engañosamente difícil de trabajar. Se pueden hacer cosas muy bonitas por los colores que tiene pero hay que saber trabajarla jejeje
Amazing
Hola amigo @gaboamc2393. Gracias por compartirnos está está hermosa tortuga tu vecina debe valorar mucho ese detalle que le obsequiaste, casualmente te estaba recordando en estos días que tú eres muy bueno con la plastilina y de hecho tenía muchos días sin ver una de tus creaciones.
Yo sinceramente admiro ése arte que tú haces porque yo en definitivas cuentas soy muy mala para las manualidades, pero sin duda alguna a ti te quedan muy bonitas
Saludos
Oye si, por ahí voy a traer otra publicación pronto, es sobre un instrumento musical. Me está costando terminarlo pero ahí voy poco a poco jeje espero que cuando lo haga les guste tanto como esta tortuguita.
As always, great work Gabo! they look pretty realistic and looks like made of high quality materials.
Hi, nice to have you here again. It was nice, wasn't it? Hehehe I gave that realistic touch to the shell and the truth is that even I was surprised by the result hehehe.... let's see what other little creature I can come up with...
It is! Did you ever make zombie? if so, can you make one :D like zombie from zombie vs plants.
Siempre es impresionante ver todo el proceso que realizas para crear tus esculturas, lo realista del caparazón me tiene asombrada que gran técnica usar pegamento, le da un brillo estupendo pero sutil., te envío un saludo!
Holaaa! Para darle ese toque realista al caparazon usé la tecnica de pintado en seco. No es fácil pero si se puedennlograr cosas interesantes, como unas empanadas de plastilina que hice el oooootro día en hivefood jeje.
Hola! @gaboamc2393, que trabajo tan interesante, envidio tu destreza con la plastilina, mi nieta tiene un animalito de esos y cuando vio tu escultura también quedó encantada, de verdad te felicito por ese contenido tan original, saludos.
Jejeje que bueno que les gustó. Creo que esta es la segunda figura que hago de un aninal desde que estoy en hive. Una vez hice un gato pero no he hecho mas animales... debería...
Congratulations @gaboamc2393! You have completed the following achievement on the Hive blockchain and have been rewarded with new badge(s):
Your next target is to reach 3500 comments.
You can view your badges on your board and compare yourself to others in the Ranking
If you no longer want to receive notifications, reply to this comment with the word
STOPCheck out the last post from @hivebuzz:
Felicidades @gaboamc2393. Es un gran trabajo El que has mostrado. Gracias por compartir tu arte. 🌟🌟🌟
Sin duda alguna eres un gran artista.
Hola! Vaya que bueno que lo vea así. Le agradezco mucho su visita y que dejase este comentario. Saluditos 😁
Thank you for sharing this amazing post on HIVE!
Your content got selected by our fellow curator @tibfox & you just received a little thank you via an upvote from our non-profit curation initiative!
You will be featured in one of our recurring curation compilations and on our pinterest boards! Both are aiming to offer you a stage to widen your audience within and outside of the DIY scene of hive.
Join the official DIYHub community on HIVE and show us more of your amazing work and feel free to connect with us and other DIYers via our discord server: https://discord.gg/mY5uCfQ !
If you want to support our goal to motivate other DIY/art/music/homesteading/... creators just delegate to us and earn 100% of your curation rewards!
Stay creative & hive on!
bellísimo trabajo!!
Hola! Muchas gracias por leer mi post y dejar este valioso comentario. Muchas gracias!
PIZZA Holders sent $PIZZA tips in this post's comments:
@gaboamc2393(1/10) tipped @dayadam (x1)
You can now send $PIZZA tips in Discord via tip.cc!
Me he enamorado de esta pequeña escultura, me acordé en seguida de mi tía que le gusta coleccionar éste tipo de creaciones. Estoy segura de que a ella le encantaría.
Que hermoso trabajo, y la pintura es muy buena, la pondría en la mesa del comedor donde tengo mis adornos.
Bendiciones
Como siempre un trabajo increíble.