
Organise your things easily ! // Organiza tus cosas fácilmente !
I confess to being a bit obsessed with the organisation of my home, in my mind everything has a place and I manage to meticulously place everything in its proper place, it happens that I don't feel good when I see an object out of its ideal place; and this has happened throughout my life! That's why I love to make multifunctional organiser boxes, in order to make my life easier and have everything in sight!
Todo bien organizado se ve más bonito! yo confieso ser un poco obsesionada con la organización de mi hogar, en mí mente todo tiene un sitio y logro colocar meticulosamente todo en su lugar adecuado, sucede que no me siento bien cuando veo un objeto fuera de su lugar ideal; y esto ha ocurrido durante toda mi vida! por eso me encanta hacer cajas organizadoras multifuncionales, con el fin de hacerme la vida más fácil y tener todo a la vista!
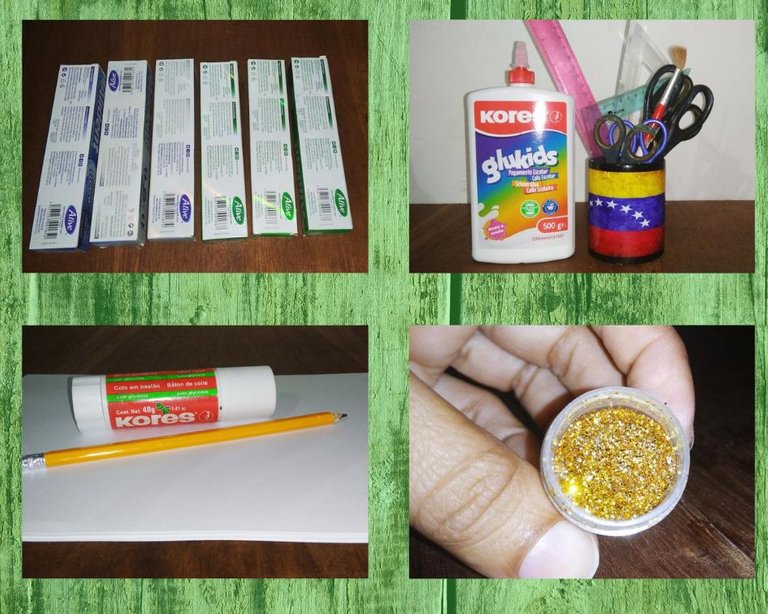
In this recycling tutorial we will give a really fabulous use to empty toothpaste boxes, and to make this project we need the following materials:
*Five empty toothpaste boxes, they should be of equal size.
*Glue, use whatever glue you like best for paper and cardboard; I use glue sticks and liquid glue as well.
*Brush to spread the liquid glue
*Scissors
*Rulers
*Pencil
*White paper
*Glitter, I chose gold because it stands out magnificently with the blue, you can choose the one you like the most or the one you have at home.
*Coloured cardstock, I combined blue and pink
En éste tutorial de reciclaje le daremos un uso realmente fabuloso a las cajas vacías de pasta dental, y para realizar éste proyecto necesitamos los siguientes materiales:
*Cinco cajas vacías de pasta dental, deben ser de igual tamaño para que las medidas cuadren perfectamente.
*Pegamento, usa el que más te agrade para pegar papel y cartulina; yo uso en barra y líquido también
*Pincel para esparcir el pegamento líquido , y si el pegamento es muy espeso deberás agregar un poquito de agua
*Tijeras
*Reglas
*Lápiz
*Hojas blancas, pueden ser recicladas
*Escarcha o brillantina, Escogí color dorado porque resalta magníficamente con el azul, tu puedes elegir el que más te agrade o el que tengas en casa
*Cartulina de colores, yo combiné azul oscuro y rosado
STEP 1 // PASO 1
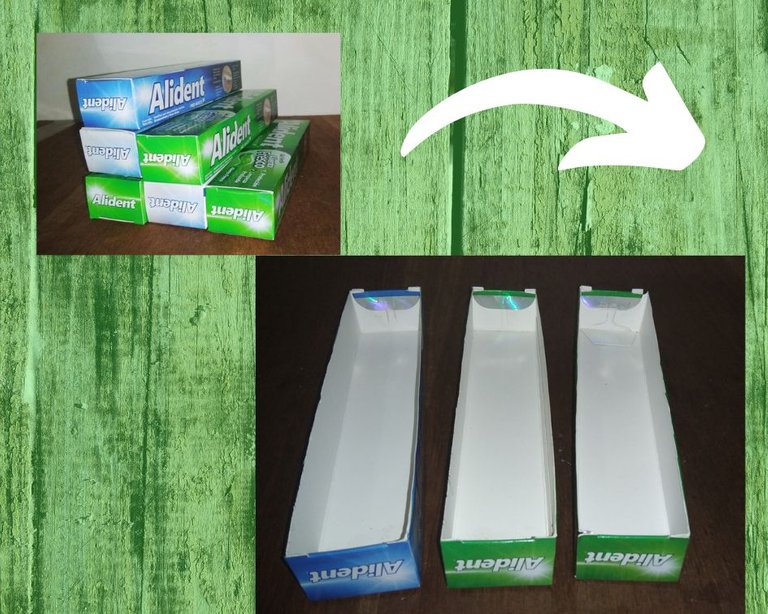
The organiser that we will make will have three levels, we will achieve that all the products that are placed there will be seen making a staircase with the boxes, see the way in which we place the boxes, you will see that we only need to cut only three, because they would be the ones that are placed above, when cutting them we must make sure to maintain a good finish, so we will be very meticulous when using the scissors.
El organizador que haremos tendrá tres niveles, lograremos que todos los productos que se coloquen allí se vean haciendo una escalera con las cajas, vean la forma en que colocamos las cajas, verán que solamente necesitamos cortar solamente tres, porque serían las que se ubican arriba, al cortarlas debemos asegurarnos de mantener un buen acabado, así que seremos muy meticulosos al utilizar la tijera, generalmente se utiliza una tijera de punta muy fina para estos casos.
STEP 2 // PASO 2
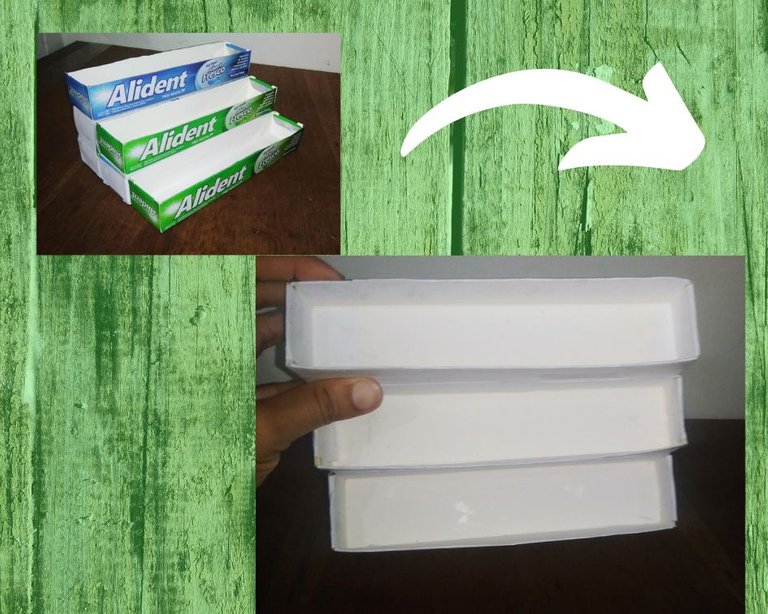
We glue the boxes in the right place, you can see how the three levels are, then we cover everything with white paper, I love to cover everything in white and then give it the desired colour.
Pegamos las cajas en su debido lugar, pueden observar como quedan los tres niveles, luego cubrimos todo con papel blanco, me encanta cubrir todo de blanco y luego darle el color deseado
STEP 3 // PASO 3
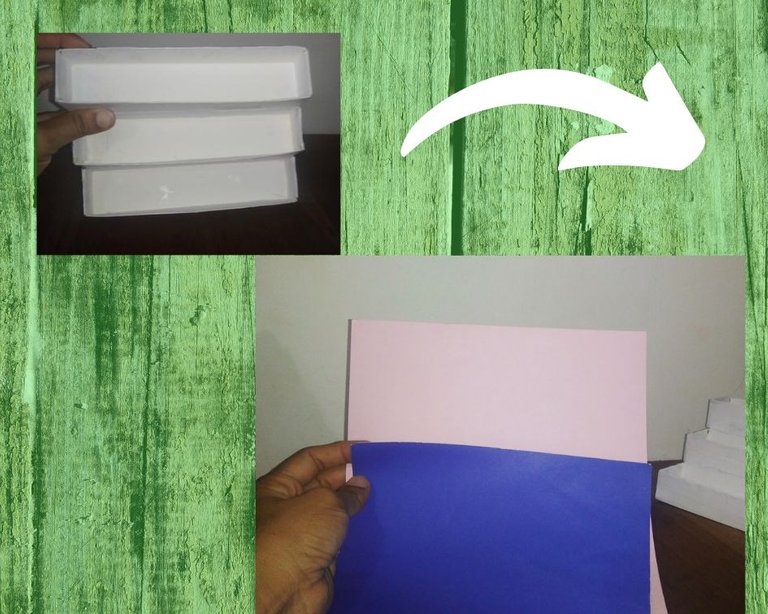
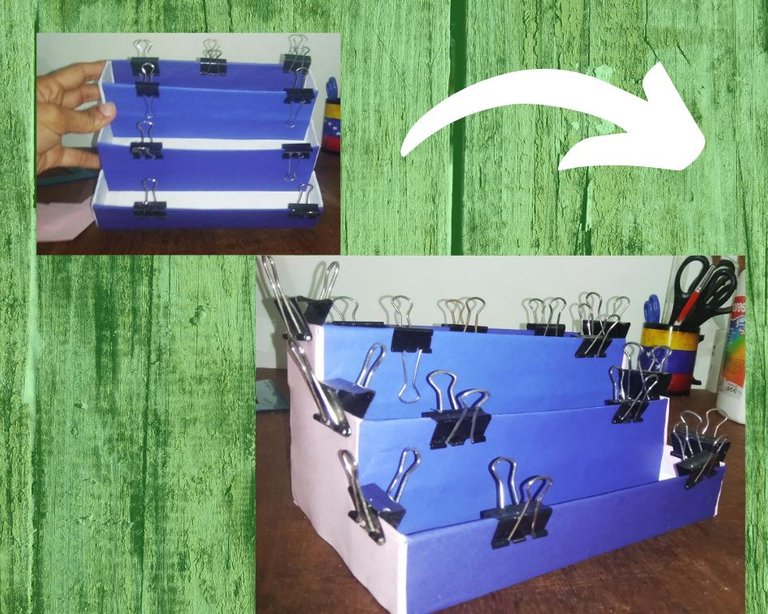
We will use colours that stand out and combine very well, I use these tweezers or hooks, I don't know what they are called in other countries, they are very useful to exert pressure in difficult places, we will let them dry from one day to another.
Utilizaremos colores que resalten y combinen muy bien, yo utilizo estás pinzas o ganchos, no se cómo se llaman en otros países, son muy útiles para ejercer presión en los sitios un poco difíciles, dejaremos secar de un día para otro , el secado es muy importante
Final result of this project // Resultado final de este proyecto
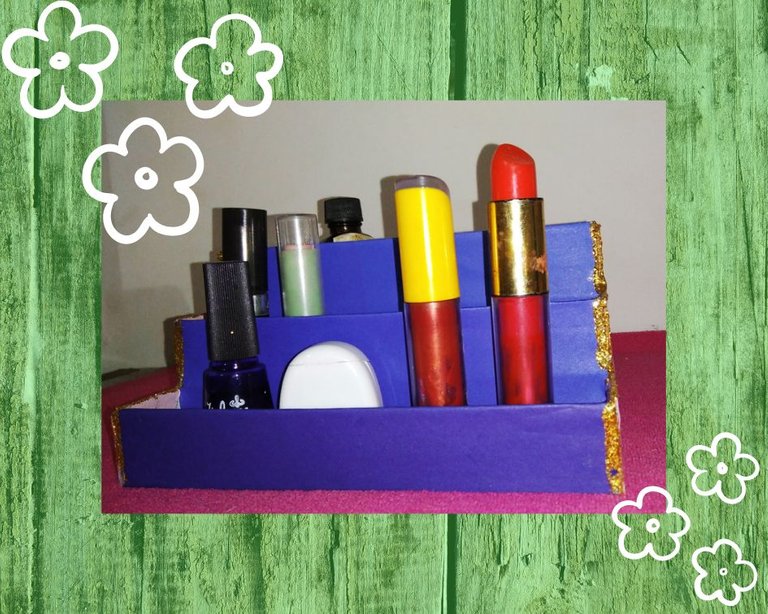
To finish off we put glitter, I decided to highlight the side edges only, I love the way the blue looks and you can see all the things we put in our new box!This is due to its staircase shape, and if you want a fourth level, you only have to add four more boxes.
Para finalizar le colocamos brillantina, decidí resaltar los bordes laterales solamente, me encanta como se ve el azul y además se puede apreciar todas las cosas que colocamos en nuestra nueva caja!esto debido a la forma de escalera que posee, además si deseas un cuarto nivel solo tienes que añadir cuatro cajas más y seguir la forma de escalera
Thank you so much for coming here and reading this recycling tutorial, crafts are a great way to reform and give use to materials that are usually discarded! It is also an excellent hobby and an opportunity to learn something new every day.
See you next time for a future post ♻️ "RECYCLE - CREATE - LEARN"
Muchas gracias por llegar hasta aquí y leer éste tutorial de reciclaje, las manualidades son una gran manera de reformar y dar utilidad a materiales que generalmente son desechados! ademas es un excelente pasatiempos y una oportunidad para aprender cada día algo nuevo.
Hasta una próxima publicación ♻️ "RECICLA - CREA - APRENDE"
The images were taken from my Redmi Xiaomi 8A phone and the edits were made in Canva // Las imágenes fueron tomadas desde mi teléfono Redmi Xiaomi 8A y las ediciones fueron hechas en Canva
Thank you for sharing this amazing post on HIVE!
Your content got selected by our fellow curator @rezoanulvibes & you just received a little thank you via an upvote from our non-profit curation initiative!
You will be featured in one of our recurring curation compilations and on our pinterest boards! Both are aiming to offer you a stage to widen your audience within and outside of the DIY scene of hive.
Join the official DIYHub community on HIVE and show us more of your amazing work and feel free to connect with us and other DIYers via our discord server: https://discord.gg/mY5uCfQ !
If you want to support our goal to motivate other DIY/art/music/homesteading/... creators just delegate to us and earn 100% of your curation rewards!
Stay creative & hive on!
Me encanta esta idea, siempre he querido hacer algo así para organizar mis pinturas de uña y termino metiendolas en una caja de zapatos 😅 voy a intentar algo así a ver que tal me queda, gracias por compartir tu idea, saludos ♥️
Hola @mariajcastro28 , esta perfecta para pinturas de uñas , he hecho varias y el tamaño calza perfectamente! Saludos 💜
The rewards earned on this comment will go directly to the people( @ileart ) sharing the post on Twitter as long as they are registered with @poshtoken. Sign up at https://hiveposh.com.