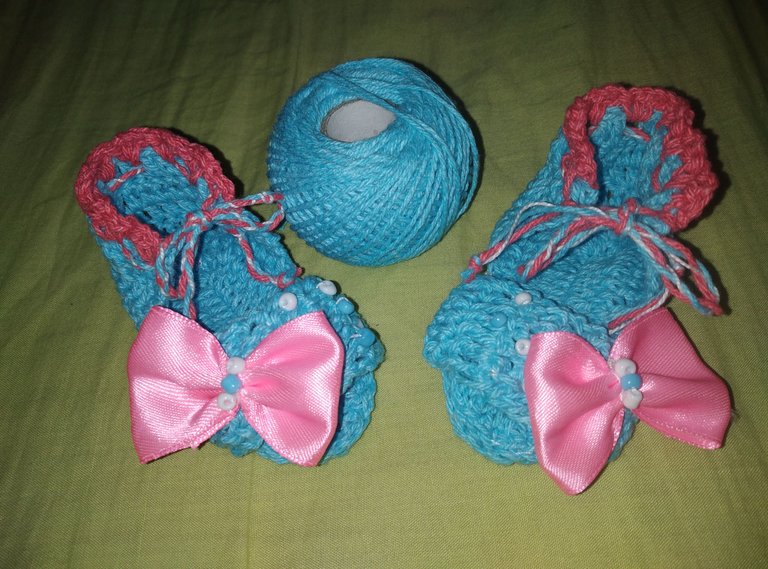
Hello, good night to everyone at @hivediy, have a nice start to the weekend, full of many reflections, family rest and brainstorming to show us, it is a great pleasure, being with you today, and showing you a very nice tutorial, how to make, using the crochet technique of a cute and tender Slippers, to be used for girls from three to six months, ideal to make them look radiant and very beautiful, I invite you to follow me until the end, so you can see how easy it is to make them./
Hola, buena noche para todos en @hivediy, que tengan un lindo inicio de fin de semana, lleno de muchas reflexiones, descanso en unión familiar y lluvia de ideas para mostrarnos, es un gran gusto, estar hoy con ustedes, y mostrarles un muy lindo tutorial, de cómo hacer, usando l atecnica a crochet de una lindas y tiernas Zapatillas, para ser usadas para niñas de tres a seis meses, ideales para hacerles lucir radiantes y muy bellas, te invito a seguirme hasta el final, para que veas lo fácil que es elaborarlas.
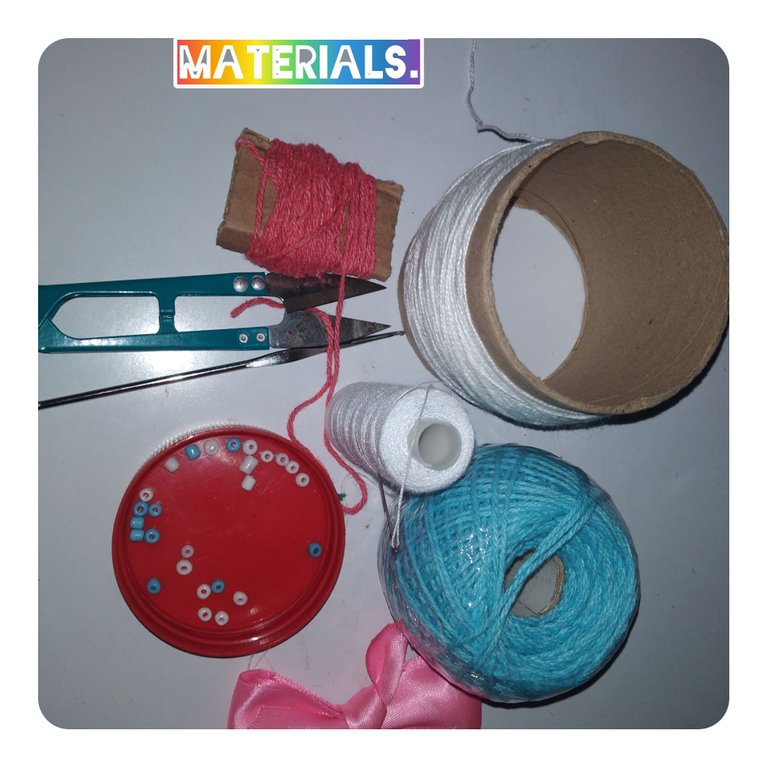
Materials/Materiales
. Yarns for knitting, colors (blue, fuchsia and white)
. knitting needle n6
. Needle and thread for sewing
. Color beads (white and blue)
. Medium pink ribbon.
. Scissors./
. Hilos para tejer, colores (azul, fucsia y blanco)
. Aguja para tejer n6
. Hilo y aguja para coser
. Mostacillas colores (blanca y azúl)
. Cinta mediana color rosada.
. Tijeras
Step/Pasos.
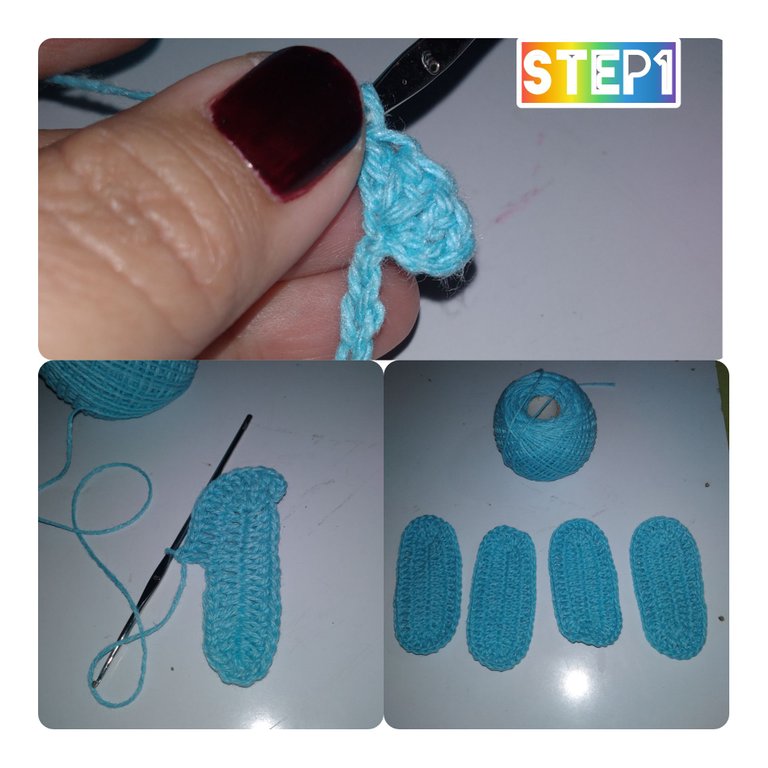
1.) Start by knitting 16 sc, knit an increase in each end, 4 sc, to increase and go over both sides, knitting 1 sc, in each sc.
And I close with 1 sl, in this way, I continue the next round, making an increase of 2 sl in each increase point of the previous round, for both ends it will be the same, I bind off and repeat until we knit four templates of the same size.
1.) Inicio, tejiendo 16p.c, tejo un aumento en cada extremo, 4p.a,para aumentar y recorro ambos lados, tejiendo 1 p.a, en cada p.c.
Y cierro con 1p.d, de esta manera, continuo la siguiente vuelta, haciendo aumemto de 2p.a encada punto de aumento de la vuelta anterior, para ambos extremos será igual, remato y repito hasta tejer cuatro plantillas de mismo tamaño.
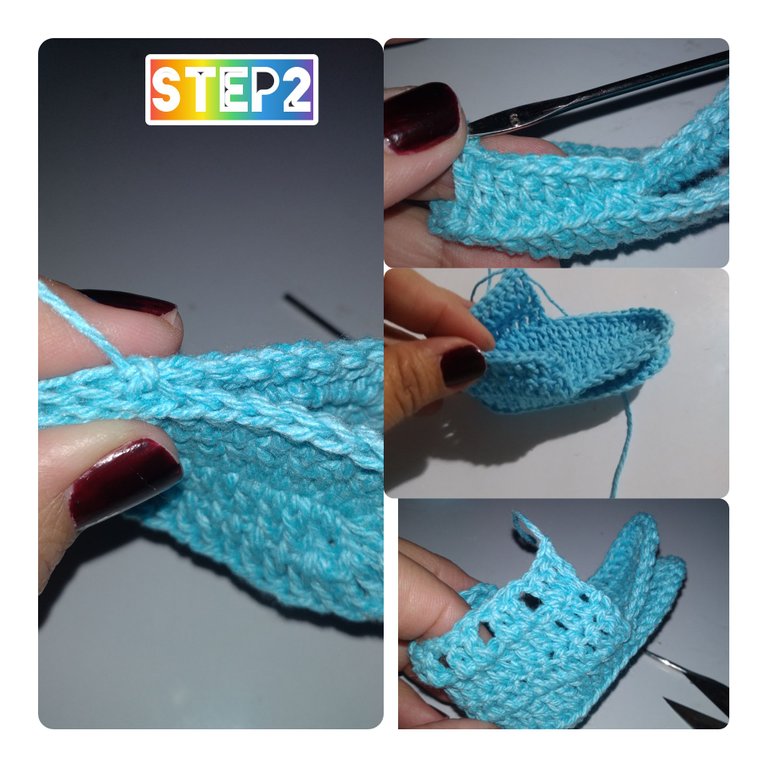
2.) Next, I will use two templates for each Sandal, I will begin to join the back part and for that I knit 23m/p outlining and defining the heel, and going back I knit three rounds of double crochet, the fourth round, I will knit a tape loop, from 2dc, a sc and repeat until I finish the 22dc cast off and cut the blue thread.
2.) Seguidamente, usaré para acada Sandalia, dos plantilla, comenzaré unirnos la parte tracera y para eso tejo 23m/p deliniando y definiendo el talón, y devolviendome tejo tres vueltas de puntos altos, la cuarta vuelta, tejere un pasa cintas, de 2p.a, un p.c y repito hasta concluir los 22p.a.remati y corto el hilo de color azul.
3.) In this step using the fuchsia yarn, I pick up two dc in the back, run a space and repeat in the next one, cast off and cut the yarn.
3.) En este paso usando el hilo de color fucsias, levanto en la parte tracera,dos p.a, corro un espacio y repito en el siguiente, remato y corto el hilo.
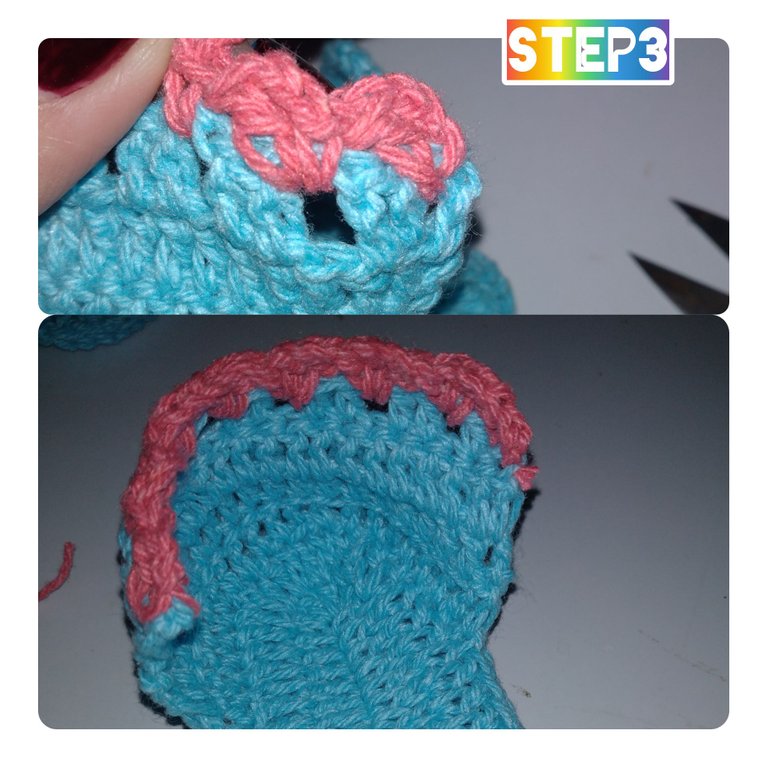
4.) The next thing will be to knit 7ch and pick up 7 tr, repeat and reach knit 12 rows in a row. I finish off and cut the thread.
4.) Lo siguiente será tejer 7p.c y levantar 7p.a, repetir y alcanzar tejer 12 vueltas consecutivas. Remato y corto el hilo.
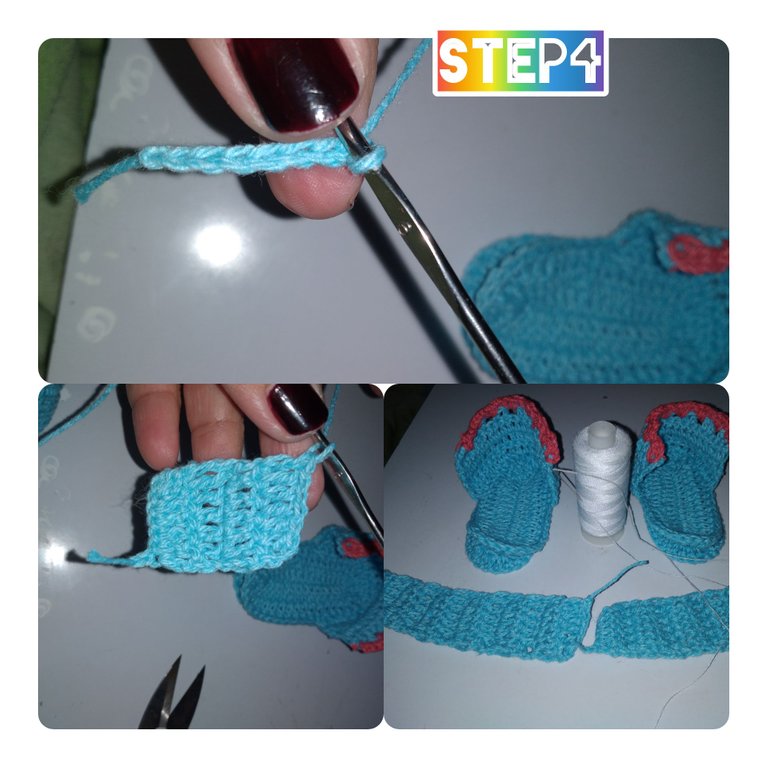
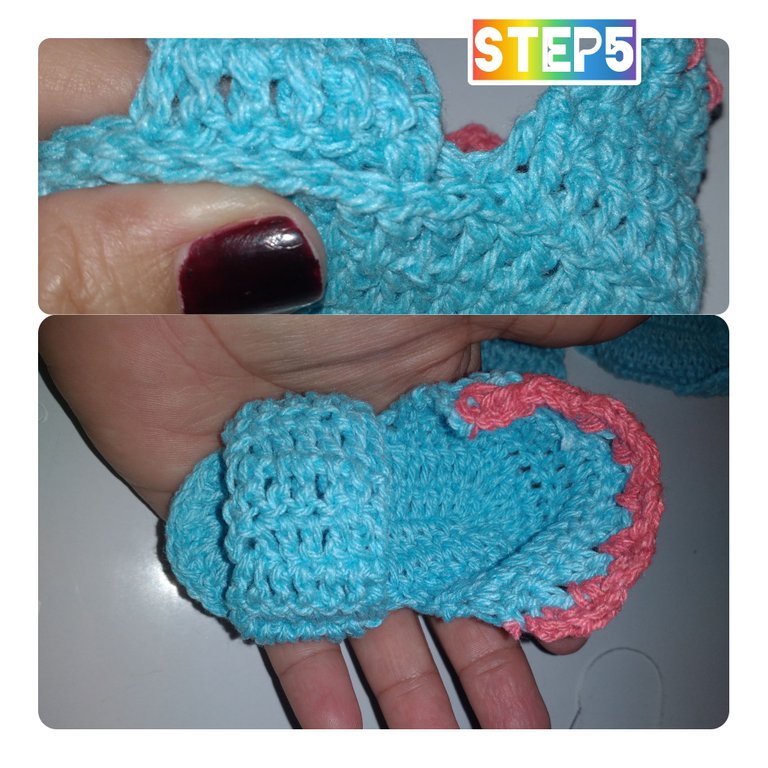
5.) The woven ribbons are ready, now I will work the front part of the Sandals and with a needle and thread I stick the ribbon on both sides, keeping the same direction on both sides.
5.) Listo los listones tejidos, ahora trabajaré la parte delantera de la Sandalias y con hilo y aguja pego el listón en ambos lados, manteniendo l amisma dirección en ambos lados.
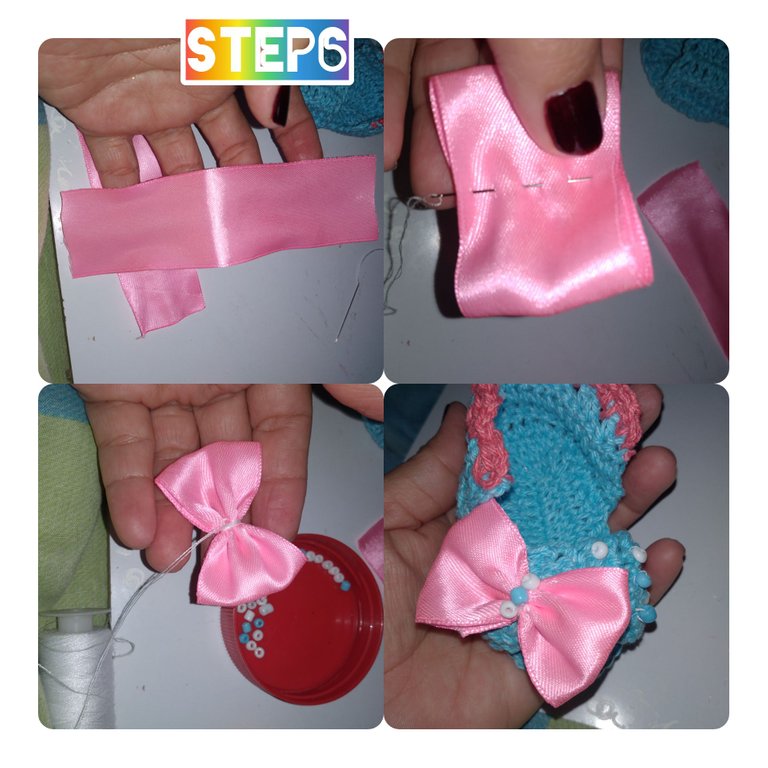
6.) I cut a ribbon of pink ribbon, fold, center and make a seam in the middle to make a delicate bow, in the center next, I glue with needle and thread stitches, white and blue beads, then I hit the sandal with one side. It is important to be careful, in that one loop must go in the opposite direction to the other, that is, both must be on the side of the Sandal.
6.) Corto un listón de cinta color rosada, doblo, centro y hago una costura en el medio para armar un delicado lazo, en el centro seguidamente, pego con puntadas de aguja e hilo, Mostacillas de color blanco y azul, seguida mente lo pega a la Sandalia de un ladito. Es importante tener precaución, en que un lazo debe ir de sentido contrario a el otro, es decir ambos deben estar del lado fuese la Sandalia.
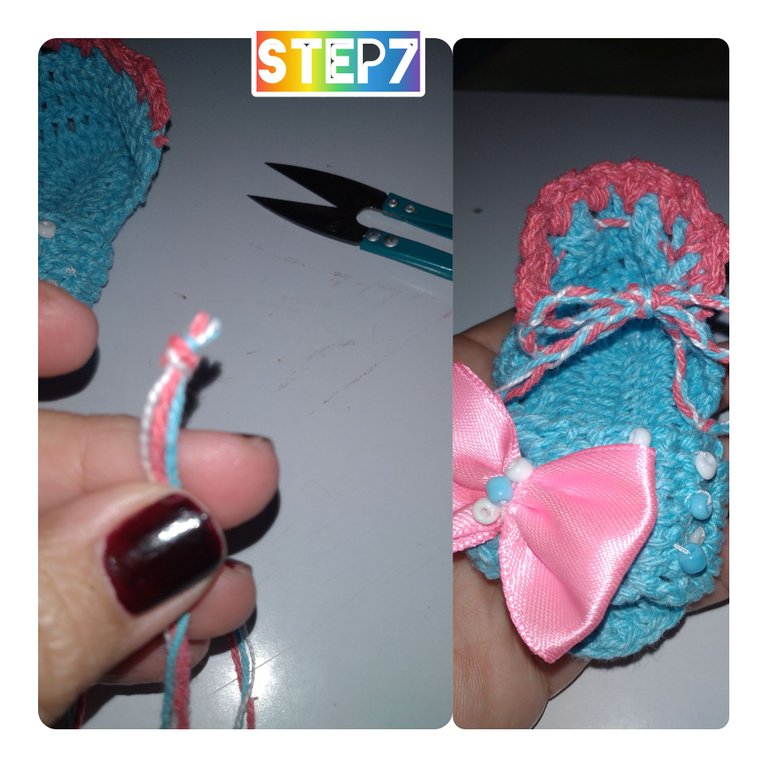
7.) In this step, I will join the three colors of thread, I make a knot in one of the ends and weave a clineja, in the other end, I make a new knot, and I will use it as a ribbon, I go through the ribbon guide and make a small bow on the front, this lace allow to tie to the foot of the girl.
7.) En este paso, unire los tres colores de hilo, hago un nudo en uno de los extremos y tejere una clineja, en el otro extremo, hago un nuevo nudo, y usaré como cinta, paso por el pasa cintas y hago un pequeño lazo en el frente, este cordón permitir atar al pie de la niña.
And in this way it culminated, this cute and tender project, ideal to pamper the beautiful princesses of the house./
Y de esta forma culminó, este lindo y tierno proyecto, ideal para consentir a las princesas hermosas de la casa.
All photos are my property, taken with my smartphone.
. Use InShot, to show them step by step.
. Use google translate./
. Todas las fotos son de mí propiedad, tomadas con mí teléfono inteligente.
. Use InShot, para mostrarles el paso a paso.
. Use traductor Google.
I am grateful that you have visited my blog, it is a pleasure that you have stopped by looking at my post, do not forget to leave me a comment of pleasure. It will be until tomorrow if God allows me./
Agradecida hayas visitado mí blog, es un gusto hayas pasado por aquí mirando mi post, no olvides dejarme un comentario de agrado. Será hasta mañana si Dios me lo permite.
Thank you for sharing this amazing post on HIVE!
Your content got selected by our fellow curator tibfox & you just received a little thank you upvote from our non-profit curation initiative!
You will be featured in one of our recurring curation compilations which is aiming to offer you a stage to widen your audience within the DIY scene of Hive.
Make sure to always post / cross-post your creations within the DIYHub community on HIVE so we never miss your content. We also have a discord server where you can connect with us and other DIYers. If you want to support our goal to motivate other DIY/art/music/gardening/... creators just delegate to us and earn 100% of your curation rewards!
Stay creative & hive on!
Your content has been voted as a part of Encouragement program. Keep up the good work!
Use Ecency daily to boost your growth on platform!
Support Ecency
Vote for new Proposal
Delegate HP and earn more
Que bellezas ♥️ te quedaron muy cuchis y tiernas, trabajas muy bien el crochet, yo siempre he querido aprender pero nunca lo he intentado, desde mi punto de vista se ve difícil pero viendo el resultado creo que valdría la pena
que bien trabajo amiga.. felicidades!!
Que boniyo te quedó.. sin duda las cosas pequeñas siempre se ven mejor..