Español
Hola mis estimados lectores, gusto en saludarles.
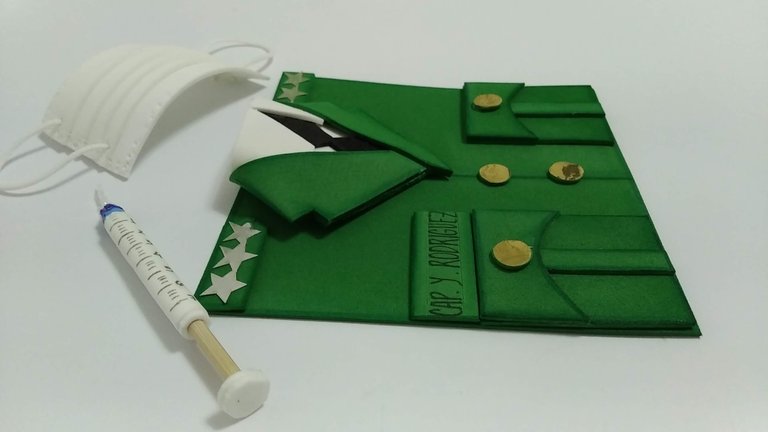
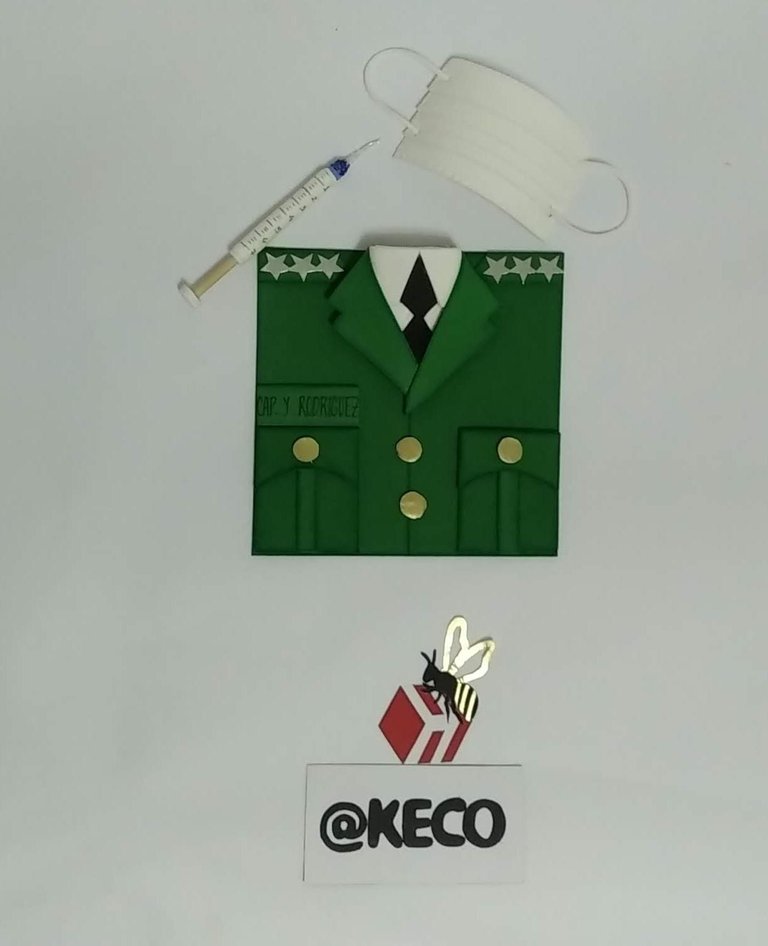
El trabajo que hoy les muestro, forma parte de una sorpresa que se le dió a un doctor que forma parte del cuerpo militar de Venezuela y recibió su asenso militar a capitán.
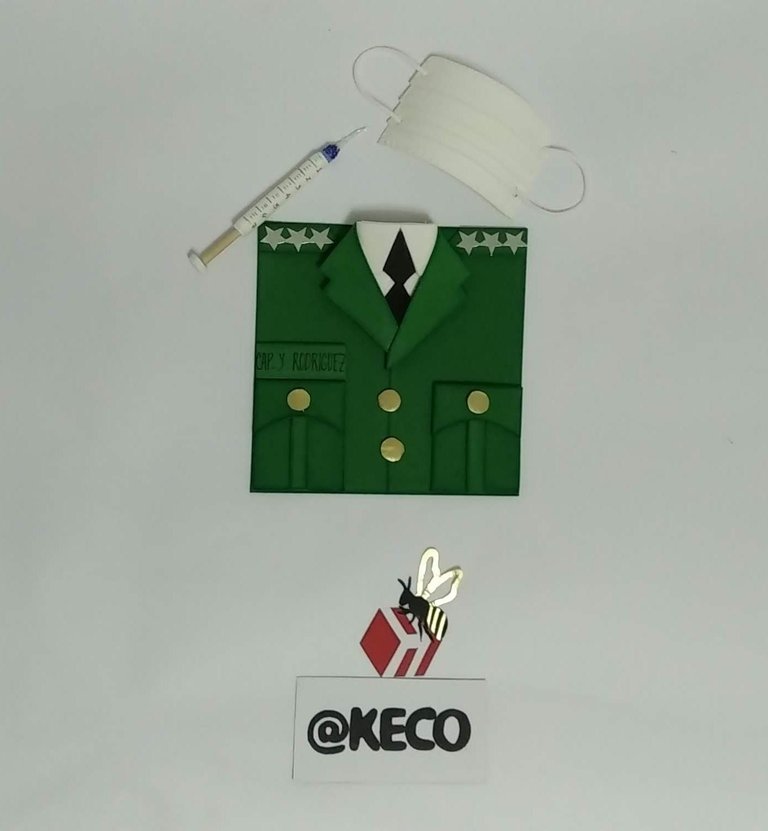
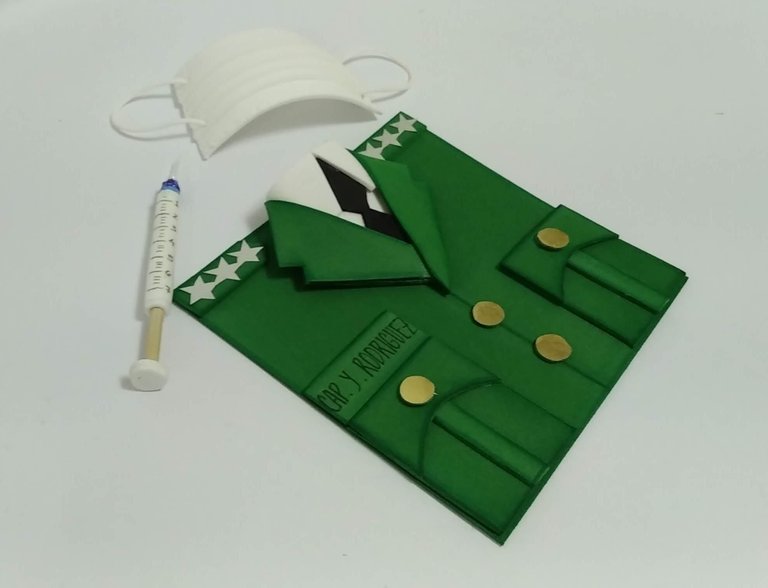
Parte de la sorpresa la conformaba ésta traje militar con su nombre, el nuevo rango, la jeringa y el tapabocas.
Fue un trabajo sencillo que quedó muy lindo y quiero mostrarlo para que vean las grandes posibilidades que nos ofrece la goma Eva.
Sin más, y esperando disfruten del trabajo realizado les dejo los materiales utilizados, el proceso y las imágenes del trabajo.
- Foami (Goma Eva) color verde.
- Foami (Goma Eva) color blanco.
- Foami (Goma Eva) color negro.
- Cartulina dorada tipo espejo.
- Cartulina plateada tipo espejo.
- Marcadores permanentes de colores.
- Palito de madera.
- Cordón elástico blanco.
- Silicón frio.
- Silicón caliente.
- Tijera.
English
Hello my dear readers, I am pleased to greet you.
The work that I show you today, is part of a surprise that was given to a doctor who is part of the Venezuelan military corps and received his military promotion to captain.
Part of the surprise was this military suit with his name, the new rank, the syringe and the mask.
It was a simple work that was very nice and I want to show it so you can see the great possibilities that Eva rubber offers us.
Without further ado, and hoping you enjoy the work done, I leave you the materials used, the process and the images of the work.
- Foami (Eva rubber) green color.
- Foami (Eva rubber) white color.
- Foami (Eva rubber) black color.
- Golden cardboard mirror type.
- Silver mirror cardboard.
- Permanent color markers.
- Wooden stick.
- White elastic cord.
- Cold silicone.
- Hot glue.
- Scissors.
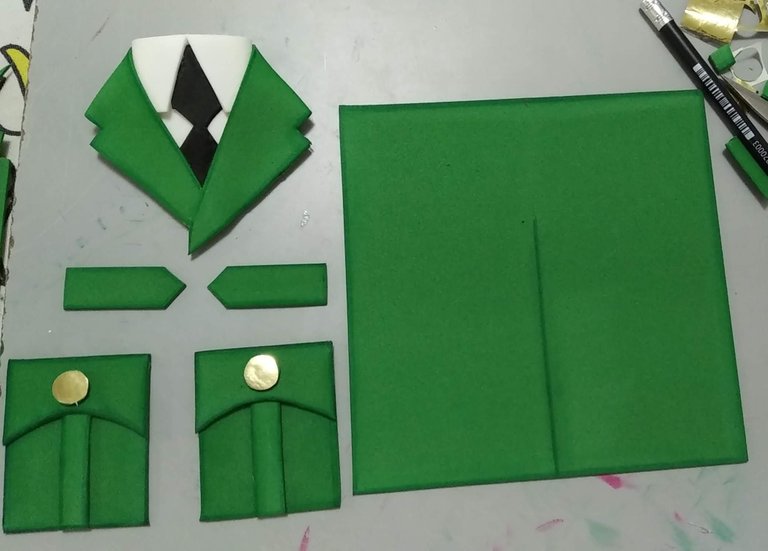
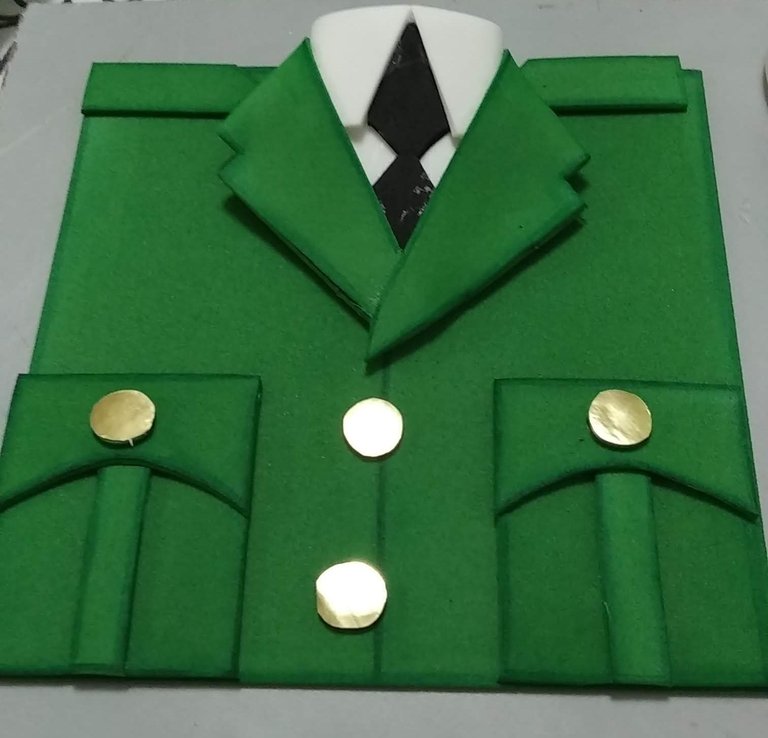
1.- Se cortaron las piezas por separado que conforman el traje militar: camisa, corbata, bolsillos, rango, botones. Se trabajan por separado para darle mayor relieve a la pieza completa.
Cada parte verde se sombrea por los bordes con marcador verde intenso para darle mayor dimensión. Se debe difuminar muy bien.
1.- The pieces that make up the military suit were cut separately: shirt, tie, pockets, rank, buttons. They are worked separately to give more relief to the whole piece.
Each green part is shaded around the edges with an intense green marker to give it more dimension. It should be blurred very well.
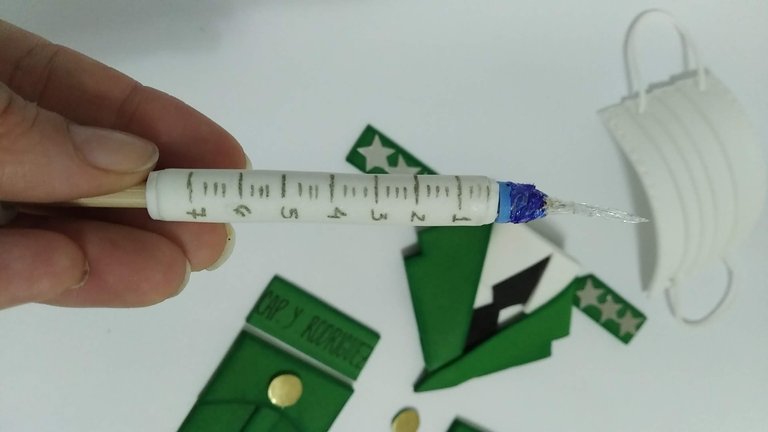
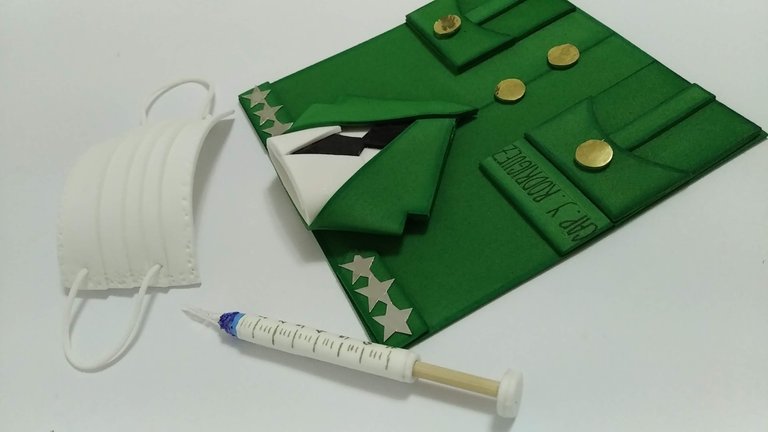
2.- Para hacer la jeringa se debe enrollar un pedazo de foami blanco con un pedazo de palito de madera en el centro y que sobresalga hacia un lado. Una vez enrollado pegar con silicón caliente para fijar de manera inmediata, cuidando de no derramar silicón . La parte superior darle forma circular (puede cortar o pegar a algo caliente) colocar un pedacito de foami o cartulina azul y lo que seria la aguja hacerla con silicón caliente. La otro extremo del palito pegar un circulo de foami para un mejor acabado. Terminar decorando con marcador negro fino, haciéndole rayas y números.
2.- To make the syringe, roll a piece of white foami with a piece of wooden stick in the center and sticking out to one side. Once rolled up, glue it with hot silicone to fix it immediately, taking care not to spill silicone. The upper part give it a circular shape (you can cut or glue it to something hot) place a piece of foami or blue cardboard and what would be the needle with hot silicone. The other end of the stick stick a circle of foami for a better finish. Finish decorating with a fine black marker, making stripes and numbers.
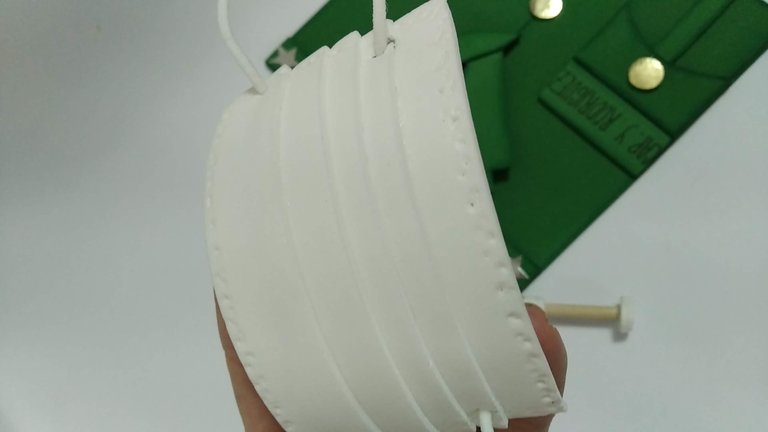
3.- Para hacer el tapabocas, cortar en foami blanco en el tamaño deseado, pero para hacer los pliegues propios de un tapabocas, se deberá pegar un pedazo sobre el otro, cuidando de mantener entre todos la misma distancia. Una vez todos estén pegados, perforar los orificios en los bordes (dos de cada lado). Pegar el foami a la plancha de ropa y una vez este el foami caliente, darle la forma con algún objeto cóncavo. Luego colocar el cordón elástico de cada lado, cuidando queden del mismo tamaño.
3.- To make the mouthpiece, cut the white foami in the desired size, but to make the folds of a mouthpiece, glue one piece on top of the other, taking care to keep the same distance between all of them. Once they are all glued together, punch holes on the edges (two on each side). Glue the foami to the clothes iron and once the foami is hot, shape it with a concave object. Then place the elastic cord on each side, making sure they are the same size.
4.- Para terminar el trabajo, pegar las piezas y terminar de dar los detalles finales, colocar el nombre y pegar las estrellas plateadas y los botones dorados.
4.- To finish the work, glue the pieces and give the final details, place the name and glue the silver stars and gold buttons.

Espero les haya gustado y sobre todo se entusiasmen a crear algo parecido para sorprender a familiares y amigos.
I hope you liked it and, above all, I hope you get excited to create something similar to surprise your family and friends.
SALUDOS / REGARDS
Todas las Fotos fueron tomadas con mi teléfono Redmi 7A.
Contenido original de @keco (fotos y texto) - Todos los derechos reservados Publicado en HIVE así como en mi instagram : http://instagram.com/carton_pintura_algo_mas
All Photos were taken with my Redmi 7A phone.
Original content from @keco (photos and text) - All rights reserved Posted on HIVE as well as on my instagram: http://instagram.com/carton_pintura_algo_mas
Te quedó bonito
Gracias @jorgelissanchez por visitar y comentar. Un fuerte abrazo.
Saludos, bendiciones y éxitos.
Feliz inicio de semana amiga y que bueno comenzar viendo tan lindo trabajo.
Gracias por compartir!
Hola @elmundodebetty que alegría leer tu comentario, pues viniendo de usted, una persona con tanto talento, me hace sentir genial, muchas gracias.
Saludos, bendiciones y éxitos.
Mucha creatividad,,,felicitaciones una vez más...
Gracias mi estiamdo @xavierdleon, me alegra te haya gustado.
Saludos, bendiciones y éxitos.