¡Hola gente!
Me complace saludarlos y estar de nuevo compartiendo en esta comunidad. Les estaré mostrando el procedimiento para realizar una tarjeta creativa de aniversario de novios y que puedes personalizar para otra ocasión.
Hello people!
I am pleased to greet you and to be back sharing in this community. I will be showing you the procedure to make a creative wedding anniversary card that you can personalize for another occasion.

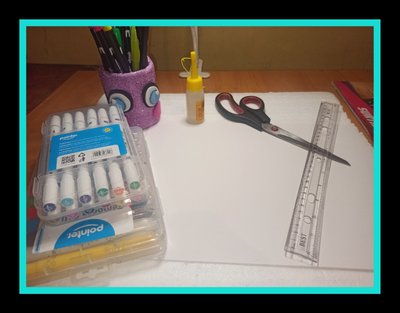
❤️ Cartulina blanca
❤️ Cartulina de color
❤️ Marcadores
❤️ Pega
❤️ Regla
❤️ Lápiz
❤️ Tijera
❤️ White poster board
❤️ Colored card stock
❤️ Markers
❤️ Glue
❤️ Ruler
❤️ Pencil
❤️ Scissors
♥️♥️ Paso 1
♥️♥️ Step 1
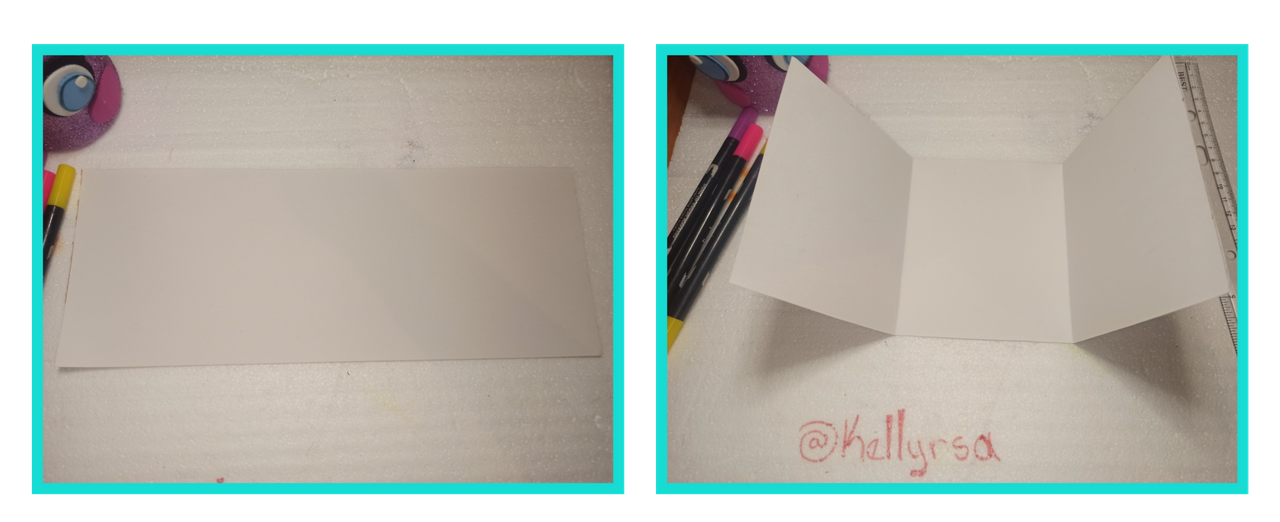
Con una cartulina de 30 cm x 12 cm, la divido en tres partes iguales.
We divide it into three equal parts with a 30 cm x 12 cm cardboard.

Paso 2
♥️♥️ Step 2
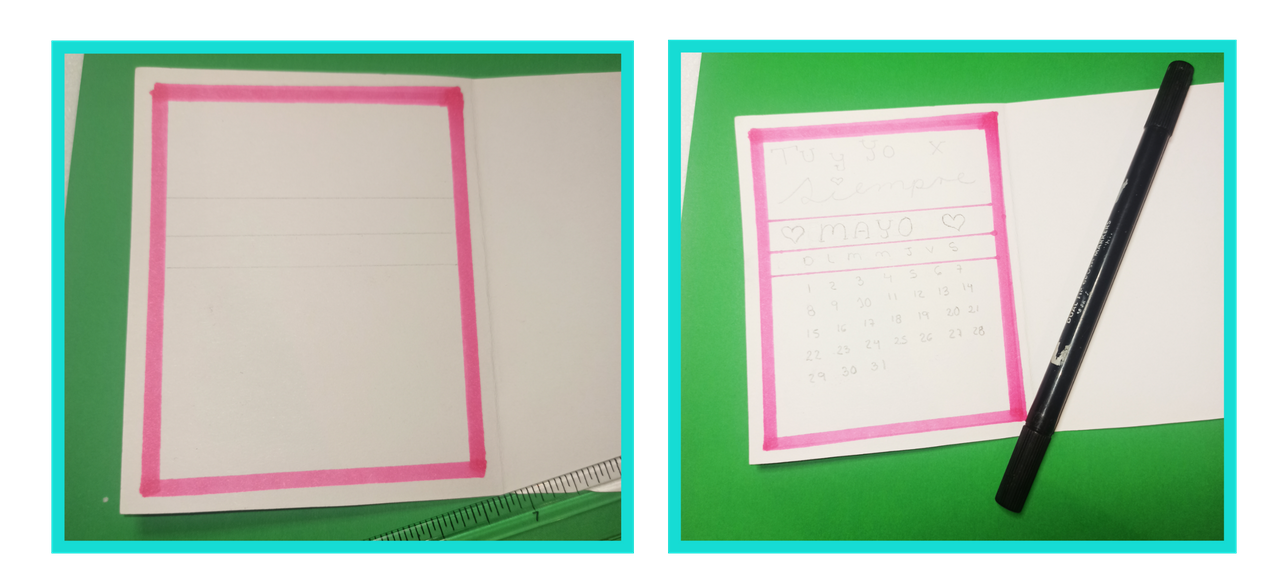
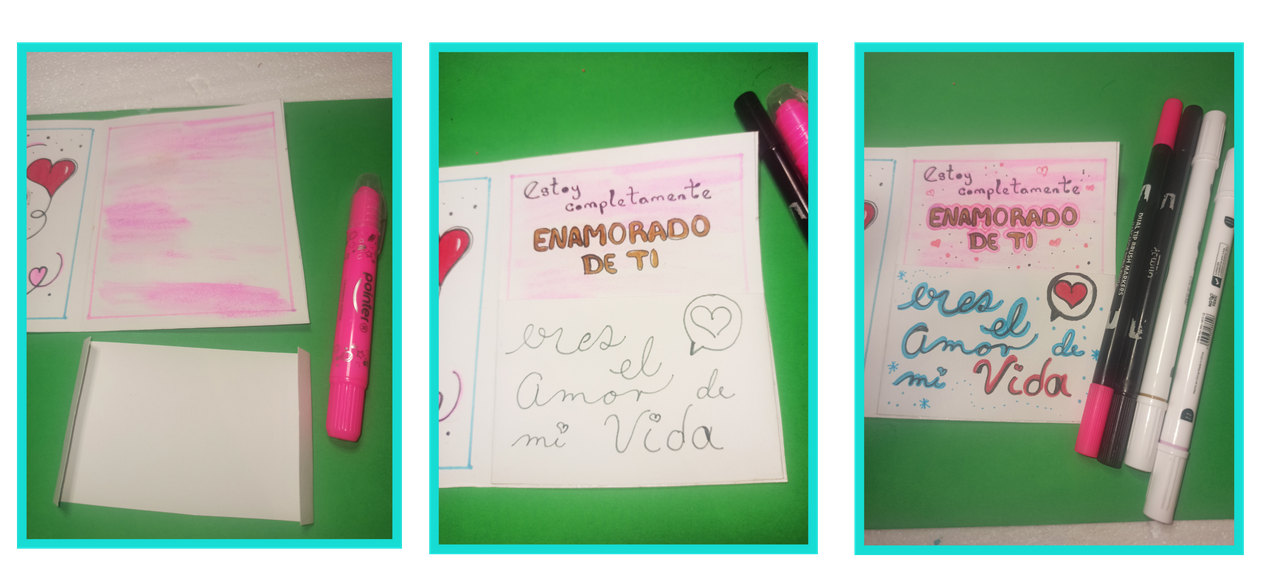
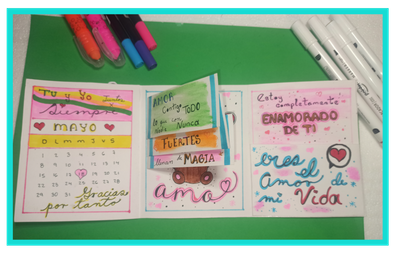
En la primera parte hice un calendario indicando la fecha de aniversario
Tracé un margen fucsia
Tres rayas horizontales, la primera a 3 cm, la segunda 1.5 cm y la tercera de 12 cm
En la primera división coloqué la frase" Tú y Yo juntos x siempre"
EN la segunda división coloqué el mes de aniversario, en este caso "mayo"
En la tercera división los días de la semana " D L M M J V S"
En la última división los números señalando la fecha de aniversario y coloqué al final la Frase "Gracias por tanto"
Luego remarque con los marcadores.
In the first part, I made a calendar indicating the anniversary date.
I traced a fuchsia border.
Three horizontal stripes, the first at 3 cm, the second at 1.5 cm, and the third at 12 cm.
In the first division I placed the phrase "You and me together forever".
In the second division I placed the anniversary month, in this case, "May".
In the third division, I placed the days of the week " M T W T F S S".
In the last division, the numbers indicate the anniversary date and I placed the phrase "Thank you for so much" at the end.
Then I marked with the markers

Paso 3
♥️♥️ Step 3
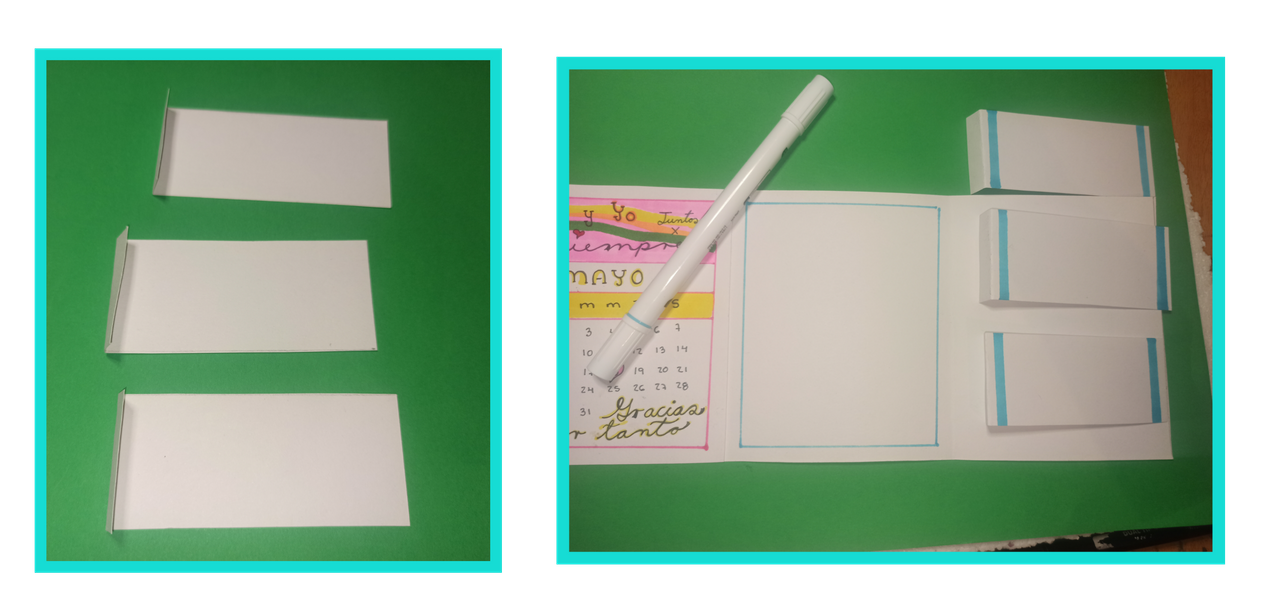
Vamos a decorar la segunda parte de la cartulina.
Cortamos 3 trozos de cartón de 4 cm de largo por 10 cm de ancho, y los doblamos a 1 cm para hacer unas pestañas.
Hacemos un borde azul
Let's decorate the second part of the cardboard.
Cut 3 pieces of cardboard 4 cm long by 10 cm wide, and fold at 1 cm to make some tabs.
We make a blue border
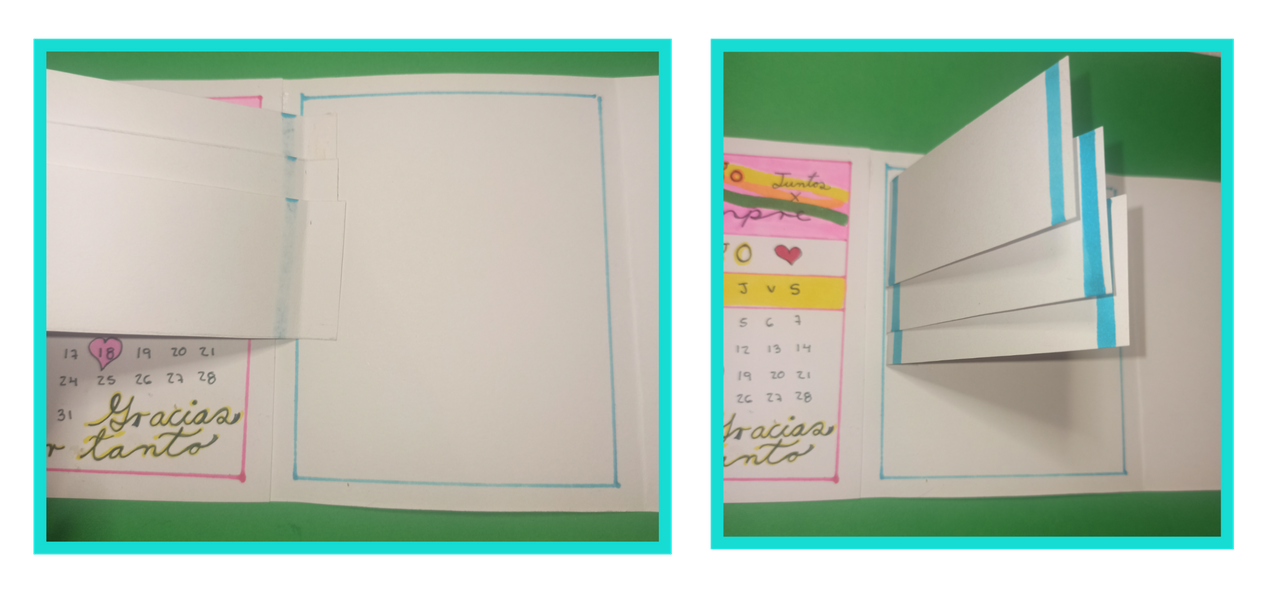
- Pegamos las cartulinas una debajo de la otra.
- Glue the cardboards one below the other.
Paso 4
♥️♥️ Step 4
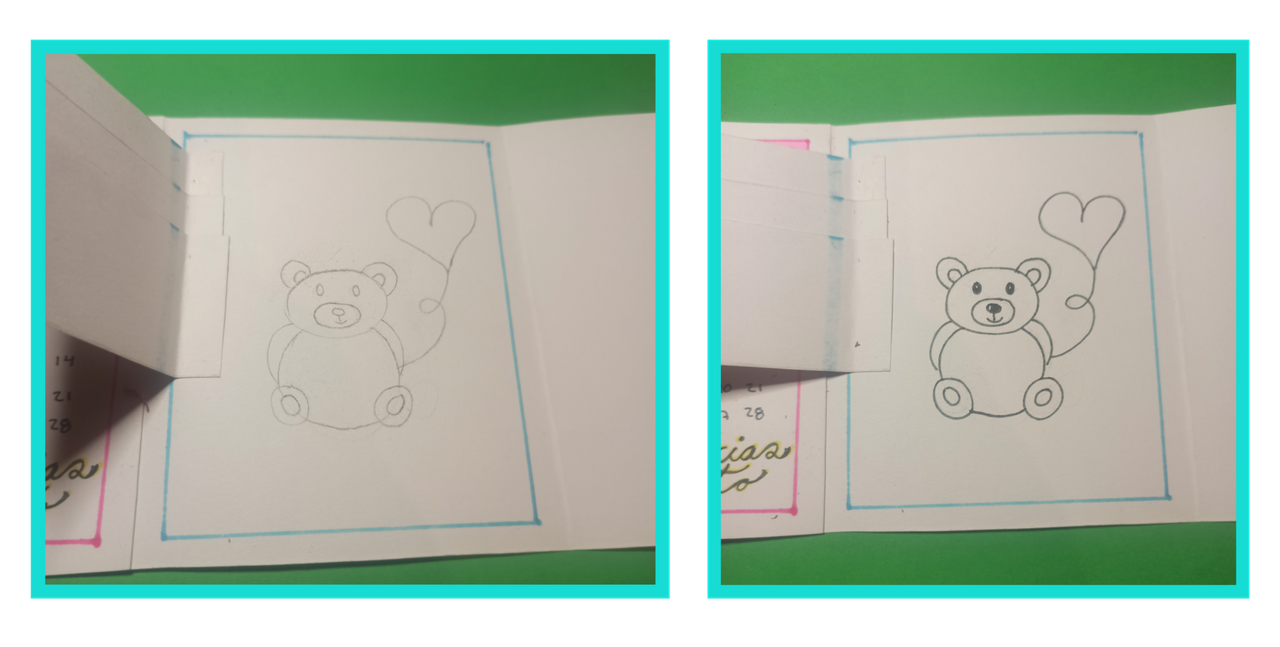
- Debajo de las cartulinas que pegamos dibuje un osito con un globo de corazón.
- Draw a bear with a heart-shaped balloon under the cardboard we glued.
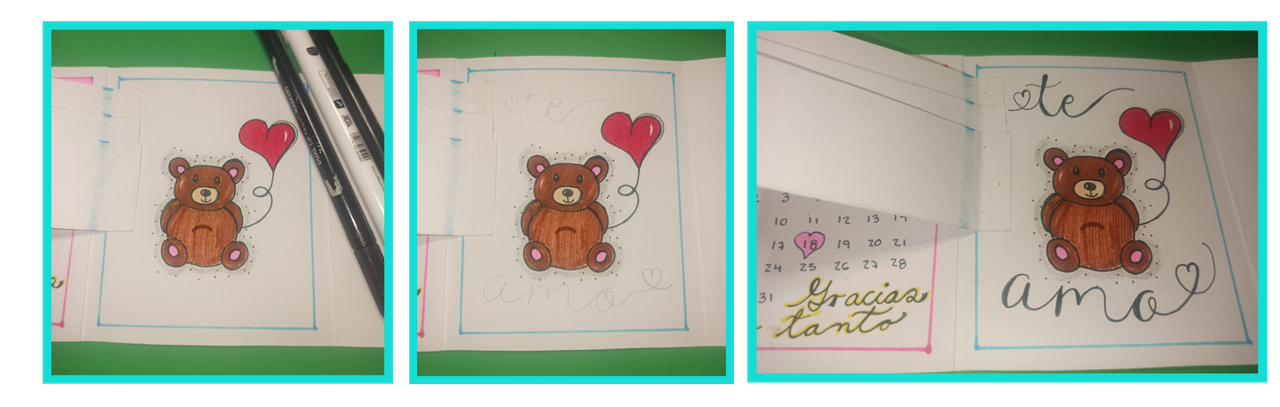
- Coloree con marcadores, agregue detales, y coloque la frase" Te Amo"
- Color with markers, add details, and place the phrase "I love you".
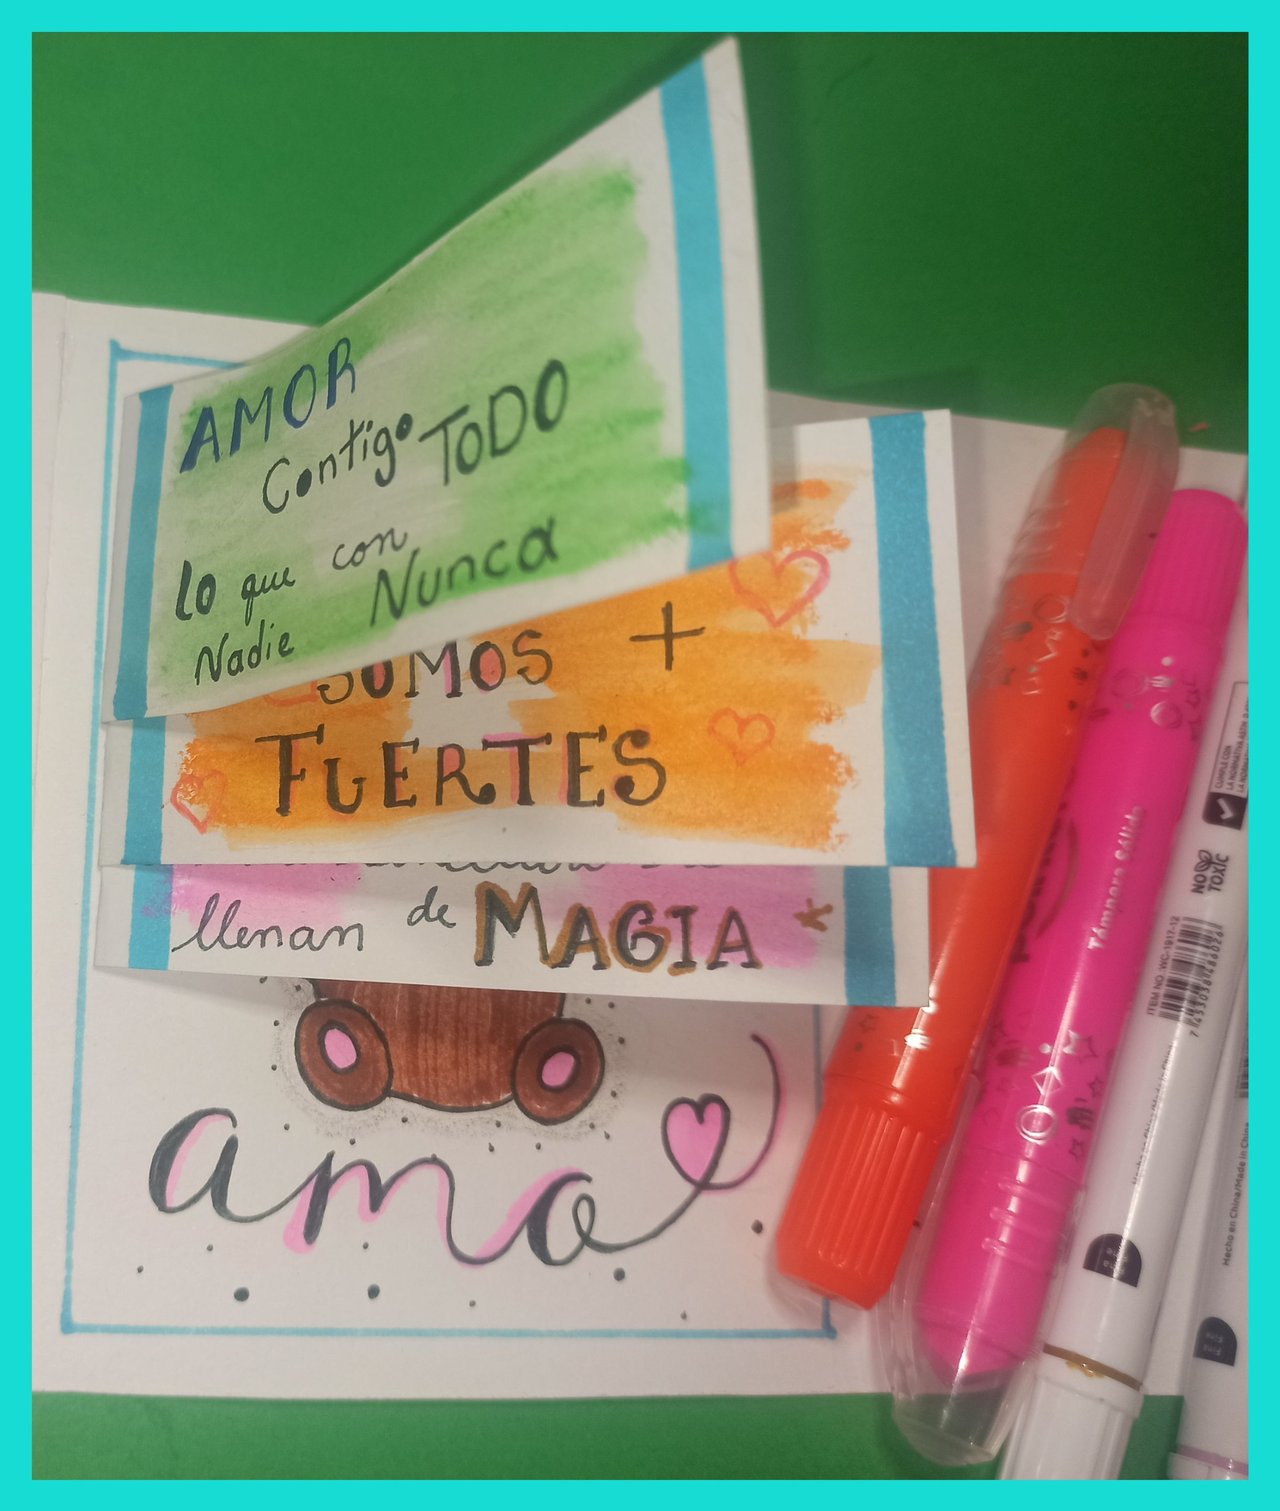
♥️♥️ Paso 5
♥️♥️ Step 5
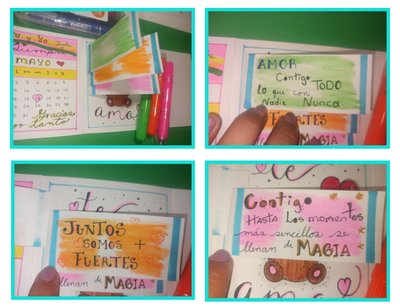
En las cartulinas que anteriormente pegue coloque frases
"Amor contigo Todo lo que con nadie Nunca"" Juntos somos + Fuertes"" Contigo hasta los momentos más sencillos se llenan de Magia"Añadí detalles y color con los rotuladores a base de témpera.
On the cards that were previously posted, place the following phrases
"Love with you Everything that with anyone Never" Together we are Stronger" With you, even the simplest moments are filled with Magic".I added details and color using the gouache-based markers.

♥️♥️ Paso 6
♥️♥️ Step 6
En la tercera parte del interior de la tarjeta
- Hice un borde de color fucsia.
- Añadí color al fondo utilizando un rotulador a base de témpera de color fucsia.
- Corta un trozo de cartulina de 6 cm de alto x 9 cm de ancho. Lo pegué quedando como un sobre, en cuyo interior se puede guardar oara un detalle como un anillo, una cadena, un collar o varios billetes de 100 dólares.
On the third part of the inside of the card
- I made a fuchsia-colored border.
- I added color to the background using a fuchsia-colored tempera-based marker.
- Cut a piece of cardboard 6 cm high x 9 cm wide. I glued it to look like an envelope, inside of which you can keep a ring, a chain, a necklace, or several 100-dollar bills.
♥️♥️ Paso 7
♥️♥️ Step 7
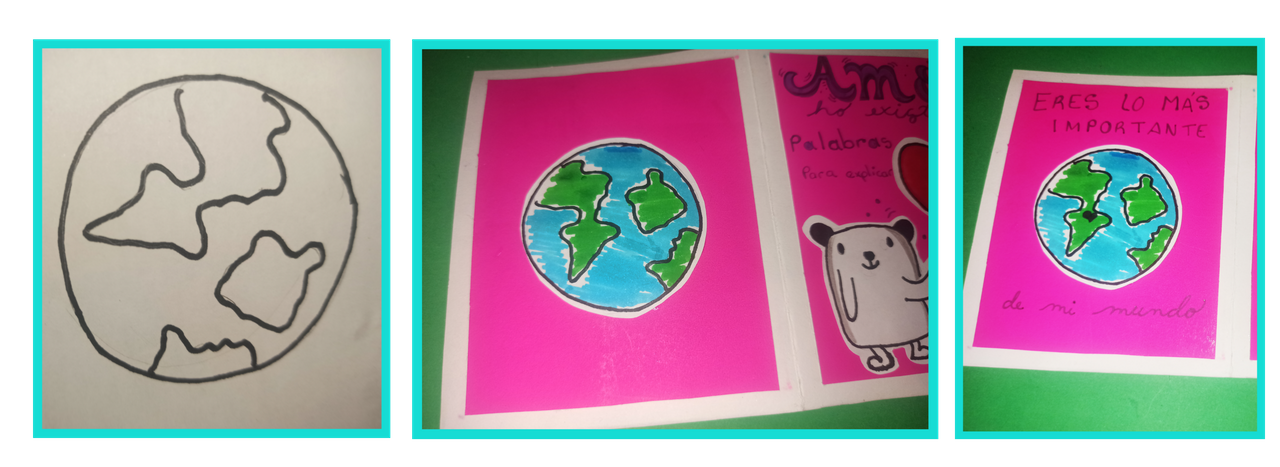
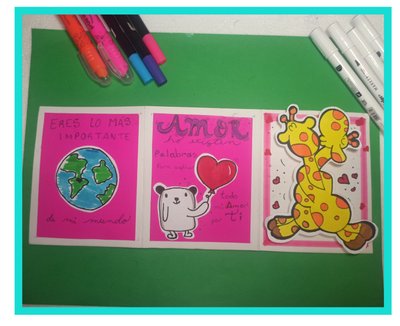
Aquí ya estamos al reverso de la cartulina
En la primera cuadrícula pegué un dibujo del planeta tierra que hice en hoja blanca.
Luego escribí la frase" Amor eres lo más importante de mi mundo"
Here we are on the reverse side of the cardboard.
In the first grid I posted a drawing of the planet earth that I made on white paper.
Then I wrote the phrase "Love, you are the most important thing in my world".
♥️♥️ Paso 8
♥️♥️ Step 8
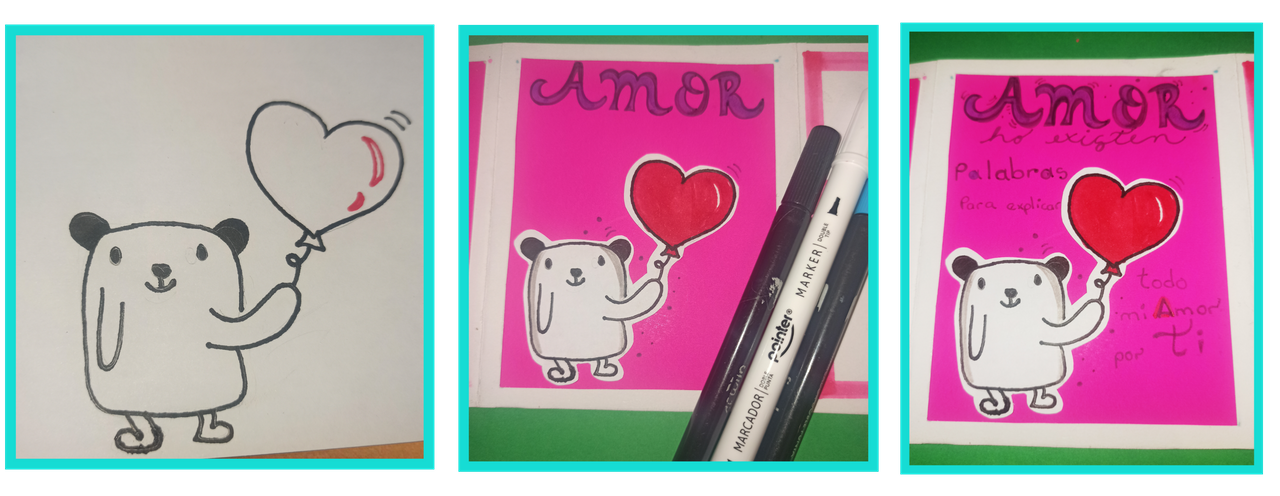
En la segunda, hice otro osito con un globo en forma de corazón, coloreado con rotuladores y pegado. Escribí la frase "Amor no hay palabras para explicar todo mi amor por ti".
In the second one, I made another teddy bear with a heart-shaped balloon, colored with markers and glued. I wrote the phrase "Love there are no words to explain all my love for you".
♥️♥️ Paso 9
♥️♥️ Step 9
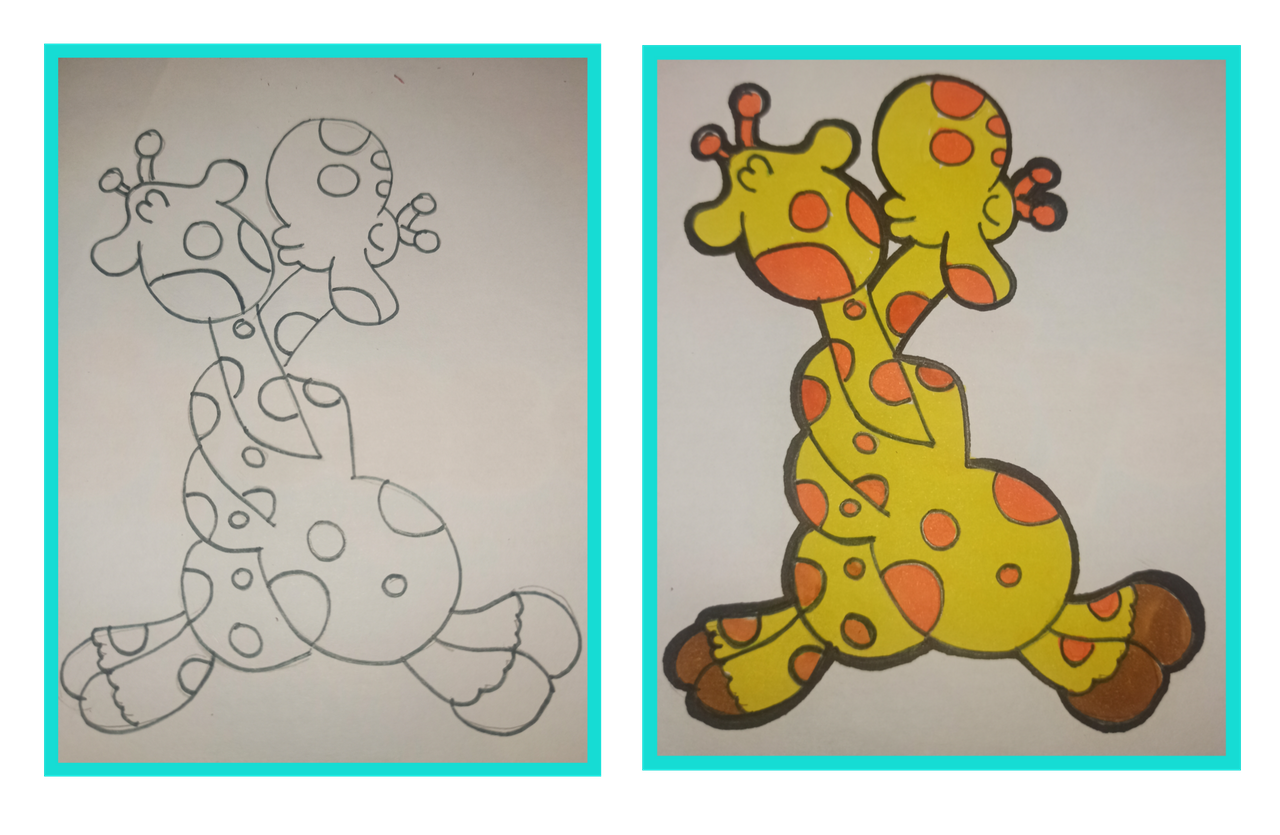
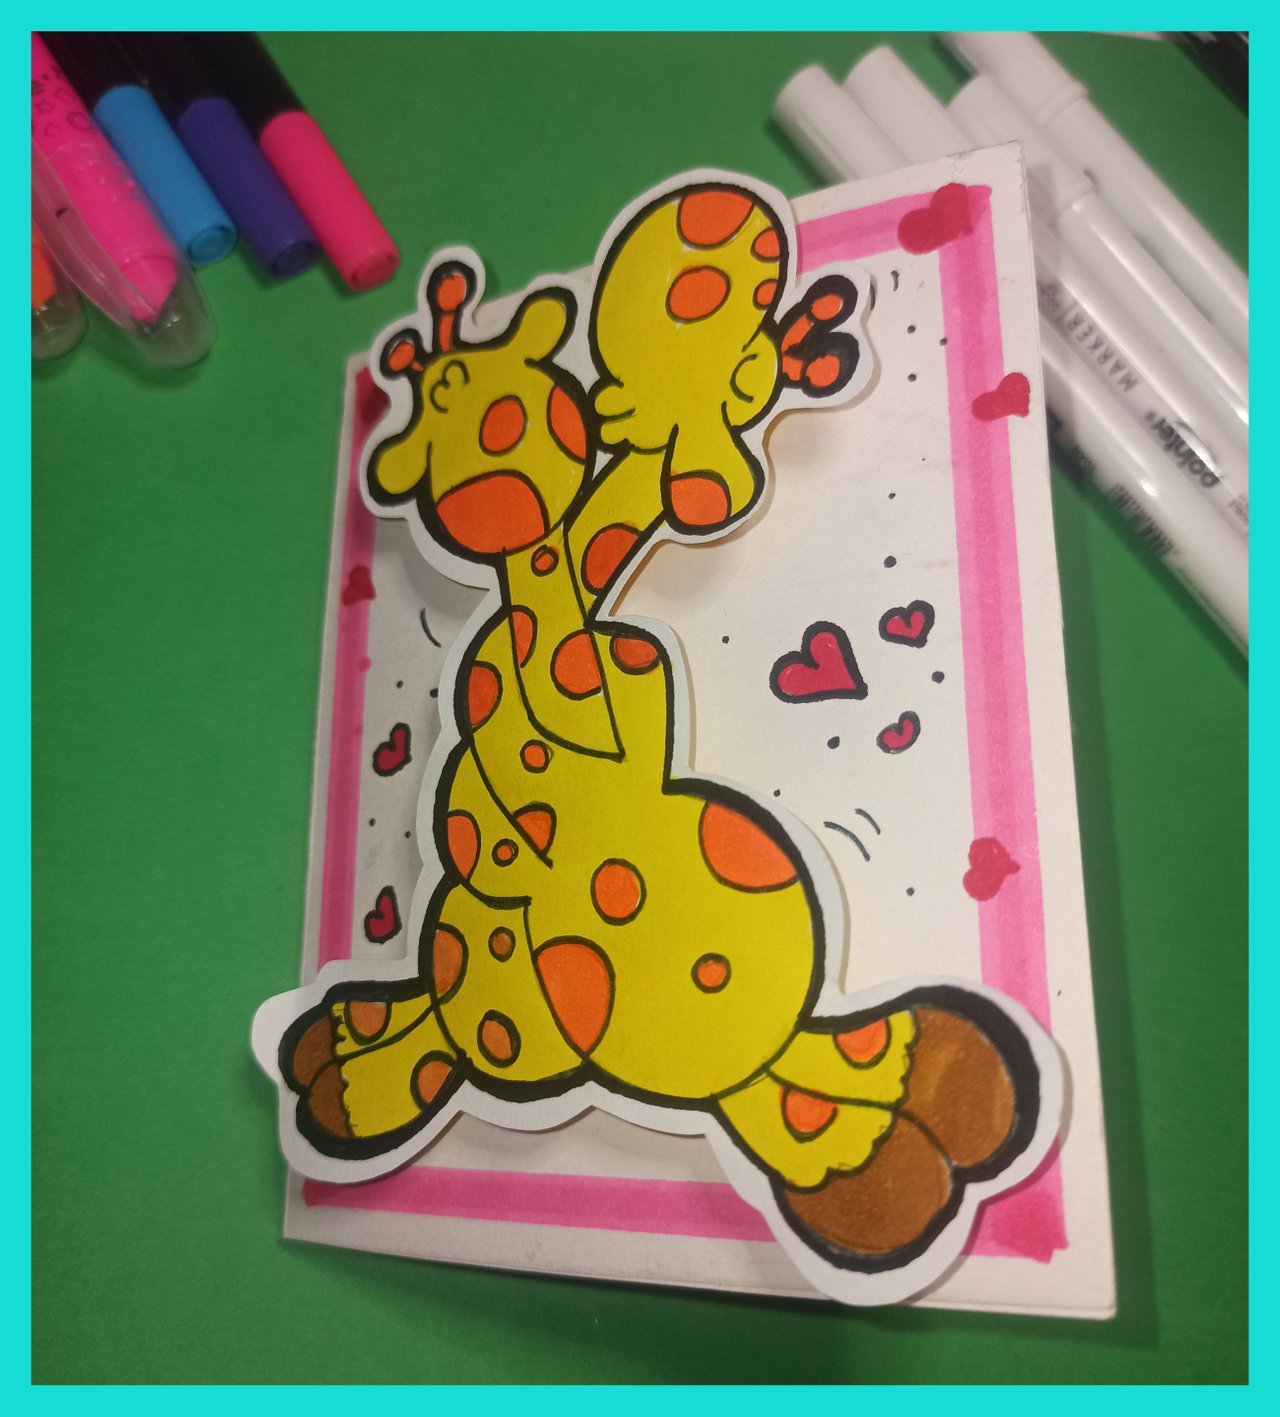
En la tercera y última parte, que sería la portada de la tarjeta, dibuje en hoja blanca (si se utiliza opalina blanca queda más resistente) dos jirafas enamoradas y coloree.
Momento de publicidad: los marcadores que use para darle color a los dibujos y toda la decoración de la tarjeta son los doble puntas de la marca pointer, son buenísimos, me encantaron estos marcadores.
In the third and last part, which would be the cover of the card, draw on white paper (if you use white opaline is more resistant) two giraffes in love and color.
Advertising moment: the markers I used to color the drawings and all the decoration of the card are the double-ended markers of the brand pointer, they are very good, I loved these markers.
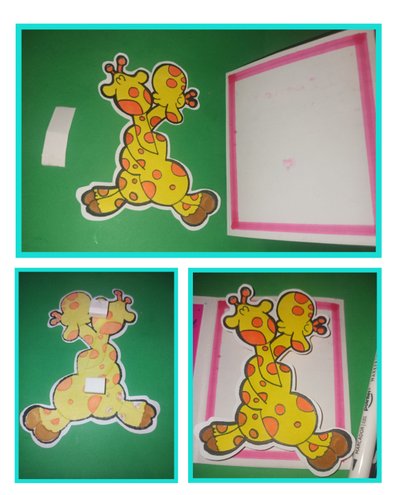
Recorté dos pequeñas tiras de cartulina, con las que hice un pequeño cuadrado para pegar las jirafas, y luego pegué el dibujo en la tapa para dar un efecto 3D a la jirafa.
I cut out two small strips of cardboard, with which I made a small square to glue on the giraffes, and then glue the drawing on the cover to give a 3D effect to the giraffe.
La tarjeta está terminada. A mí me ha encantado, ¿y a ti? Muy colorida, con frases para enamorar. Ya tienes la idea, ahora atrévete a hacerla, personalizarla a tu gusto y regalársela a tu ser querido. Es muy bonito recibir estos detalles.
The card is finished. I loved it, how about you? Very colorful, with phrases to fall in love. You already have the idea, now dare to make it, customize it to your liking and give it to your loved one. It is very nice to receive these details.

Otros trabajos similares :
| DIY - Creative card for mom ENG/SPA | DIY - Surprise gift box ENG/ESP | DIY "A card dedicated to my favorite hiver " ENG/ESP |
|---|---|---|
 |  |  |
Fotografías de mi propiedad tomadas con el celular Redmi note 8 pro, editadas en canva
Traducción realizada con la versión gratuita del
traductor DeepL
Todos los diseños fueron creados en canva
Photographs of my property taken with the Redmi note 8 pro cell phone, edited in canva
Translation made with the free version of
translator DeepL
All designs were created in canva
Espectacular tu trabajo.... Me encantó.
💙✨🎊🌷🌺🐞💖🌻💜🎉💐🍄🌈⭐🌹🌱🌙🍁🌳🌟🌲🌼🏵️💮🌸🌵🍀💫🍂🥀🌺🌷🎊✨💙
Holaaa 💐🌹🌺🌷🌸💮🏵️🌻🌼🍄🍂🌱🌾🌋🌋🙈🙉🙊🐵🦁🐯🐱🐶🐹🦓🐢🦕🦖🐉🦎 ayyy que alegriaa!! Muchas gracias 😊
Bueno, para no perder la costumbre.
Excelente carta. Se ve tu estilo por todos lados por donde se mire. Ciertamente tienes una gran creatividad para este tipo de trabajos y te quedan realmente lindos.
Bellos tus marcadores, bellos tus dibujos y bella tu carta. Gracias por compartir estas ideas con la comunidad.
... y bella yo 😋 gracias Gabo . Ando adicta a los marcadores, los quierooo comprar todossss y este tipo de trabajo me gusta mucho realizarlo. Saludos
The rewards earned on this comment will go directly to the person sharing the post on Twitter as long as they are registered with @poshtoken. Sign up at https://hiveposh.com.
Thank you for sharing this amazing post on HIVE!
Your content got selected by our fellow curator @rezoanulvibes & you just received a little thank you via an upvote from our non-profit curation initiative!
You will be featured in one of our recurring curation compilations and on our pinterest boards! Both are aiming to offer you a stage to widen your audience within and outside of the DIY scene of hive.
Join the official DIYHub community on HIVE and show us more of your amazing work and feel free to connect with us and other DIYers via our discord server: https://discord.gg/mY5uCfQ !
If you want to support our goal to motivate other DIY/art/music/homesteading/... creators just delegate to us and earn 100% of your curation rewards!
Stay creative & hive on!