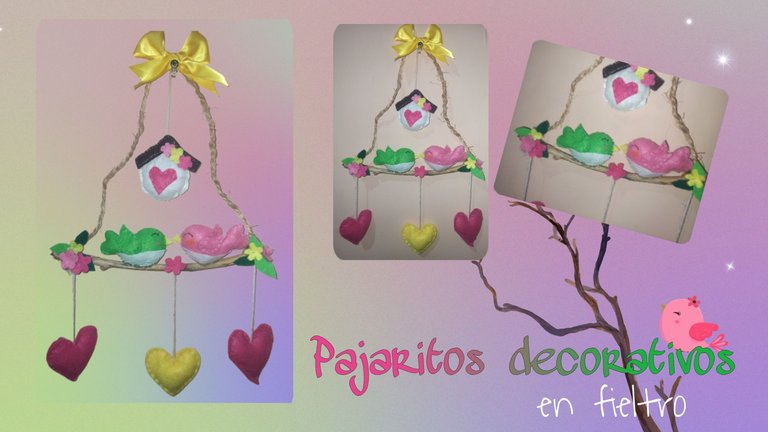

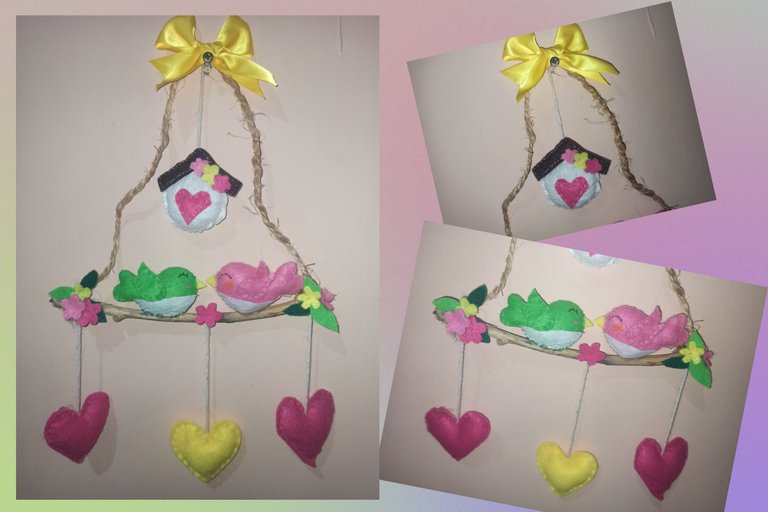
Hola gente bella y creativa. Seguimos usando el fieltro para crear cosas lindas. Dos pajaritos enamorados son los protagonista de este nuevo tutorial. Este adorno ahora está como decoración en mi cuarto, quedaría muy lindo en un jardín. Pero bueno, yo les enseño a hacerlo y ustedes se encargan de darle un lugar, quedará lindo en cualquier espacio.
Hello beautiful and creative people. We continue to use felt to create cute things. Two little birds in love is the protagonist of this new tutorial. This ornament is now as decoration in my room, it would look very nice in a garden. But well, I'll show you how to do it and you are in charge of giving it a place, it will look nice in any space.

🐦 Fieltro verde claro y oscuro
🐦 Fieltro rosa y fucsia
🐦 Fieltro blanco
🐦 Fieltro marrón
🐦 Fieltro amarillo
🐦 Hilos de coser y aguja
🐦 Cinta raso amarilla
🐦 Silicona caliente
🐦 Estambre
🐦 Mecatillo 30 cm aprox.
🐦 Palo de madera (rama)
🐦 Light and dark green felt
🐦 Pink and fuchsia felt
🐦 White felt
🐦 Brown felt
🐦 Yellow felt
🐦 Sewing threads and needle.
🐦 Yellow satin ribbon
🐦 Hot glue
🐦 yarn
🐦 jute rope 30 cm approx.
🐦 Wooden stick (branch)
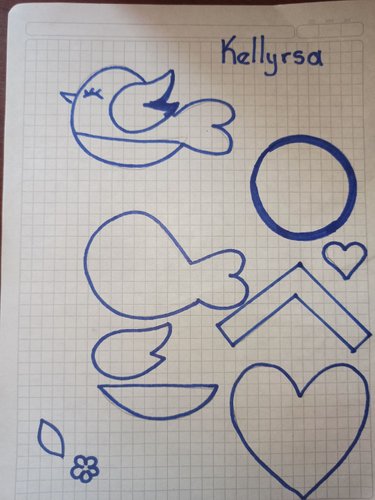
▶️ Paso 1:
- Dibujar los patrones
▶️ Step 1 :
- Drawing patterns
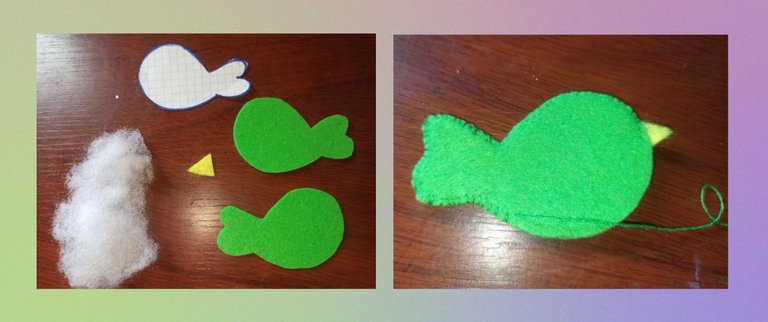
▶️ Paso 2:
- Empezamos marcando el cuerpo del pájaro (dos piezas color verde) y el pico amarillo.
- Cosemos el pico y seguimos uniendo las dos piezas del cuerpo con la puntada hilván. Añadimos relleno.
▶️ Step 2 :
- We start by marking the body of the bird (two green pieces) and the yellow beak.
- We sew the beak and continue joining the two pieces of the body with the basting stitch. Add stuffing.
▶️ Paso 3 :
- Ubicamos el detalle de la barriga(color blanco) y una alita (color verde). El detalle del ojo con hilo negro y mejillas rosadas con pintura.
▶️ Step 3:
- We place the detail of the belly (white color) and a wing (green color). The detail of the eye with black thread and pink cheeks with paint.
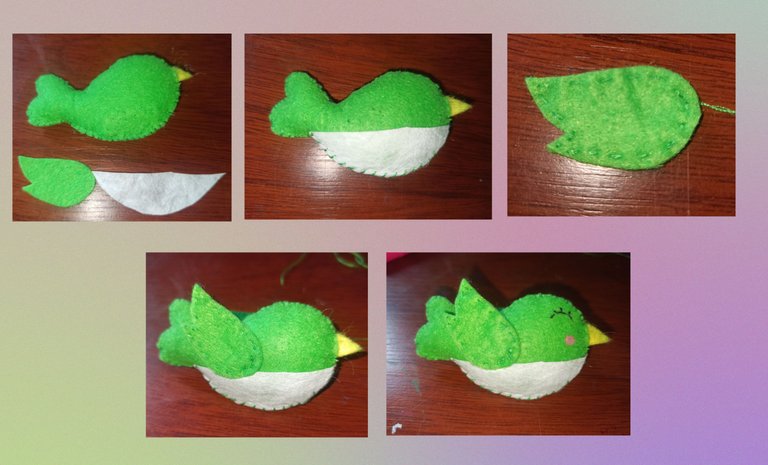
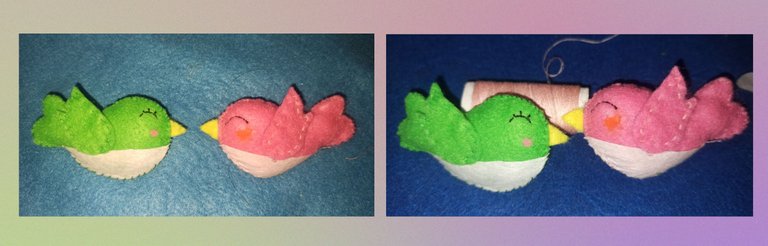
▶️ Paso 4 :
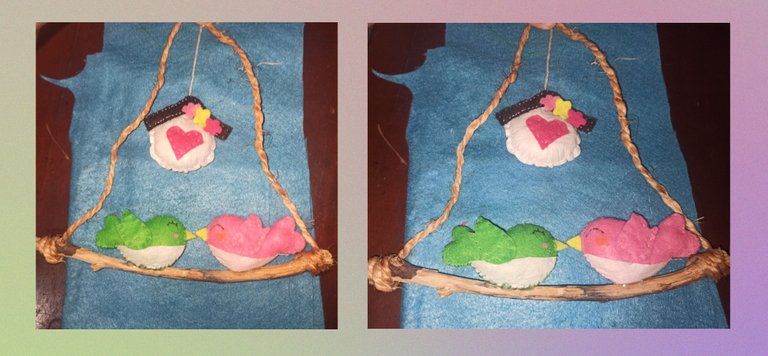
- Cómo pueden observar en la imagen, son dos pajaritos, uno color verde y otro rosado. Para este segundo pájaro se realiza el mismo procedimiento, solo que se ubica los detalles de la barriga, ojos y alas del lado contrario para que los pajaritos queden frente a frente.
▶️ Step 4:
- As you can see in the image, there are two birds, one green and the other pink. For this second bird the same procedure is done, but the details of the belly, eyes and wings are placed on the opposite side so that the birds are facing each other.
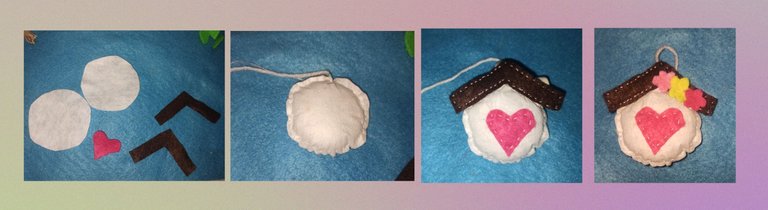
▶️ Paso 5 :
- Para la casita, dos círculos blancos, el techo marrón y un corazón fucsia. Unimos las piezas usando la puntada hilván, en el centro de la parte superior de la casita, coser un pedazo de estambre de unos 7 cm aproximadamente.
▶️ Step 5 :
- For the little house, two white circles, the brown roof and a fuchsia heart. Join the pieces using the basting stitch, in the center of the top of the house, sew a piece of yarn about 7 cm long.
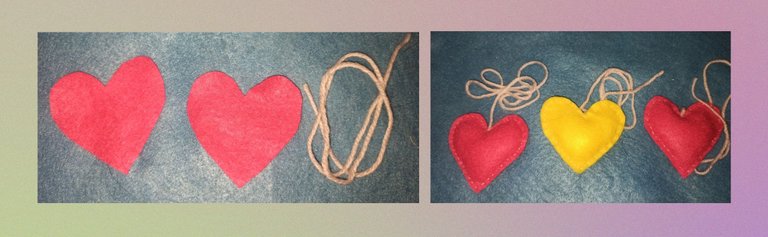
▶️ Paso 6:
- Vamos a armar 3 corazones, dos fucsias y uno amarillo. Marcamos y cortamos los patrones, unir las piezas con la puntada hilván, añadir relleno. Pegar estambre de unos 10 cm aproximadamente en la parte superior de los corazones.
▶️ Step 6 :
- We are going to assemble 3 hearts, two fuchsia and one yellow. We mark and cut the patterns, join the pieces with the basting stitch, add stuffing. Glue yarn of about 10 cm approximately on the top of the hearts.
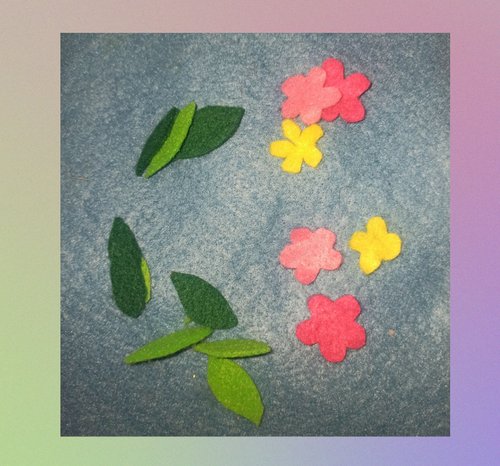
▶️ Paso 7 :
- Hacer 7 flores de variados colores y 6 hojas en verde.
▶️ Step 7 :
- Make 7 flowers of various colors and 6 green leaves.
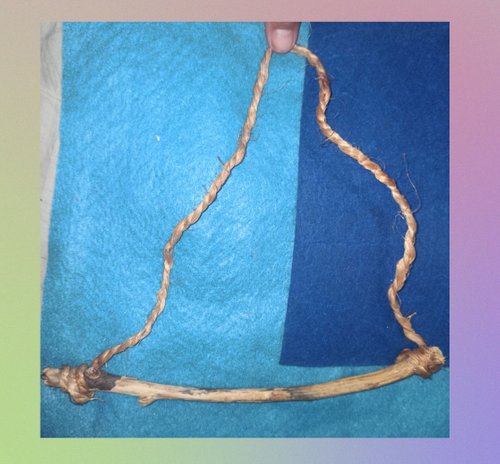
▶️ Paso 8 :
- Con toda las piezas lista, empezamos a armar. Amarramos, pegamos las puntas de mecatillo a cada extremo del palo de madera.
▶️ Step 8:
- With all the pieces ready, we begin to assemble. Tie, glue the jute rope ends to each end of the wooden stick.
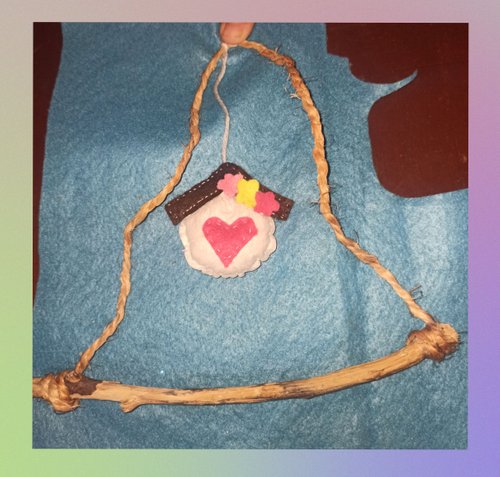
▶️ Paso 9 :
- Se amarra la casita en el centro del mecatillo.
▶️ Step 9:
- The house is tied in the center of the jute rope.
▶️ Paso 10:
- Pegamos con silicona los pajaritos en el palo de madera.
▶️ Step 10:
- Glue the birds to the wooden stick with silicone.
▶️ Paso 11:
- Ata o pega las tiras de los corazones al palo de madera, en cada extremo y en el centro. Para que queden colgando.
▶️ Step 11:
- Tie or glue the strips of the hearts to the wooden stick, at each end and in the center. So that they are hanging.
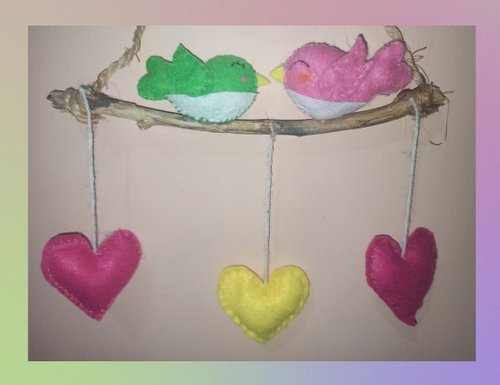
▶️ Paso 12:
- Para finalizar, pegamos las hojas y flores en las mismas posiciones donde se pegaron las tiras de los corazones.
▶️ Step 12:
- Finally, we glue the leaves and flowers in the same positions where the heart strips were glued.
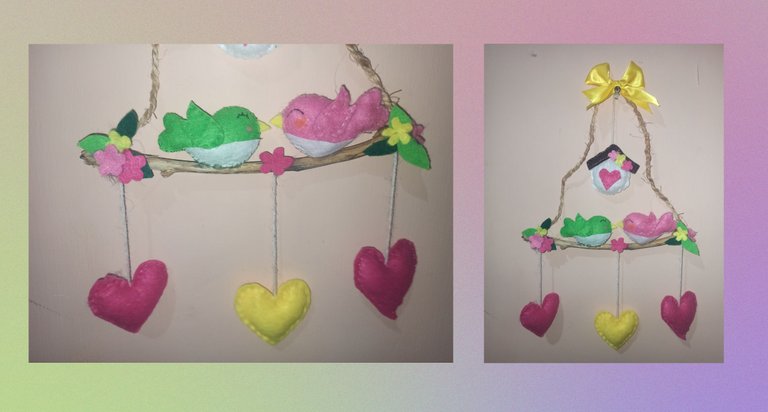
▶️ Resultado :
▶️ Result :
Estaré encantada de leer y responder a sus comentarios. Gracias totales a todos los que aprecian mi contenido, y que se toman el tiempo de leer y dejar un comentario, gracias, muchas gracias. Les deseo lo mejor.
Hasta pronto.
I will be happy to read and respond to your comments. Total thanks to all of you who appreciate my content, and who take the time to read and leave a comment, thank you, thank you very much. I wish you all the best.
See you soon.

Otros trabajos con fieltro :
| DIY- Stitch keychain ENG/ESP | DIY- Mickey Mouse keychain ENG/ESP | [ENG/ESP] DIY - Tutorial Llavero y monedero Frida Khalo | DIY- Monster keychains ENG/ESP | DIY- Llavero Hive con fieltro [ENG/ESP] |
|---|---|---|---|---|
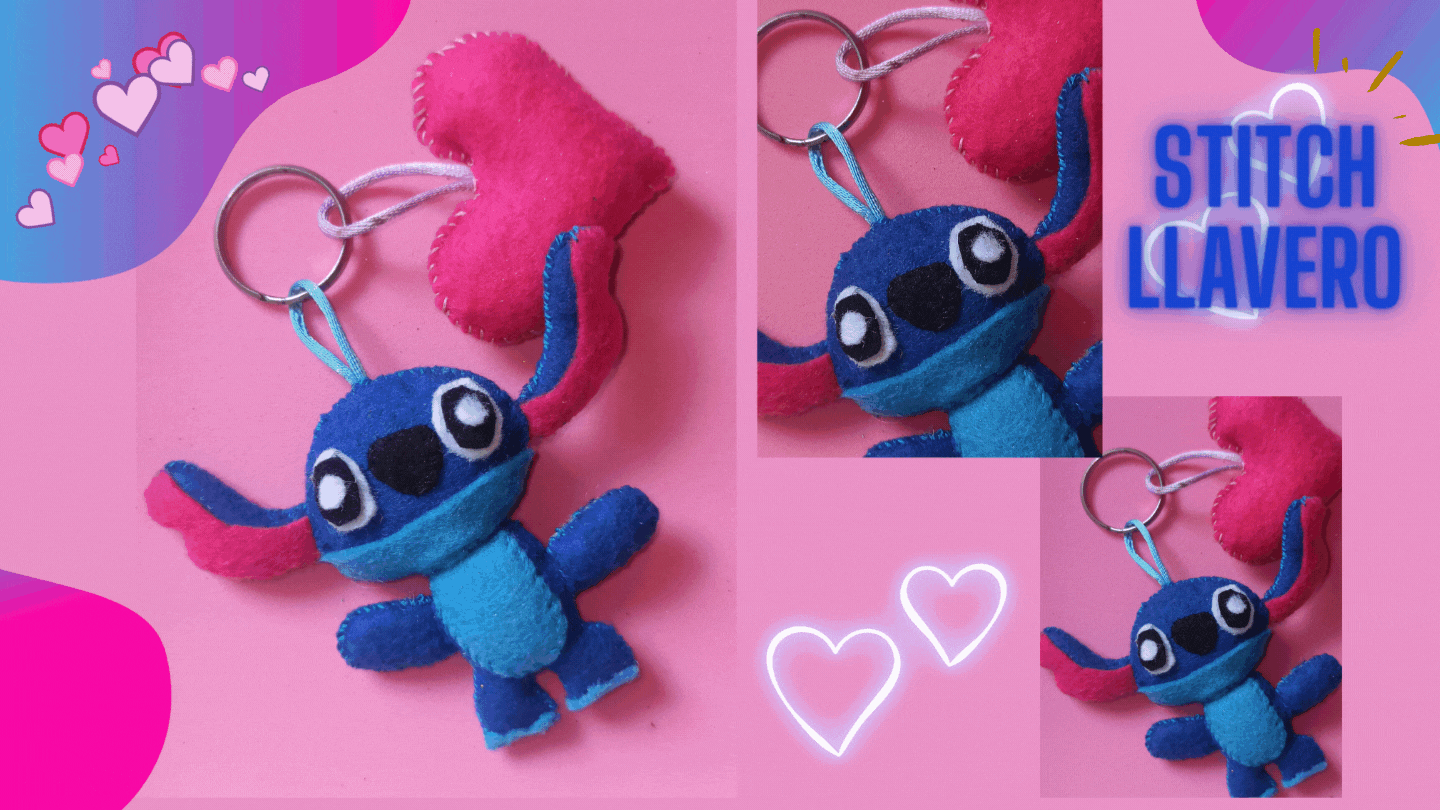 | 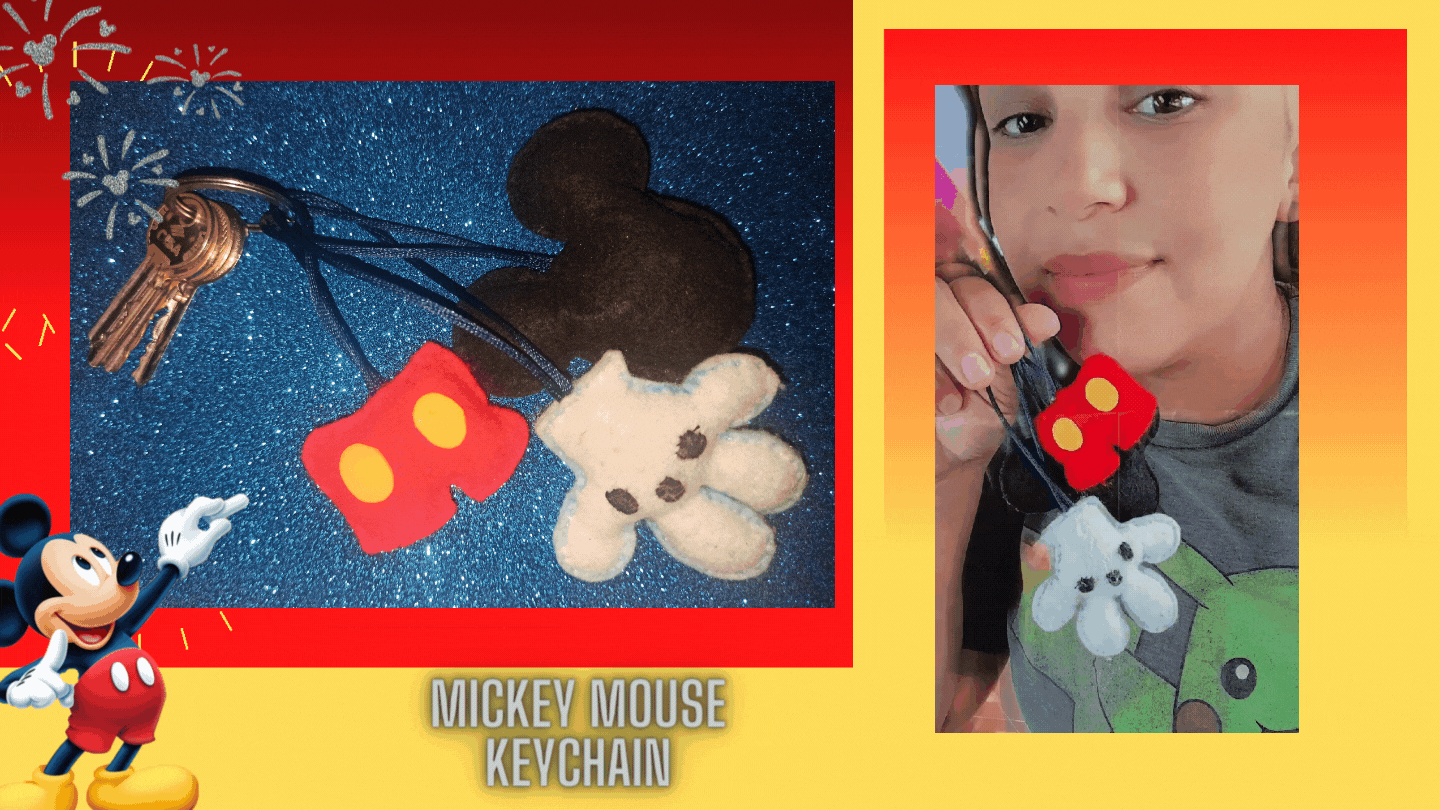 |  | 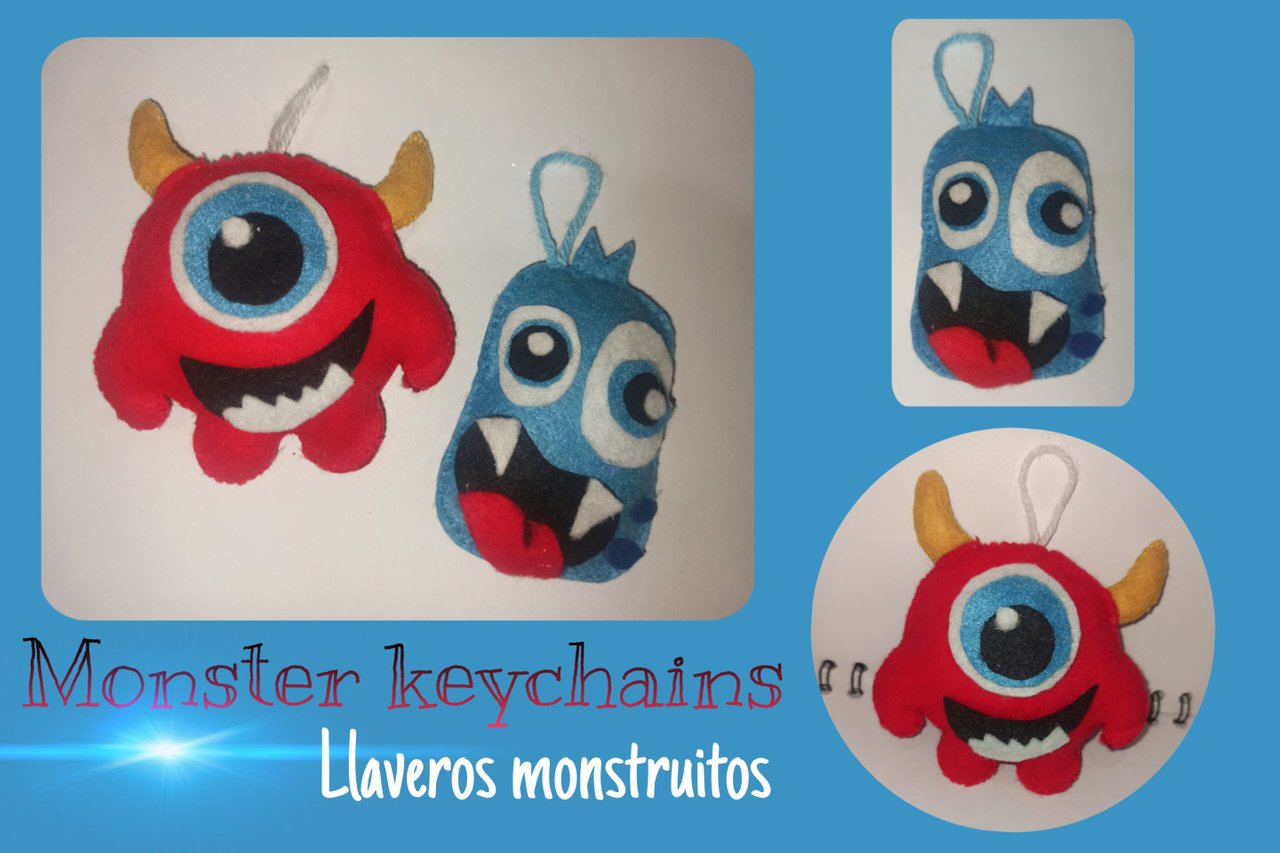 |  |

Fotografías de mi propiedad tomadas con el celular Redmi note 8 pro, editadas en canva
Traducción realizada con la versión gratuita del
traductor DeepL
Todos los diseños fueron creados en canva
Photographs of my property taken with the Redmi note 8 pro cell phone, edited in canva
Translation made with the free version of
translator DeepL
All designs were created in canva
Hermosos
Gracias, gracias 💚🐦💜
Thank you for sharing this amazing post on HIVE!
Your content got selected by our fellow curator @rezoanulvibes & you just received a little thank you via an upvote from our non-profit curation initiative!
You will be featured in one of our recurring curation compilations and on our pinterest boards! Both are aiming to offer you a stage to widen your audience within and outside of the DIY scene of hive.
Join the official DIYHub community on HIVE and show us more of your amazing work and feel free to connect with us and other DIYers via our discord server: https://discord.gg/mY5uCfQ !
If you want to support our goal to motivate other DIY/art/music/homesteading/... creators just delegate to us and earn 100% of your curation rewards!
Stay creative & hive on!
The rewards earned on this comment will go directly to the people sharing the post on Twitter as long as they are registered with @poshtoken. Sign up at https://hiveposh.com.
Dear @kellyrsa,
May I ask you to review and support the Dev Marketing Proposal (https://peakd.com/me/proposals/232) we presented on Conference Day 1 at HiveFest?
The campaign aims to onboard new application developers to grow our ecosystem. If you missed the presentation, you can watch it on YouTube.
You cast your vote for the proposal on Peakd, Ecency,
Thank you!