BIENVENIDOS A MI BLOG
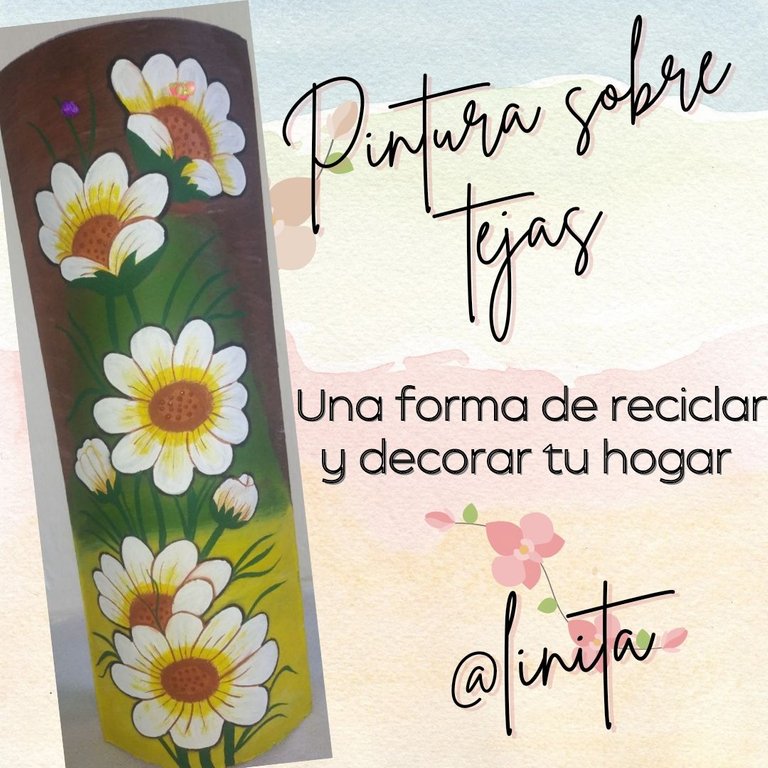
Desde hace algunos años atrás, el rescate de las tejas que mis vecinos botan ha sido una tarea que me ha proporcionado muchos beneficios, no sólo porque con ellas decoro algún rinconcito de mi casa, sino que también me ha servido para obsequiarle a familiares y amigos en ciertas ocasiones. También me ha servido como un medio para despejar mi mente, ya que mientras pinto me desconecto del mundo real y me envuelve una especie de tranquilidad que sólo consigo cuando comienzo a realizar cualquier objeto que involucre pincel y pintura. Solo soy un aficionada más en este arte, no sé mucho sobre técnicas ni estudios artísticos pero trato de ponerle corazón a cada una de las piezas que realizo.
Generalmente en esta época, mis vecinos se dedican a hacer cambios en sus fachadas, la mayoría tienen tejas, y cuando comienzan a retirarlas, allí estoy yo con mi saquito para rescatar las que están enteras y después de pintarlas, le regreso a mi vecino una bien pintadita para su casa. Ya he ganado fama en la comunidad donde vivo, y muchos se acercan a mi casa para preguntarme si las voy a querer, pues y como siempre la respuesta es sí. Las escojo y luego las lavo y elimino la suciedad y las reutilizo.
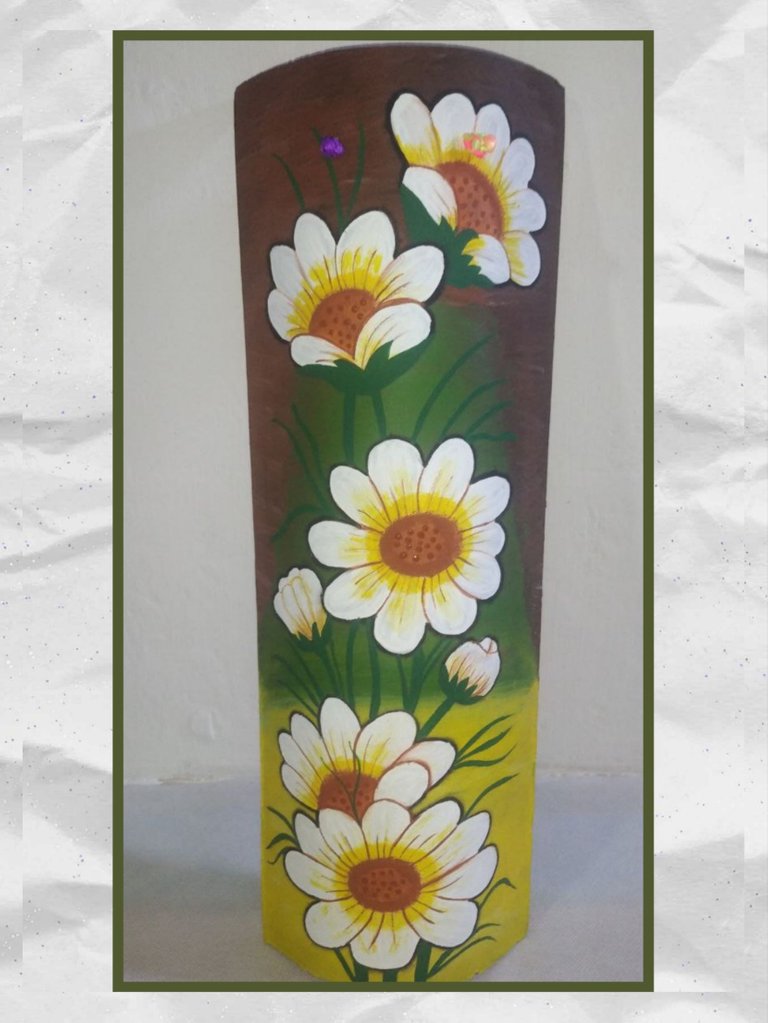
En esta oportunidad realicé unas flores blancas con matices amarillos y marrones que resaltan en el fondo oscuro. Espero les guste.
WELCOME TO MY BLOG
For some years now, rescuing the tiles that my neighbors throw away has been a task that has provided me with many benefits, not only because I decorate some corner of my house with them, but it has also served as a gift to family and friends. on certain occasions. It has also served as a means to clear my mind, since while I paint I disconnect from the real world and a kind of tranquility surrounds me that I only achieve when I begin to make any object that involves brush and paint. I'm just one more fan of this art, I don't know much about techniques or artistic studies but I try to put heart into each of the pieces I make. Generally at this time, my neighbors dedicate themselves to making changes to their facades, most of them have tiles, and when they start to remove them, I am there with my little bag to rescue the ones that are whole and after painting them, I return one to my neighbor well painted for your home. I have already gained fame in the community where I live, and many come to my house to ask me if I am going to love them, well, and as always, the answer is yes. I pick them out and then wash them and remove the dirt and reuse them. This time I made some white flowers with shades of yellow and brown that stand out on the dark background. I hope you like it.
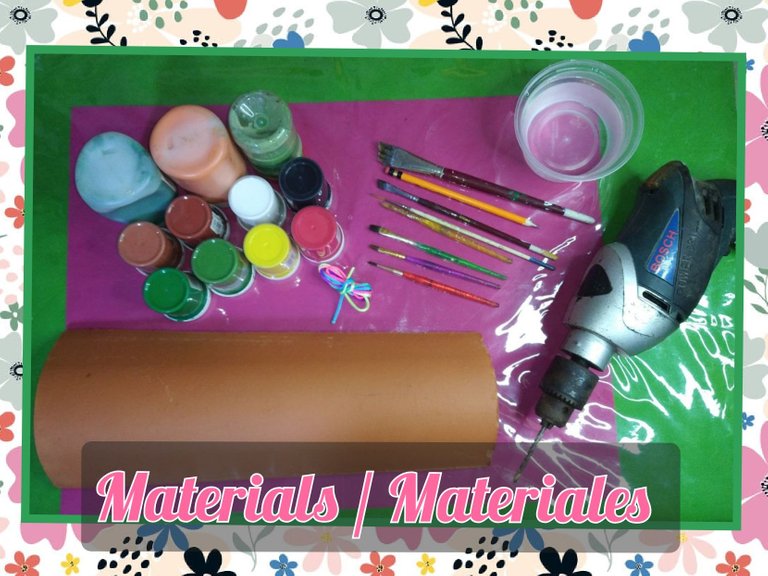
MATERIALES
- Pinturas al frío
- Pinceles liner, redondo, plano, angular.
- Lápiz de grafito
- Cordón
- Taladro
MATERIALS
- Cold paints
- Liner, round, flat, angular brushes.
- Graphite pencil
- Drawstring
- Drill
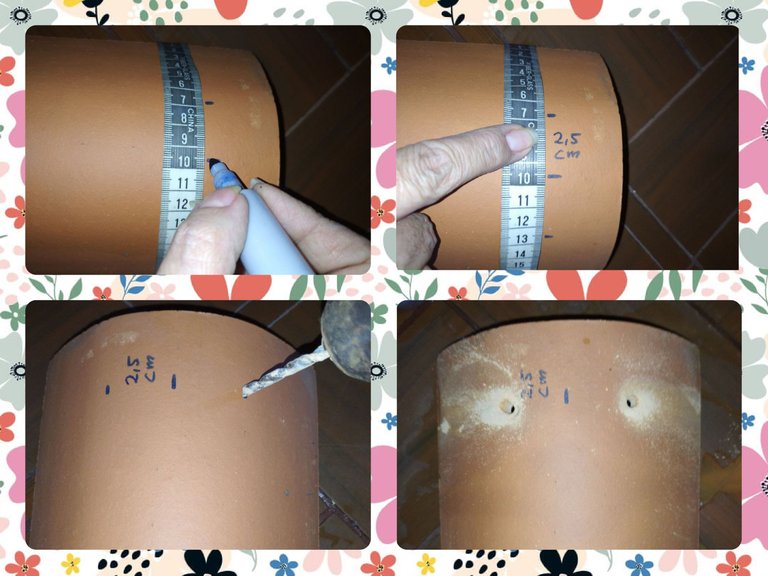
PASO A PASO
Antes de comenzar a pintar, debemos realizar los agujeros para colgar nuestra teja. Marcamos los puntos con un marcador y luego realizamos los agujeros con un taladro con una mecha para concreto mediana. Humedecemos la teja a medida que vayamos haciendo el hoyo para evitar que se raje en la perforación.
STEP BY STEP
Before starting to paint, we must make the holes to hang our tile. We marked the spots with a marker and then drilled the holes with a drill with a medium concrete bit. We moisten the tile as we make the hole to prevent it from cracking in the perforation.
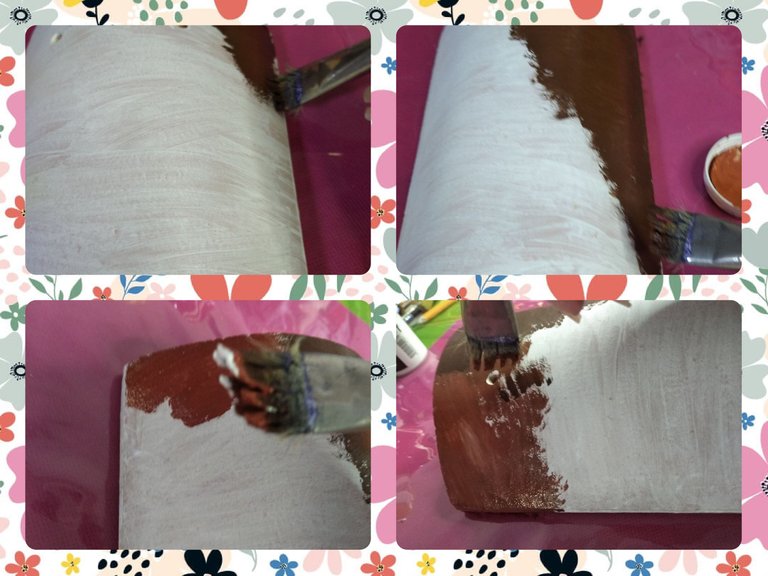
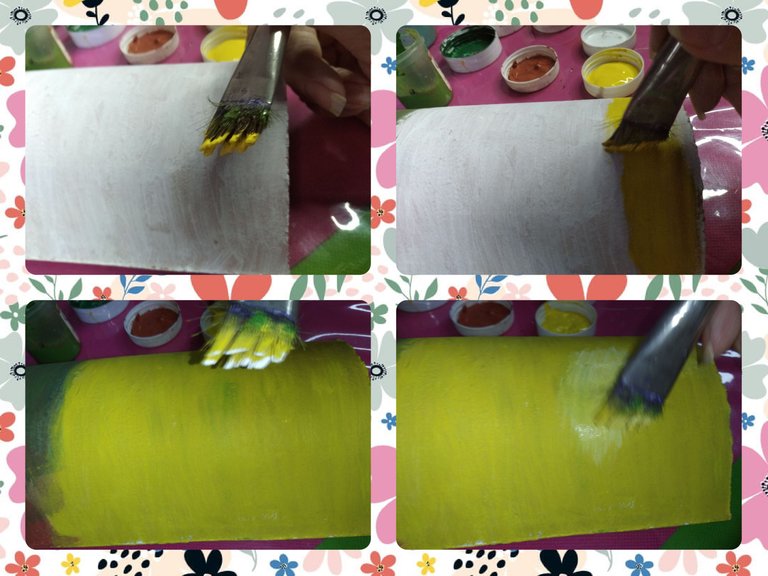
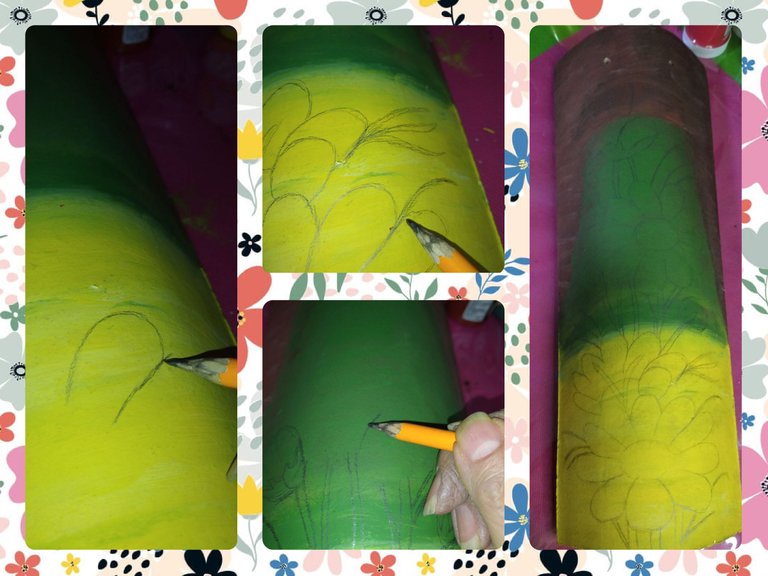
Comenzamos realizando una base blanca para que la teja absorba una capa de pintura y sólo realizar una capa de las otras pinturas a medida que vayamos realizando el arte.
We start by making a white base so that the tile absorbs a layer of paint and only make a layer of the other paints as we make the art.

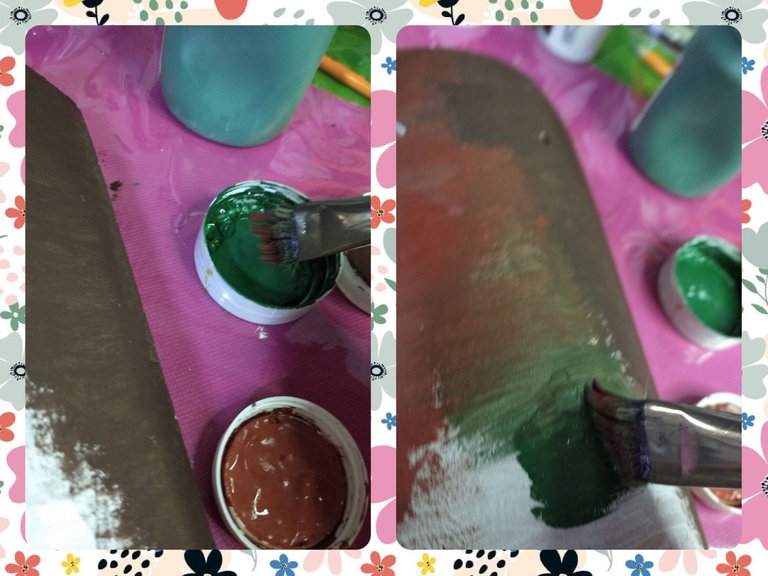
Empezamos realizando pincelada con la pintura marrón oscura, desde el centro superior derecho en declive hasta la parte central de la teja.
Realizamos el mismo procedimiento en el lado izquierdo,mezclando ambas pinturas en la parte media de la teja.
We start by making a brush stroke with the dark brown paint, from the upper right center in decline to the central part of the tile.
We carry out the same procedure on the left side, mixing both paints in the middle part of the tile.
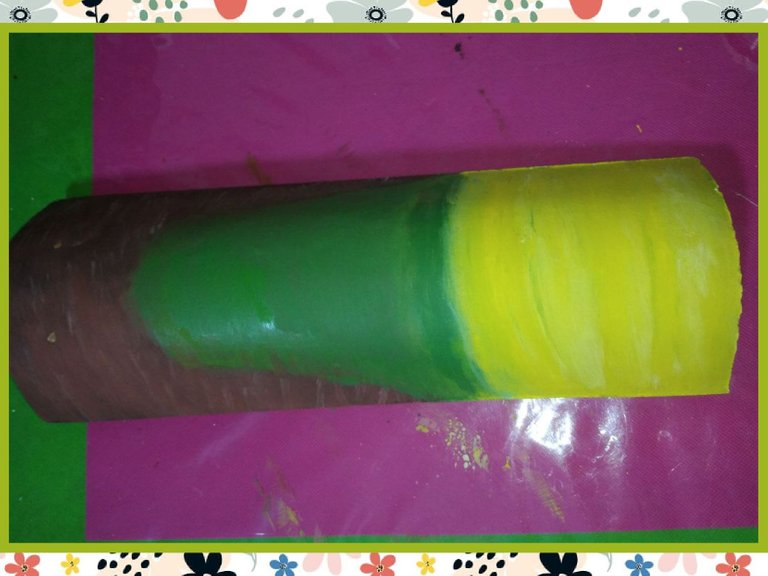
Con pintura verde bosque hacemos pinceladas en la parte central, entre ambas pinturas marrones hasta alcanzar un poco más abajo de la mitad de la teja.
With forest green paint we make brushstrokes in the central part, between both brown paints until reaching a little below the middle of the tile.
Luego con pintura amarilla completamos de pintar el resto de la teja.
Mojamos las puntas del pincel con un poco de blanco y realizamos pinceladas apenas rozando la teja para darle un poco de iluminación.
Then with yellow paint we complete painting the rest of the tile.
We wet the tips of the brush with a little white and make brush strokes just touching the tile to give it a little lighting.
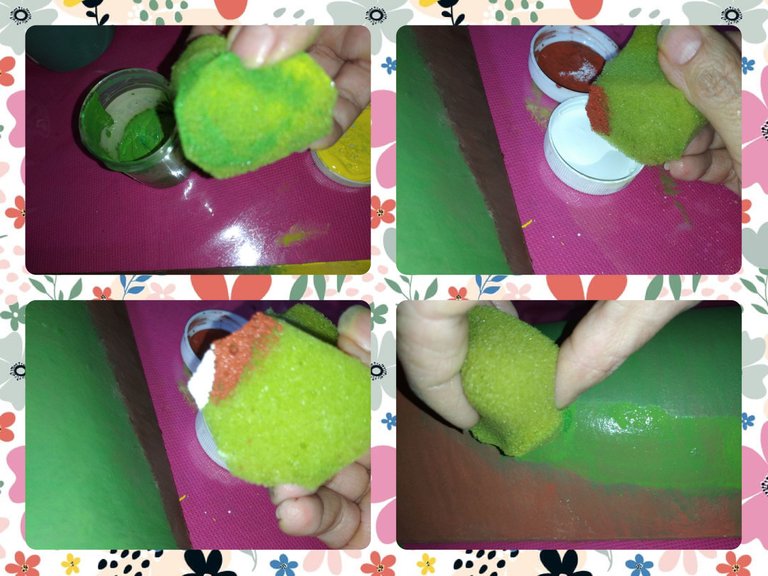
Con una esponja húmeda y ligeramente manchada con los tonos de las pinturas usadas, comenzamos a realizar una especie de degradado entre las uniones de las mezclas.
With a damp sponge slightly stained with the tones of the paints used, we begin to make a kind of gradient between the joints of the mixtures.
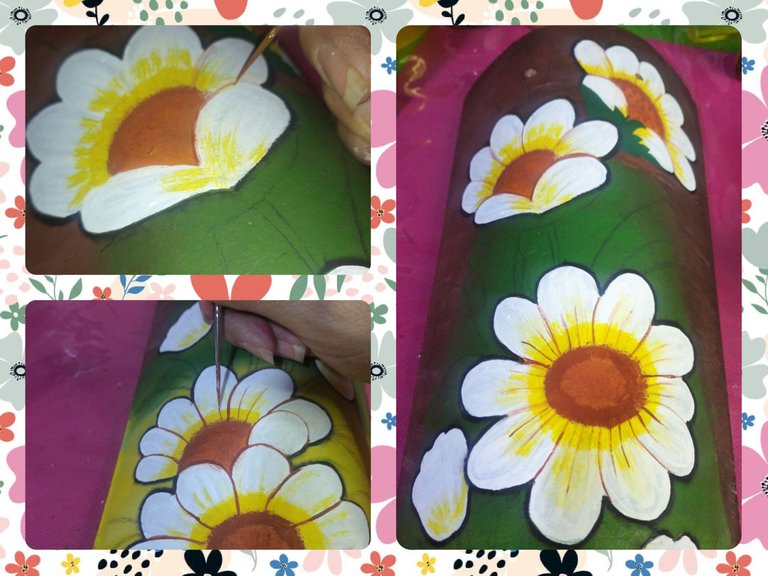
Ya terminada la base del fondo, comenzamos a trazar con el lápiz la figura que queremos pintar. En mi caso realicé unas flores blancas semejantes a unas margaritas, que con el fondo oscuro hace un muy bonito contraste.
Once the base of the background is finished, we begin to trace with the pencil the figure that we want to paint. In my case I made some white flowers similar to daisies, which make a very nice contrast with the dark background.
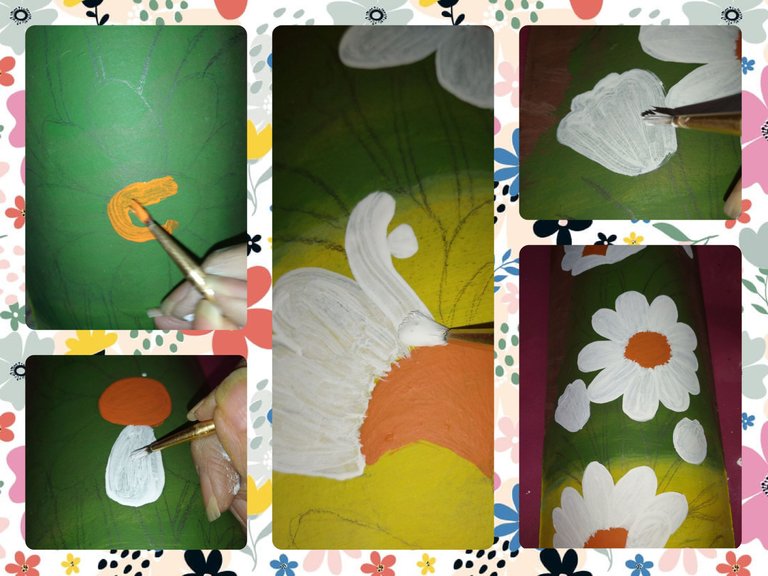
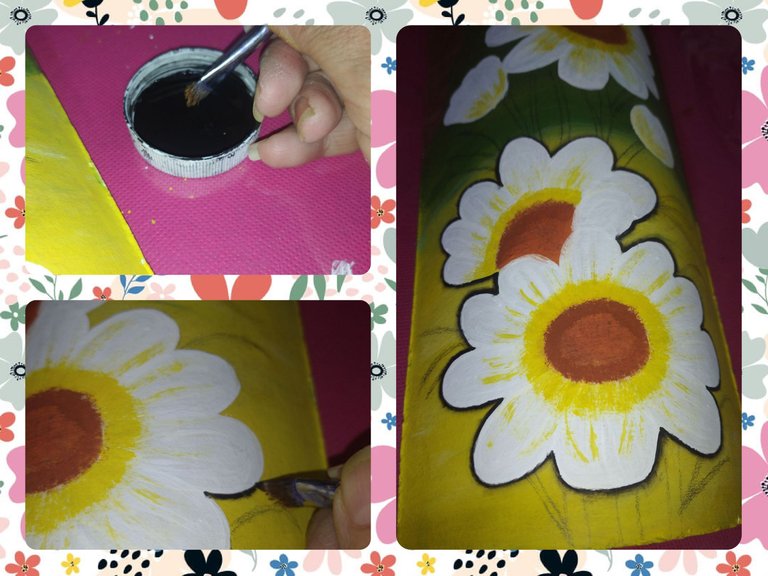
Ahora rellenamos el dibujo con las pinturas seleccionadas para cada parte de la flor. El centro de la flores abiertas con pintura naranja y los pétalos de las flores en blanco. Igualmente los dos capullos que contiene el dibujo. Para aplicar estas pinturas utilizo pincel redondo. De ser necesario aplico dos capas de pintura.
Now we fill the drawing with the selected paints for each part of the flower. The center of the open flowers with orange paint and the petals of the flowers in white. Likewise the two cocoons that the drawing contains. To apply these paints I use a round brush. If necessary I apply two coats of paint.
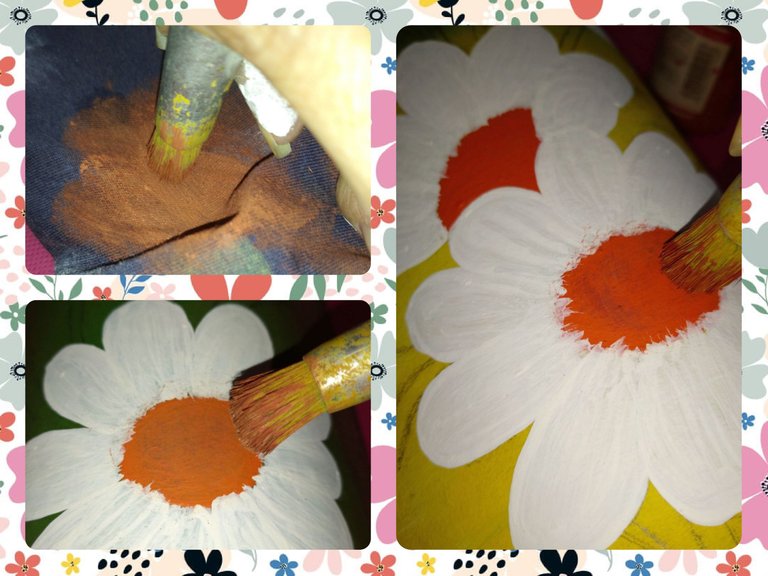
Ahora con el pincel redondo de cerdas duras, realizo el difuminado en el centro de las flores, utilizando puntura marrón que luego elimino los excesos en un trozo de tela para luego realizar el difuminado.
Now with the round brush with hard bristles, I make the blurring in the center of the flowers, using brown paint that I then eliminate the excesses on a piece of cloth to then make the blurring.
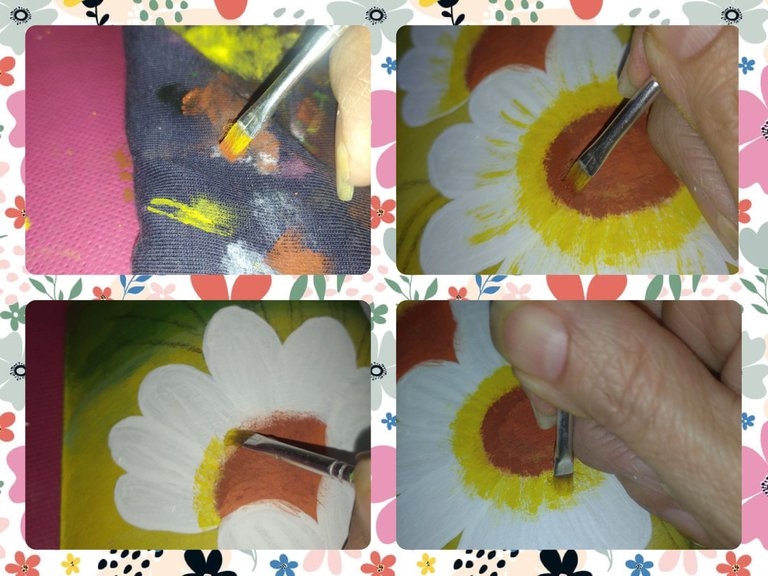
A continuación con un pincel plano agrego retoques con amarillo para darle volumen al centro de las flores y coloco puntos en marrón.
Then with a flat brush I add touches of yellow to give volume to the center of the flowers and I put points in brown.
Para realizar el sombreado, utilizo pintura negra y pincel angular. Humedezco el pincel en agua, elimino el exceso y luego coloco la punta del pincel en la pintura. Elimino un poco y luego realizo el sombreado por fuera del borde de las flores para resaltar el dibujo.
To do the shading, I use black paint and an angular brush. I wet the brush in water, tap off the excess, and then dip the tip of the brush into the paint. I remove a bit and then do the shading outside the border of the flowers to make the drawing stand out.
Con el pincel liner y pintura terracota realizo los delineados y contornos de las flores.
With the liner brush and terracotta paint I make the outlines and contours of the flowers.
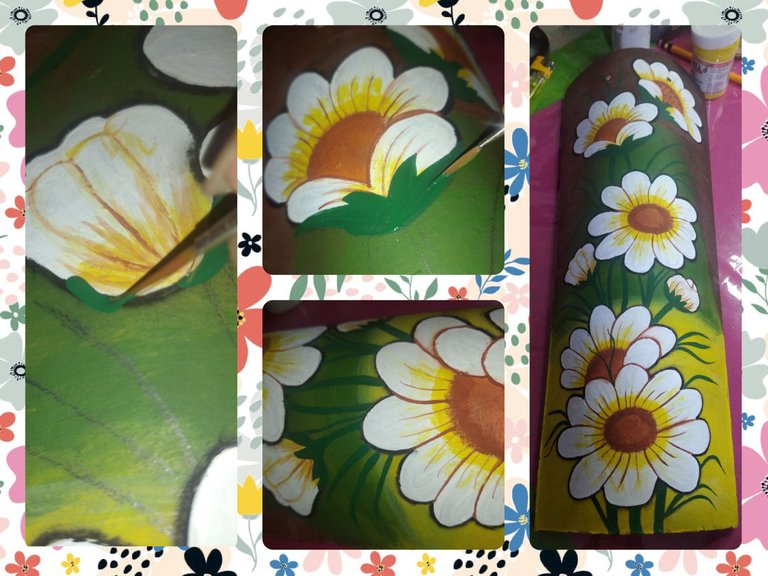
Y ya para culminar con el pincel liner y pintura verde amazonas pinto los sépalos, el cáliz y tallos de las flores.
And to finish with the liner brush and Amazon green paint I paint the sepals, the calyx and stems of the flowers.
Reutilizar materiales que creemos perdidos es una tarea que no a todos nos llama la atención. La mayoría de las personas desechas cantidades de objetos a diario, sin siquiera preguntarse que otra utilidad podrían darle. El rescate de las tejas se ha convertido una de mis tareas favoritas porque no sólo consigo una nueva pieza para decorar sino que promuevo el reciclaje en mi comunidad. ya algunas vecinas se han dado cuenta del buen provecho que le doy a estas y se han sumado a la tarea de rescatar, no sólo tejas, sino trozos de madera, piedras, vidrio y tantas otras cosas que podemos reciclar. No es convertirse en acumuladores, pero si tratar de sacarle el mayor provecho a estos materiales. Esto es todo por hoy. Espero que les guste y promuevan un poco más esta hermosa tarea del reciclaje. Nos vemos.
Reusing materials that we believe to be lost is a task that not all of us are interested in. Most people throw away loads of objects on a daily basis, without even wondering what else they could be used for. The rescue of the tiles has become one of my favorite tasks because I not only get a new piece to decorate but also promote recycling in my community. Some neighbors have already realized the good use I give them and have joined the task of rescuing, not only tiles, but pieces of wood, stones, glass and many other things that we can recycle. It is not to become accumulators, but to try to get the most out of these materials. That is all for today. I hope you like it and promote this beautiful task of recycling a little more. See you.
Todas las fotos son de mi autoría, tomadas con mi teléfono POCO M3
Para la edición de las fotos y separadores utilicé CANVA Y Polish
Utilicé https://translate.google.com para la traducción

Para la edición de las fotos y separadores utilicé CANVA Y Polish
Utilicé https://translate.google.com para la traducción
La verdad es que te queda muy linda tu teja 💕. Tengo una que compre hace muchos años a una compañera de trabajo. Desde que me mudé no la he colgado y se está dañando ye si por negligencia . Pero en encanta mucho necesito limpiarte y colocar el soporte donde la voy a colgar porque desde hace mucho tengo el sitio ideal pero no he hecho nada. Te felicito por tu inciativa y por el impacto en tu comunidad con esta actividad que haces desde hace algún tiempo 👏
¡Wow, que bonito! Me hiciste recordar cuando mi mamá hizo eso con unas tejas que le habían traído, ella es medio artesana jejejeje entonces hace cosas con pintura y así. Te quedo muy bonito éste trabajo. Saludos
Que bonito te quedó, además de super creativo utilizar las tejas con este propósito. Gracias por compartirlo.
Debes tener unas cuantas tejas para pintar entonces. 🙋
Espero ver muchos más tutoriales como estos. Me gusta mucho saber que pintar te mantiene alejada de las preocupaciones. Es lo mismo que siento cuando tejo.
Te quedó muy bonita la teja pintada. La flor es muy llamativa. 🤗
Me encanta como la pintaste quedó hermosa, que suerte que tus vecinos las botan y tus las reciclas hasta las regalas, que lindo pintas.
~~~ embed:1591857364717948928 twitter metadata:OTk5NjE1NDA4ODUxMzQ5NTA0fHxodHRwczovL3R3aXR0ZXIuY29tLzk5OTYxNTQwODg1MTM0OTUwNC9zdGF0dXMvMTU5MTg1NzM2NDcxNzk0ODkyOHw= ~~~
The rewards earned on this comment will go directly to the people( @yolimarag, @equipodelta ) sharing the post on Twitter as long as they are registered with @poshtoken. Sign up at https://hiveposh.com.
Thank you for sharing this post on HIVE!
Your content got selected by our fellow curator jasonmunapasee & you just received a little thank you upvote from us for your great work! Your post will be featured in one of our recurring compilations which are aiming to offer you a stage to widen your audience within the DIY scene of Hive. Next time make sure to post / cross-post your creation within the DIYHub community on HIVE and you will receive a higher upvote ;) Stay creative & HIVE ON!
Congratulations, your post has been upvoted by @dsc-r2cornell, which is the curating account for @R2cornell's Discord Community.
Enhorabuena, su "post" ha sido "up-voted" por @dsc-r2cornell, que es la "cuenta curating" de la Comunidad de la Discordia de @R2cornell.
Hermoso