Hola hola mundo Hive, espero que todos estén sanos y felices. Hoy quiero compartirles la elaboración de un envase al que podemos darle diferentes usos. Podemos ubicarlo como organizador de escritorio, un cotillón para variadas ocasiones, jarrones para plantas y más.
Hello hello Hive world, I hope you are all healthy and happy. Today I want to share with you the elaboration of a container that can be used for different purposes. We can place it as a desk organizer, a cotillion for various occasions, vases for plants and more.
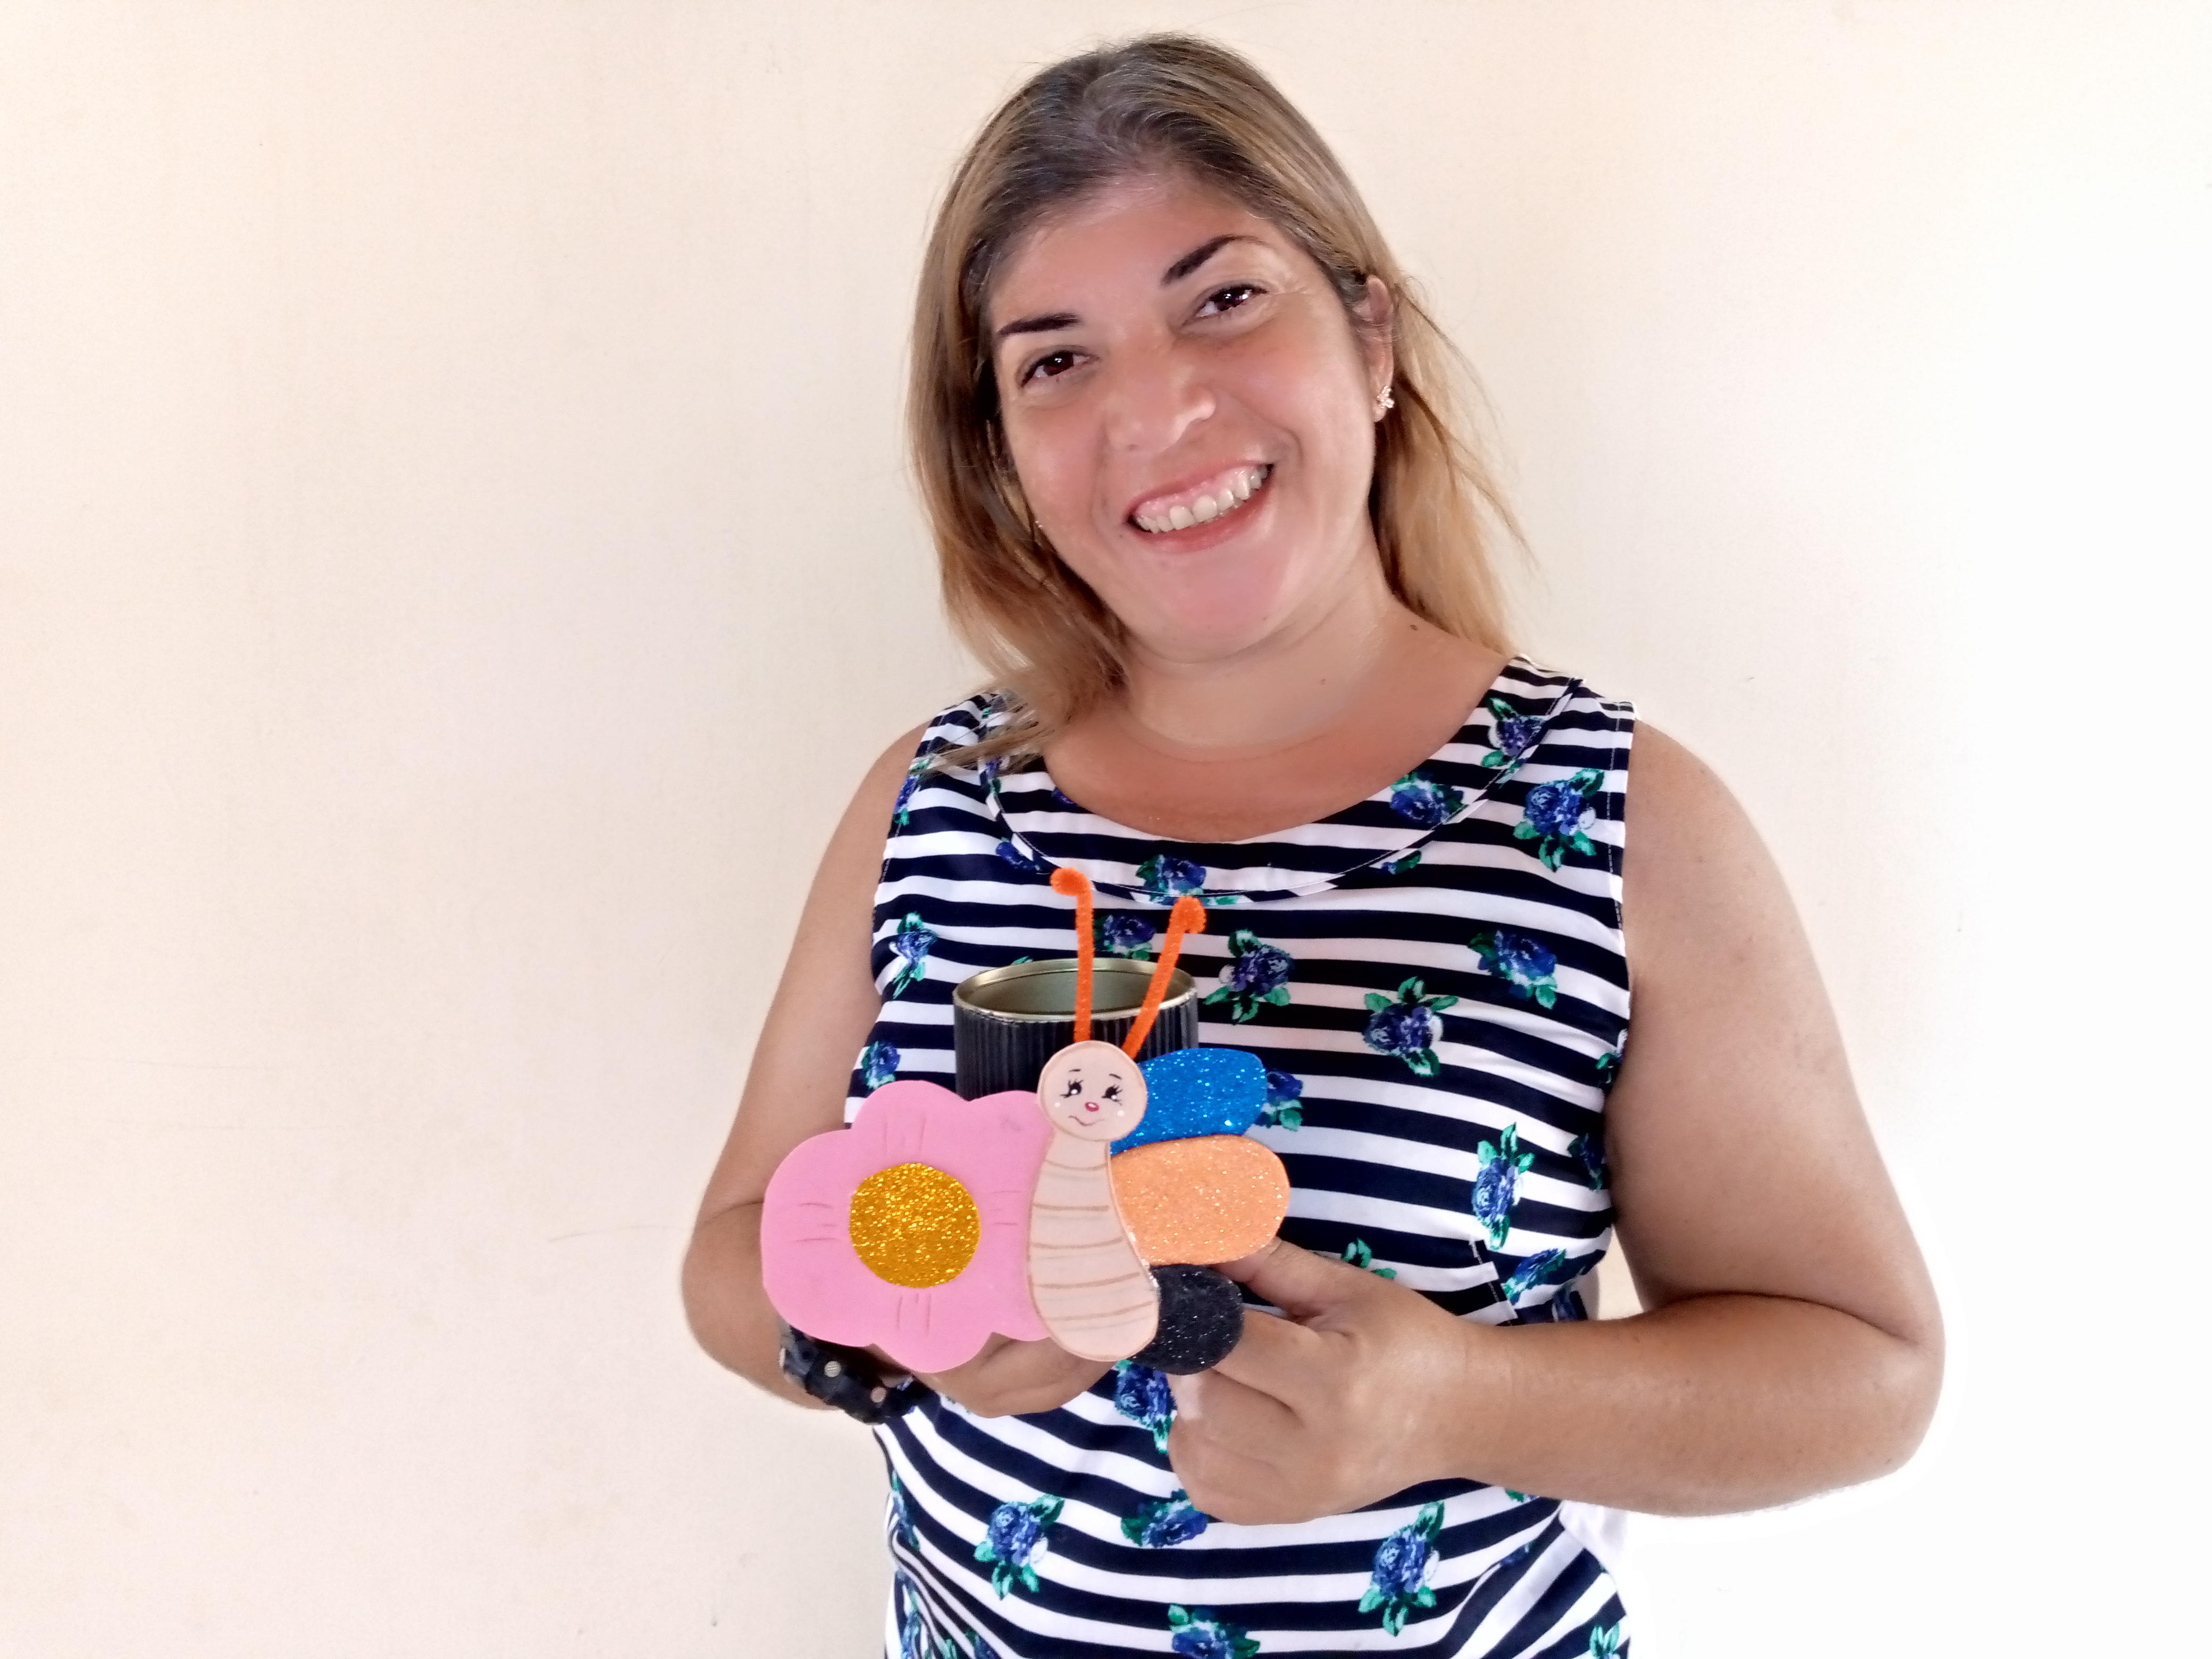
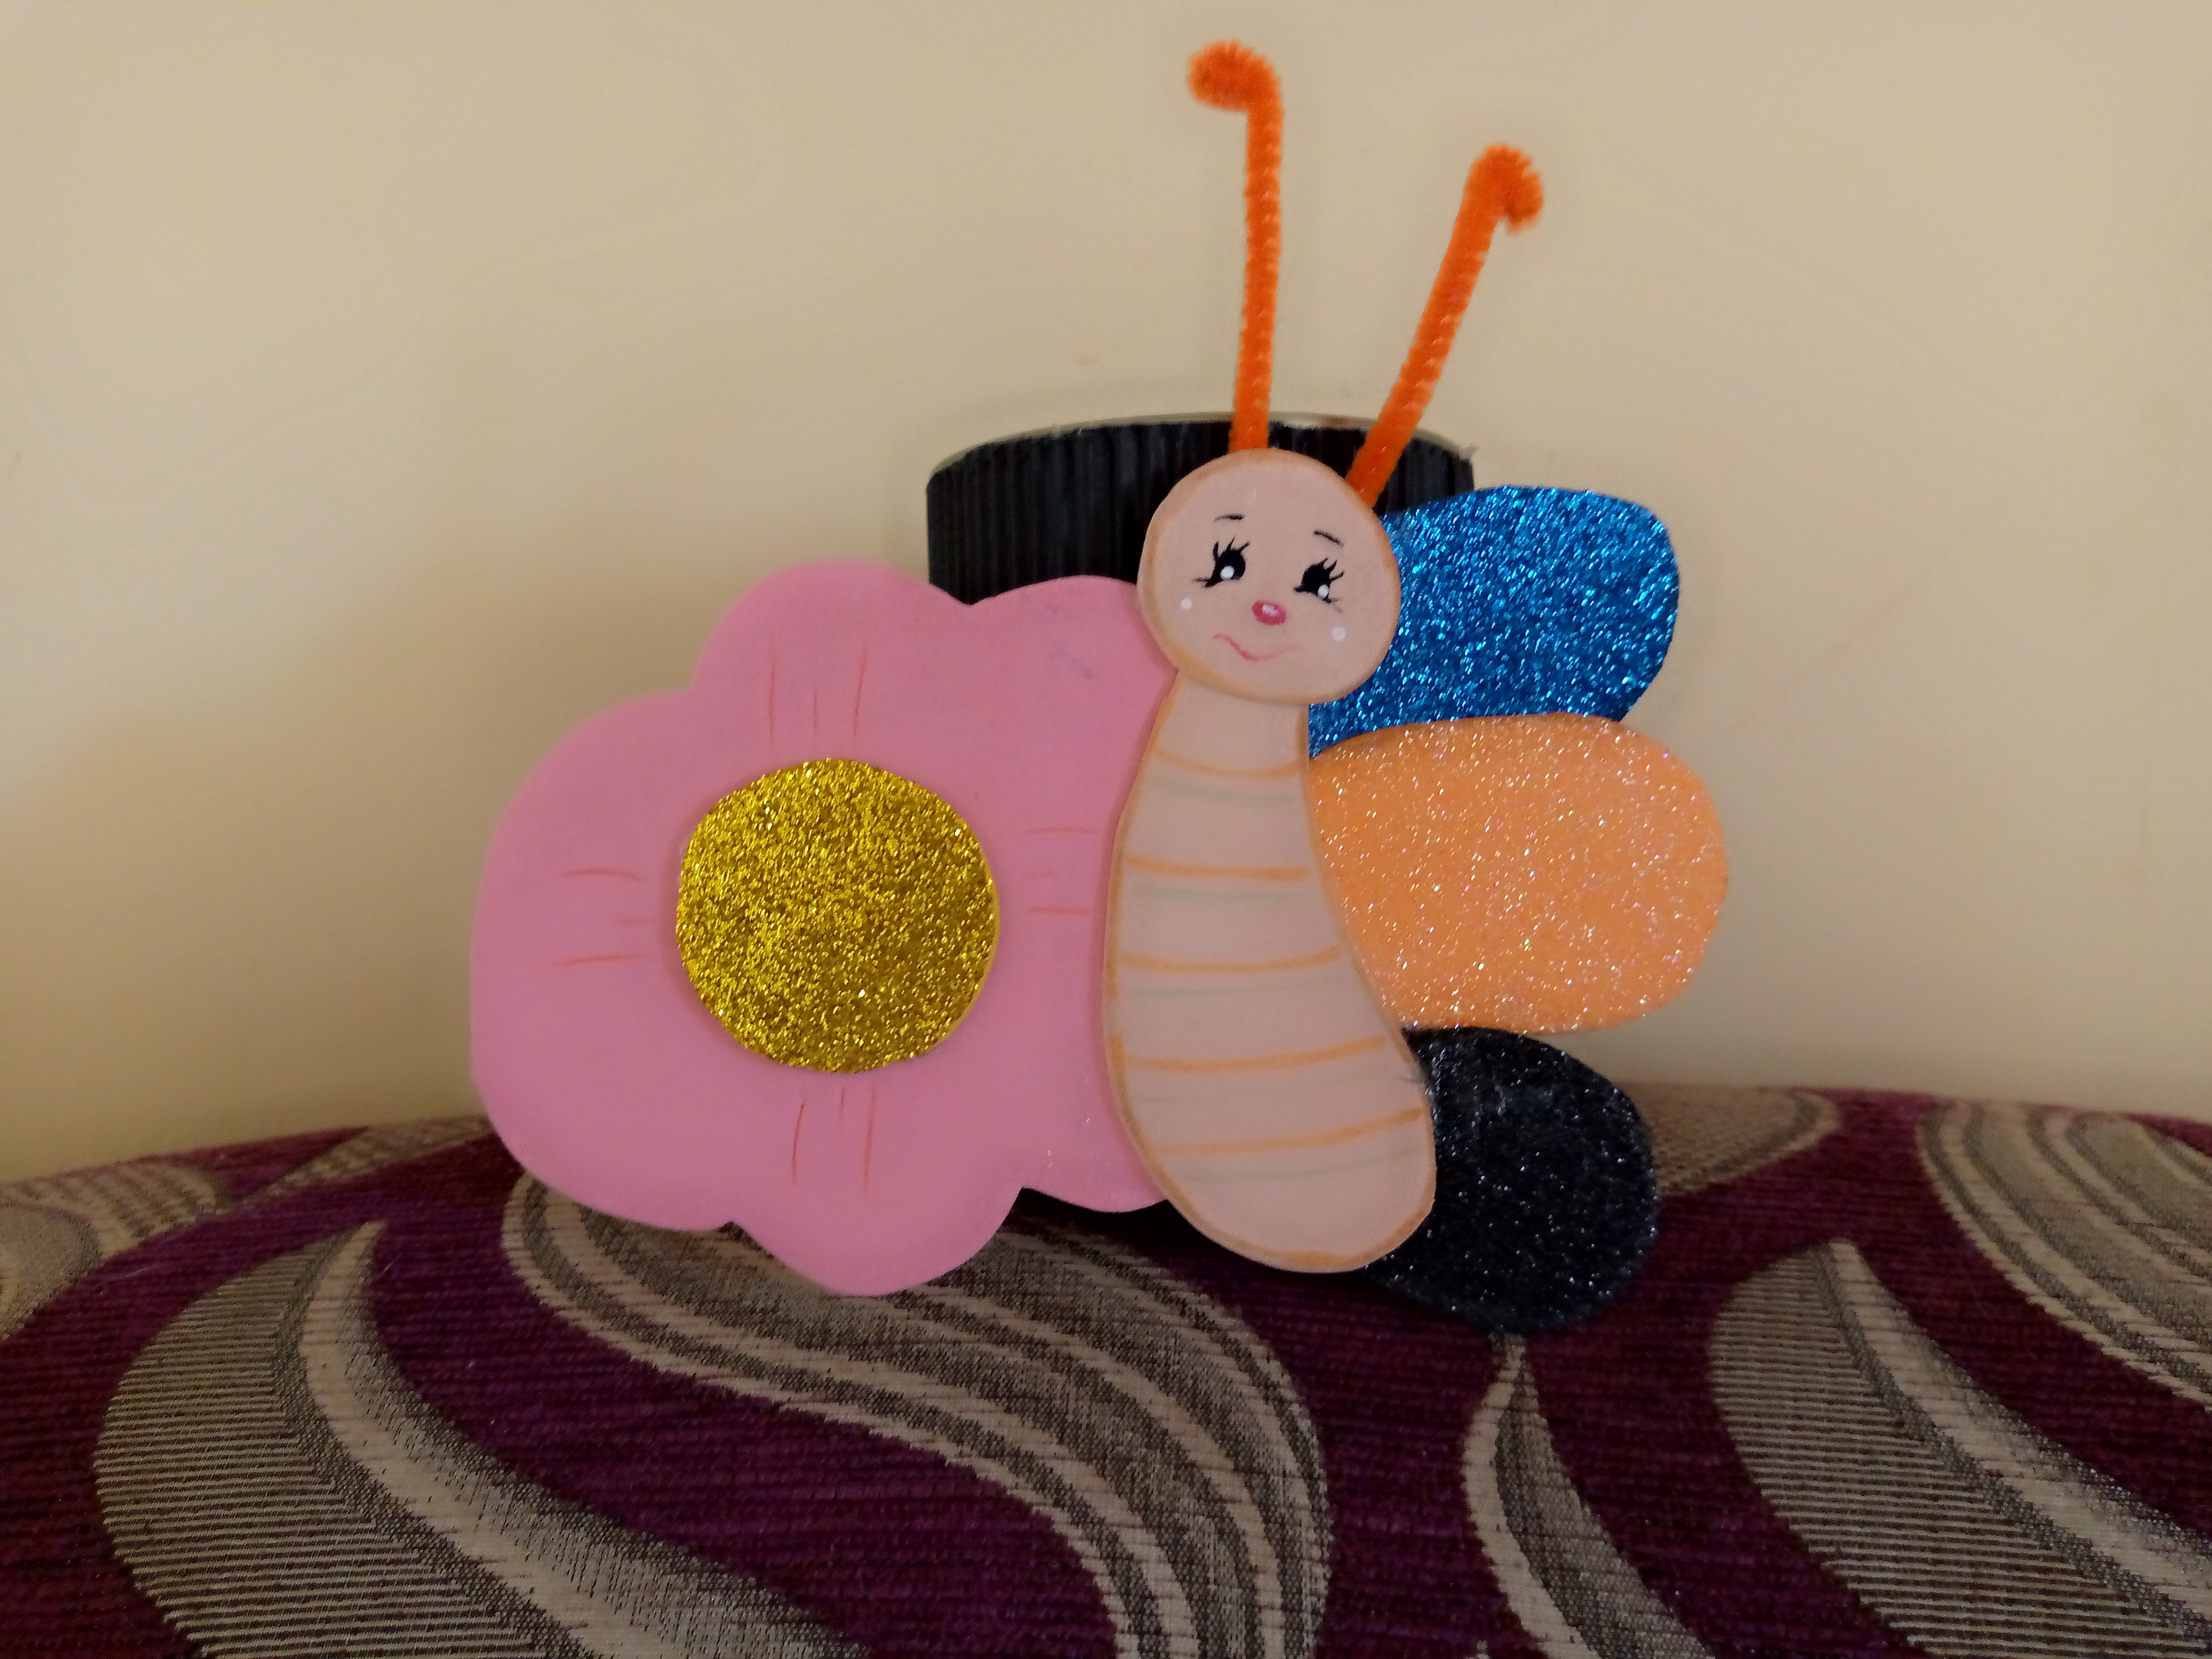
Desde hace un buen tiempo soy fanática de las libélulas y mariposas, estas últimas me maravilla con su diversidad de especies y colores. Mientras que el cuarto para el nacimiento de mi hija lo decore con libélulas muy coloridas, por esta razón escogí este motivo como adorno de mi envase.
I have been a fan of dragonflies and butterflies for a long time, the latter amaze me with their diversity of species and colors. I decorated my daughter's nursery with colorful dragonflies, which is why I chose this motif to decorate my container.
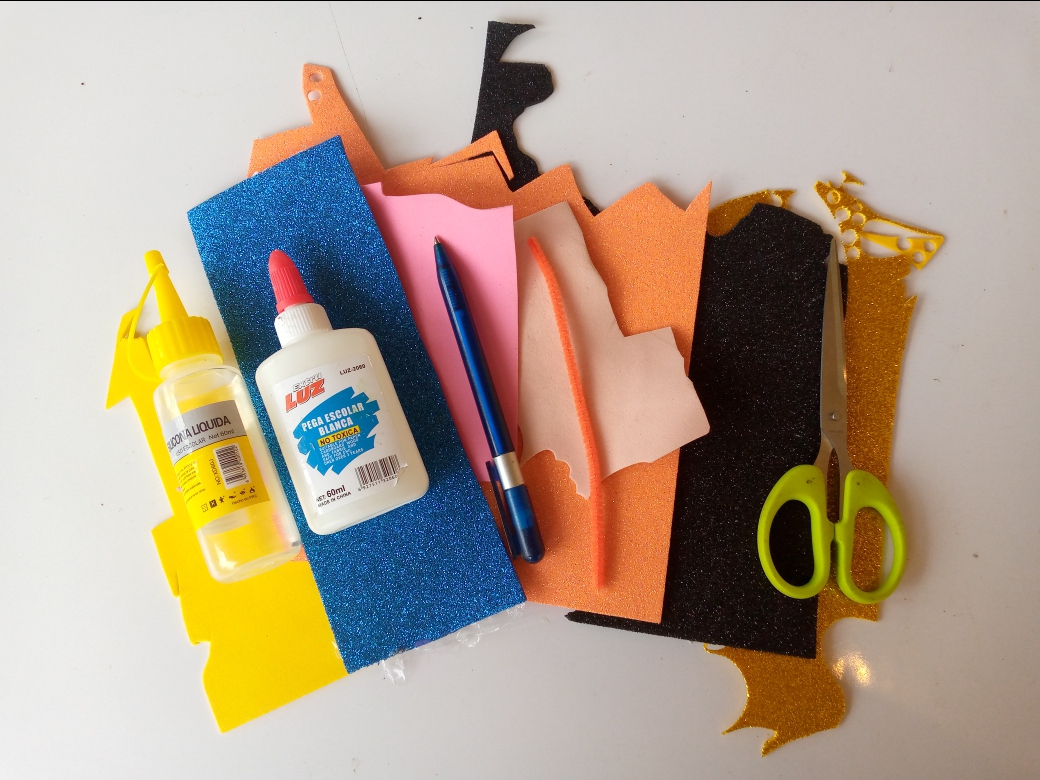
MATERIALES
✔️ Tijeras
✔️ Foamy
✔️ Silicón
✔️ Pincel
✔️ Pinturas
✔️ Envase
✔️ Limpia Pipa
✔️ Lápiz
MATERIALS.
✔️ Scissors
✔️ Foamy
✔️ Silicon
✔️ Brush
✔️ Paints
✔️ Container
✔️ Pipe Cleaner
✔️ Pencil
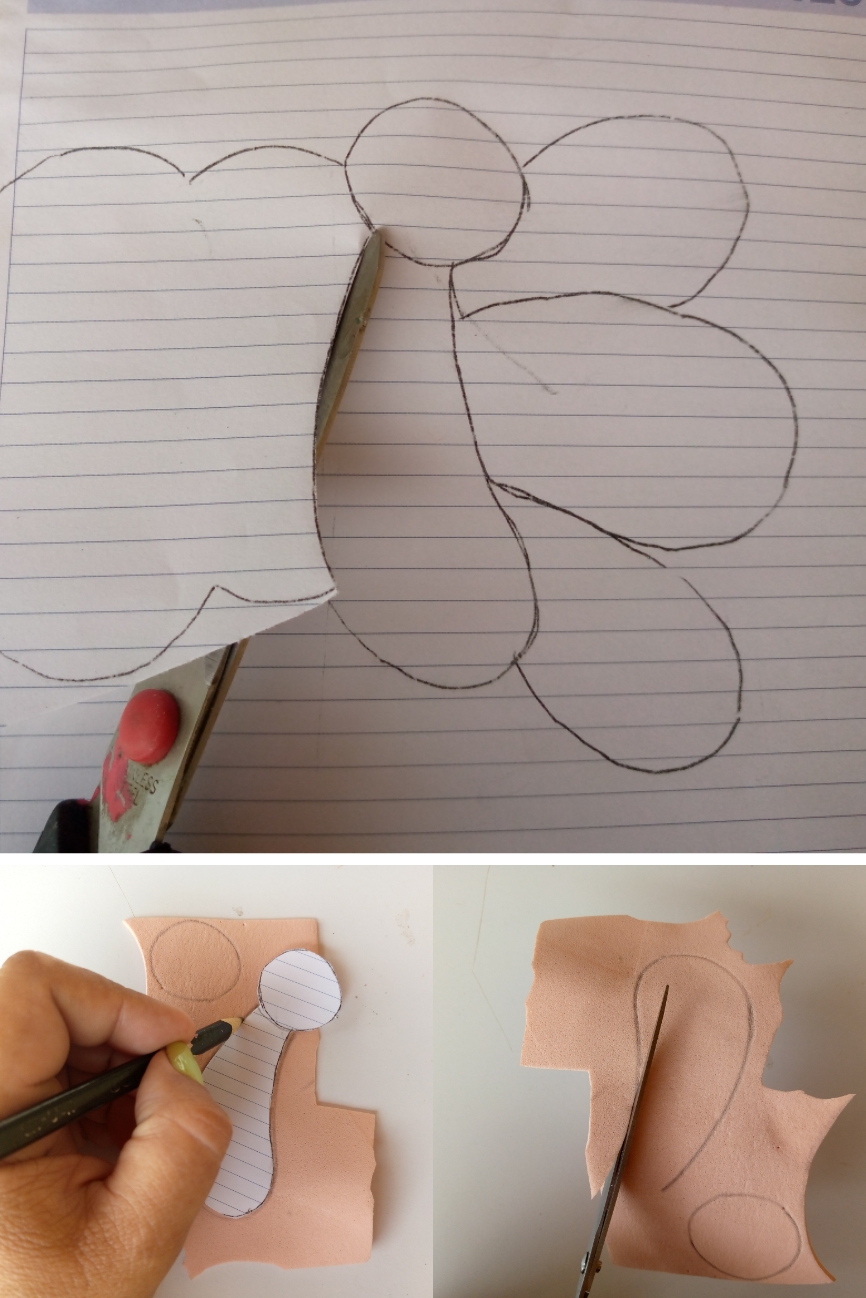
PASO A PASO
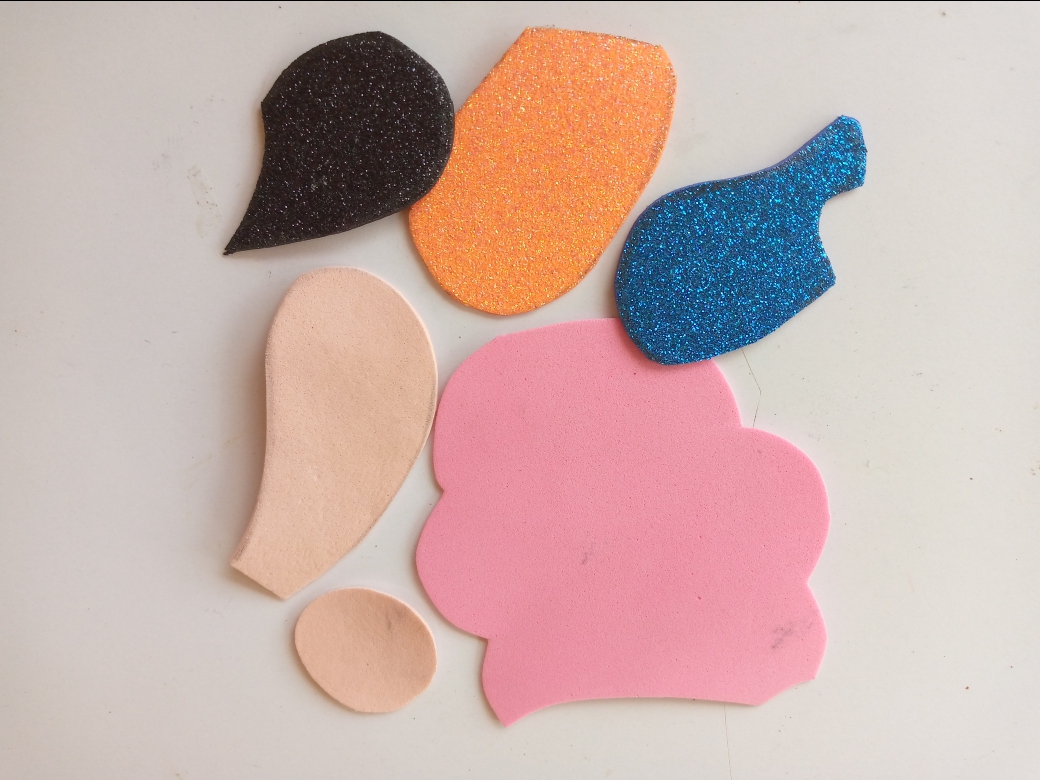
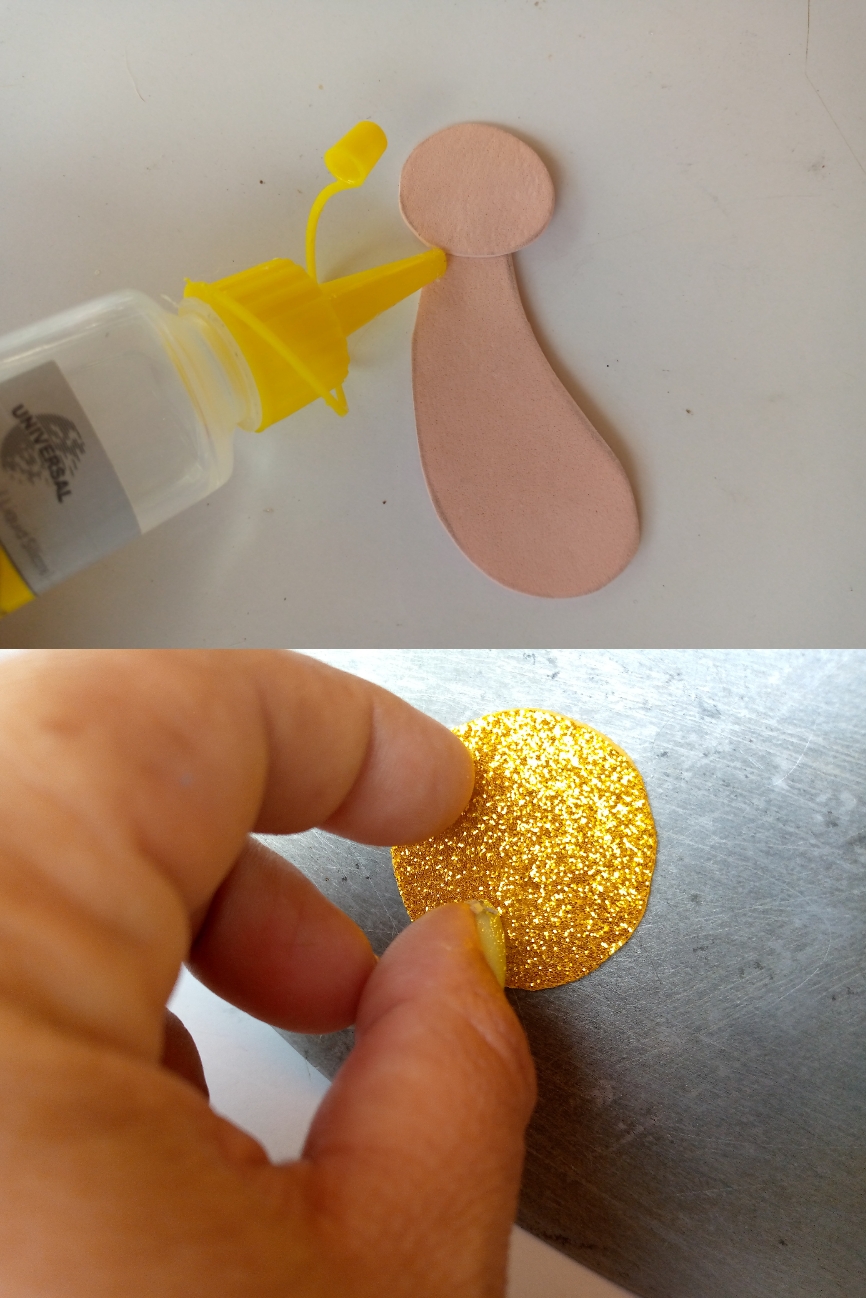
Lo primero que hice fue elaborar el molde con la temática escogida, y seguido lo transfiero al foamy y recorté para obtener cada pieza.
STEP BY STEP
The first thing I did was to make the mold with the chosen theme, and then I transferred it to the foamy and cut it out to obtain each piece.
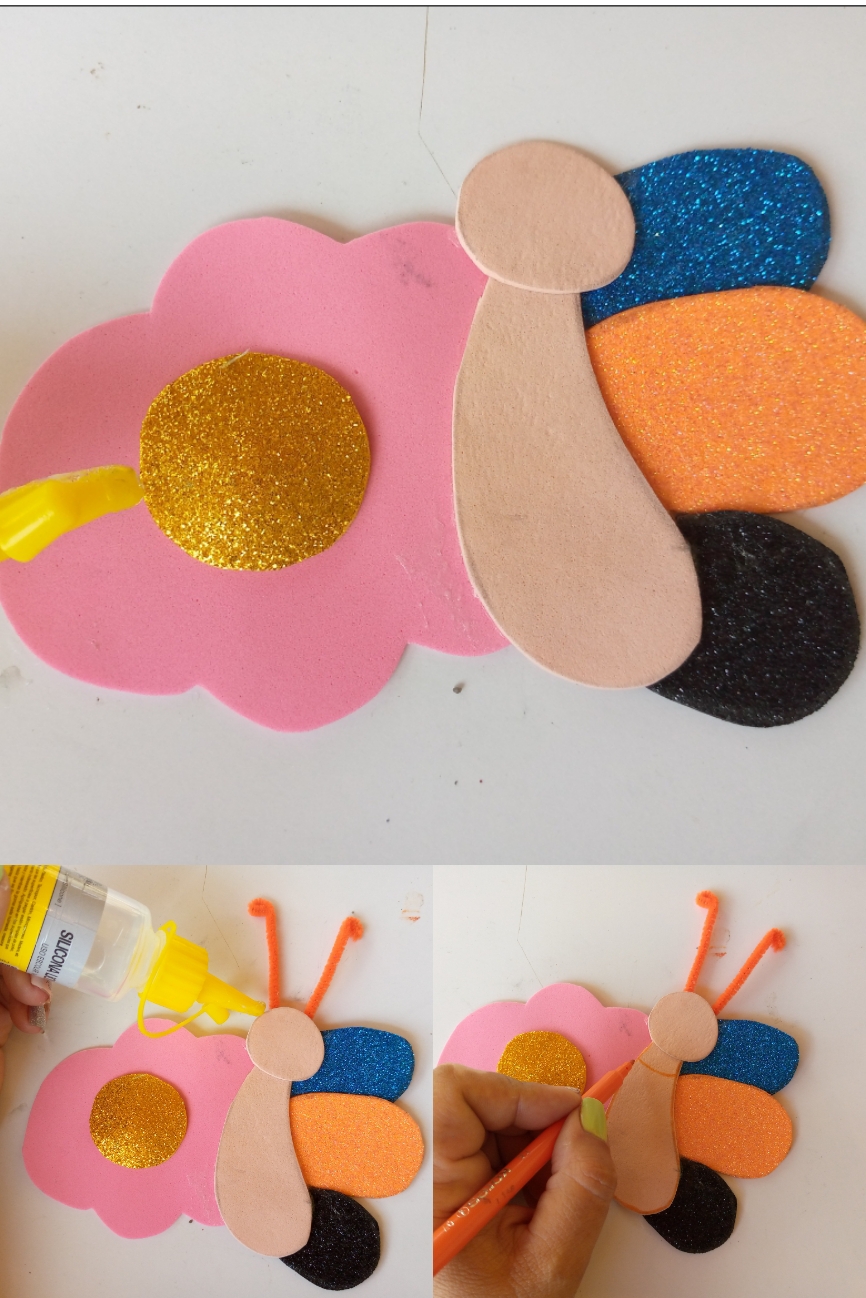
Una vez obtenido las piezas, pegué cada una en el lugar correspondiente para darle forma al motivo de mi mariposa, y con la plancha realicé un simple thermoforme al centro de la flor.
Once the pieces were obtained, I glued each one in the corresponding place to give shape to the motif of my butterfly, and with the iron I made a simple thermoform in the center of the flower.
En este momento del trabajo, pegué el limpia pipa y con un marcador realicé los bordes y centro de la mariposa.
At this point of the work, I glued the pipe cleaner and with a marker I made the edges and center of the butterfly.
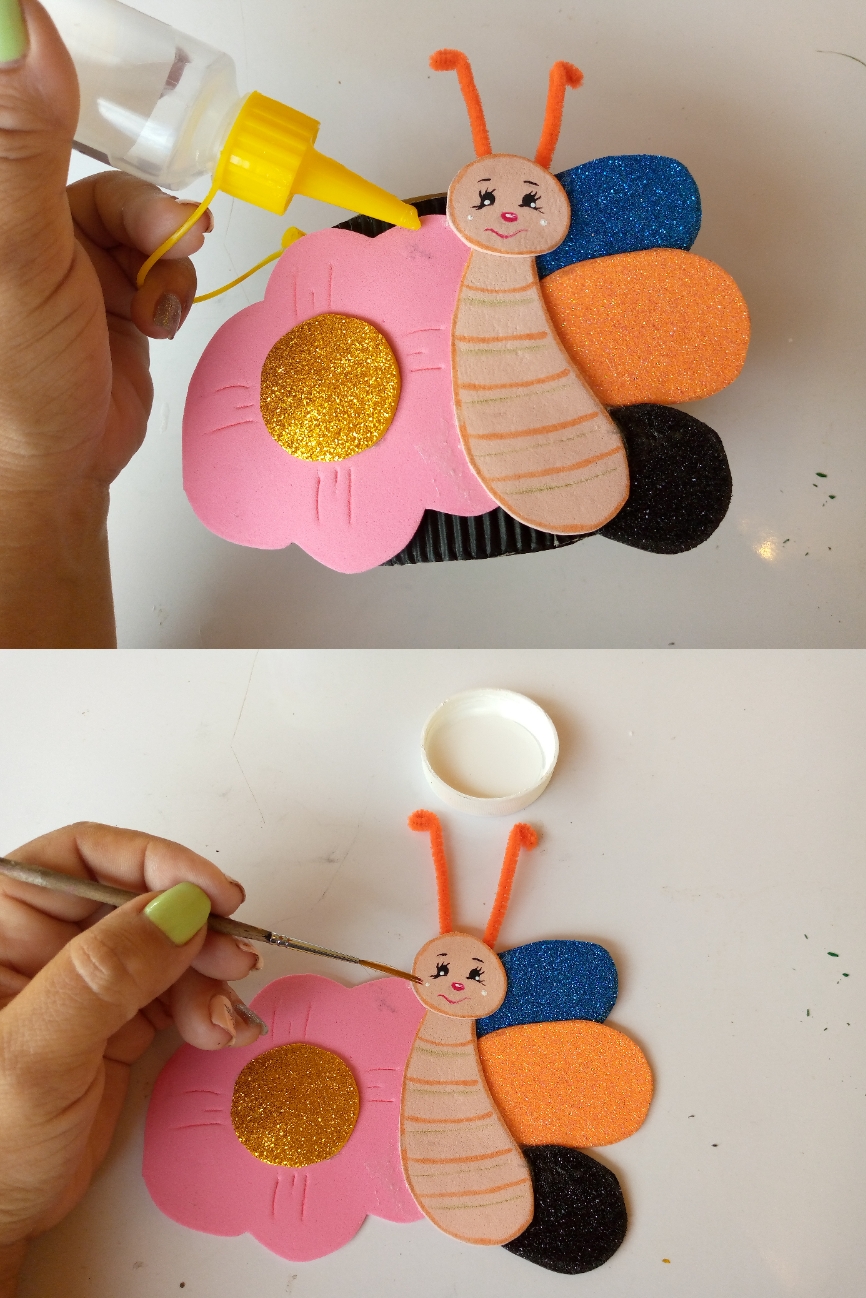
Seguí para terminar , pegando la mariposa del envase y le pinte la cara con los pinceles y pintura al frío de varios colores.
I continued to finish by gluing the butterfly from the container and painted its face with brushes and cold paint in various colors.
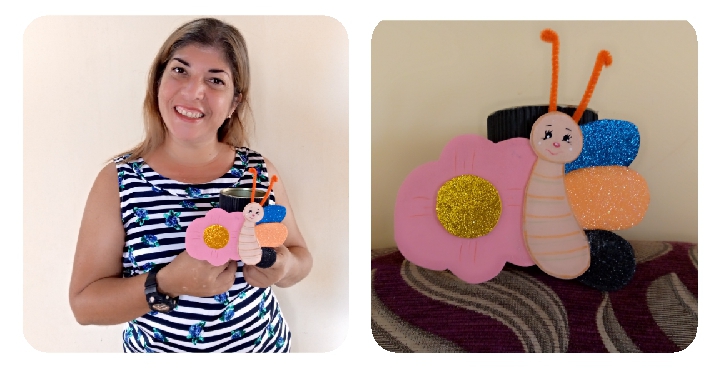
Y como podemos ver ya he finalizado, mi envase con usos diversos, espero que les haya gustado, gracias por acompañarme hasta aquí y nos vemos en la próxima oportunidad.
And as we can see I have already finished my packaging with different uses, I hope you liked it, thanks for joining me here and see you next time.

Hermosa manualidad, muy bien detallada, me gusta voto en tu post.
Muchas gracias por el buen comentario
Thank you for sharing this amazing post on HIVE!
Your content got selected by our fellow curator @rezoanulvibes & you just received a little thank you via an upvote from our non-profit curation initiative!
You will be featured in one of our recurring curation compilations and on our pinterest boards! Both are aiming to offer you a stage to widen your audience within and outside of the DIY scene of hive.
Join the official DIYHub community on HIVE and show us more of your amazing work and feel free to connect with us and other DIYers via our discord server: https://discord.gg/mY5uCfQ !
If you want to support our goal to motivate other DIY/art/music/homesteading/... creators just delegate to us and earn 100% of your curation rewards!
Stay creative & hive on!