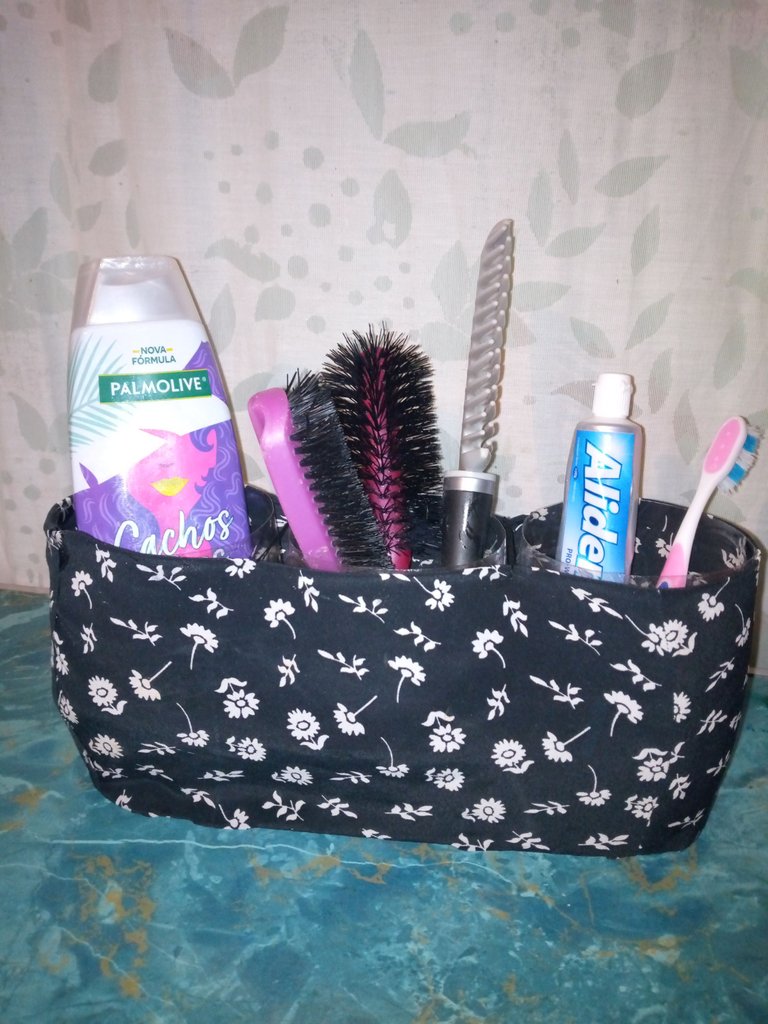
Hola, cómo están? mis queridos amigos hivers, muy buenas tardes para todos y buen provecho, espero que se encuentren súper bien este día maravilloso en compañía de sus seres más queridos, me complace mucho de estar aquí una vez más compartiendo con todos ustedes un tutorial donde les mostraré cómo realizar un práctico organizador de cepillos para baños con solo utilizar materiales reciclados, la verdad es muy fácil de hacer y nos ayuda mucho a mantener organizado el sitio donde elijas colocarlo y lo mejor es que le damos vida a cosas que ya no utilizamos, como en mi caso utilice botellas de refresco una cajita que tenía por ahí guardada y una tela con estampados que ya no utilizaba,me encanta mucho trabajar con esta clase de materia ya que no tenemos gasto pero si nos genera soluciones, espero que les guste y les sirva de gran ayuda al igual que mi persona, sin más que decir les demostraré los materiales que utilizan para elaborar este lindo organizador.
Hello how are you? my dear hivers friends, good afternoon to all and bon appetit, I hope you are having a great day on this wonderful day in the company of your loved ones, I am very pleased to be here once again sharing with all of you a tutorial where I will show you how make a practical toilet brush organizer using only recycled materials, it is really easy to do and it helps us a lot to keep organized the place where you choose to place it and the best thing is that we give life to things that we no longer use, as in In my case, I used soda bottles, a box that I had stored away and a patterned fabric that I no longer used, I really love working with this kind of material since we have no expense but if it generates solutions for us, I hope you like it and it works for you They are very helpful, as is my person, without further ado I will show you the materials they use to make this beautiful organizer.
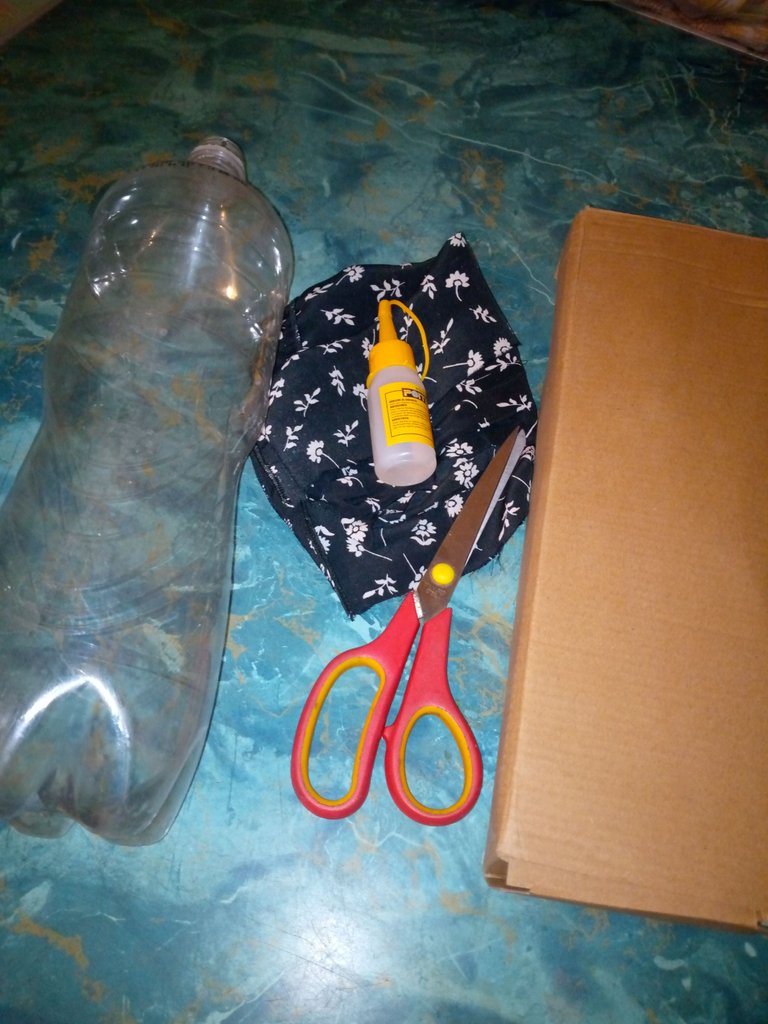
MATERIALES
♻️ 3 botellas de refresco
♻️ Silicón frío
♻️ Caja de cartón
♻️ Tela con estampado
♻️ Tijera
MATERIALS
♻️ 3 bottles of soda
♻️ Cold silicone
♻️ Cardboard box
♻️ Patterned fabric
♻️ Scissors
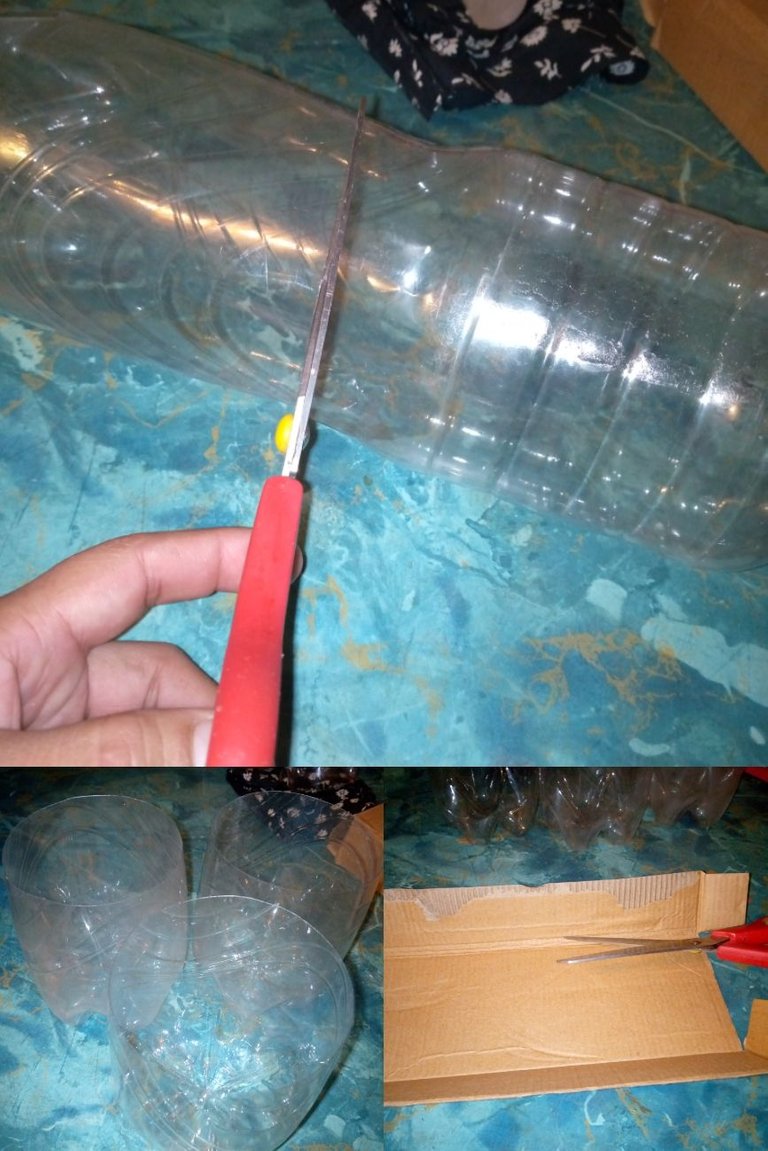
PASO A PASO
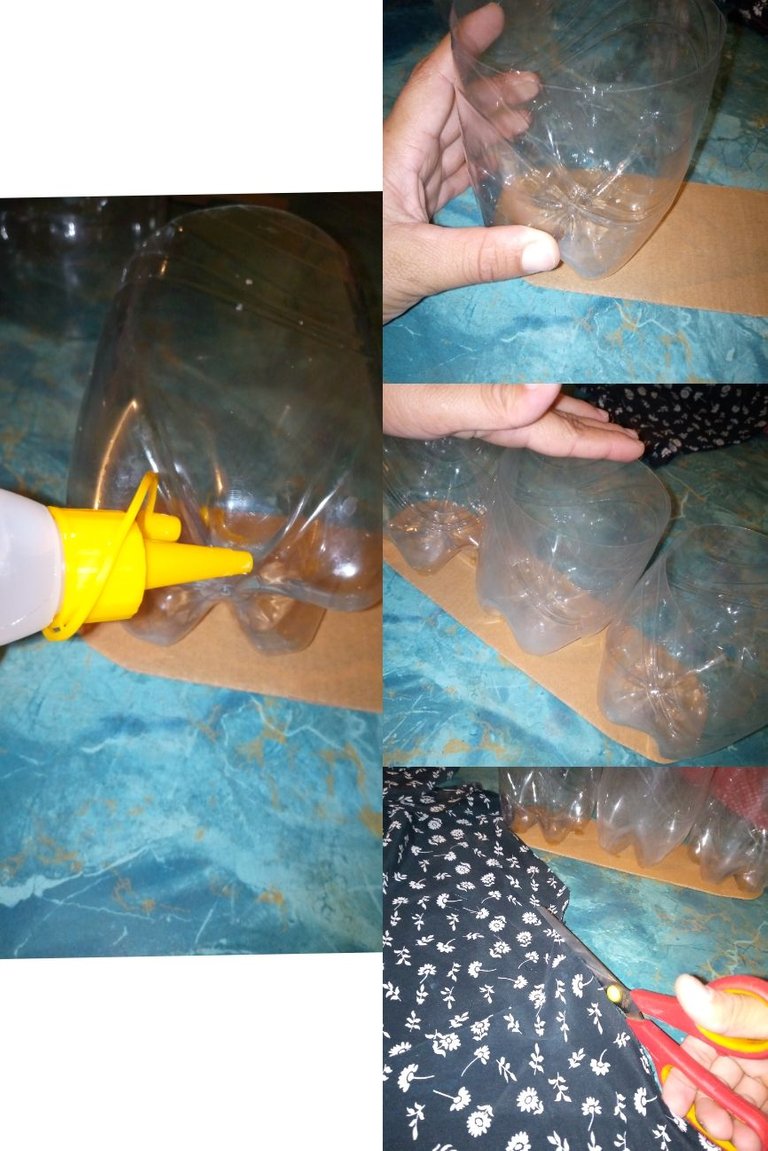
Mi querido amigo para comenzar con la creación de este lindo organizador lo primero que hice fue cortar las botellas por un poco más abajo de la mitad todas del mismo tamaño, para luego seguir cortando el cartón en 18 cm dónde entre las tres botellas cortadas por la mitad.
STEP BY STEP
My dear friend, to begin with the creation of this beautiful organizer, the first thing I did was cut the bottles a little below half, all of the same size, and then continue cutting the cardboard in 18 cm where between the three bottles cut by the half.
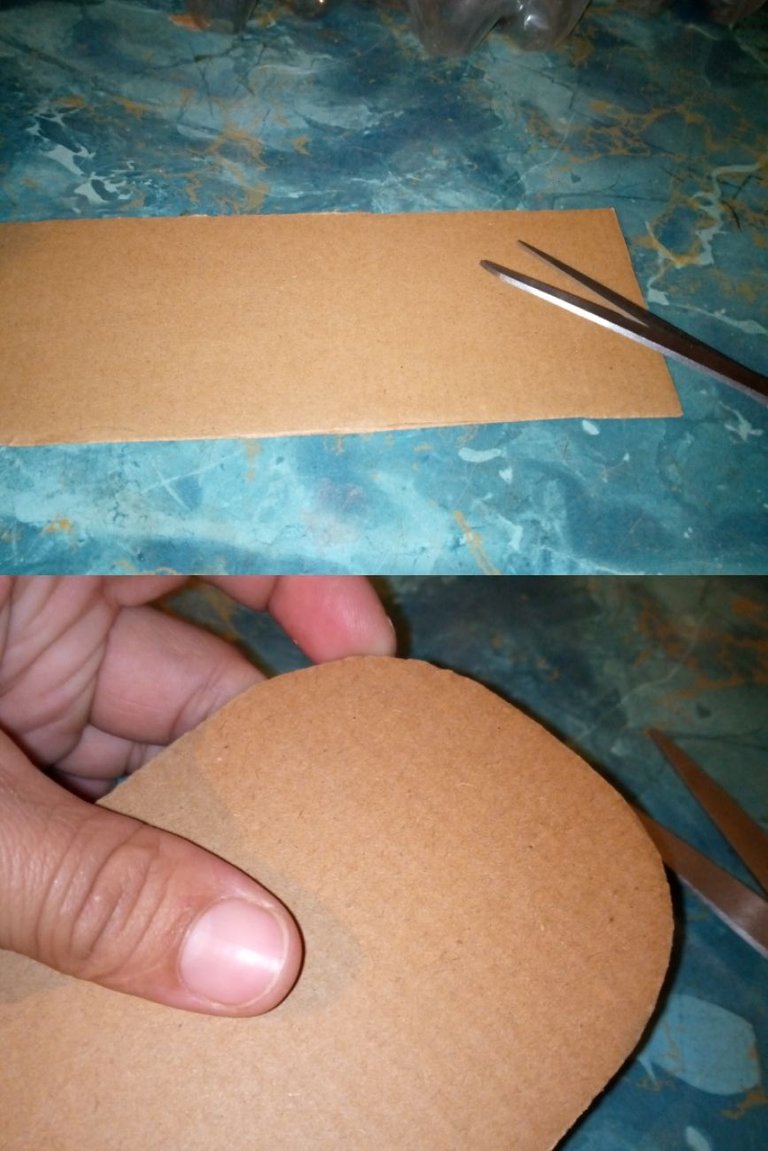
Después de esto los siguientes pasos que realice fue cortar el cartón y las puntas cortarlas de forma ovalada para que quede más bonito al momento de colocarle la tela.
After this, the next steps I took was to cut the cardboard and cut the ends in an oval shape so that it looks more beautiful when placing the fabric.
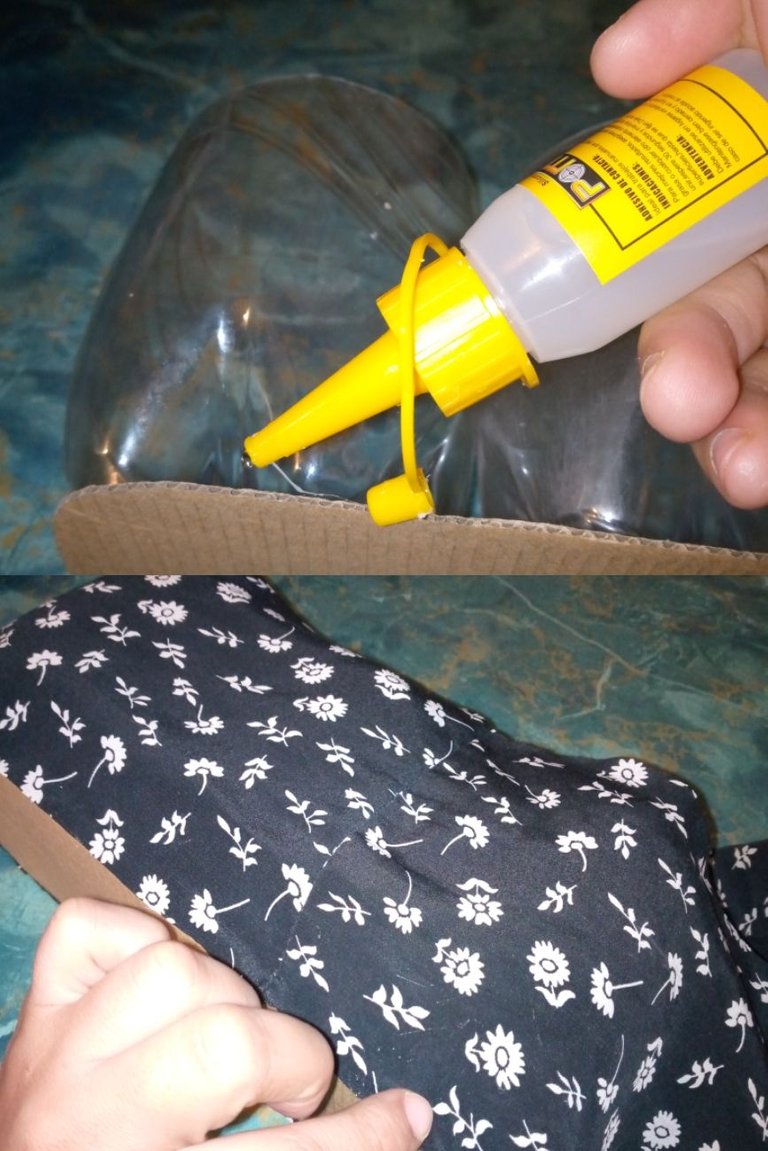
Ya con esto listo empecé a colocarle pegamento y utilice silicón frío a las botellas y colocarla al cartón después de haber colocado las tres botellas lo dejé a un lado para que se secara y comencé a cortar la tela.
With this ready, I began to apply glue and use cold silicone to the bottles and place it on the cardboard. After having placed the three bottles, I put it aside to dry and began to cut the fabric.
Luego empecé a colocarle alrededor del cartón silicón al frío y con mucho cuidado peje la tela esto lo fui haciendo poco a poco hasta rodear todo el alrededor y que quedara en forma de cesta.
Then I began to place silicone around the cardboard in the cold and very carefully weaved the fabric. I did this little by little until I surrounded everything around it and it was left in the shape of a basket.
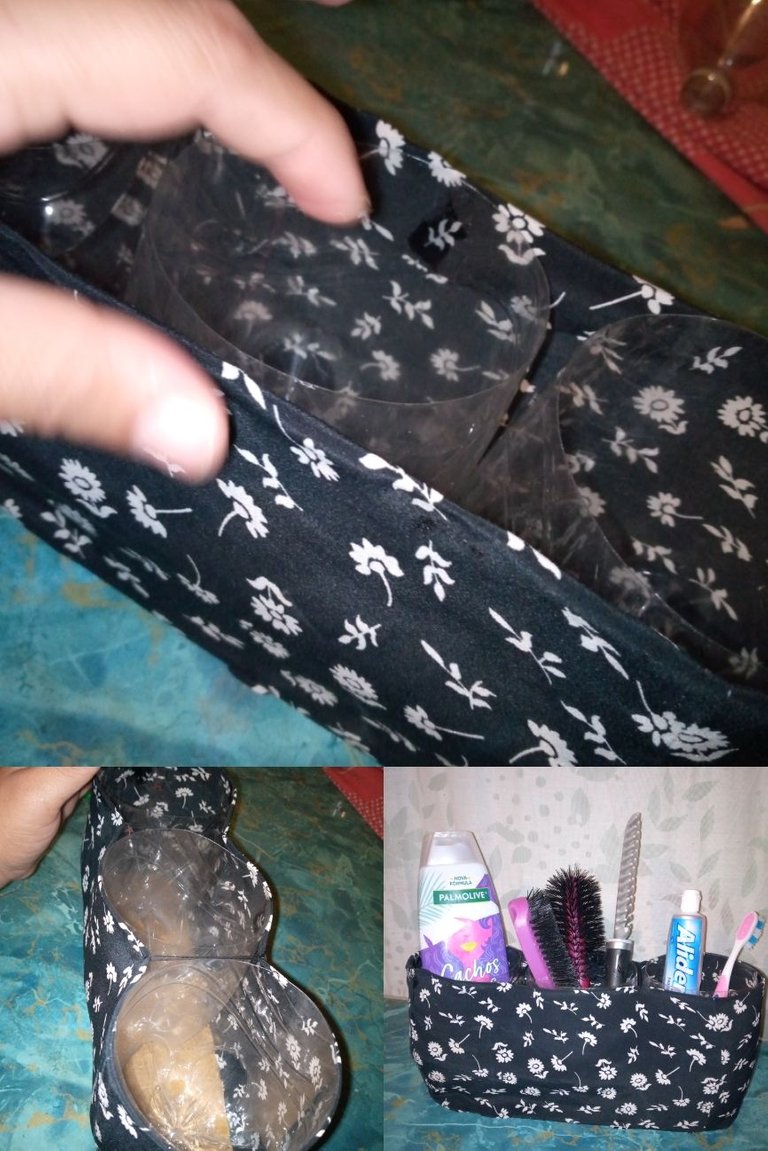
Aquí doble las puntas de la tela que quedaron sobrando hacia arriba y las pegue de las juntas de la botella y para asegurar mejor agarre una aguja con hilo y le pase en el medio de ambas botellas esto es opcional porque si quieres lo dejas solo con la pega que ya colocaste y listo así terminé este práctico organizador para cepillos, no sirve para colocarlo en el baño qué es mi caso o para otros sitios donde necesites organizar tus cosas, espero que les guste será hasta una próxima ocasión y muchas gracias por visitar mi blog. Bendiciones para todos.
Here fold the ends of the fabric that were left over upwards and glue them to the joints of the bottle and to ensure better grab a needle with thread and pass it in the middle of both bottles this is optional because if you want you can leave it alone with the Paste that you already placed and that's it I finished this practical organizer for brushes, it is not suitable for placing it in the bathroom, which is my case, or for other places where you need to organize your things, I hope you like it until a next time and thank you very much for visiting my Blog. Blessings for all.
Todas las fotos son de mi propiedad.
All photos are my property.
@mariaj151305
Thank you for sharing this post on HIVE!
Your content got selected by our fellow curator sharminmim & you just received a little thank you upvote from us for your great work! Your post will be featured in one of our recurring compilations which are aiming to offer you a stage to widen your audience within the DIY scene of Hive. Stay creative & HIVE ON!
Please vote for our hive witness <3