¡Feliz Noche Comunidad Creativa! | ¡Happy Night Creative Community !
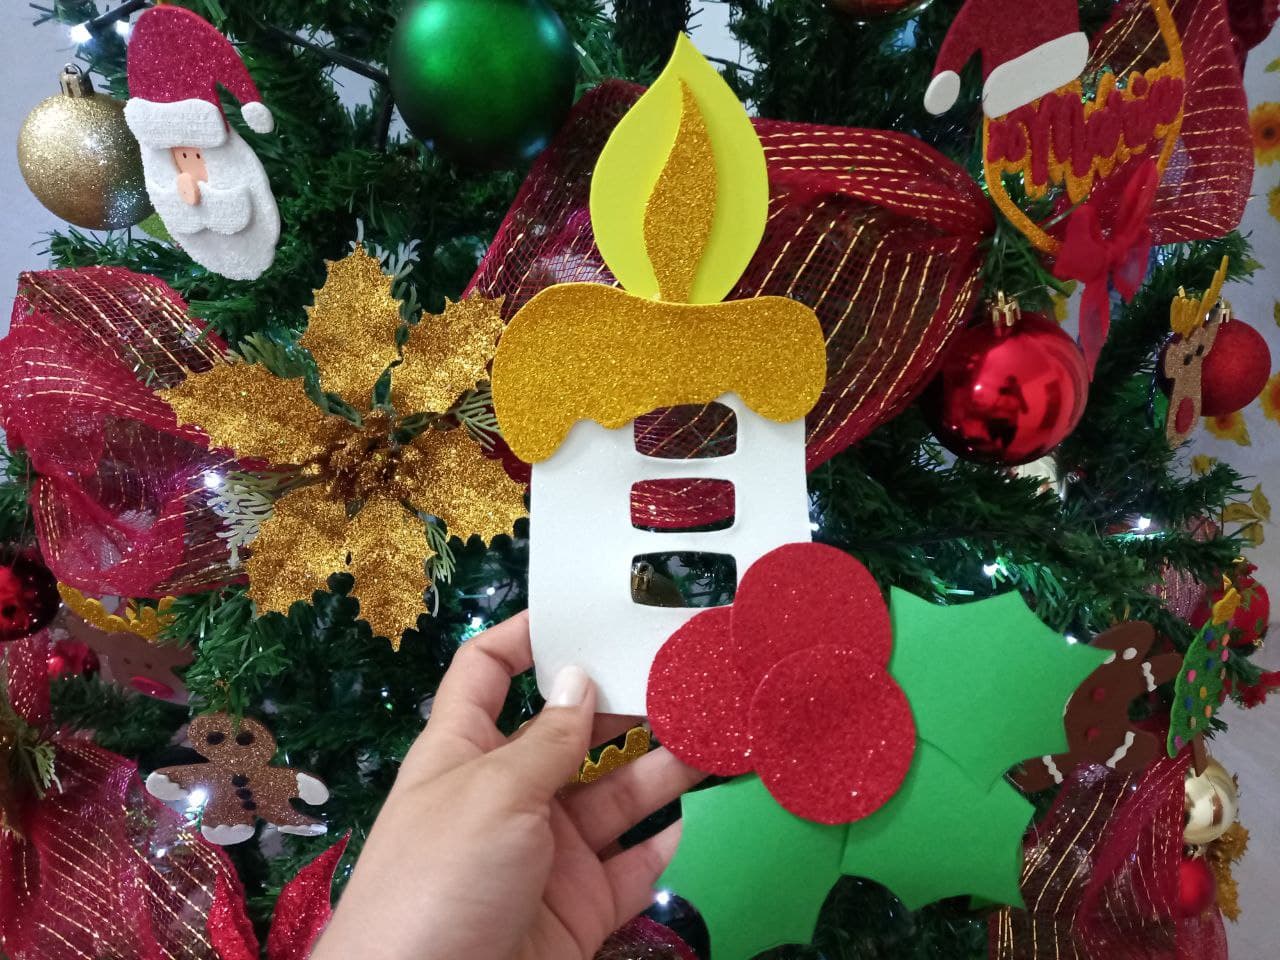
Una vez más vengo a compartirles un nuevo tutorial navideño y esta vez se trata de un bello adorno en forma de vela navideña para un interruptor de luz, y es que en esta hermosa época nunca esta demás decorar cualquier espacio de nuestro hogar y los interruptores no son la excepción, les aseguro que queda muy lindo y le da un toque único al interruptor, es un bello adorno que no pueden dejar de hacer para sus hogares, sin más que añadir aquí les dejo el tutorial y espero que les guste.
Once again I come to share with you a new Christmas tutorial and this time it is a beautiful ornament in the form of a Christmas candle for a light switch, and it is that in this beautiful time it is never too much to decorate any space in our home and the switches are not They are the exception, I assure you that it is very nice and gives a unique touch to the switch, it is a beautiful ornament that you can not stop making for your homes, without more than adding here I leave the tutorial and I hope you like it.

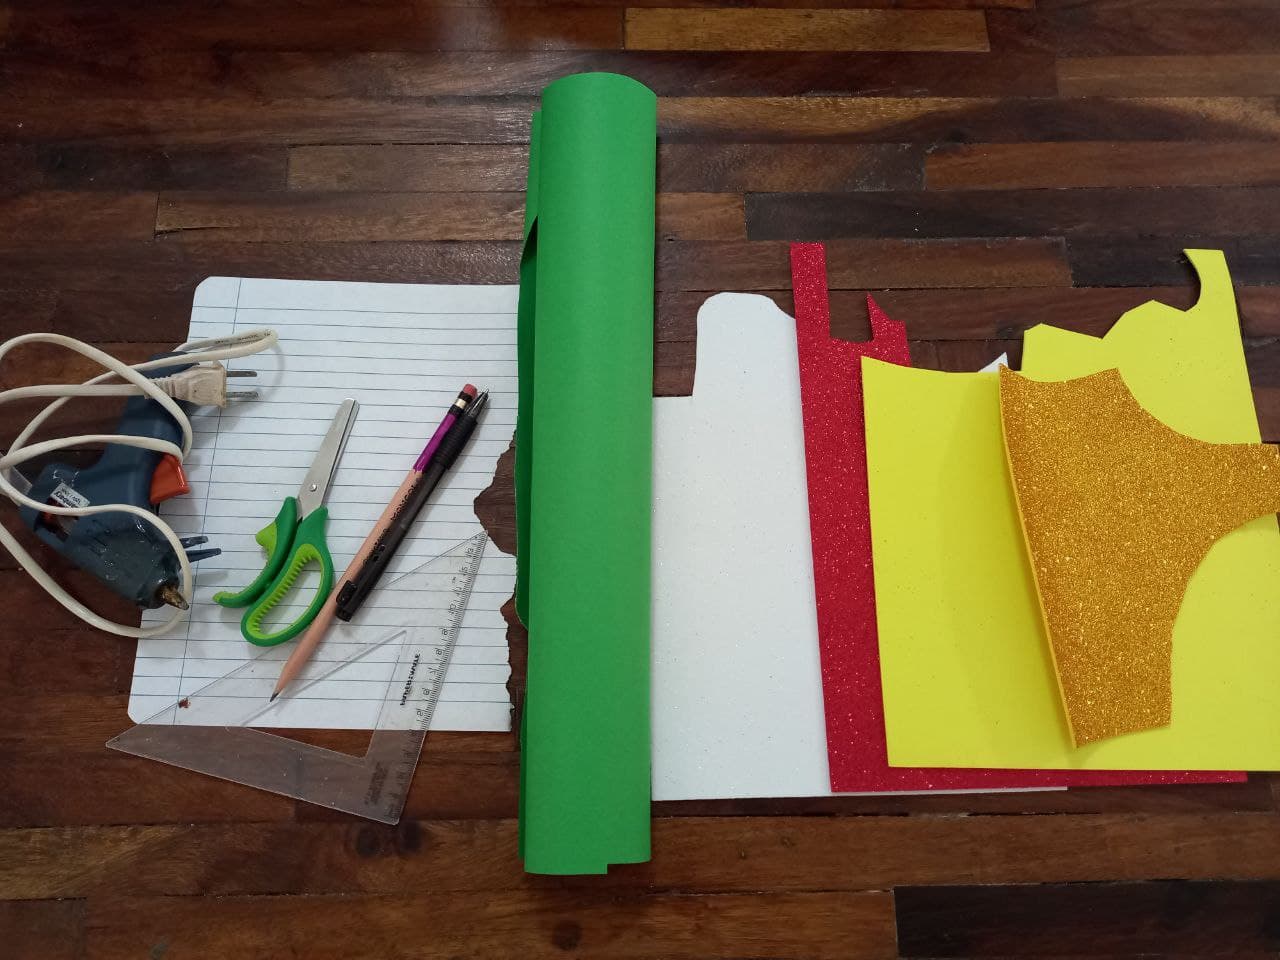
Materiales | Materials
- Foami escarchado blanco.
- Foami escarchado rojo.
- Foami escarchado dorado.
- Foami amarillo.
- Cartulina escolar verde.
- Tijera.
- Hoja de papel.
- Silicon
- Pistola de silicon.
- Regla.
- Lápiz.
- White frosted foam.
- Red frosted foam.
- Golden frosted foam.
- Yellow foam.
- Green school card.
- Scissor.
- Paper sheet.
- Silicon
- Silicone gun.
- Rule.
- Pencil.
Procedimiento ✂ | Process ✂
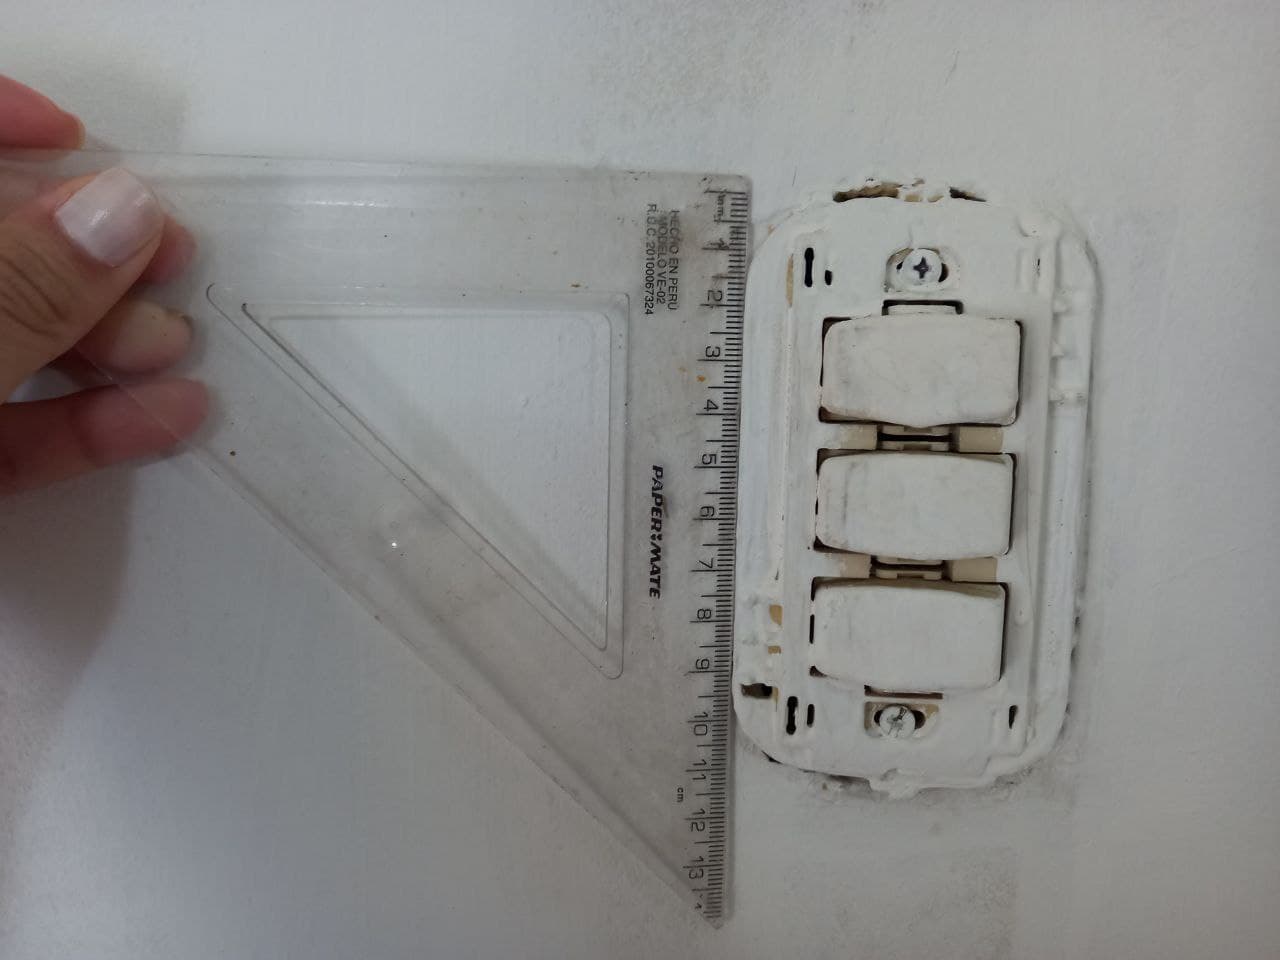
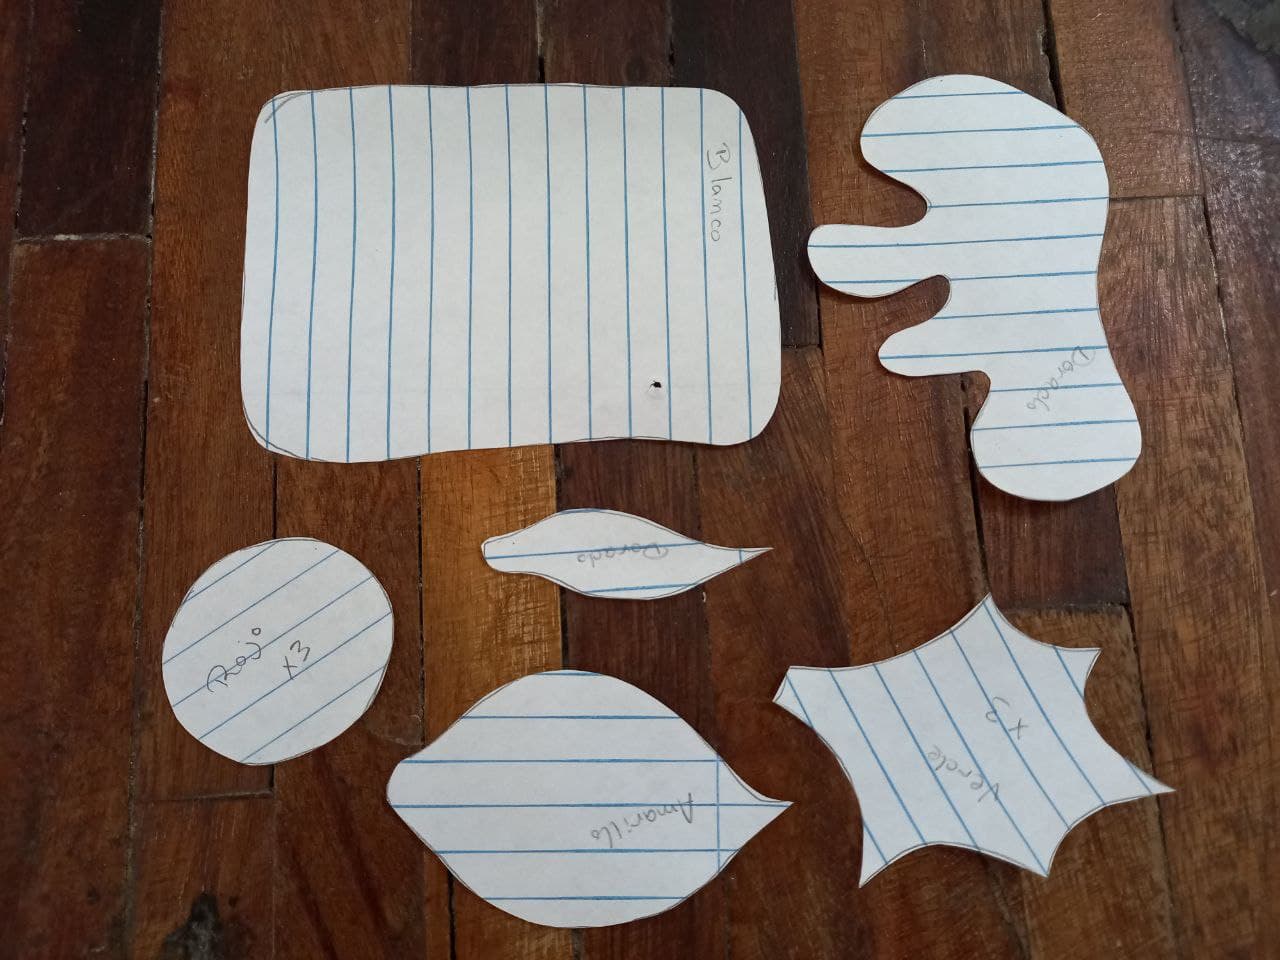
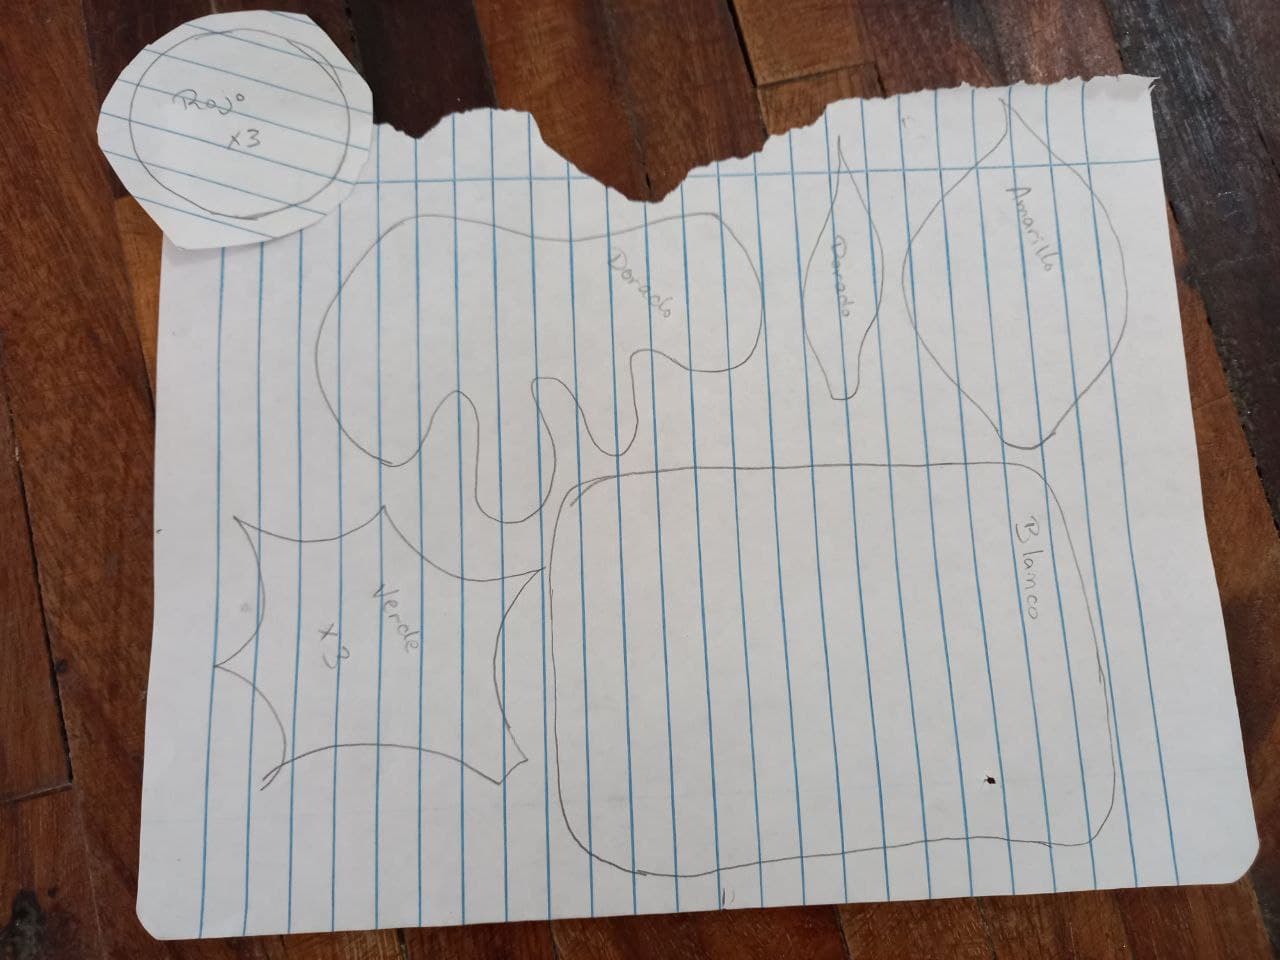
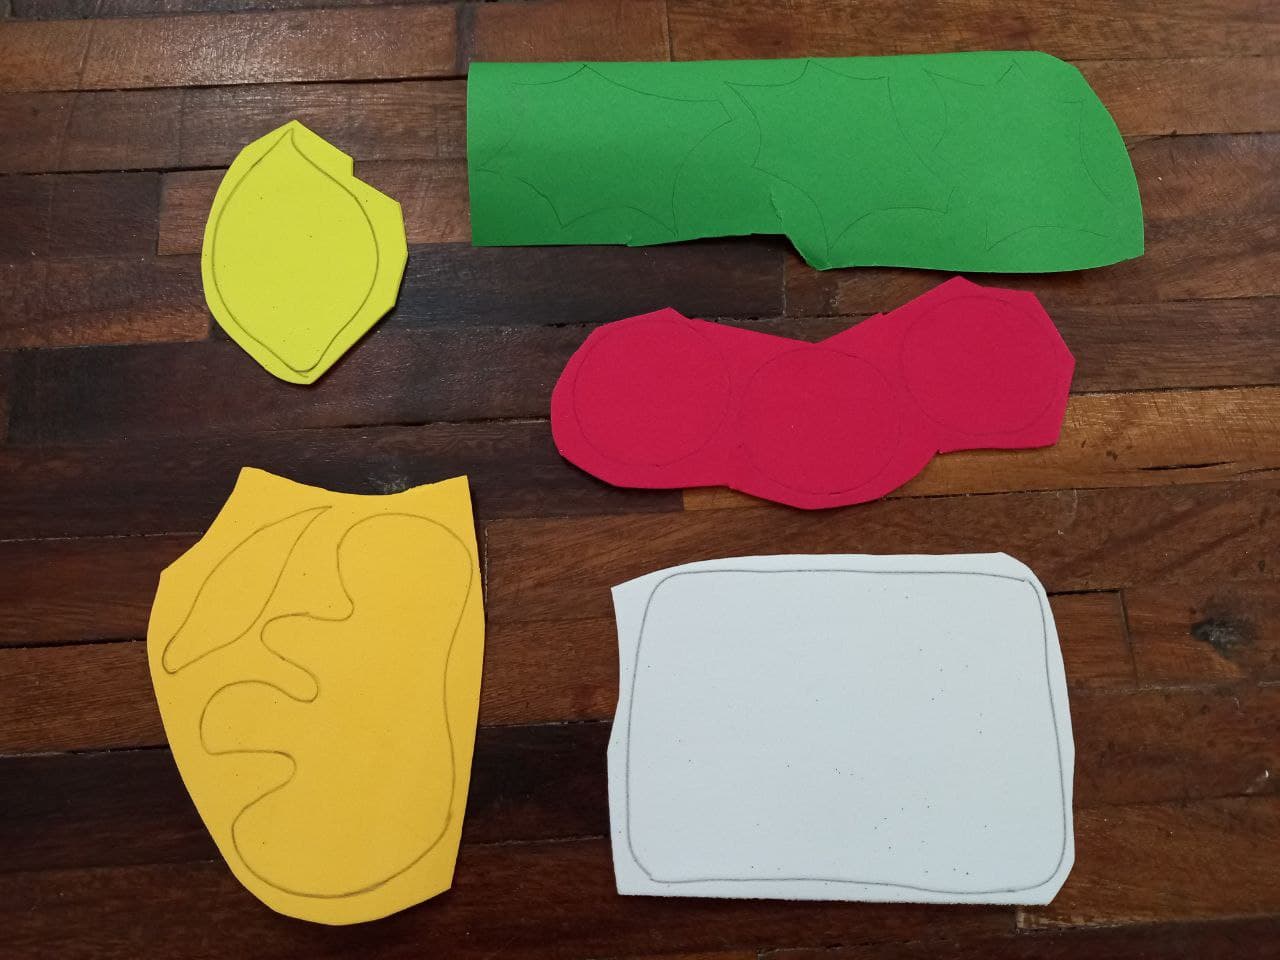
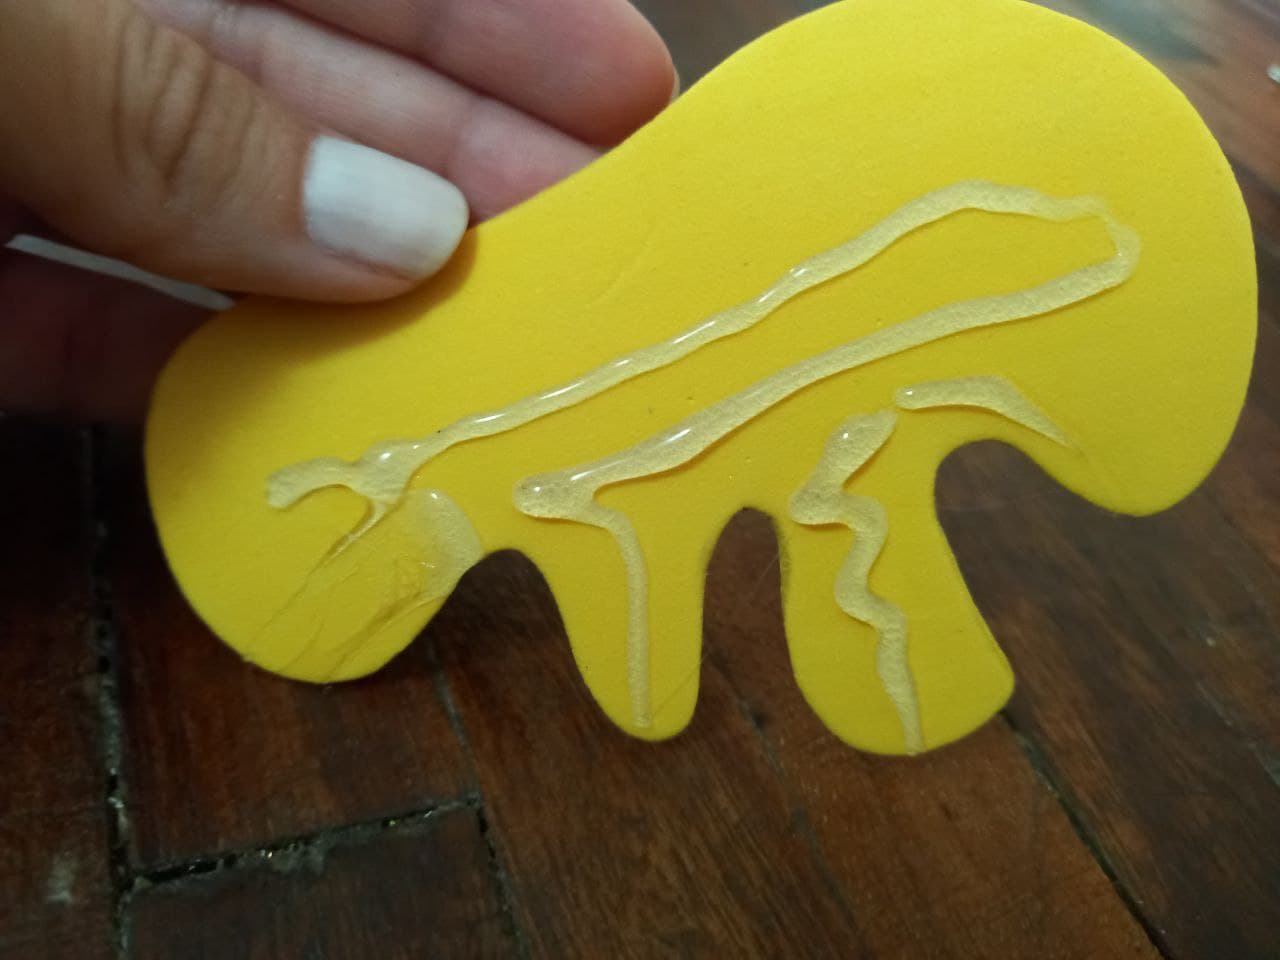
🎄PASO 1. Hacemos el molde de la vela en la hoja de papel, pero antes vamos a medir con la regla el tamaño del interruptor para asegurarnos de que la vela pueda cubrirlo, vamos a dividir la en piezas y recortamos, luego pasamos las piezas al foami del color correspondiente como se muestra en la foto y recortamos..
🎄 STEP 1. We make the mold of the candle on the sheet of paper, but first we are going to measure the size of the switch with the ruler to make sure that the candle can cover it, we are going to divide it into pieces and cut it, then We pass the pieces to the foami of the corresponding color as shown in the photo and cut.
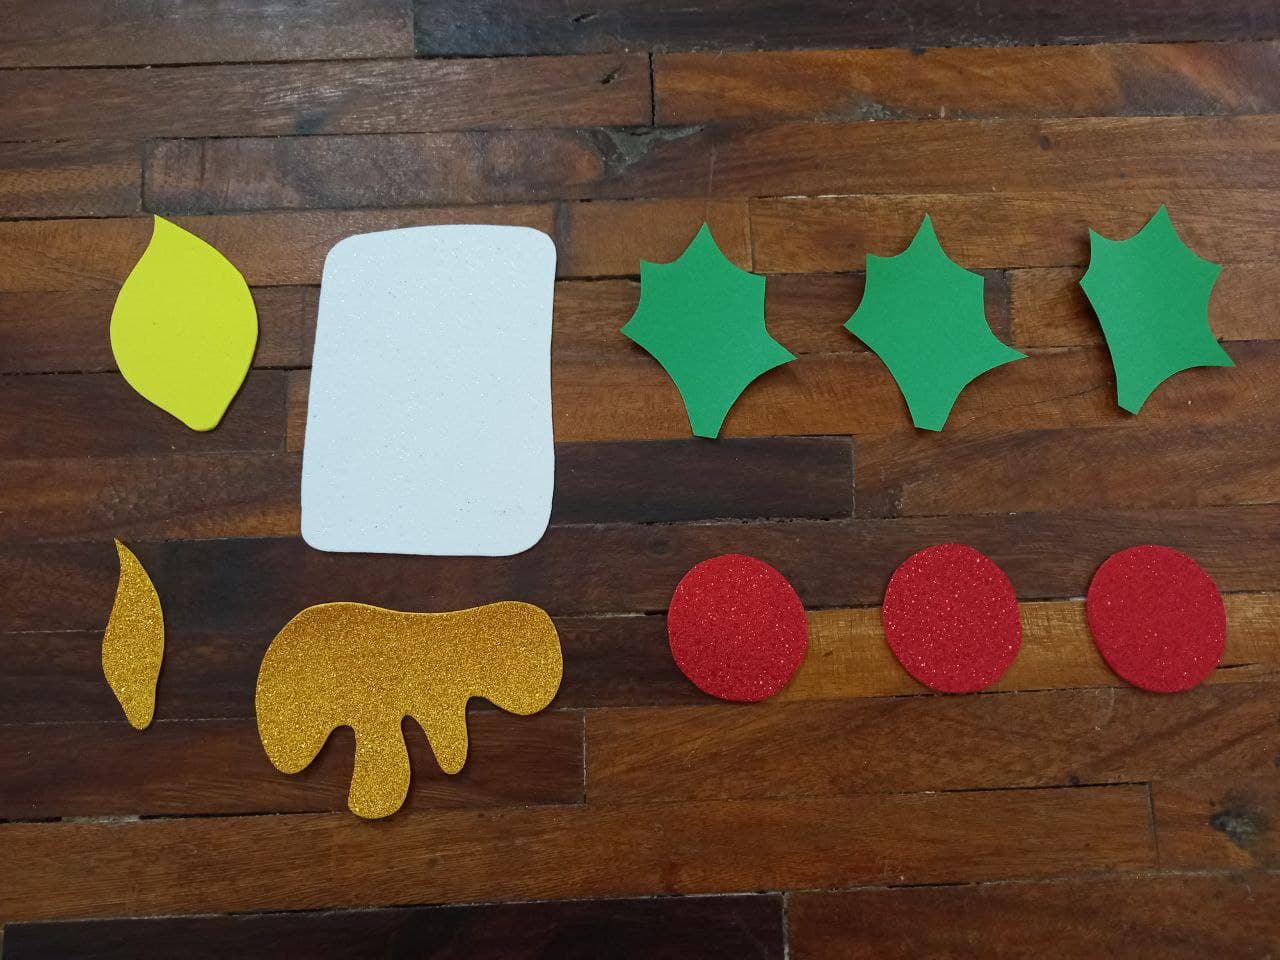
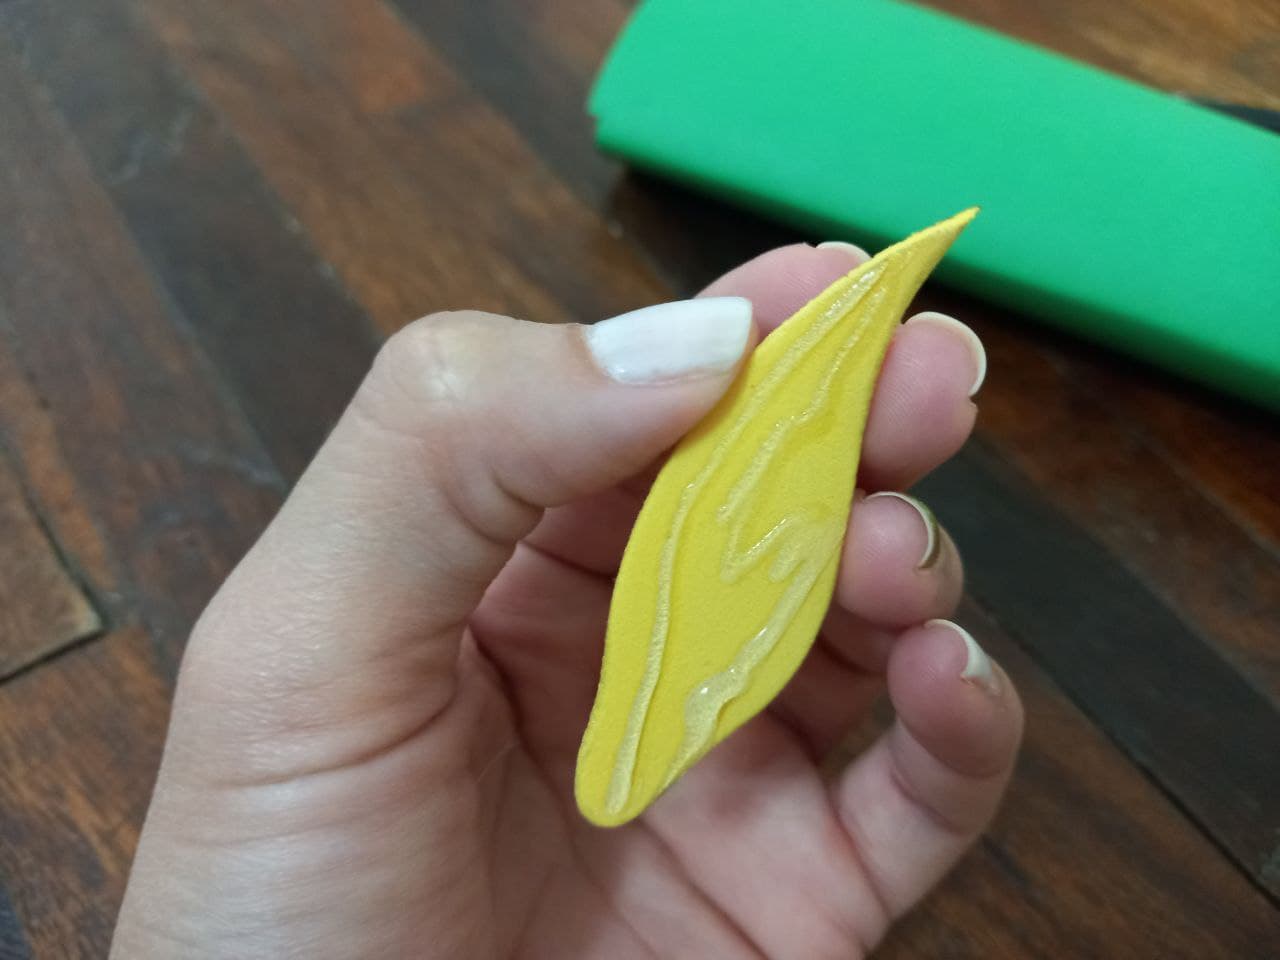
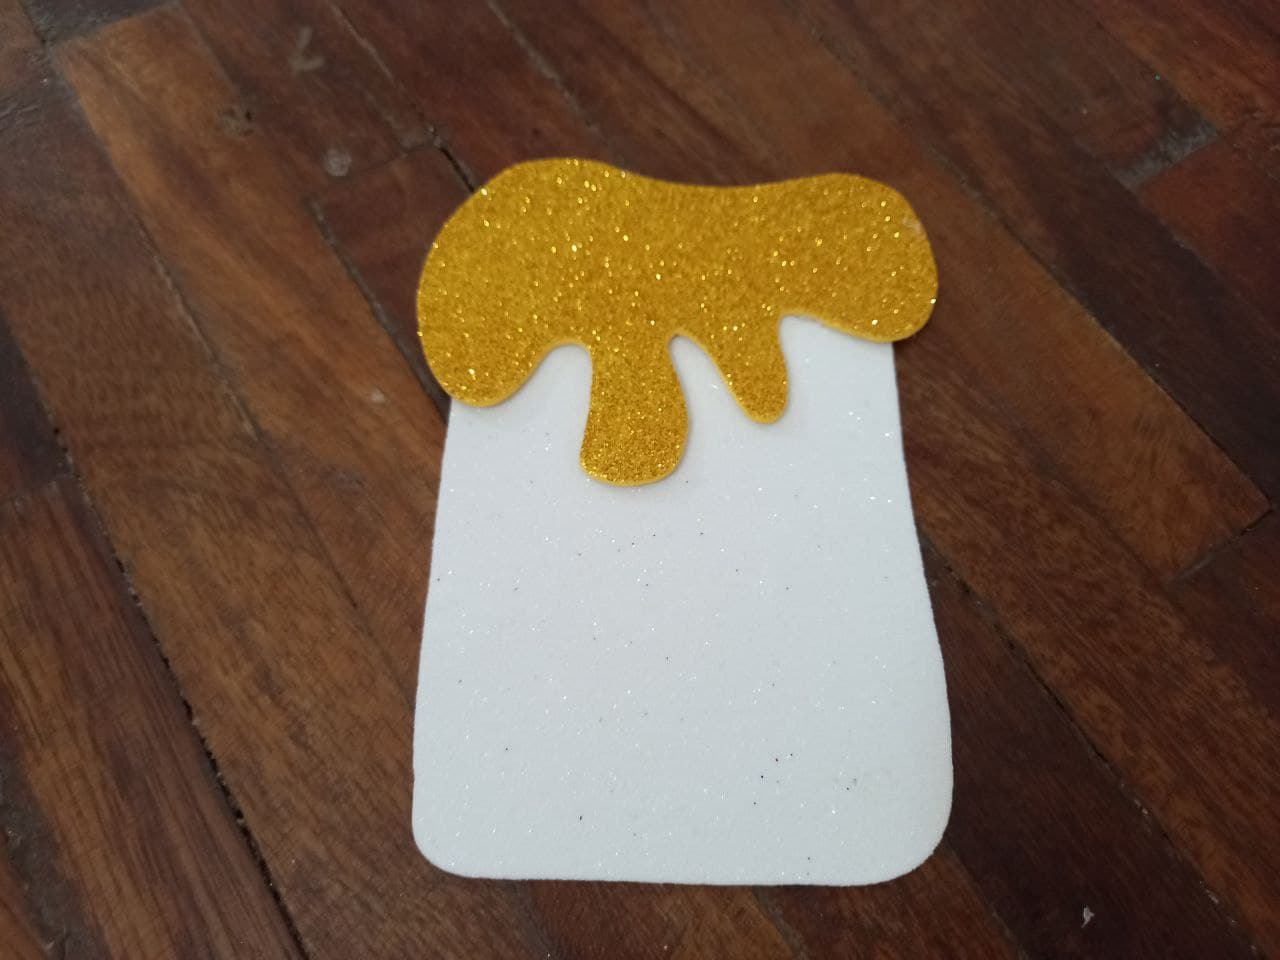
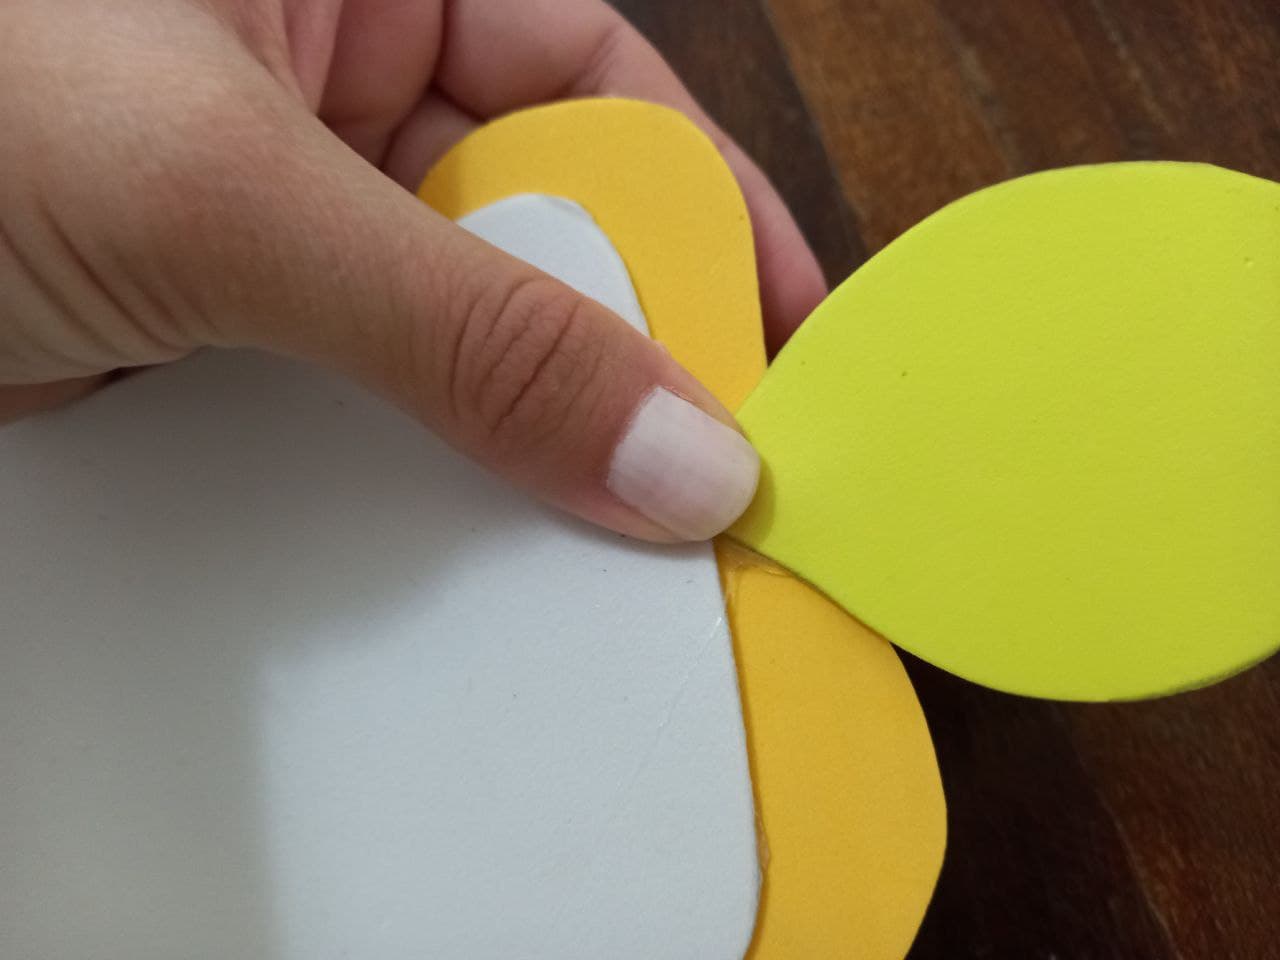
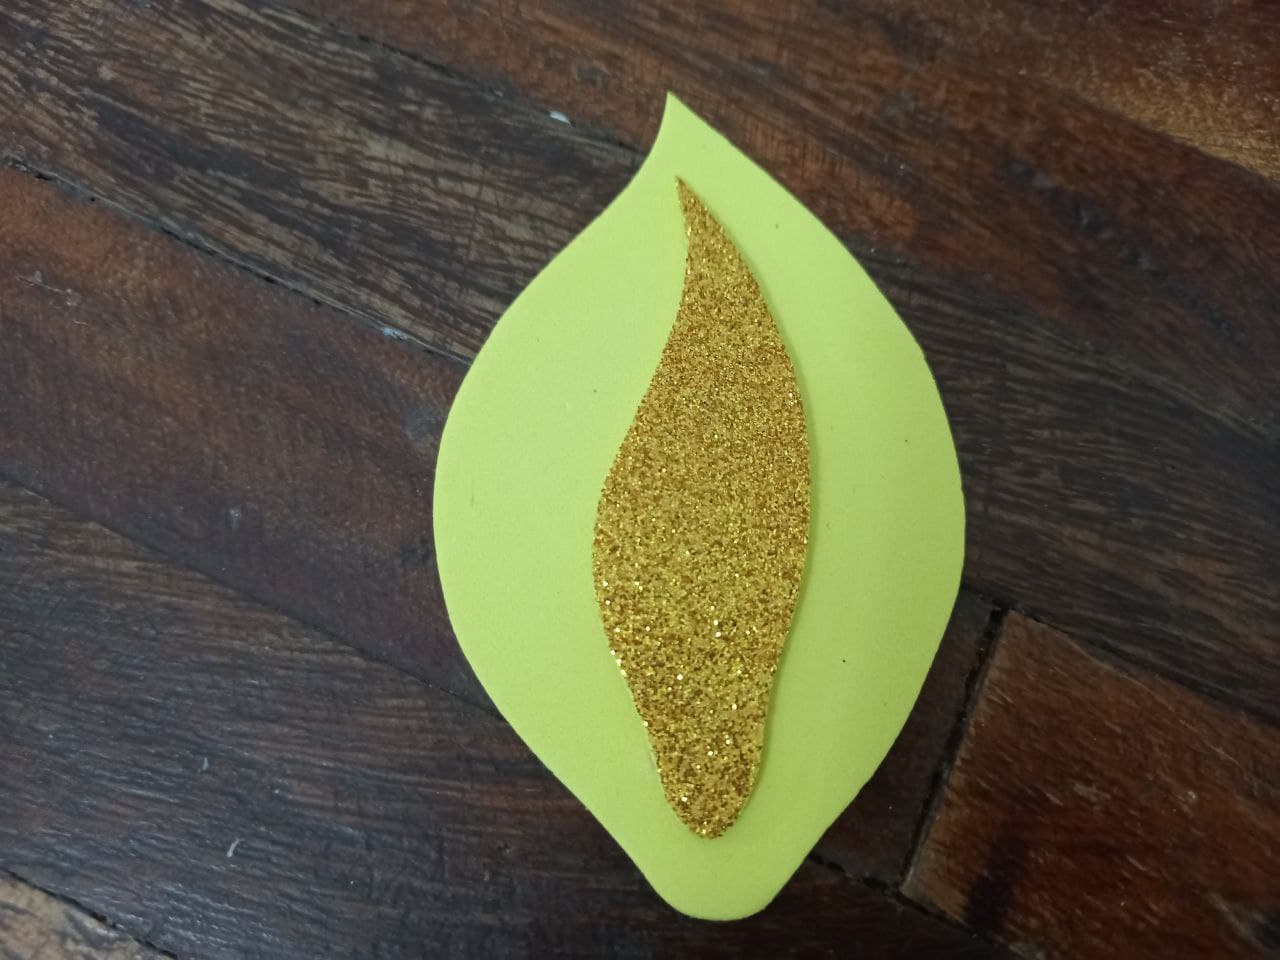
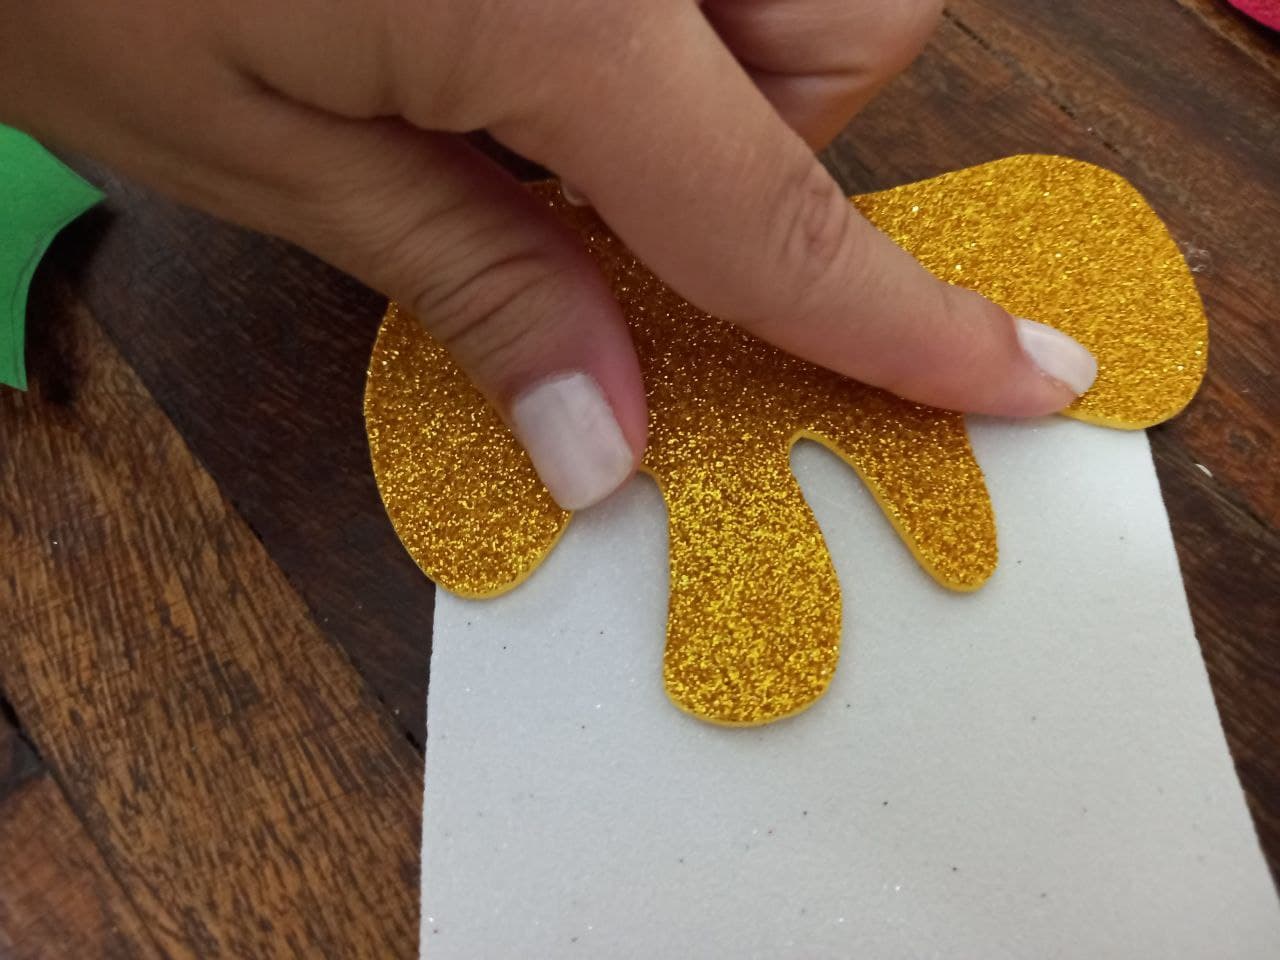
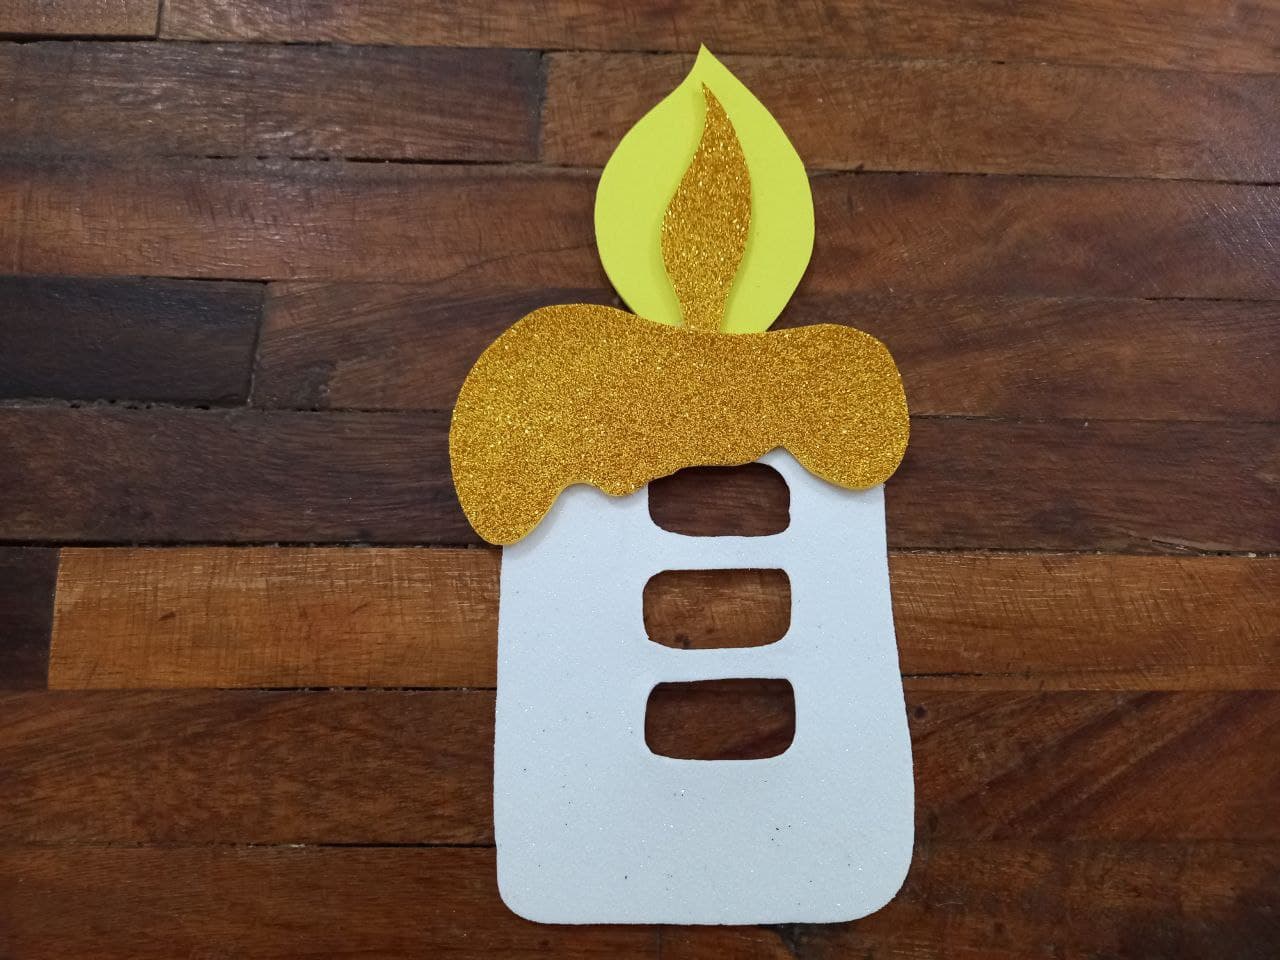
🎄PASO 2. Pegamos la llama dorada sobre la amarilla y luego el borde dorado de la vela sobre la orilla superior de la vela y pegamos la llama en la parte trasera del borde dorado de la vela.
🎄 STEP 2. We glue the golden flame on the yellow and then the golden edge of the candle on the upper edge of the candle and we glue the flame on the back of the golden edge of the candle.

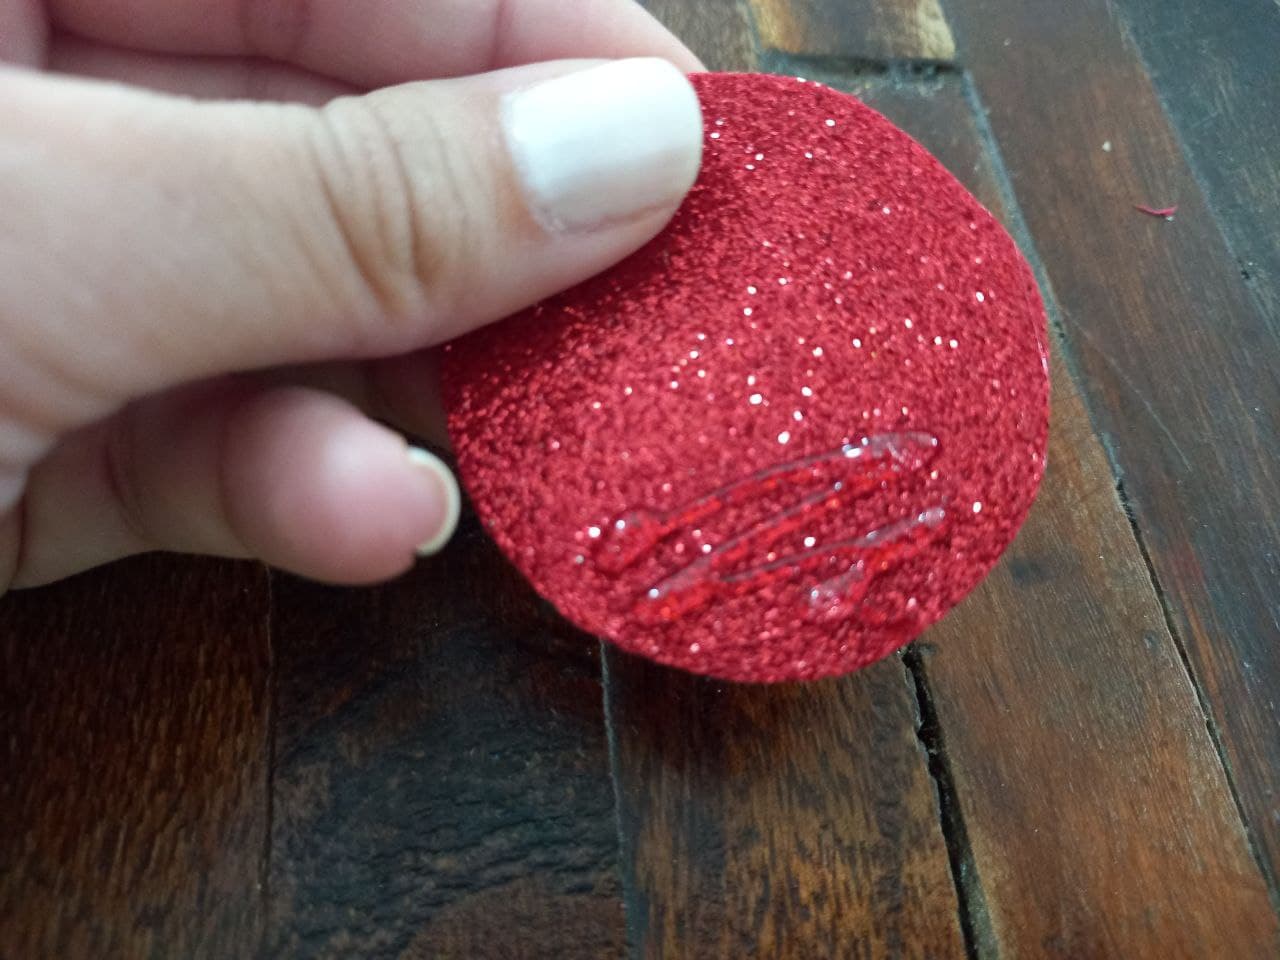
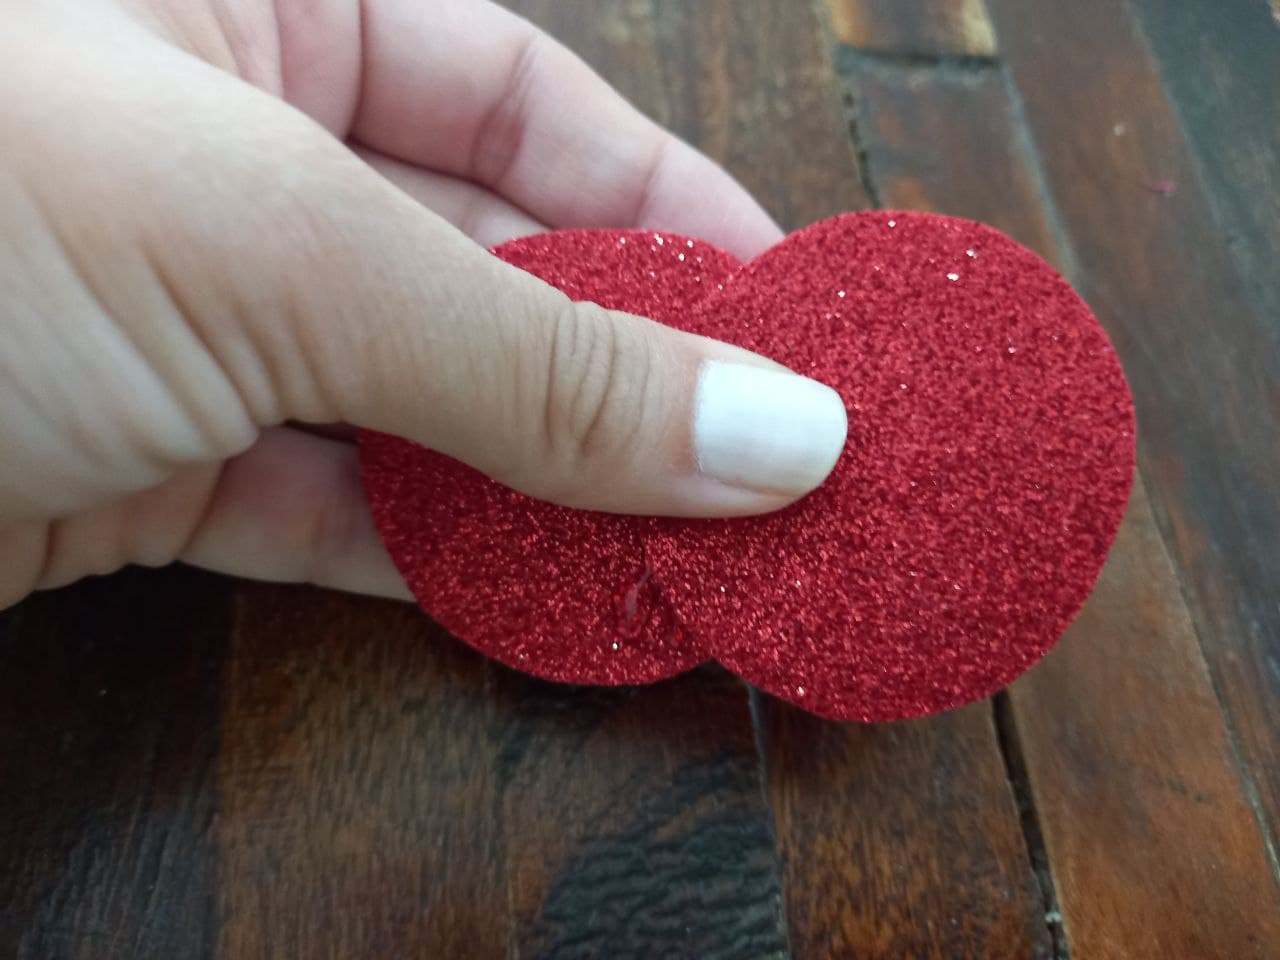
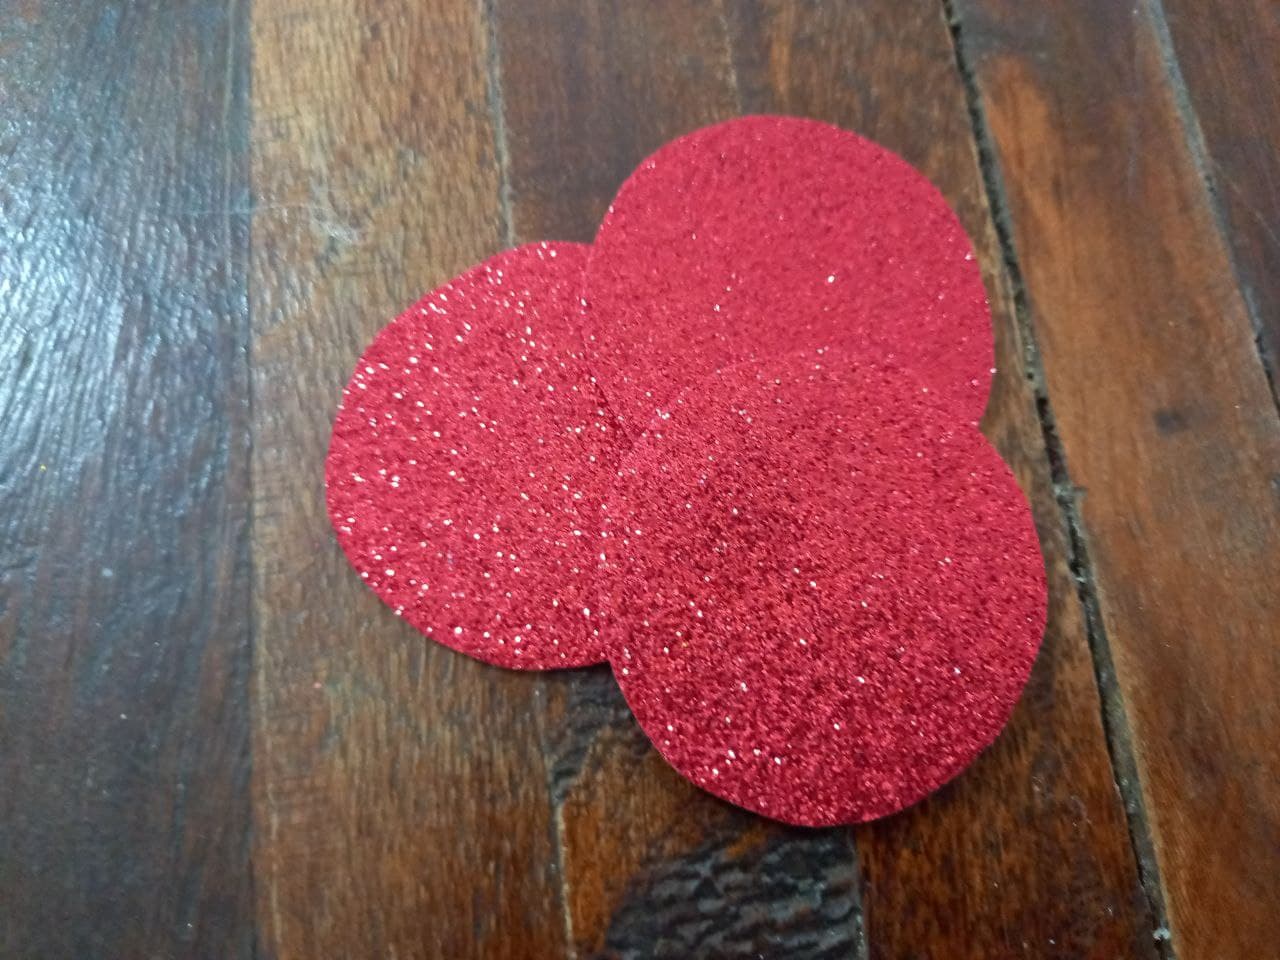
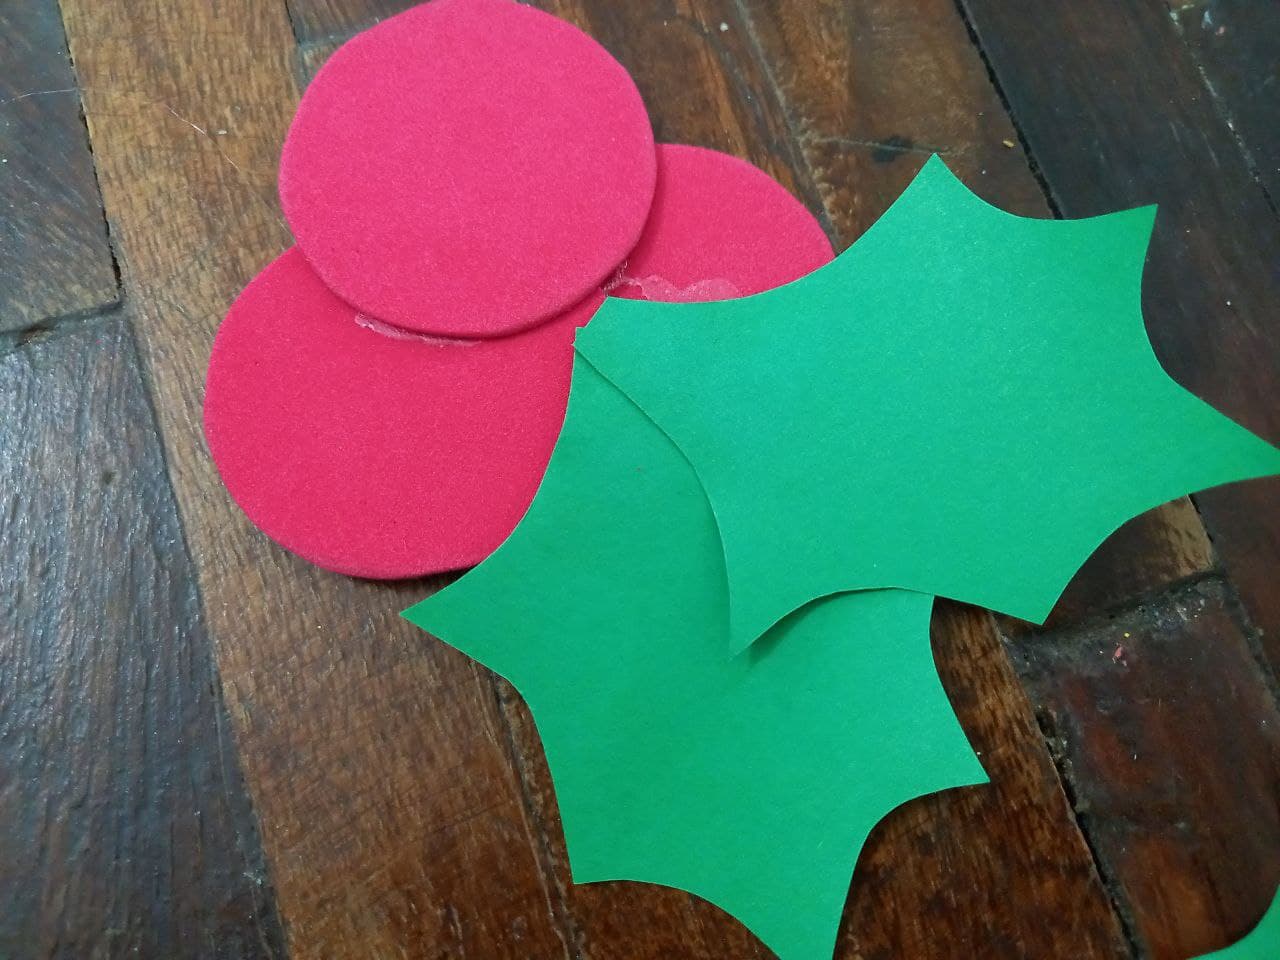
🎄PASO 3. Pegamos los 3 círculos rojos entre si quedando de esta forma.
🎄 STEP 3. We glue the 3 red circles together, remaining in this way.
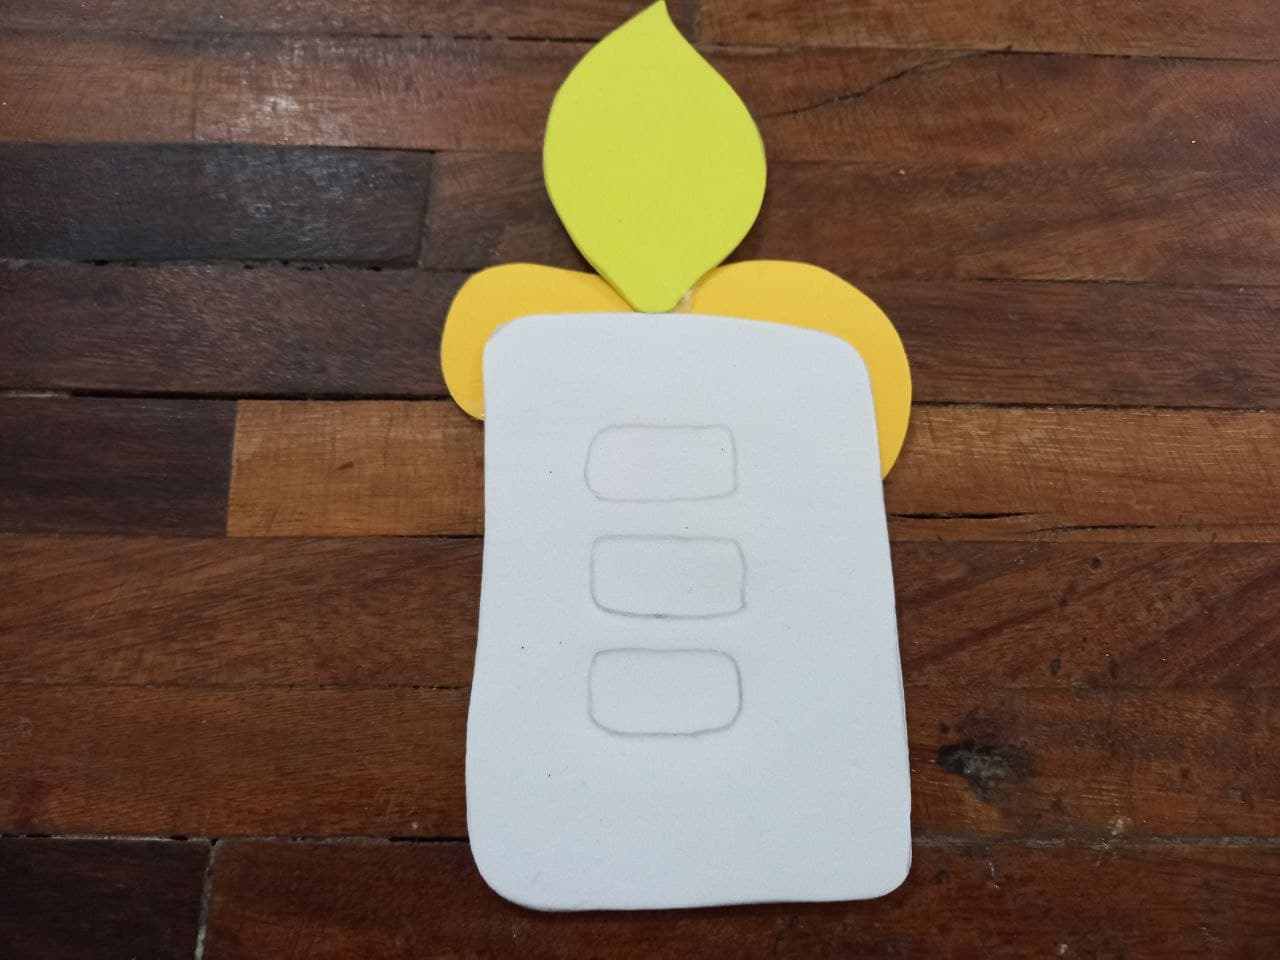
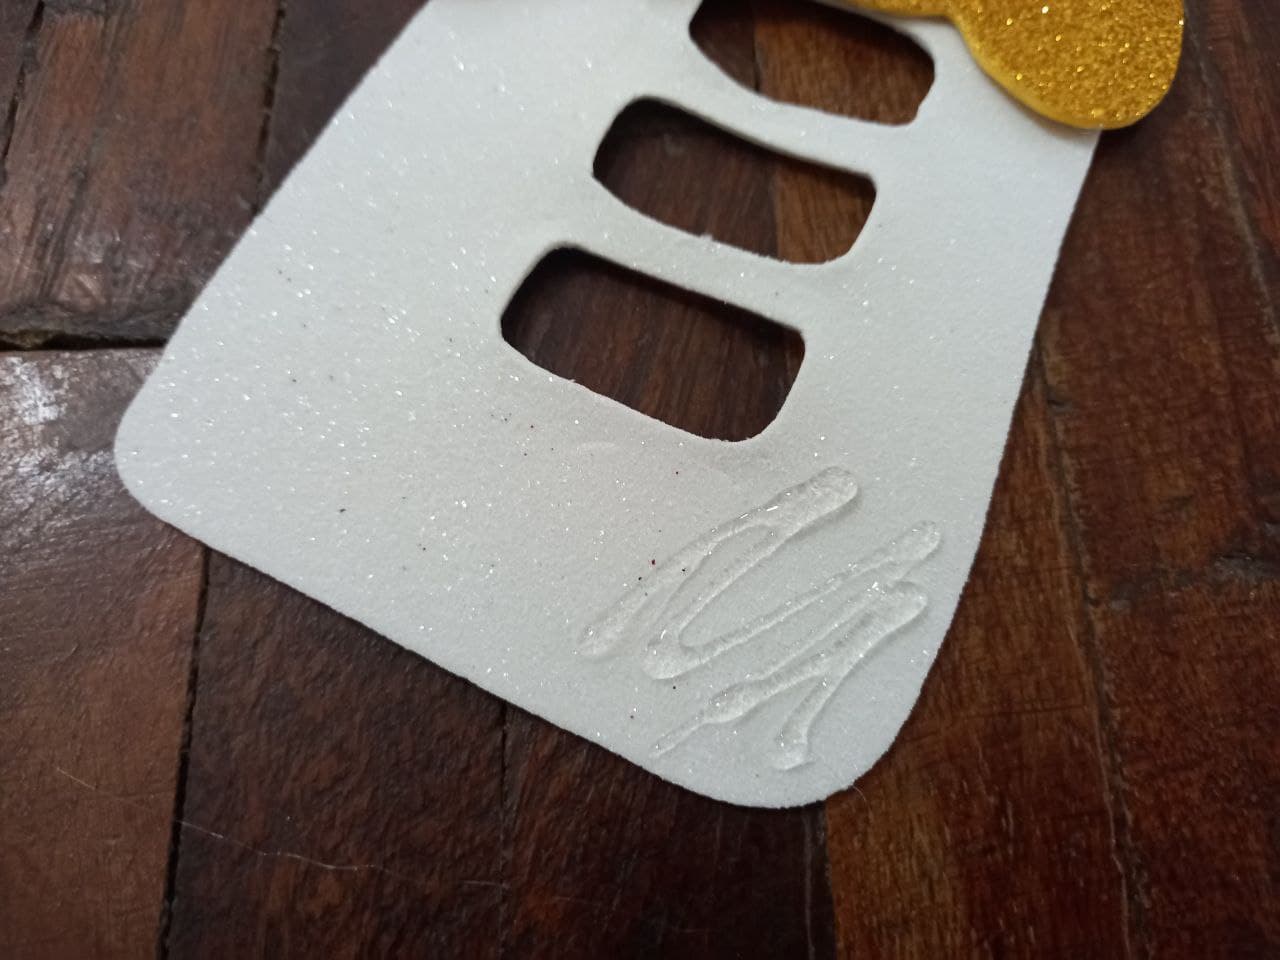
🎄 PASO 4. Tomamos la vela y la colocamos sobre el interruptor, ejercemos un poco de presión de tal manera que se puedan marcar los botones, una vez conseguido esto recortamos dejando el espacio para estos.
🎄 STEP 4. We take the candle and place it on the switch, exert a little pressure so that the buttons can be marked, once this is achieved we cut out leaving the space for them.

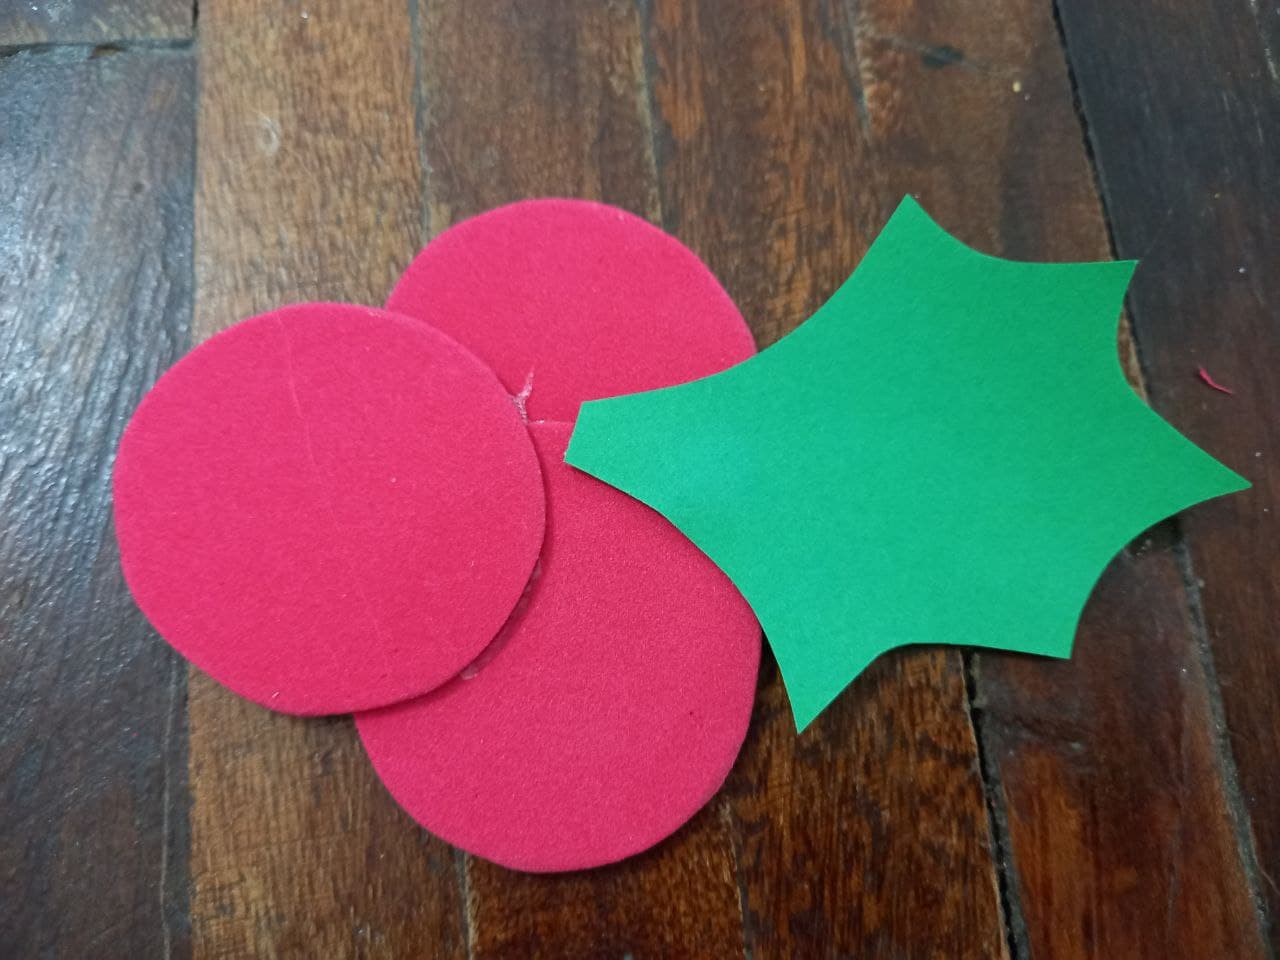
🎄PASO 5. Pegamos las hojas verdes en la parte trasera de la pieza con los círculos rojos, una al lado de la otra, luego aplicamos silicón en la esquina inferior derecha de la vela y pegamos los círculos con las hojas.
🎄 STEP 5. We glue the green leaves on the back of the piece with the red circles, one next to the other, then we apply silicone to the lower right corner of the candle and glue the circles with the leaves.
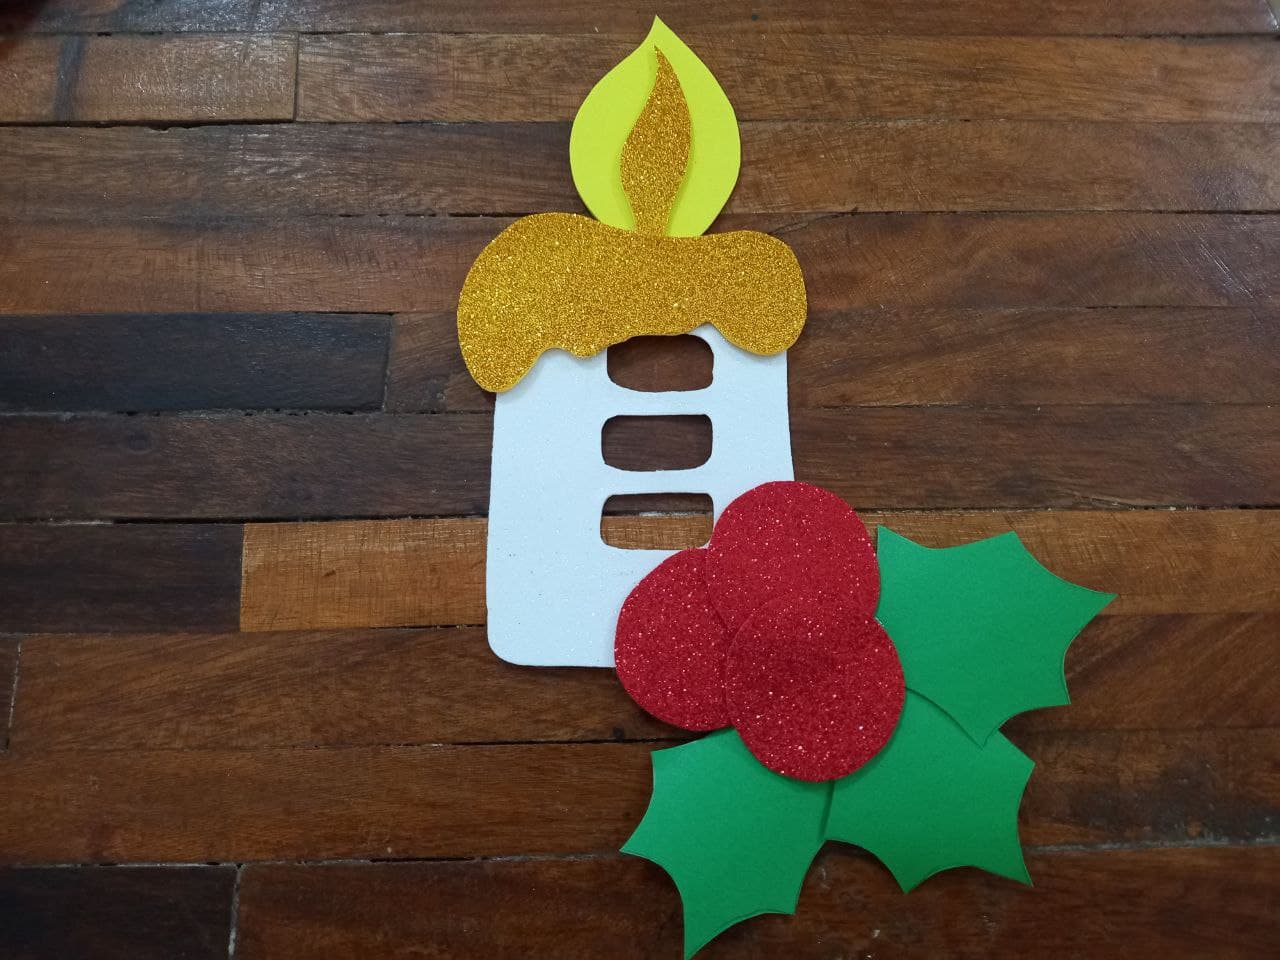
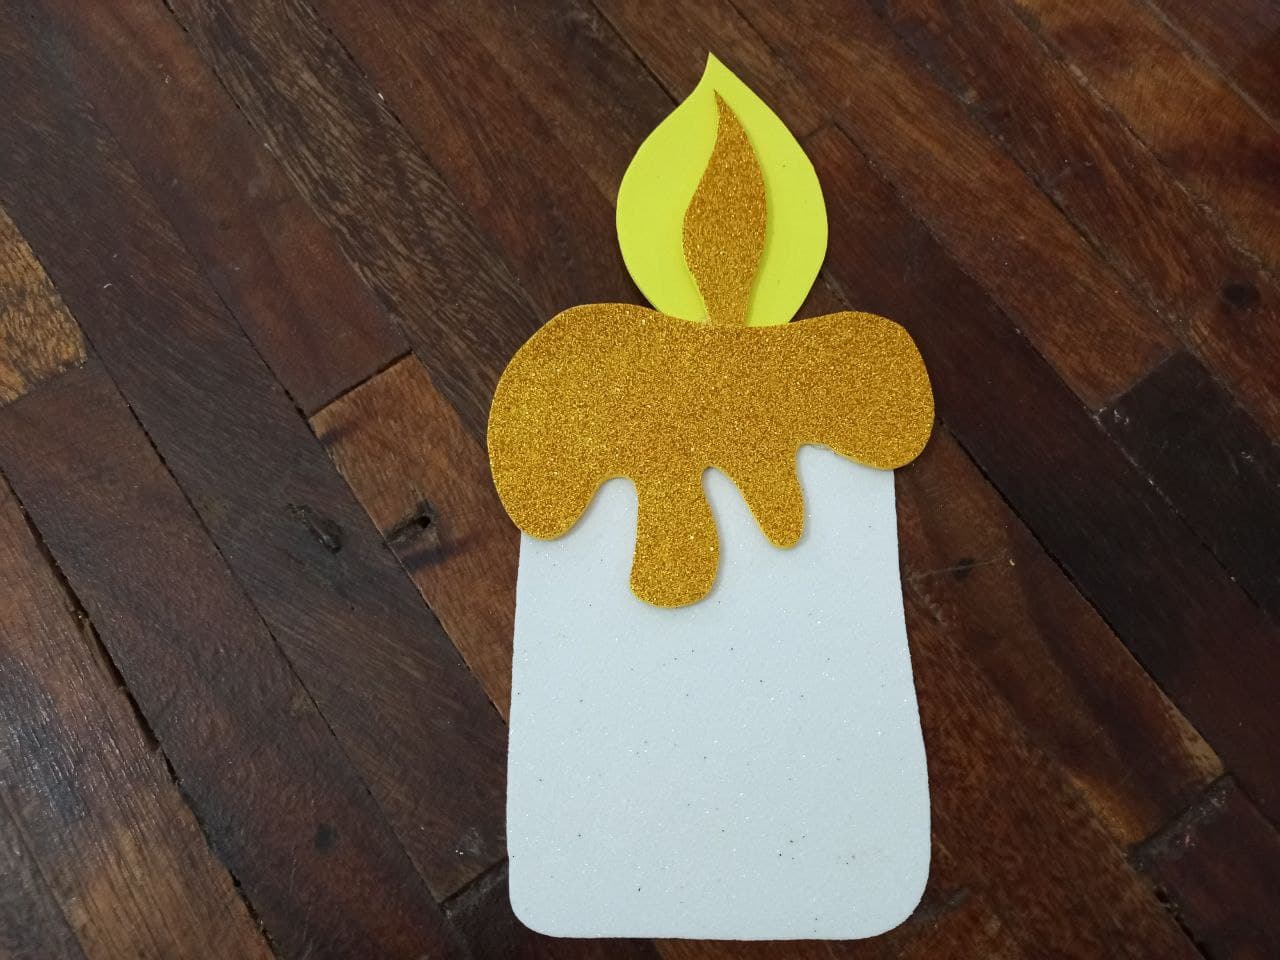
🎄PASO 6. Ahora solo resta colocar nuestra linda vela en el interruptor encajando bien todas sus partes.
🎄 STEP 6. Now it only remains to place our cute candle on the switch fitting all its parts well.
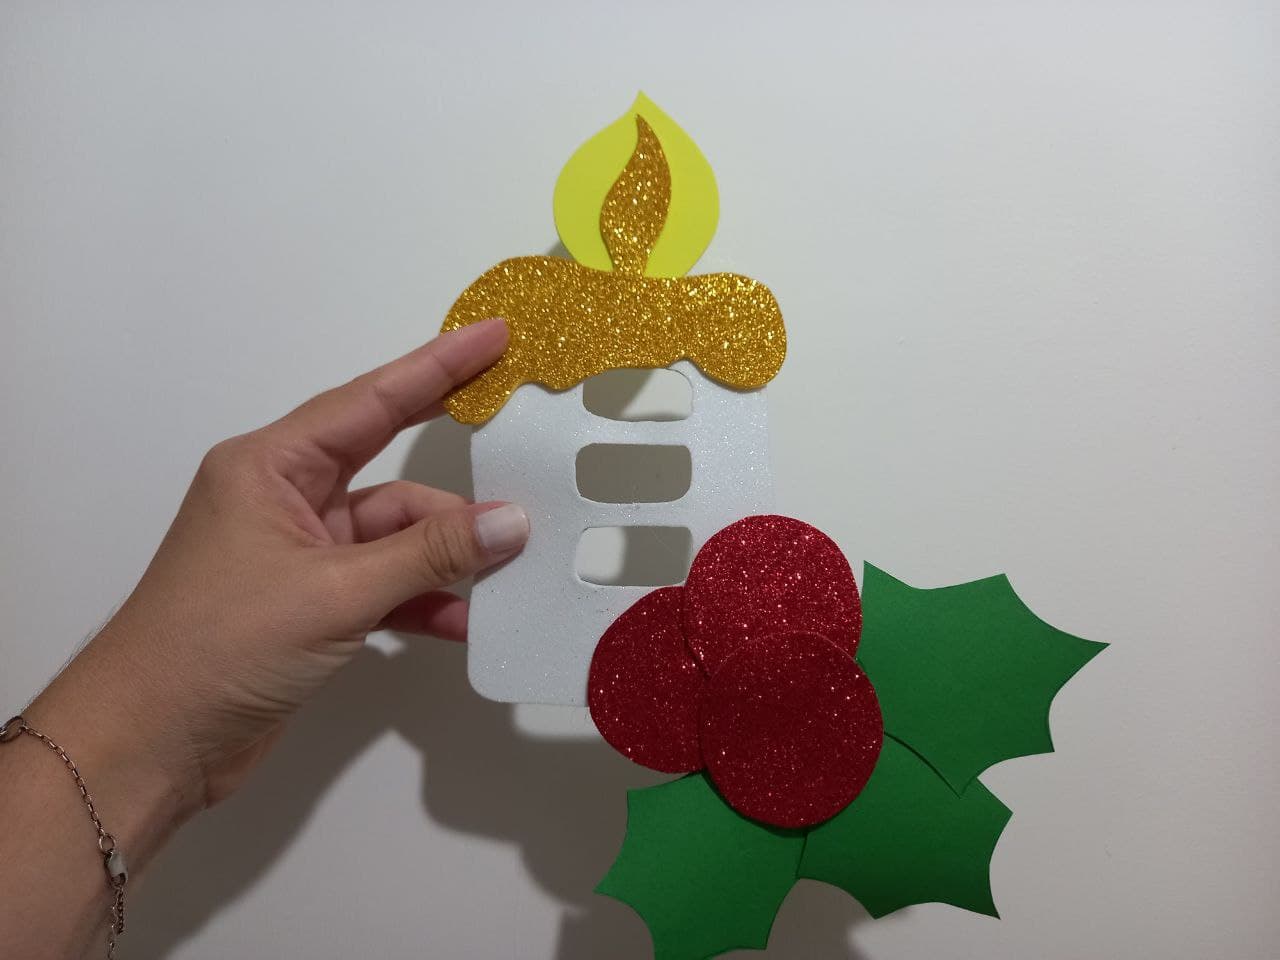
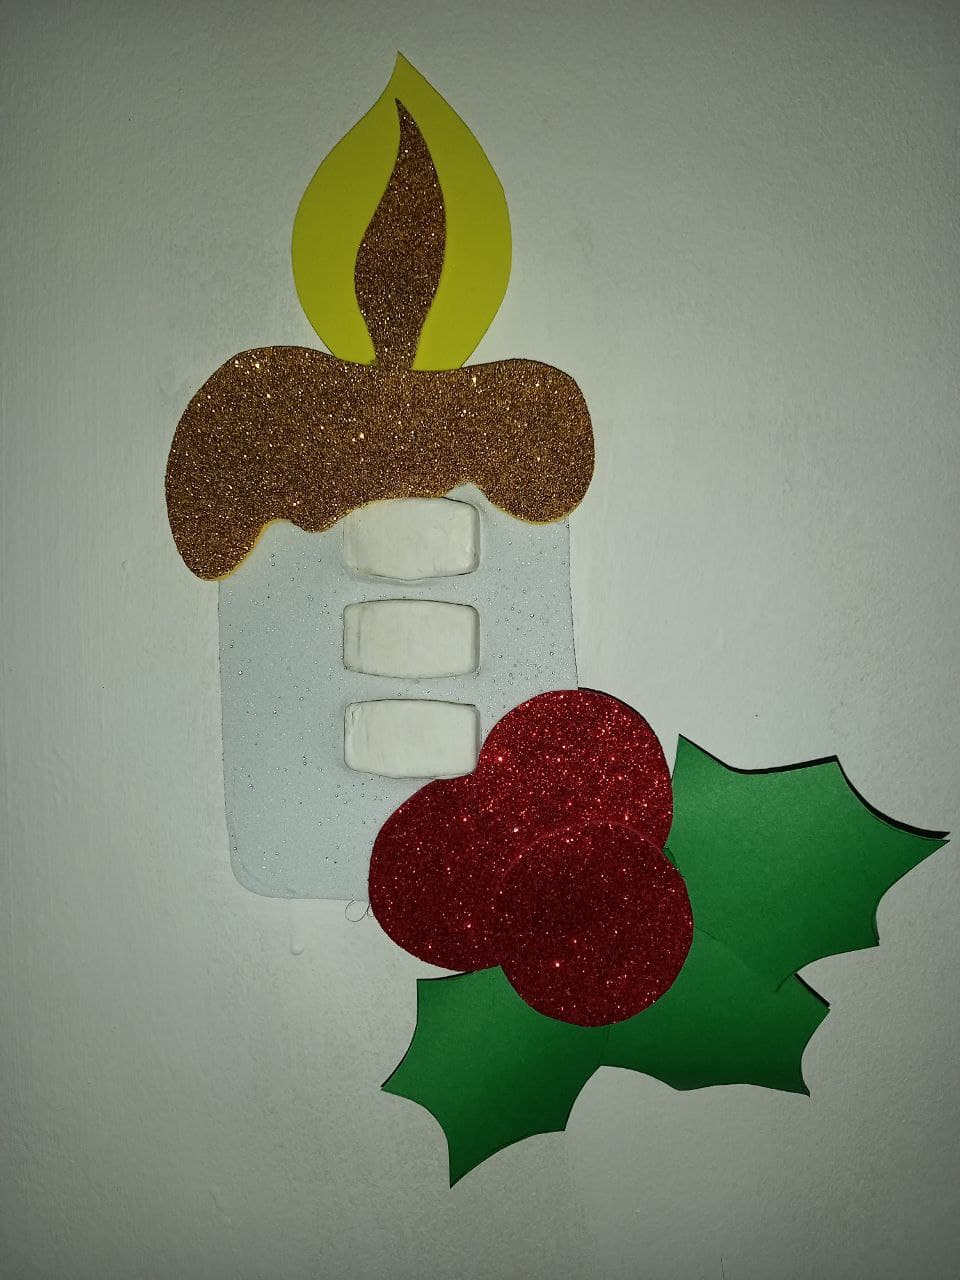
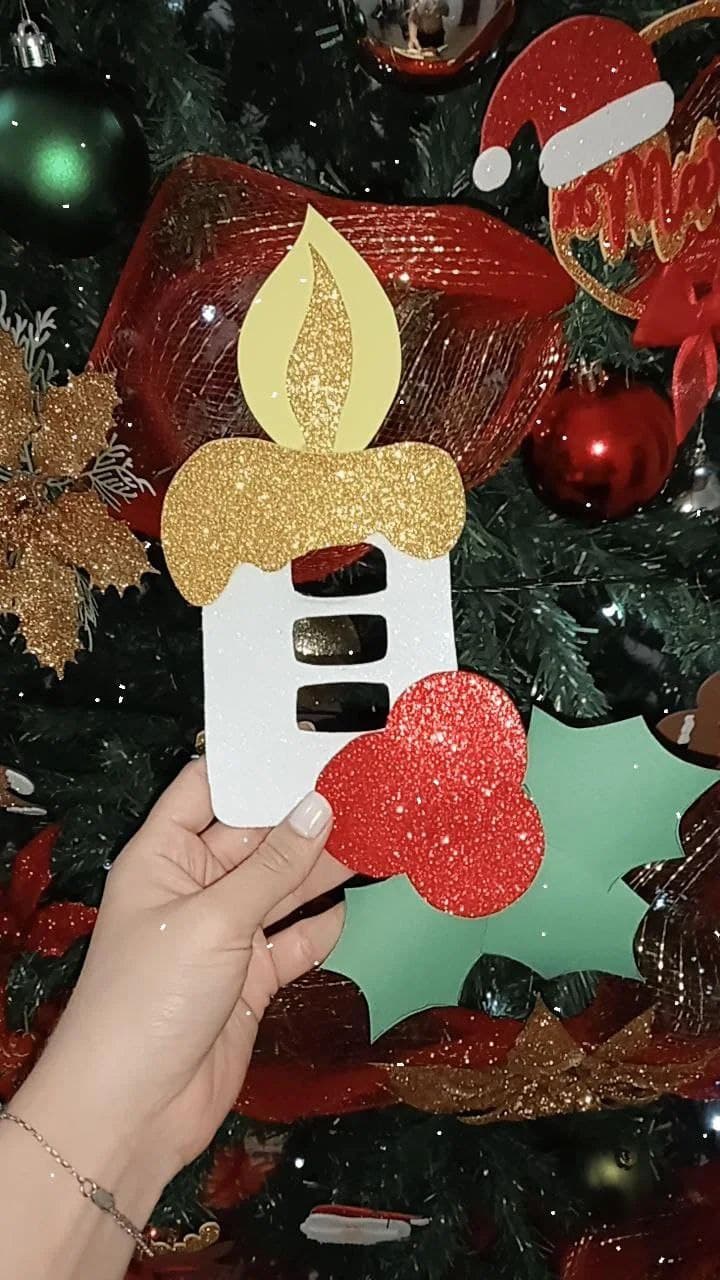
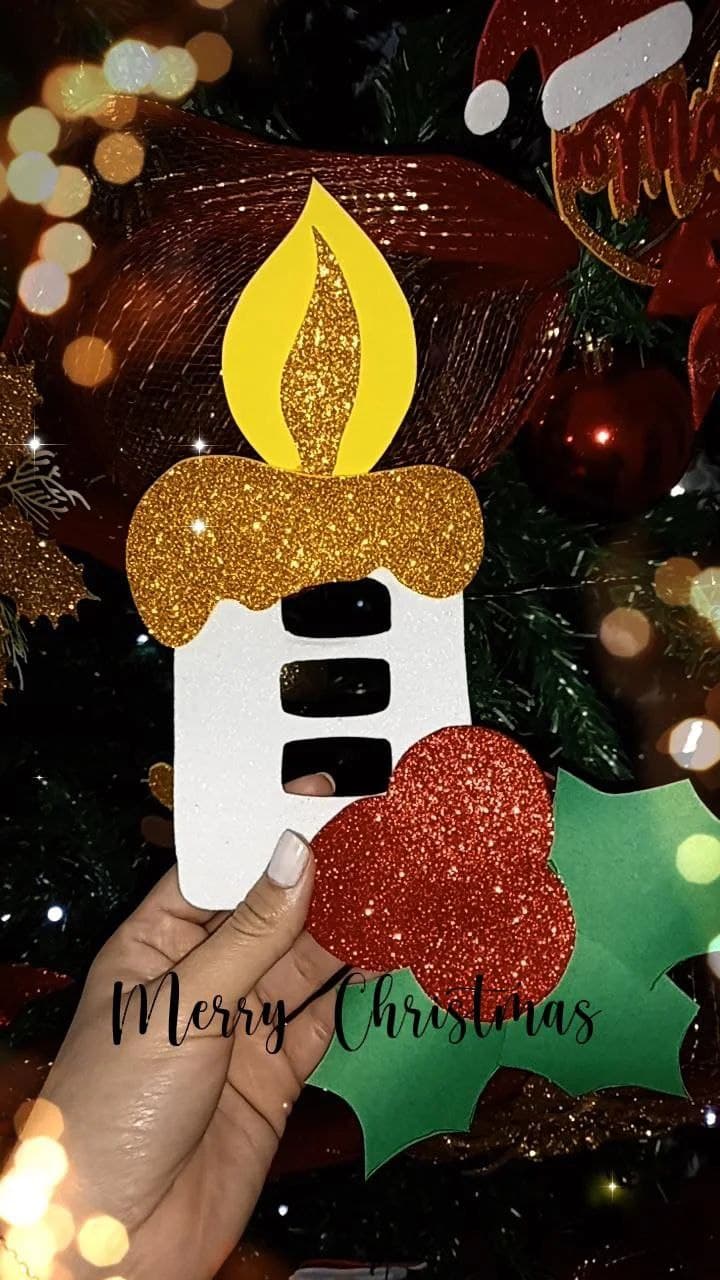
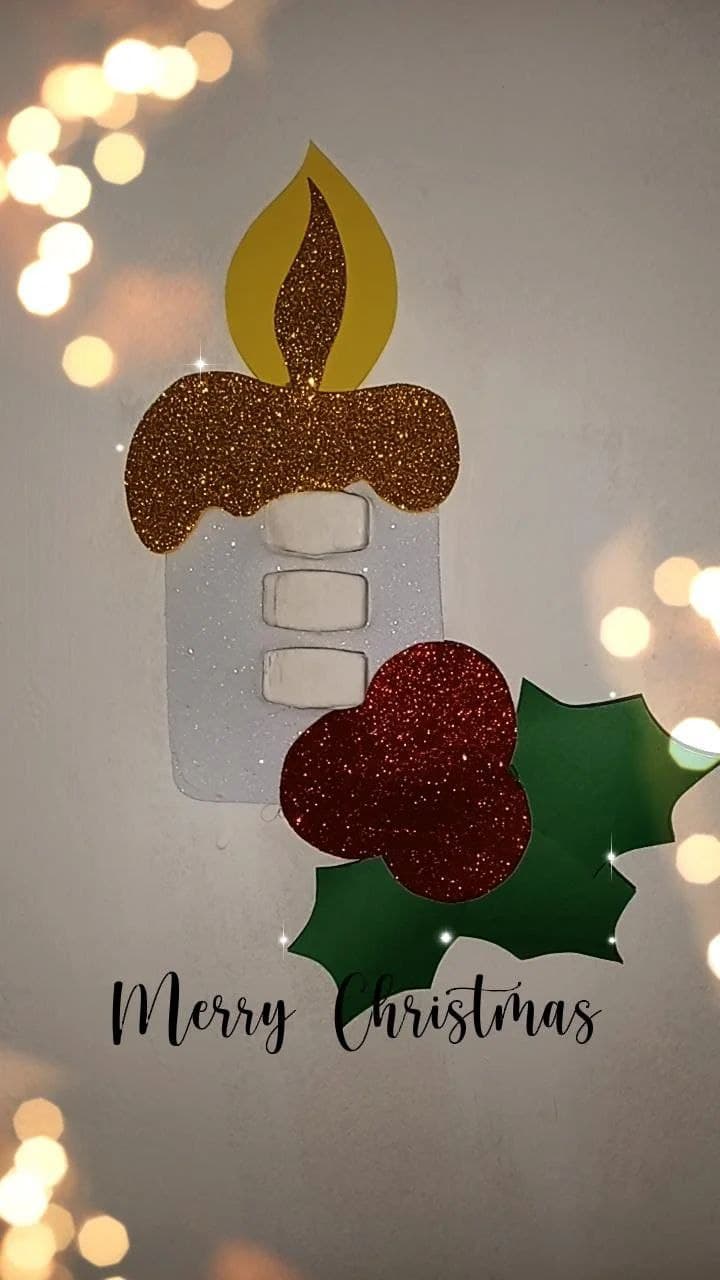
Y listo, ya tenemos un hermoso adorno para forrar nuestros interruptores en esta época navideña, yo elegí la figura de la vela de navidad pero siguiendo estos pasos se puede hacer con cualquier otro modelo, con Santa Claus, un reno, muñeco de nieve, hombre de jengibre, el que más nos guste, la navidad es una ocasión perfecta para decorar cada espacio de nuestro hogar y con esta linda idea podemos decorar los interruptores, espero que les haya gustado este tutorial y se animen a hacer sus propios adornos navideños para sus hogares, nos vemos en el próximo tutorial ¡Lindo Día! 🎄
And voila, we already have a beautiful ornament to line our switches this Christmas time, I chose the figure of the Christmas candle but following these steps it can be done with any other model, with Santa Claus, a reindeer, snowman, man of gingerbread, the one we like the most, Christmas is a perfect occasion to decorate each space of our home and with this cute idea we can decorate the switches, I hope you liked this tutorial and are encouraged to make your own Christmas decorations for your homes, see you in the next tutorial. ¡Nice Day! 🎄

Todas las fotografías son de mi propiedad.
Fotografías capturadas con mi Samsung Galaxy A12
Nos vemos en mi próxima publicación.
¡Tengan un feliz día!
All photographs are my property.
Photos captured with my Samsung Galaxy A12
See you in my next post.
¡Have a happy day!
The rewards earned on this comment will go directly to the person sharing the post on Twitter as long as they are registered with @poshtoken. Sign up at https://hiveposh.com.
¡Que lindo amiga hermosa! A penas vi el post me encantó la idea de hacer la manualidad para el apagador, muy creativo. Saludos amiga, un abrazo inmenso <3
Muchas gracias amiga, me alegra que te guste, de niña me gustaba decorar los tomacorrientes e interruptores y se me ocurrió hacerlo de nuevo para navidad, queda muy lindo ♥️ un abrazo para ti también amiga bella ♥️♥️♥️
Es que sí amiga, lo vi, y de verdad me imaginé realizándolo para mi casa. Se ve tan tierno y original. Un toque demasiado lindo para la navidad❤️🎉🌲
Queda bello amiga, pensé en hacerlo con otros motivos para poner en todos los interruptores, tal vez los publique si los hago
Chévere amiga, te estaré leyendo, un abrazo <3
Que bellooooo! Me encantó! Te ha quedado muy bonito 👏🏻👏🏻
Muchas gracias bella, ya entré en modo navideño asi que vendrán muchas mas manualidades para decorar en esta época, gracias por pasar, un abrazo! ♥️
Gracias por el apoyo a mi post, saludos! ♥️