¡Mis queridos amigos!
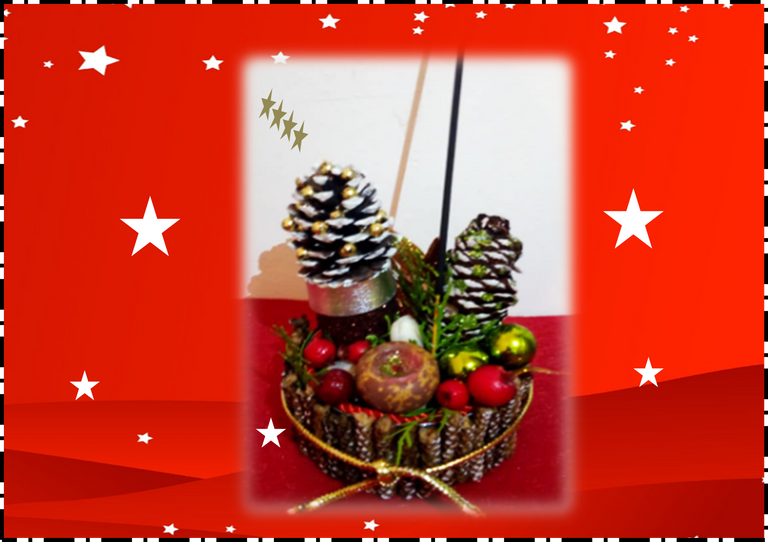
Feliz Viernes para todos los creativos artesanos y para toda esa hermosas personas que conforman la comunidad de Hive Diy; espero estén excelente y sobre todo con mucha Salud. En esta oportunidad les traigo un paso a paso de como elabore este Lindo Centro Navideño, realizado con material de provecho, para decorar nuestra Cena en Navidad; aunque lo elabore también con la función de alumbrar y de expandir agradables olores, ya que le puedes colocar alguna velita o varilla de incienso. Yo en particular lo utilizaría también para esperar al espíritu de la Navidad ya que ese día en algunos hogares en Venezuela lo celebran con frutas cítricas, canciones,inciensos con olores a mandarina, limón entre otros, se hacen peticiones por escritos para el bienestar del mundo y la familia. Bueno mis queridos Hivers manos a la obra, espero que sea iniciativa para que creen un Centro de mesa para estas navidades. Comencemos
My dear friends!
Happy Friday to all the creative artisans and all those beautiful people that make up the Hive Diy community; I hope they are excellent and above all with a lot of health. This time I bring you a step by step on how to make this Nice Christmas Center, made with useful material, to decorate our Christmas Dinner; Although I also make it with the function of lighting and expanding pleasant smells, since you can place a candle or incense stick. I in particular would also use it to wait for the spirit of Christmas since that day in some homes in Venezuela they celebrate it with citrus fruits, songs, incense with the scents of mandarin, lemon among others, requests are made in writing for the welfare of the world and the family. Well my dear Hivers get to work, I hope it is an initiative to create a Centerpiece for this Christmas. Let's get started


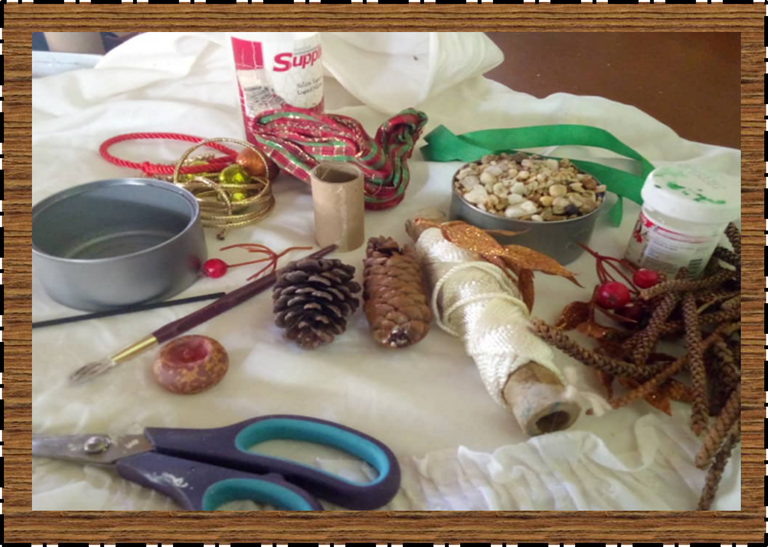
2 Piñas secas de pino
1 Lata de metal
Pintura Blanca
Escarcha verde
Bolitas doradas
Cordón rojo
Piedras
Bolitas pequeñas verdes
Cerezas plásticas
Foami marrón y plateado
Ramita de pino natural
Tubito de Cartón
Pega
Tijera
2 dried pine cones
1 metal can
White paint
Green frost
Golden balls
Red cord
Stones
Small green balls
Plastic cherries
Brown and silver foam
Natural pine twig
Cardboard Tube
Job
Scissor

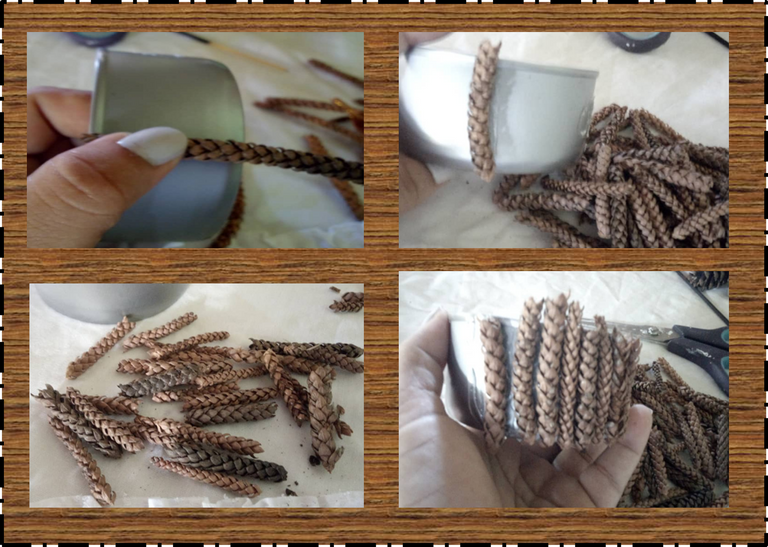
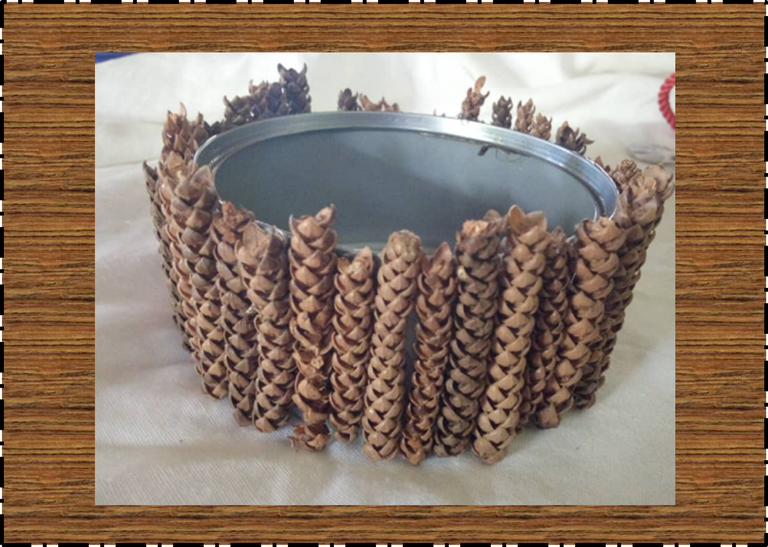
1.-En primer lugar vamos a medir las ramitas secas de pino por el borde de la lata, luego picamos y pegamos una a una por todo el borde.
.
1.-First we are going to measure the dry pine twigs along the edge of the can, then we chop and glue one by one along the entire edge..
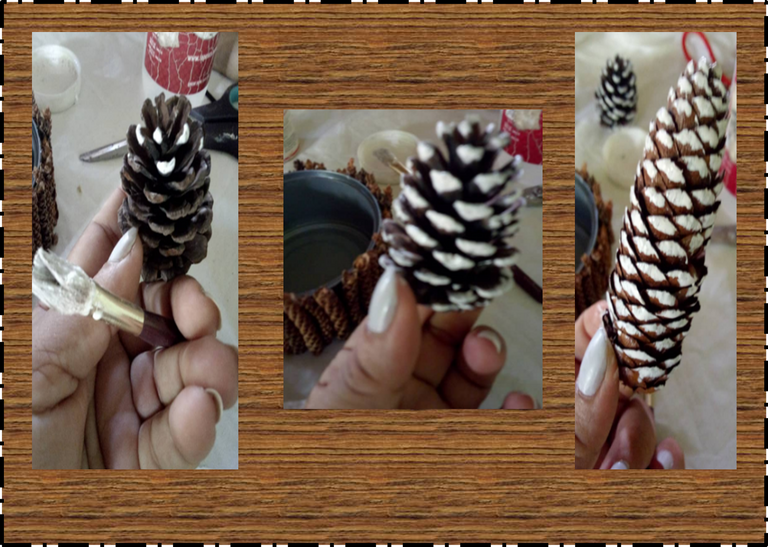
2.- Ahora tomamos las piñas de pino y con un pincel le damos
pinceladas en las puntas, aunque si le gusta lo pueden dejar al natural, pero a mi me gusta darle el toque de la nieve.
2.- Now we take the pine cones and with a brush we give them
brushstrokes on the tips, although if you like you can leave it natural, but I like to give it the touch of snow.
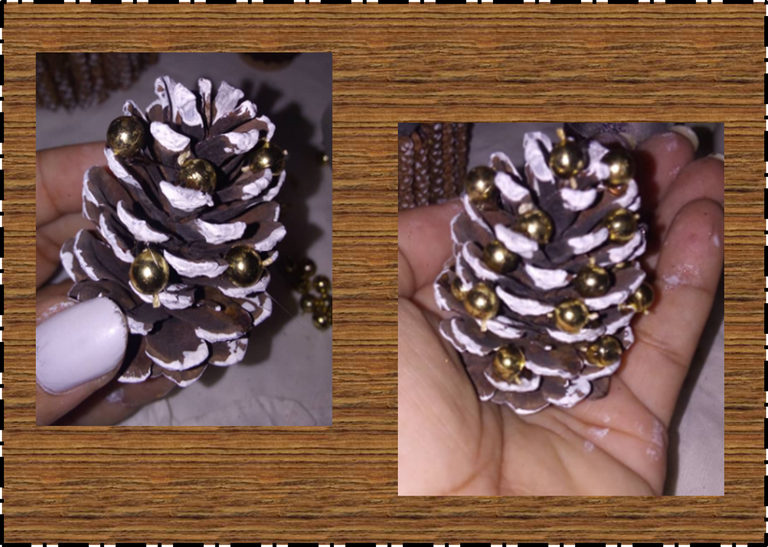
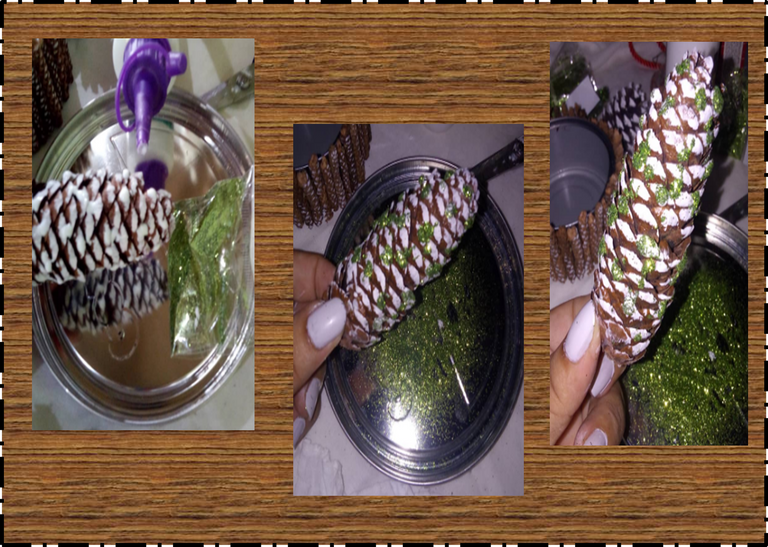
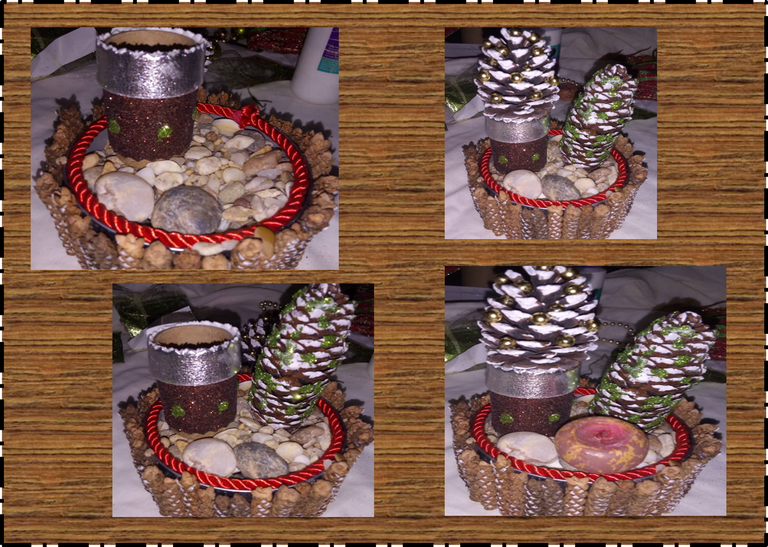
3.-Al pino mas pequeño los vamos a decorar con bolitas doradas. la cual iremos pegando entre las puntas, y a la piñita mas grande le colocaremos un poco de escarcha verde para darle brillo ya que para mi la navidad debe ser brillante.
3.-We are going to decorate the smallest pine with golden balls. which we will be gluing between the tips, and to the largest pineapple we will place a little green frost to give it shine since for me Christmas should be bright.
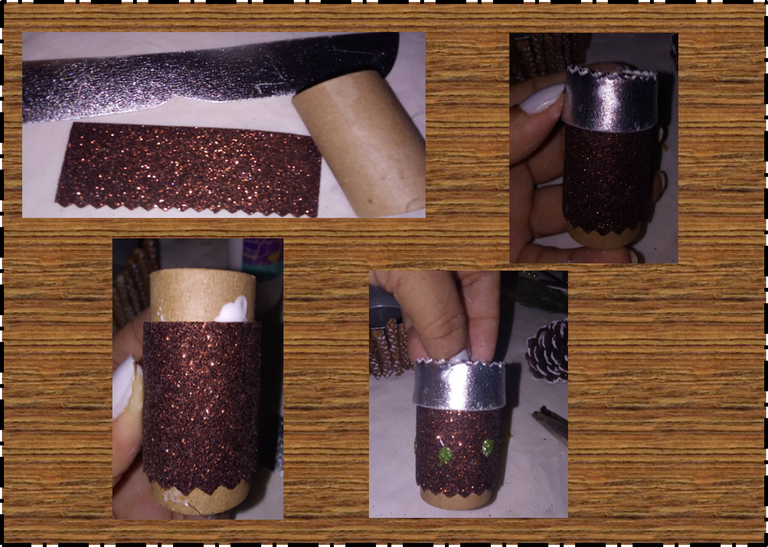
4.-Luego el rollito de cartón los vamos a decorar con foami marrón y plateado para que sea la base de la piñita mas pequeña y allí entonces formaremos un lindo árbol de navidad.
4.-Then the cardboard roll we are going to decorate with brown and silver foami so that it is the base of the smallest pineapple and there then we will form a beautiful Christmas tree.
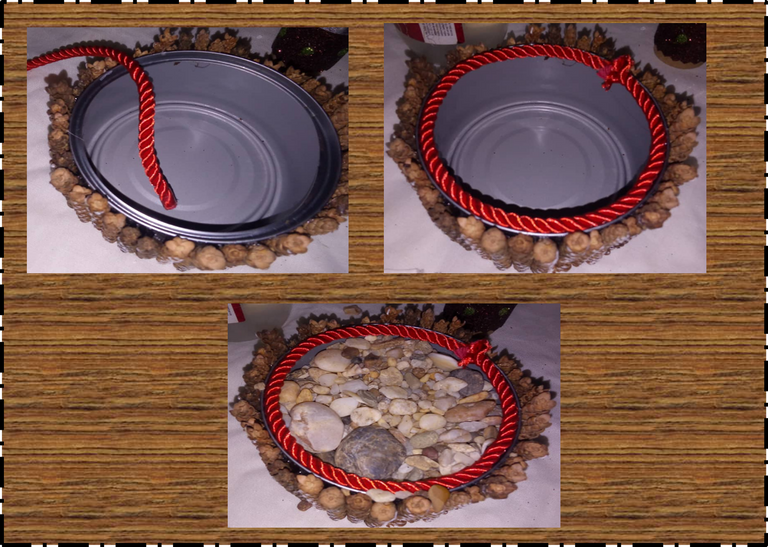
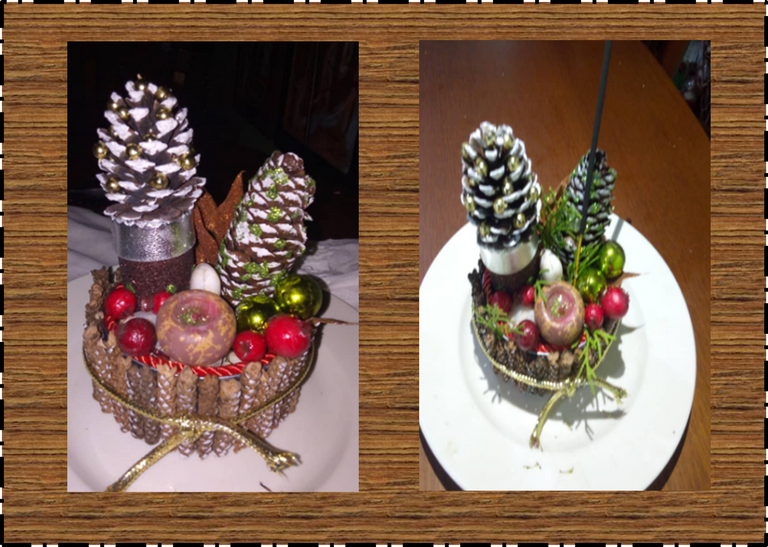
5.- Para ya ir terminando con mi proyecto, para la decoración del envase, tome un pedazo de cordón rojo y lo pegue por el borde de la lata, luego lo llene de piedras muy pequeñas que había recogido en una oportunidad en la playa para hacer una manualidad, Pegue en el envase los dos arbolitos, los cerezos, algunas bolitas verdes de navidad que estaban en desuso, pegue una mini velita que tengo de recuerdo de una vieja amiga,le amarre al envase un lindo cordón dorado y por ultimo le coloque unas ramitas naturales de pino. Vieron que hermoso me quedo. hay que poner a volar nuestra imaginación.
5.- To finish my project, to decorate the container, take a piece of red cord and stick it around the edge of the can, then fill it with very small stones that I had collected on an opportunity on the beach to Make a craft, Paste in the container the two little trees, the cherry trees, some green Christmas balls that were in disuse, paste a mini candle that I have as a souvenir of an old friend, tie a nice golden cord to the container and finally place some natural pine twigs. They saw how beautiful I am. we must let our imagination fly.
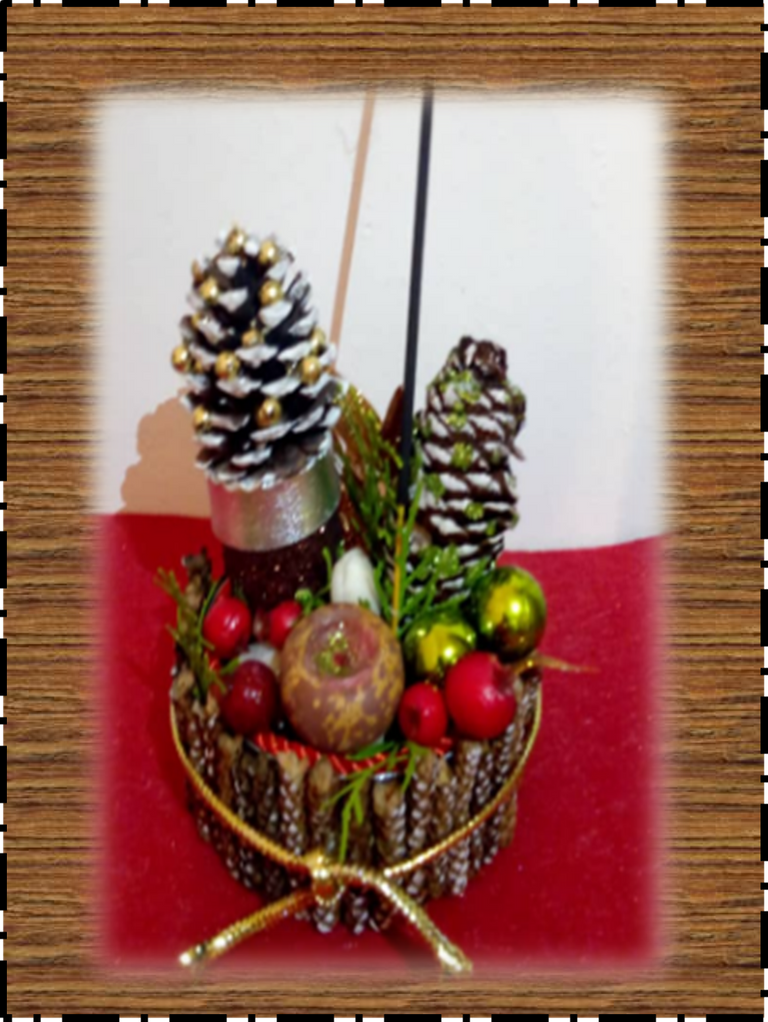
Listo terminado mi proyecto del día de hoy, espero les haya gustado. !Hasta la próxima!
Ready finished my project today, I hope you liked it. ! until next time!

El fondo de la foto principal fue tomada de la siguiente fuente: https://www.solofondos.com/fondos-navidad-para-fotos.html
The background of the main photo was taken from the following source: https://www.solofondos.com/fondos-navidad-para-fotos.html
Las fotografías fueron tomadas con un teléfono inteligente HUAWE Y5, el texto fue traducido al inglés con el traductor de Google.
The photographs were taken with a HUAWE Y5 smartphone, the text was translated into English with the Google translator.
Te quedo hermoso amiga @marifranci73, gracias por compartir tu linda creacion. Saludos
Gracias amiga floreudys79 . Feliz noche