Saludos apreciados amigos de esta creativa comunidad, deseo estén muy bien.
Greetings dear friends of this creative community, I wish you all the best.

Es un placer para mí estar acá compartiendo con ustedes, hoy quiero presentarles mi participación en el extraordinario concurso que lleva a cabo esta gran comunidad de Hive Diy titulado "Amor y Pasión " y desde ya, aprovecho la oportunidad para invitar a mis queridas amigas @yurimar, @editatovar y @soyalex para que nos muestren su participación y hagan con sus propias manos algún regalito que deseen darle a alguien especial en este San Valentín. Acá les dejo el link del concurso 👇.
It is a pleasure for me to be here sharing with you, today I want to present my participation in the extraordinary contest carried out by this great community of Hive Diy entitled "Love and Passion" and from now on, I take this opportunity to invite my dear friends @yurimar, @editatovar and @soyalex to show us their participation and make with their own hands a gift they want to give to someone special this Valentine's Day. Here I leave the link of the contest 👇.
Ahora sí amigos Hivers les hablaré un poco de mi participación, este obsequio que hoy les compartiré va cargado de mucho sentimiento, emoción y amor, va dirigido a mi amado esposo, ese hombre que a pesar de que vivimos juntos se roba mis suspiros y mis pensamientos, quise hacer mi participación hoy 13 de febrero ya que es un día súper especial para ambos, hoy estamos cumpliendo 5 años de nuestra unión, desde ese día que decidimos ser novios y amarnos por siempre, han pasado 5 años y mi amor por él está intacto, cada día lo amo más y quiero hacer este día especial obsequiando este hermoso adorno elaborado con mis propias manos en señal de mi amor. Para la elaboración de este adorno usé los siguientes materiales y herramientas.
Now yes Hivers friends I will tell you a little about my participation, this gift that I will share today is loaded with a lot of feeling, emotion and love, it is addressed to my beloved husband, that man who despite that we live together steals my sighs and my thoughts, I wanted to make my participation today February 13 since it is a super special day for both of us, today we are celebrating 5 years of our union, since that day we decided to be boyfriends and love each other forever , 5 years have passed and my love for him is intact, every day I love him more and I want to make this day special by giving this beautiful ornament made with my own hands as a sign of my love. For the elaboration of this ornament I used the following materials and tools.
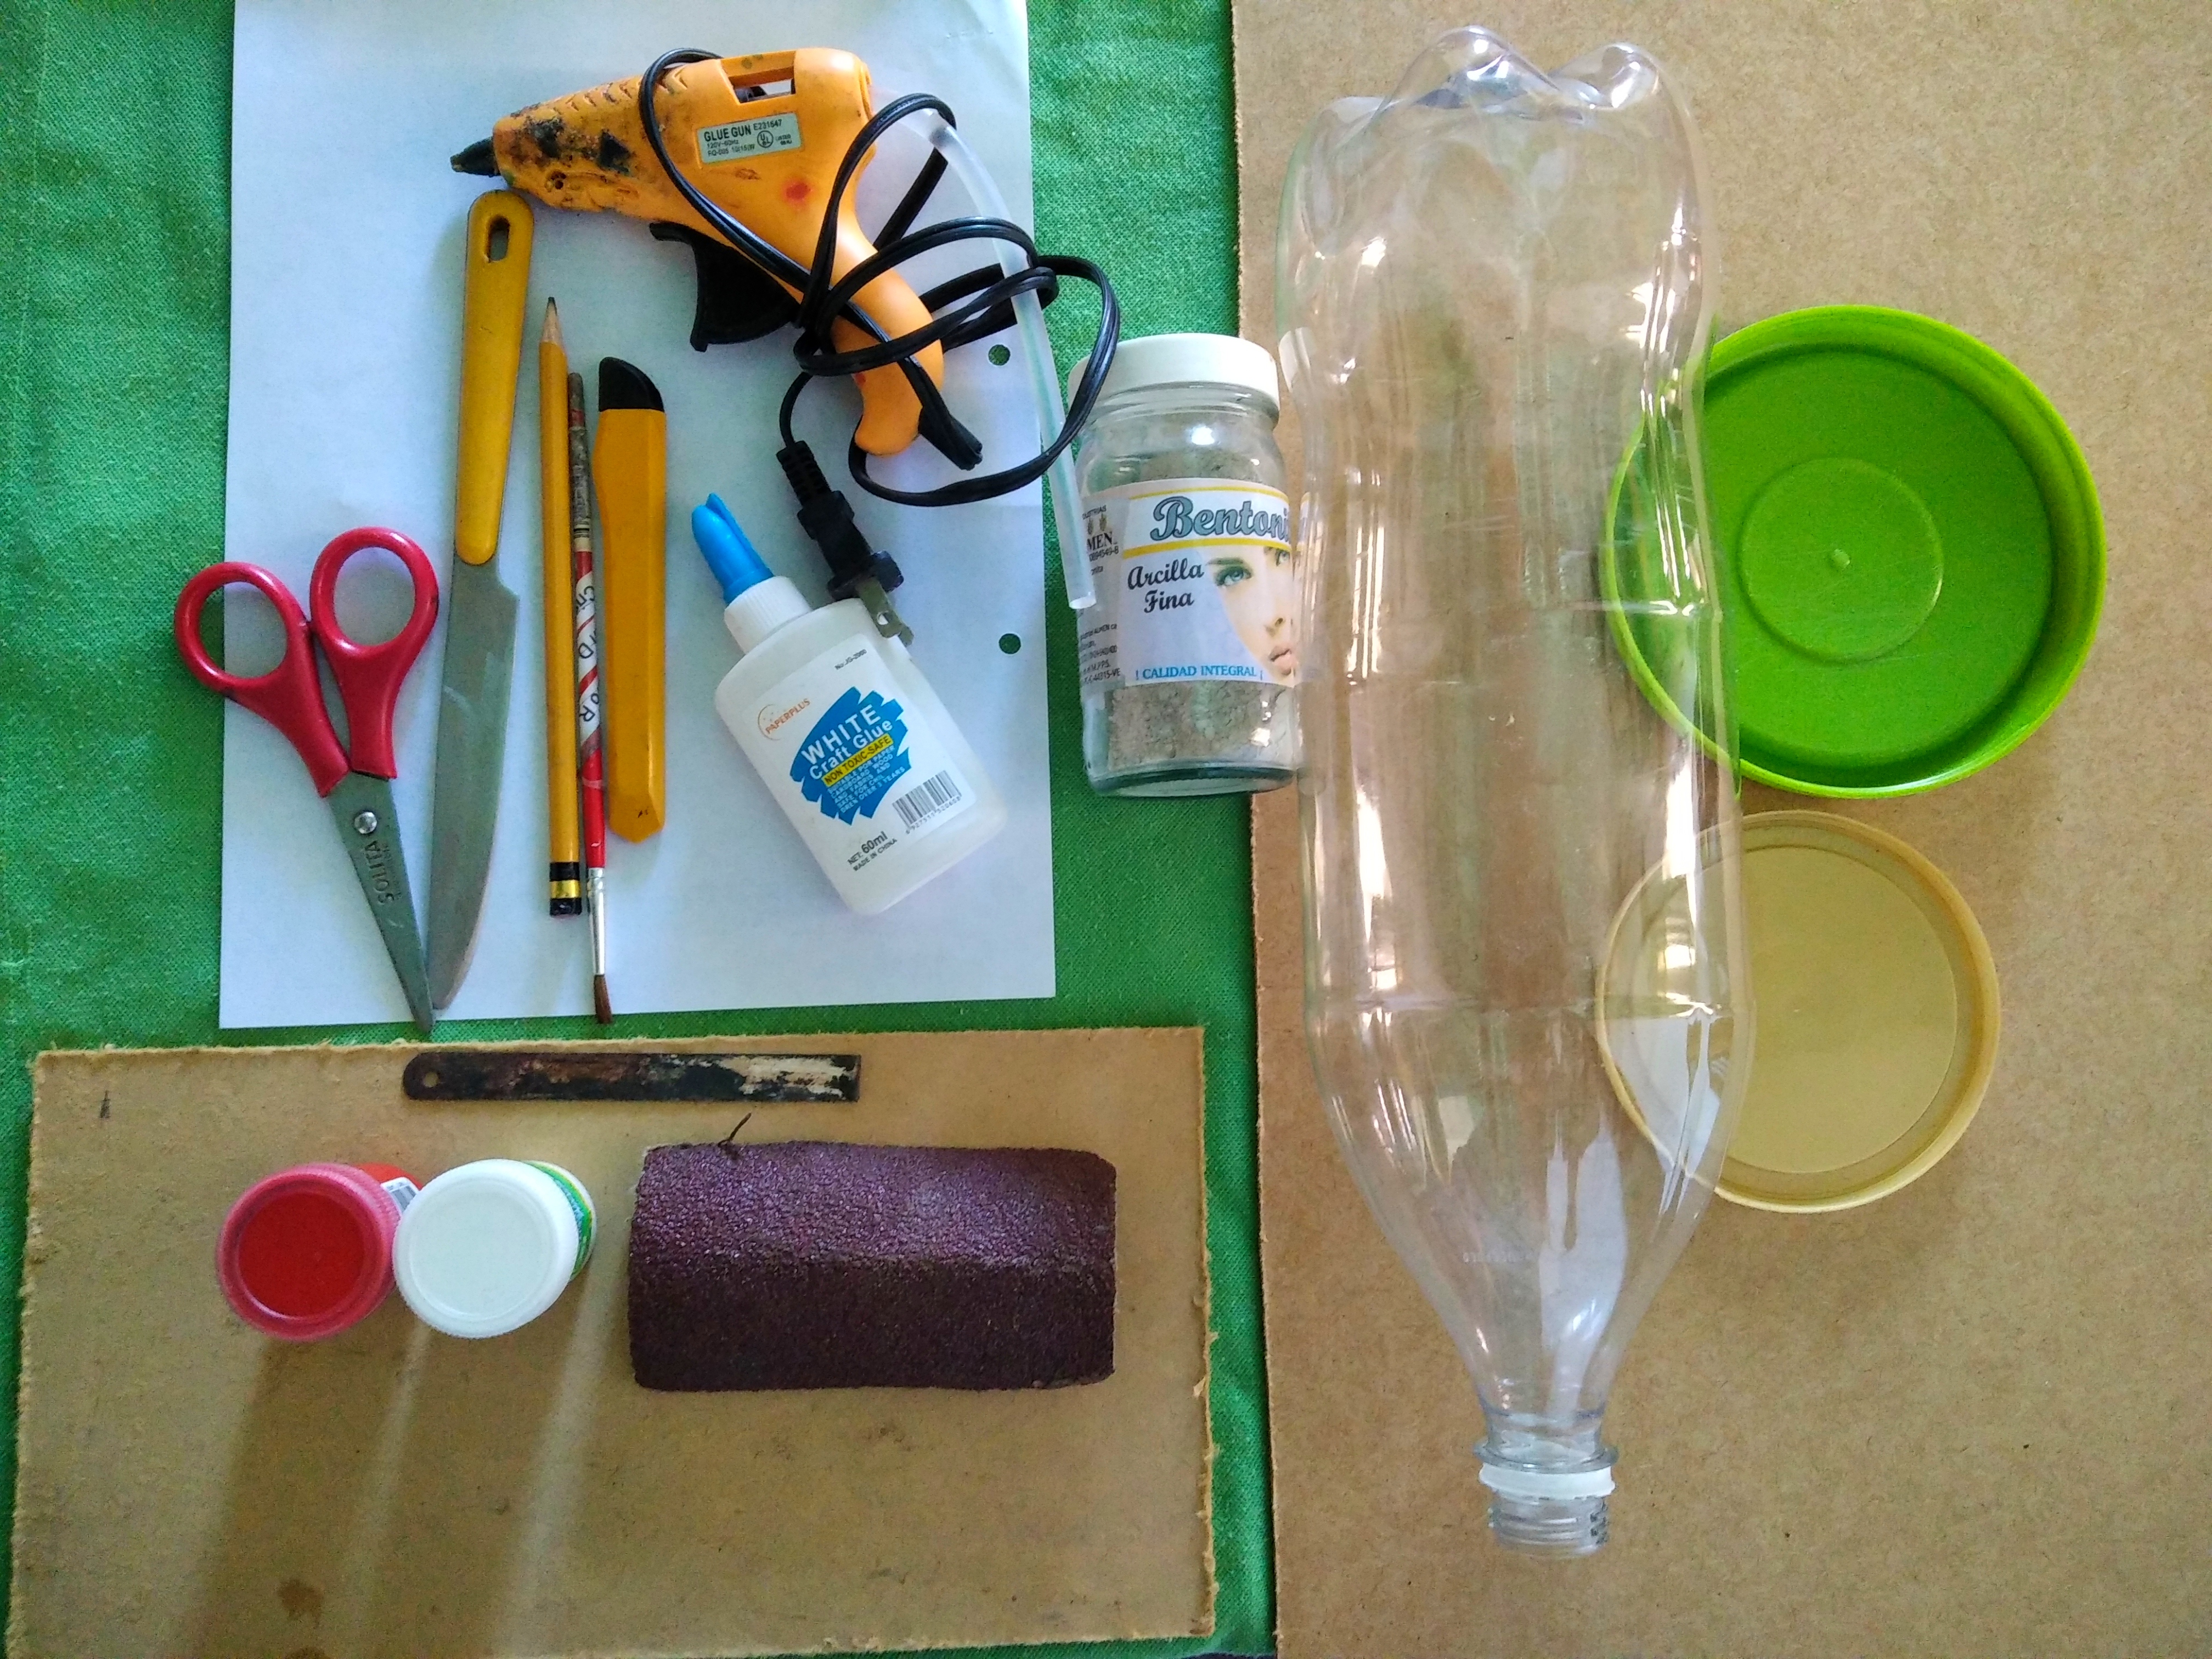
Materiales y Herramientas:
Materials and Tools:
🖊️ Madera de (corazones).
🖊️ Madera de (Soporte).
🖊️ Arcilla.
🖊️ Perola de refresco.
🖊️ Pintura blanca, roja y amarilla.
🖊️ Pincel.
🖊️ Pega blanca.
🖊️ tijera.
🖊️ Lápiz de grafito.
🖊️Regla.
🖊️ Lija.
🖊️ Hoja de segueta.
🖊️ Exacto.
🖊️ Pistola de silicón y silicón en barra.
🖊️Cuchillo.
🖊️ Palitos de altura.
🖊️ Tapas para moldes.
🖊️ Wood of (hearts).🖊️ Wood from (Support).🖊️ Clay.🖊️ Soda pot.🖊️ White, red, and yellow paint.🖊️ Brush.🖊️ White paste.🖊️ scissors.🖊️ Graphite pencil.🖊️Rule.🖊️ Sandpaper.🖊️ Tracking sheet.🖊️ Exactly.🖊️ Silicone gun and silicone stick.🖊️Knife.🖊️ Height sticks.🖊️ Lids for molds.
Pasemos ahora al procedimiento, el paso a paso de como elaborar este hermoso adorno para regalar a mi esposo en este San Valentín.
Now let's move on to the procedure, the step by step of how to make this beautiful ornament to give to my husband this Valentine's Day.
Elaboración.
Crafting.
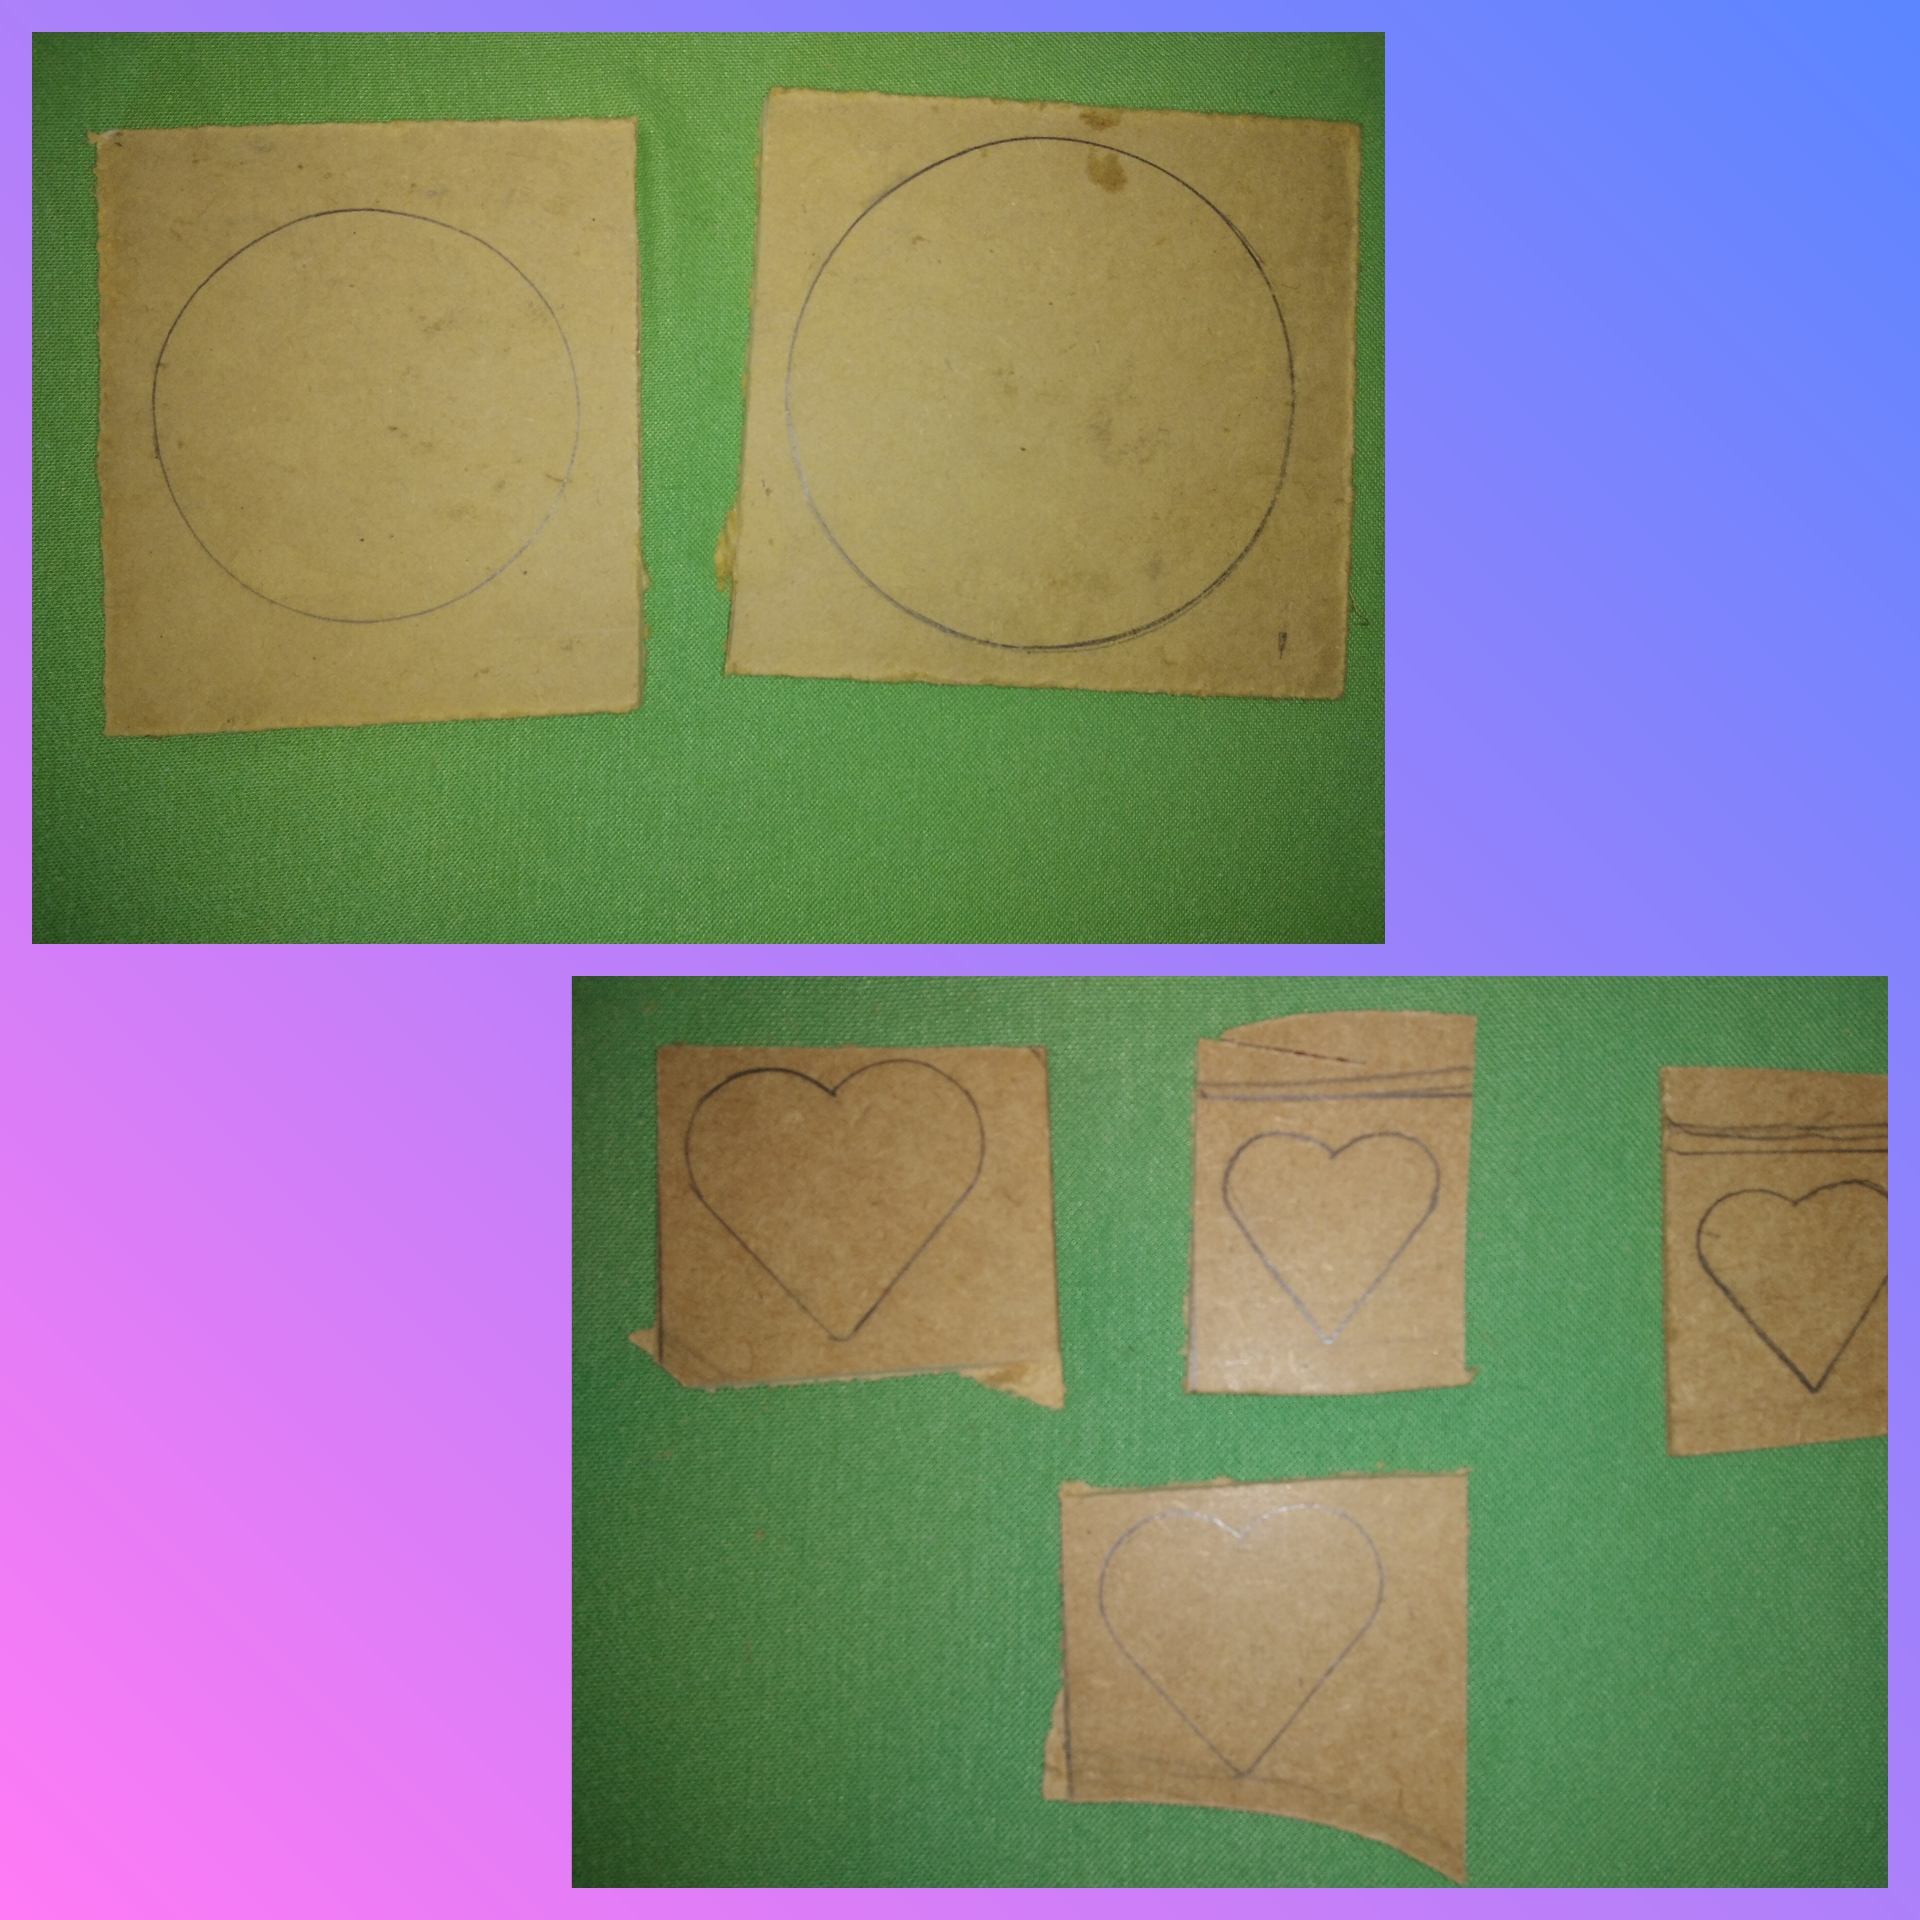
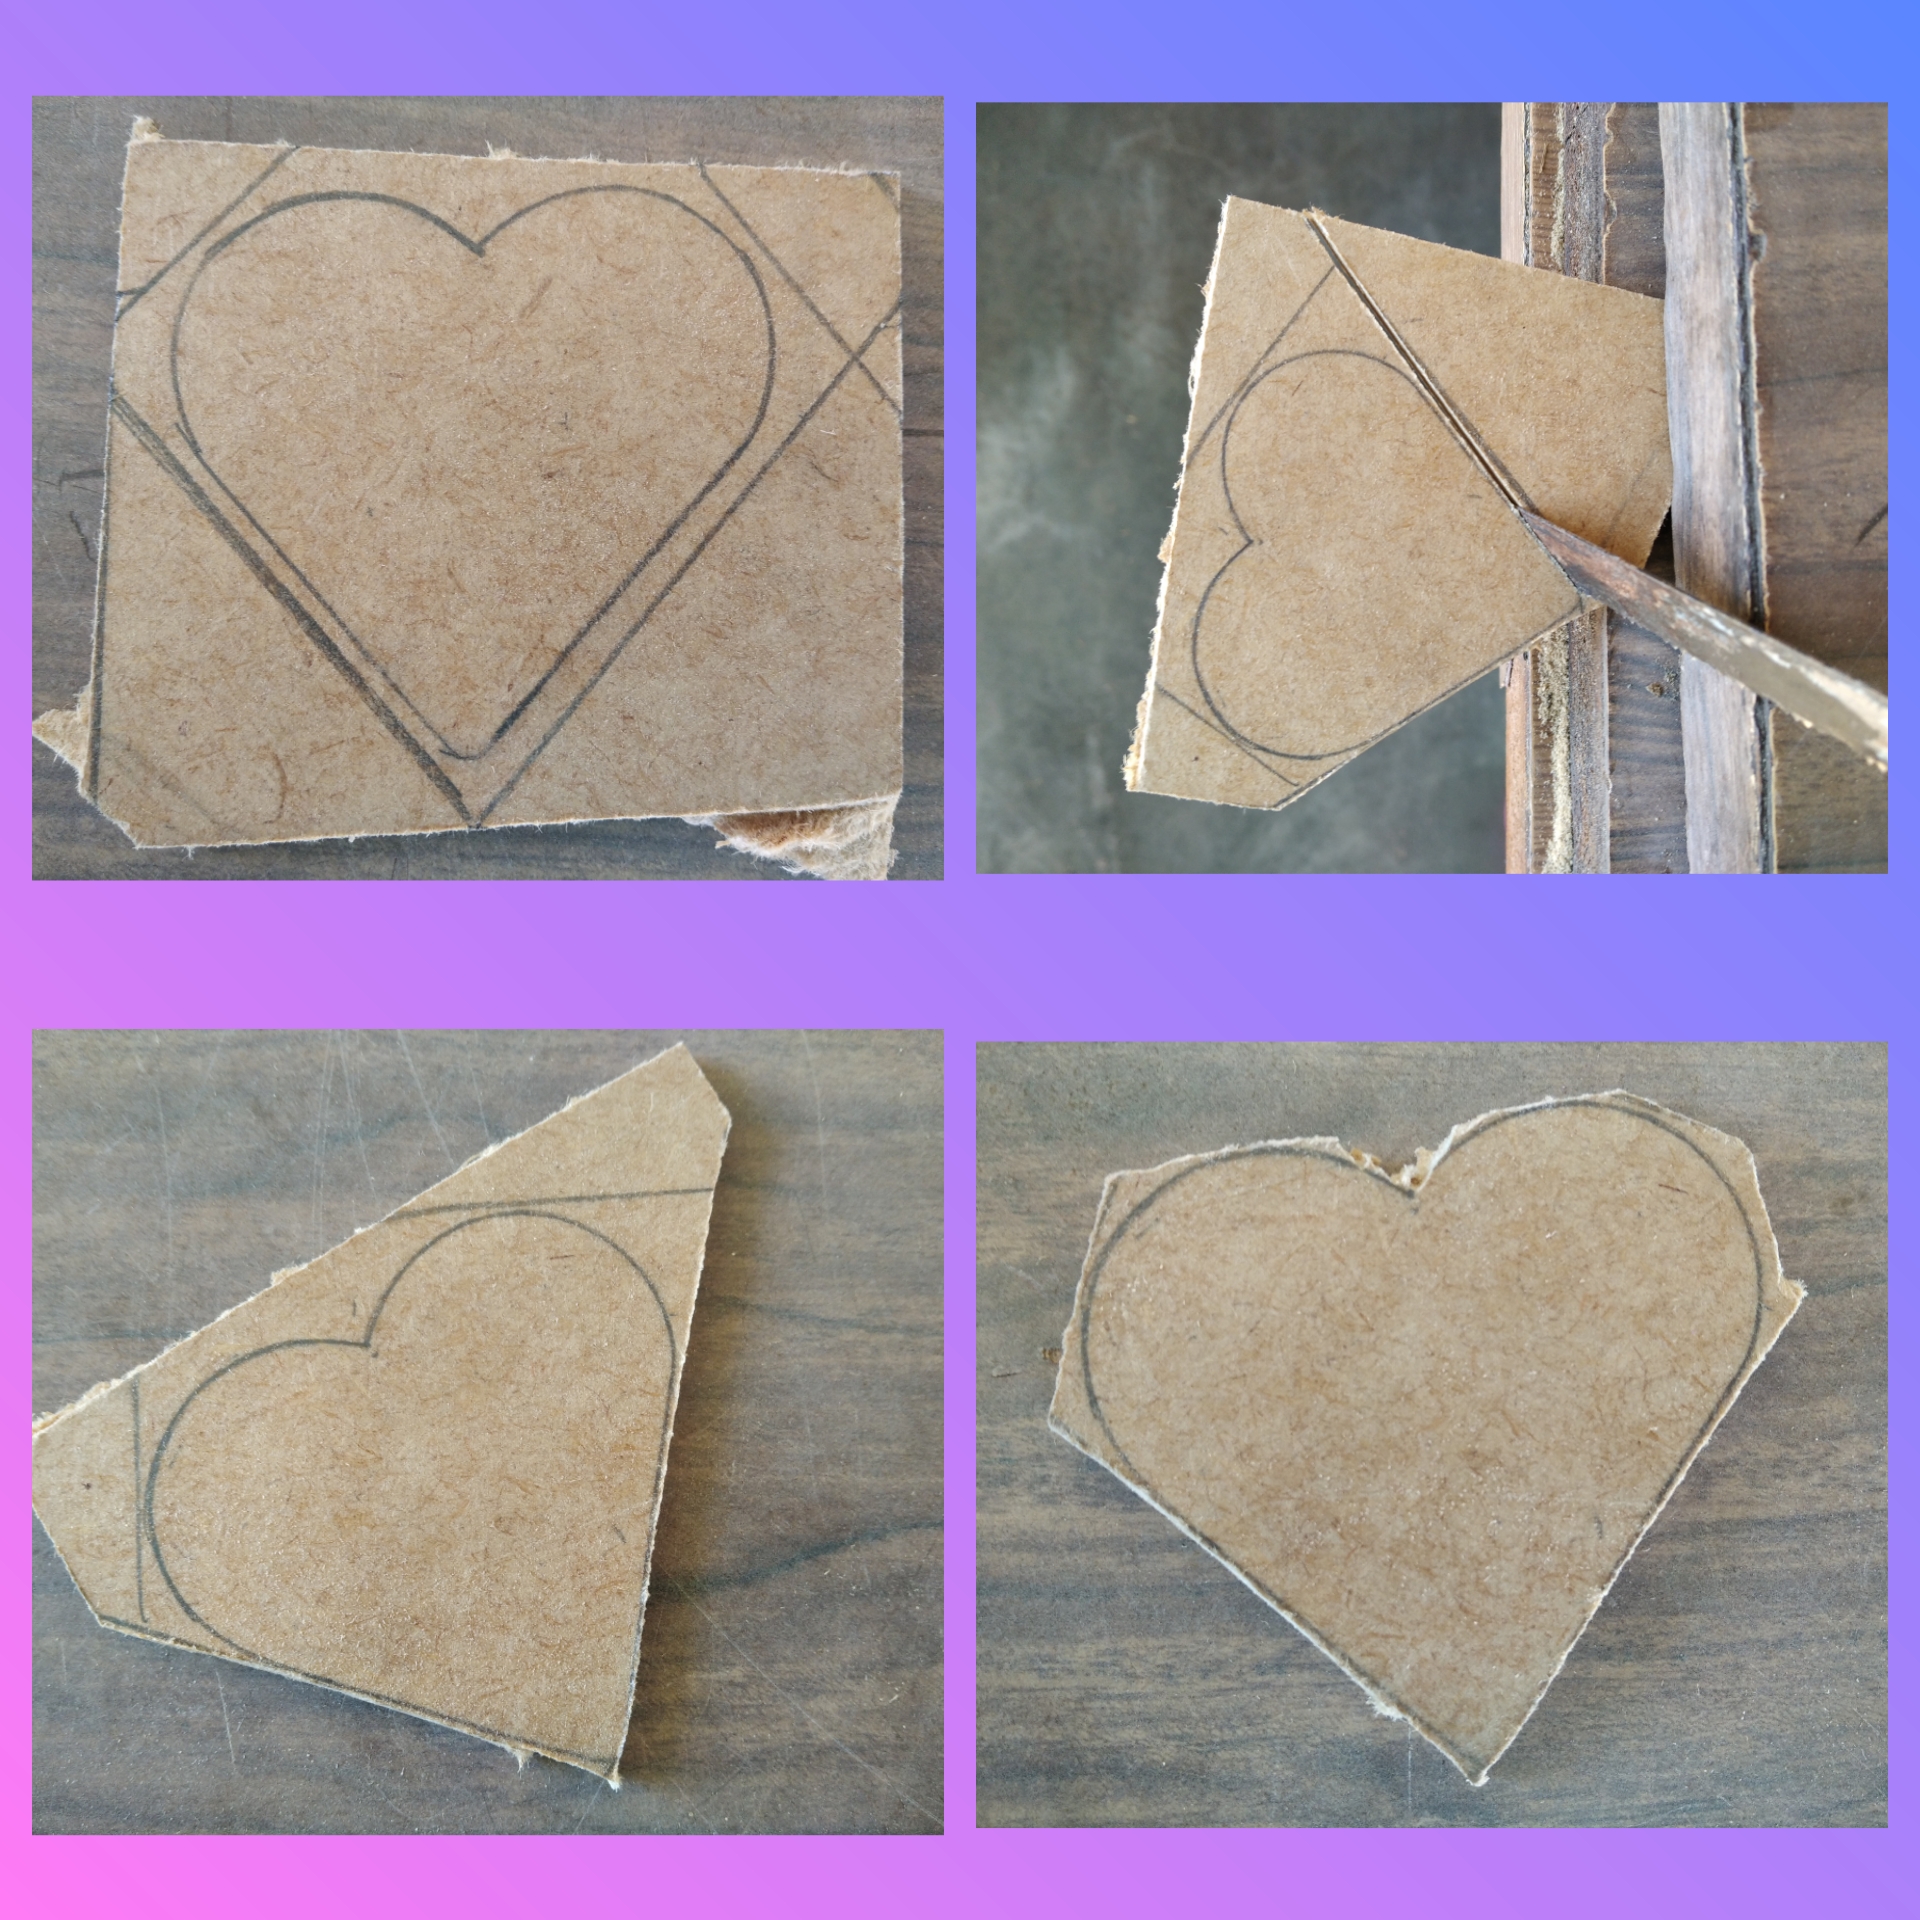
Paso 1.
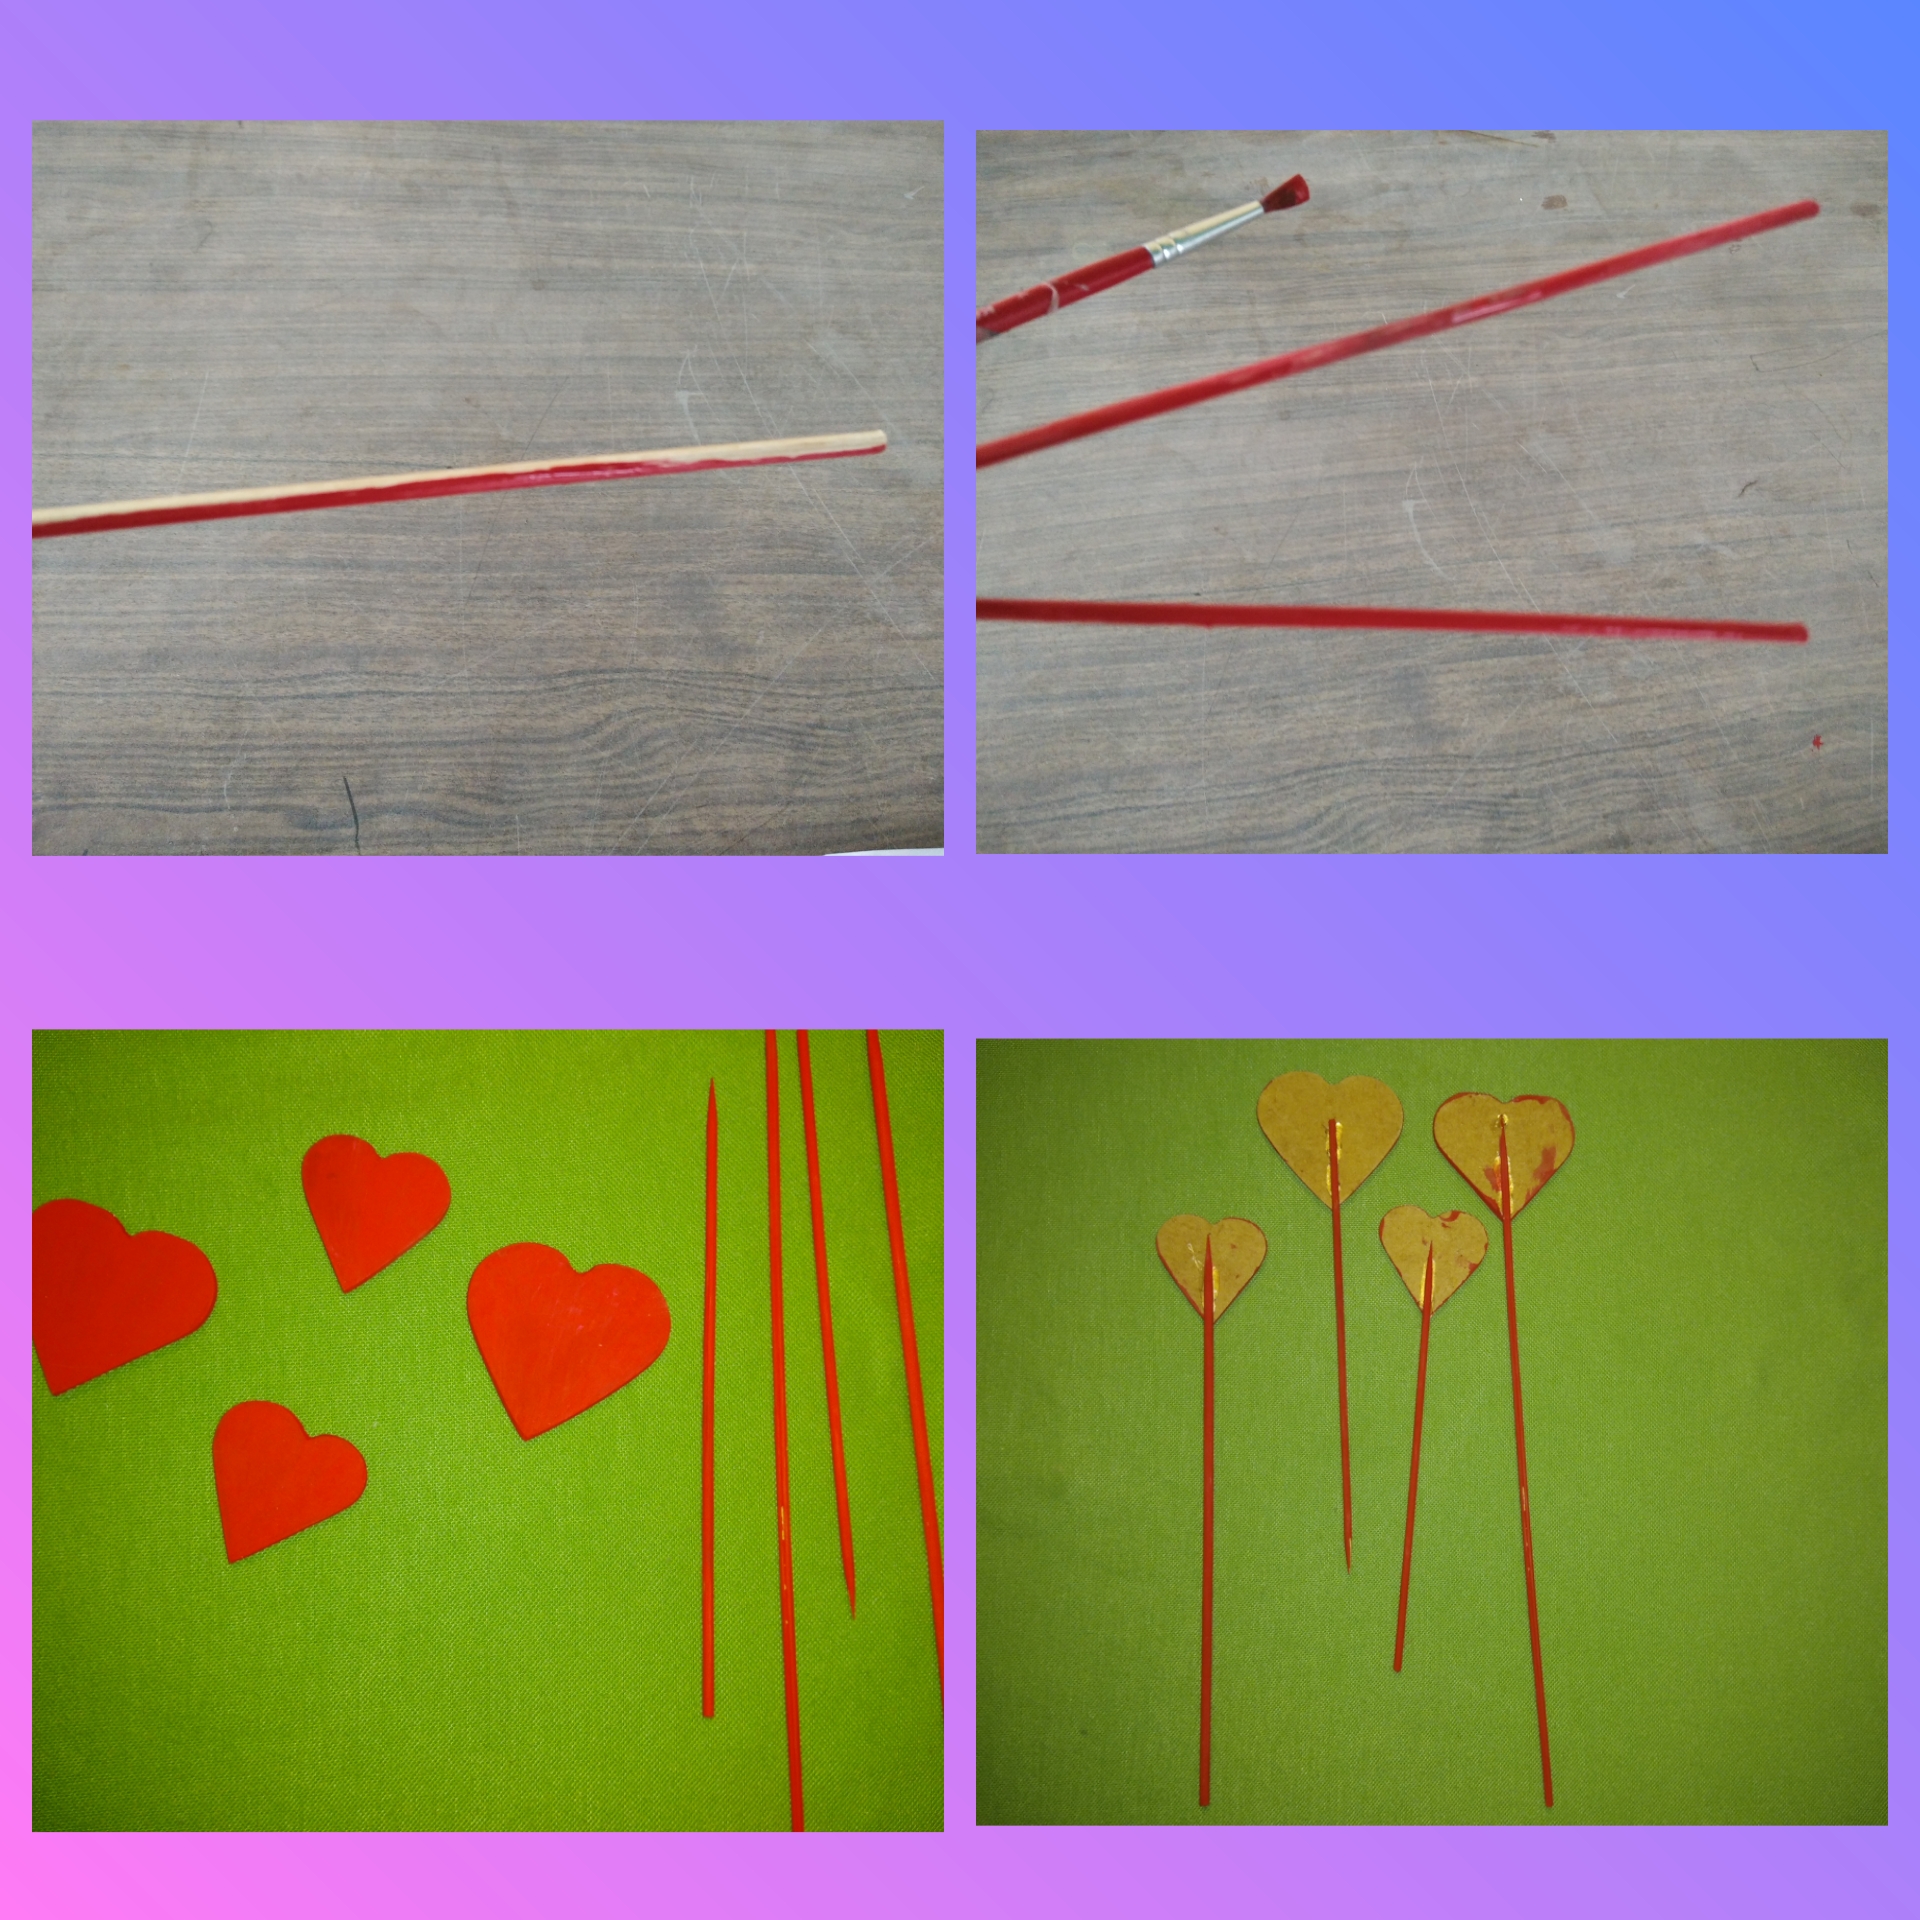
Con ayuda de los moldes voy a dibujar las 2 bases que serán el soporte de este adorno, 1 más grande de 13 cm y la más pequeña de 10 cm. Luego también voy a dibujar los 4 corazones 2 más grandes de aproximadamente 5 cm de ancho y 2 más pequeños de 2,5 cm.
Step 1.With the help of the molds I am going to draw the 2 bases that will be the support of this ornament, 1 larger of 13 cm and the smaller one of 10 cm. Then I'm also going to draw the 4 hearts 2 larger about 5cm wide and 2 smaller about 2.5cm.

Paso 2.
Ahora con ayuda de la segueta voy a separar las dos bases y los 4 corazones, quedando de esta manera.
Step 2.Now with the help of the hacksaw I am going to separate the two bases and the 4 hearts, leaving it this way.
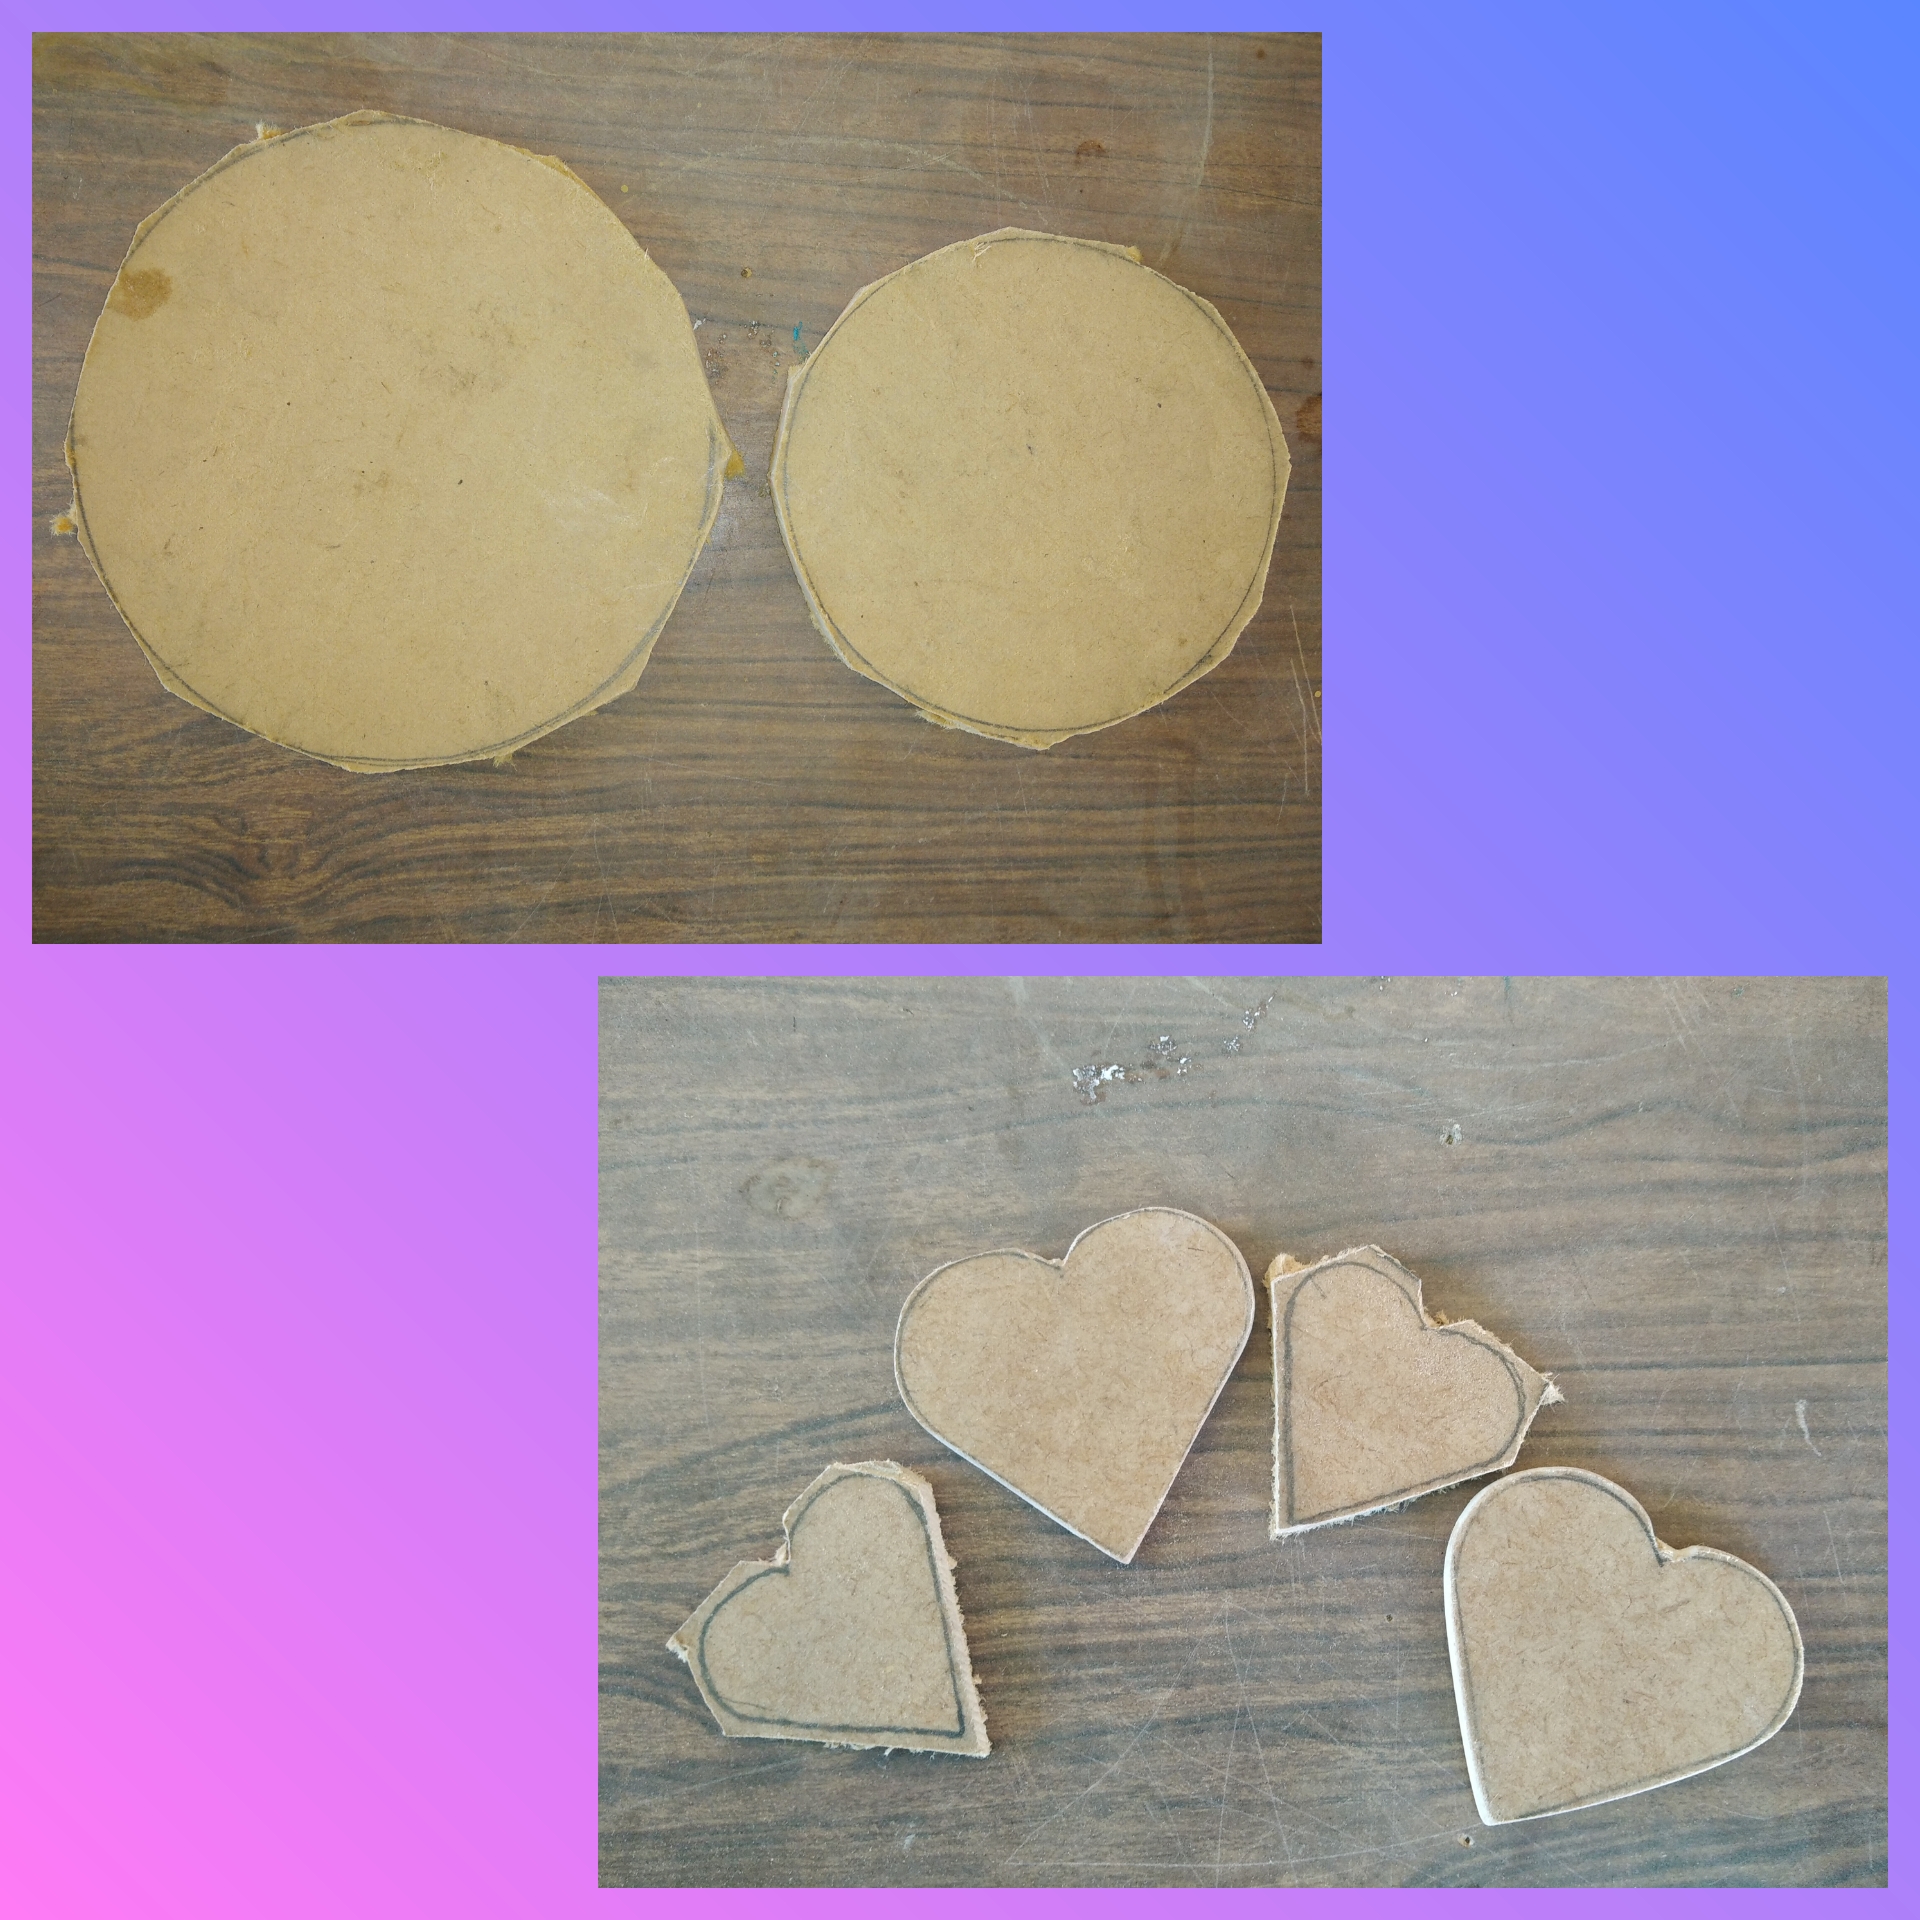
Paso 3.
En este siguiente paso con la regla vamos a marcar las partes que sobresalen del dibujo que se hizo anteriormente y con la segueta vamos a ir cortando los corazones y las bases en forma de círculo para darle forma, cortamos y cortamos poco a poco con cuidado para que nuestras piezas no se dañen y así poder obtener el resultado deseado.
Step 3.In this next step with the ruler we are going to mark the parts that protrude from the drawing that was made previously and with the hacksaw we are going to cut the hearts and the bases in the shape of a circle to give it shape , we cut and cut little by little carefully so that our pieces are not damaged and thus be able to obtain the desired result.
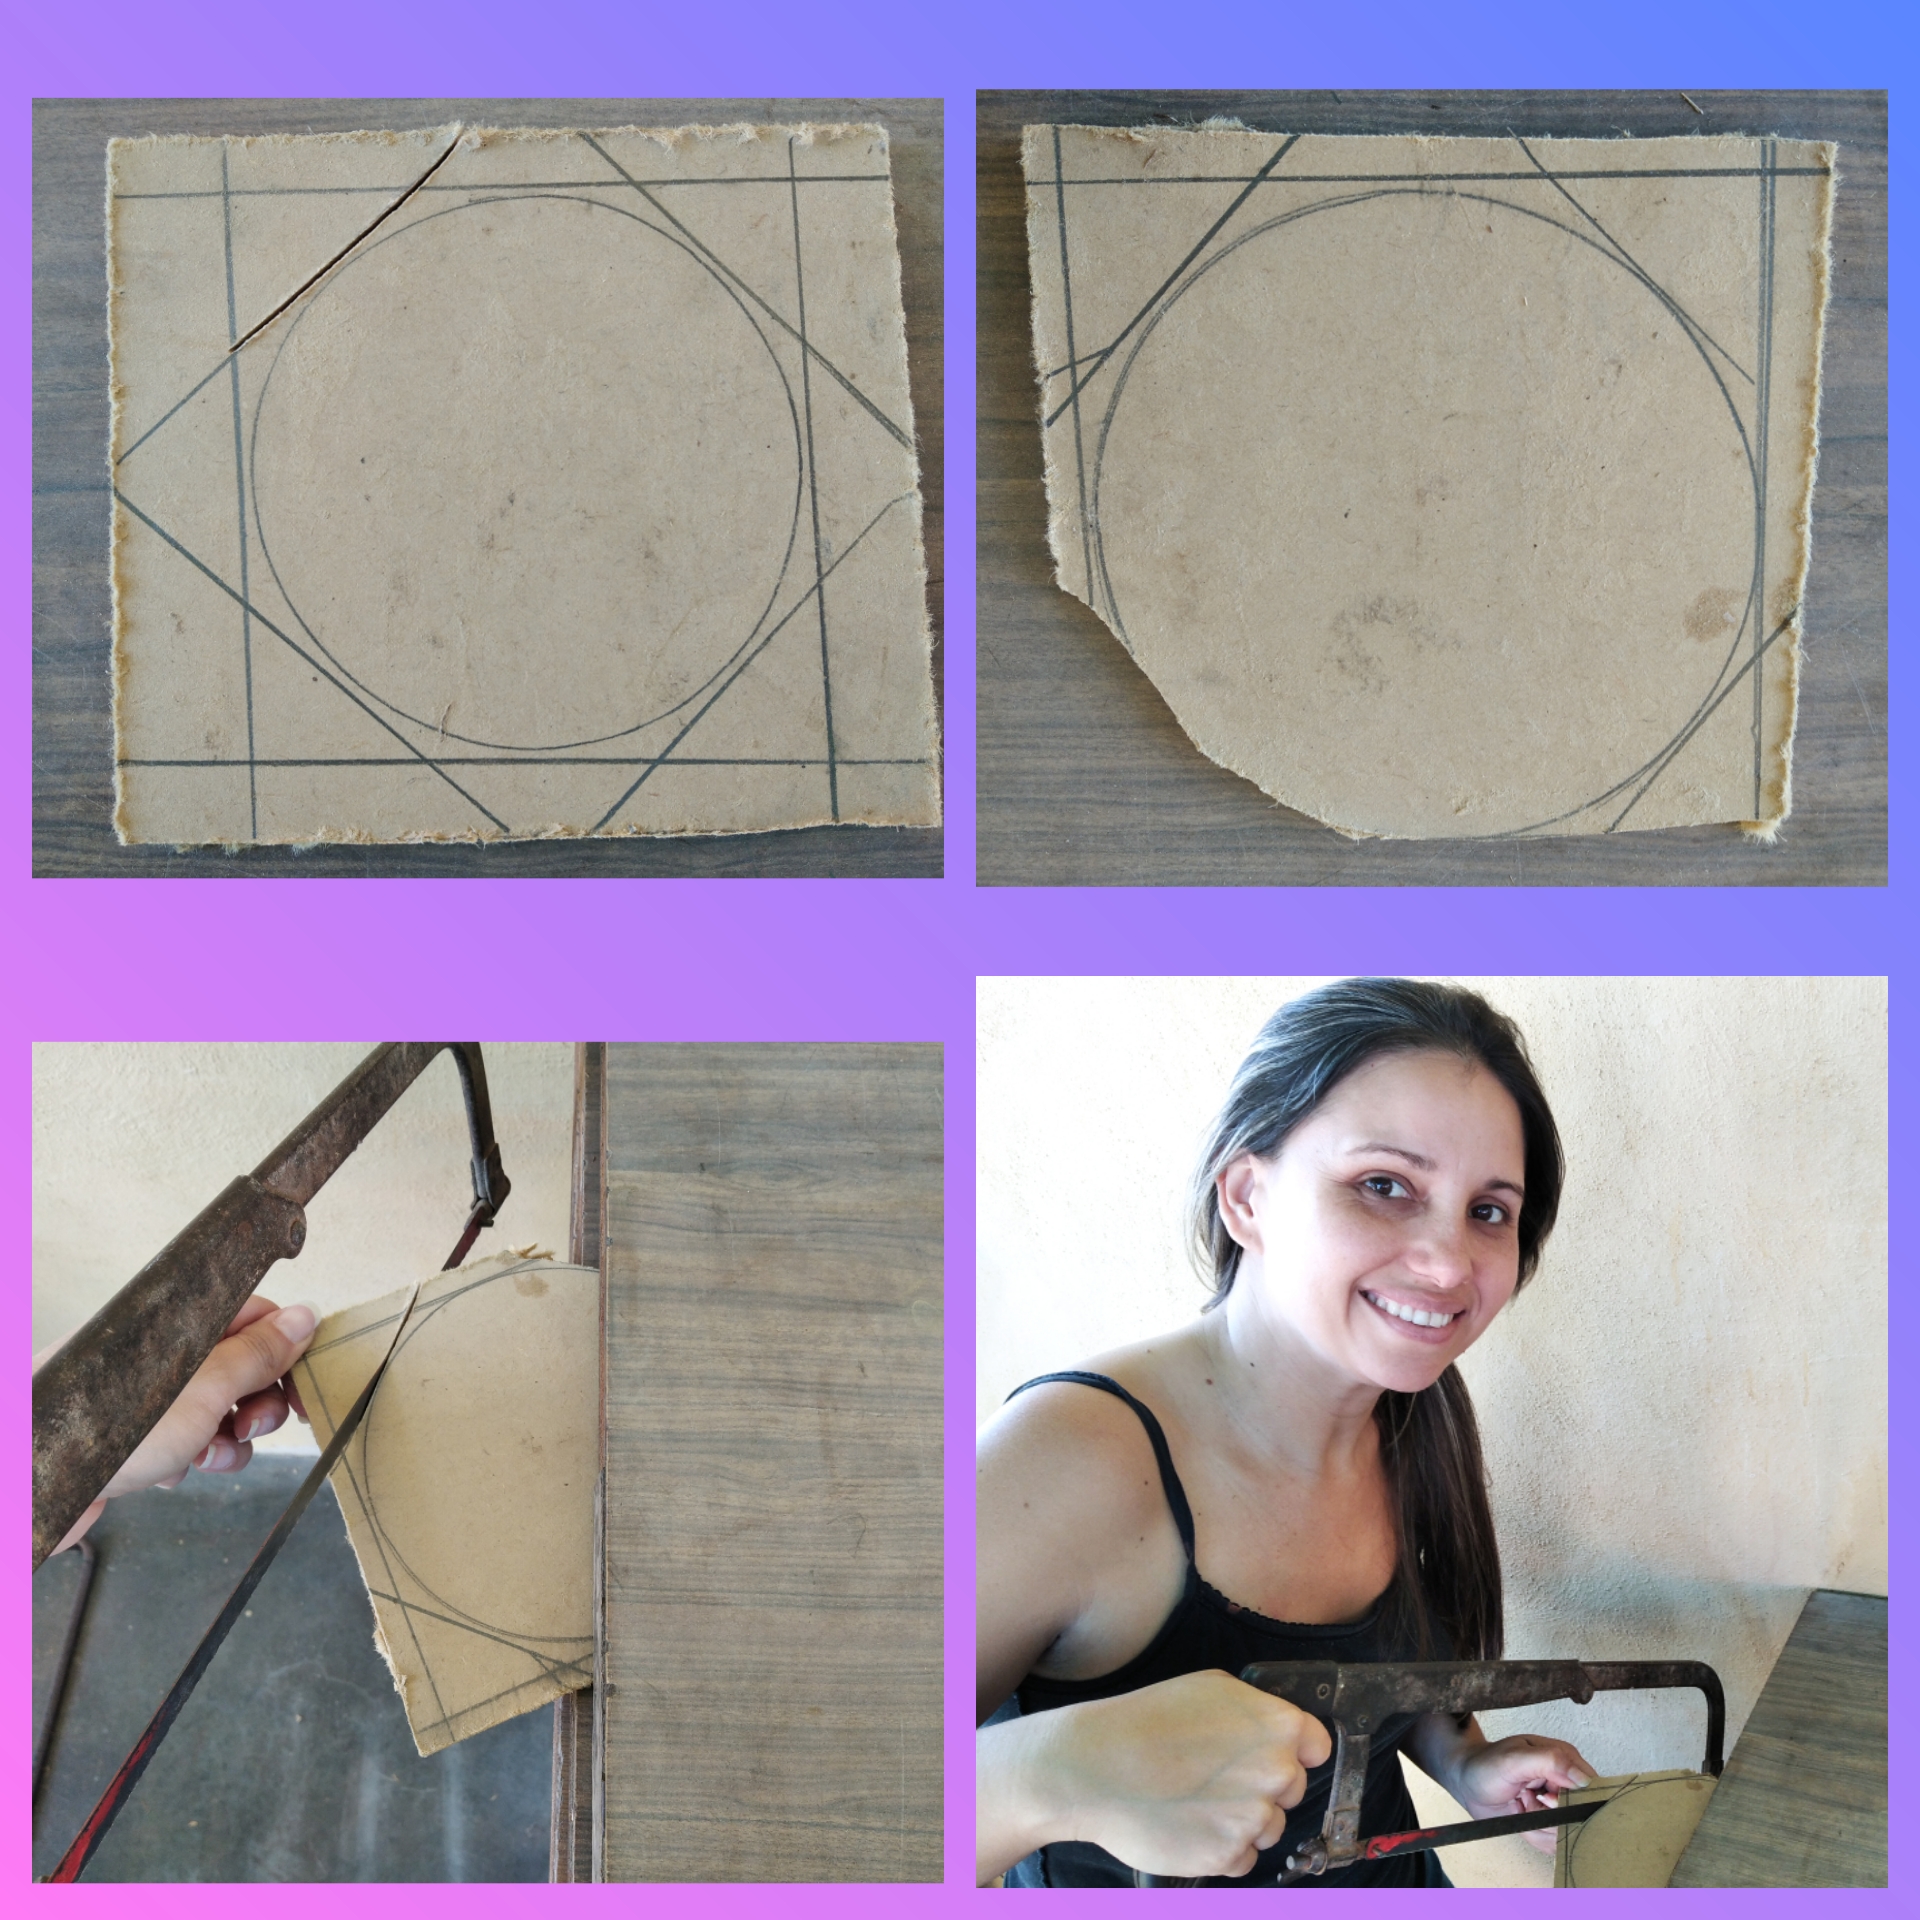
Quedarían de esta manera como lo apreciamos en la imagen.
They would stay this way as we can see in the image.
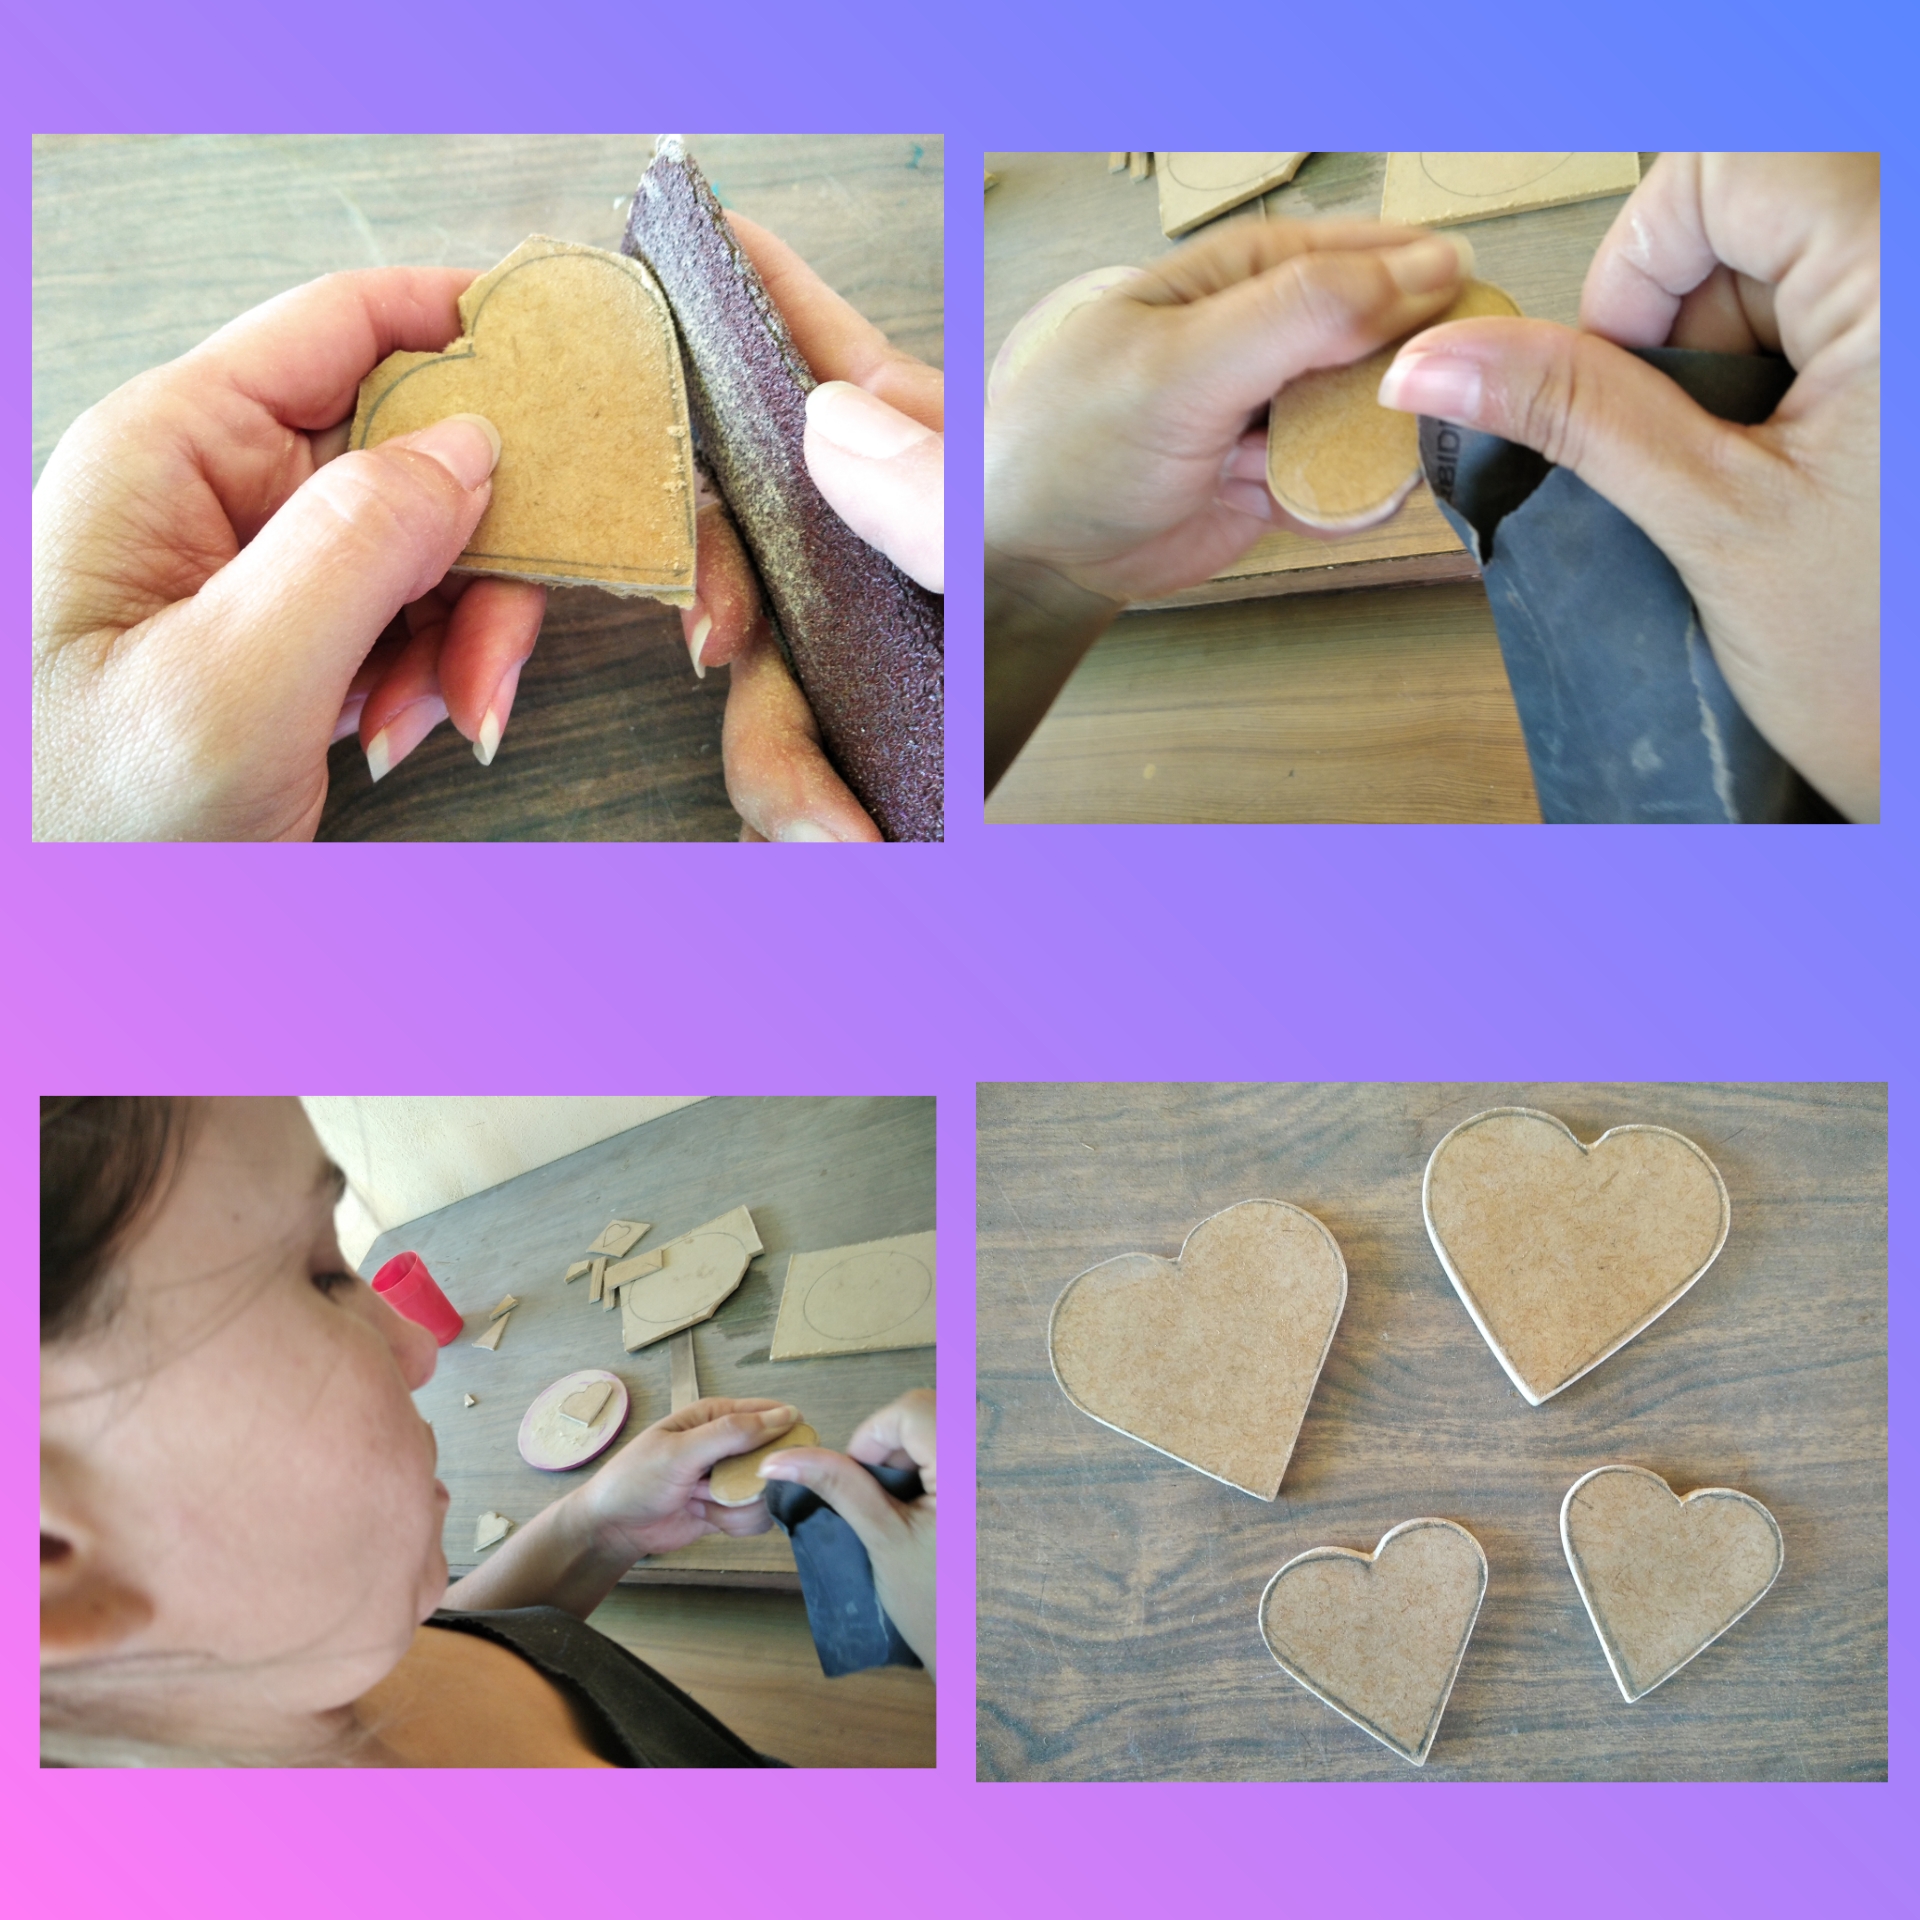
Paso 4.
Ahora con la lija vamos a frotar los bordes de cada corazón y el borde de cada base de madera que hicimos, este proceso se hace con el fin de suavisar y darle un mejor acabado a la madera eliminando con el lijado los grumos e imperfectos que pueda tener la pieza, productos del corte.
Step 4.Now with the sandpaper we are going to rub the edges of each heart and the edge of each wooden base that we made, this process is done in order to smooth and give the wood a better finish eliminating with the sanding the lumps and imperfections that the piece may have, products of the cut.
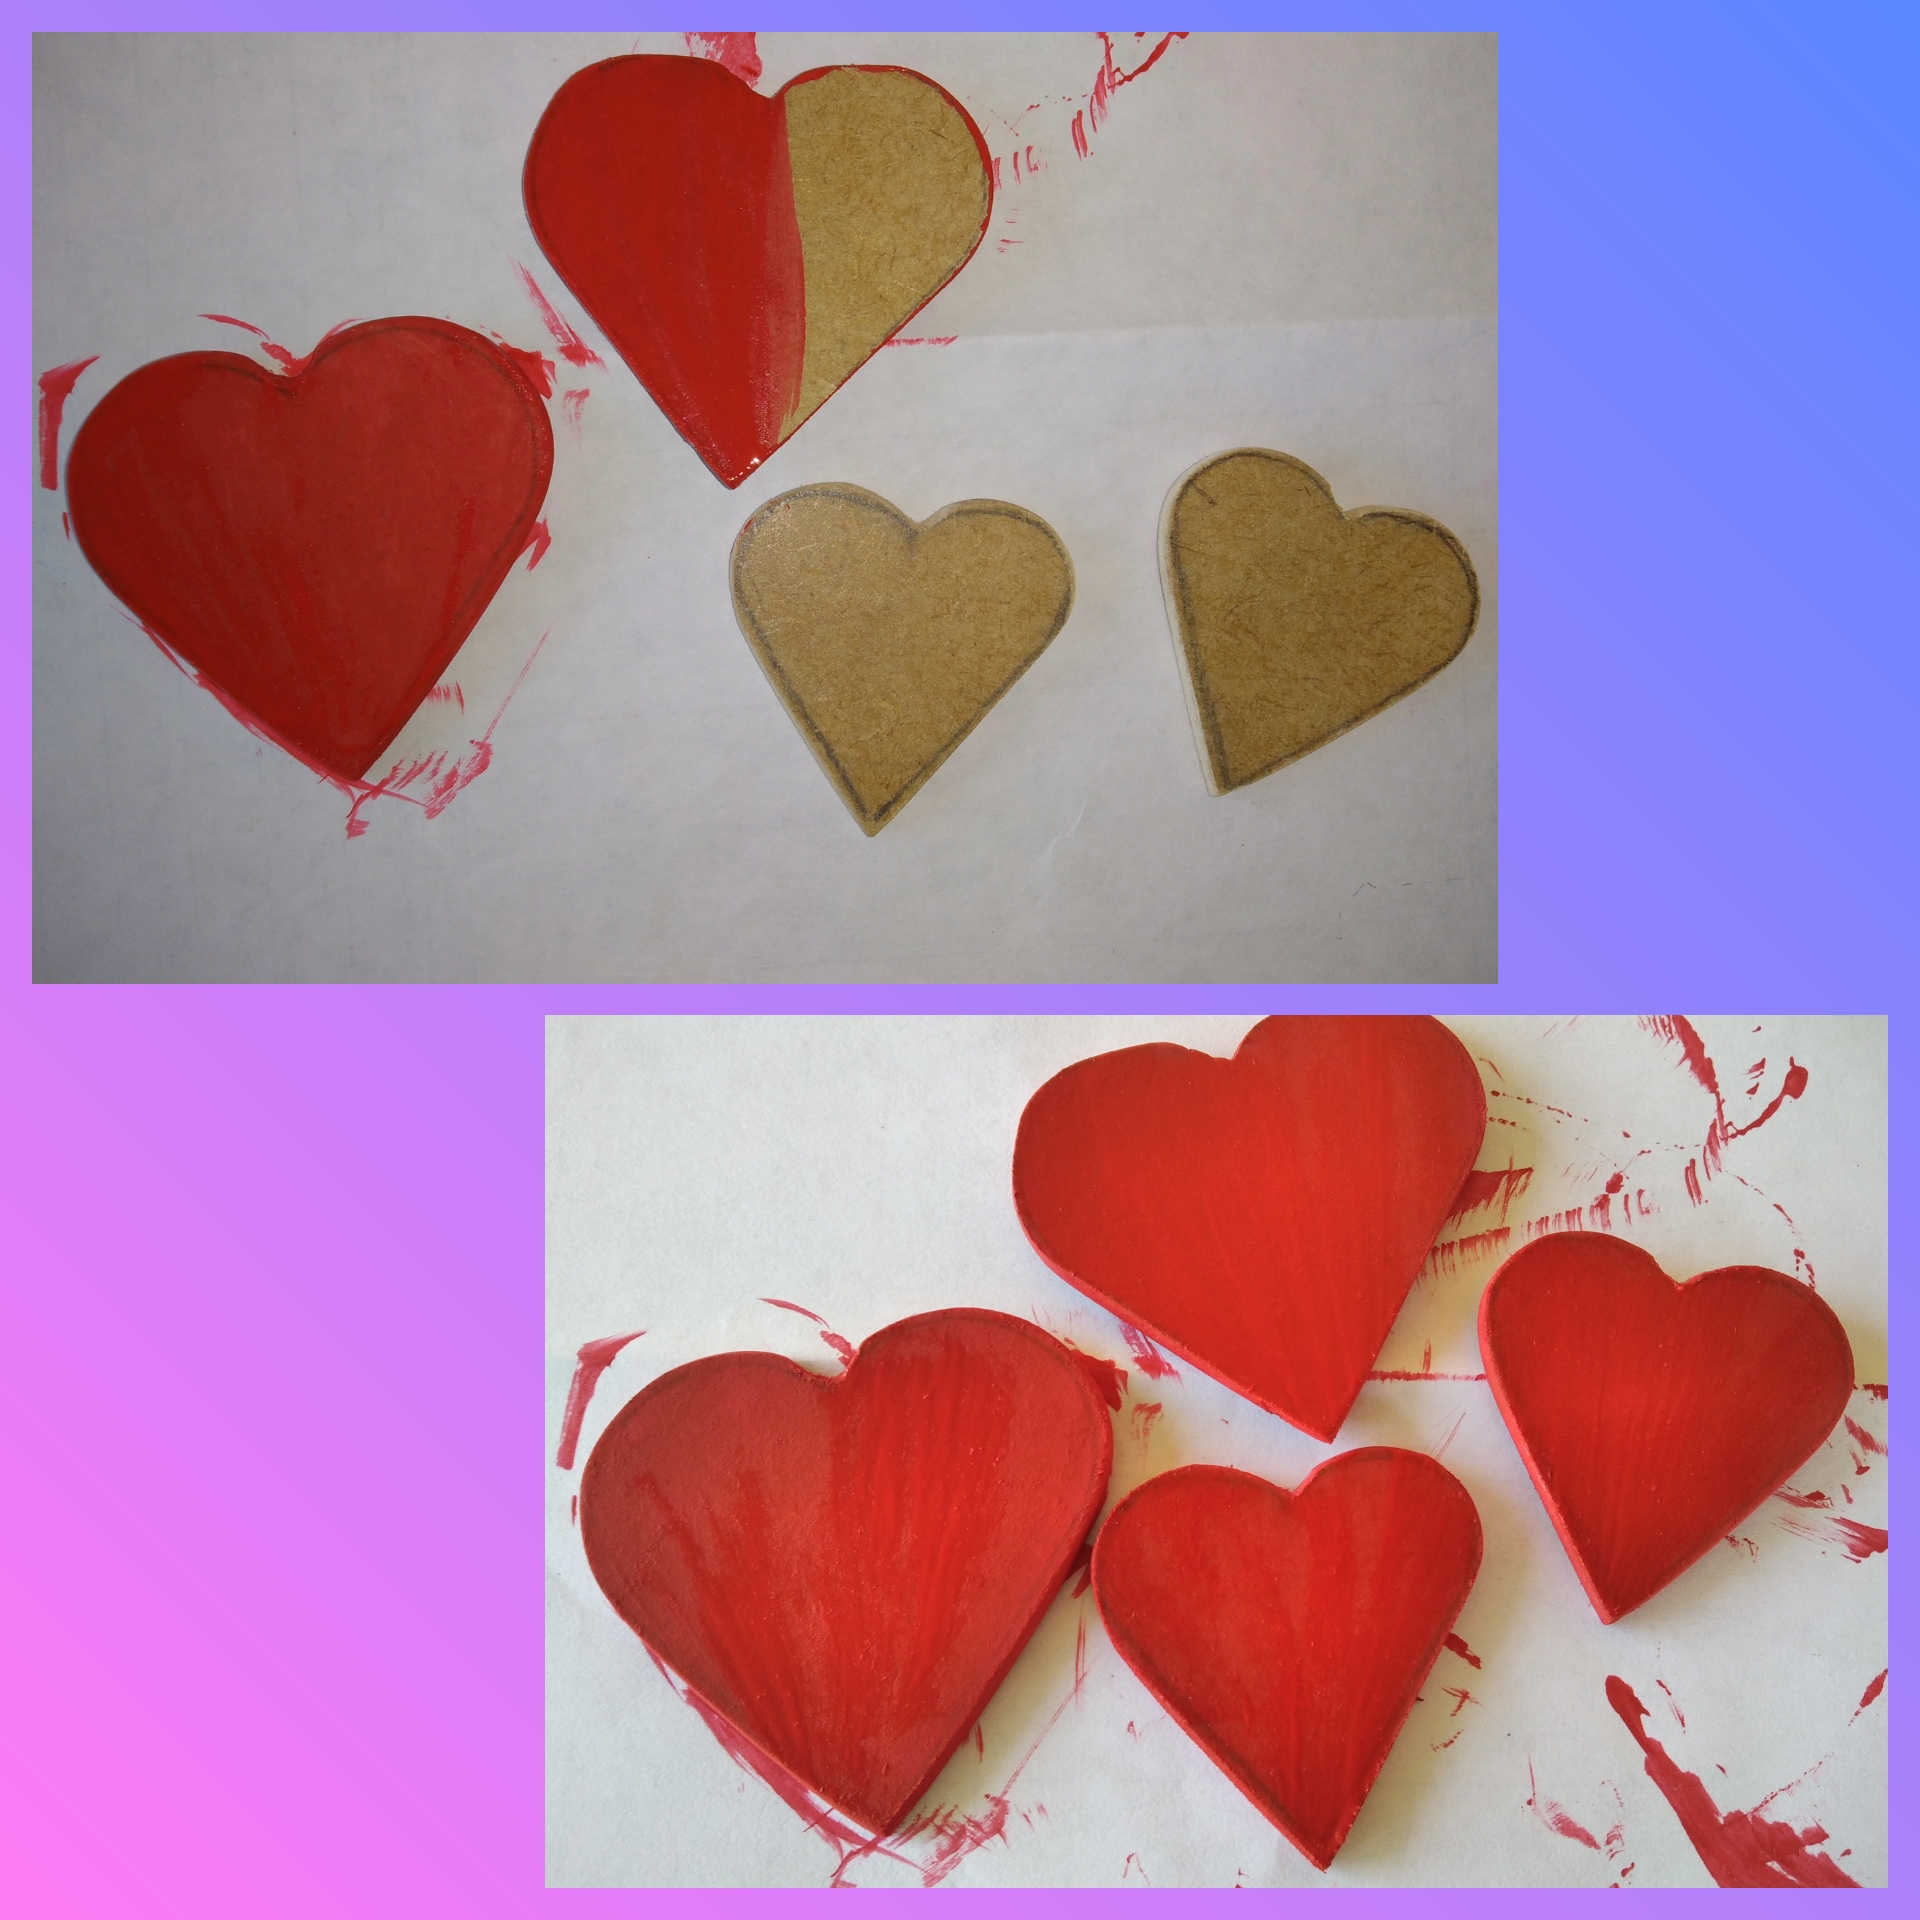
Paso 5.
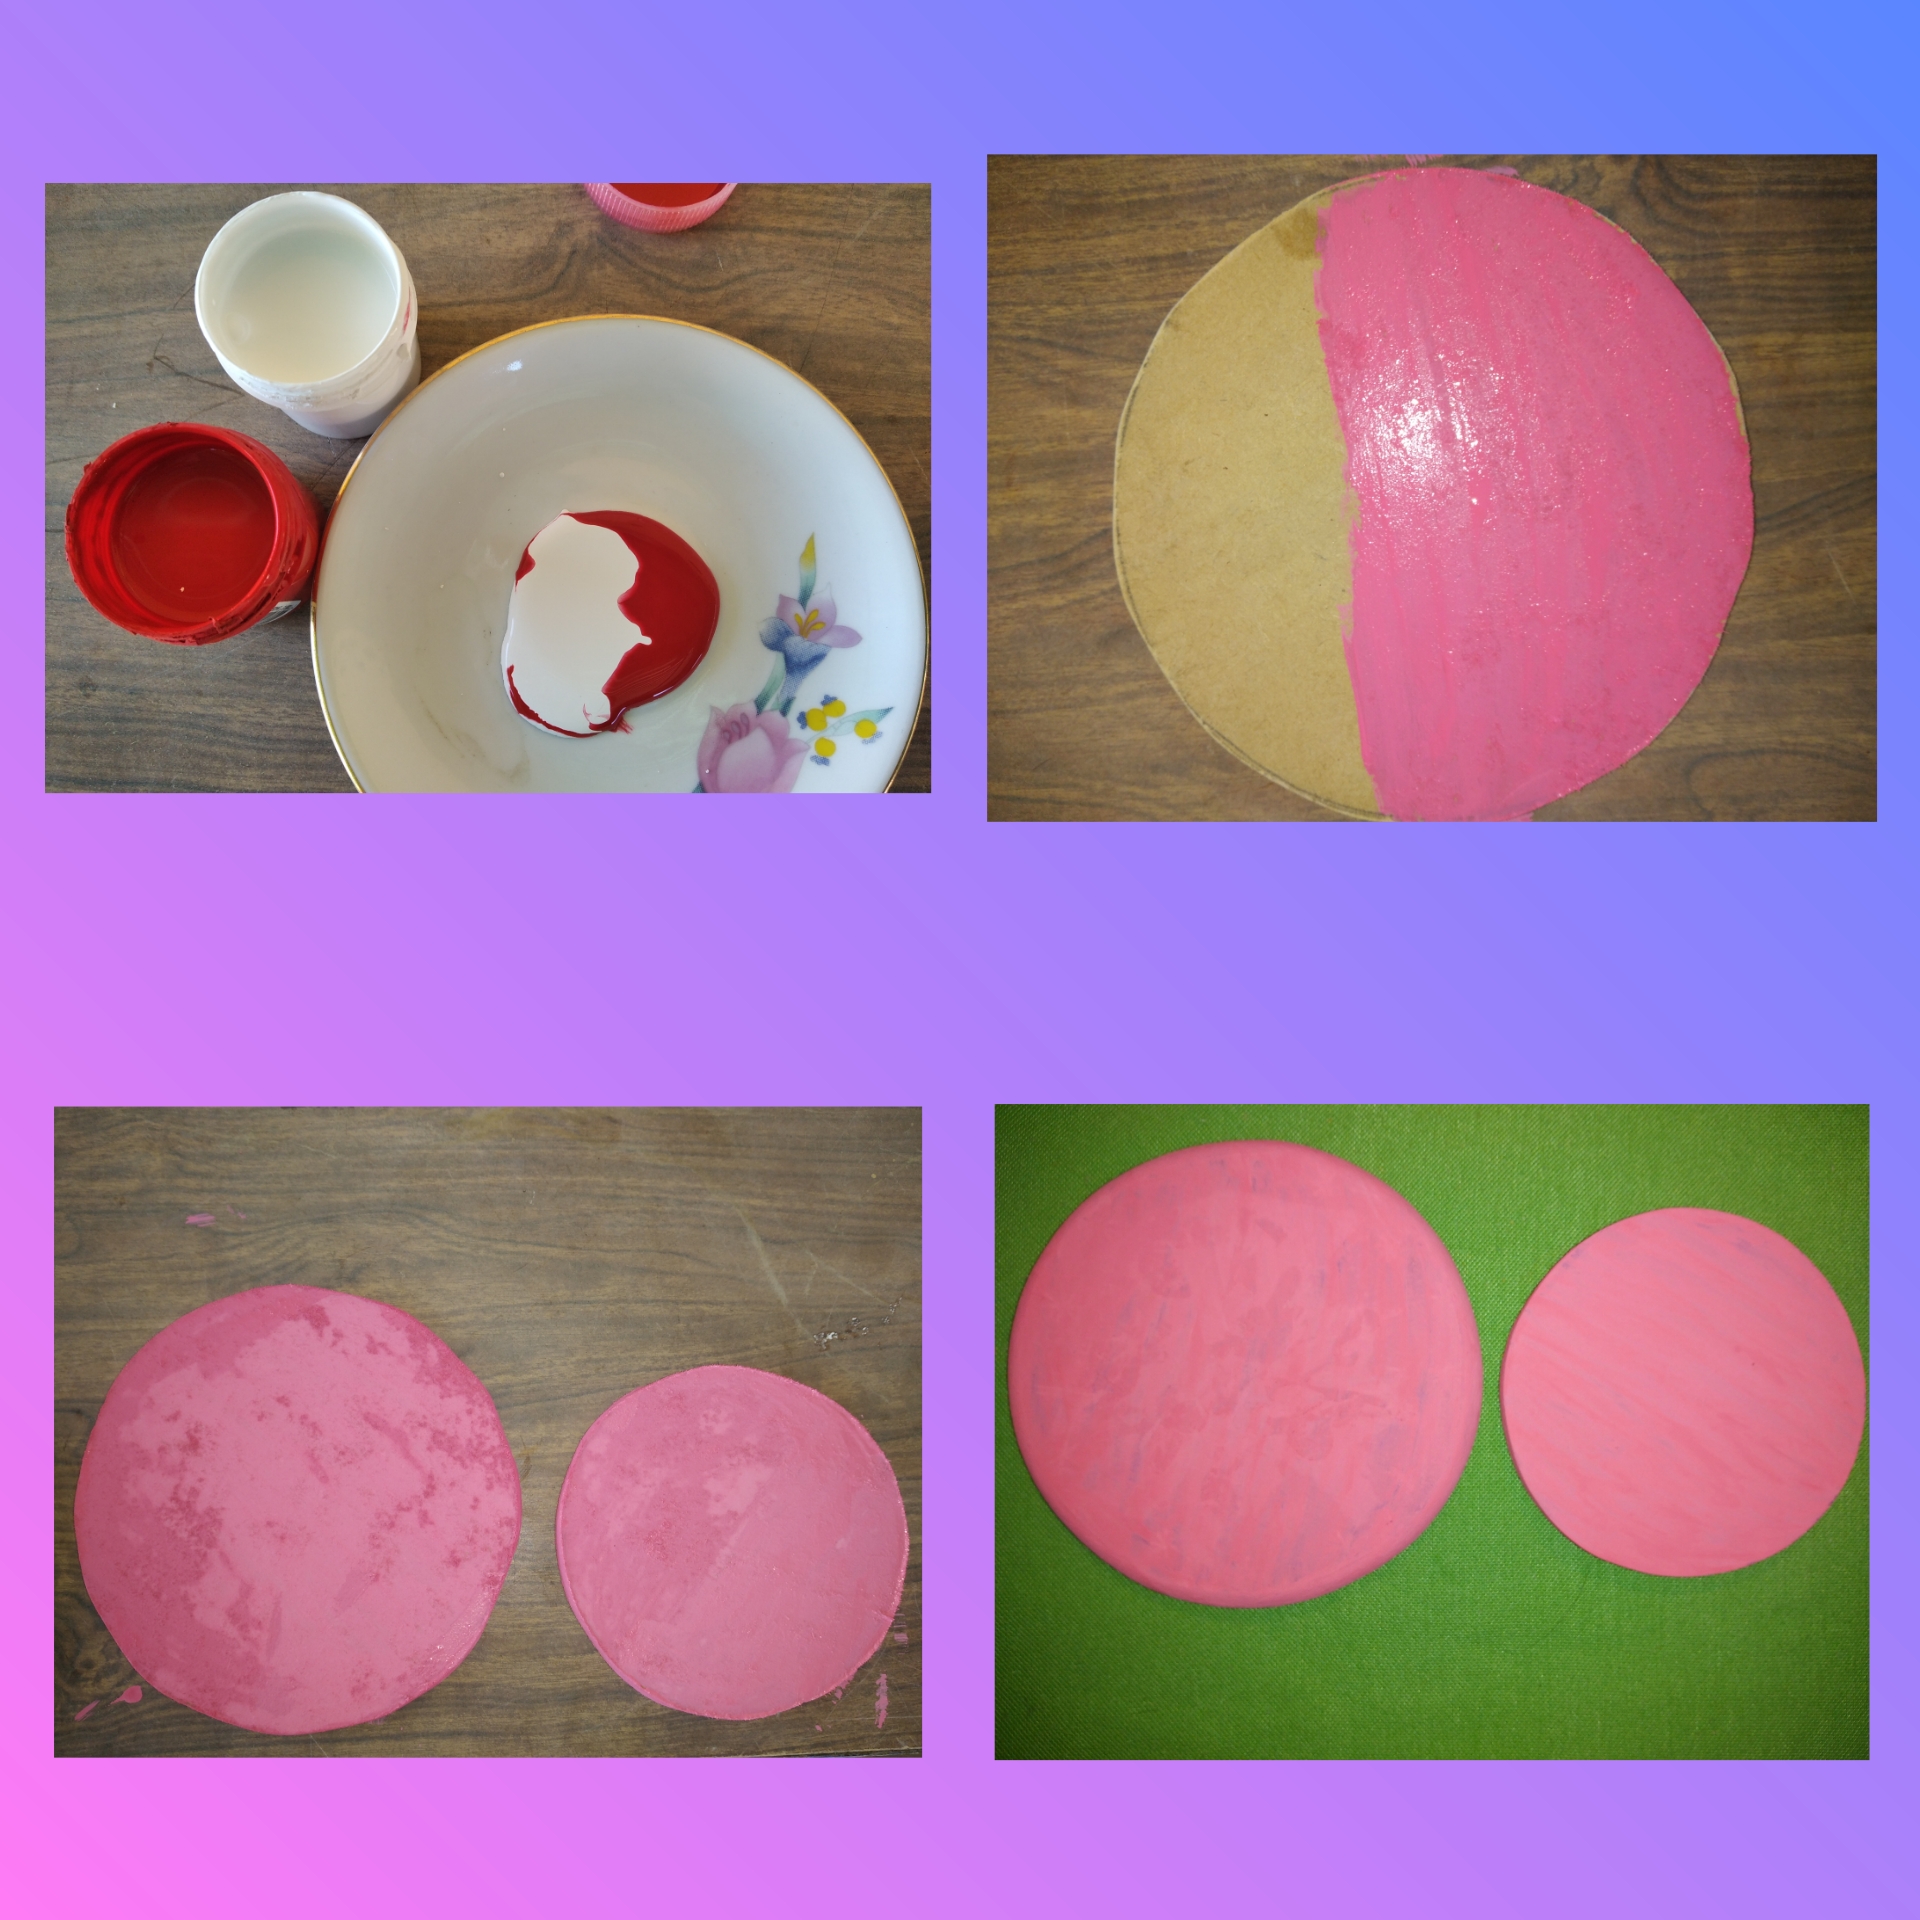
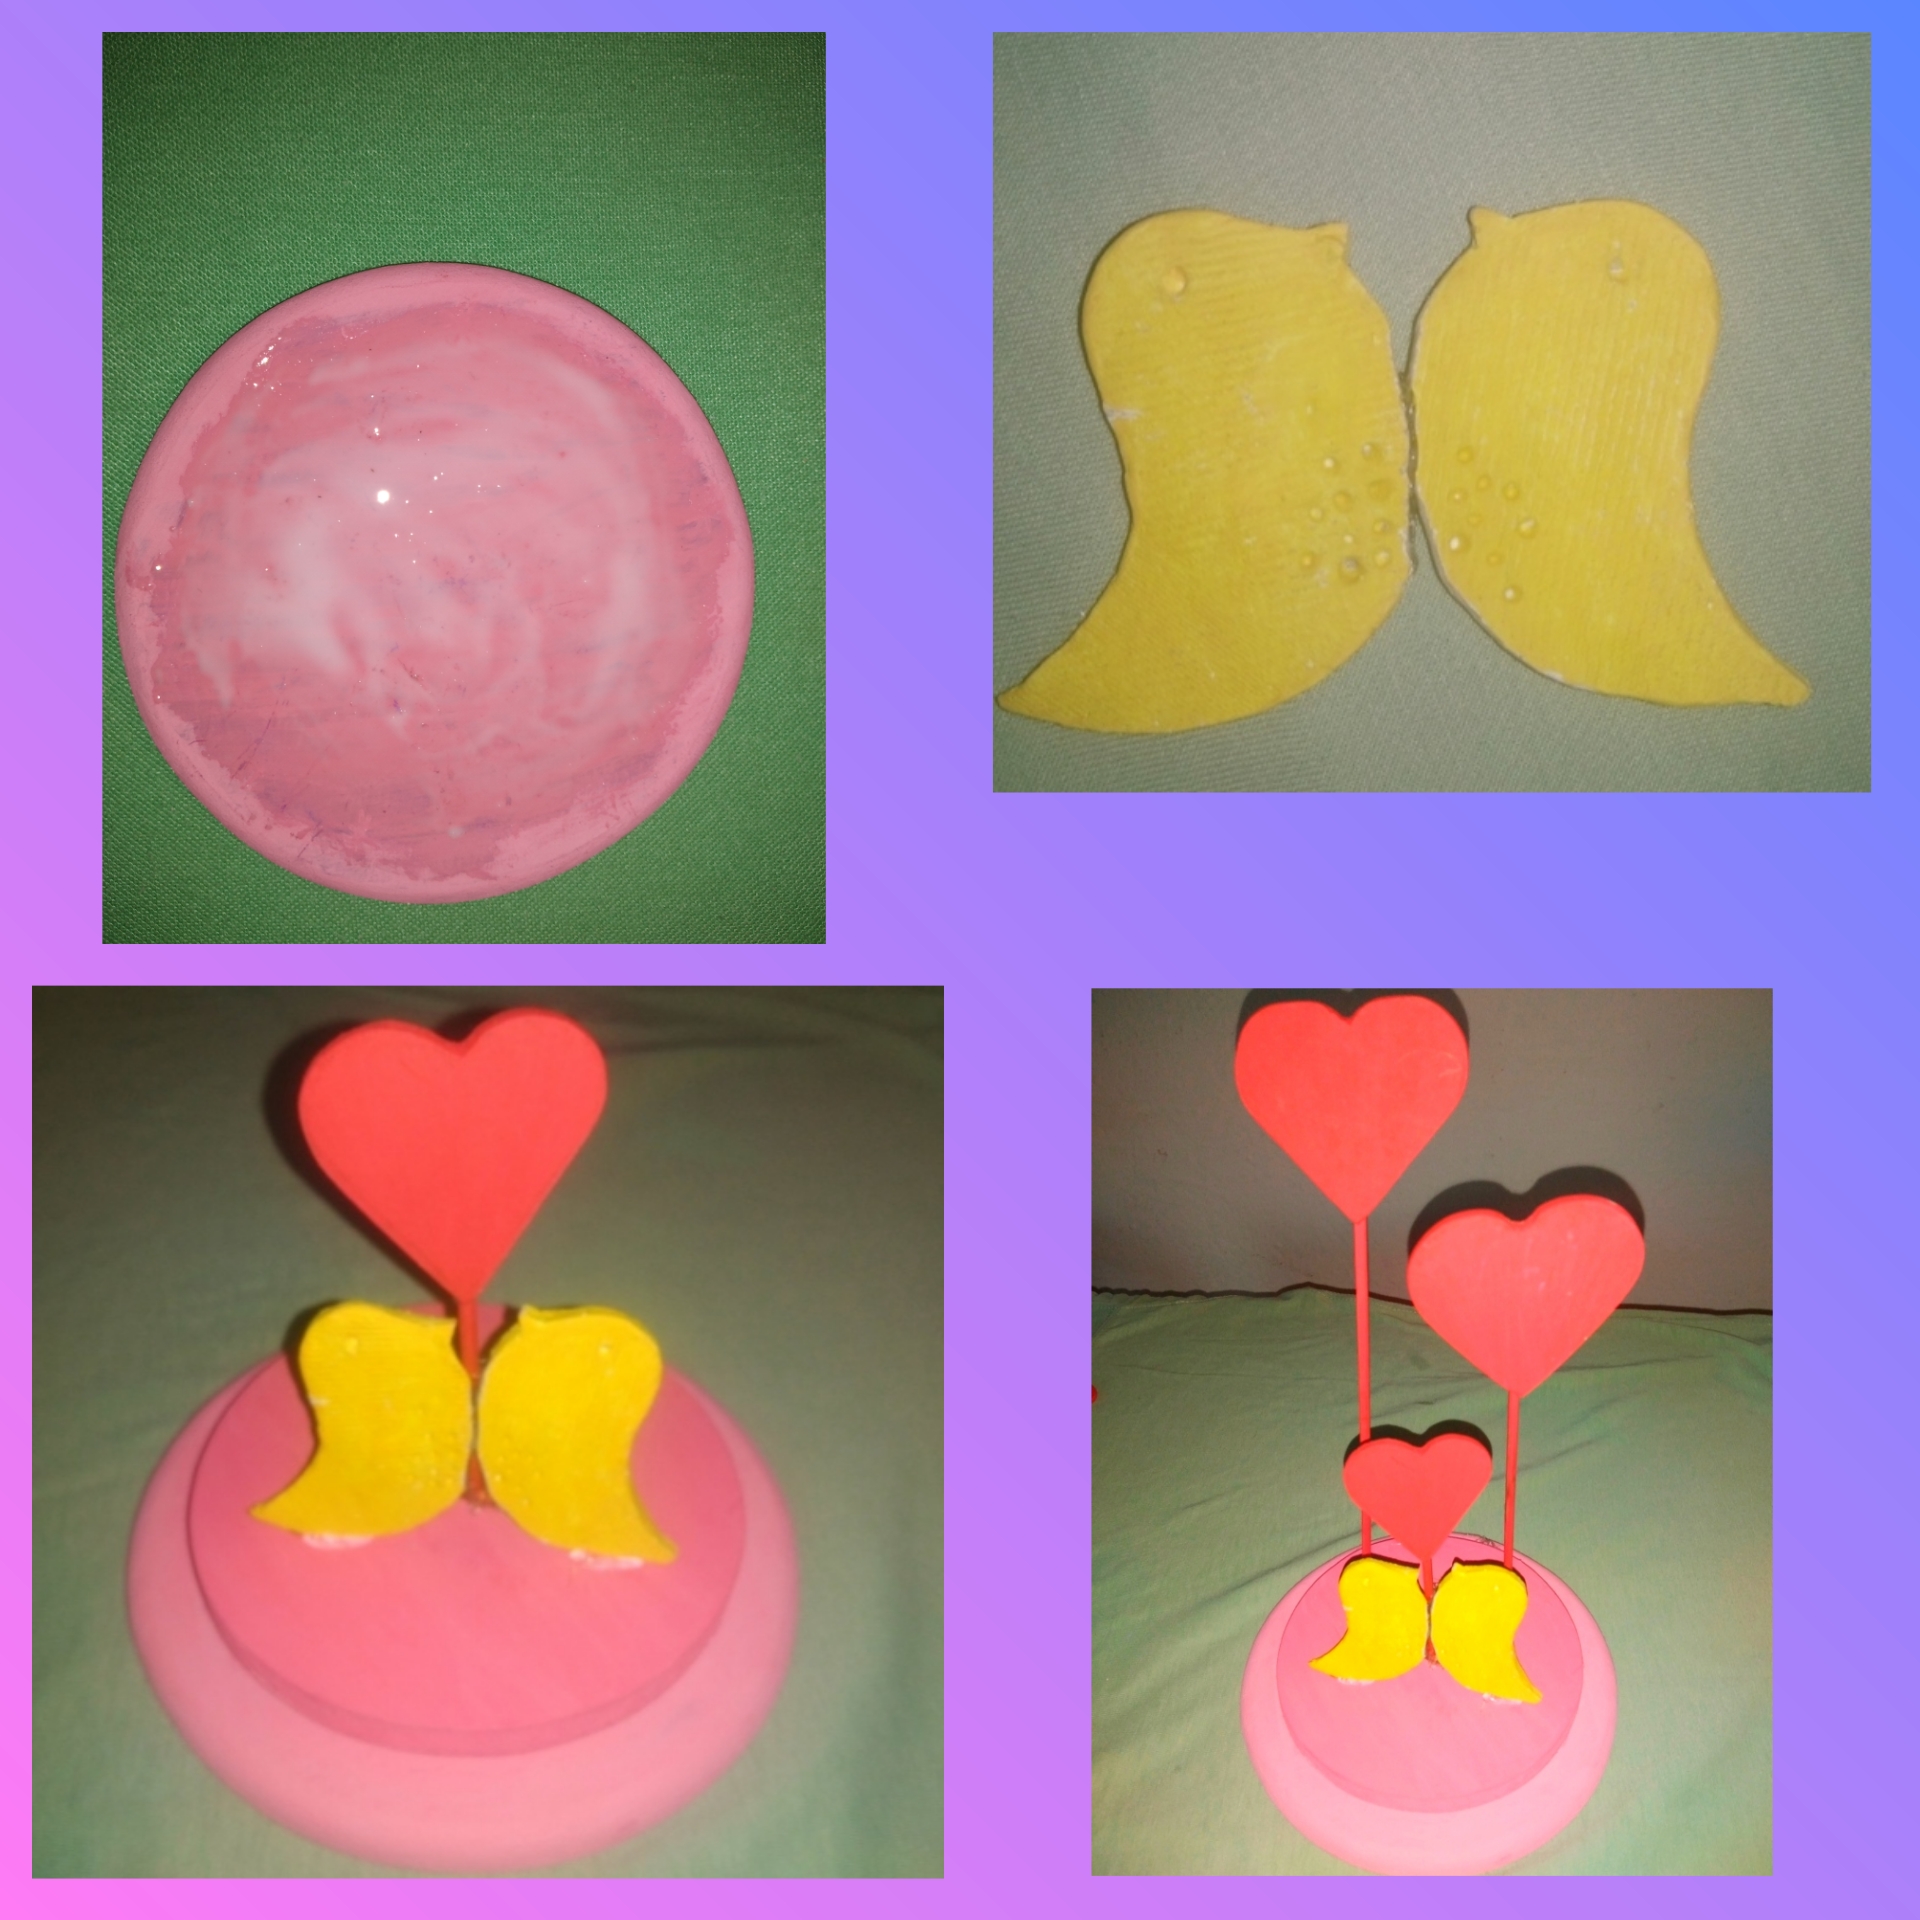
Luego del lijado los corazones y las bases las vamos a pintar, tomamos un pincel y con pintura al frío de color rojo vamos a pintar cada corazón que tenemos. Luego con pintura blanca y la pintura roja las unimos y formamos un lindo color rosado el cual le apliqué a cada base, con el fin de resaltarlas de esta manera, además que el color rosa al igual que el color rojo hace referencia al amor que es lo que pretendemos.
Step 5.After sanding the hearts and the bases we are going to paint them, we take a brush and with red cold paint we are going to paint each heart that we have. Then with white paint and red paint we join them and form a nice pink color which I applied to each base, in order to highlight them in this way, besides the pink color as well as the red color refers to the love that is what we intend.
Paso 6.
Con pintura roja vamos a pintar los 4 palitos de altura y con silicón de barra vamos a unir a los corazones y culminamos con las figuras elaboradas en madera, ahora pasamos a la arcilla.
Step 6.With red paint we are going to paint the 4 height sticks and with silicone bar we are going to join the hearts and finish with the figures made of wood, now we move on to the clay.
En arcilla vamos a moldear dos pajaritos enamorados, estos lindos pajaritos me encantan los veo muy románticos y llenos de mucho amor, por eso quise que fueran parte de este lindo obsequio.
In clay we are going to mold two little birds in love, I love these cute little birds, I see them very romantic and full of love, that's why I wanted them to be part of this beautiful gift.
Paso 7.
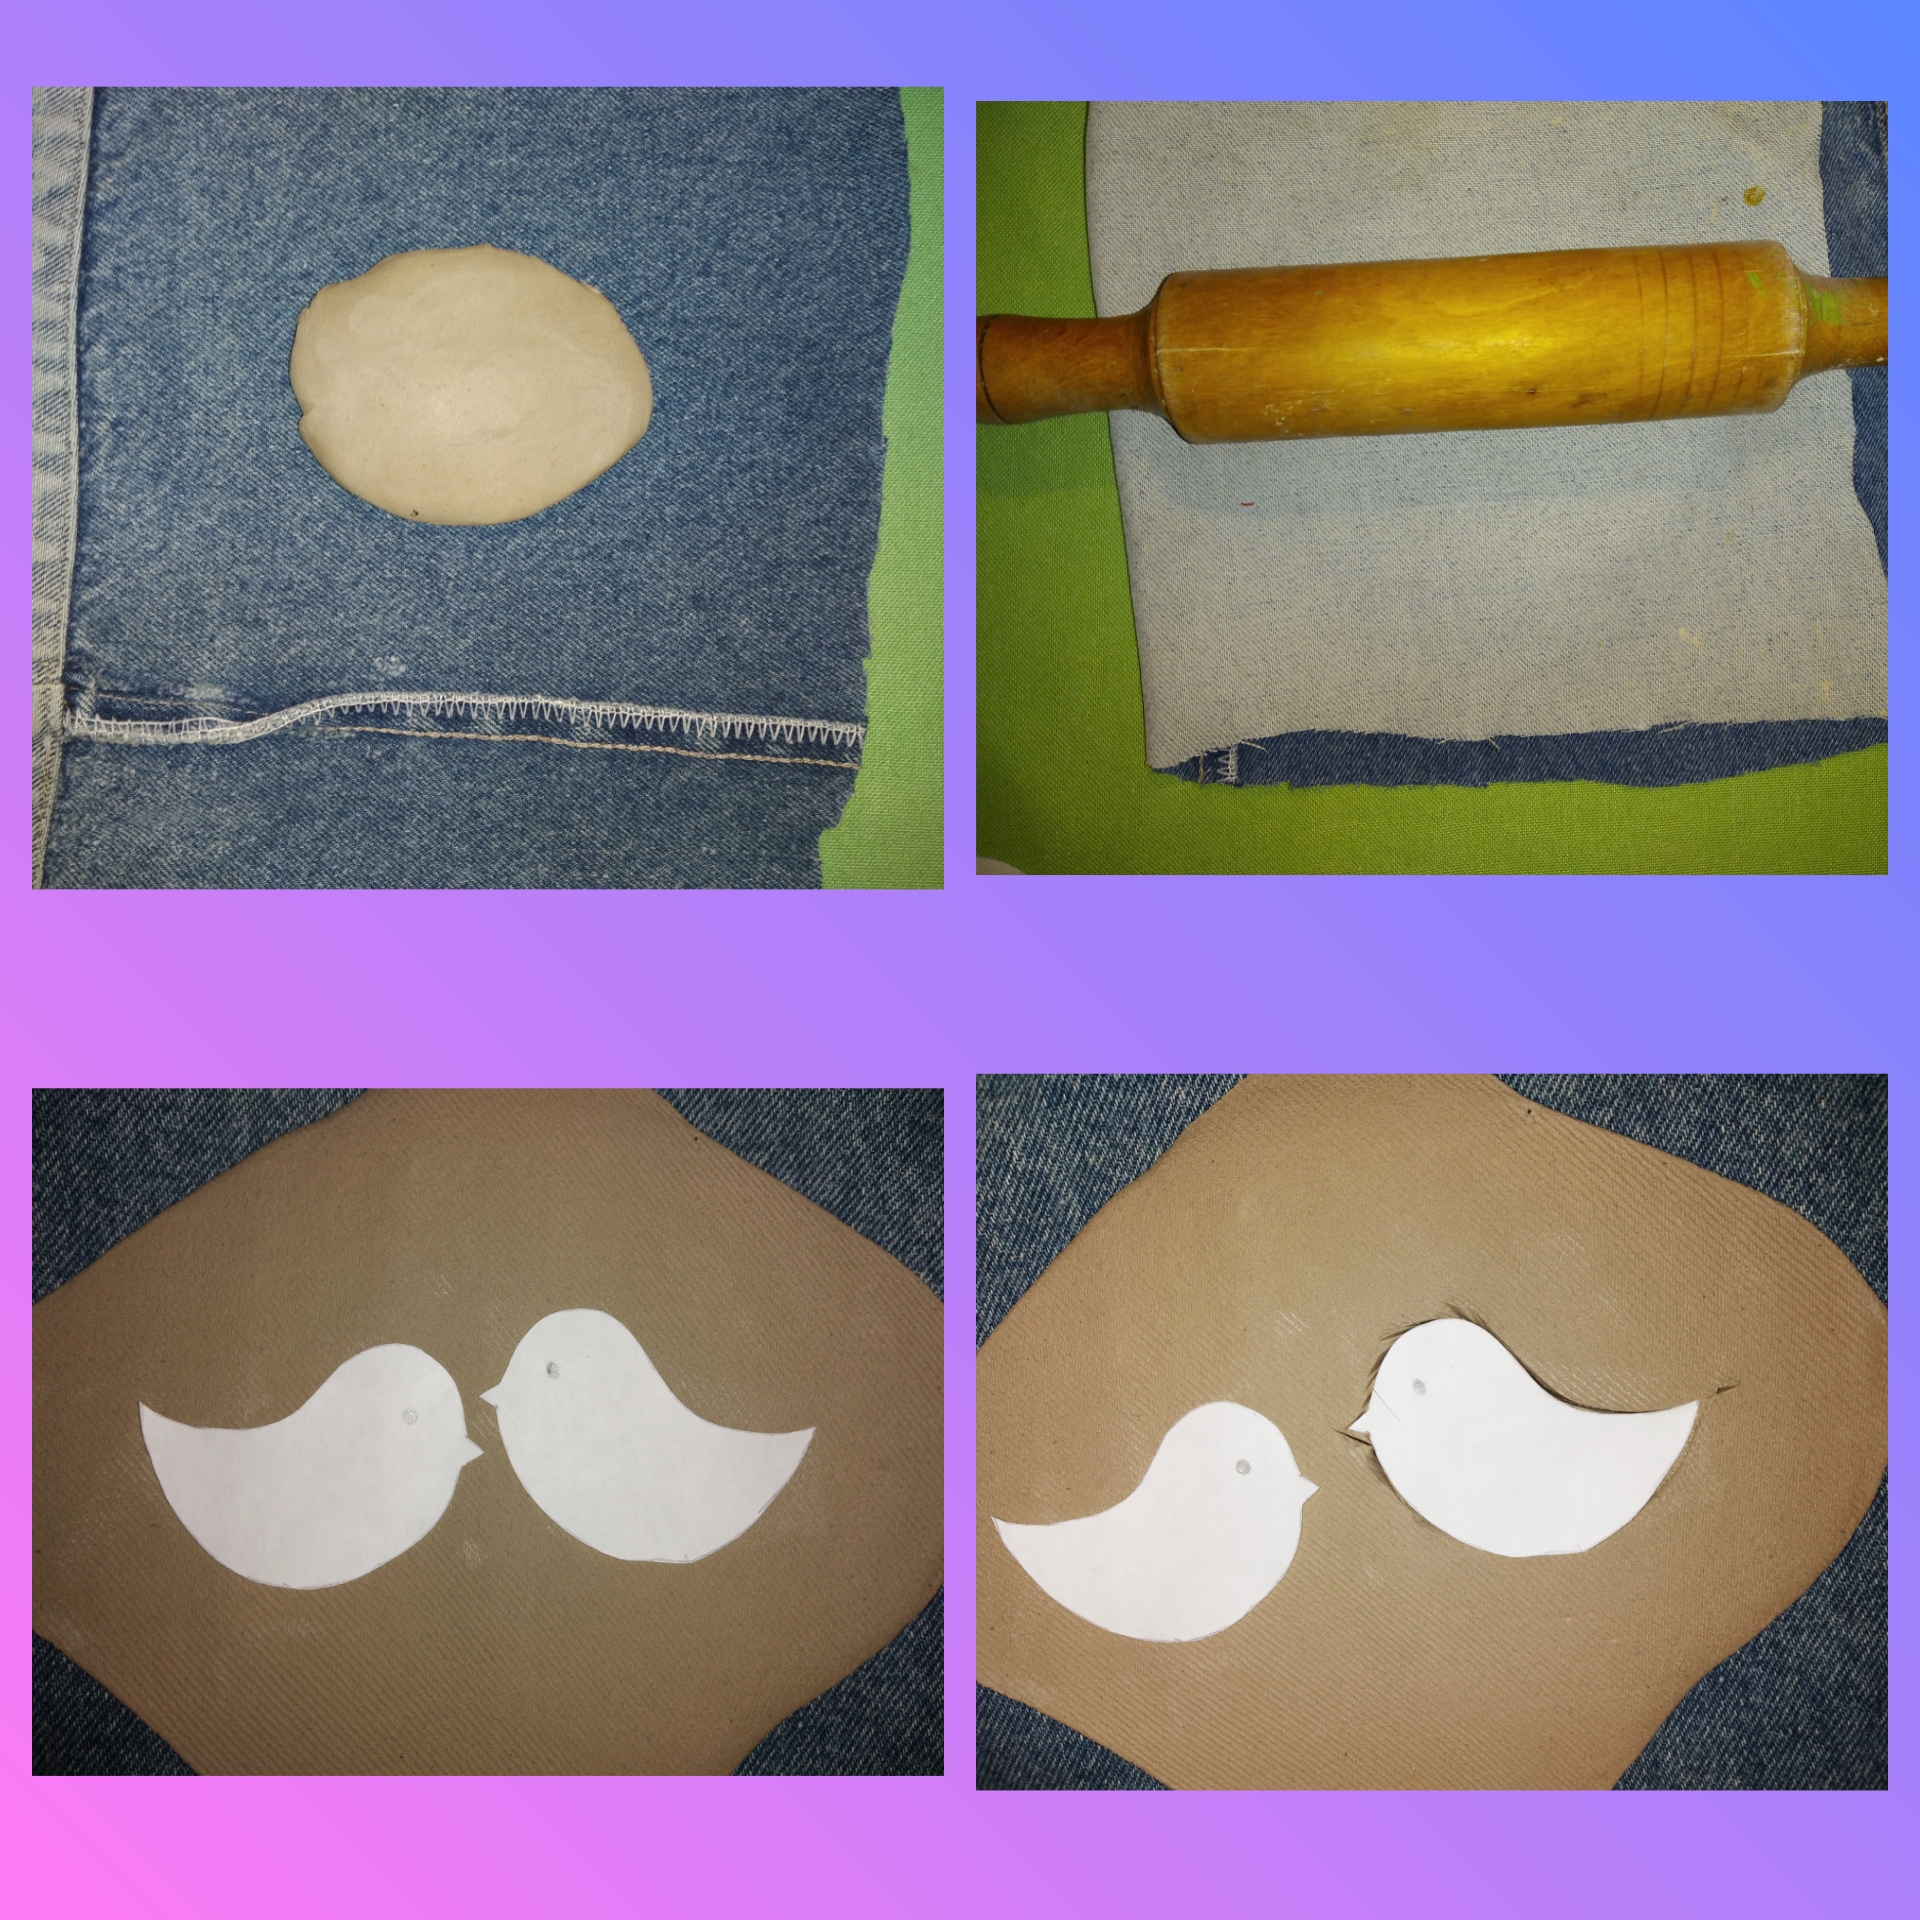
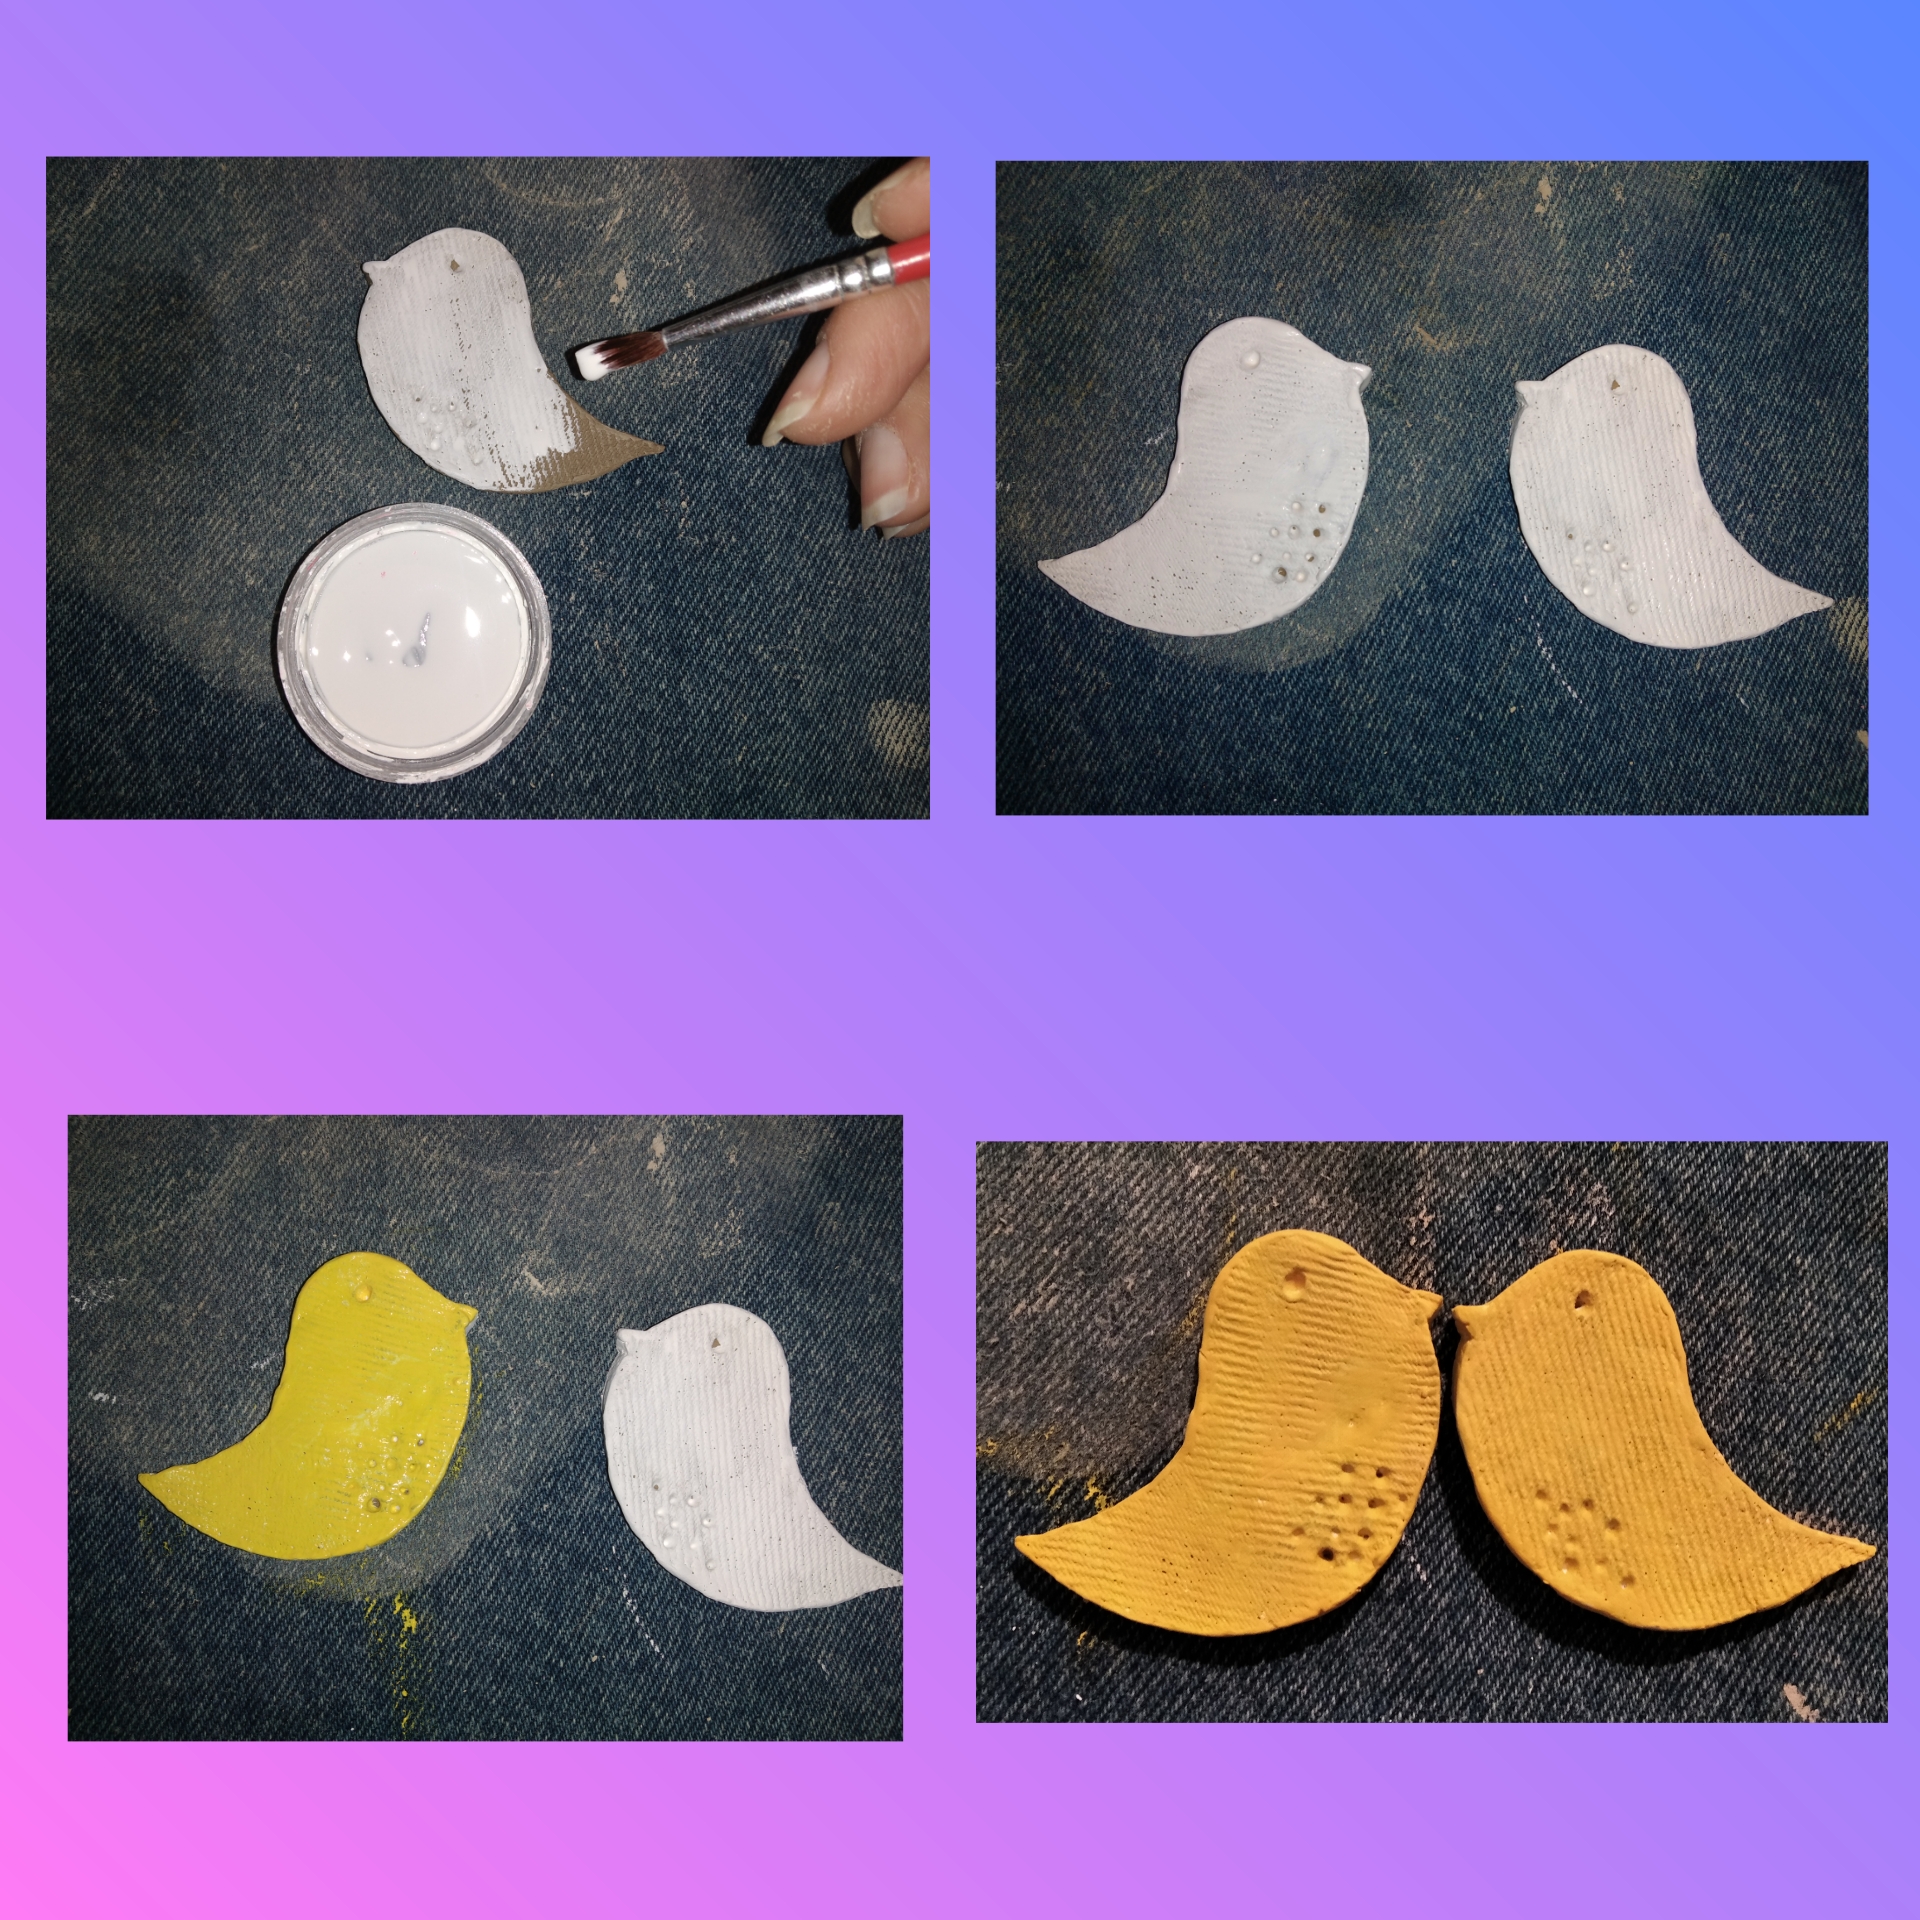
Tomamos un pedazo de arcilla y lo voy a extender, en este caso usé un pedazo de pantalón ya que la arcilla no la podemos poner directamente a una superficie porque tienen a pegarse, es bueno trabajarla sobre una lona o tela gruesa. Luego de extenderla con ayuda de un rodillo de cocina, colocamos sobre ella los moldes de los pajaritos que queremos hacer y con el exacto cortamos por todo el borde.
Step 7.We take a piece of clay and I am going to spread it out, in this case I used a piece of pants since we cannot put the clay directly on a surface because it tends to stick, it is good to work on a thick canvas or cloth. After extending it with the help of a kitchen roller, we place on it the molds of the little birds that we want to make and with the exact one we cut along the entire edge.
Paso 8.
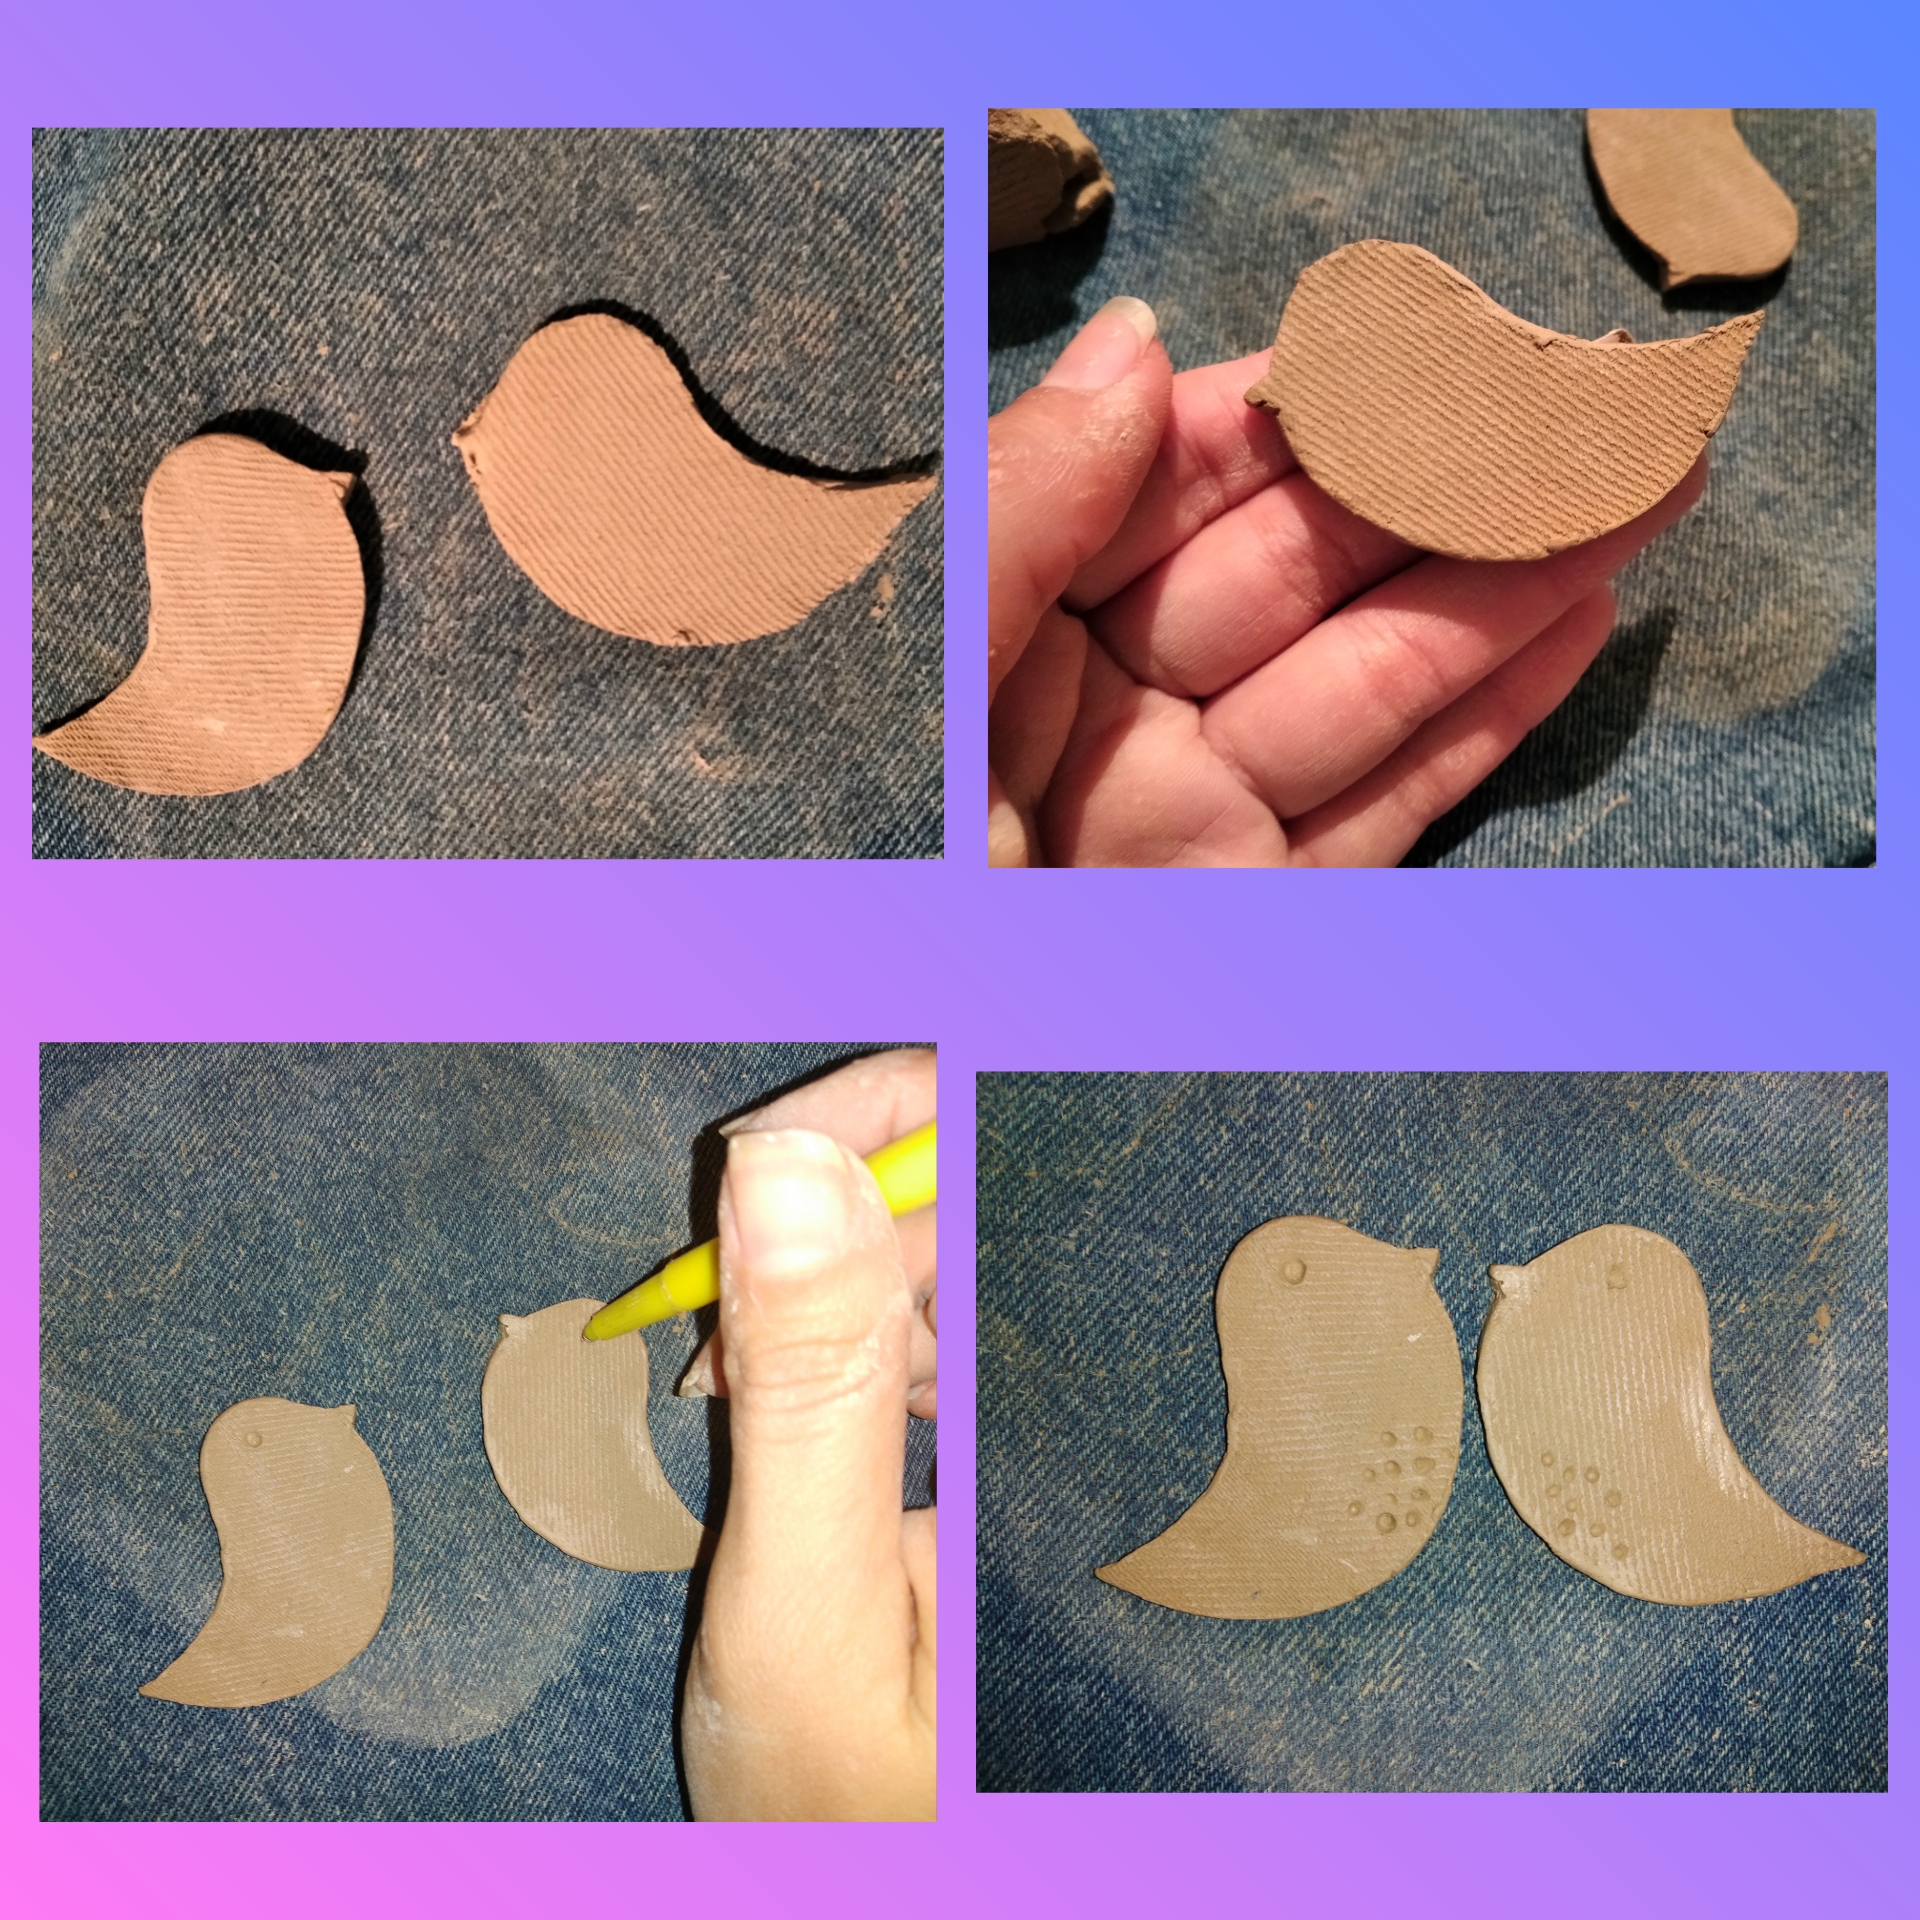
Con nuestras manos moldeamos la arcilla para darle mejor forma a estos bellos pajaritos, con la punta de un lapicero hacemos un huequito como sí fuera el ojito y luego por la parte de la barriga de igual manera le hacemos con el lapicero más puntitos, este proceso a cada pajarito.
Step 8.With our hands we mold the clay to give these beautiful little birds a better shape, with the tip of a pen we make a little hole as if it were the eye and then through the part of the belly in the same way We make more dots with the pen, this process to each little bird.
Paso 9.
Ahora vamos a pintar los pajaritos, primero agrego pintura blanca para bajar el color fuerte de la arcilla y luego le colocamos el color amarillo que es el deseado para estos pajaritos, los dejamos hasta que sequen.
Step 9.Now we are going to paint the little birds, first I add white paint to lower the strong color of the clay and then we put the yellow color that is desired for these little birds, we leave them until they dry.
Que emoción ya voy a comenzar a armar el obsequio para mi esposo, wow! Siento que quedará increíble y él estará muy contento cuando se entere que lo elaboré yo misma, con mis propias manos con mucho amor para él.
I'm so excited, I'm going to start putting together the gift for my husband, wow! I feel that it will be incredible and he will be very happy when he finds out that I made it myself, with my own hands with a lot of love for him.
Paso 10.
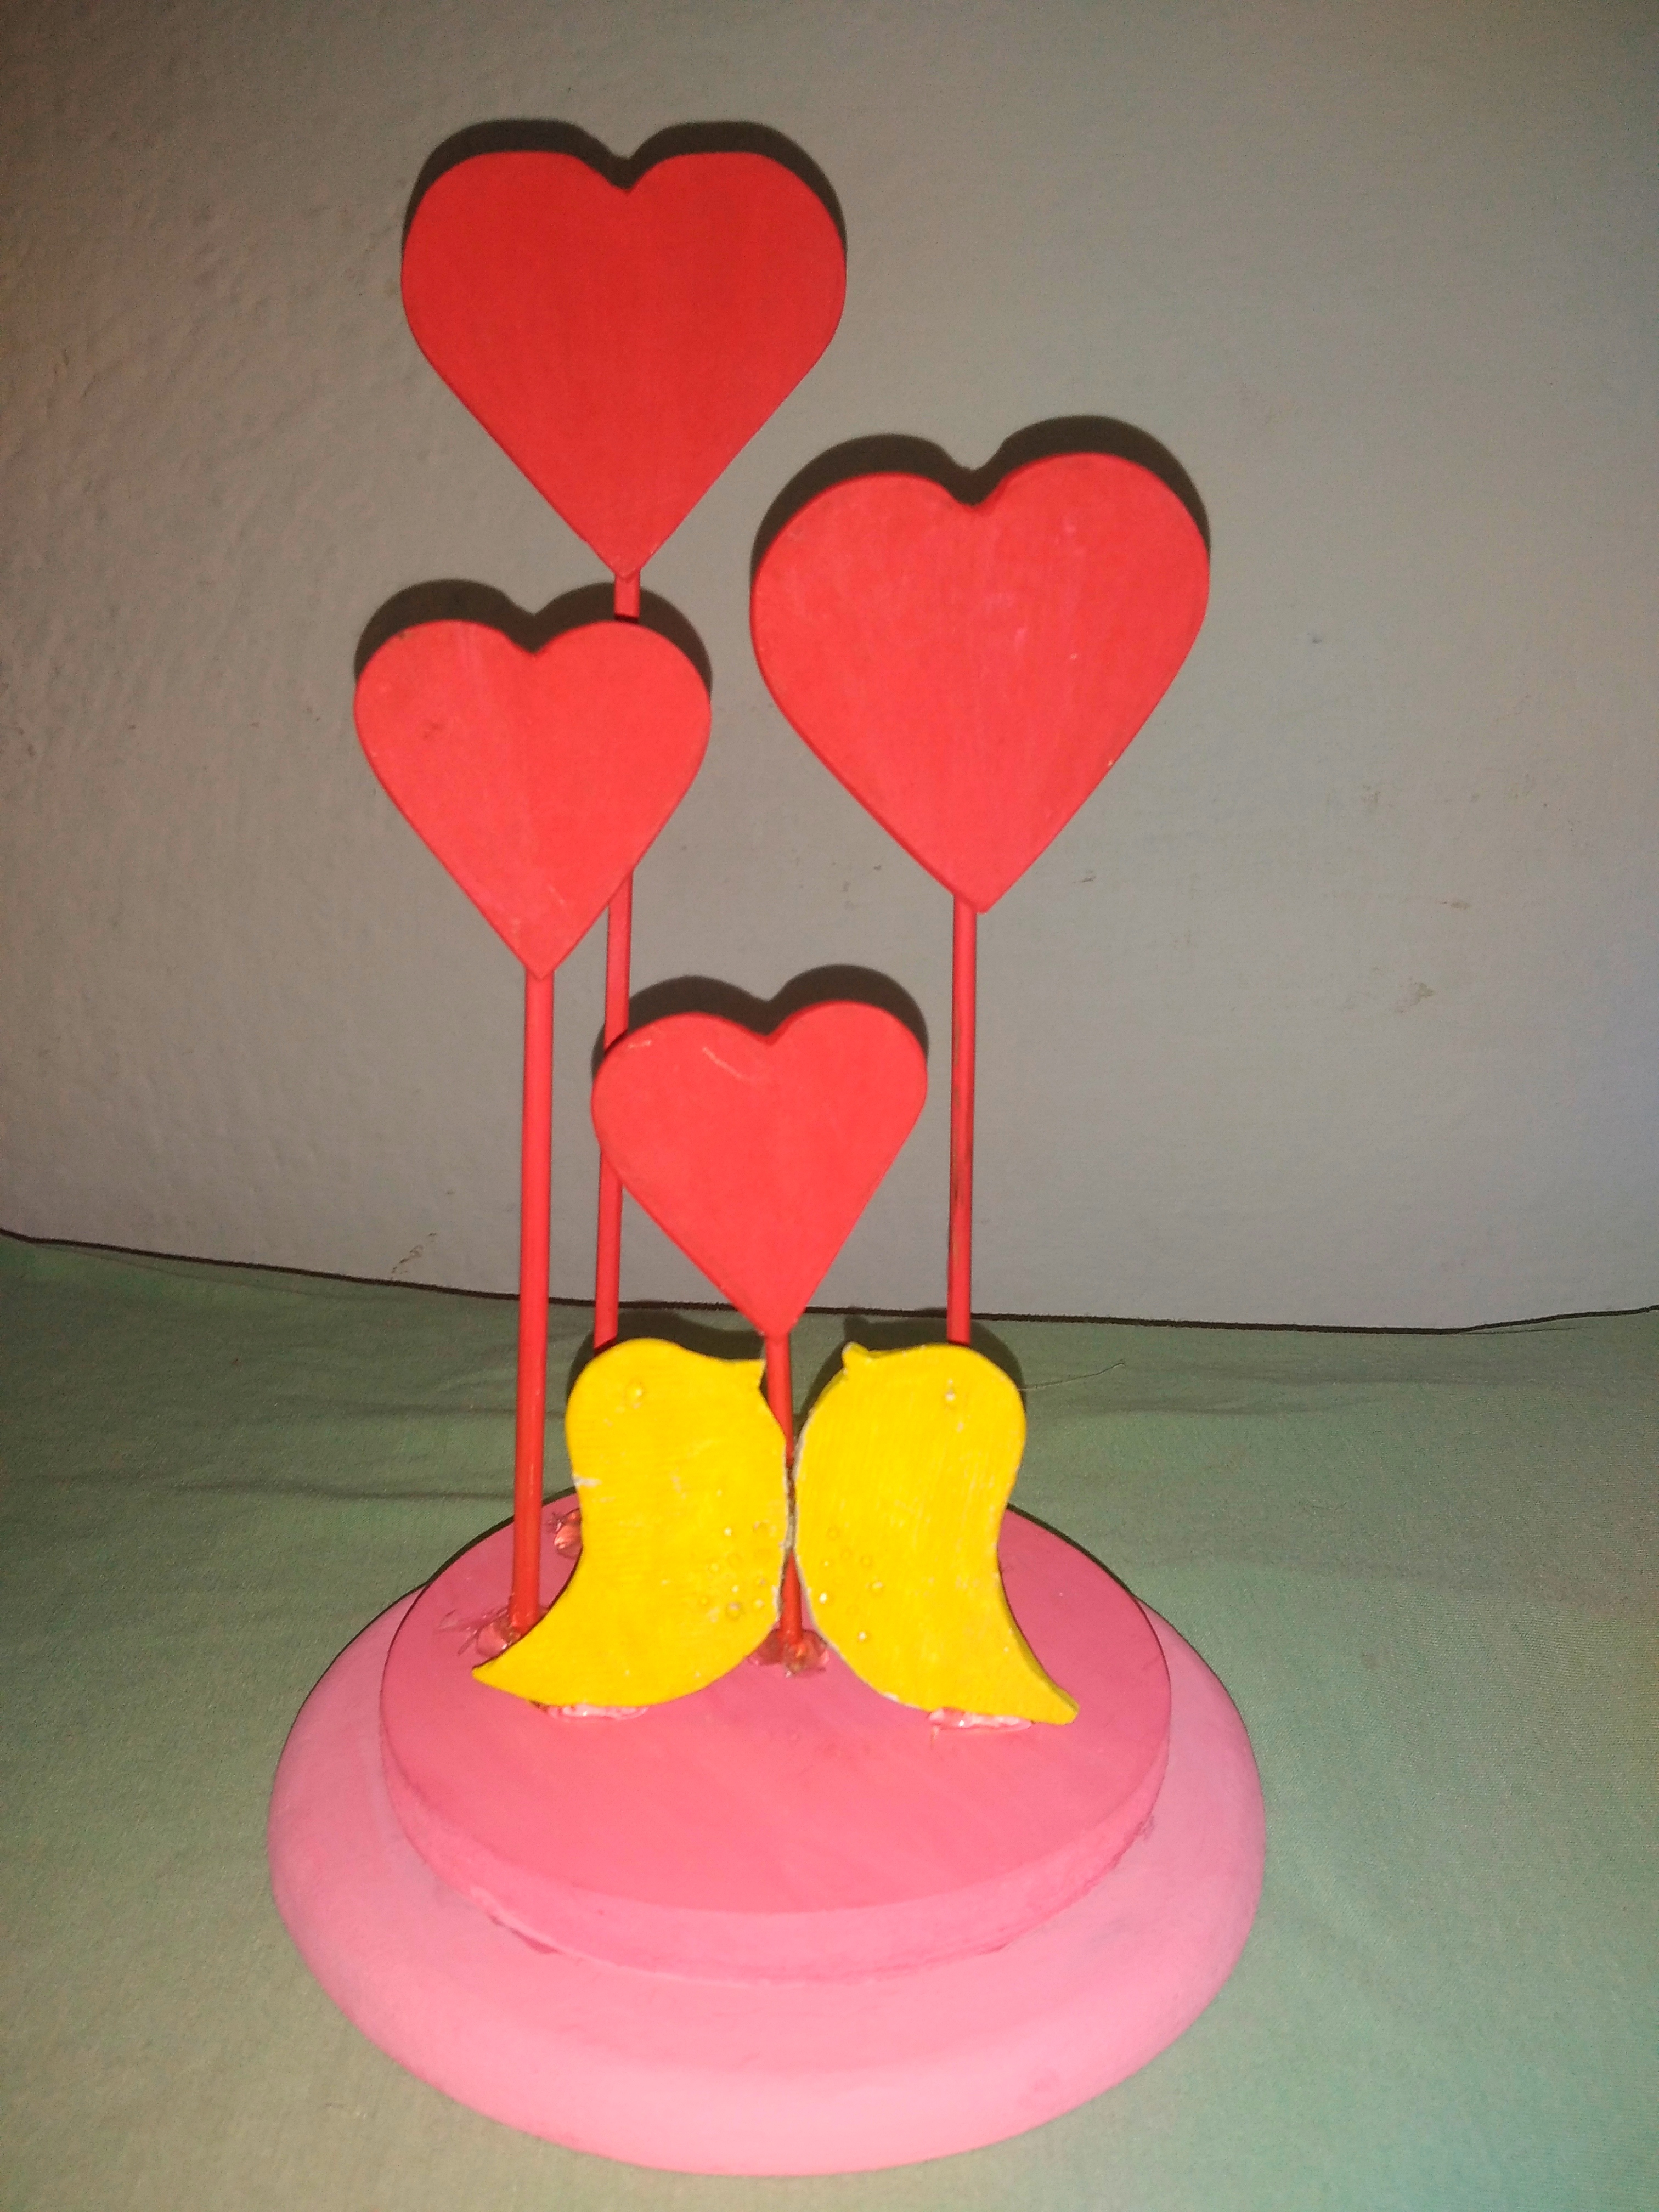
Comienzó por agregar pega a la base para unir las 2, luego con silicón uno los dos pájaritos y procedo a fijarlos en la base, con la tijera corté de diferentes tamaños los palitos de altura y los fuí fijando a la base, uno a uno.
Step 10.I began by adding glue to the base to join the 2, then with silicone I joined the two little birds and proceeded to fix them on the base, with the scissors I cut the height sticks of different sizes and the I was fixing to the base, one by one.
Así de lindo va mi obsequio.
That's how cute my gift is.
Paso 11.
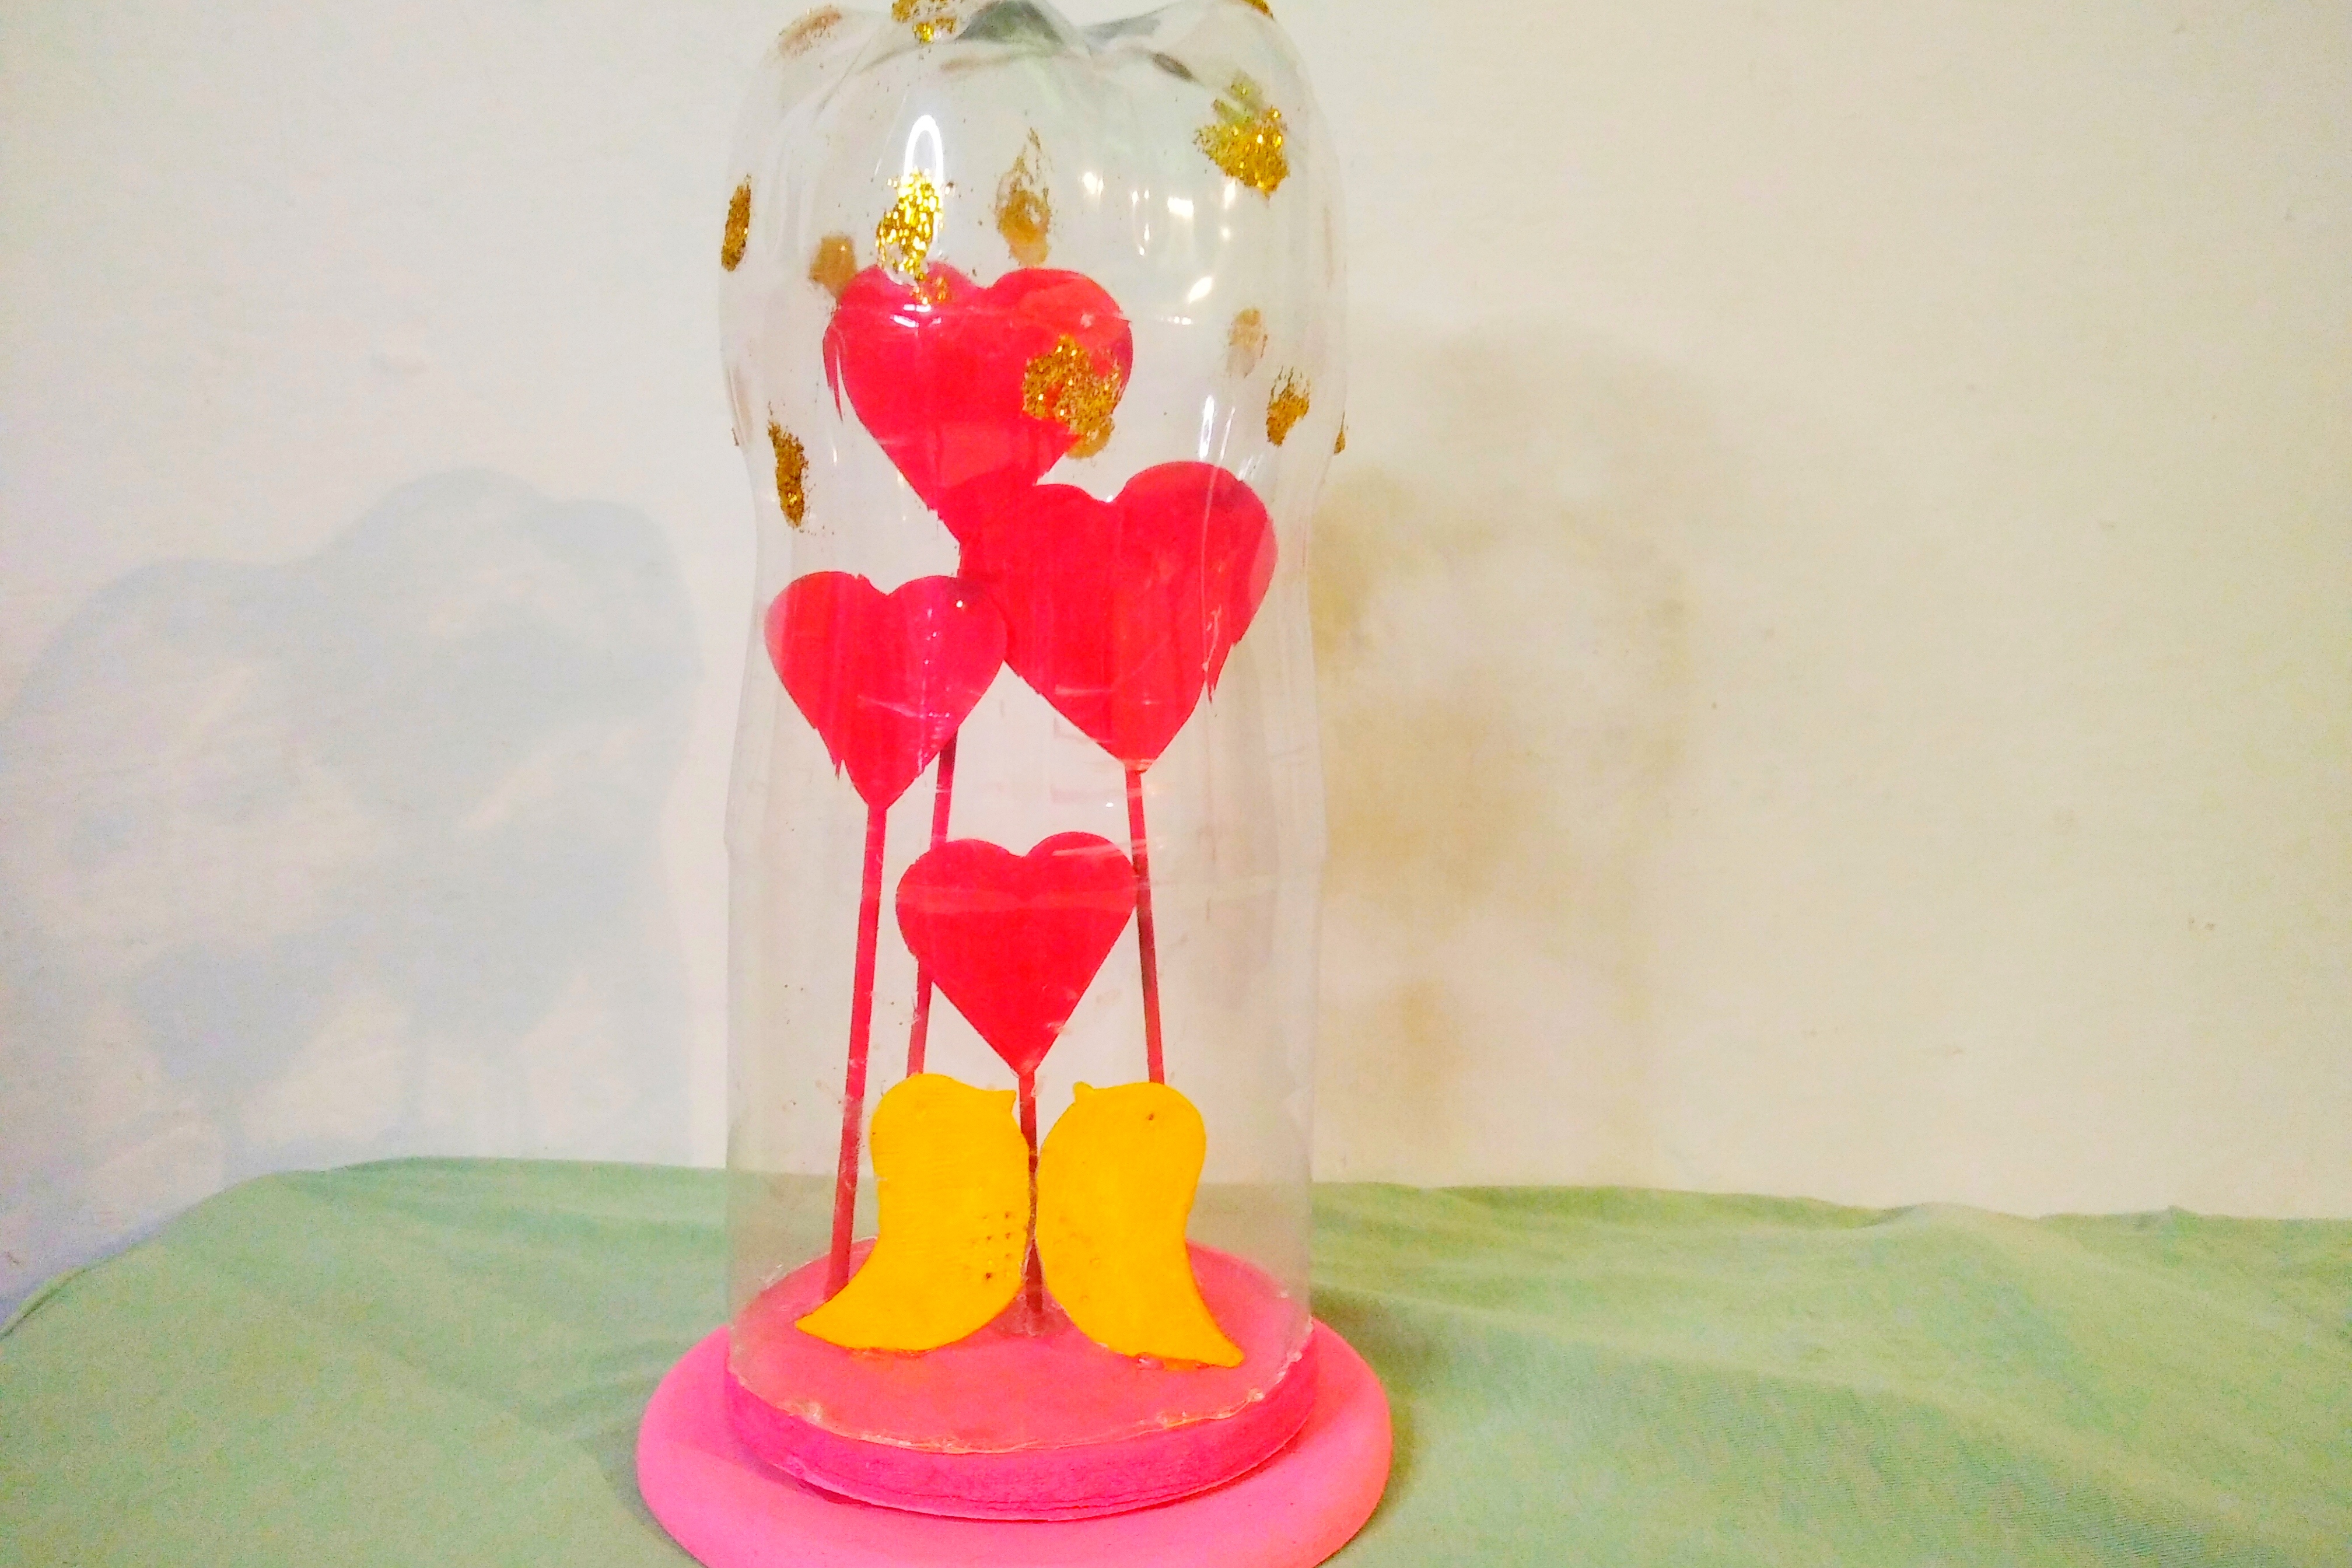
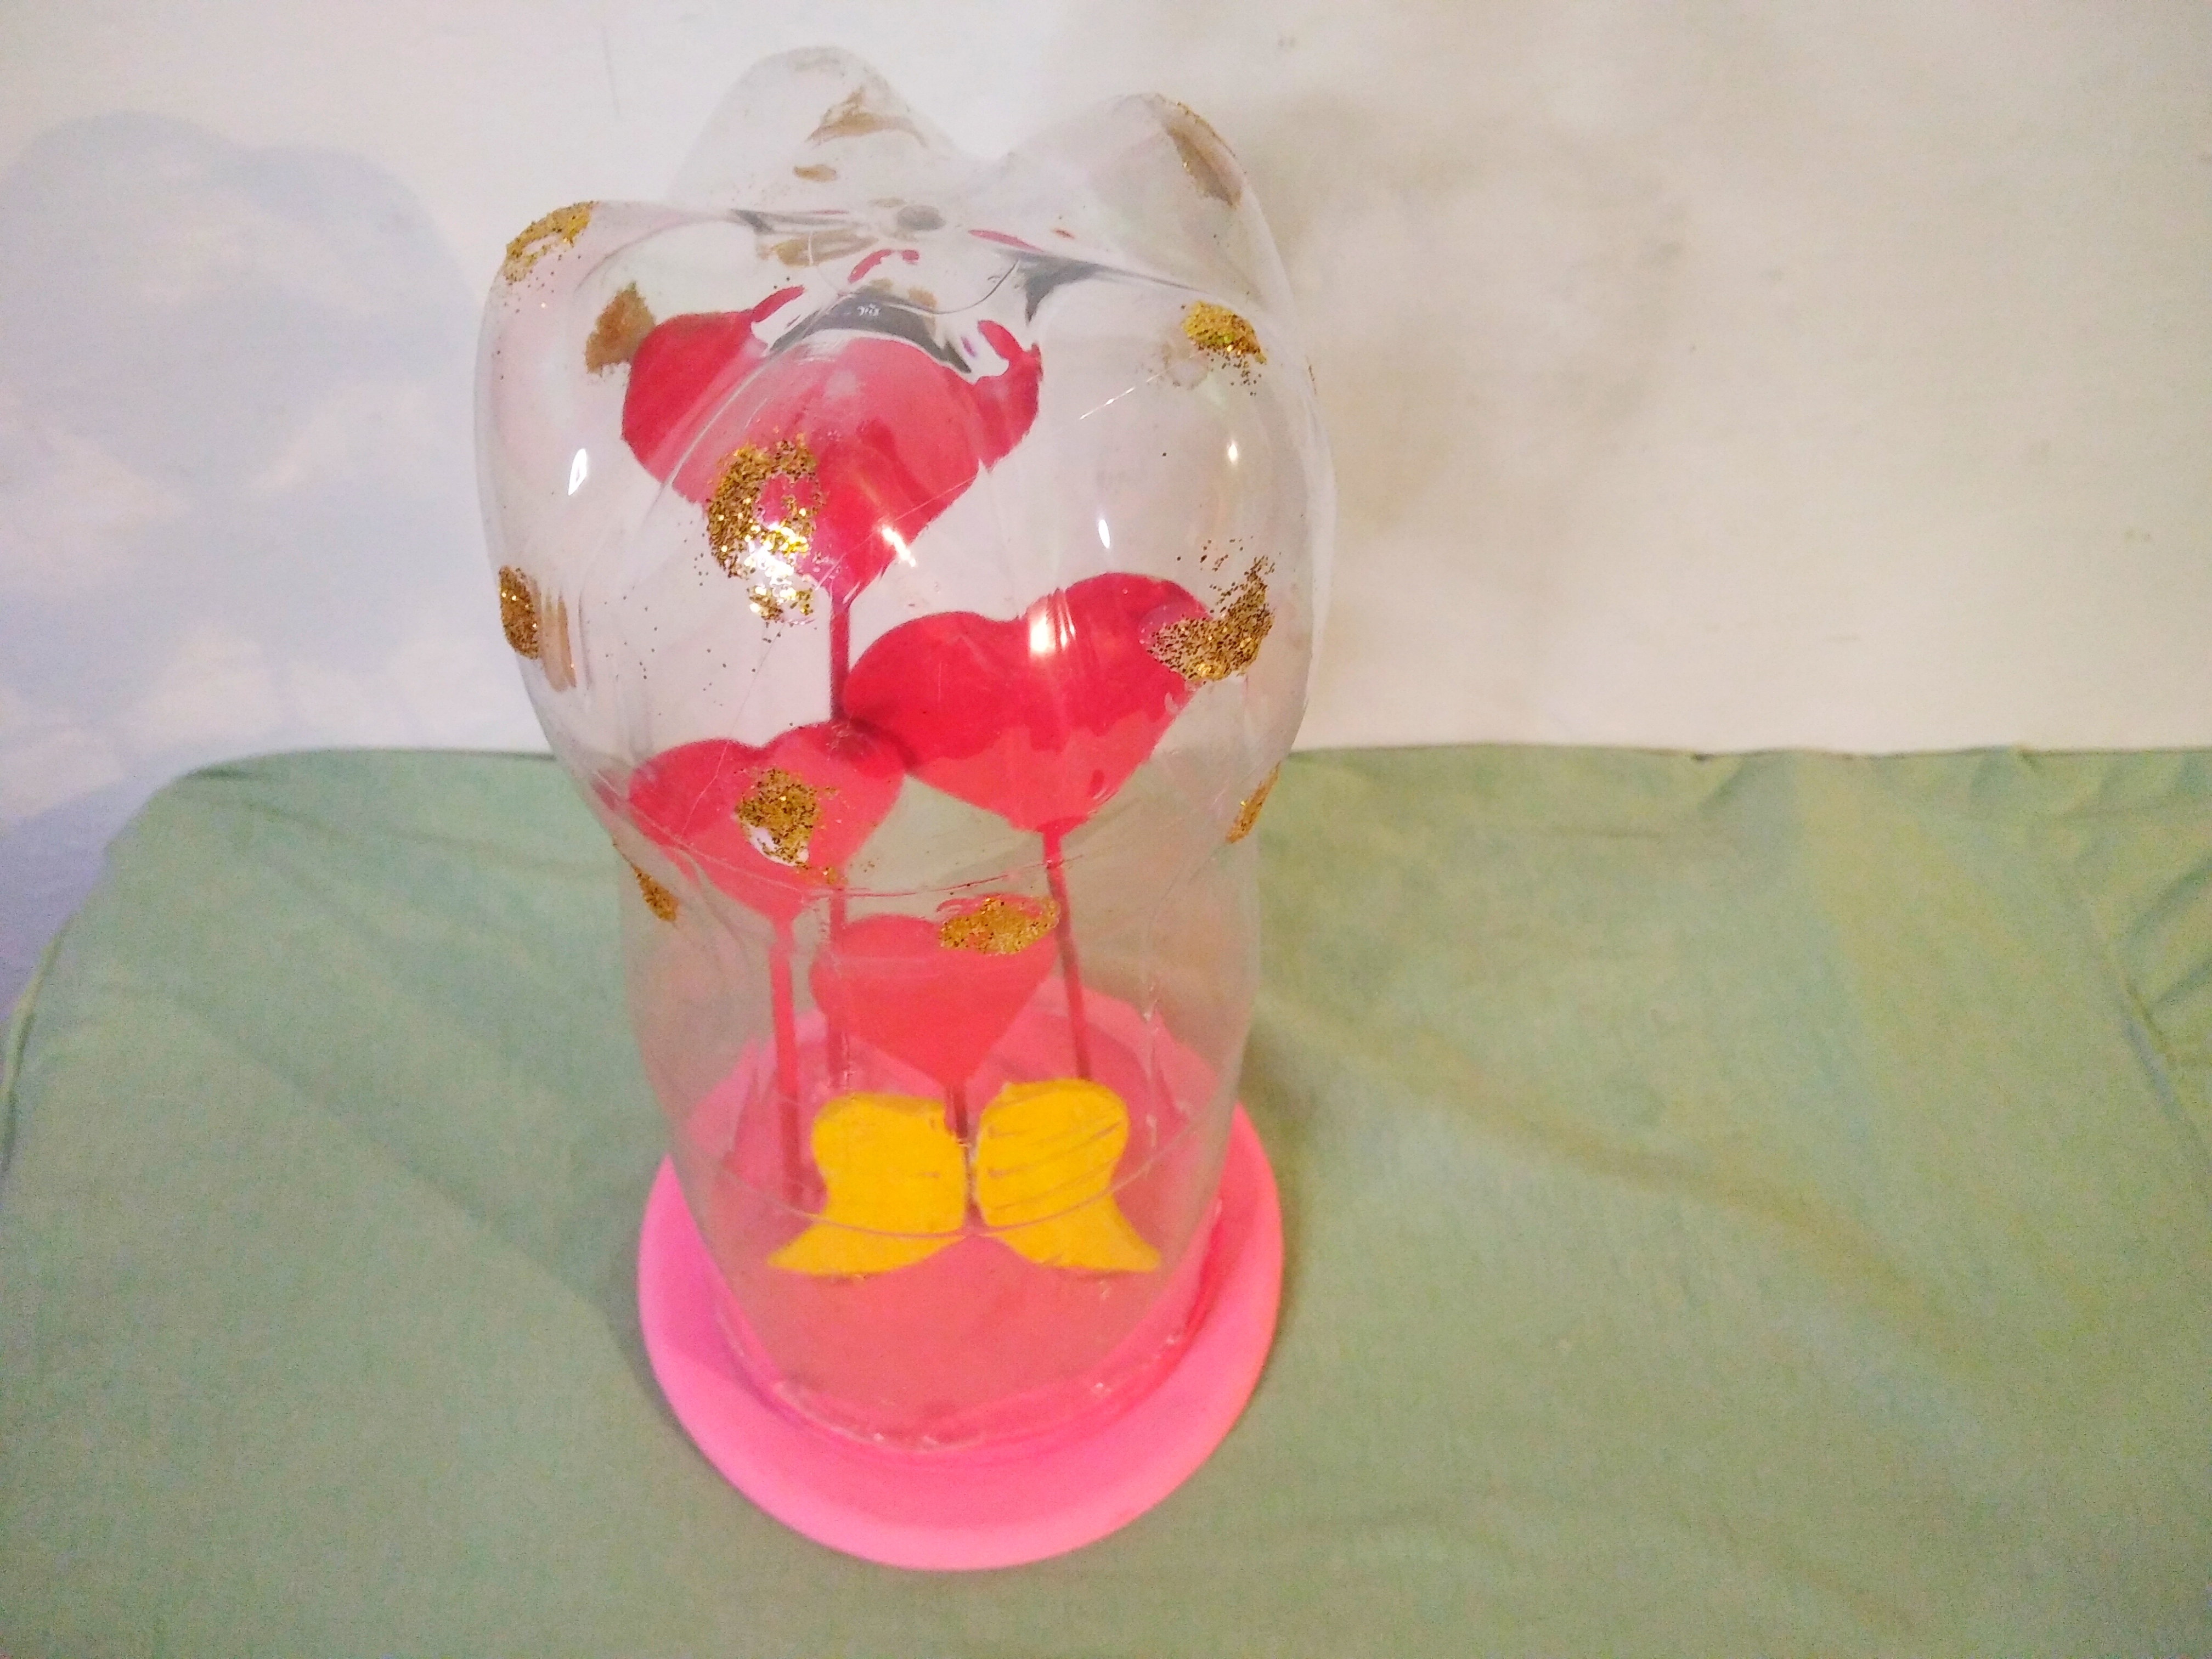
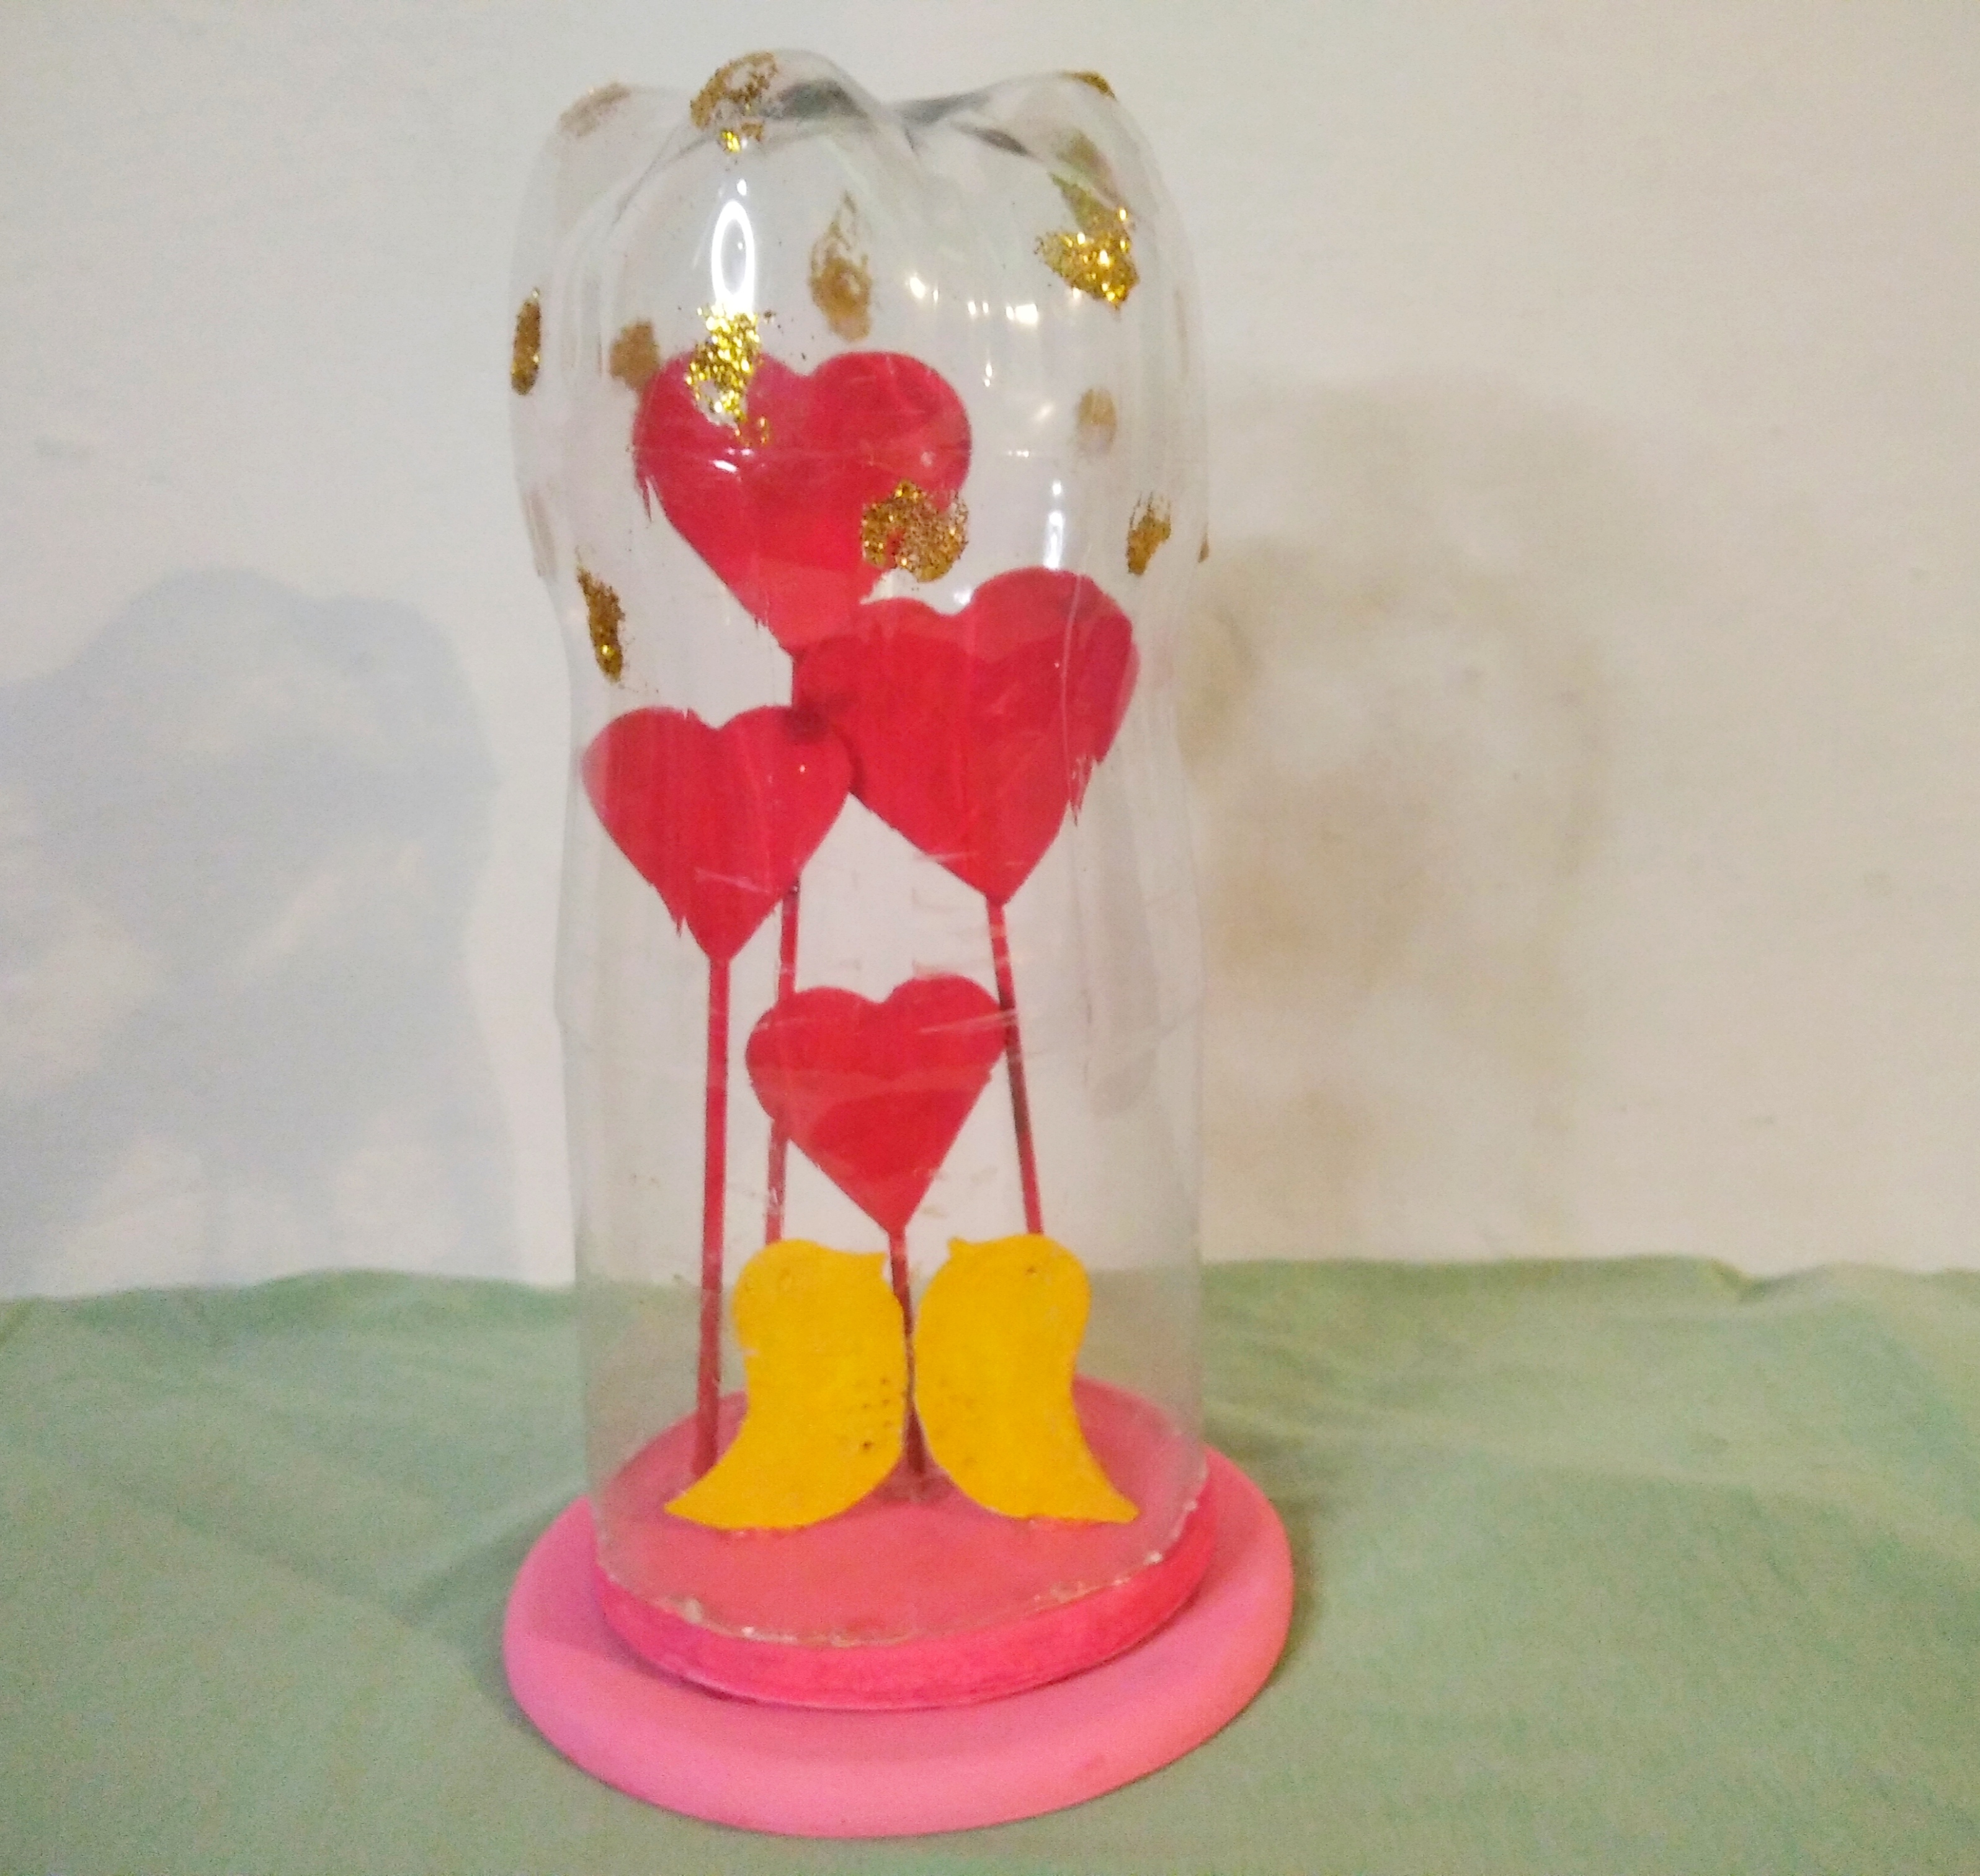
Como último paso tomé una Perola de refresco y la corté, luego la medí a mi adorno y le quedó perfecto, esta perola evitará que al obsequio le entre polvo o se dañe rápidamente, es una especie de cúpula protectora, luego con pega y escarcha le hice unos adornitos en la parte de arriba, veamos ahora el resultado final amigos.
Step 11.
As a last step I took a soda pot and cut it, then I measured it to my ornament and it fit perfectly, this pot will prevent the gift from getting dusty or damaged quickly, it's kind of of protective dome, then with glue and glitter I made some ornaments on the top, now let's see the final result friends.
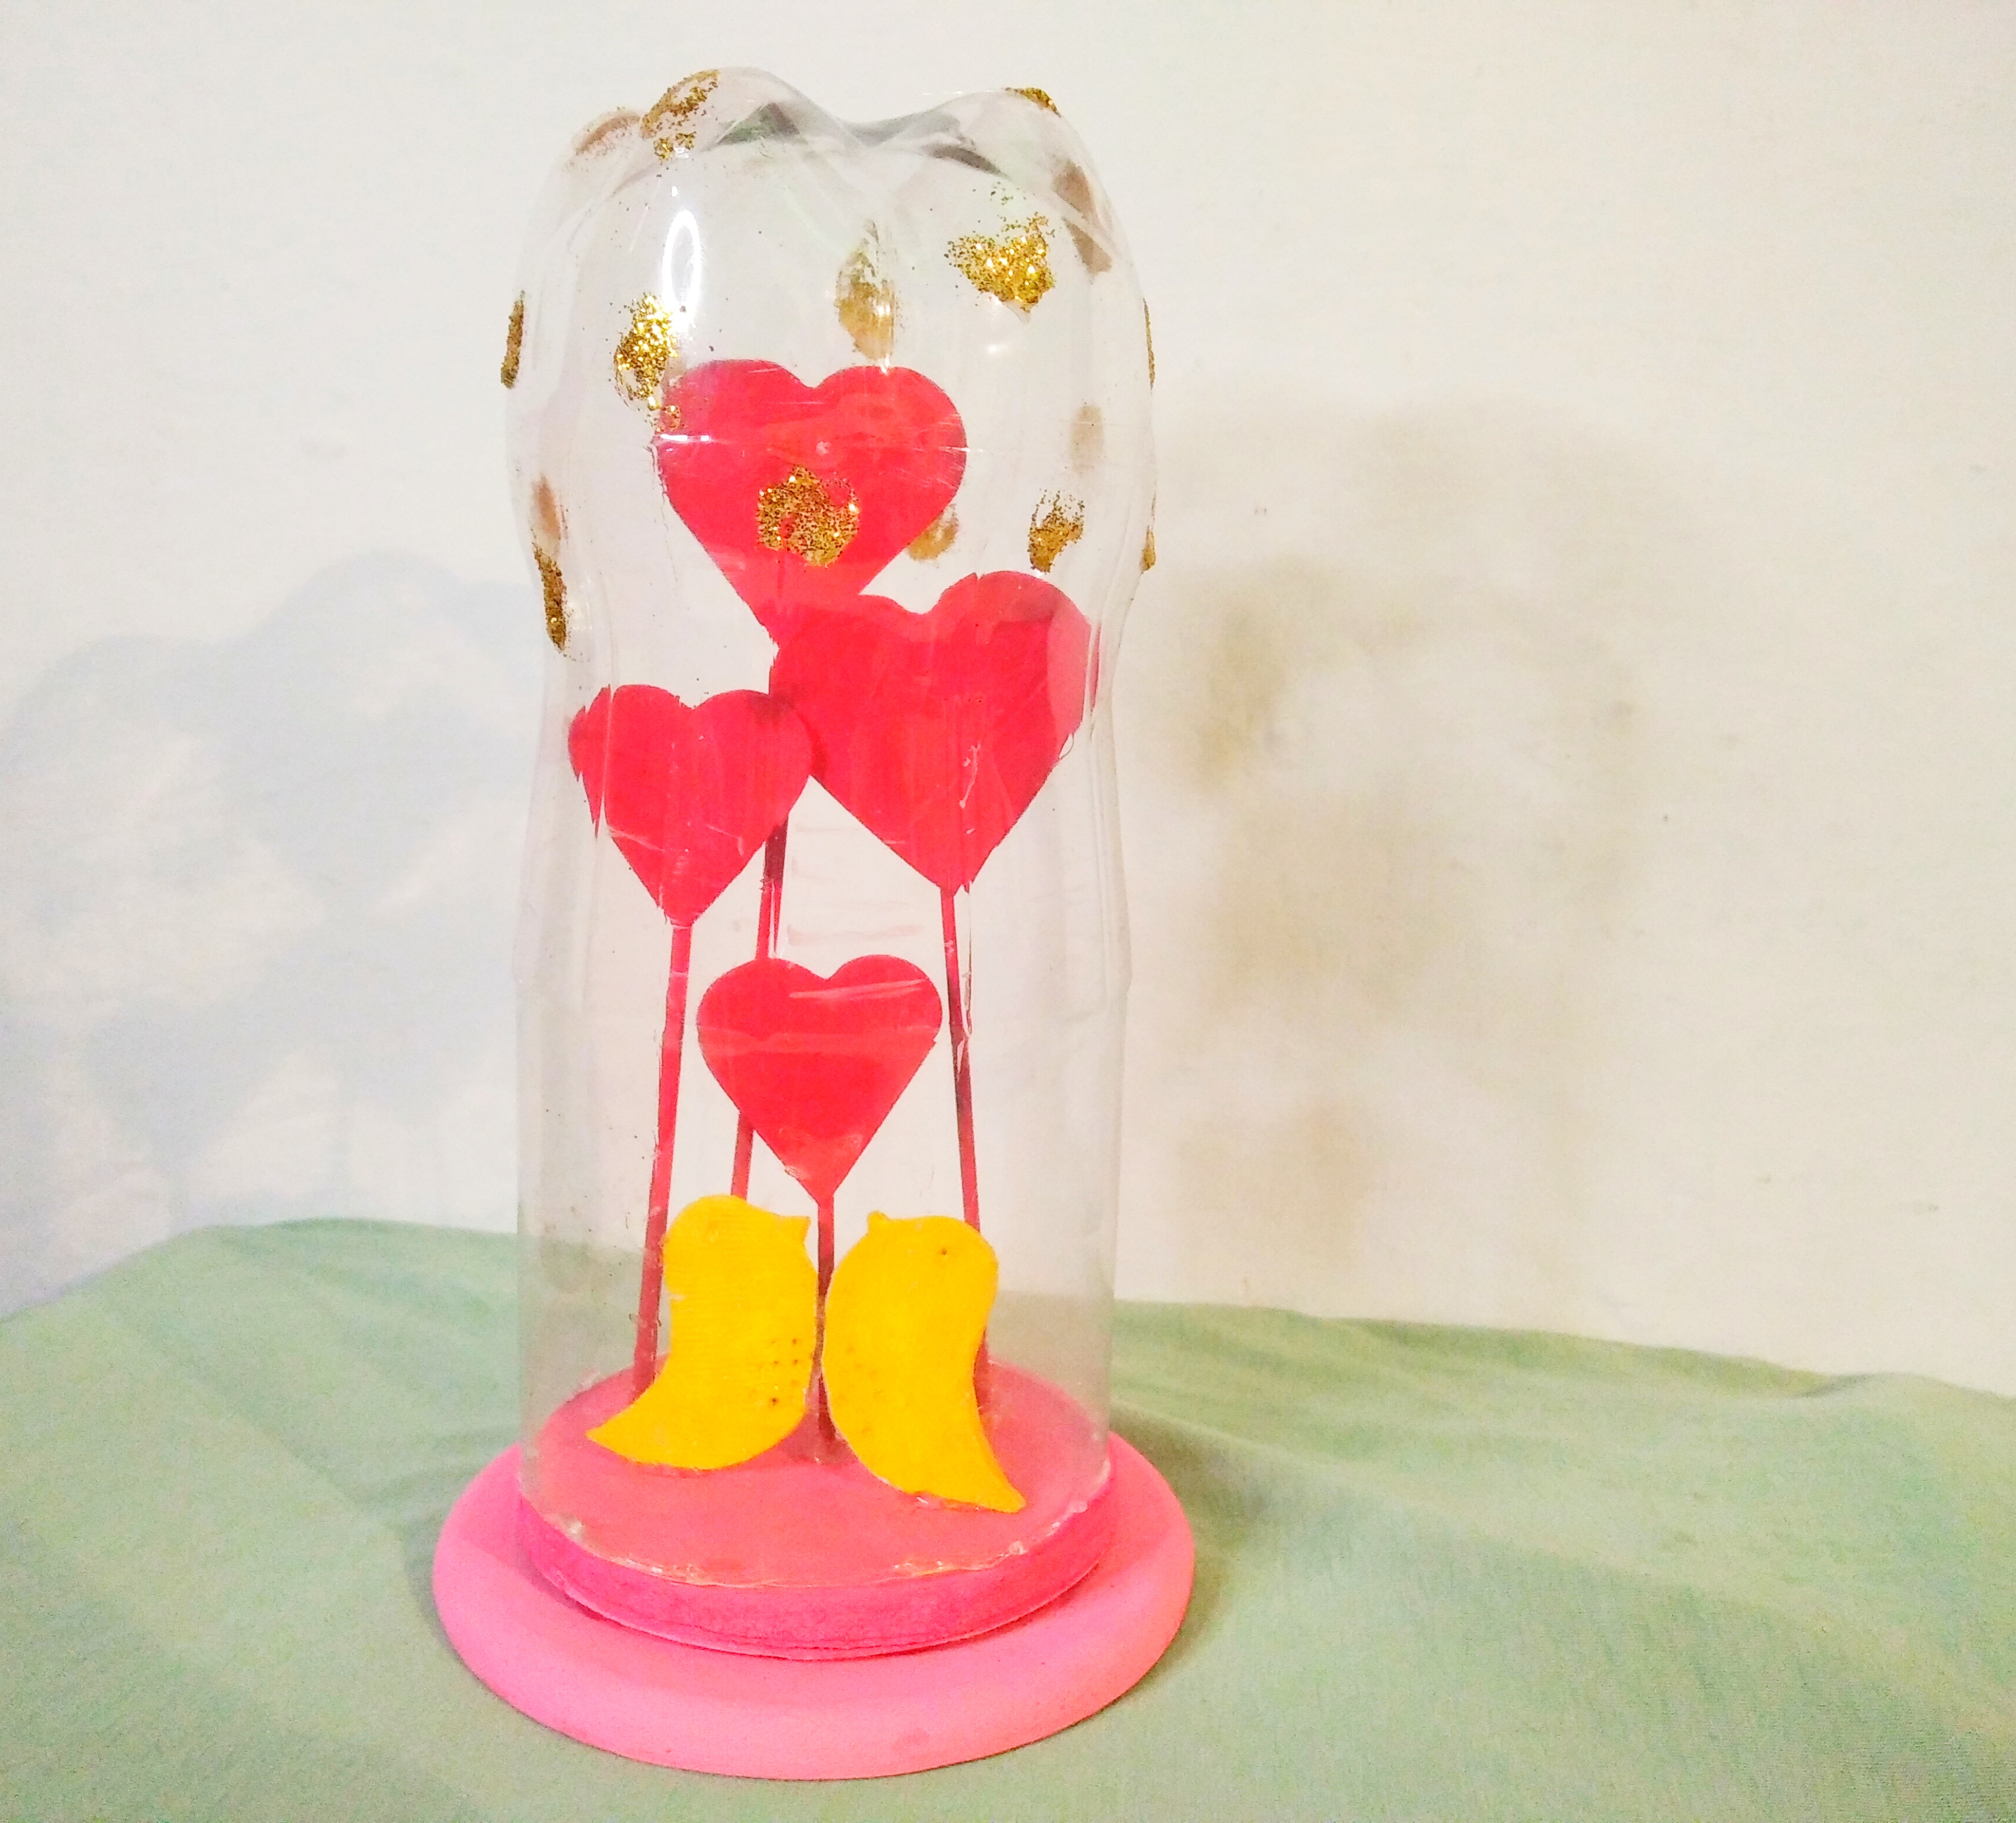
Presentación Final
Final Presentation
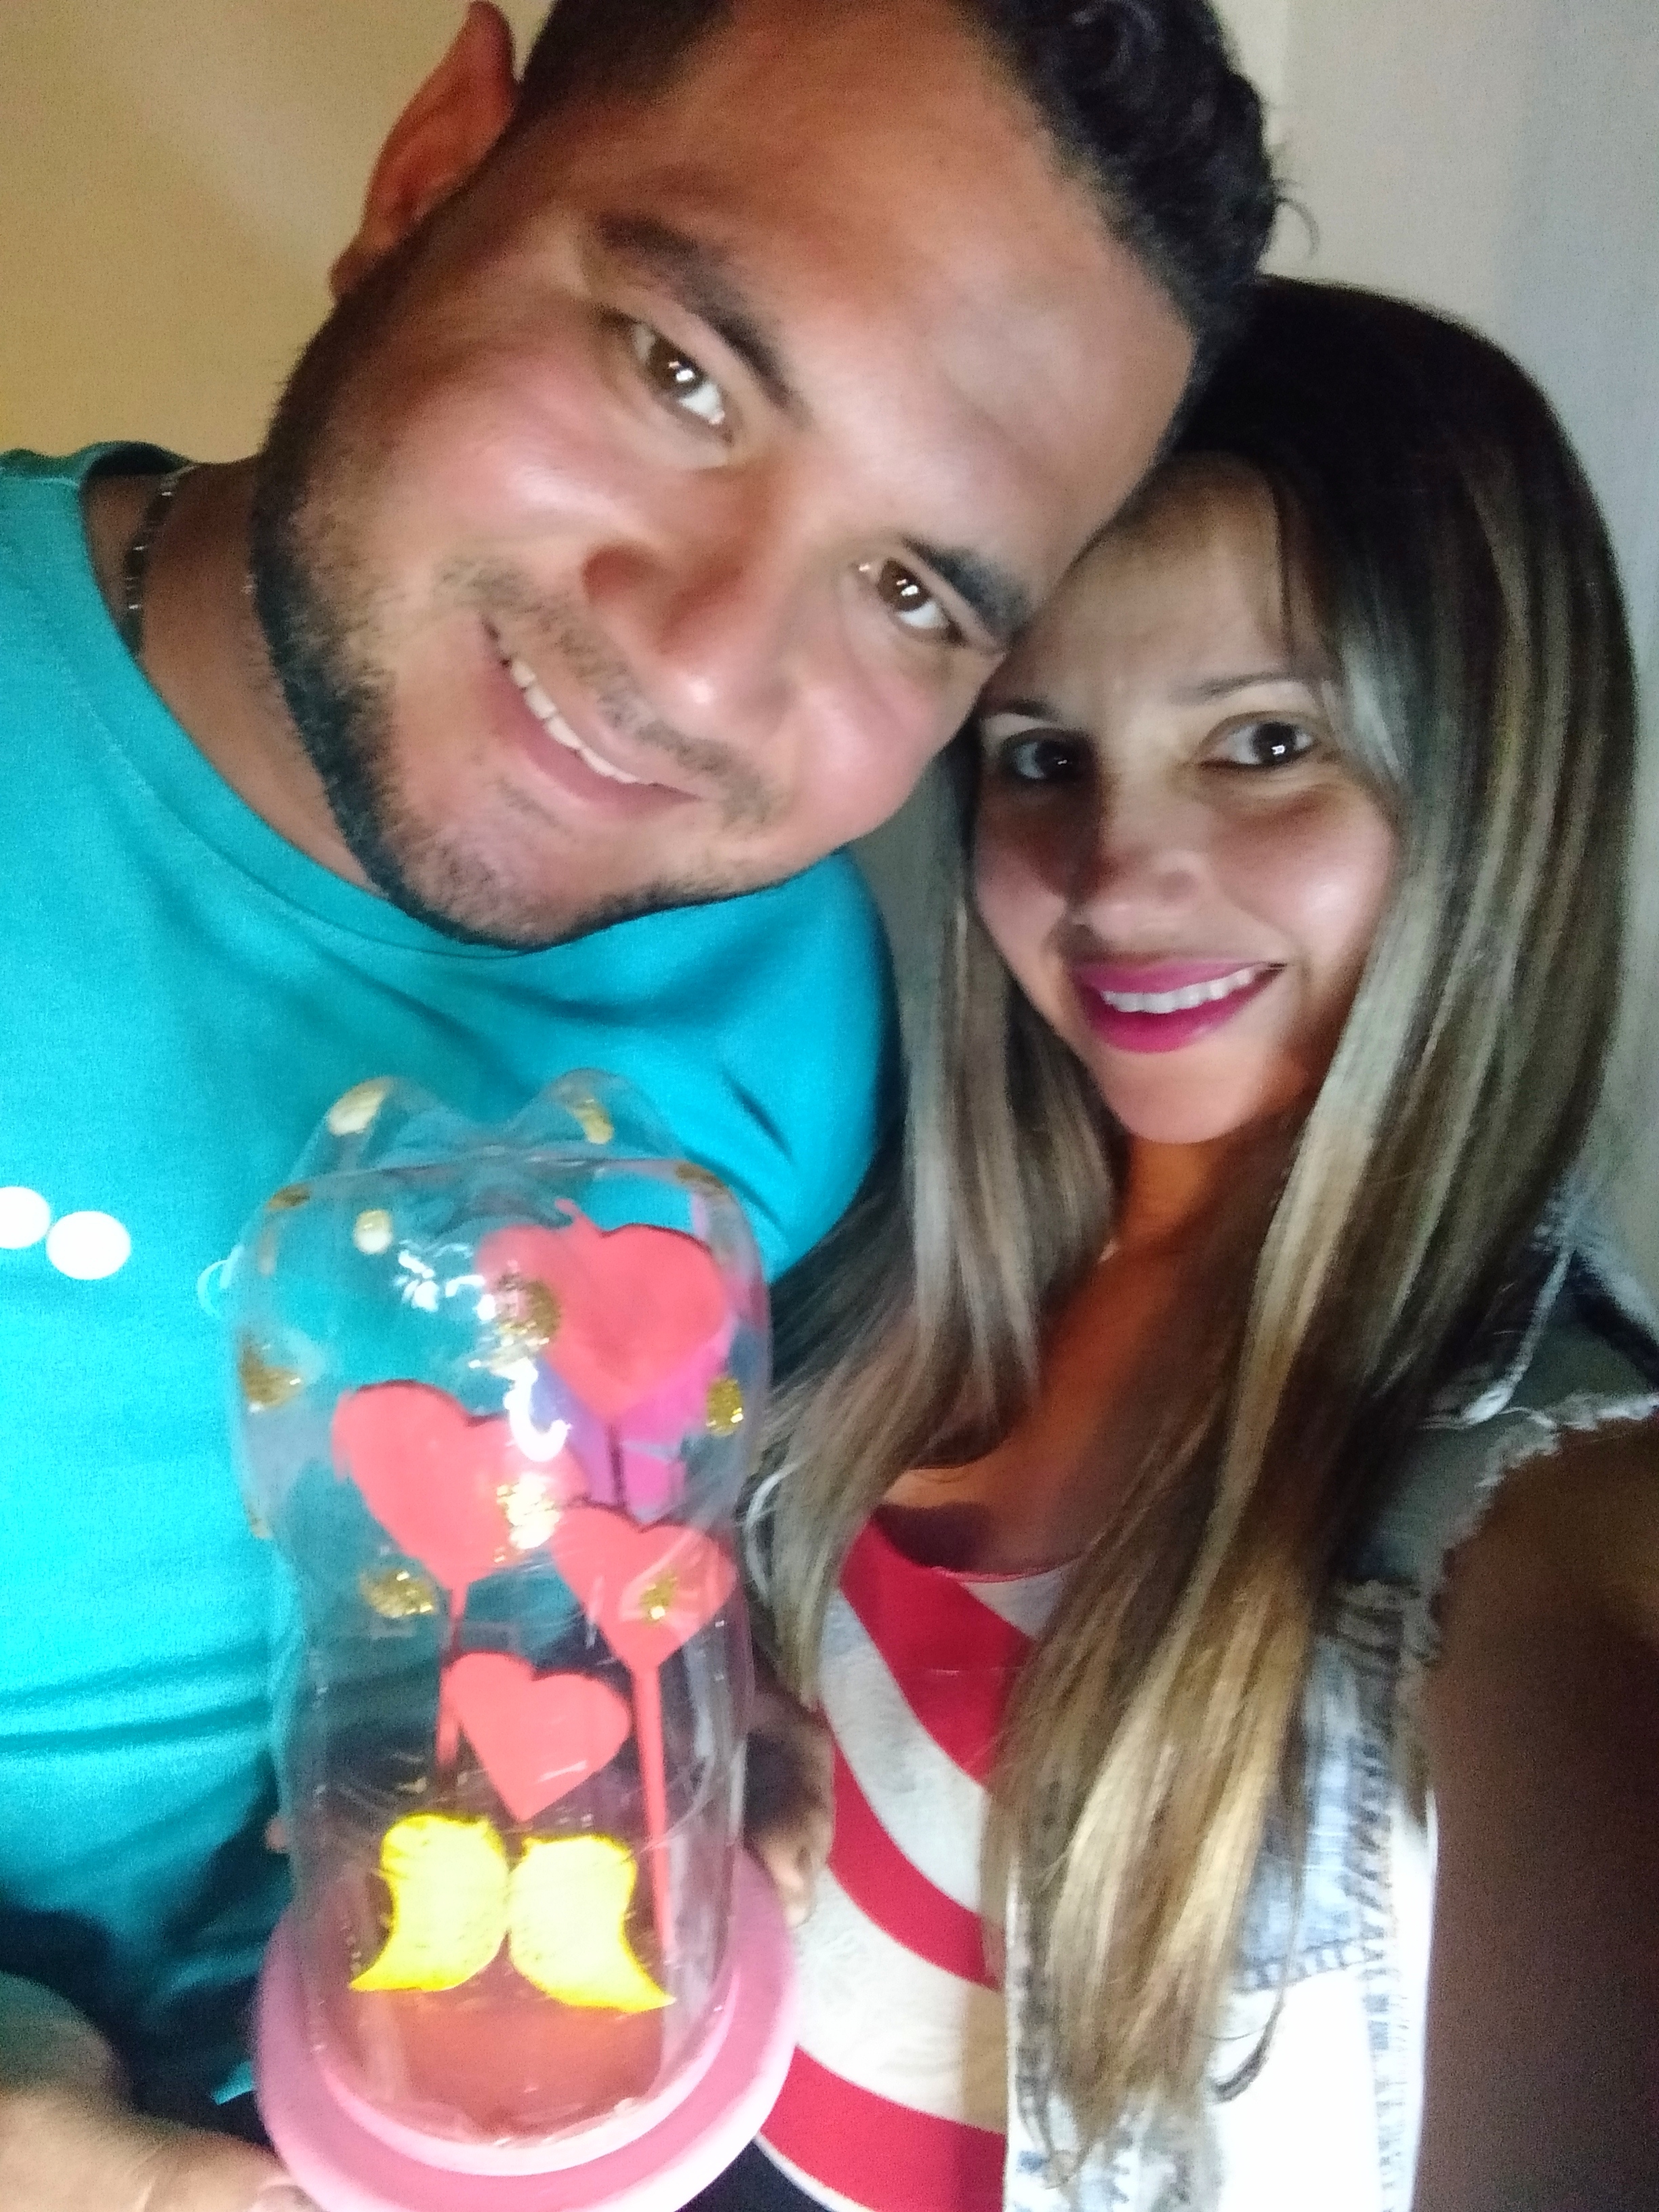
Este adorno está inspirado en un amor bueno, bonito y verdadero por eso quise obsequiarselo a mi esposo, en este día especial celebrando 5 años juntos. Los dejo con las fotografías finales amigos, gracias por seguirme hasta acá.
This ornament is inspired by a good, beautiful and true love, that's why I wanted to give it to my husband, on this special day celebrating 5 years together. I leave you with the final photographs friends, thanks for following me here.
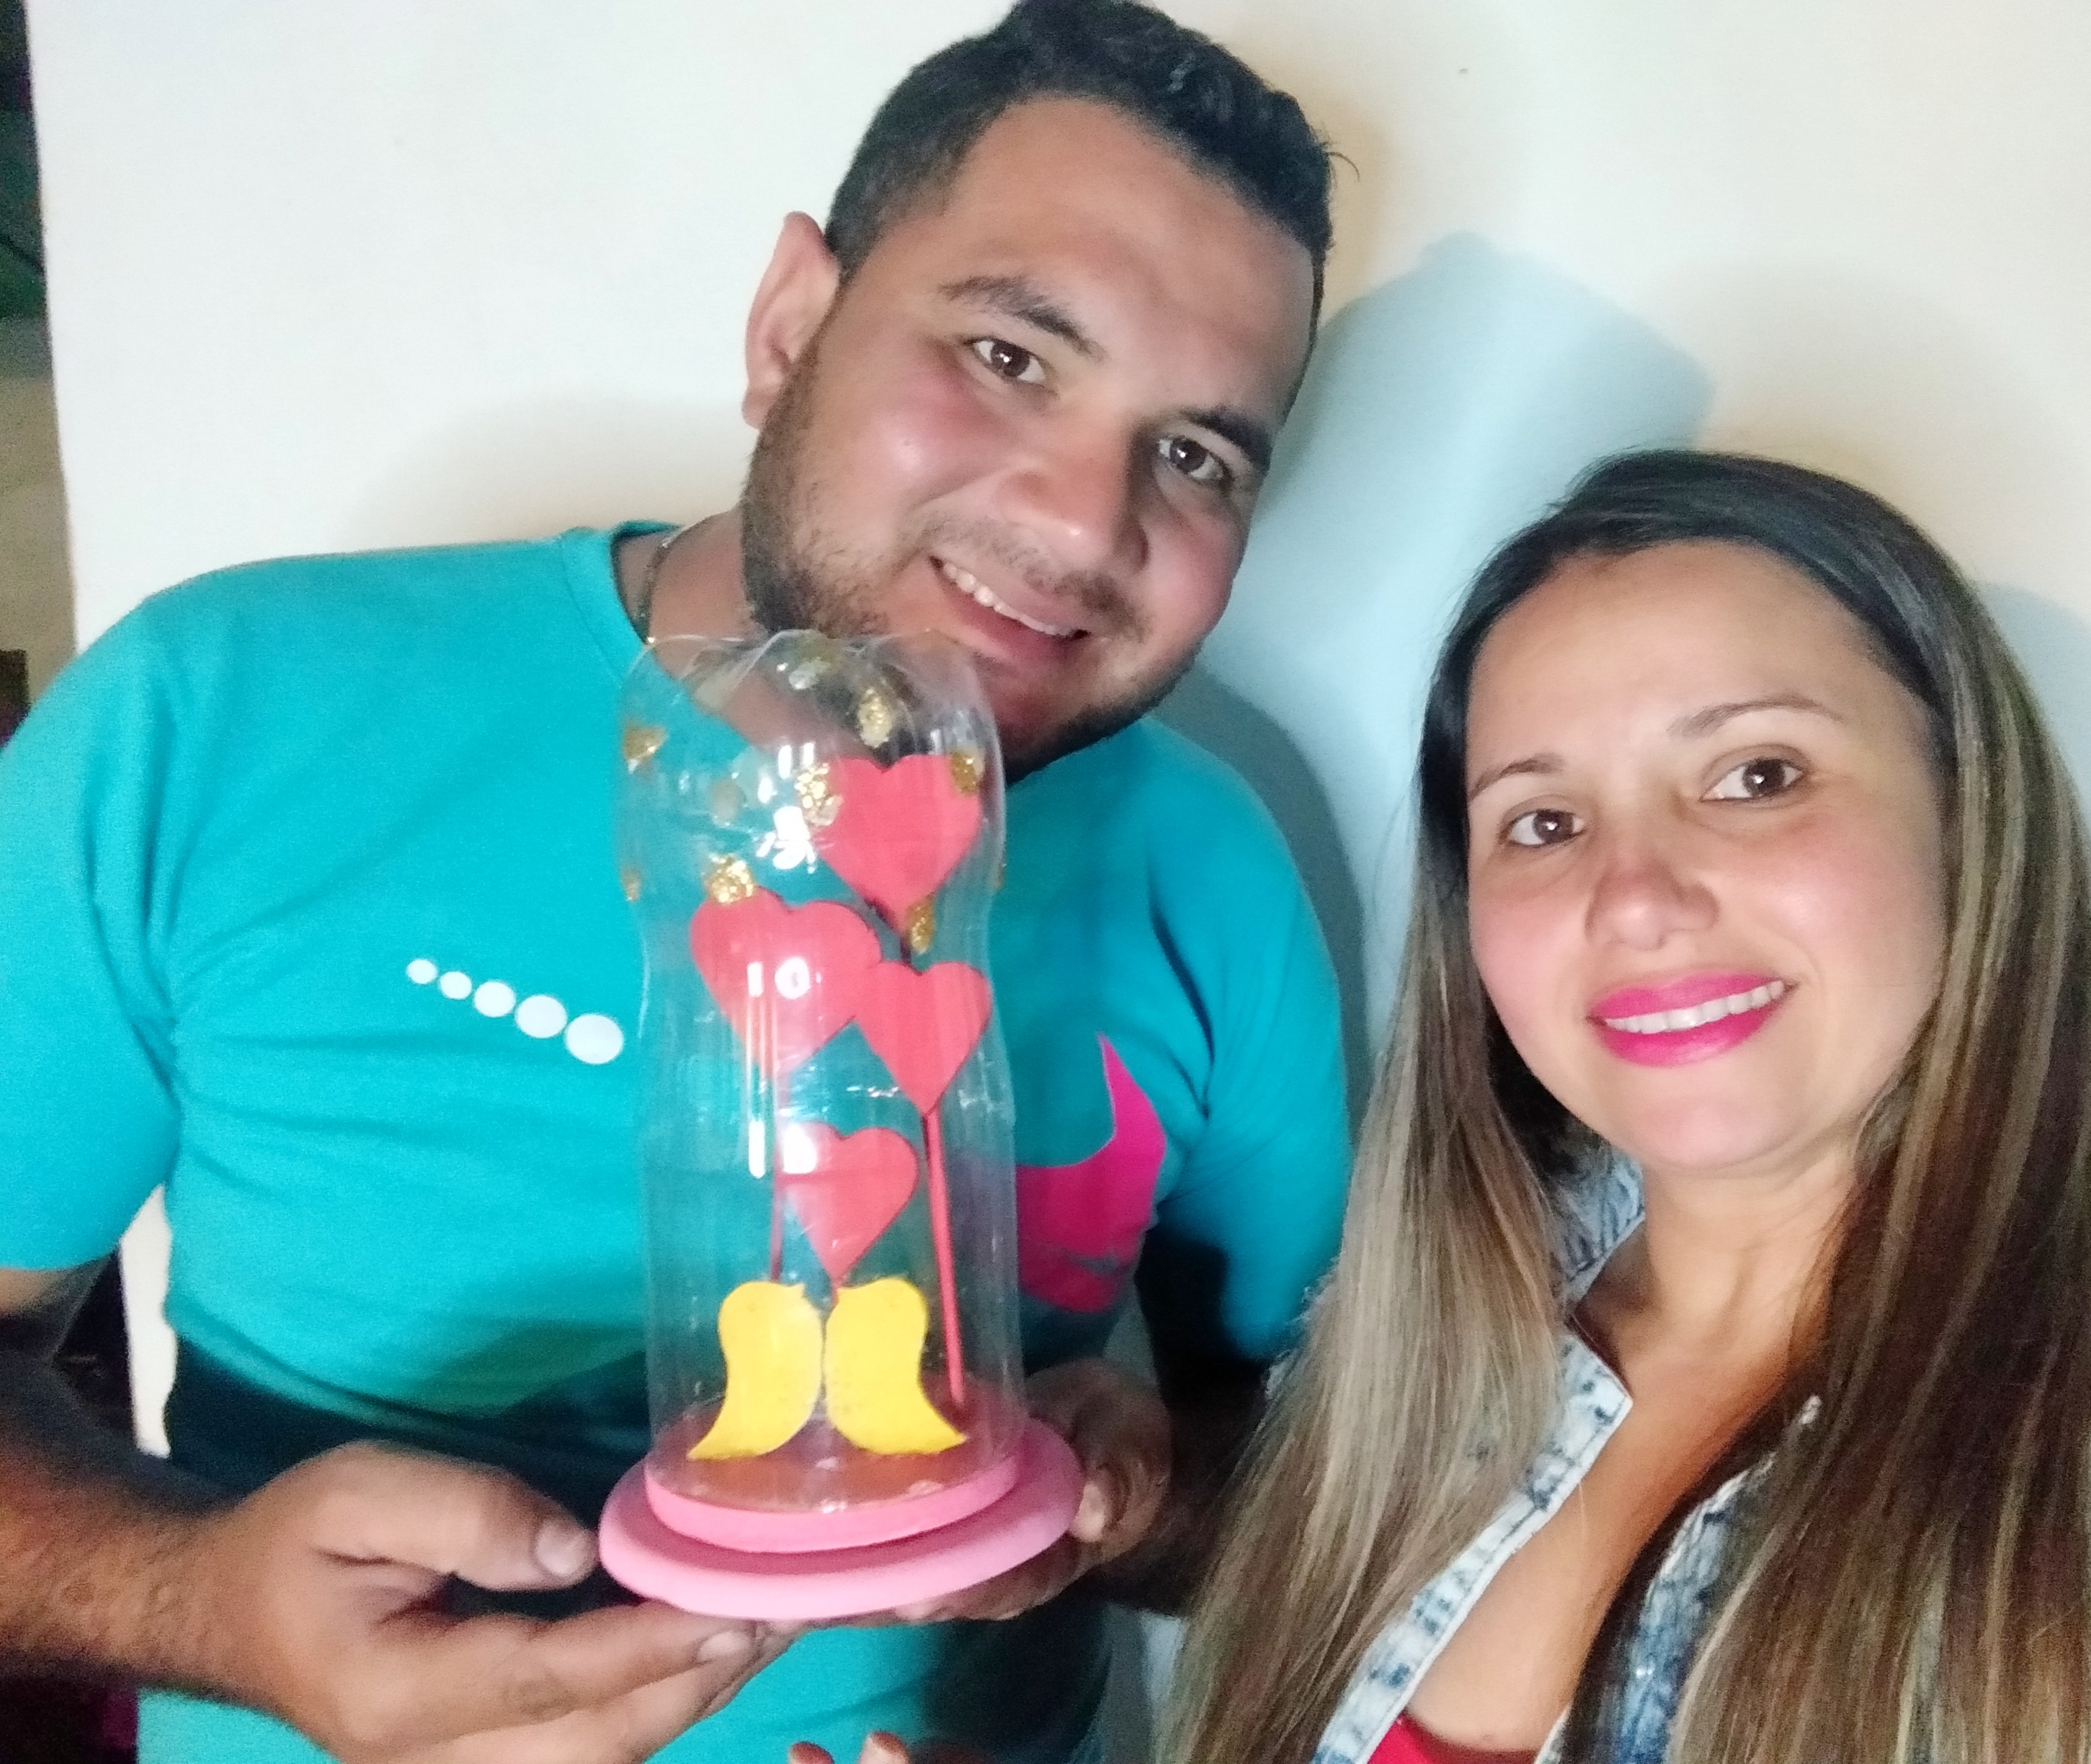
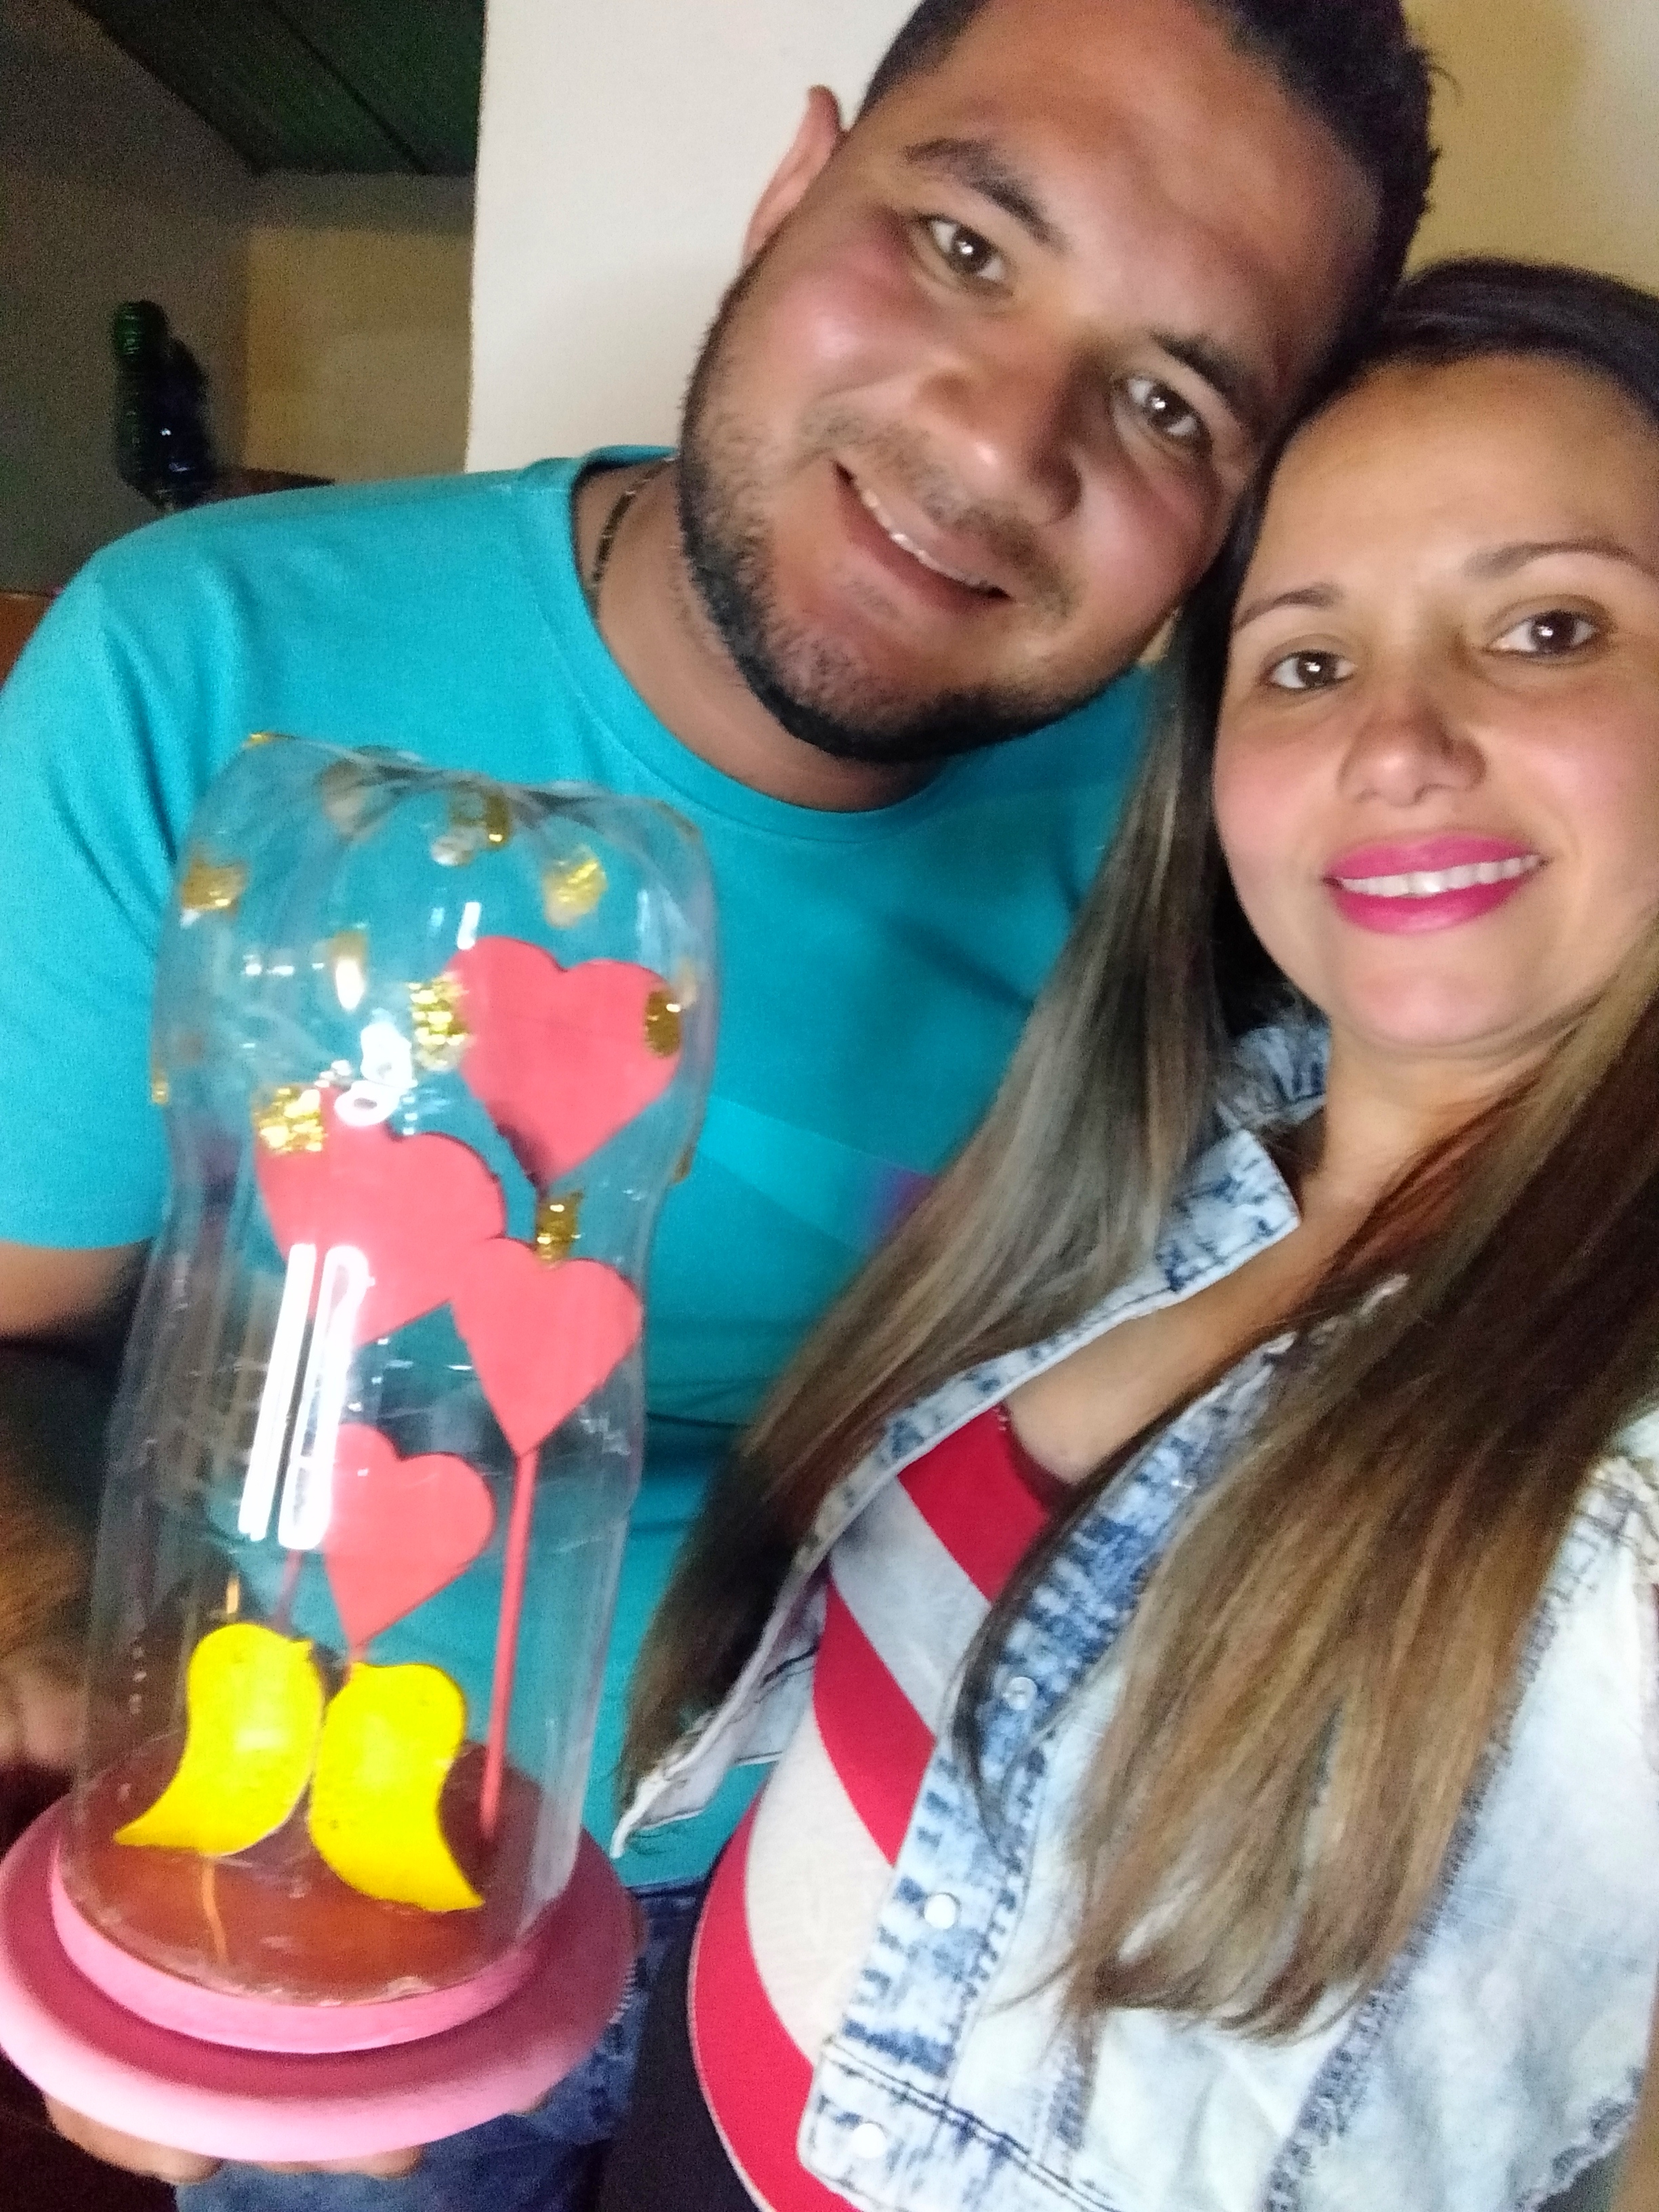
Fotografías especiales con mi amorcito recibiendo su obsequio.
Special photos with my sweetie receiving his gift.
Todas las fotografías son mi propiedad, tomada con mi teléfono Redmi 8A y editadas con la aplicación Polish.Traductor Googl.co.ve. Los separadores de texto usados. All photos are my property, taken with my Redmi 8A phone. Translator Googl.co.ve. The text separators used.
Congratulations @mayi04! You have completed the following achievement on the Hive blockchain and have been rewarded with new badge(s):
Your next target is to reach 100 comments.
You can view your badges on your board and compare yourself to others in the Ranking
If you no longer want to receive notifications, reply to this comment with the word
STOPTo support your work, I also upvoted your post!
Check out the last post from @hivebuzz:
Support the HiveBuzz project. Vote for our proposal!
Thank you for sharing this amazing post on HIVE!
Your content got selected by our fellow curator @rezoanulvibes & you just received a little thank you via an upvote from our non-profit curation initiative!
You will be featured in one of our recurring curation compilations and on our pinterest boards! Both are aiming to offer you a stage to widen your audience within and outside of the DIY scene of hive.
Join the official DIYHub community on HIVE and show us more of your amazing work and feel free to connect with us and other DIYers via our discord server: https://discord.gg/mY5uCfQ !
If you want to support our goal to motivate other DIY/art/music/homesteading/... creators just delegate to us and earn 100% of your curation rewards!
Stay creative & hive on!
Muchas gracias por el apoyo.☺️
Que lindo adorno amiga, me encantaron los corazones y los dos pajaritos adorables, saludos!
Saludos amiga, muchas gracias por tu visita me alegra que le haya gustado el obsequio. Y siii los pajaritos adorables.🤩🥰
Ajaaaa! que bueno verlos en acción, me encantó tu presentación, las fotografías usando las herramientas, eso fue genial! Tu proyecto está hermoso y lleno de buena vibra.
Muchas gracias por participar, feliz día de san Valentín.
Saludos equipodelta me contenta tanto que les haya gustado mi presentación 🥰 es todo un honor para mí crear para esta linda comunidad la cual se ha vuelto mi preferida por permitirme expresarme a través de las manualidades. Gracias por su apoyo.😊❤️
Feliz día del Amor y la Amistad.🥰❤️