
Saludos gente increíble de #hive saludos cordiales a todas las abejitas hermosas que todos los días llenan a la plataforma de tanto talento, sobretodo los de esta comunidad de hive #diy que se ha convertido en un espacio donde todos podemos hacer y mostrar nuestras ideas concretadas, también está comunidad nos ayuda a dejar fluir toda esa creatividad lo que hace que día a día sea un derroche de talento.
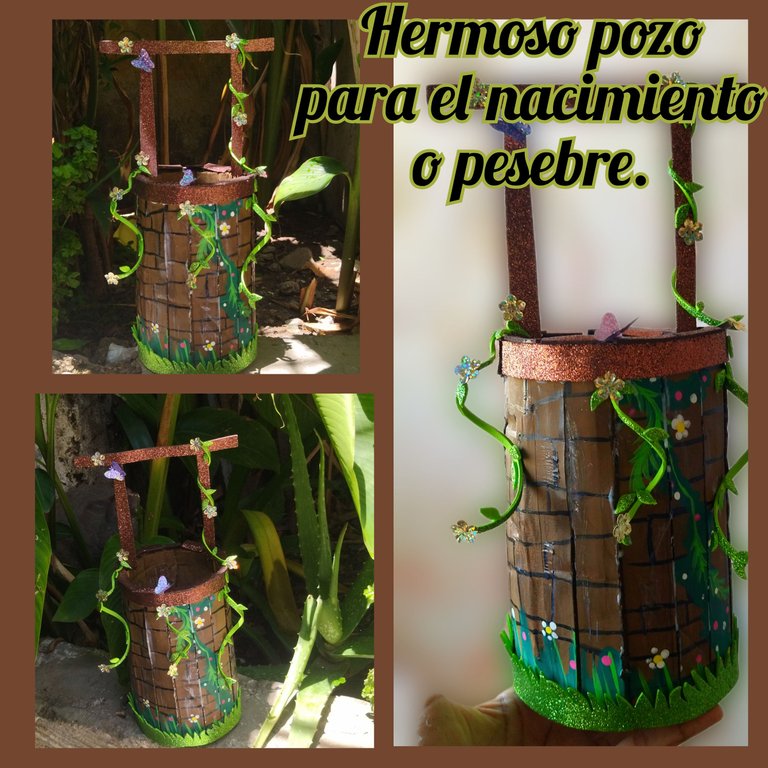
Hoy les traigo una hermosa creación, que pude realizar para mí nacimiento o pesebre, si señores, aunque suene algo loco, ya comencé a prepararme para la navidad porque es mi época favorita del año, así que muy probablemente verán que les compartiré algunos contenidos de la navidad.
En esta oportunidad yo trabajé para realizar un hermoso pozo de los deseos que voy a colocar en mi nacimiento o pesebre, cómo se le diga en su país de origen, trabaje por supuesto con materiales de reciclaje en su mayoría porque hay que contribuir con la limpieza del medio ambiente y si haciendo una pequeña tarea manual ayudamos, que así sea, así que sin más aquí les dejo el paso a paso, y por supuesto manos a la obra.
 PASO A PASO
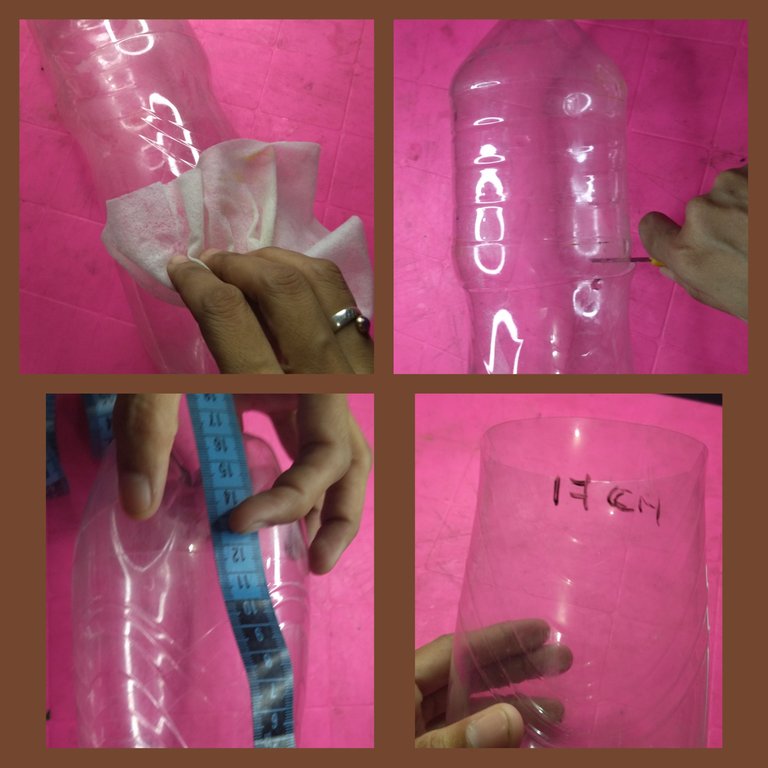
Marcamos en la botella plástica midiendo desde la parte de abajo hacia arriba unos 17 cm Y luego con ayuda de una cuchilla picamos y también limpiamos con una toallita húmeda.
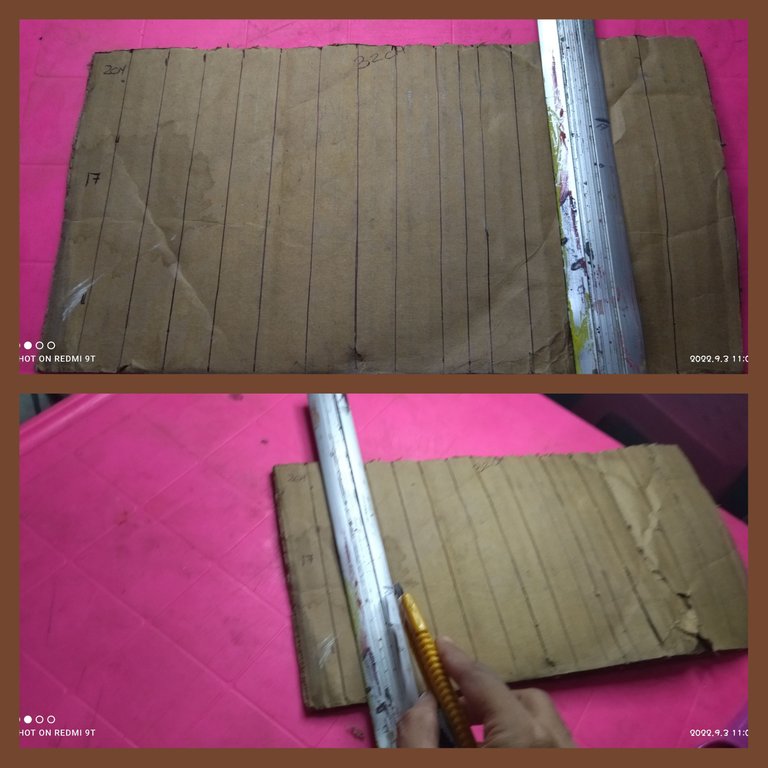
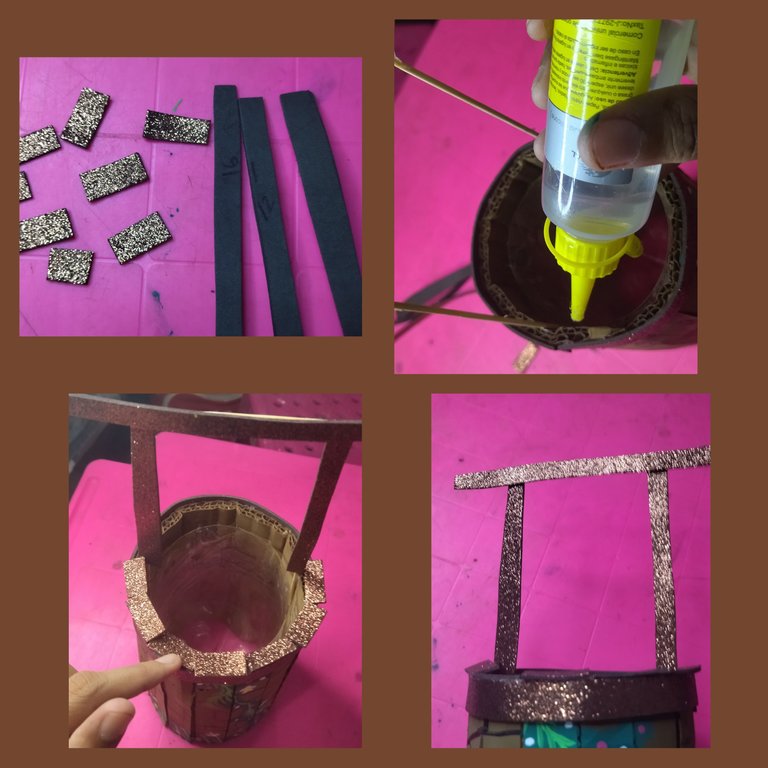
Luego en el trozo de cartón y ayudandome con una regla marque unos 17 cm de largo y luego picamos, al terminar marque unas líneas cada 2 cm de ancho.
Cuando termine de marcar tome la cuchilla y fui haciendo pequeños cortes No tan profundo para evitar romper totalmente el cartón.
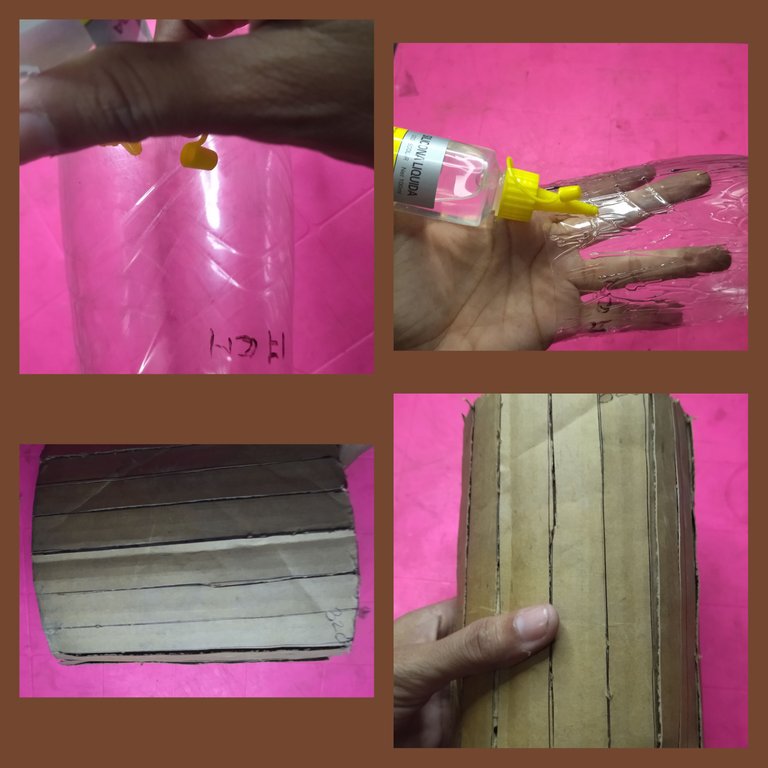
Luego tome el silicón liquido y lo aplique en la botella, eso sí cubrí bien de silicón para que el cartón pudieran fijarse bien, finalmente ejercí un poco de presión para que fijara bien.
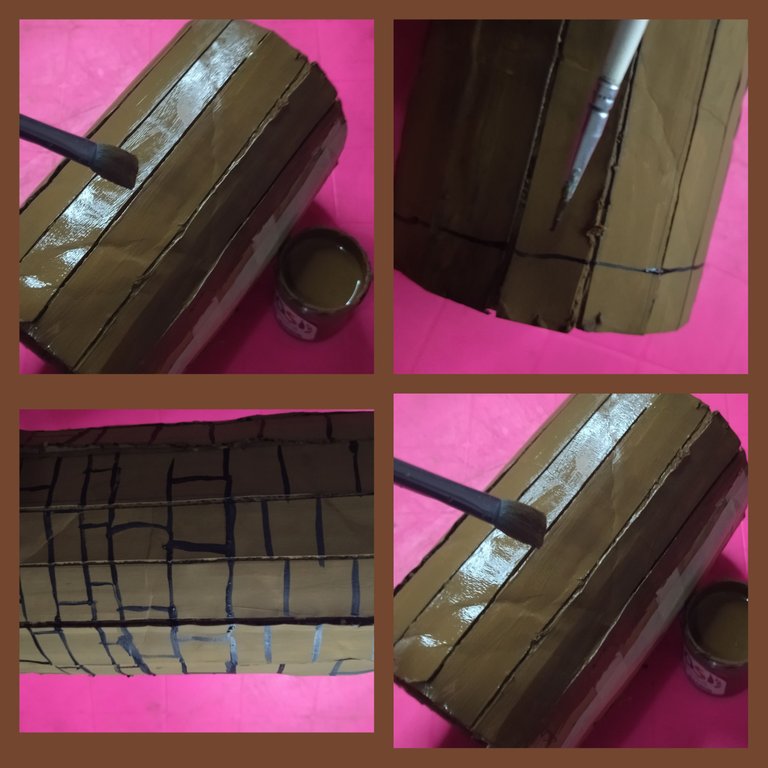
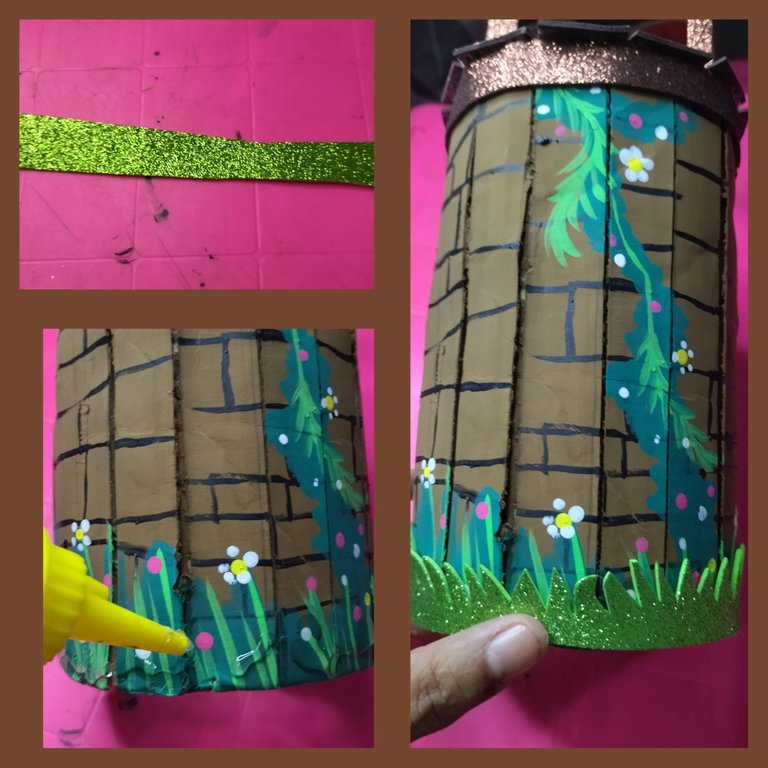
Luego de que seco, tome la pintura marrón y cubrí todo el cartón, yo le di dos capas para cubrir bien, luego con el pincel fino y la pintura negra dibuje las diferentes líneas que forman los bloques del pozo.
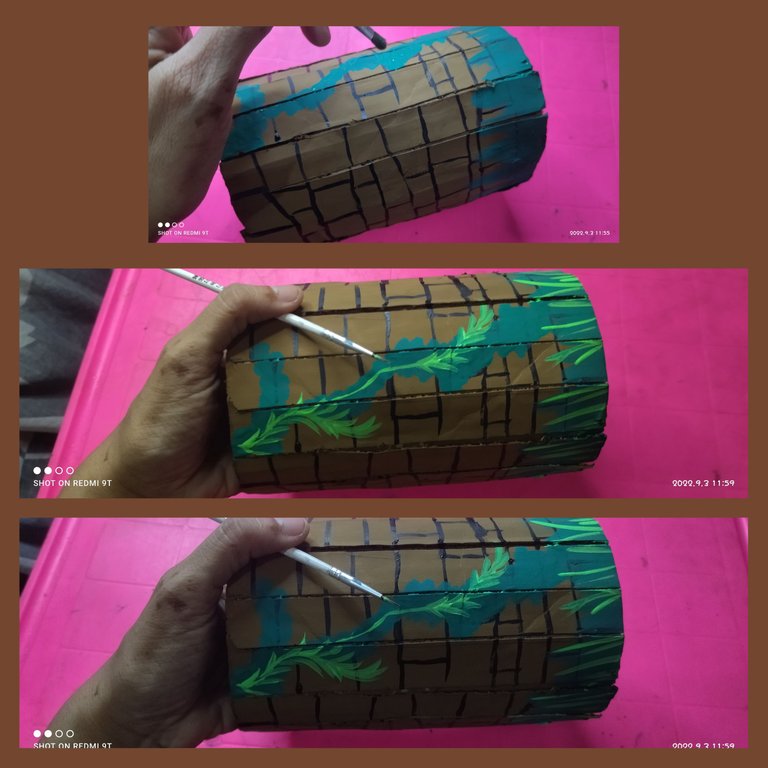
Ahora tome la pintura verde oscura y dibuje una especie de follaje, y grama,luego tome la pintura de color verde manzana.
También dibuje flores de color blanco y de manera aleatoria coloque puntos fucsia, y blancos.
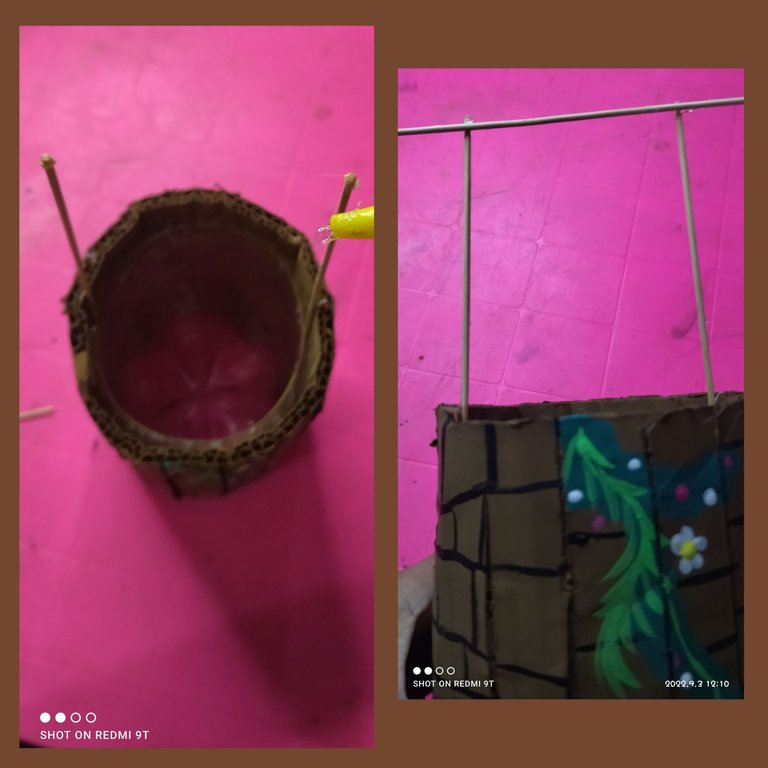
Luego tome dos palillos y los introduje en ambos lados y los pegue con silicón liquido y finalmente coloque otro palillo en la parte de arriba.
Tome el foami marrón y marque un listón de unos 17 cm de.largo por 1 cm de ancho,al terminar aplico el silicón liquido por todo el borde y fue pegando.
También recorte tres listones más los cuales utilice para forrar los palillos.
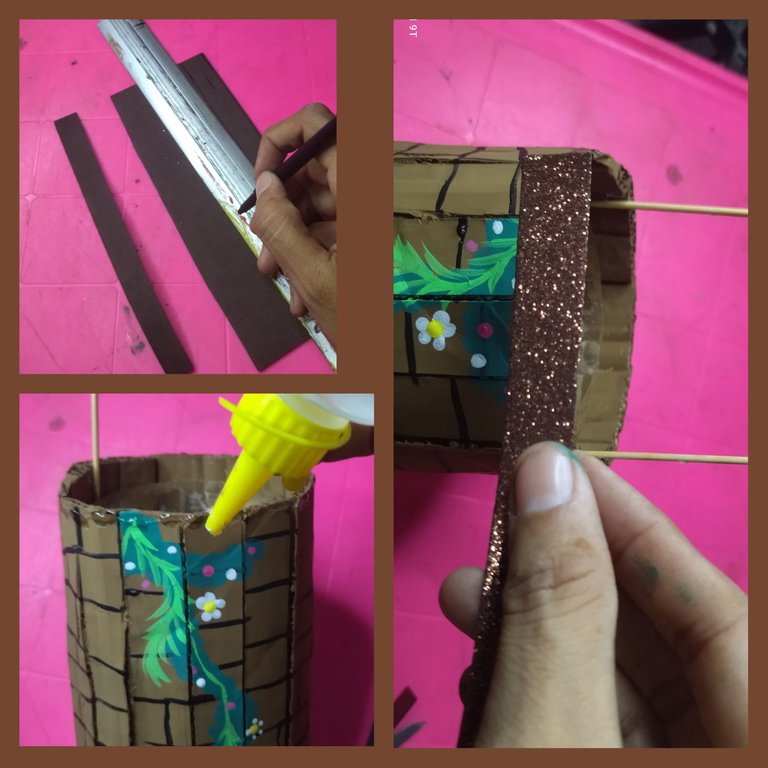
Después con los retazos que nos van quedando recortamos pequeños rectangulos de diferentes tamaños los cuales peque en el borde con el silicón liquido.
Después agarre un trozo de foami escarchado verde y recorte, haciéndole pequeños cortes de manera que se formará como la grama Y pegamos por la parte de abajo de nuestro pozo.
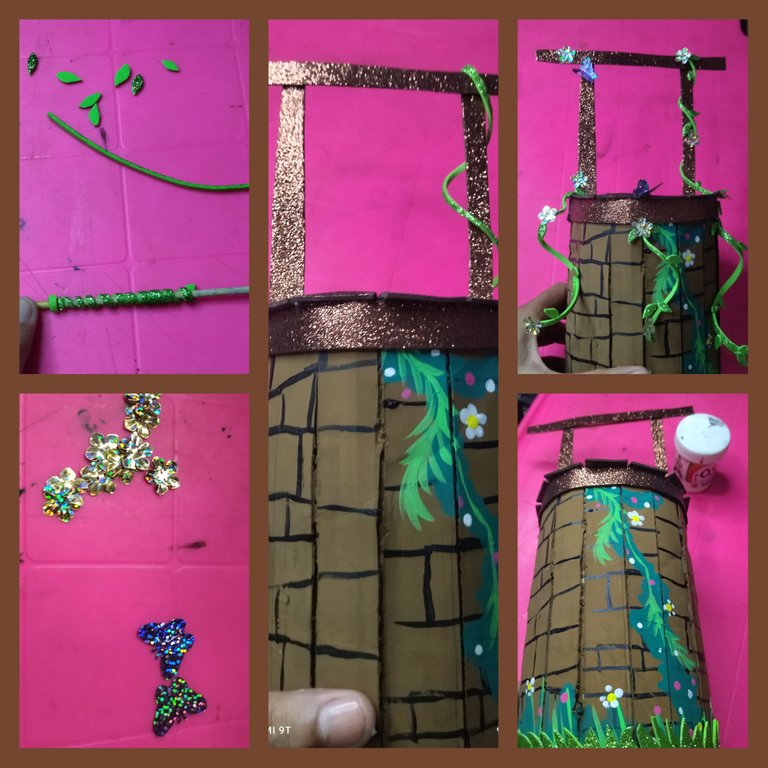
Ahora para finalizar tome los retazos más delgados y los enrolle en un palillo, hasta formar una especie de enredadera, también recorte pequeñas hojitas luego pegue en diferentes partes del pozo y también coloque unas flores y unas mariposas y así terminamos.
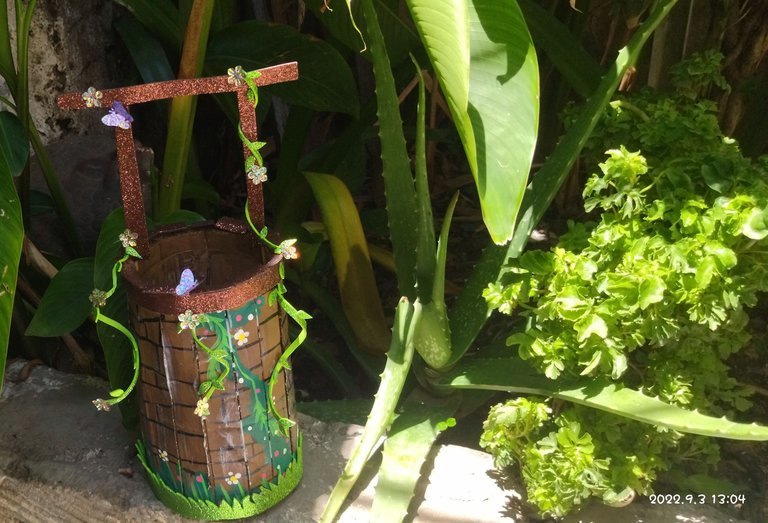
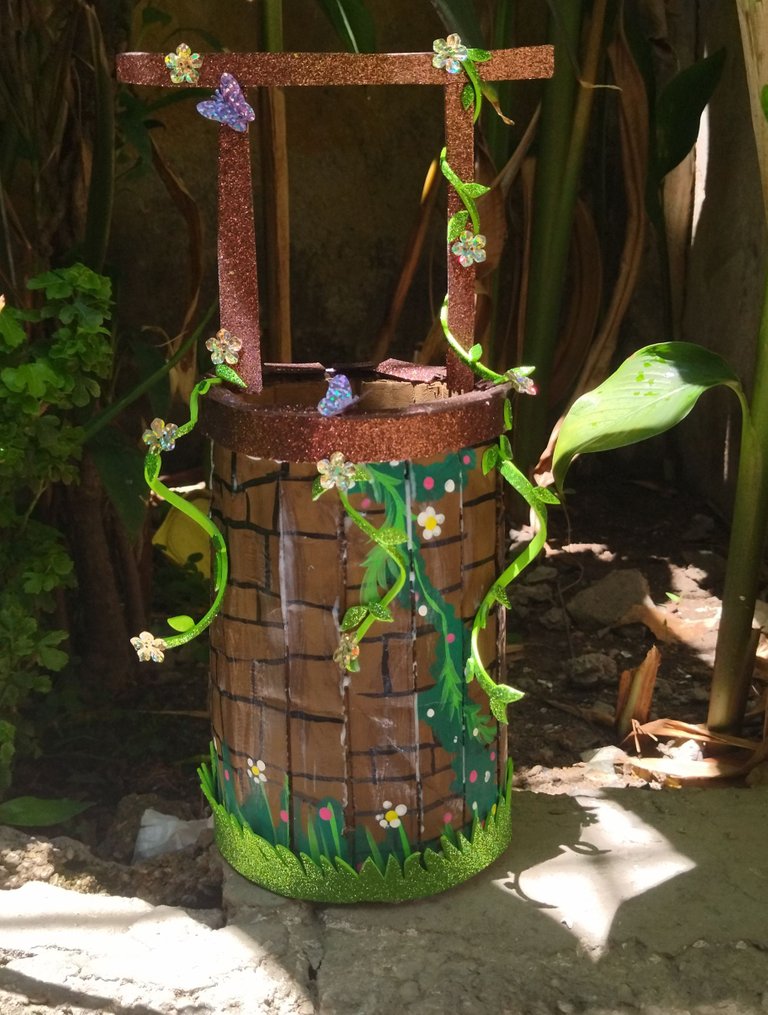
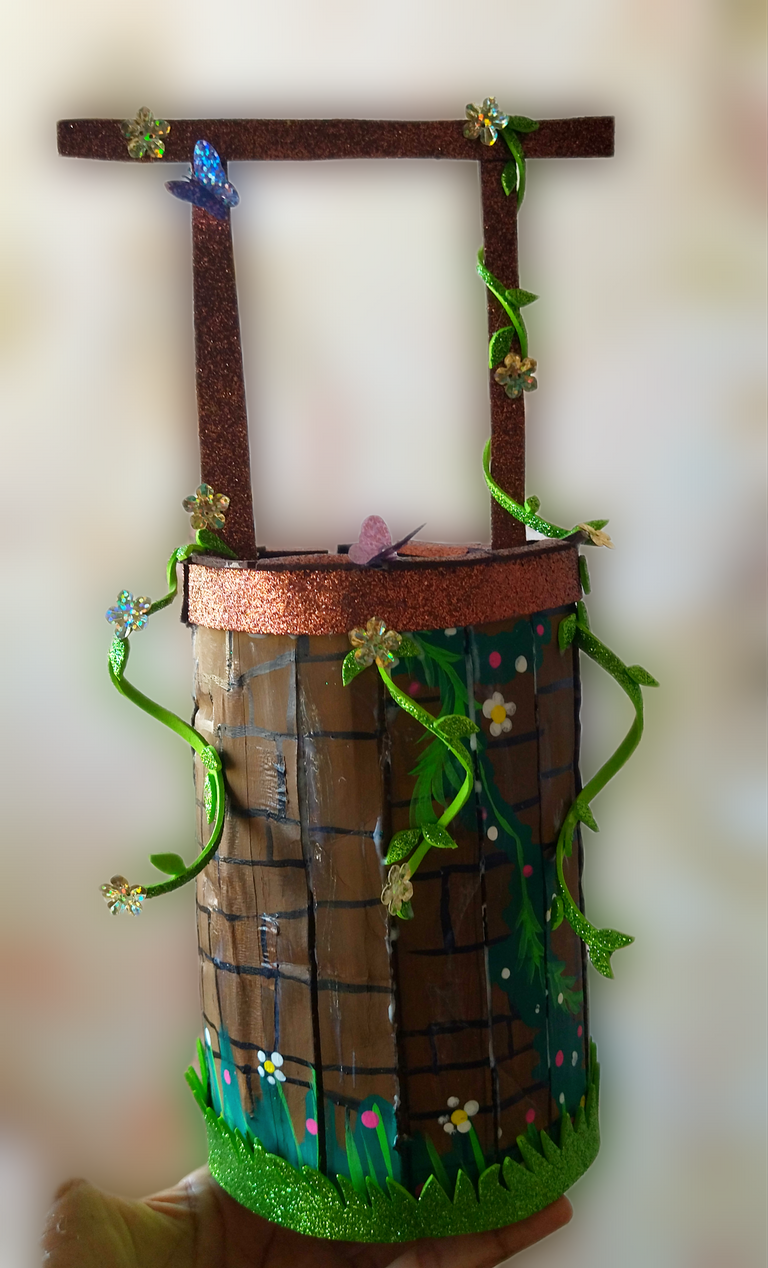
Ven mis amores que facil es realizar labores manuales que nos van a ser de utilidad al tiempo que ayudamos a reciclar, aquí les dejo el resultado final espero que les guste, agradecida de ante mano por el apoyo que me brindan.
RESULTADO
📸Todas las fotos fueron tomadas con mi teléfono Xiaomi readmi 9T y son de mi propiedad utilice el traductor de Google y el programa polish.
 🍀🌹🍀 INGLES 🍀🌹🍀
Greetings incredible people of #hive cordial greetings to all the beautiful bees that fill the platform with so much talent every day, especially those of this hive #diy community that has become converted into a space where we can all make and show our concrete ideas, this community also helps us to let all that creativity flow, which makes every day a waste of talent.
Today I bring you a beautiful creation, which I was able to make for my nativity or crib, yes gentlemen, although it sounds crazy, I have already started preparing for Christmas because it is my favorite time of the year, so you will most likely see that I will share some Christmas content.
This time I worked to make a beautiful wishing well that I am going to place in my nativity or manger, whatever it is called in your country of origin, of course I worked with recycling materials mostly because we have to contribute to cleaning the environment and if we help by doing a small manual task, so be it, so without further ado here I leave you the step by step, and of course let's get to work.< /div>
STEP BY STEP
We mark on the plastic bottle measuring from the bottom to the top about 17 cm And then with the help of a knife we cut and also clean with a damp cloth.
Then on the piece of cardboard and helping me with a ruler mark about 17 cm long and then we chop, when finished mark some lines every 2 cm wide.
When I finished marking, take the blade and make small cuts. Not so deep to avoid completely breaking the cardboard.
Then take the liquid silicone and apply it to the bottle, I did cover it well with silicone so that the cardboard could be fixed well, finally I exerted a little pressure so that it fixed well.
After it was dry, I took the brown paint and covered the whole cardboard, I gave it two layers to cover well, then with the fine brush and the black paint I drew the different lines that form the blocks of the well.
Now take the dark green paint and draw some kind of foliage, and grass, then take the apple green paint.
Also draw white flowers and randomly place fuchsia and white dots.
Then I took two toothpicks and inserted them on both sides and glued them with liquid silicone and finally put another toothpick on the top.
Take the brown foami and mark a strip of about 17 cm long by 1 cm wide, when finished I apply the liquid silicone all over the edge and stick it.</ div>
Also cut out three more ribbons which you use to line the chopsticks.
Later, with the remaining scraps, we cut out small rectangles of different sizes, which we glue on the edge with liquid silicone.
Then grab a piece of green frosted foami and cut it out, making small cuts so it will form like grass AND glue it to the bottom of our well.
Now to finish, take the thinnest pieces and wrap them around a stick, until forming a kind of vine, also cut small leaves then paste in different parts of the well and also place some flowers and some butterflies and that's the end.
Come my loves how easy it is to do manual labor that will be useful to us while we help to recycle, here I leave you the final result I hope you like it, thank you in advance hand for the support they give me.
RESULT
📸All photos were taken with my Xiaomi readmi 9T phone and are my property, use Google translate and polish program.
The rewards earned on this comment will go directly to the people( @mayifiestas ) sharing the post on Twitter as long as they are registered with @poshtoken. Sign up at https://hiveposh.com.
Muchas gracias 🙂
Felicitaciones amiga..te quedó bellísimo... Saludos, bendiciones y que tengas muchos éxitos...
Muchas gracias amiga se hace con todo el amor, agradezco tus palabras 🙂🌹💕
Te ha quedado muy lindo amiga.. gracias por compartir la idea..❤️
Gracias a ti por tu apoyo 😜😜😜
Qué bello amiga! yo también estaba pensando que ya es hora de ir compartiendo cositas para la navidad. Me encantó tu pozo.
Muchas gracias, que bueno que le gustó voy a tratar de ir incorporando poco a poco ideas para la navidad. Gracias por el apoyo.
Que hermoso linda, es una idea increíble para el pesebre, además, con materiales súper accesibles y muy bien explicado.
Justo estaba pensando en comenzar a hacer cositas para navidad, me encanta tu idea, gracias por compartir amiga. Saludos.😊❣️
Feliz de que les haya gustado, gracias amiga por el apoyo agradecida 💕💯
Hola @mayifiestas, te quedó muy lindo. Me encantan los materiales que utilizaste. Felicidades por tu creación.
Saludos amiga es bueno improvisar con materiales que ya consideramos desechos, si dejamos fluir nuestra imaginación al mismo tiempo que reciclamos.
Es muy cierto, quiero hacer algo con materiales de desecho, que quede bonito. Me encantó.
Muchas gracias por su apoyo 😊😊😊
Hola amiga, muy lindo tu trabajo.
Felicitaciones.
Gracias por compartir.
Gracias a ti por apoyar 😊 saludos
Thank you for sharing this amazing post on HIVE!
Your content got selected by our fellow curator @rezoanulvibes & you just received a little thank you via an upvote from our non-profit curation initiative!
You will be featured in one of our recurring curation compilations and on our pinterest boards! Both are aiming to offer you a stage to widen your audience within and outside of the DIY scene of hive.
Join the official DIYHub community on HIVE and show us more of your amazing work and feel free to connect with us and other DIYers via our discord server: https://discord.gg/mY5uCfQ !
If you want to support our goal to motivate other DIY/art/music/homesteading/... creators just delegate to us and earn 100% of your curation rewards!
Stay creative & hive on!
esta muy bonito y se ve sencillo de hacer, tambien puede tener multiples usos, gracias por compartirlo.
Saludos